
A galette is the pastry preparation that the least experienced home baker can make with genuinely beautiful results and that the most experienced home baker chooses deliberately for its casual elegance — it is simultaneously the easiest and one of the most genuinely impressive summer desserts available. The key to a galette that is genuinely outstanding rather than merely acceptable is the pastry: a properly cold, properly made flaky crust that bakes to a shattering, buttery result that holds the juicy strawberry filling without turning soggy is the entire difference between a galette that earns genuine admiration and one that is simply a functional delivery mechanism for fruit.
This post covers the classic strawberry galette in complete technical detail — the cold-butter pastry technique, the filling construction, the folding method, and the finishing details that make the difference between a beautiful galette and an ordinary one — plus five variations for different flavor directions and occasions: a strawberry rhubarb galette for the most classically summery combination, a strawberry cream cheese galette for a richer, more substantial filling, a strawberry almond frangipane galette for a genuinely extraordinary flavor pairing, a savory strawberry and brie galette for appetizer occasions, and a chocolate strawberry galette for a dramatic dessert that earns conversation at any table.
Let's bake the most beautiful rustic pastry of the summer!
WHY YOU WILL LOVE THIS RECIPE
- The Rustic Appearance Is the Point — No Perfection Required: A galette's folded, irregular edges, its slightly uneven fruit distribution, and its naturally imperfect surface are not presentation failures — they are the aesthetic of the preparation and they are what makes it look genuinely handmade and genuinely artisanal. The home baker who spends 20 minutes trying to make galette edges perfectly uniform is working against the format rather than with it. Fold the edges loosely and imperfectly, let the fruit arrange itself when the dough is folded, and the galette will look exactly as it should.
This post covers the classic strawberry galette in complete technical detail — the cold-butter pastry technique, the filling construction, the folding method, and the finishing details that make the difference between a beautiful galette and an ordinary one — plus five variations for different flavor directions and occasions: a strawberry rhubarb galette for the most classically summery combination, a strawberry cream cheese galette for a richer, more substantial filling, a strawberry almond frangipane galette for a genuinely extraordinary flavor pairing, a savory strawberry and brie galette for appetizer occasions, and a chocolate strawberry galette for a dramatic dessert that earns conversation at any table.
- Genuinely Easier Than Pie — No Pie Dish, No Crimping, No Fitting: A galette requires only a sheet pan and parchment paper — no pie dish to fit the crust into, no double-crust crimping, no blind baking, no worrying about the bottom crust getting soggy from a wet filling. Roll the dough on parchment, fill the center, fold the edges over, and slide the whole thing onto a sheet pan. The entire assembly from rolled dough to oven takes under 10 minutes and requires no special equipment or pastry experience.
- Works with Fresh or Frozen Strawberries — Any Season: Fresh ripe strawberries at peak season produce the most extraordinary galette. Frozen strawberries produce a genuinely excellent, genuinely beautiful result at any time of year — the baking process that a galette undergoes concentrates and caramelizes the fruit in a way that compensates for the less-forward flavor of frozen berries and produces something deeply delicious regardless of the season. A strawberry galette made in January from frozen berries is a genuinely satisfying, genuinely beautiful dessert and one of the better uses of frozen fruit available in winter baking.
- From Pantry to Table in Under an Hour: 15 minutes of pastry making, 20 minutes of chilling, 5 minutes of filling and folding, and 35–40 minutes of baking — a strawberry galette from nothing to table in under 90 minutes, and most of that is passive time. With a pre-made pie crust from the refrigerator section, the active preparation is under 10 minutes and the galette is in the oven in 15 minutes from the moment the idea occurred. There is no other impressive, genuinely beautiful pastry dessert that comes together this quickly.
- The Coarse Sugar Finish Makes Every Galette Look Professional: A generous scatter of turbinado or demerara sugar across the egg-washed dough edges before baking produces a sparkling, caramelized, crunch-edged crust that is simultaneously beautiful and delicious — the large sugar crystals don't melt during baking but caramelize to a slightly sticky, deeply golden crunch that clings to every bite of pastry. This one finishing touch costs nothing and takes 10 seconds and is the single detail that most elevates the visual quality of a home galette to professional standards.
- Outstanding Warm, at Room Temperature, or Cold: Galette is one of the very few pastry preparations that is genuinely excellent at every serving temperature — warm from the oven with a scoop of vanilla ice cream is the most dramatic and most satisfying serving moment; at room temperature with a dusting of powdered sugar is the most casually elegant presentation; cold from the refrigerator the next morning with coffee is genuinely one of the best breakfast pastry experiences available. This versatility makes galette one of the most practical desserts available for gatherings where timing is unpredictable.
INGREDIENTS
- The Galette Dough:
- 1.25 cups all-purpose flour
- 1 tablespoon sugar
- ½ teaspoon salt
- ½ cup (1 stick) unsalted butter, very cold, cut into ½-inch cubes — the butter must be genuinely cold for flakiness; warm butter produces a mealy, dense crust. Freeze the cubed butter for 15 minutes before using for the most reliably flaky result
- 3–5 tablespoons ice water — add one tablespoon at a time until the dough just holds together
- 1 teaspoon apple cider vinegar — added to the ice water. The acid slightly inhibits gluten development and produces a more tender crust
- Alternatively: 1 refrigerated store-bought pie crust round, allowed to come to room temperature for 15 minutes
- The Strawberry Filling:
- 1.5 lbs fresh strawberries, hulled and halved, or 1 lb frozen strawberries, thawed and patted dry
- ¼ cup granulated sugar — adjust based on berry sweetness; very ripe berries need only 3 tablespoons
- 2 tablespoons cornstarch — essential for absorbing the juice the berries release during baking and preventing a soggy crust
- 1 teaspoon pure vanilla extract
- 1 tablespoon fresh lemon juice
- Pinch of salt
- The Finish:
- 1 egg beaten with 1 tablespoon milk or cream — for egg wash
- 2–3 tablespoons turbinado or demerara sugar — for the sparkling, crunchy crust finish
- Vanilla ice cream, whipped cream, or crème fraîche for serving
DIRECTIONS
- Step No.1: Make the galette dough
Combine flour, sugar, and salt in a large bowl and whisk to distribute. Add cold butter cubes and work into the flour using a pastry cutter or your fingertips — press each cube between your fingers and thumb to create flat, irregular shards of butter coated in flour rather than small round crumbs. Work quickly, stopping before the butter is fully incorporated — you want pieces ranging from pea-sized to almond-sized remaining visibly throughout the flour. These visible butter pieces are what create the flakiness; over-processing produces a dense, crumbly crust without layers. Mix apple cider vinegar into the ice water. Drizzle the ice water over the flour-butter mixture one tablespoon at a time, tossing with a fork after each addition. Add only enough water that the dough holds together when pressed in your palm — it should look shaggy and slightly dry rather than smooth and wet. Turn onto a lightly floured surface and press together with your hands into a flat disk without kneading. Wrap in plastic and refrigerate for at least 30 minutes, or up to 2 days.
- Step No.2: Prepare the strawberry filling
Combine hulled, halved strawberries with sugar, cornstarch, vanilla, lemon juice, and salt in a bowl. Toss gently to coat every berry evenly — the cornstarch will look white and powdery on the berries initially but will dissolve as the berries release juice. Let the mixture stand for 10–15 minutes — during this time the sugar draws moisture from the berries and the cornstarch begins dissolving into the emerging juice. Do not let the filling stand longer than 20 minutes before using — the berries release increasing amounts of juice over time and excess liquid in the filling produces a soggy galette bottom. If using frozen strawberries, pat them thoroughly dry with paper towels before tossing with the filling ingredients and allow only 5 minutes of standing time since they have already released significant moisture during thawing.
- Step No.3: Roll and fill the galette
Preheat oven to 400°F. Place the chilled dough disk on a lightly floured sheet of parchment paper. Roll from the center outward in all directions to form a rough circle approximately 12–13 inches in diameter and ⅛ inch thick — the circle does not need to be perfect; irregular edges are part of the galette aesthetic and any cracks at the edges can be pressed back together. Slide the parchment with the rolled dough onto a large baking sheet. Spoon the strawberry filling into the center of the dough, leaving a 2–2.5 inch border of bare dough around the entire edge — this border is what gets folded up to contain the filling. Do not pile the filling too high — a filling that mounds more than 1 inch above the dough surface is difficult to fold over and may burst through the sides during baking. Distribute the berries in a relatively even layer rather than a cone-shaped mound.
- Step No.4: Fold the edges and finish
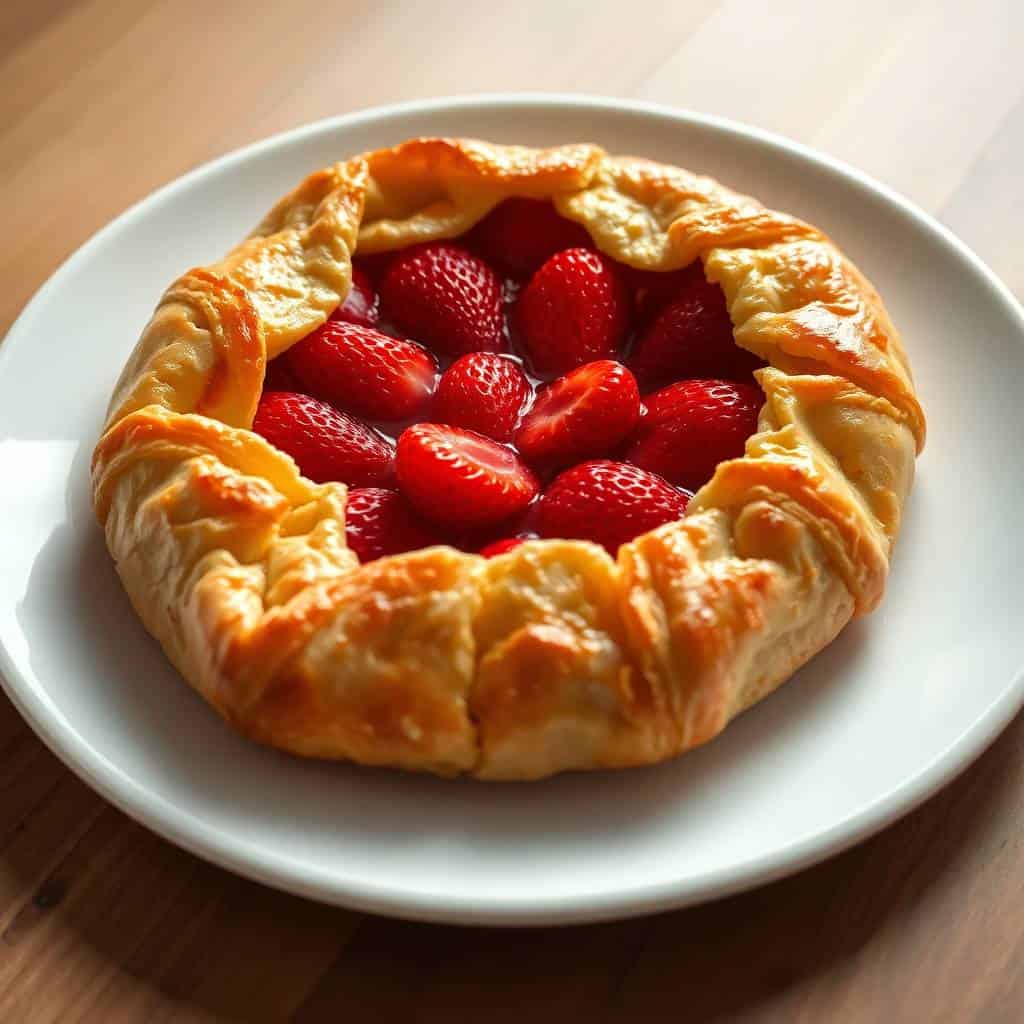
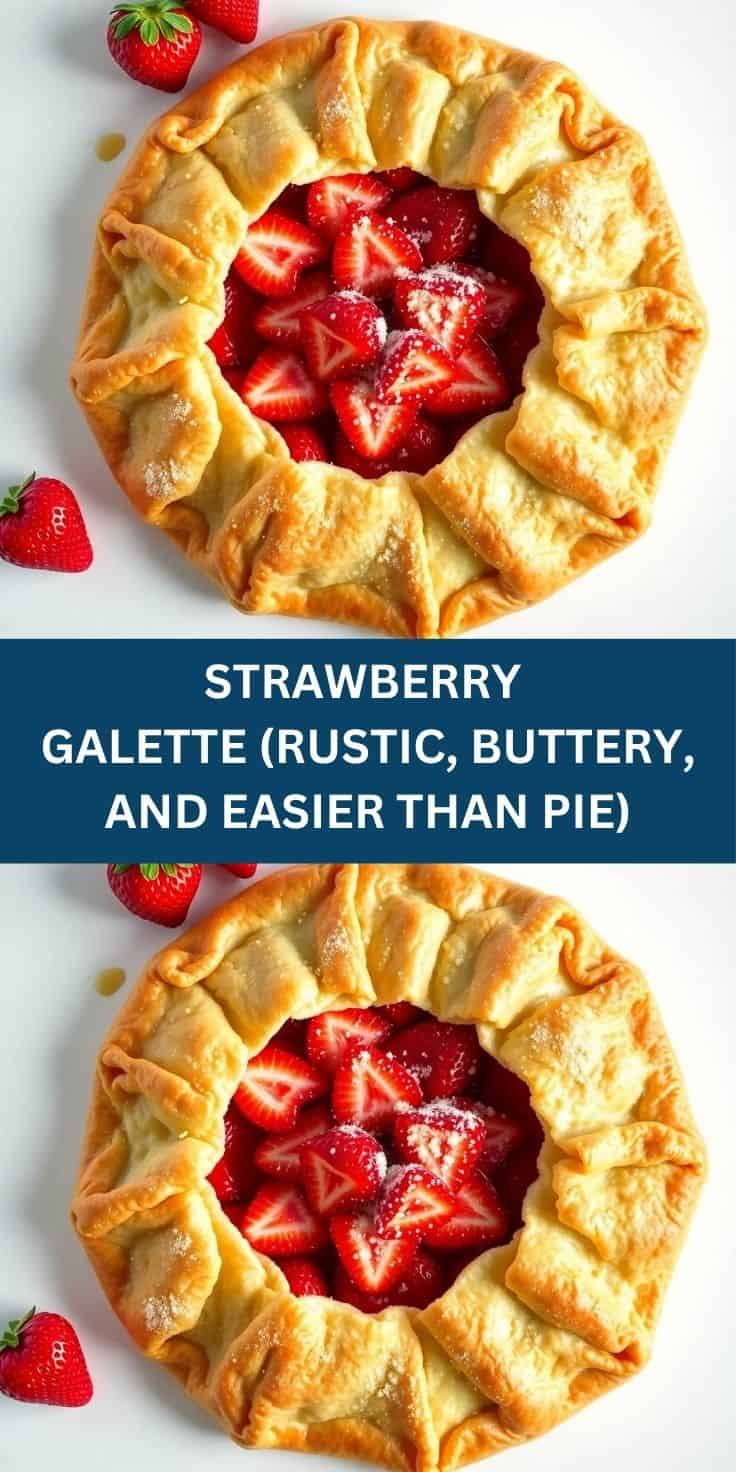
Fold the border of dough up and over the outer edge of the filling in loose, overlapping pleats — work around the galette pressing each fold gently to adhere it to the previous fold but not pressing so firmly that the dough tears. The folds should look natural and unforced — approximately 8–10 pleats around the circumference depending on the size. A few small cracks in the fold are normal and acceptable; they simply allow some juice to escape and caramelize on the parchment during baking, which is part of the galette's rustic charm. Refrigerate the assembled galette for 15 minutes — this cold rest firms the butter in the dough before baking and produces significantly better flakiness than going immediately from room temperature assembly to the oven. Brush the folded dough border generously with egg wash — cover every visible pastry surface for an even, deep golden color. Scatter turbinado or demerara sugar generously across the entire egg-washed dough border — use more than seems necessary, approximately 2–3 tablespoons for the full crust border.
- Step No.5: Bake and serve
Bake at 400°F for 35–42 minutes until the pastry border is deeply, thoroughly golden — the edges should look almost too dark before the galette is ready. The filling should be visibly bubbling throughout, the strawberries should look jammy and slightly caramelized at their edges, and the aroma filling the kitchen should be intensely of baked strawberry and browned butter pastry. If the edges are browning faster than the filling is bubbling, tent the edges loosely with foil strips and continue baking until the filling bubbles vigorously. Slide the parchment with the galette onto a wire rack and cool for at least 20 minutes before serving — the filling needs time to firm slightly from the resting temperature drop. Serve warm or at room temperature with a generous scoop of vanilla ice cream, a spoonful of crème fraîche, or a dollop of lightly sweetened whipped cream. A light dusting of powdered sugar across the entire galette immediately before serving adds a beautiful finishing touch.
TIPS FOR SUCCESS
- Keep Everything Cold from Start to Baking: Flaky galette pastry requires cold butter — warm butter is absorbed into the flour rather than remaining in distinct pieces that create steam and flakiness during baking. Chill the cubed butter for 15 minutes in the freezer before making the dough, use genuinely ice-cold water, work quickly during mixing, chill the finished dough disk for at least 30 minutes, and chill the assembled galette for another 15 minutes before baking. Each cold rest reinforces the butter's integrity and produces progressively better flakiness. A galette made from dough that was worked warm produces a noticeably inferior, denser, less impressive crust.
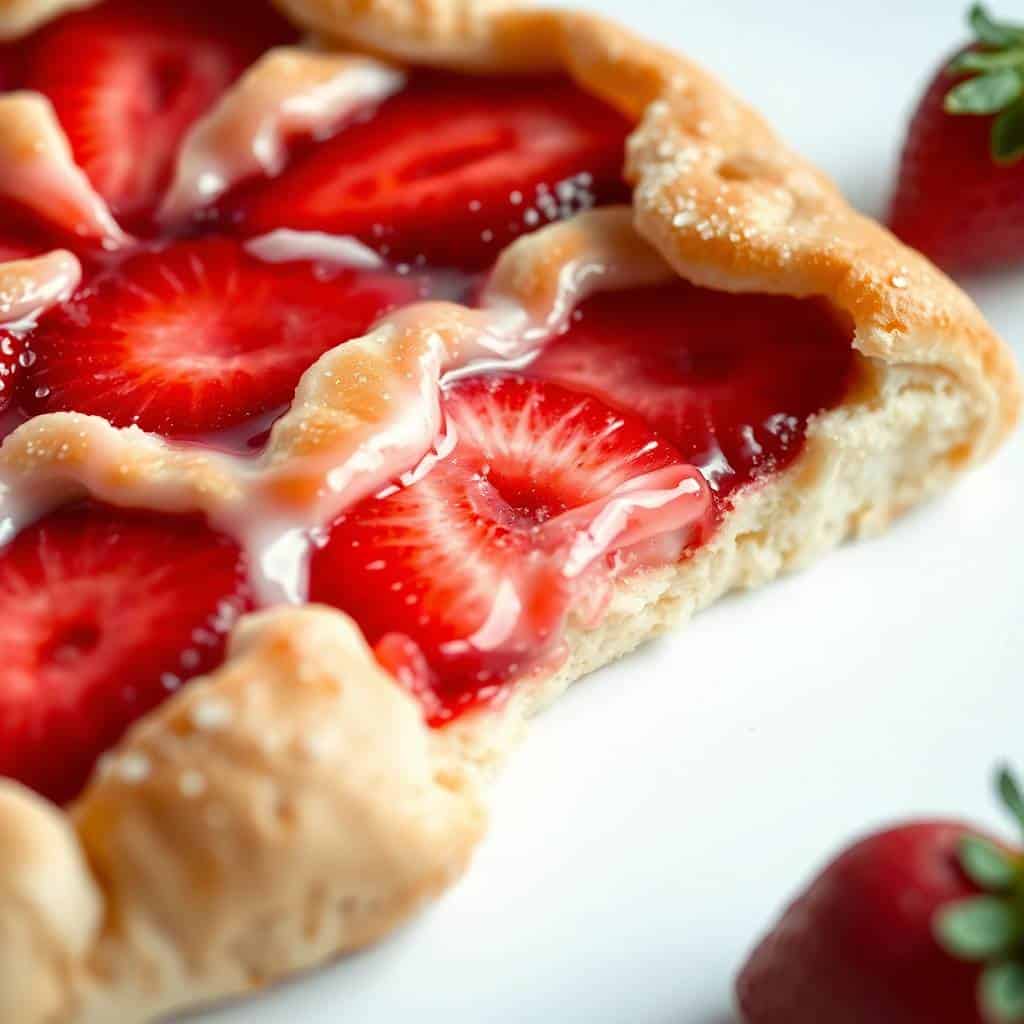
- The Cornstarch Is Non-Negotiable: Strawberries release a significant volume of juice during baking — without cornstarch to absorb and thicken that juice, it pools at the bottom of the galette and saturates the crust from below, producing a soggy, undercooked bottom center that is the most common galette failure. The cornstarch absorbs the released juice and thickens it into a glossy, jammy filling that caramelizes slightly at the edges of the berries and holds the entire filling together as a cohesive, sliceable mass rather than a liquid pool. Two tablespoons is the correct quantity for 1.5 pounds of strawberries — do not reduce.
- Don't Leave the Filling Standing Too Long Before Baking: The strawberry filling should be assembled and transferred to the dough within 15–20 minutes of mixing — the longer the berries sit with the sugar, the more juice they release. Excess juice that has already been released before baking cannot be fully absorbed by the cornstarch during the relatively short baking time and produces a wet filling. Mix the filling, roll the dough, then add the filling immediately before folding and baking. If preparing the galette in stages, keep the filling ingredients separated (unmixed berries and the sugar-cornstarch mixture) until the dough is rolled and ready.
- Bake Until the Filling Bubbles Vigorously — Not Just Until the Crust Is Golden: The crust can reach full golden color 5–10 minutes before the filling has fully bubbled and thickened — removing the galette at the crust's first golden color produces an undercooked filling that is watery and loose rather than jammy and set. The filling must bubble actively throughout — not just at the edges but through the center of the fruit — for the cornstarch to fully thicken the released juice. A deeply golden, fully bubbling galette that looks slightly over-baked is almost always perfectly baked; an attractively golden, non-bubbling galette is almost always underdone.
- Leave the Edges Genuinely Irregular — Resist the Urge to Neaten: The galette format specifically celebrates rustic imperfection — trying to make the folded edges uniform and neat produces a result that looks like an attempted pie that didn't succeed rather than a deliberately casual galette that succeeded beautifully. Press each fold down firmly to adhere it to the neighboring fold so the border holds together during baking, but don't attempt to smooth or regularize the edge profile. The irregular folds are the visual signature of a galette and they are correct.
- Line the Sheet Pan with Parchment and Consider a Second Layer for Juicy Fillings: Strawberry galette filling bubbles and some juice inevitably escapes through gaps in the folded edges, caramelizing on the parchment and potentially burning on the sheet pan surface beneath. A single layer of parchment usually catches this juice, but a particularly juicy filling can burn through. For extra protection, place a second sheet of parchment or a silicone baking mat beneath the first and bake on a lower oven rack to prevent excessive bottom browning. The caramelized escaped juice on the parchment is completely normal, completely delicious, and should be scraped up and served alongside the galette rather than discarded — it is one of the most concentrated, most extraordinary strawberry caramel flavors in the entire baking process.
VARIATIONS
- strawberry rhubarb Galette: Replace ½ lb of the strawberries with ½ lb of fresh rhubarb stalks cut into ½-inch pieces — the most beloved fruit pairing in American summer baking. Increase the sugar to ⅓ cup to compensate for rhubarb's significant tartness and increase cornstarch to 3 tablespoons since rhubarb releases even more juice than strawberries. The rhubarb-strawberry combination is more complex and more deeply flavored than strawberry alone — the rhubarb's acidity amplifies the strawberry's sweetness and the two fruits' colors merge into a deep red-pink filling that is visually extraordinary when the galette is cut. Add ½ teaspoon of cinnamon and ¼ teaspoon of ground ginger to the filling for additional warmth. This is the most classic and most beloved galette variation.
- Strawberry Cream Cheese Galette: Before adding the strawberry filling, spread a thin layer of sweetened cream cheese across the center of the rolled dough within the filling area — beat 4 oz softened cream cheese with 2 tablespoons powdered sugar and ½ teaspoon vanilla until smooth. Spread to within ½ inch of the fold line. Add the strawberry filling on top of the cream cheese layer and fold the edges as directed. The cream cheese layer melts and puffs slightly during baking, creating a creamy, tangy layer between the crust and the fruit that makes each slice more substantial, more complex, and more satisfying. It also acts as a moisture barrier that protects the crust bottom from the strawberry juice. This is the variation to make when you want the galette to feel like a genuinely special occasion dessert. Pair with our fresh strawberry pie cream cheese technique.
- Strawberry Almond Frangipane Galette: Make a simple frangipane by creaming 4 tablespoons softened butter with 4 tablespoons sugar, then beating in 1 egg, ½ cup almond flour, and ½ teaspoon almond extract. Spread this almond cream across the dough center before adding the strawberry filling. The frangipane bakes to a soft, nutty, marzipan-like layer that elevates this galette into the most sophisticated and most genuinely extraordinary of all the variations — the almond's flavor is one of the most naturally complementary to fresh strawberries in pastry baking, and the contrast between the jammy fruit, the creamy almond layer, and the flaky crust is genuinely outstanding. Scatter sliced almonds across the top of the filling before folding and baking for additional texture and visual impact.
- Savory Strawberry and Brie Galette: Reduce sugar in the filling to 1 tablespoon and add 1 tablespoon of aged balsamic vinegar, 1 teaspoon fresh thyme, and a crack of black pepper. Scatter 4 oz of thinly sliced Brie (rind removed) across the dough center before adding the lightly sweetened strawberry-balsamic filling. The brie melts into a creamy, slightly pungent layer during baking that contrasts with the sweet-tart strawberries and the flaky crust in a way that works equally well as an appetizer or as a dessert course. Finish with a drizzle of honey and additional fresh thyme after baking. This savory version is the most sophisticated preparation on the entire list and the one most likely to generate genuine conversation at a dinner party. Find more balsamic strawberry inspiration in our balsamic roasted strawberries.
- chocolate strawberry Galette: Add 2 tablespoons of Dutch process cocoa powder and an additional tablespoon of sugar to the galette dough before adding water — knead the cocoa in thoroughly before the cold rest for an evenly chocolate-colored dough. Scatter 2 oz of finely chopped dark chocolate across the dough center before adding the strawberry filling — the chocolate melts into the filling during baking, creating dark chocolate ribbons throughout the jammy strawberry interior. Finish with a drizzle of melted dark chocolate across the baked, cooled galette. The chocolate-strawberry galette is the most dramatic visual on the list and produces a genuinely extraordinary flavor combination — the bitterness of dark chocolate is the most complementary contrast to sweet-tart strawberries in the entire dessert category.
SERVING AND STORAGE
Serving
Serve the galette on its parchment on a wooden board or transfer carefully to a serving platter after cooling — the parchment presentation is genuinely charming and rustic and requires no additional serving vessel. Slice with a sharp knife and use a wide spatula to lift each wedge. The galette holds its shape best after 20–30 minutes of cooling from the oven — cutting while still steaming hot produces a filling that runs freely. Serve warm portions with vanilla ice cream or crème fraîche, room-temperature portions with powdered sugar and a fresh mint sprig, and cold leftover galette with a cup of coffee as one of the best morning pastry experiences available.
Storage
Strawberry galette stores loosely covered at room temperature for 1 day or refrigerated for up to 3 days. The pastry softens slightly during refrigeration from the filling's moisture but remains genuinely good — refrigerated galette reheated at 350°F for 8–10 minutes on a sheet pan (uncovered) restores significant crispness to the pastry and makes the filling jammy and warm again. Do not microwave galette — the crust becomes irreversibly soggy in the microwave. The baked galette does not freeze well in its assembled form. The unbaked assembled galette can be frozen on the sheet pan until solid, then wrapped tightly and frozen for up to 1 month — bake directly from frozen at 400°F, adding 10–15 minutes to the baking time.
FAQ
A galette is a free-form pastry made without a pie dish — the dough is rolled flat, filled in the center, and the edges are folded up over the filling by hand. A pie is made in a pie dish with a fitted crust that follows the shape of the vessel. The practical differences are significant: galette requires no pie dish, no crust fitting, no crimping technique, and no blind baking, making it significantly easier to assemble. The aesthetic difference is deliberate — galette embraces rustic imperfection as its visual identity while pie aims for precision. The eating difference is minimal in terms of the fruit and pastry combination, though galette often produces crispier, flakier crust edges from the direct oven exposure of the free-form folded border compared to the enclosed edges of a pie.
A soggy galette center has one of four causes: insufficient cornstarch in the filling (the released berry juice wasn't absorbed during baking), the filling was assembled and allowed to stand too long before baking (excess juice had already been released before the oven could help), the galette was removed from the oven before the filling was fully bubbling throughout (undercooked filling doesn't fully thicken), or the berries used were frozen and not dried thoroughly before using. The solution: use the full 2 tablespoons of cornstarch, assemble and bake within 15 minutes of mixing the filling, bake until the filling bubbles vigorously throughout, and pat frozen berries completely dry before using.
Yes — one round of refrigerated store-bought pie crust works perfectly for a galette and produces genuinely excellent results. Allow the cold refrigerated crust to come to room temperature for 15–20 minutes before unrolling to prevent cracking. Unroll it onto parchment paper on a sheet pan and proceed with filling and folding exactly as the homemade version. The store-bought crust produces a slightly different texture than homemade — less flaky and more uniform — but the overall result is genuinely good and the time savings are significant. Store-bought is the recommended approach for anyone new to galette making or anyone who wants to minimize preparation time. Brush generously with egg wash and scatter with plenty of coarse sugar for the best visual and textural result from a store-bought base.
Some filling leakage from a galette is normal, expected, and genuinely desirable — the caramelized strawberry juice that escapes through small gaps and pools on the parchment is one of the best-tasting elements of the entire preparation. To minimize excessive leakage: ensure the folded edge pleats are pressed firmly enough to adhere to each other; don't overfill — the filling should be no more than 1 inch above the dough surface; use the full 2 tablespoons of cornstarch to thicken the juice during baking; and bake on parchment paper with a second sheet underneath for very juicy fillings. Any juice that escapes and caramelizes on the parchment should be scraped up and served alongside the galette — it is intensely flavored and genuinely outstanding.
A galette can be prepared at several stages ahead of serving. The dough can be made up to 2 days ahead and refrigerated, or up to 1 month ahead and frozen. The assembled unbaked galette can be refrigerated for up to 24 hours before baking — bake directly from cold, adding 5 minutes to the baking time. The fully baked galette stores at room temperature loosely covered for 1 day and refrigerated for up to 3 days. For the freshest result at a dinner party, assemble the galette the morning of and bake it so it comes out of the oven 30 minutes before dessert service — this timing produces a galette that is warm, just-set, and at its absolute best when served.
This strawberry galette is the pastry that earns the most consistent genuine admiration from every person who sees it — make it with the almond frangipane variation for the most extraordinary flavor, or keep it perfectly classic for the most genuinely summery and most effortlessly beautiful result.
Try the strawberry rhubarb version for the most classic summer fruit combination, or the chocolate strawberry version for the most dramatic dinner party presentation. Pair with our fresh strawberry pie, our strawberry freezer jam, and our balsamic roasted strawberries for the complete summer strawberry dessert collection. 🍓🥐✨
STRAWBERRY GALETTE (RUSTIC, BUTTERY, AND EASIER THAN PIE)
Equipment
- Baking sheet
- Parchment paper
- Mixing Bowl
- Rolling Pin
Ingredients
Crust:
- 1 ¼ cups all-purpose flour
- ½ cup cold butter cubed
- 1 tablespoon granulated sugar
- ¼ teaspoon salt
- 3-4 tablespoon ice water
Filling:
- 3 cups fresh strawberries sliced
- ⅓ cup granulated sugar
- 1 ½ tablespoon cornstarch
- 1 tablespoon lemon juice
Finish:
- 1 egg egg wash
- coarse sugar
Instructions
Make Dough:
- Mix flour, sugar, and salt. Cut in cold butter until crumbly. Add ice water gradually until dough forms. Chill for 30 minutes.
Prepare Filling:
- Toss sliced strawberries with sugar, cornstarch, and lemon juice. Set aside.
Roll Dough:
- Roll dough into a rough 12-inch circle on parchment paper.
Assemble:
- Spoon strawberry mixture into the center, leaving a 2-inch border. Fold edges over filling.
Bake:
- Brush crust with egg wash, sprinkle with coarse sugar, and bake at 375°F (190°C) for 35 minutes until golden.
Serve:
- Cool slightly before slicing. Serve warm or at room temperature.
Notes
- Keep butter cold for a flaky crust.
- Don’t overfill or galette may leak.
- Great with vanilla ice cream or whipped cream.





Comments
No Comments