
Keto side dishes have a reputation problem. Most recipes I found early on were either sad lettuce piles or overly complicated cauliflower experiments that took an hour and tasted like disappointment. When I started cooking lower-carb meals for my husband — who was trying to cut back on rice and bread for a few months — I had to get creative fast. Keto sides needed to actually taste good, hold up next to a main dish, and not require me to track down seventeen specialty ingredients.
What makes a good keto side dish isn't just "no carbs." It's flavor, texture, and something that actually feels satisfying on the plate. A roasted vegetable with the right seasoning can outshine a pile of plain rice any day. I look for sides that work with both Pakistani-style mains and classic Western dinners — because in my kitchen, that's the reality. If you're also cooking low-carb meals and need protein to pair these with, I have a whole post on keto chicken recipes that covers a lot of ground.
This list covers 23 keto side dish recipes — everything from Air Fryer Brussels Sprouts and Cheesy Oven Roasted Cauliflower Steaks to Green Beans Almondine and Keto Loaded Oven Roasted Radishes. There's Spanish Cauliflower Rice for when someone at the table is missing their rice bowl, and Cauliflower Mexican Rice for taco nights. If you're looking for more vegetable-forward ideas, my posts on air fryer vegetables and roasted vegetables have a lot of overlap with what works here.
These are the ones I keep coming back to — the sides that actually made it onto the dinner table more than once and didn't get pushed to the edge of the plate.
Top 23 Keto Side Dish Recipes

23. Sauteed Broccoli Recipe
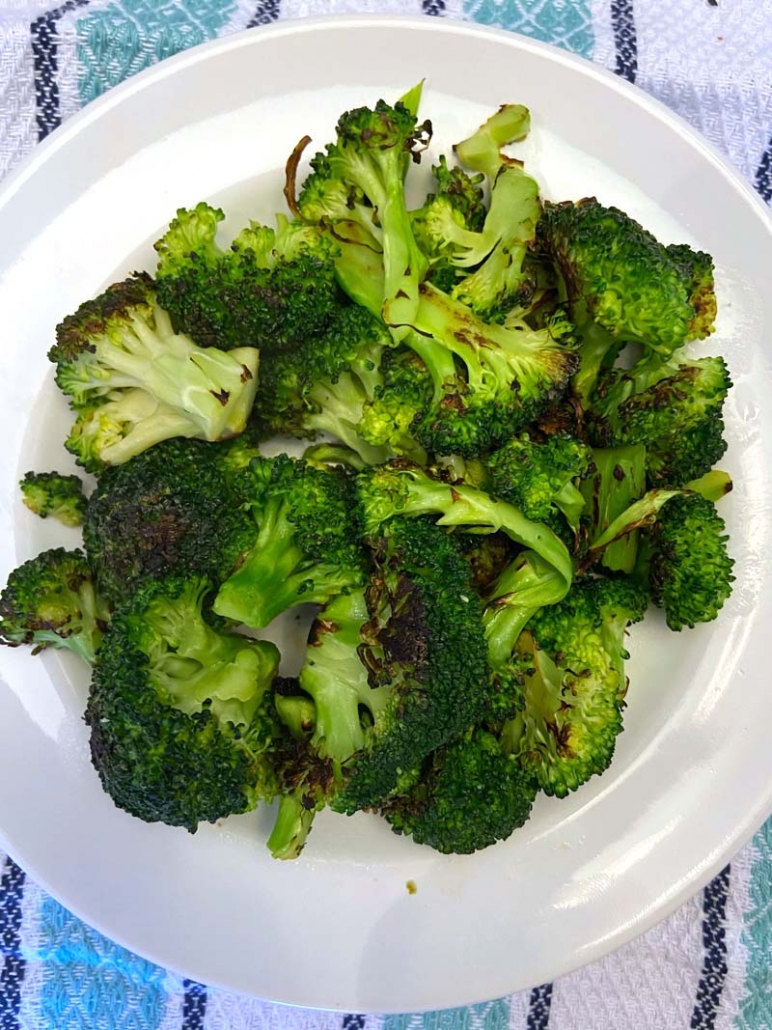
Sauteed broccoli sounds simple — and it is — but I spent a while getting it wrong before I figured out the trick: don't crowd the pan and don't skip the garlic. When you give the broccoli enough room in a hot skillet, the edges get slightly golden and a little crisp while the inside stays tender. That contrast is what makes it worth eating. This is one of those sides I throw together when I need something green on the table in under 10 minutes, and it works every single time.
Ingredients
- 4 cups broccoli florets (about 1 medium head)
- 2 tablespoons olive oil
- 3 cloves garlic, thinly sliced
- ¼ teaspoon red pepper flakes (optional)
- ½ teaspoon salt
- ¼ teaspoon black pepper
- 1 tablespoon lemon juice (fresh or bottled)
Instructions
- Heat olive oil in a large skillet over medium-high heat until shimmering. You want the pan genuinely hot before the broccoli goes in.
- Add broccoli florets in a single layer. Let them sit undisturbed for 2 minutes so they get some color on the bottom.
- Add the garlic and red pepper flakes. Toss everything together and cook another 3-4 minutes, stirring occasionally, until the broccoli is bright green and tender with slightly charred edges.
- Season with salt and pepper, squeeze lemon juice over the top, and serve immediately.
Tips
- Tip: Make sure your broccoli is dry before it hits the pan — any water will steam the broccoli instead of searing it, and you'll lose that golden edge.
- Tip: If your skillet isn't large enough to fit all the florets in a single layer, do it in two batches rather than piling them up.
- Tip: A sprinkle of grated Parmesan right at the end (skip if dairy-free) takes this from a plain vegetable side to something people actually ask for seconds of.
22. Air Fryer Brussels Sprouts

I did not grow up eating Brussels sprouts. They were not a thing in my mother's kitchen in Pakistan, and the first time I tried them roasted at a friend's house here, I understood immediately why people are obsessed. The air fryer version is even better than oven-roasted because the hot circulating air gets the outer leaves genuinely crispy — almost like little chips — while the center stays soft. These take about 12 minutes start to finish, which makes them one of the fastest keto sides on this entire list.
Ingredients
- 1 lb Brussels sprouts, trimmed and halved
- 2 tablespoons olive oil
- ½ teaspoon garlic powder
- ½ teaspoon onion powder
- ½ teaspoon salt
- ¼ teaspoon black pepper
- 1 tablespoon balsamic vinegar (optional, for finishing)
Instructions
- Preheat your air fryer to 375°F for 3 minutes. Trim the stem end off each Brussels sprout and cut them in half through the core so they stay together.
- In a bowl, toss the halved sprouts with olive oil, garlic powder, onion powder, salt, and pepper until well coated.
- Arrange the sprouts cut-side down in a single layer in the air fryer basket. Cook at 375°F for 10-12 minutes, shaking the basket once halfway through.
- Once the outer leaves are crispy and the cut sides are deep golden, transfer to a plate. Drizzle with balsamic if using and serve right away.
Tips
- Tip: Place them cut-side down — this is what gives you that caramelized flat surface. Don't skip this step.
- Tip: Don't overcrowd the basket. If you have a smaller air fryer, cook in two batches — crowding causes steaming instead of crisping.
- Tip: If you don't have an air fryer, roast them on a sheet pan at 425°F for 20-25 minutes. You still get great results, just takes a bit longer.
21. Classic American Coleslaw (Gluten-Free, Vegan, Allergy-Free)

Coleslaw is one of those things I had to learn from scratch because it's not something we made growing up — in Pakistan, our cold salads looked very different. The first time I made an American-style coleslaw for a backyard cookout, I used too much mayo and it was basically a dressed salad swimming in cream. Now I know to go lighter on the dressing and let the cabbage do the work. This version is vegan, so the mayo is swapped for something plant-based, and it still holds up perfectly alongside grilled proteins or keto wraps.
Ingredients
- 3 cups green cabbage, finely shredded
- 1 cup red cabbage, finely shredded
- 1 medium carrot, grated
- 3 tablespoons vegan mayonnaise (such as Hellmann's Vegan or Vegenaise)
- 1 tablespoon apple cider vinegar
- 1 teaspoon Dijon mustard
- 1 teaspoon granulated sweetener of choice (erythritol or monk fruit for keto)
- ½ teaspoon salt, plus more to taste
- ¼ teaspoon black pepper
Instructions
- Combine the shredded green cabbage, red cabbage, and grated carrot in a large bowl. Toss to mix.
- In a small bowl, whisk together the vegan mayo, apple cider vinegar, Dijon mustard, sweetener, salt, and pepper until smooth.
- Pour the dressing over the cabbage mixture and toss well until everything is evenly coated.
- Refrigerate for at least 20 minutes before serving. This rest time is what lets the cabbage soften slightly and the flavors come together.
Tips
- Tip: A bag of pre-shredded coleslaw mix from Walmart or Aldi saves significant time — just check the label to make sure there's no added sugar in the mix.
- Tip: Don't dress it too far in advance — it's best within 2 hours of dressing. After that the cabbage releases water and the slaw gets watery.
- Tip: Taste the dressing before you pour it on and adjust the vinegar or sweetener to your preference — everyone's palate is different with coleslaw.
20. Vegan Broccoli Salad (Gluten-Free, Allergy-Free)
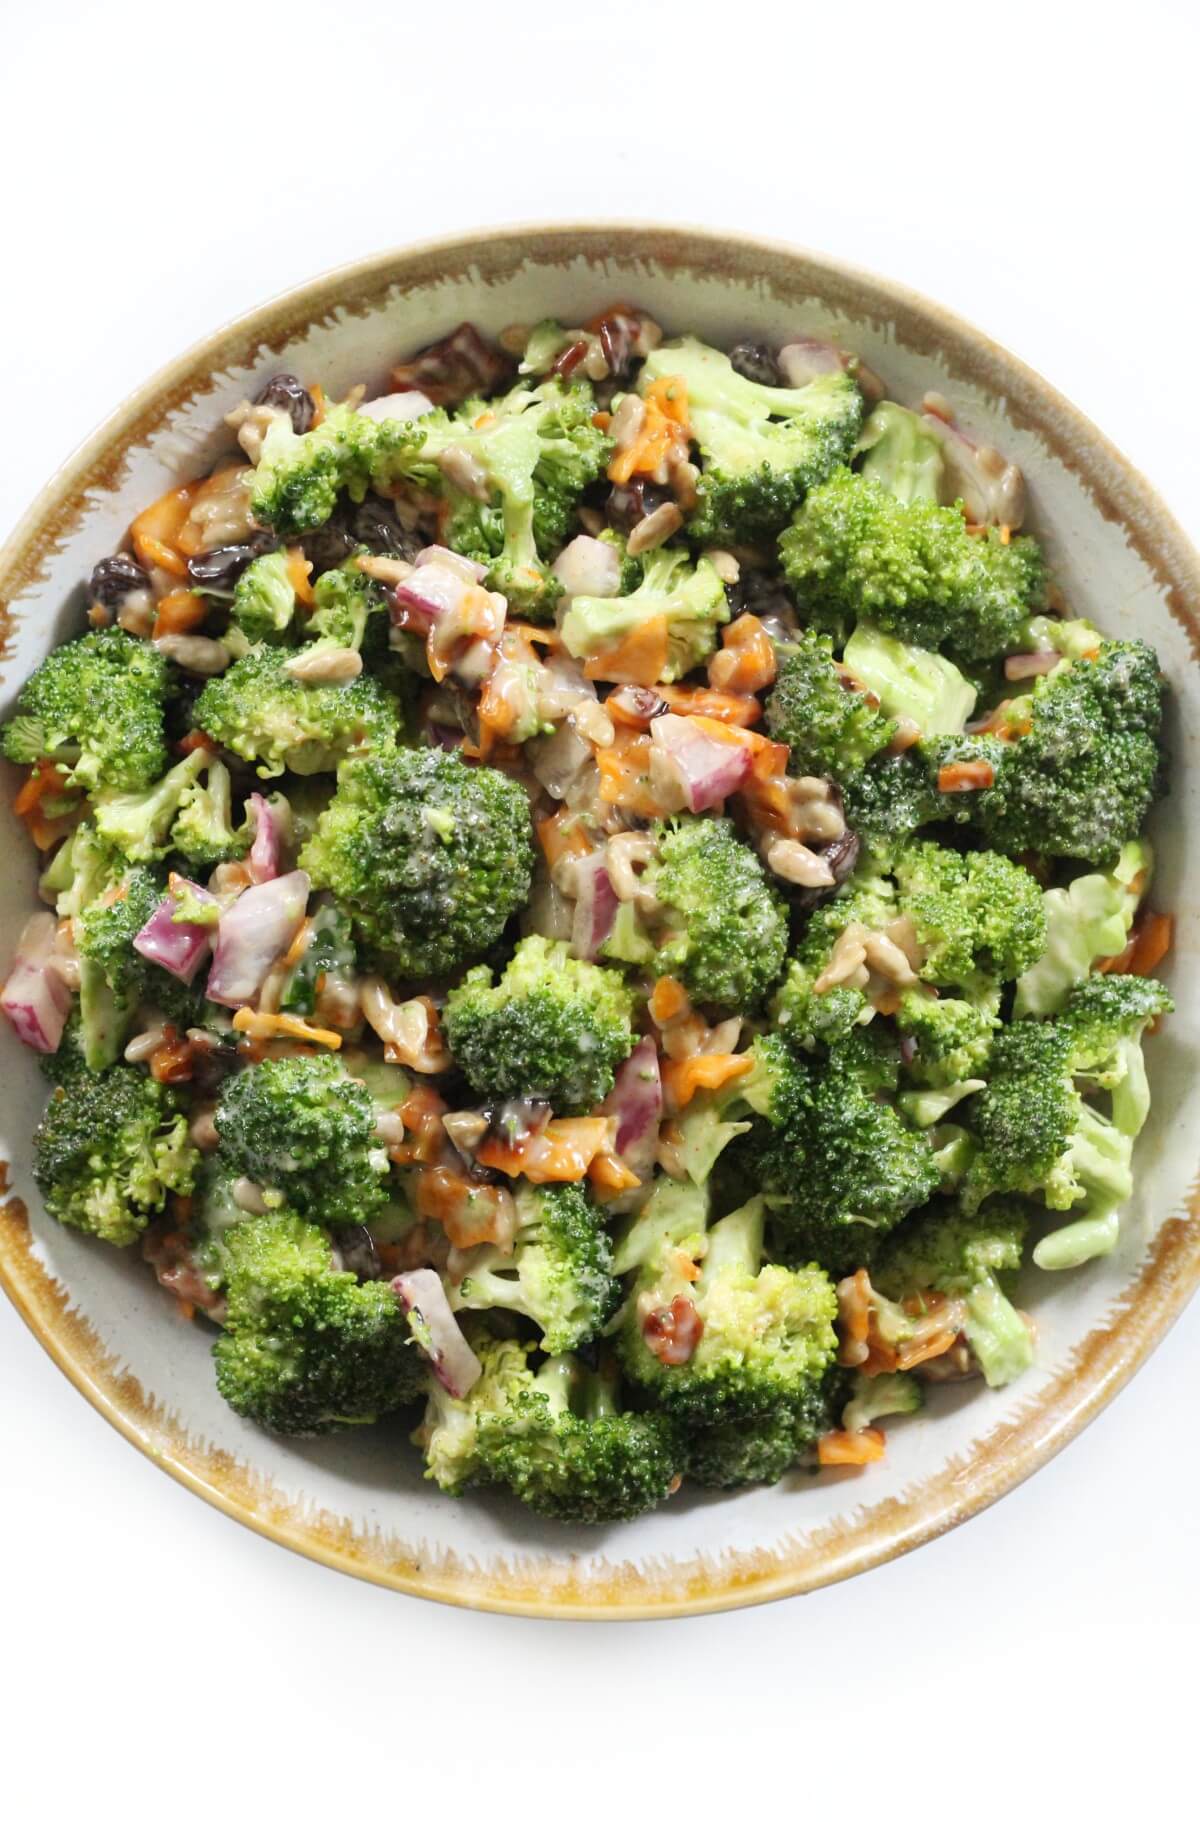
This is a raw broccoli salad — no cooking required — and it's one of those things that looks too simple to be good until you actually taste it. The combination of crunchy raw broccoli, a tangy-creamy dressing, and a little sweetness from dried cranberries (use a sugar-free version to keep it strict keto) is genuinely satisfying. It's also one of those salads that gets better as it sits, so I make it in the morning and it's ready by dinnertime. Eight ingredients, no stove, done.
Ingredients
- 4 cups broccoli florets, chopped small (raw)
- ¼ cup red onion, finely diced
- ¼ cup sunflower seeds (or pumpkin seeds)
- 3 tablespoons dried cranberries (sugar-free for strict keto)
- 3 tablespoons vegan mayonnaise
- 1 tablespoon apple cider vinegar
- 1 teaspoon keto-friendly sweetener (monk fruit or erythritol)
- Salt and pepper to taste
Instructions
- Chop broccoli florets into small, bite-sized pieces and place in a large mixing bowl along with the diced red onion, sunflower seeds, and dried cranberries.
- In a small bowl, whisk together the vegan mayo, apple cider vinegar, sweetener, salt, and pepper until fully combined.
- Pour the dressing over the broccoli mixture and toss well to coat every piece evenly.
- Cover and refrigerate for at least 30 minutes before serving. The broccoli softens just slightly and absorbs the dressing during this time.
Tips
- Tip: Chop the broccoli smaller than you think — big chunks make it hard to eat and the dressing doesn't coat as well.
- Tip: If you can't find sugar-free dried cranberries, just skip them and add a few more sunflower seeds for crunch — the salad is still great.
- Tip: This keeps well in the fridge for up to 2 days, making it a solid meal-prep option for the week.
19. Fresh Spring Salad Recipe

Sometimes the side dish you need is just a genuinely fresh, well-dressed green salad — nothing heavy, nothing complicated. This spring salad uses whatever crisp vegetables are at their best: radishes, sugar snap peas, cucumber, spring onions, and tender greens. The whole thing comes together with a simple lemon vinaigrette that doesn't mask anything — it just lifts the vegetables. It pairs with almost everything on this list and takes about 10 minutes to put together, which is exactly what I need on a busy weeknight.
Ingredients
- 3 cups mixed spring greens or butter lettuce
- ½ cup radishes, thinly sliced
- ½ cup cucumber, halved and sliced
- ¼ cup snap peas, halved (or asparagus tips)
- 2 spring onions, thinly sliced
- 2 tablespoons extra-virgin olive oil
- 1 tablespoon fresh lemon juice
- ½ teaspoon Dijon mustard
- Salt and black pepper to taste
Instructions
- Wash and dry your greens thoroughly — wet greens will dilute the dressing and make the salad soggy. A salad spinner works great here, or just pat them dry with a clean towel.
- Arrange the greens in a large bowl and scatter the radishes, cucumber, snap peas, and spring onions over the top.
- In a small jar or bowl, whisk together the olive oil, lemon juice, Dijon mustard, salt, and pepper until emulsified.
- Drizzle the dressing over the salad just before serving and toss gently. Don't dress it ahead of time — it wilts fast.
Tips
- Tip: Use whatever spring vegetables look good at the store — this salad is flexible. Shaved fennel, baby spinach, or thinly sliced celery all work well.
- Tip: A small pinch of salt directly on the greens before dressing helps bring out their flavor — I picked this up from watching my mother salt vegetables before cooking.
- Tip: If you want more substance, add a handful of sliced almonds or a few tablespoons of hemp seeds — both are keto-friendly and add a nice texture contrast.
14. Creamy Basil Mushrooms
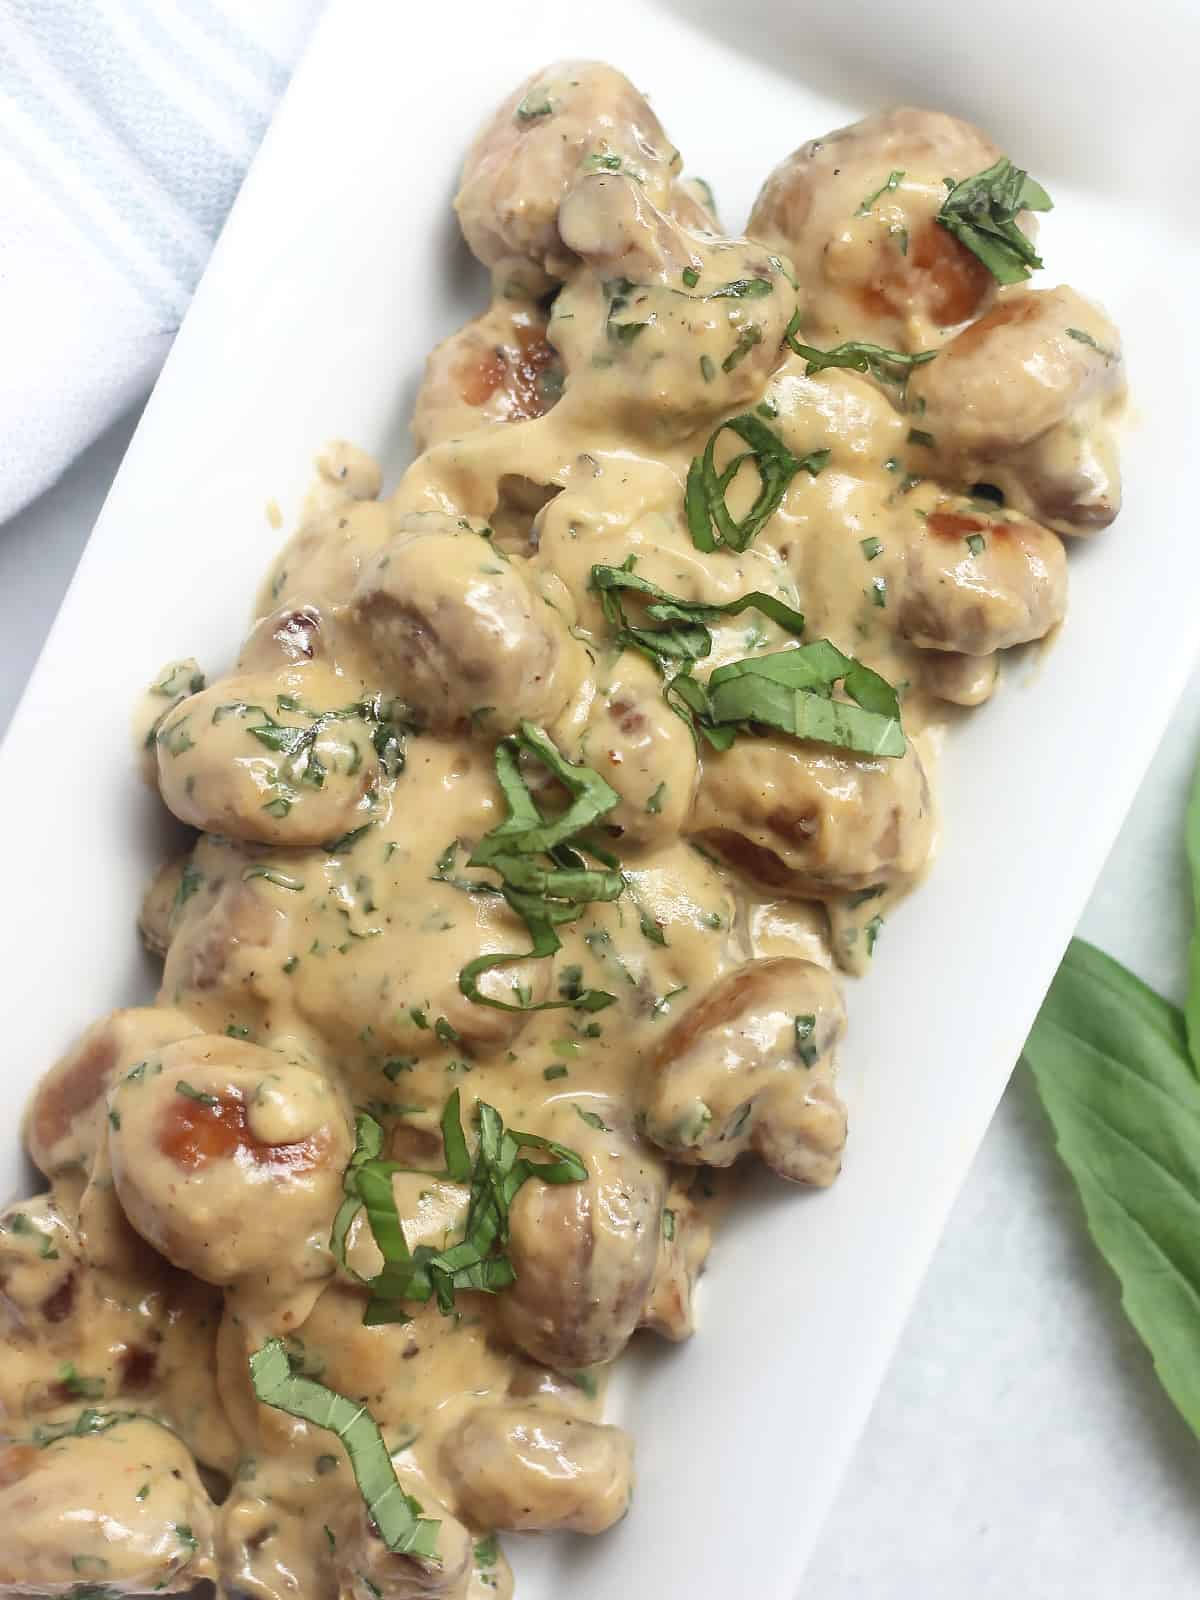
Mushrooms cooked in a creamy sauce with fresh basil — this one sounds simple but it genuinely surprised me the first time I made it. The sauce comes together fast and it clings to every piece of mushroom in the best way. I serve this alongside steak when I want something that feels a little indulgent without actually being complicated. It's low-carb, rich, and ready in under 20 minutes.
Ingredients
- 1 lb cremini or button mushrooms, cleaned and halved
- 2 tablespoons butter
- 3 cloves garlic, minced
- ½ cup heavy cream
- ¼ cup freshly grated Parmesan
- ¼ cup fresh basil leaves, roughly torn
- Salt and black pepper to taste
- Red pepper flakes, optional
Instructions
- Melt butter in a large skillet over medium-high heat. Add mushrooms in a single layer and let them sit undisturbed for 2-3 minutes so they get some color — resist stirring too early or they'll steam instead of brown.
- Stir and cook another 2-3 minutes until mushrooms are golden. Add garlic and cook for 30 seconds until fragrant.
- Pour in heavy cream and reduce heat to medium. Simmer for 3-4 minutes, stirring occasionally, until the sauce thickens slightly.
- Stir in Parmesan until melted and smooth. Season with salt, pepper, and red pepper flakes if using.
- Remove from heat and fold in fresh basil. Serve immediately.
Tips
- Tip: Don't crowd the pan — cook mushrooms in batches if needed. Crowded mushrooms release water and turn soggy instead of golden.
- Tip: Add the basil at the very end, off the heat. Cooking it too long turns it dark and bitter.
- Tip: If you want this dairy-free, coconut cream works and gives the sauce a slightly sweeter note that actually pairs well with the basil.
15. Cauliflower Mexican Rice

I grew up eating rice at every single meal, so switching to cauliflower rice was honestly a hard sell for me. But this version — seasoned with cumin, smoked paprika, garlic, and tomatoes — actually holds its own. It's not trying to pretend it's real rice. It's its own thing, and it's good. Serve it alongside grilled chicken or keto tacos and nobody at my table complains.
Ingredients
- 1 medium head cauliflower, riced (about 4 cups) — or one 12 oz bag pre-riced from Trader Joe's or Walmart
- 2 tablespoons olive oil
- ½ cup white onion, finely diced
- ½ cup bell pepper (any color), diced
- 3 cloves garlic, minced
- 1 cup diced tomatoes (canned, drained, or fresh)
- 1 teaspoon cumin
- 1 teaspoon smoked paprika
- ½ teaspoon chili powder
- Salt and pepper to taste
- Fresh cilantro and lime wedges for serving
Instructions
- If using a whole cauliflower head, cut into florets and pulse in a food processor until it resembles rice. If you don't have a food processor, use a box grater — the large holes work fine.
- Heat olive oil in a large skillet over medium heat. Add onion and bell pepper and cook for 3-4 minutes until softened. Add garlic and cook 30 seconds more.
- Stir in diced tomatoes, cumin, smoked paprika, and chili powder. Cook for 2 minutes to let the spices bloom in the oil.
- Add the riced cauliflower and stir everything together. Cook over medium-high heat for 5-7 minutes, stirring occasionally, until cauliflower is tender but not mushy.
- Season with salt and pepper. Serve topped with fresh cilantro and a squeeze of lime.
Tips
- Tip: Don't cover the pan while cooking — cauliflower releases moisture and you want it to evaporate so the rice stays fluffy, not wet.
- Tip: Drain canned tomatoes well before adding. Too much liquid makes the cauliflower rice go soggy fast.
- Tip: This keeps in the fridge for up to 3 days and reheats well in a skillet with a tiny drizzle of oil.
16. Air Fryer Crispy Broccoli with Parmesan
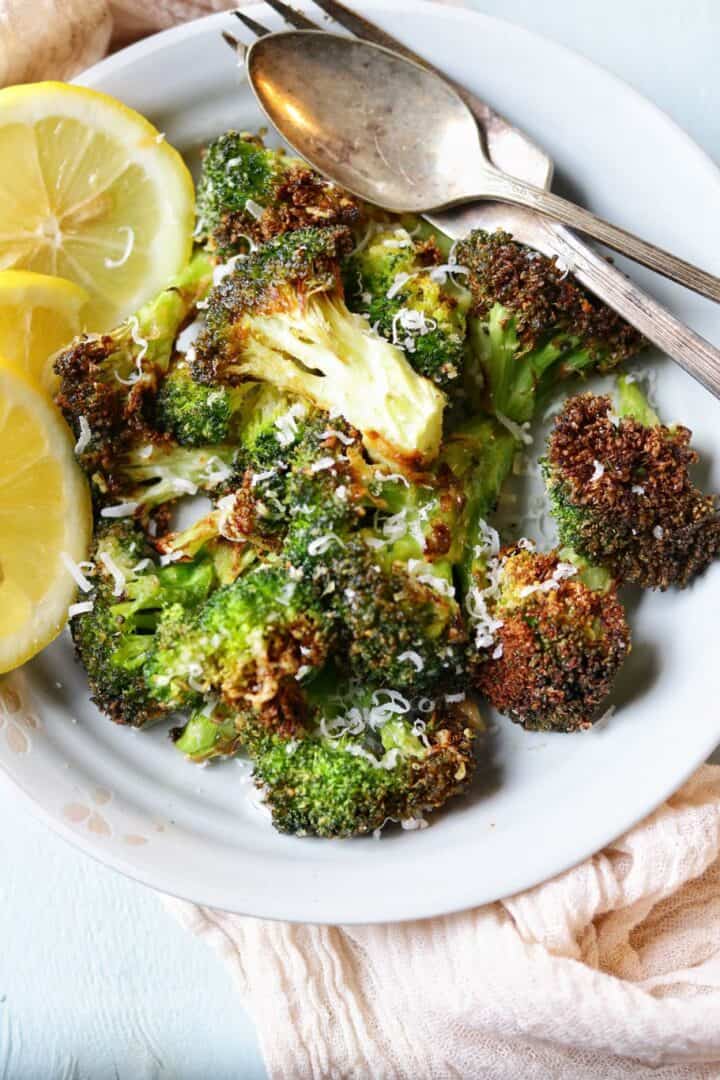
Twelve minutes. That's genuinely all this takes. I started making air fryer broccoli as a weeknight shortcut and now it's the side dish Zainab actually asks for by name, which tells you everything you need to know. The edges get slightly charred and the Parmesan crisps up into little golden bits. It's the kind of vegetable side that disappears before the main dish even hits the table.
Ingredients
- 4 cups broccoli florets (about 1 medium head)
- 2 tablespoons olive oil
- ½ teaspoon garlic powder
- ¼ teaspoon onion powder
- ¼ teaspoon salt
- ¼ teaspoon black pepper
- ⅓ cup freshly grated Parmesan cheese
- Lemon wedge for serving, optional
Instructions
- Preheat your air fryer to 400°F for 3 minutes. Make sure the broccoli florets are dry — pat them with a paper towel if needed. Wet broccoli steams instead of crisping.
- Toss broccoli with olive oil, garlic powder, onion powder, salt, and pepper in a bowl until evenly coated.
- Arrange in the air fryer basket in a single layer — don't pile them. Cook at 400°F for 8 minutes.
- Sprinkle Parmesan over the broccoli and air fry for another 2-4 minutes until the cheese is golden and the edges are lightly charred.
- Serve immediately with a squeeze of lemon if you like.
Tips
- Tip: Cut florets into similar sizes so they cook evenly — very small pieces will burn before large ones are done.
- Tip: No air fryer? Roast on a sheet pan at 425°F for 18-20 minutes, adding Parmesan in the last 5 minutes.
- Tip: Use freshly grated Parmesan rather than the pre-shredded kind — it melts and crisps far better.
17. Easy Air Fryer Asparagus Parmesan
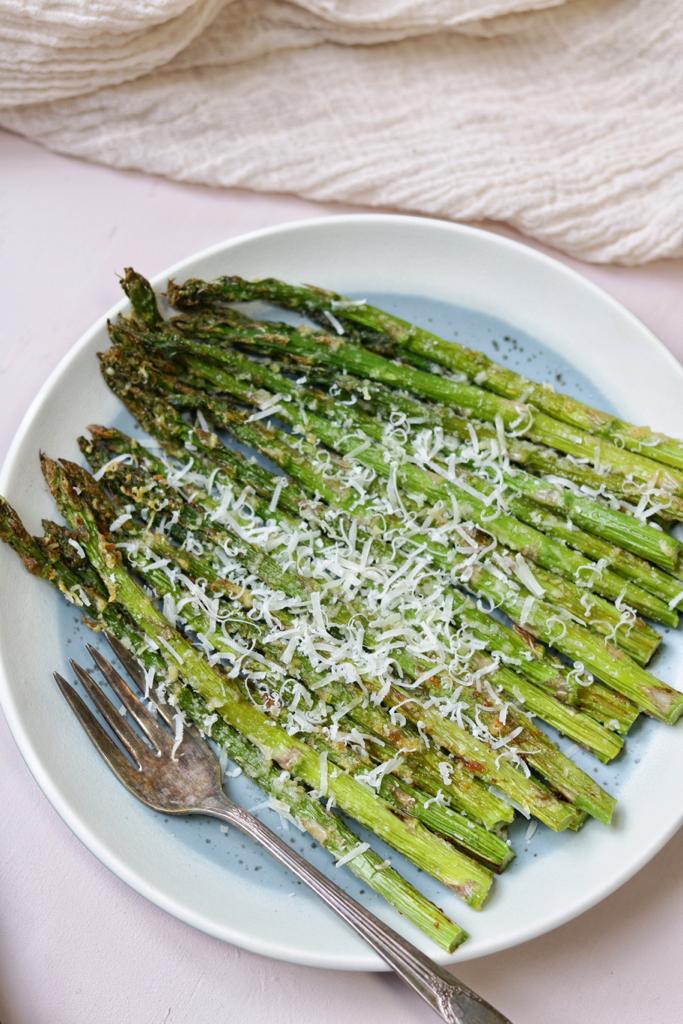
Asparagus used to be something I'd roast in the oven and forget about for 20 minutes. The air fryer version takes half the time and comes out better — the tips get lightly crispy while the stalks stay tender. A hit of garlic powder, a little Parmesan, and you have a proper side dish that looks like you put in more effort than you did. Works well alongside grilled salmon or a simple chicken breast.
Ingredients
- 1 lb fresh asparagus, woody ends trimmed
- 1½ tablespoons olive oil
- ½ teaspoon garlic powder
- ¼ teaspoon onion powder
- ¼ teaspoon salt
- ¼ teaspoon black pepper
- ¼ cup freshly grated Parmesan cheese
- Lemon zest or a squeeze of lemon juice, for serving
Instructions
- Preheat air fryer to 400°F. Snap or trim the tough woody ends off the asparagus — they snap naturally at the right spot if you bend them.
- Toss asparagus with olive oil, garlic powder, onion powder, salt, and pepper until well coated.
- Lay asparagus in the air fryer basket in a single layer (you may need to do two batches depending on your air fryer size). Cook at 400°F for 6 minutes.
- Sprinkle Parmesan evenly over the spears and air fry for another 2-3 minutes until the cheese is golden and slightly crispy.
- Transfer to a plate immediately and finish with lemon zest or a small squeeze of lemon juice.
Tips
- Tip: Thin asparagus spears cook in 6-7 minutes total; thick ones may need 9-10 minutes. Keep an eye on the tips — they burn fastest.
- Tip: Asparagus goes from perfect to overdone quickly in an air fryer. Check at 5 minutes the first time you make this so you get a feel for your machine.
- Tip: The lemon at the end isn't optional in my kitchen — it cuts through the richness of the Parmesan and makes the whole dish taste fresher.
18. Authentic Vegan German Potato Salad (Gluten-Free, Paleo, Allergy-Free)

I'll be honest — German potato salad was not something I grew up with. I tried it at a potluck years ago and immediately wanted to figure out how to make it at home. This version skips the mayo entirely and uses a warm vinegar-based dressing instead, which means it's vegan, gluten-free, and paleo-friendly without tasting like it's missing anything. The tangy dressing soaks into the warm potatoes and the result is something genuinely good — not a compromise version of something better.
Ingredients
- 1½ lbs small waxy potatoes (red or Yukon Gold), scrubbed
- 3 tablespoons olive oil
- ½ cup white or yellow onion, finely diced
- 3 tablespoons apple cider vinegar
- 1 tablespoon whole-grain mustard (or Dijon)
- 1 teaspoon maple syrup or honey (optional, for balance)
- ½ teaspoon salt, plus more for boiling water
- ¼ teaspoon black pepper
- 3 tablespoons fresh parsley, chopped
- 2 green onions, sliced, for garnish
Instructions
- Place potatoes in a pot of well-salted cold water. Bring to a boil and cook for 15-18 minutes until fork-tender. Drain and let cool just enough to handle — you want them still warm when you dress them.
- While potatoes cook, heat olive oil in a skillet over medium heat. Add onion and cook for 5-6 minutes until soft and translucent.
- Add apple cider vinegar, mustard, maple syrup (if using), salt, and pepper to the skillet. Stir and cook for 1-2 minutes until the dressing is warm and combined. Remove from heat.
- Slice or halve the warm potatoes and place in a large bowl. Pour the warm dressing over them right away and toss gently — warm potatoes absorb the dressing much better than cold ones.
- Fold in fresh parsley and top with sliced green onions. Serve warm or at room temperature.
Tips
- Tip: Dress the potatoes while they're still warm — this is the most important step. Cold potatoes won't absorb the vinegar dressing and the salad ends up tasting flat.
- Tip: This salad is actually better after sitting for 20-30 minutes, once the dressing fully soaks in. Make it a little ahead if you can.
- Tip: Note that potatoes are higher in carbs than most keto vegetables — this one fits better into a paleo or low-carb approach rather than strict keto. Use it on maintenance days or serve in smaller portions alongside a protein-heavy main.
9. Sauteed Zucchini
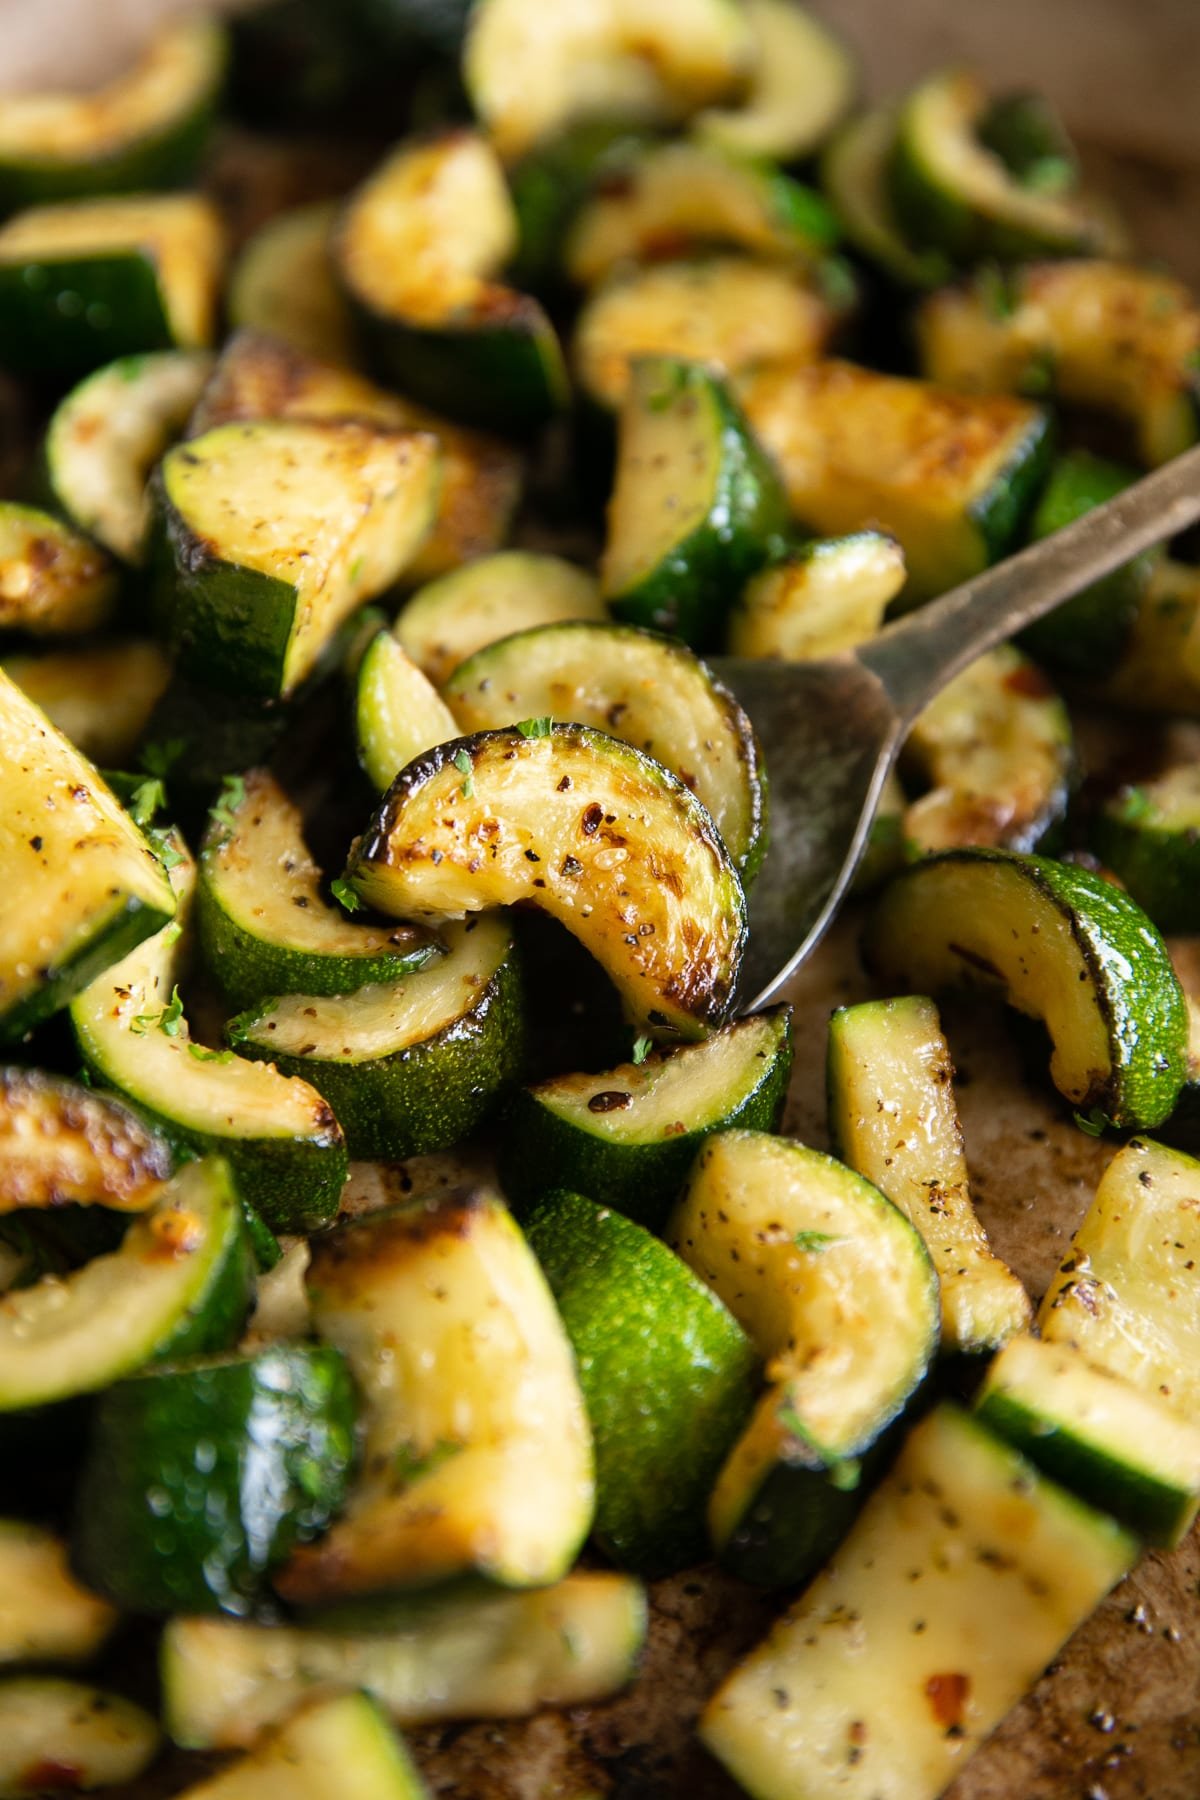
Zucchini has a reputation for going mushy the second you blink, and I've made that mistake more times than I'd like to admit. The secret is a genuinely hot pan and not crowding it — give the pieces room and they'll actually get a little golden instead of steaming themselves into mush. This comes together in about 10 minutes, which makes it my go-to when dinner is almost ready and I realize I have zero side dishes sorted. Garlic, olive oil, a pinch of chili flakes if you want a little heat — that's really all it needs.
Ingredients
- 3 medium zucchini, sliced into ¼-inch rounds
- 2 tablespoons olive oil
- 3 cloves garlic, minced
- ¼ teaspoon red chili flakes (optional)
- ½ teaspoon salt
- ¼ teaspoon black pepper
- 2 tablespoons freshly grated Parmesan (optional, for finishing)
Instructions
- Heat a large skillet over medium-high heat until it's genuinely hot — not just warm. Add the olive oil and let it shimmer for about 30 seconds.
- Add the zucchini slices in a single layer. Don't stir for 2 minutes — let them sit and develop some color on the bottom.
- Flip the slices, add the garlic and chili flakes, and cook for another 2 minutes until the zucchini is just tender but still has a little bite.
- Season with salt and pepper, toss once more, and take it off the heat. Finish with Parmesan if using. Serve immediately.
Tips
- Tip: If your zucchini is very watery, pat the slices dry with a paper towel before they go in the pan — this helps them brown instead of steam.
- Tip: Work in two batches if your skillet isn't large enough. Crowding the pan is the number one reason zucchini goes soggy.
- Tip: A squeeze of fresh lemon juice right at the end brightens everything up nicely without adding any carbs.
10. Keto Scalloped Turnips
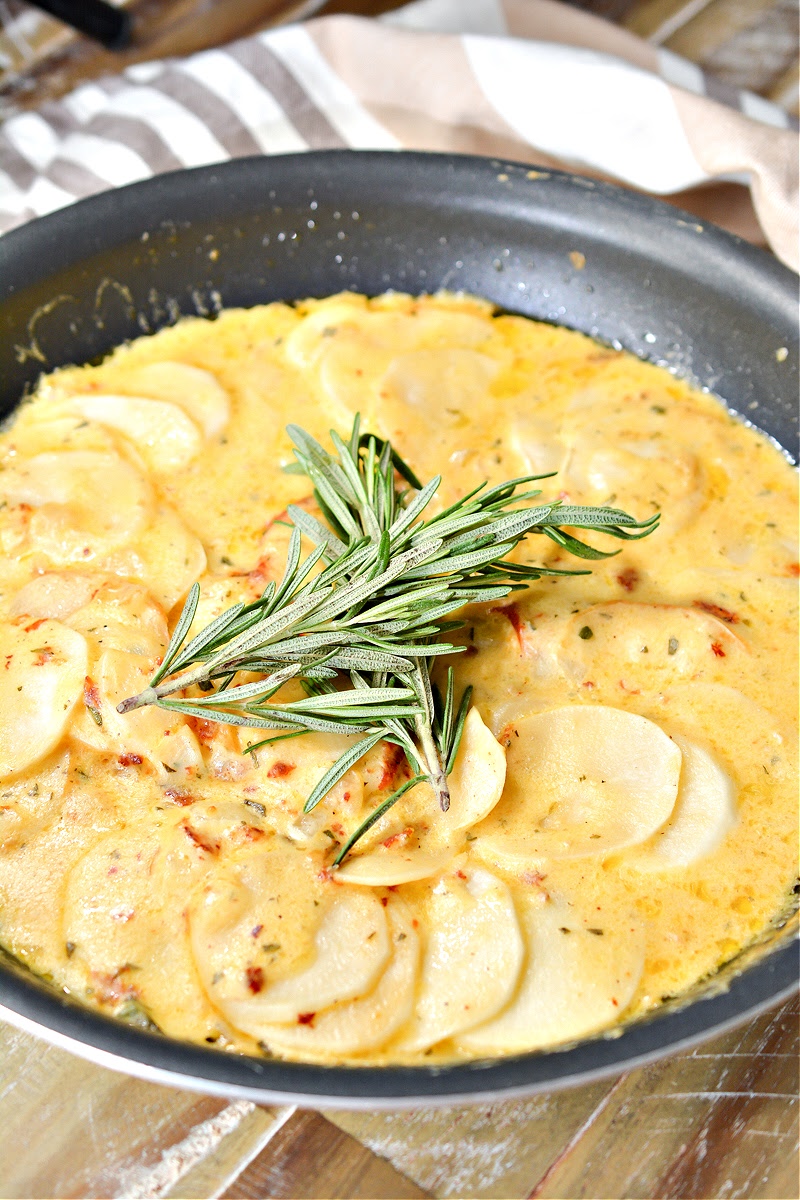
I was genuinely skeptical about turnips doing the job of potatoes in a scalloped dish — turnips have that slightly bitter edge that potatoes don't. But thin-sliced and baked low and slow in a cream and cheese sauce, they mellow out completely and you get something that is genuinely comforting. Saad had no idea these weren't potatoes the first time I made them, which told me everything I needed to know. This is the kind of keto side dish that doesn't feel like a compromise at all.
Ingredients
- 2 lbs turnips, peeled and sliced paper-thin (use a mandoline or a sharp knife)
- 1 cup heavy cream
- 2 cloves garlic, minced
- 1 teaspoon salt
- ½ teaspoon black pepper
- ¼ teaspoon dried thyme
- 1 cup shredded Gruyère cheese (or sharp cheddar if Gruyère is hard to find)
- ¼ cup grated Parmesan
- 1 tablespoon unsalted butter, for greasing the dish
Instructions
- Preheat your oven to 375°F. Butter a 9x9-inch baking dish generously.
- Whisk together the heavy cream, garlic, salt, pepper, and thyme in a small bowl or measuring jug.
- Layer one-third of the turnip slices in the baking dish, overlapping slightly. Pour over one-third of the cream mixture and scatter one-third of the Gruyère. Repeat layers twice more.
- Top with the Parmesan, cover tightly with foil, and bake for 45 minutes. Remove the foil and bake for another 20-25 minutes until the top is golden and bubbling and a knife slides through the turnips easily.
- Let it rest for 10 minutes before serving — this helps it set so it slices cleanly.
Tips
- Tip: Slice the turnips as thin as you can — about ⅛ inch. Thick slices won't cook through evenly and will stay firm in the middle.
- Tip: If you can't find Gruyère at your regular grocery store, sharp cheddar works really well here and gives you a bolder, more familiar flavor.
- Tip: This reheats beautifully the next day — just cover it with foil and warm at 325°F for 15 minutes.
11. Instant Pot Southern Green Beans

Southern-style green beans are the opposite of those bright, crisp green beans you'd get at a fancy restaurant — these are slow-cooked until they're deeply savory and almost silky, seasoned with bacon and onion until every bite tastes like something your grandmother would make. The Instant Pot gets you there in a fraction of the time without standing over the stove for an hour. These are keto-friendly as long as you skip any added sugar some Southern recipes call for, which I do anyway — the bacon and broth bring more than enough flavor on their own.
Ingredients
- 1½ lbs fresh green beans, ends trimmed (frozen works in a pinch)
- 4 strips bacon, chopped
- ½ medium onion, diced
- 3 cloves garlic, minced
- 1 cup chicken broth (low-sodium)
- ½ teaspoon salt
- ½ teaspoon black pepper
- ¼ teaspoon red pepper flakes (optional)
Instructions
- Set the Instant Pot to Sauté mode. Add the chopped bacon and cook for 3-4 minutes until it renders out some fat and starts to crisp at the edges.
- Add the diced onion and cook for 2 more minutes, stirring occasionally. Add the garlic and stir for 30 seconds.
- Add the green beans, chicken broth, salt, pepper, and red pepper flakes if using. Stir everything together.
- Secure the lid, set the valve to Sealing, and cook on High Pressure for 4 minutes. Quick release the pressure when done.
- Open the lid, taste for seasoning, and serve. The beans should be tender and well-seasoned — not squeaky-crisp, but properly soft in the Southern style.
Tips
- Tip: If you don't have an Instant Pot, simmer the beans in a covered pot on the stovetop with all the same ingredients for 30-40 minutes on low heat until very tender.
- Tip: Smoked bacon makes a noticeable difference here — that smoky depth is what makes Southern green beans taste the way they do.
- Tip: Make a double batch — these reheat well and taste even better the next day once the flavors have had time to settle.
12. Keto Cauliflower Hummus

Growing up in Pakistan, hummus wasn't really a thing in our house — chickpea dips weren't part of the repertoire. But once I started making it for my family here, it became a snack board staple, and this cauliflower version surprised me by being genuinely good rather than just "good for keto." Roasting the cauliflower first is non-negotiable — it brings out a nuttiness that raw or steamed cauliflower just doesn't have. Blended with tahini, lemon, and garlic, it's creamy and satisfying, and nobody has ever looked at this dip and said "wait, where are the chickpeas?"
Ingredients
- 1 medium head cauliflower, cut into florets
- 3 tablespoons olive oil, divided
- 3 tablespoons tahini
- 2 cloves garlic
- 3 tablespoons fresh lemon juice
- ½ teaspoon cumin
- ½ teaspoon salt
- 2-4 tablespoons water, to thin as needed
- Paprika and extra olive oil, to garnish
Instructions
- Preheat your oven to 425°F. Toss the cauliflower florets with 2 tablespoons of olive oil and a pinch of salt. Spread on a sheet pan and roast for 25-30 minutes until golden and tender, flipping once halfway through.
- Let the cauliflower cool for 5-10 minutes, then transfer to a food processor. If you don't have a food processor, a blender works fine — just add the water first to help it move.
- Add the tahini, garlic, lemon juice, cumin, salt, and remaining 1 tablespoon of olive oil. Blend until smooth, scraping down the sides as needed.
- Add water one tablespoon at a time until you reach your preferred consistency — some people like it thick, I like it just slightly looser so it's easy to scoop.
- Transfer to a serving bowl, drizzle with olive oil, and dust with paprika. Serve with cucumber slices, bell pepper strips, or keto crackers.
Tips
- Tip: Don't skip roasting — steamed cauliflower gives you a bland, watery result. The roasting step is what makes this actually taste good.
- Tip: Tahini can be found at Walmart, Trader Joe's, or most mainstream grocery stores now — it's in the international aisle or near the peanut butter.
- Tip: This keeps in the fridge for up to 5 days in an airtight container. The flavor actually improves overnight once the garlic mellows a bit.
13. Cheesy Oven Roasted Cauliflower Steaks
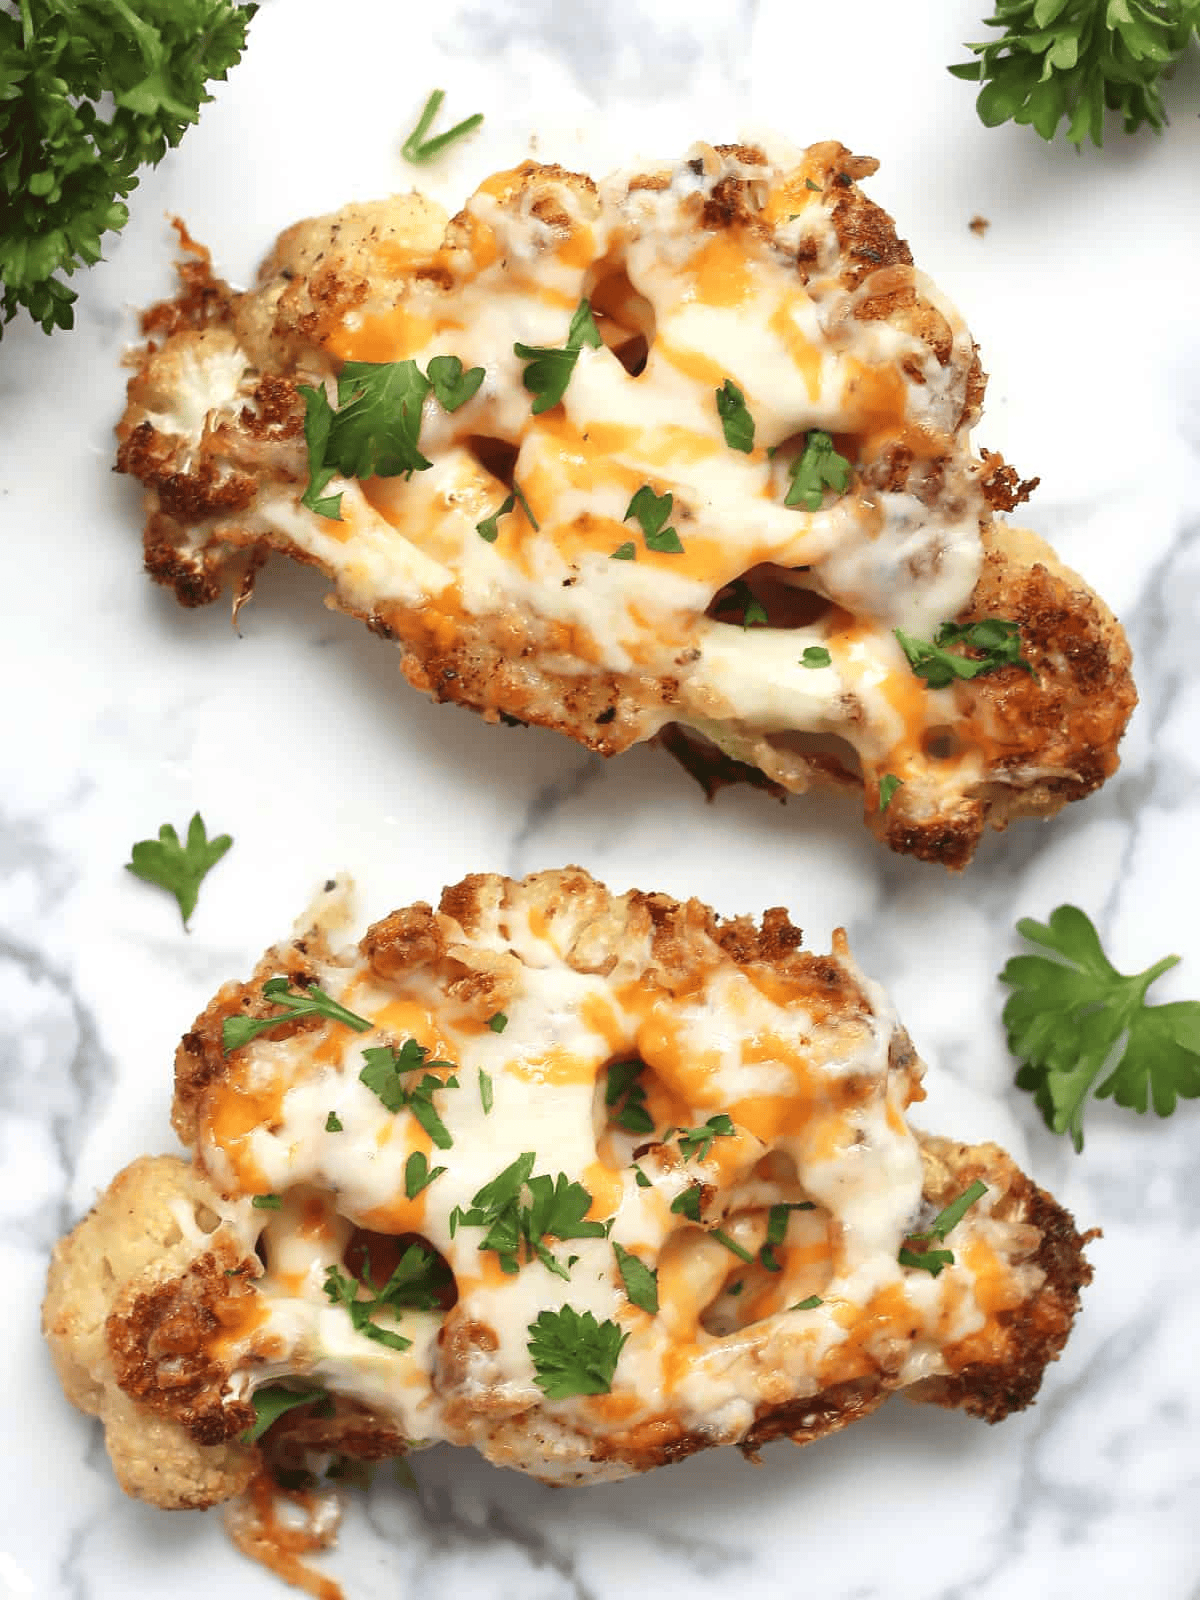
Cauliflower steaks sound a bit restaurant-fancy but they're honestly one of the easier things you can make — slice a whole head through the core, season it, roast it, pile cheese on top, and you're done. The key is getting a good sear on the bottom before it goes in the oven, which means a hot pan and a little patience. I use a mix of Parmesan and sharp cheddar because Parmesan gives you that crispy, nutty edge and cheddar gives you the gooey pull. These work beautifully as a side dish but I've also served them as the main with a simple salad on the side and nobody complained.
Ingredients
- 1 large head cauliflower, sliced into ¾-inch steaks (you'll get about 4 slabs from the center; save the florets that fall off for something else)
- 3 tablespoons olive oil
- 1 teaspoon garlic powder
- ½ teaspoon smoked paprika
- ½ teaspoon salt
- ¼ teaspoon black pepper
- ½ cup shredded sharp cheddar
- ¼ cup grated Parmesan
- Fresh parsley, chopped, to serve
Instructions
- Preheat your oven to 425°F. Mix together the garlic powder, smoked paprika, salt, and pepper in a small bowl. Brush both sides of each cauliflower steak with olive oil, then rub the spice mix all over them.
- Heat an oven-safe skillet over medium-high heat. Once hot, sear the cauliflower steaks for 2-3 minutes per side until golden brown. Work in batches if needed — don't crowd the pan.
- Transfer the seared steaks to a lined sheet pan (or leave them in the oven-safe skillet). Top each one generously with the cheddar and Parmesan mixture.
- Roast in the oven for 18-22 minutes until the cauliflower is tender when pierced with a knife and the cheese is melted, bubbly, and golden at the edges.
- Scatter fresh parsley over the top and serve immediately while the cheese is still melty.
Tips
- Tip: The searing step is what gives you that satisfying caramelized crust — don't skip it and go straight to the oven, the texture won't be the same.
- Tip: Slice carefully through the core — the core is what holds the steak together. If you cut too far to the side you'll just get loose florets.
- Tip: If you want a little heat, a pinch of cayenne in the spice mix works really well alongside the smoked paprika.
8. Easy Keto Garlic Knots Recipe
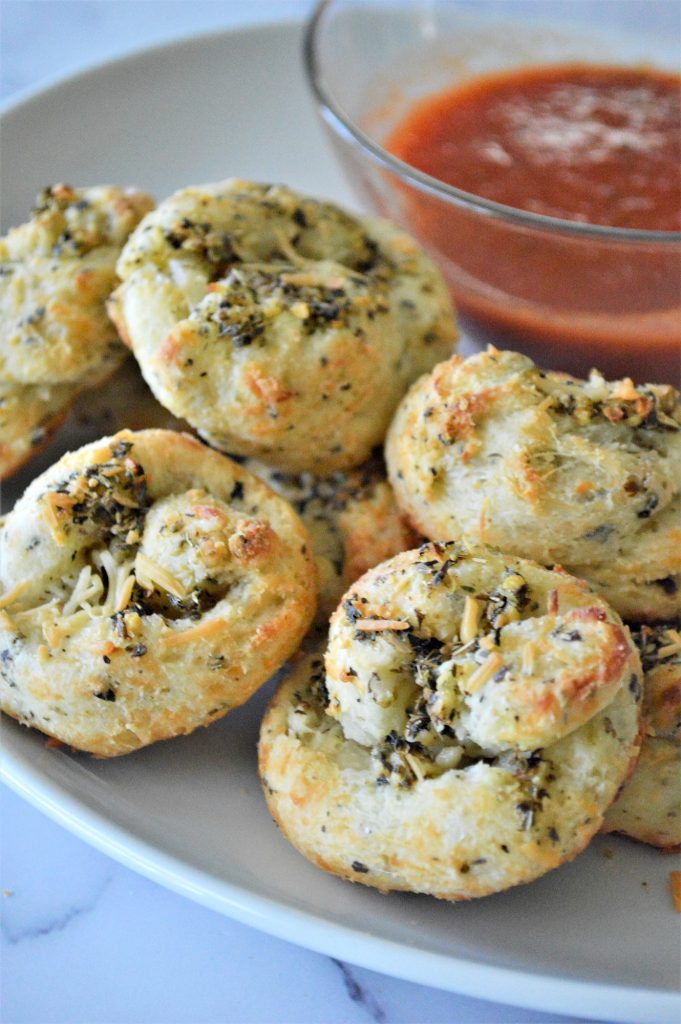
Garlic knots were one of those things I genuinely thought I'd have to give up when my husband started eating low-carb. Then I tried making them with a fathead dough base and realized I'd been wrong. These come out soft in the middle, slightly golden on the outside, and absolutely loaded with garlic butter. They work alongside pizza night or soup, and honestly they disappear fast enough that I'd recommend making a double batch.
Ingredients
- 1 ½ cups shredded mozzarella cheese
- 2 tablespoons cream cheese
- ¾ cup almond flour
- 1 large egg
- ½ teaspoon garlic powder
- ¼ teaspoon salt
- 3 tablespoons unsalted butter, melted
- 3 cloves garlic, finely minced
- 1 tablespoon fresh parsley, chopped (or ½ teaspoon dried)
Instructions
- Preheat your oven to 400°F and line a baking sheet with parchment paper.
- In a microwave-safe bowl, combine mozzarella and cream cheese. Microwave in 30-second intervals, stirring each time, until fully melted and smooth — usually about 1 minute total.
- Stir in almond flour, egg, garlic powder, and salt. Mix until a soft dough forms. If it gets sticky, refrigerate for 5 minutes.
- Divide dough into 8 equal pieces. Roll each piece into a rope about 6 inches long, then tie loosely into a knot. Place on the prepared baking sheet.
- Bake for 12–15 minutes until golden. While they bake, stir together melted butter, minced garlic, and parsley. Brush generously over the hot knots as soon as they come out of the oven.
Tips
- Tip: Don't skip the parchment paper — fathead dough sticks badly to an unlined pan and you'll lose half your knots trying to pry them off.
- Tip: Brush the garlic butter on immediately while the knots are still hot — that's when they absorb it best and get that proper garlic bread flavor.
- Tip: These reheat well in an air fryer at 350°F for 3 minutes — much better than microwaving, which makes them rubbery.
7. Keto Loaded Oven Roasted Radishes
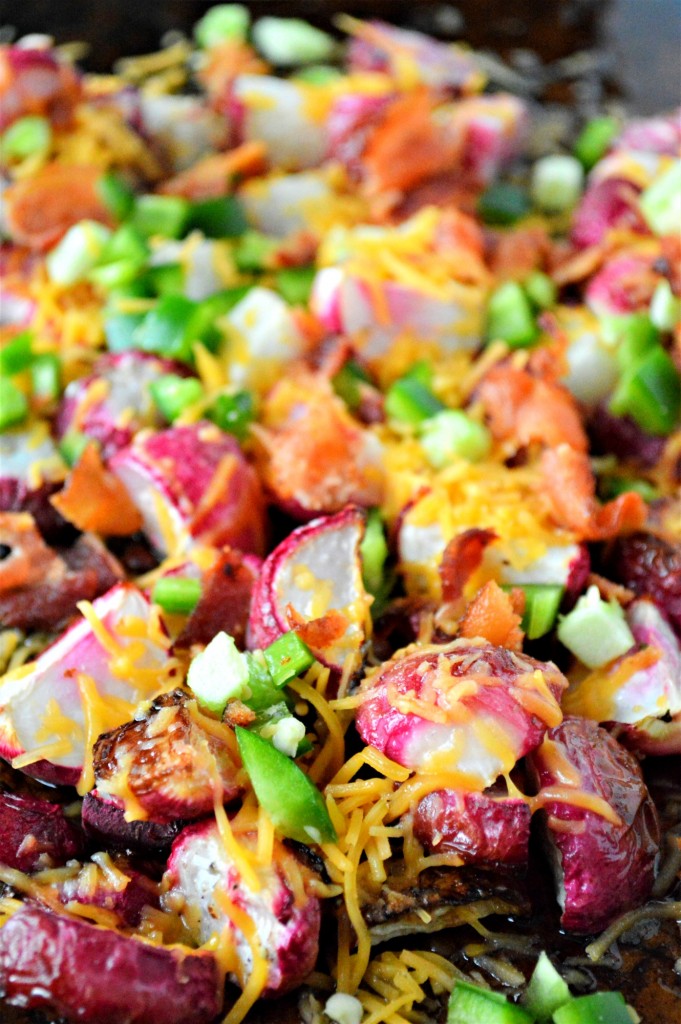
I was skeptical about roasted radishes for a long time. Raw radishes have that sharp, almost spicy bite that I never loved on their own. But roasting them completely transforms the texture — they go soft and almost potato-like, losing most of that sharpness. Loading them up with bacon, cheddar, and sour cream like a loaded baked potato situation? That's when they really earned a permanent spot in my keto rotation. Zainab keeps asking me to make these, which I never saw coming.
Ingredients
- 1 lb radishes, trimmed and halved
- 2 tablespoons olive oil
- ½ teaspoon garlic powder
- Salt and black pepper to taste
- 4 slices bacon, cooked and crumbled
- ½ cup shredded cheddar cheese
- ¼ cup sour cream
- 2 tablespoons sliced green onions
Instructions
- Preheat oven to 425°F. Toss halved radishes with olive oil, garlic powder, salt, and pepper until evenly coated. Spread cut-side down on a sheet pan in a single layer.
- Roast for 20–25 minutes, flipping once halfway through, until the radishes are tender and caramelized on the edges.
- Remove from oven and immediately scatter shredded cheddar and crumbled bacon over the top. Return to oven for 2–3 minutes just until the cheese melts.
- Transfer to a serving dish and top with dollops of sour cream and sliced green onions. Serve immediately.
Tips
- Tip: Make sure radishes are cut-side down on the pan — that flat surface gets the best caramelization and is what makes them taste more like potatoes.
- Tip: Don't overcrowd the pan or they'll steam instead of roast. Use two sheet pans if needed — it's worth it.
- Tip: If you want to keep this dairy-free, skip the cheese and sour cream and finish with a drizzle of olive oil and fresh herbs instead.
6. Spanish Cauliflower Rice
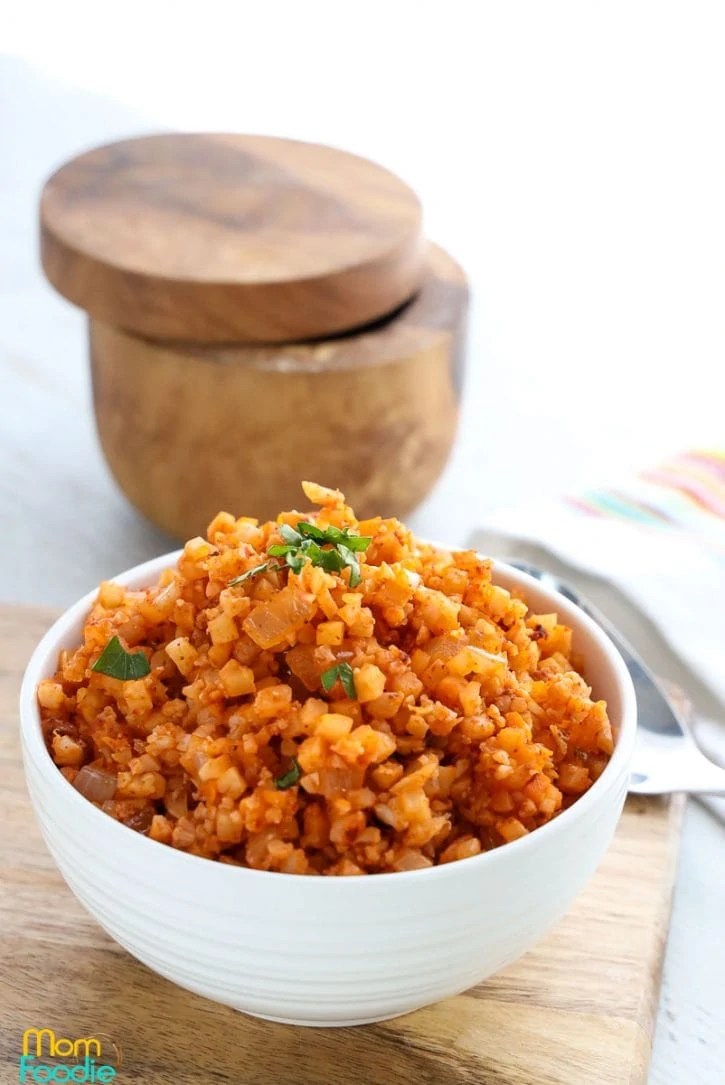
Growing up in Pakistan, rice was never something I thought twice about — it was just part of every meal. So watching my husband try to cut it out while still wanting something rice-adjacent sent me down a cauliflower rice rabbit hole. This Spanish version is the one that actually stuck. It gets seasoned with tomato, cumin, and smoked paprika so it tastes like proper Mexican rice, not like sad diet food. I make it alongside grilled chicken or keto tacos at least twice a month, and it comes together in under 15 minutes.
Ingredients
- 1 medium head cauliflower, riced (about 4 cups) — or 1 bag store-bought frozen cauliflower rice, thawed
- 2 tablespoons olive oil
- ½ medium onion, finely diced
- 3 cloves garlic, minced
- ½ cup canned crushed tomatoes (or 1 tablespoon tomato paste thinned with 3 tablespoons water)
- 1 teaspoon cumin
- 1 teaspoon smoked paprika
- ½ teaspoon salt, or to taste
- 2 tablespoons fresh cilantro, chopped (optional)
Instructions
- If using a whole cauliflower head, cut into florets and pulse in a food processor until it resembles rice — about 10–12 pulses. Don't over-process or it turns mushy. No food processor? A box grater works fine on the large holes.
- Heat olive oil in a large skillet over medium-high heat. Add the onion and cook for 3–4 minutes until softened. Add the garlic and stir for 30 seconds.
- Stir in crushed tomatoes, cumin, smoked paprika, and salt. Let the tomato mixture cook for 1–2 minutes to deepen the flavor.
- Add the cauliflower rice and toss everything together. Cook for 5–7 minutes, stirring occasionally, until the cauliflower is tender but not soggy. Finish with fresh cilantro and serve.
Tips
- Tip: If your cauliflower rice releases a lot of liquid while cooking, turn the heat up and let it evaporate rather than steaming — you want it dry and fluffy, not wet.
- Tip: Frozen store-bought cauliflower rice (Trader Joe's and Walmart both carry it) works perfectly here and saves you about 10 minutes of prep.
- Tip: Add a squeeze of lime juice right before serving — it lifts all the flavors and makes it taste noticeably fresher.
5. Roasted Asparagus With Pico De Gallo

This one surprised me. I've made roasted asparagus a hundred times, usually just with olive oil and salt, and it's fine — but adding a fresh pico de gallo on top completely changes the experience. The warm, slightly charred asparagus spears against the cold, bright tomato topping is a genuinely good contrast. It works in the air fryer in about 8 minutes, or in a regular oven at high heat if you don't have one. Either way it's on the table in under 20 minutes, which makes it a real weeknight option.
Ingredients
- 1 lb fresh asparagus, tough ends snapped off
- 1 tablespoon olive oil (or cooking spray for oil-free)
- Salt and black pepper to taste
- 2 medium tomatoes, finely diced
- ¼ cup white onion, finely diced
- 1 jalapeño, seeded and finely minced
- 2 tablespoons fresh cilantro, chopped
- Juice of 1 lime
- ¼ teaspoon salt (for the pico)
Instructions
- Make the pico de gallo first so it has time to sit: combine diced tomatoes, onion, jalapeño, cilantro, lime juice, and salt in a bowl. Stir and set aside.
- Toss asparagus with olive oil, salt, and pepper. Air fryer method: Cook at 400°F for 7–9 minutes, shaking the basket once halfway through. Oven method: Roast at 425°F on a sheet pan for 12–15 minutes until tender and slightly charred at the tips.
- Arrange roasted asparagus on a serving platter. Spoon the pico de gallo generously over the top. Serve immediately while the asparagus is still warm.
Tips
- Tip: Thinner asparagus spears cook faster and get crispier tips — if yours are thick, add 3–4 minutes to the cooking time and check with a fork.
- Tip: Drain any excess liquid from the pico before spooning it on — waterlogged tomatoes will make the asparagus soggy fast.
- Tip: If jalapeño is too much heat for your family, swap in a small amount of green bell pepper for the crunch without the spice.
4. Garlic Sauteed Asparagus And Mushrooms

This is the kind of side dish that looks like you put in more effort than you actually did. Asparagus and mushrooms are both good on their own, but sautéed together in garlic and butter they become something you want to eat directly out of the pan. The mushrooms go golden and slightly meaty while the asparagus stays crisp-tender — the textures work really well together. I make this on nights when dinner needs to come together in under 15 minutes, and it fits alongside almost everything: grilled steak, baked salmon, roast chicken, whatever you've got going.
Ingredients
- 1 lb asparagus, tough ends removed, cut into 2-inch pieces
- 8 oz cremini or button mushrooms, sliced
- 2 tablespoons butter (or olive oil to keep it vegan)
- 4 cloves garlic, minced
- ¼ teaspoon red pepper flakes (optional)
- Salt and black pepper to taste
- 1 tablespoon soy sauce or coconut aminos (for depth)
- Fresh lemon juice, for finishing
Instructions
- Heat a large heavy skillet over medium-high heat. Add butter and let it melt and start to foam. Add mushrooms in a single layer and don't stir for the first 2–3 minutes — let them get golden on one side before tossing.
- Once mushrooms are browned, add asparagus pieces to the pan. Toss everything together and cook for another 3–4 minutes until the asparagus is bright green and just tender.
- Push everything to the edges of the pan and add garlic (and red pepper flakes if using) to the center. Let the garlic sizzle for 30 seconds, then toss it all together.
- Add a splash of soy sauce or coconut aminos, stir to coat, and cook for 1 more minute. Season with salt and pepper, finish with a squeeze of lemon juice, and serve immediately.
Tips
- Tip: Don't crowd the mushrooms — if the pan is too full they'll steam and turn grey instead of browning. Use a 12-inch skillet or cook them in two batches.
- Tip: Add the garlic late, not at the start — garlic burns fast in a hot pan and turns bitter, which will ruin the whole dish.
- Tip: Coconut aminos from Trader Joe's or Walmart is a great soy-free swap and keeps the dish both keto and Whole30 friendly.
21. Air Fryer Portobello Mushrooms

I came to portobello mushrooms late — for years I just sautéed them in a pan and wondered why they turned out soggy and sad. The air fryer completely changed the situation. These come out with crispy, slightly charred edges and a meaty, juicy center that makes them feel like a proper side dish, not an afterthought. They're low carb, naturally keto, and take maybe 12 minutes start to finish. I've started keeping a pack of portobellos in the fridge specifically for nights when I need a fast side and can't think of what to make.
Ingredients
- 4 large portobello mushroom caps, stems removed and gills scraped
- 2 tablespoons olive oil
- 2 cloves garlic, minced
- 1 tablespoon soy sauce (or coconut aminos for strict keto)
- 1 teaspoon smoked paprika
- ½ teaspoon black pepper
- Salt to taste
- Fresh parsley, chopped, for garnish
Instructions
- Preheat your air fryer to 375°F. While it heats up, mix together the olive oil, minced garlic, soy sauce, smoked paprika, black pepper, and salt in a small bowl.
- Using a pastry brush or just your hands, coat both sides of each mushroom cap generously with the marinade. Let them sit for 5 minutes so the mushrooms can absorb some of that flavor.
- Place the mushrooms gill-side up in the air fryer basket in a single layer. Cook for 10-12 minutes until the edges are crispy and the caps look slightly shrunken and caramelized.
- Remove from the air fryer, scatter chopped parsley on top, and serve immediately.
Tips
- Tip: Scraping out the gills before cooking makes a real difference — they hold excess moisture and can make the mushrooms steam instead of crisp up.
- Tip: Don't overcrowd the basket. If you're making more than four caps, do them in two batches — crowding traps steam and you lose the crispy edges.
- Tip: These are also great topped with a little crumbled feta or shredded parmesan right after they come out of the air fryer — the residual heat melts it perfectly.
22. Best Grilled Vegetables
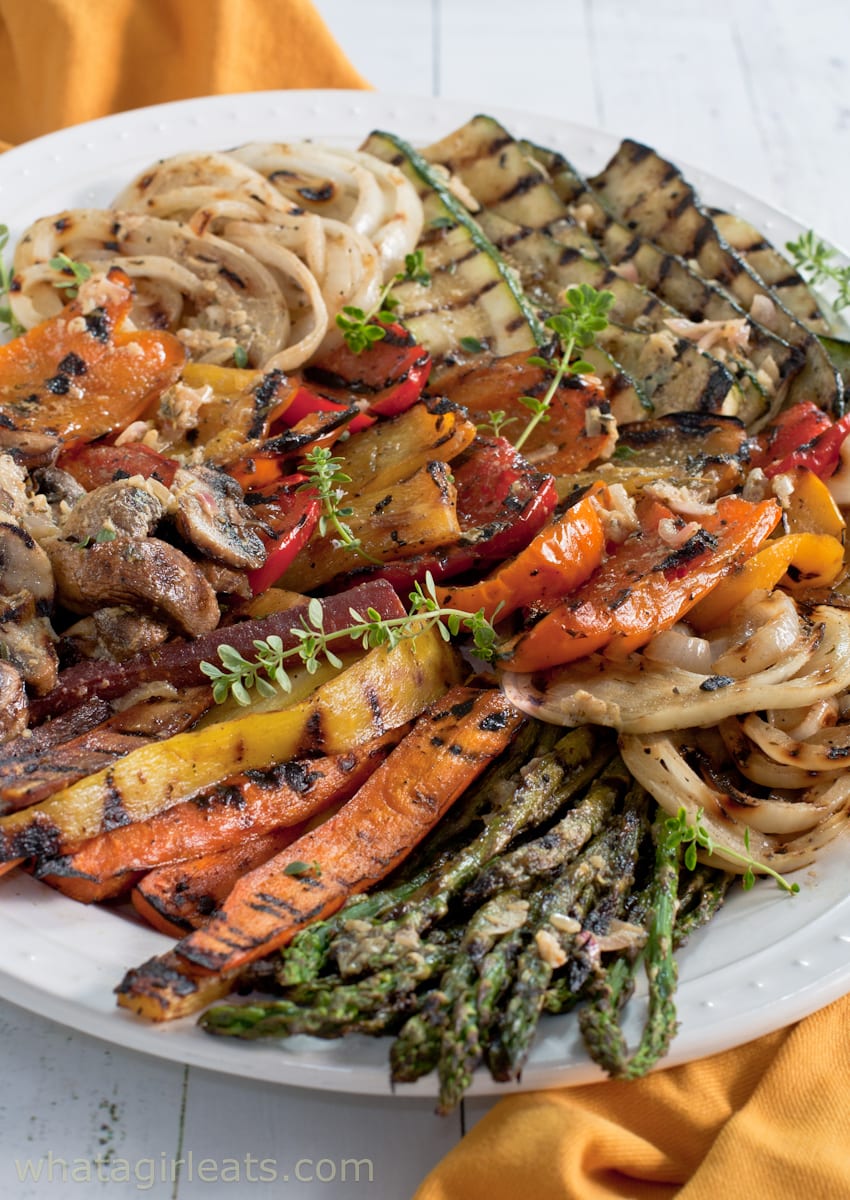
Grilling vegetables sounds simple but there's a version that's just slightly charred and bland, and then there's this — vegetables marinated in a lemon thyme butter marinade that makes everything taste like it came from a restaurant patio. The marinade does all the work. You coat the vegetables, let them sit, and the grill does the rest. It works on zucchini, bell peppers, asparagus, eggplant, red onion — basically anything in your crisper drawer. Keto, paleo, and completely satisfying alongside grilled chicken or steak.
Ingredients
- 2 zucchini, sliced into ½-inch rounds
- 1 red bell pepper and 1 yellow bell pepper, cut into wide strips
- 1 small red onion, cut into thick wedges
- 1 cup asparagus spears, woody ends trimmed
- 3 tablespoons butter, melted (or olive oil for dairy-free)
- 2 tablespoons fresh lemon juice
- 1 teaspoon fresh thyme leaves (or ½ teaspoon dried)
- 3 cloves garlic, minced
- ½ teaspoon salt and ½ teaspoon black pepper
Instructions
- Whisk together the melted butter, lemon juice, thyme, garlic, salt, and pepper in a large bowl to make the marinade.
- Add all the cut vegetables to the bowl and toss well to coat everything in the marinade. Let them sit for at least 15 minutes — 30 is better if you have time.
- Preheat your grill to medium-high heat (about 400°F). Grill the vegetables in batches, turning once, until tender with good char marks — about 4-5 minutes per side for thicker pieces, 2-3 minutes for asparagus.
- Arrange on a platter and squeeze a little extra lemon over the top before serving.
Tips
- Tip: If you don't have an outdoor grill, a cast iron grill pan on high heat works almost as well — you'll still get good char marks and that smoky flavor.
- Tip: Cut vegetables into larger pieces than you think you need — smaller pieces fall through the grill grates or cook too fast and turn mushy before they get any color.
- Tip: This marinade also works as a finishing drizzle — save a few tablespoons before adding the raw vegetables and spoon it over everything right before serving.
23. Green Beans Almondine
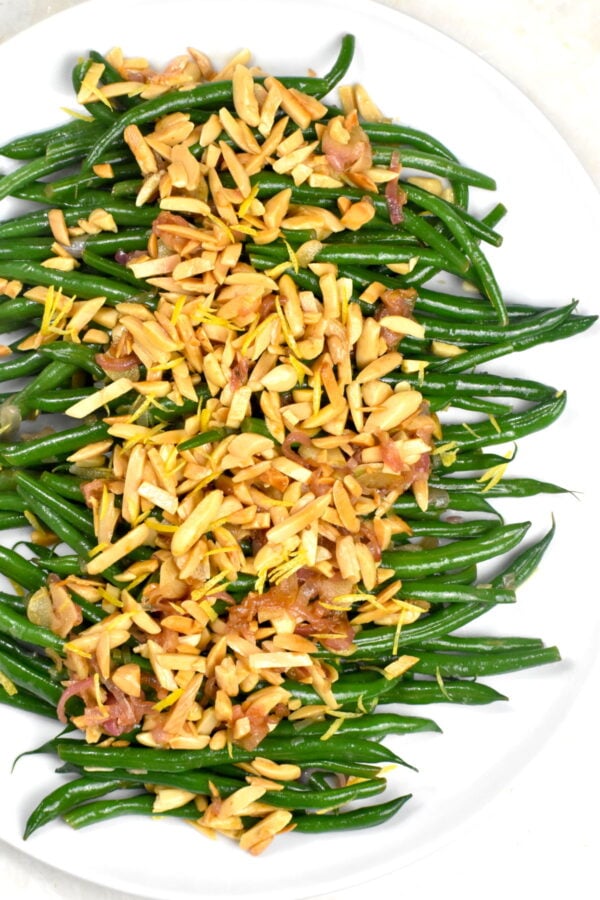
Green beans almondine is one of those dishes that looks like it took effort but actually comes together in under 15 minutes. You're working with fresh green beans, toasted sliced almonds, browned butter, and a squeeze of lemon — that's basically it. The trick is the brown butter. Don't just melt it and stop there; let it keep going until it smells nutty and turns golden. That step alone takes this from fine to really good. I make this when I want the table to look like I tried harder than I did — it's become my go-to side for keto dinners when I'm bored of plain roasted vegetables.
Ingredients
- 1 lb fresh green beans, trimmed
- 3 tablespoons unsalted butter
- ⅓ cup sliced almonds
- 2 cloves garlic, thinly sliced
- 1½ tablespoons fresh lemon juice
- ½ teaspoon lemon zest
- Salt and black pepper to taste
Instructions
- Bring a large pot of salted water to a boil. Add the green beans and blanch for 3-4 minutes until bright green and just barely tender. Drain immediately and transfer to a bowl of ice water to stop the cooking. Drain again and pat dry.
- In a large skillet over medium heat, melt the butter and let it continue cooking, swirling occasionally, until it turns golden and smells nutty — about 3-4 minutes. Watch it carefully; it goes from brown to burnt quickly.
- Add the sliced almonds to the brown butter and toast them for 1-2 minutes, stirring constantly, until golden. Add the garlic slices and cook for another 30 seconds.
- Add the blanched green beans to the skillet and toss everything together over medium heat for 2 minutes until the beans are heated through and coated in the butter. Remove from heat, add lemon juice and zest, season with salt and pepper, and serve right away.
Tips
- Tip: The ice bath after blanching is not optional if you want bright green beans — skip it and they'll turn that dull army green color by the time they hit the table.
- Tip: Make sure the beans are completely dry before they go into the skillet — any water left on them will make the hot butter splatter and the almonds won't stay crispy.
- Tip: Frozen green beans work in a pinch — thaw them fully and dry them very well before cooking, though the texture won't be quite as snappy as fresh.
View More Recipes here Recipe Roundups
Twenty-three recipes and I still think I could have kept going — that's how good keto sides have gotten in my kitchen. When I first started cutting back on carbs for a few weeks a couple years ago, I thought side dishes would be the hardest part. Turns out, once you stop defaulting to rice and bread, you start paying way more attention to vegetables, and everything gets more interesting. These 23 recipes are the ones I actually make on repeat, not just things I tested once and moved on from.
What I love about this list is that it covers real variety — quick roasted things for busy weeknights, creamy casserole-style sides for when you want something more substantial, and a few cold salads that work beautifully for meal prep. My husband will eat anything from this list alongside grilled chicken or steak without even registering that it's "keto." That's honestly the best sign I know that a recipe works — when nobody's thinking about what's missing from the plate, just what's on it.
If you're just starting out with low-carb cooking, I'd say pick two or three from this list and make them a few times until they feel easy. Build from there. And if you already cook keto regularly, I hope there's at least one recipe in here that you haven't tried yet and ends up becoming a staple. That's always my goal with these roundups — not to overwhelm, just to give you something genuinely useful. 🥦🧄✨
More Recipes You Might Like
- Keto Dinner Recipes — main dishes that pair perfectly with everything on this list
- Low Carb Soup Recipes — hearty, filling soups that won't kick you out of ketosis
- Roasted Vegetable Recipes — when you want maximum flavor with minimum effort
- Easy Weeknight Dinner Recipes — fast family meals that pair well with simple sides
- Browse All Recipe Roundups — find more curated lists across every category
Frequently Asked Questions
Which of these keto side dishes is easiest for beginners?
Anything roasted is where I'd start — roasted broccoli, cauliflower, or zucchini. You toss vegetables in olive oil, season them, and put them in the oven. There's very little technique involved and the margin for error is small. Even if you leave them in a few minutes too long, slightly caramelized edges usually just taste better anyway.
Can I meal prep these keto sides in advance?
Most of them, yes. Cold salads like cauliflower salad and broccoli salad actually get better after a day in the fridge because the flavors settle. Roasted vegetables reheat well in a 375°F oven for about 8 minutes — I avoid the microwave for those because they go soggy. Creamy casserole-style sides reheat beautifully and often taste even richer the next day.
How do I know if a side dish is actually keto-friendly?
The general rule I follow is staying under 20 grams of net carbs per day total, and a side dish should ideally be under 5-6 grams per serving. Every recipe in this roundup is built around low-carb vegetables — things like cauliflower, broccoli, zucchini, green beans, and spinach — along with fats from butter, cheese, cream, or olive oil. If a recipe calls for starchy vegetables like corn, peas, or potatoes, it's not keto regardless of how it's cooked.
What proteins pair well with these keto side dishes?
Honestly, almost anything works — grilled chicken thighs, pan-seared salmon, a simple ribeye steak, or even baked pork chops. My husband's go-to is grilled chicken with two or three sides from this list, which sounds like a lot but he's a big eater. The creamy, cheesy sides work especially well next to something simply seasoned, so the richness from the side carries the plate.
Can these keto side dishes work for people who aren't eating keto?
Every single one. My kids don't eat keto — Saad would eat pasta seven nights a week if I let him — but he happily eats garlic roasted green beans and cheesy cauliflower mash without a single complaint. These are vegetable dishes cooked well, which appeals to pretty much everyone. The keto label just tells you what's not in them. What is in them is butter, seasoning, and actual flavor.
Share This Post!
If this list helped you figure out what to make this week, share it with someone who's trying to eat low-carb and running out of ideas. Pin it, send it, whatever works — I put a lot of time into these roundups and it genuinely means a lot when they reach people who need them. 🥦✨