
I first made this around the holidays a few years back, when I needed something quick to bring to a school event and had exactly zero energy for anything complicated. I had a sleeve of saltines, a stick of butter, some brown sugar, and chocolate chips — and honestly, I expected something mediocre. What came out of that oven stopped me in my tracks.
What makes this work is the saltine cracker itself. It's not just a base — it crisps up in the oven and becomes this thin, crunchy layer that holds the toffee without going soggy. The caramel gets poured right over the raw crackers and bakes into them, so by the time you break it apart, the cracker and toffee are basically one thing. That's the part nobody tells you about this recipe until you've made it and understood it yourself.
Zainab calls this "the cracker chocolate thing" and asks for it every December. I've started making a double batch because a single tray disappears the same day. My husband, who normally doesn't touch sweets, will stand at the counter and eat three pieces before I've even finished spreading the chocolate. It's become one of those things I make when I need something fast that still feels like a real effort.
One thing to know going in: the caramel moves fast. Once it's boiling, you don't stop stirring, and the moment it's done you pour it immediately. No phone checking, no wandering. I learned that the hard way when I let it sit an extra 30 seconds and it seized up slightly at the edges. It still tasted fine, but the texture was off. Keep your baking sheet right next to the stove and you'll be fine. If you're in the mood for more make-ahead treats, my Millionaire's Cheesecake follows a similar sweet-and-salty logic and is equally dangerous to leave on the counter.
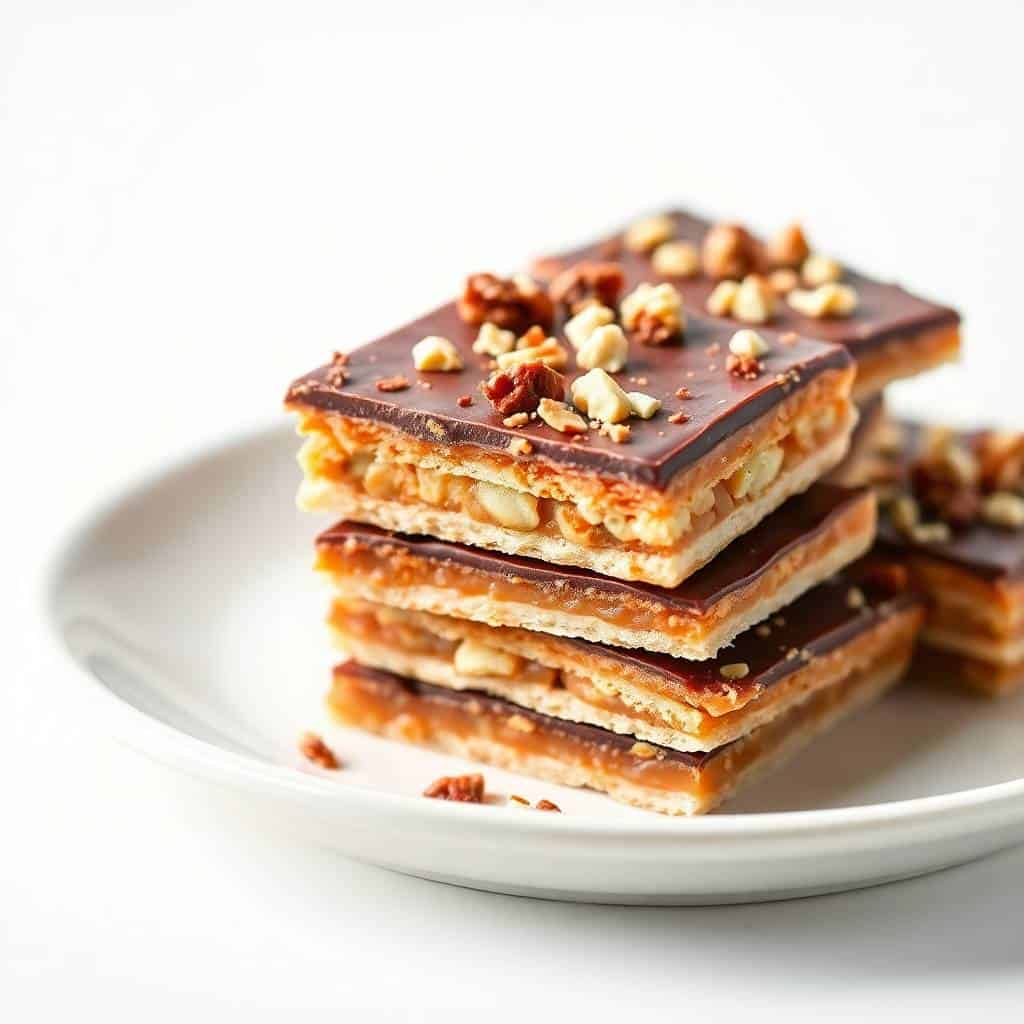
Why You'll Love This Recipe
- Only 4 real ingredients: Butter, brown sugar, saltines, and chocolate chips — that's the whole recipe. I usually have all of these at home already, which means I can make this on a random Tuesday without a grocery run. No specialty ingredients, nothing you'd need to hunt down at a specialty store.
- It comes together in under 20 active minutes: The oven does most of the work. You're looking at maybe 10 minutes of actual hands-on time — melting butter, boiling the caramel, pouring it over. The fridge handles the rest. On days when I've already made something like Honey Garlic Chicken Bites for dinner and I still want to put something out for dessert, this is the answer.
- The salty-sweet thing is genuinely good here: I know that phrase gets thrown around constantly, but with this recipe the saltine cracker actually earns its place. It doesn't just sit there — it flavors the whole thing. The salt from the cracker cuts through the sweetness of the toffee in every single bite, and it makes the chocolate taste more chocolatey somehow.
- It makes a great gift: I wrap pieces in small cellophane bags tied with ribbon and give them out at the holidays. People always ask for the recipe and are stunned when I tell them it's saltine crackers underneath. There's something satisfying about that reaction.
- It stores well: Unlike a lot of homemade desserts that go soft or stale fast, this one keeps its crunch for days. I store it in the fridge in a container and it's still good a week later — if it lasts that long.
Ingredients
- 1 sleeve saltine crackers (about 40 crackers)
- 1 cup unsalted butter
- 1 cup packed brown sugar
- 2 cups semi-sweet chocolate chips
- Optional: ½ cup chopped pecans or walnuts, flaky sea salt, or sprinkles
Directions
- Preheat and prep your pan: Heat your oven to 400°F (200°C). Line a large rimmed baking sheet with foil and give it a light spray of nonstick cooking spray. A rimmed sheet is important here — the caramel is liquid and will run right off a flat pan.
- Lay out the crackers: Arrange saltine crackers in a single layer across the entire prepared baking sheet. They should fit snugly edge to edge. This is your base, so fill the whole pan — gaps mean wasted caramel.
- Make the toffee: In a medium saucepan, melt the butter over medium heat, then stir in the brown sugar. Bring it to a full boil, then let it boil for 3 minutes while stirring constantly. Don't walk away — caramel turns on you the second you stop paying attention. You want it smooth, glossy, and deep amber.
- Pour it over the crackers: As soon as the 3 minutes are up, pour the hot toffee straight over the crackers. Use a spatula to spread it quickly and evenly — work fast because it starts to set as it cools. Every cracker should get some coverage.
- Bake: Slide the pan into the oven and bake for 5 minutes, until the toffee is bubbling all over the surface. It should look active and slightly puffed. Don't go longer than 5-6 minutes or the caramel can burn.
- Add the chocolate: Pull the pan out of the oven and immediately scatter the chocolate chips over the surface in an even layer. Let them sit undisturbed for 4-5 minutes — the residual heat melts them. Then use an offset spatula or the back of a spoon to spread the chocolate smoothly across the whole surface. Add any toppings now while the chocolate is still wet.
- Chill and break: Let the pan cool to room temperature, then refrigerate for at least 1-2 hours until completely set. Once firm, lift the foil out of the pan, peel it back, and break the toffee into pieces by hand. It snaps cleanly when it's properly chilled.
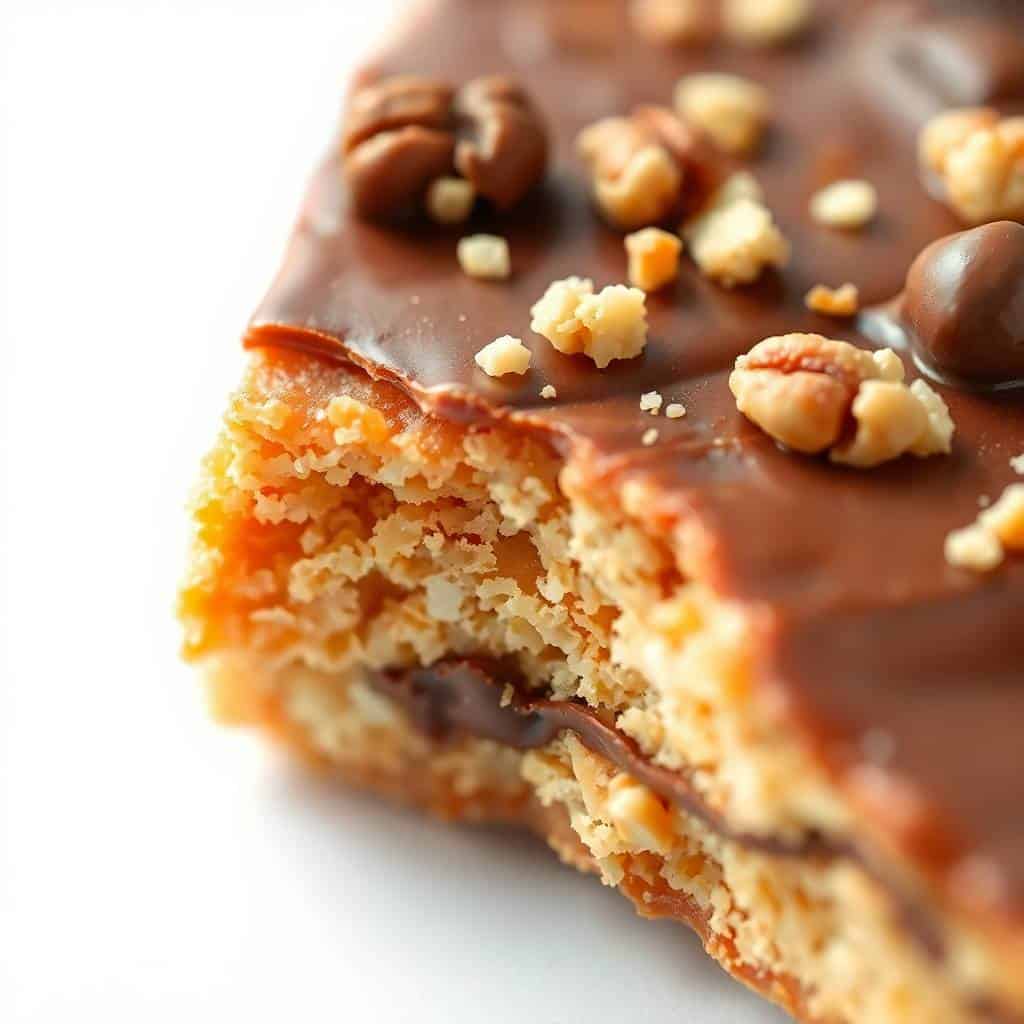
Tips for Success
- Don't skip the foil or nonstick spray: I tried parchment paper once and it worked, but foil with a light spray is easier — you can peel it back cleanly once the toffee is set. Trying to scrape set caramel off an unlined pan is a miserable experience I only made once.
- Stir the caramel the entire time it boils: Not "mostly" stir. The whole time. The sugar at the bottom of the pan will scorch if you stop moving it, and burnt sugar has a bitter taste that comes through in the finished toffee. Set a timer for 3 minutes and stir continuously from the moment it hits a boil.
- Have your baking sheet right next to the stove: When the caramel is done, you need to pour it immediately. I position the pan on the counter right next to the burner before I even start making the caramel. Those few extra seconds of carrying a pot of hot sugar across the kitchen matter when you're working with something that sets fast.
- Let the chocolate chips melt on their own before spreading: A lot of people spread the chips too early and end up dragging unmelted pieces around and making a mess. Give them a full 4-5 minutes of sitting. By then they're soft all the way through and spread like a dream with one clean pass of the spatula.
- Chill fully before breaking: I know it's tempting to break into it after an hour, but if the chocolate hasn't fully hardened, you get jagged messy pieces instead of clean shards. Two hours in the fridge is ideal. I usually make it after dinner and break it apart in the morning.
Variations
- Flaky sea salt on top: This is my personal favorite version. After spreading the chocolate, I scatter a pinch of Maldon or any flaky sea salt over the surface before it sets. It makes the chocolate taste deeper and the whole thing feel more intentional. Zainab picks the salt flakes off. My husband eats them specifically.
- Peppermint bark version: Crush up a handful of candy canes and scatter them over the wet chocolate instead of nuts. This is the holiday version I make every December — it looks festive and the peppermint cuts through the richness nicely. Pairs well with a simple holiday spread alongside Holiday Roasted Vegetables if you're doing a full table.
- White chocolate drizzle: Melt a small amount of white chocolate chips separately and drizzle it over the set dark chocolate layer using a fork or a small zip bag with the corner snipped. It looks like a bakery made it and takes about two minutes extra.
- Pretzel base mix-in: Replace about a third of the saltines with small pretzel pieces. They add a thicker, knottier crunch and a bit more salt. I sometimes do this when I want something that feels more substantial — the pretzel pieces poke up through the toffee in a satisfying way.
- Dark chocolate version: Swap the semi-sweet chips for dark chocolate (70% or higher). The bitterness of the dark chocolate balances the sweet caramel better in my opinion — this isn't authentic to any particular tradition, it's just what I've found works when I want something that tastes less candy-like and more grown-up.
Serving and Storage
Serving
Break the toffee into irregular pieces — some big, some small — and pile them on a plate or in a bowl. It works as a dessert on its own, next to tea or coffee, or as part of a larger spread. I usually put it out in a shallow dish with a small pair of tongs so people can grab pieces without handling the whole batch. For gifting, stack pieces in a small box or cellophane bag tied with a ribbon. It travels well as long as you keep layers separated with parchment so they don't stick together.
Storage
Store in an airtight container. At room temperature it keeps for about 5-6 days — longer if your kitchen runs cool. In the fridge it stays crisp and fresh for up to two weeks. I prefer it cold straight from the fridge, honestly — the chocolate snaps more cleanly. If you want to freeze it, lay pieces flat in a single layer in a zip bag and freeze for up to 3 months. Thaw in the fridge overnight before serving; don't leave it at room temperature to thaw or the chocolate can get a white bloom on top (it's still edible, just less pretty).

Frequently Asked Questions
Can I use salted butter instead of unsalted?
Yes, and it actually works well here since the whole point is that salty-sweet contrast. I've used both and honestly can't tell a huge difference in the final result. If you only have salted butter, just skip adding any extra salt on top — the toffee will already have enough.
Why did my caramel seize up or turn grainy?
This usually happens if the caramel is stirred unevenly or if it cools even slightly before you pour it. Make sure you're stirring constantly during the full boil and that you pour it immediately off the heat — don't let it sit in the pot for even a minute. If it does seize, spread it as best you can; once it bakes in the oven it usually smooths out anyway.
Can I make this ahead of time?
Absolutely — this is actually one of my favorite make-ahead treats. I usually make it the night before I need it and leave it in the fridge overnight. It's fully set by morning and ready to break and serve. The flavor is actually a little better the next day once everything has had time to meld.
Can I freeze saltine cracker toffee?
Yes. Layer pieces between sheets of parchment paper in a zip-lock freezer bag and freeze for up to 3 months. Thaw in the fridge overnight before serving. I wouldn't thaw it at room temperature — condensation can make the chocolate look streaky.
What can I use instead of saltine crackers?
Graham crackers work and give you a sweeter, slightly softer base. Matzo crackers are a popular swap too and keep a similar thin, crisp texture. I haven't tried gluten-free saltines personally, but readers have told me they work fine — just check that they're sturdy enough not to crumble before you pour the hot caramel.

SALTINE CRACKER TOFFEE
Ingredients
- 1 sleeve about 40 saltine crackers
- 1 cup unsalted butter
- 1 cup packed brown sugar
- 2 cups semi-sweet chocolate chips
- Optional toppings: chopped nuts sea salt, sprinkles
Instructions
Preheat Oven:
- Preheat oven to 400°F (200°C). Line a baking sheet with foil and spray with nonstick cooking spray.
Layer the Crackers:
- Arrange saltine crackers in a single layer on the prepared baking sheet.
Make the Toffee:
- In a saucepan, melt butter and brown sugar over medium heat. Bring to a boil, then simmer for 3 minutes while stirring constantly.
Pour and Bake:
- Pour the hot toffee over the crackers and spread evenly. Bake for 5 minutes, or until the toffee is bubbling.
Add Chocolate:
- Remove from the oven and immediately sprinkle chocolate chips over the top. Let sit for 5 minutes, then spread melted chocolate evenly.
Add Toppings and Chill:
- Sprinkle with optional toppings. Let cool completely, then refrigerate for 1–2 hours until set.
Break into Pieces:
- Break into bite-sized pieces and enjoy!
Notes
This is one of those recipes that I keep coming back to not because it's impressive in a technical sense — it's not — but because it works every single time and takes almost nothing out of me. On evenings when I've already spent energy on dinner, knowing I can pull together a proper dessert in 20 minutes with pantry staples is genuinely useful. The fridge does the hard work overnight, and by morning there's a full tray of something good.
I've made it with Trader Joe's semi-sweet chips, with store-brand chocolate from Walmart, with fancy dark chocolate from a bar I chopped up — they all work. The toffee layer underneath is the thing that holds it together no matter what chocolate you use on top. Get that part right and the rest follows.
If you're putting together a holiday dessert table, this sits nicely next to something like my Millionaire's Cheesecake — both have that layered sweet-and-rich quality that people keep reaching back for. And if you want something savory to balance out the sweets at a gathering, the Cream Cheese Tortilla Bites are always on my table next to the toffee. Sweet, salty, crunchy, creamy — everyone finds something. 🍫✨
If you liked this recipe, here are a few more from the site you might want to try next:
- Millionaire's Cheesecake — layered, rich, and makes a stunning centrepiece for any dessert spread
- Cream Cheese Tortilla Bites (No-Cook Party Appetizer) — when you need a savory bite to balance all the sweets at a gathering
- Honey Garlic Chicken Bites — sweet and sticky in the best way, great for the same kind of party table
- Holiday Roasted Vegetables — if you're building out a full holiday spread and need something savory and hands-off
- Air Fryer Lemon Pepper Wings (Crispy Restaurant-Style in 25 Minutes) — another crowd-friendly recipe that disappears fast





Comments
No Comments