
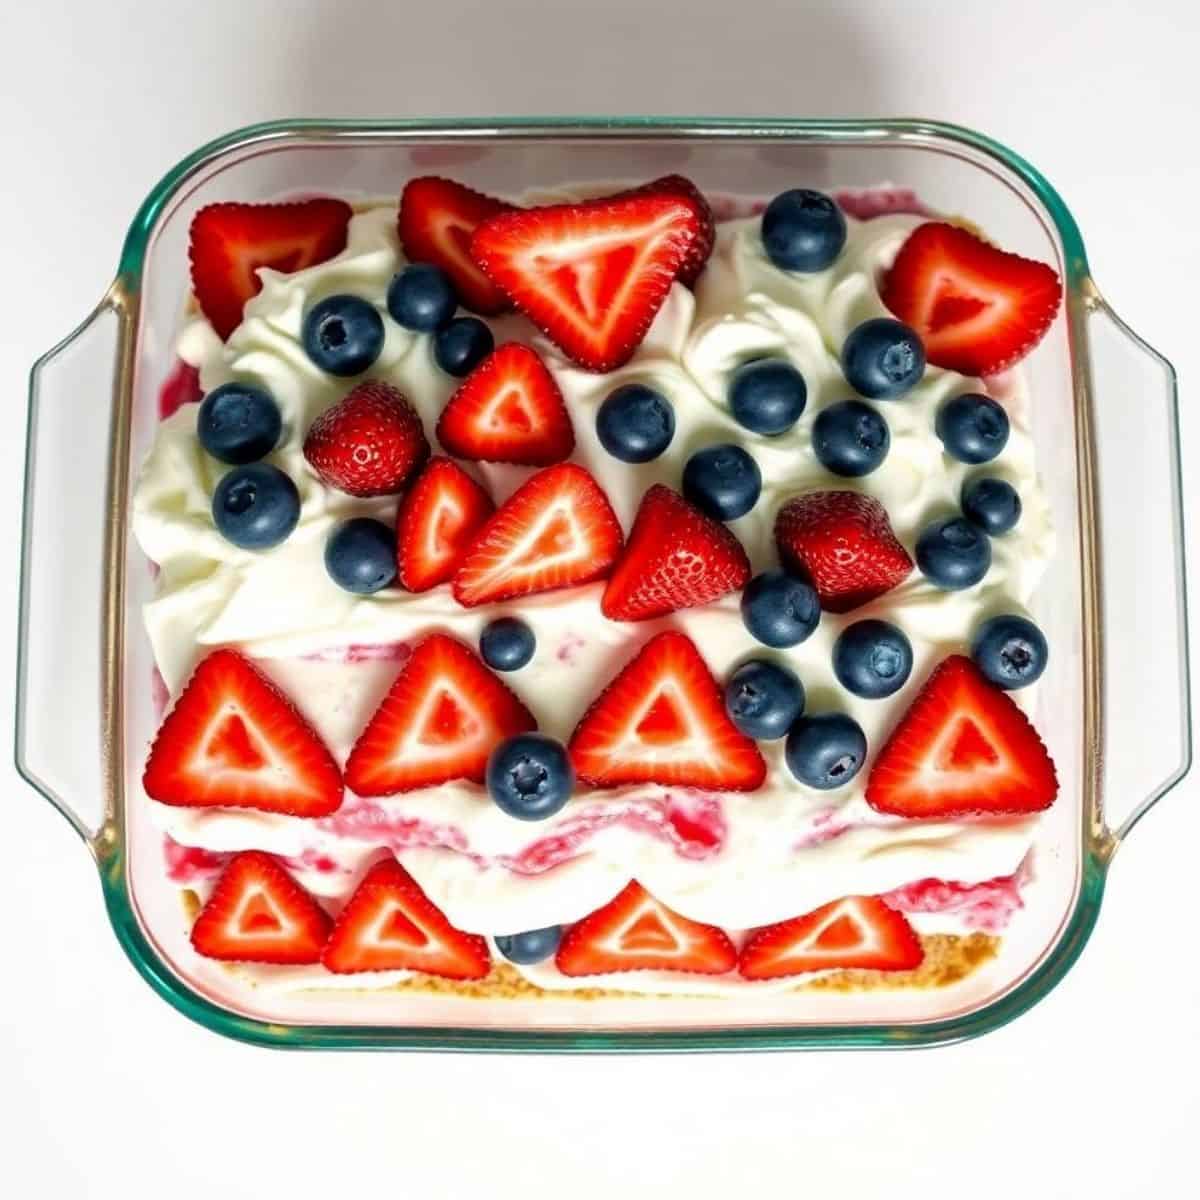
The first time I made a red white and blue dessert lasagna for a 4th of July party, I set the pan on the dessert table and stood back while every single person walked past the cookies, past the brownies, and straight to the layered pan — pulling out their phones before they even asked what it was. A patriotic dessert lasagna is the no-bake layered dessert that delivers the most visual drama of any 4th of July sweet — distinct horizontal layers of golden Oreo crust, pure white cheesecake filling, vivid red strawberry layer, and deep blue blueberry layer visible through the pan sides — and it requires zero baking, zero cooking, and about 25 minutes of active work before the refrigerator does everything else.
What makes dessert lasagna such a genuinely brilliant party format is the way it scales — one 9x13 pan feeds 20 people cleanly, cuts into perfect square portions that hold their layers during serving, and can be made up to 48 hours ahead with the flavor and texture actually improving over that time as all the layers set and meld together. It's the dessert that requires the most planning time to be done by the time the party starts, which is exactly what busy 4th of July hosts need most.
This post covers the classic red white and blue dessert lasagna plus variations that accommodate different flavor preferences — a lemon cheesecake version, a chocolate version, a strawberry Jello version for the most vivid red layer possible, and a lighter Greek yogurt version for a less rich result. Every variation uses the same 9x13 pan format, the same layering technique, and the same make-ahead approach that makes this the most practical patriotic dessert in the entire 4th of July repertoire.
Let's build the most stunning no-bake patriotic dessert of the summer!
WHY YOU WILL LOVE THIS RECIPE
- Completely No-Bake from Start to Finish: Not a single step in this recipe requires an oven, a stovetop burner, or any heat source whatsoever — everything is mixed, layered, and refrigerated. On a July 4th when the kitchen is occupied with grilling prep and side dishes, a completely cold-assembly dessert that feeds 20 people from a single pan is genuinely one of the most valuable recipes a host can have in their collection. Turn on zero appliances and produce the most impressive dessert on the table.
- The Layers That Improve With Time: Unlike most desserts that are best immediately after assembly, dessert lasagna genuinely improves over 24–48 hours of refrigeration — the crust softens to a cake-like consistency, the cheesecake layer firms to a perfect sliceable set, the fruit flavors seep into the cream layers, and everything melds into a cohesive, deeply satisfying slice. Making this the day before the party produces a better result than making it the morning of, which is the rarest and most valuable quality any party dessert can have.
- Feeds 20 People from One Pan: A standard 9x13 pan of dessert lasagna cuts cleanly into 20 generous squares — the single most efficient large-format dessert available for summer entertaining. There is no individual plating, no portion calculation anxiety, no serving equipment beyond a spatula, and no last-minute work on party day. One pan, one spatula, twenty people served.
- Every Layer Is a Different Flavor and Texture Experience: Each forkful of dessert lasagna travels through multiple distinct layers — the buttery, slightly crunchy crust, the dense tangy cheesecake, the bright fruity berry layer, and the cool, cloud-light whipped topping — creating a layered eating experience that is genuinely more interesting and more satisfying than any single-component dessert. The contrast between the firm cheesecake and the fresh berries against the light whipped topping is what makes every bite genuinely memorable.
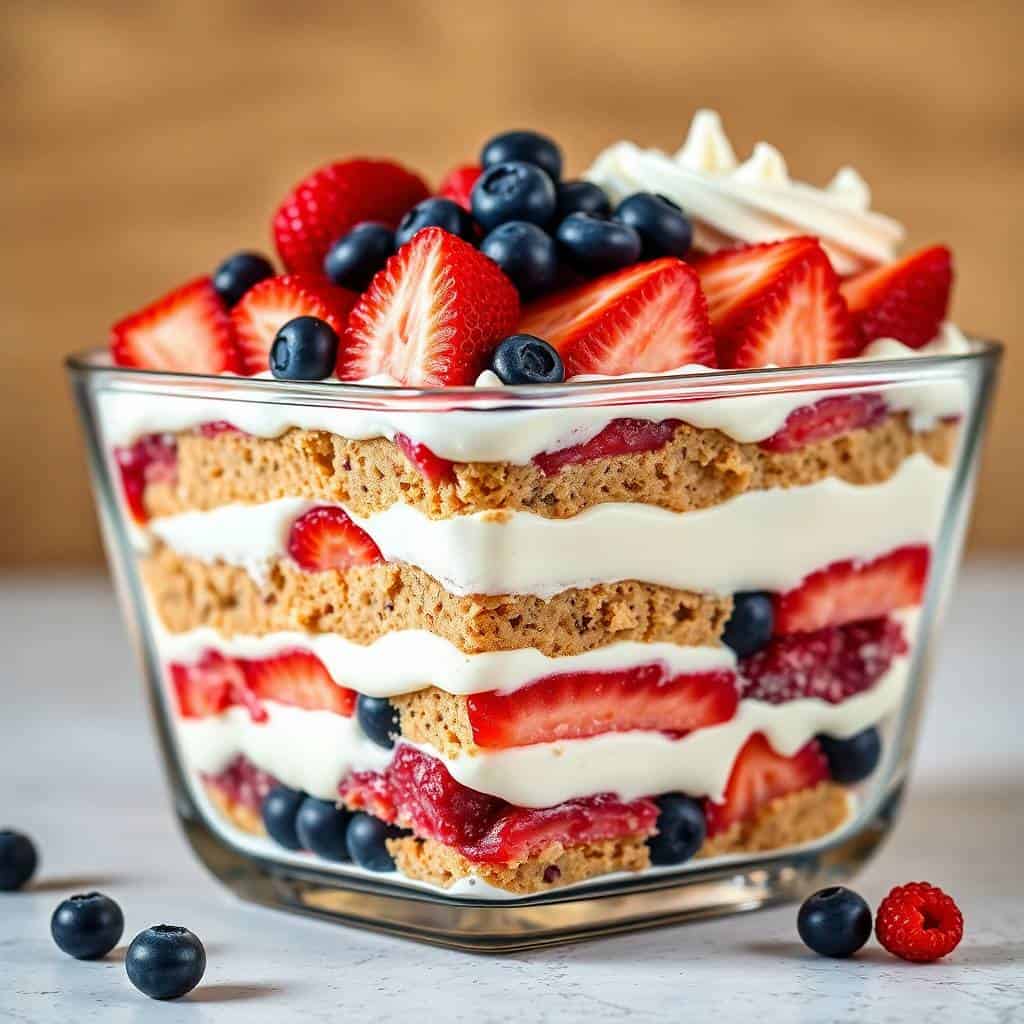
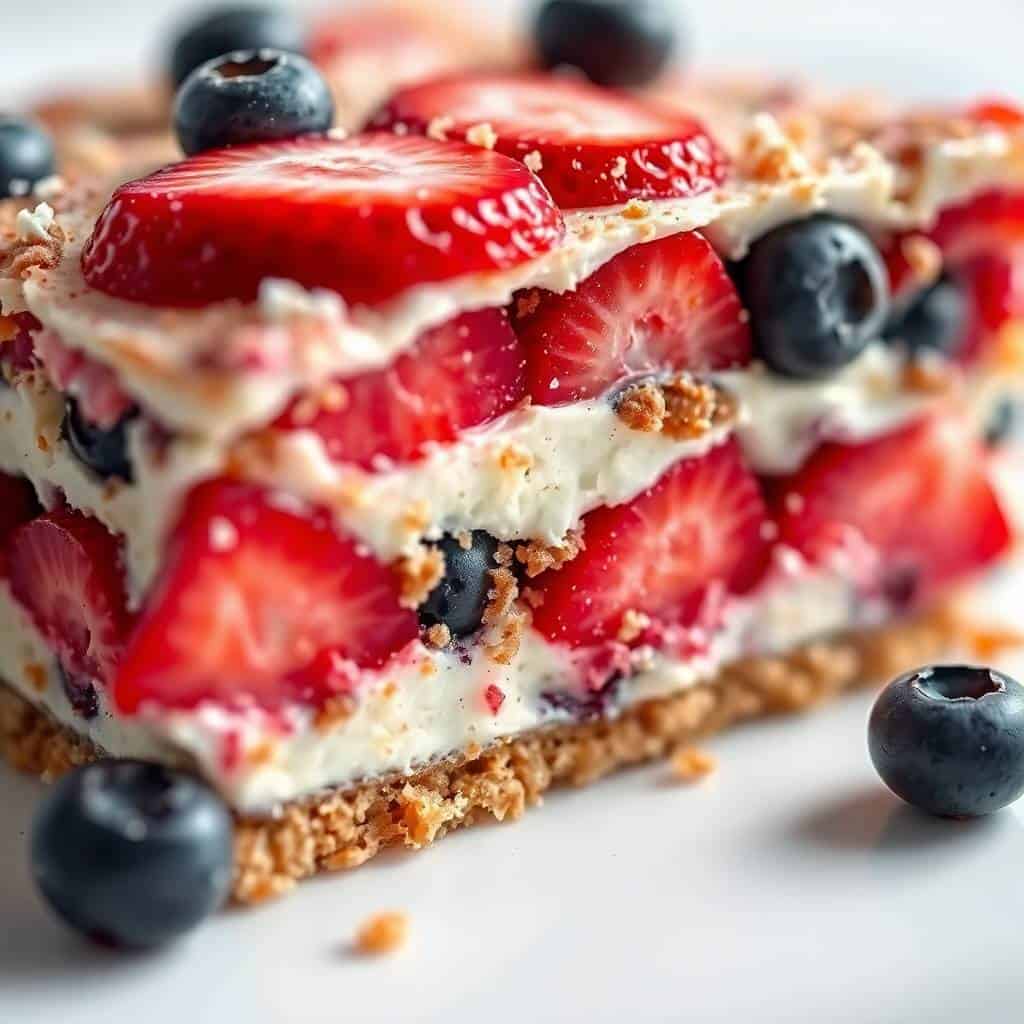
- The Cross-Section Is the Presentation: When dessert lasagna is cut and a slice is lifted from the pan, the visible cross-section of all the layers — golden crust, white cheesecake, red berry, white cream, blue berry, white topping — creates a genuinely stunning presentation that requires no decoration, no garnish, and no styling skill. The dessert presents itself through its own architecture, which means every single slice looks as beautiful as the one before it.
- Customizable for Any Crowd: The dessert lasagna format is genuinely one of the most flexible dessert templates available — the crust, the filling flavors, the fruit layers, and the topping can all be swapped independently to accommodate different dietary preferences, available ingredients, or flavor combinations without changing the technique at all. The variations section of this post covers six genuinely different flavor directions, all using the same pan and the same layering approach.
INGREDIENTS
- Layer 1 — Golden Oreo Crust:
- 36 Golden Oreo cookies (one standard package), finely crushed — Golden Oreos produce a buttery, vanilla-flavored crust that complements the cheesecake filling without competing with the berry flavors the way a chocolate Oreo crust might
- 6 tablespoons unsalted butter, melted
- Pinch of salt
- Layer 2 — No-Bake Cheesecake Filling:
- 16 oz (2 blocks) full-fat cream cheese, completely softened to room temperature — any cold spots create lumps that cannot be beaten out
- 1 cup powdered sugar, sifted
- 1 teaspoon pure vanilla extract
- 1 tablespoon fresh lemon juice — brightens the cream cheese flavor and cuts through the richness
- 8 oz Cool Whip or 2 cups homemade whipped cream, stabilized — folded into the cream cheese mixture to lighten it
- Layer 3 — Strawberry Layer (Red):
- 1.5 lbs fresh strawberries, hulled and sliced ¼-inch thick
- 3 tablespoons strawberry jam or preserves, stirred smooth — toss with sliced berries for a jammy, cohesive layer that binds the strawberries together and prevents them from shifting during slicing
- 1 teaspoon lemon juice
- Layer 4 — Second Cream Layer (White):
- 8 oz Cool Whip or 2 cups stabilized whipped cream
- 1 package (3.4 oz) instant vanilla or cheesecake pudding mix — stirred into the whipped topping to firm it slightly and add flavor depth
- ½ cup cold whole milk — mixed with the pudding before folding into whipped topping
- Layer 5 — Blueberry Layer (Blue):
- 2 cups fresh blueberries, rinsed and completely dried
- 2 tablespoons blueberry preserves — toss with blueberries for the same cohesive jammy effect as the strawberry layer
- Layer 6 — Final Whipped Topping (White):
- 8 oz Cool Whip or 2 cups stabilized whipped cream — the clean white final layer that completes the red-white-blue sequence
- Garnish:
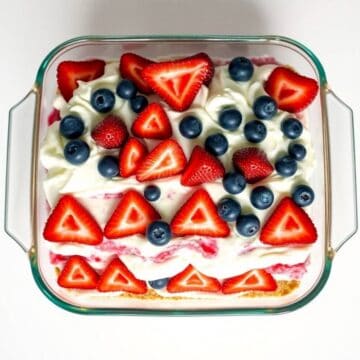
- Additional fresh strawberry slices and blueberries for the top — arranged in a flag or scattered pattern across the final whipped topping layer
- Crushed Golden Oreo sprinkles optional along the edges
DIRECTIONS
- Step No.1: Make and set the crust layer
Crush Golden Oreo cookies to fine crumbs using a food processor or by placing them in a zip-lock bag and crushing with a rolling pin — the crumbs should be uniformly fine with no large pieces remaining. Large cookie pieces create an uneven crust that doesn't hold together cleanly when sliced. Combine crumbs with melted butter and a pinch of salt and stir until every crumb is moistened and the mixture holds together when pressed between two fingers — if it feels dry and crumbly, add 1 additional tablespoon of melted butter. Press the crust mixture firmly and evenly into the bottom of a 9x13 inch pan using the flat bottom of a measuring cup — press in a single direction with firm, even pressure rather than random pressing, which creates an uneven surface. The crust should be uniformly about ¼-inch thick across the entire bottom. Refrigerate the crust for 15–20 minutes until it firms before adding any subsequent layers — a set crust holds the layers above it without shifting during assembly.
- Step No.2: Make and spread the cheesecake layer
Beat completely softened cream cheese with a hand or stand mixer on medium-high speed for 2–3 minutes until completely smooth and fluffy with no lumps — this step cannot be rushed. Cold cream cheese creates lumps that no amount of additional beating will remove, so the cream cheese must be genuinely room temperature throughout, not just slightly softened on the outside. Add powdered sugar, vanilla, and lemon juice and beat 2 more minutes until fully incorporated and very smooth. Fold in Cool Whip or stabilized whipped cream using a large spatula with gentle folding strokes rather than stirring — folding preserves the air that makes the cheesecake layer light and mousse-like rather than dense and heavy. Spread the cheesecake mixture evenly across the set crust using an offset spatula, pressing gently to fill all corners. The layer should be smooth and level — run the offset spatula across the surface in one direction for a uniform finish. Refrigerate 20–30 minutes before adding the strawberry layer so the cheesecake layer firms enough to support the berry weight without the berries sinking through.
- Step No.3: Add the strawberry layer
Toss sliced strawberries with strawberry preserves and lemon juice until every slice is lightly coated and the mixture looks slightly glossy and jammy — the preserves bind the strawberry slices so they function as a cohesive layer rather than individual pieces that shift when the dessert is cut. Arrange the strawberry mixture in an even layer across the entire surface of the chilled cheesecake layer — work methodically from one end of the pan to the other, placing overlapping strawberry slices in neat rows so the red layer is uniform in depth and has no gaps showing the white layer beneath. Press the berries down very gently into the cream layer so they settle without sinking completely. A uniform red layer across the entire width of the pan is what makes the flag cross-section appear clean and distinct when the dessert is sliced.
- Step No.4: Add the pudding cream layer and blueberry layer
Whisk instant pudding mix with cold milk for 2 minutes until slightly thickened. Fold gently into Cool Whip or whipped cream until just combined — a few streaks are acceptable. Spread this pudding cream layer evenly across the strawberry layer, smoothing gently so the strawberries don't shift from their arrangement. The pudding cream layer provides a firm white separator between the red and blue fruit layers and is essential for achieving the clean visual layering. Refrigerate 15 minutes. Then toss blueberries with blueberry preserves and spread in an even layer across the pudding cream — use the same methodical row-by-row approach as the strawberry layer, covering the entire surface with no white gaps visible. The blueberry layer should look deeply blue and uniformly dense from above.
- Step No.5: Add the final topping layer, garnish, and refrigerate
Spread the remaining Cool Whip or whipped cream across the entire blueberry layer in a smooth, even final white layer — this is the top surface that guests see first when the pan is brought to the table. Smooth it completely flat with an offset spatula for the most polished, most professional appearance. Decorate the top surface with additional strawberry slices and blueberries in a flag pattern, a simple scattered arrangement, or rows of alternating fruit. Sprinkle crushed Golden Oreo crumbs along the border edges if desired for a finished, bakery-style edge detail. Cover the pan tightly with plastic wrap pressed directly against the surface of the whipped topping — contact wrapping prevents a skin from forming on the topping surface during refrigeration. Refrigerate for a minimum of 4 hours and ideally overnight — 8–12 hours produces the best possible result as the layers firm, set, and meld into a sliceable, cohesive dessert. The overnight refrigerated dessert lasagna is genuinely better than the 4-hour version in every measurable way.
TIPS FOR SUCCESS
- Room Temperature Cream Cheese Is Non-Negotiable: The most common dessert lasagna failure is lumpy cheesecake filling caused by cream cheese that was not genuinely at room temperature before beating. Cold cream cheese — even cream cheese that feels slightly soft on the outside — creates small cold lumps that survive the entire beating and mixing process and produce a visibly grainy, speckled filling layer rather than a smooth, glossy white one. Leave cream cheese at room temperature for a minimum of 60–90 minutes before using, or cut it into small cubes and let it soften for 30 minutes if time is short.
- Chill Between Every Layer: The brief refrigeration period between each layer addition — 15–20 minutes — is the step that produces clean, defined layer edges rather than layers that blend and merge into each other. A layer that isn't set before the next one is added gets pushed and distorted during spreading and creates blurred boundaries between layers. The cross-section of a dessert lasagna where each layer was chilled before the next was added looks like a professional graphic design — clean horizontal bands of distinct color. The cross-section where chilling was skipped looks like a blurry, merged gradient.
- Dry All Fruit Completely Before Layering: Any moisture on the berries destabilizes the cream layers they sit on and creates pooling liquid between layers during the refrigeration period. Spread all berries in a single layer on clean kitchen towels after washing and allow them to air dry for 20–30 minutes before assembly. Pat strawberry slices gently with paper towels to remove the additional moisture from their cut surfaces. This drying step seems minor but produces a genuinely visible difference in the cleanliness of the layers after overnight refrigeration.
- Use a Sharp Knife Wiped Clean Between Each Cut: The cross-section reveal — the moment each slice is lifted from the pan and the distinct layers are visible — is the entire visual payoff of dessert lasagna, and it only happens when each cut is clean. Use the sharpest knife available, wipe it completely clean with a damp cloth between every cut, and cut with a single straight downward press rather than a sawing motion. Mark all cut lines before making any cuts — pre-marking with a toothpick or knife tip ensures uniform square portions and prevents uneven slicing once cutting begins.
- Make It the Day Before for the Best Result: This is one of the rare desserts where the make-ahead recommendation is not a concession to convenience but a genuine quality improvement. At 4 hours of refrigeration, the crust is still slightly firm and the layers are defined but somewhat distinct from each other. At 8–12 hours, the crust softens to a cake-like consistency, the cheesecake layer firms to a perfect dense, sliceable set, and the fruit preserves infuse the surrounding cream layers with flavor. At 24 hours, the entire dessert becomes more cohesive, more deeply flavored, and more satisfying with every additional hour of setting time.
- Bring the Full Pan to the Table Before Serving: The top surface of a garnished dessert lasagna — decorated with fresh strawberries and blueberries in a flag or patriotic pattern against the clean white whipped topping — is a genuinely beautiful presentation that deserves to be seen by every guest before the first serving is removed. Bring the complete pan to the table, allow a moment for appreciation and photographs, and then begin cutting and serving at the table. This presentation moment is free, takes 60 seconds, and generates the kind of genuine enthusiasm that makes guests feel they attended something genuinely special.
VARIATIONS
- Lemon Cheesecake Patriotic Dessert Lasagna: Add 2 tablespoons of fresh lemon zest and an additional tablespoon of lemon juice to the cheesecake filling, and use lemon curd folded into the pudding cream layer instead of plain vanilla pudding — spread ½ cup of lemon curd over the blueberry layer before adding the final whipped topping for an intensely bright, citrusy version that is the most sophisticated and most requested variation among adult guests. The lemon sharpness cuts through the richness of the cream cheese and creates a more complex, more memorable flavor than the vanilla version while maintaining the identical visual presentation.
- Strawberry Jello Patriotic Dessert Lasagna: Replace the fresh strawberry layer with a set strawberry Jello layer for the most vivid, most uniform red layer possible — dissolve one box of strawberry Jello in 1 cup boiling water, add ½ cup cold water, and let partially set until the consistency of egg whites (about 45 minutes in the refrigerator) before spreading across the cheesecake layer. The partially set Jello creates a distinctly red, wobbly layer that is more intensely colored than fresh berries and that creates an extraordinarily clean line between the red and white layers when sliced. This variation is the most visually dramatic of all the versions and the one that creates the sharpest, most photogenic cross-section.
- Chocolate Patriotic Dessert Lasagna: Replace the Golden Oreo crust with a regular chocolate Oreo crust and add a thin layer of dark chocolate ganache (4 oz dark chocolate melted with 3 tablespoons heavy cream, cooled) between the crust and the cheesecake layer. The combination of chocolate crust, dark chocolate ganache, white cheesecake, red strawberries, and deep blue blueberries produces a dessert that is richer, more indulgent, and more complex in flavor than the vanilla version — and that still reads as clearly patriotic in its color layering. This is the variation for the table where chocolate lovers are present and the standard vanilla version would feel too light.
- Lighter Greek Yogurt Dessert Lasagna: Replace the full cream cheese block with 8 oz cream cheese plus 1 cup full-fat Greek yogurt for a cheesecake filling that is tangier, lighter in calorie information, and slightly less rich than the full cream cheese version. The Greek yogurt provides a natural tang that complements the fresh berries exceptionally well and creates a filling that feels less heavy after a full 4th of July meal. Use homemade stabilized whipped cream rather than Cool Whip throughout for the cleanest ingredient list. This lighter version is genuinely delicious — the flavor is actually more complex than the full cream cheese version due to the yogurt's natural complexity — and is the recommended choice for health-conscious guests or lighter summer occasions.
- Graham Cracker Crust Version: Replace the Golden Oreo crust with a classic graham cracker crust — crush 24 full graham cracker sheets to fine crumbs and combine with 7 tablespoons melted butter, 3 tablespoons sugar, and a pinch of salt. The graham cracker crust produces a slightly more rustic, slightly less sweet base that many people prefer over cookie crusts and that pairs beautifully with the fresh berry and cream cheese filling. This is the most familiar flavor profile for guests who grew up eating no-bake cheesecake and creates a dessert that tastes like a genuinely elevated, layered version of the classic summer cheesecake.
- Mini Individual Dessert Lasagna Cups: Layer all components in the same sequence in individual clear plastic cups, mason jars, or wine glasses — crust pressed into the bottom, cheesecake layer, strawberry layer, pudding cream, blueberry layer, and whipped topping finish. Individual dessert lasagna cups are the most practical format for large outdoor gatherings, children's parties, or any event where a shared pan is impractical. They refrigerate beautifully for 24 hours, travel well covered with plastic wrap, and create a genuinely charming presentation when 20 identical layered cups are arranged together on a table or carried to guests on a tray.
SERVING AND STORAGE
Serving
Remove the dessert lasagna from the refrigerator 10 minutes before serving — this brief rest allows the layers to soften very slightly and makes cutting and lifting significantly easier than cutting a pan that has just come from the refrigerator. Bring the complete garnished pan to the table for the presentation moment before cutting. Mark all cutting lines with a toothpick before making any cuts — a 5x4 grid produces 20 even squares from a standard 9x13 pan. Cut with a single downward press and wipe the knife blade completely clean between each cut. Lift each square with a thin offset spatula slid completely under the crust layer — this full-bottom support is what allows the entire layered square to lift without collapsing. Serve each square on an individual plate with no additional garnish needed — the layers are the presentation.
Storage
Cover the pan tightly with plastic wrap pressed directly against the whipped topping surface and refrigerate for up to 3 days. The dessert actually improves over the first 24–48 hours as the layers continue to set and the flavors develop. After 48 hours, the fruit begins releasing additional juice that can slightly soften the cream layers — the dessert is still delicious but the layer definition becomes less sharp. After 72 hours, the crust has softened significantly and the dessert is more of a cohesive pudding-style dessert than a defined-layer one — still genuinely good but quite different from the freshly set version. The dessert lasagna cannot be frozen — the cream cheese and whipped layers do not survive freezing and the fruit releases all its liquid during thawing, creating a completely destabilized dessert.
FAQ
Not only can you make it the day before — you should. Dessert lasagna made the night before and refrigerated overnight is genuinely better than a same-day preparation in every measurable way: the crust softens from firm to cake-like, the cheesecake layer firms from spreadable to perfectly sliceable, and the fruit preserves infuse the surrounding cream layers with flavor that develops and deepens over 8–12 hours of refrigeration. The make-ahead recommendation is a genuine quality improvement, not a convenience concession. Assemble the complete dessert through the final whipped topping and garnish layer the evening before the party, cover tightly, and refrigerate overnight for the best possible result.
Fresh berries are strongly preferred — frozen berries release enormous amounts of liquid as they thaw, which pools between layers, softens the cream cheese filling, and destabilizes the entire structure. If fresh berries are genuinely unavailable, thaw frozen berries completely, drain them very thoroughly in a colander for 30 minutes, and then pat completely dry with paper towels before using. Even well-drained frozen berries release significantly more moisture than fresh ones, so a dessert made with frozen berries should be assembled and served within 4 hours rather than being made ahead overnight, since the extended refrigeration time allows more liquid to release from the thawed berries into the surrounding layers.
Yes — homemade stabilized whipped cream is a genuinely better substitute for Cool Whip in every layer of this dessert and produces a cleaner flavor without any artificial aftertaste. To stabilize homemade whipped cream for a dessert that will be refrigerated for 24+ hours, beat 2 cups cold heavy whipping cream with 3 tablespoons powdered sugar and 1 teaspoon vanilla to soft peaks, then add either ¼ teaspoon cream of tartar, 1 tablespoon instant vanilla pudding powder, or 2 oz softened cream cheese and continue beating to stiff peaks. The stabilizer extends the whipped cream's structure from 2–4 hours to 24+ hours without any compromise to flavor. Use 2 cups stabilized whipped cream in place of each 8 oz container of Cool Whip called for in the recipe.
Four techniques produce the cleanest possible layer cuts: use the sharpest knife available rather than a standard utility knife; wipe the blade completely clean with a damp cloth between every single cut — residue on the blade from the previous cut transfers to the next cut surface and creates a smeared, blurred edge; cut with a single straight downward press rather than a sawing motion, which drags layers horizontally; and mark all cutting lines with a toothpick before making any cuts so the portions are uniform and no re-cutting is required. For the most impressive cross-section, make the first cut near one short end of the pan and lift that first slice slowly and completely straight up from the pan using an offset spatula for the full reveal.
A standard 9x13 inch baking pan is the ideal size — it produces 20 generous serving squares when cut in a 5x4 grid and has enough depth (at least 2 inches) to accommodate 6 distinct layers with definition and visual impact. A glass 9x13 pan is preferable to a metal one because the transparency allows you to see the layer edges from the sides during assembly, which helps you assess whether each layer is uniform before adding the next. If feeding a smaller crowd of 8–10 people, use an 8x8 inch square pan and halve all ingredient quantities — the layers will be proportionally thinner but the visual cross-section effect is preserved.
This red white and blue dessert lasagna is the no-bake patriotic dessert that earns the biggest reaction of anything on the 4th of July dessert table — make it the night before, pull it from the refrigerator on party day, bring it to the table whole, and watch what happens.
Try the Strawberry Jello variation for the most photographically dramatic red layer, or the lemon cheesecake version for the most sophisticated adult flavor profile. Pair this with our patriotic fruit pizza and our red white and blue trifle for the most complete, most visually stunning patriotic dessert spread of the summer.
Which variation are you making for your celebration? Drop it in the comments — we love seeing your patriotic dessert lasagna creations! For more 4th of July entertaining ideas, check out our 4th of July charcuterie board. 🇺🇸🫐🍓
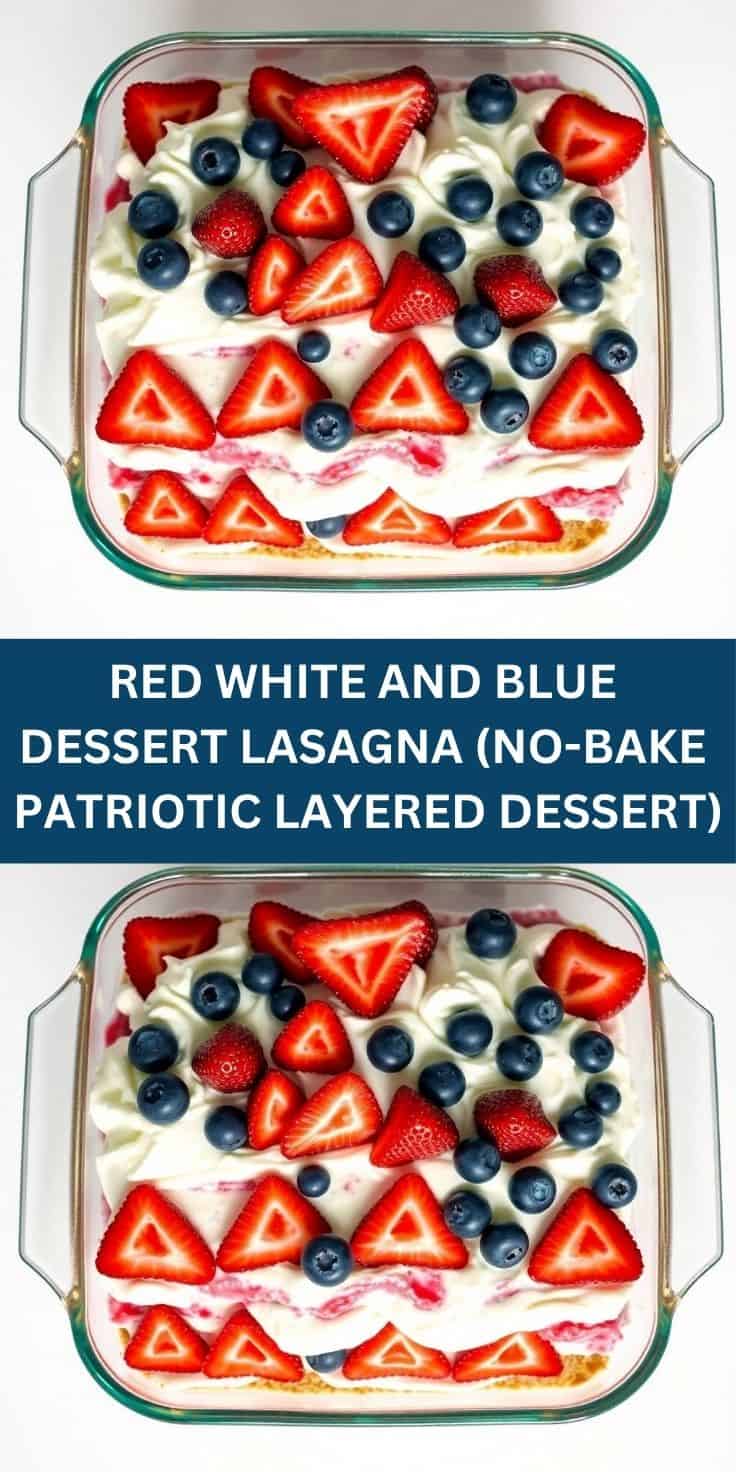
RED WHITE AND BLUE DESSERT LASAGNA (NO-BAKE PATRIOTIC LAYERED DESSERT)
Equipment
- 9x13-inch baking dish
- Mixing bowls
- Electric mixer
- Spatula
- Refrigerator
Ingredients
Cookie Crust:
- 36 Golden Oreos or vanilla cookies
- ½ cup butter melted
Cream Cheese Layer:
- 16 oz cream cheese softened
- 1 cup powdered sugar
- 2 cups whipped topping
- 1 teaspoon vanilla extract
Pudding Layer:
- 2 packages vanilla pudding mix
- 3 cups milk cold
Fruit Layers:
- 2 cups strawberries sliced
- 1 ½ cups blueberries
Instructions
Make Crust:
- Crush cookies and mix with melted butter. Press firmly into a 9x13-inch dish to form the crust.
Prepare Cream Layer:
- Beat cream cheese, powdered sugar, and vanilla until smooth. Fold in whipped topping and spread over crust.
Add Pudding Layer:
- Whisk pudding mix with cold milk until thick, then spread over cream cheese layer.
Add Fruit:
- Layer strawberries and blueberries evenly over pudding.
Chill:
- Refrigerate for at least 4 hours or until fully set.
Serve:
- Slice into squares and serve chilled.
Notes
- Use gluten-free cookies for a gluten-free version.
- Best made the day before serving.
- Swap pudding flavor for cheesecake or white chocolate variation.





Comments
No Comments