
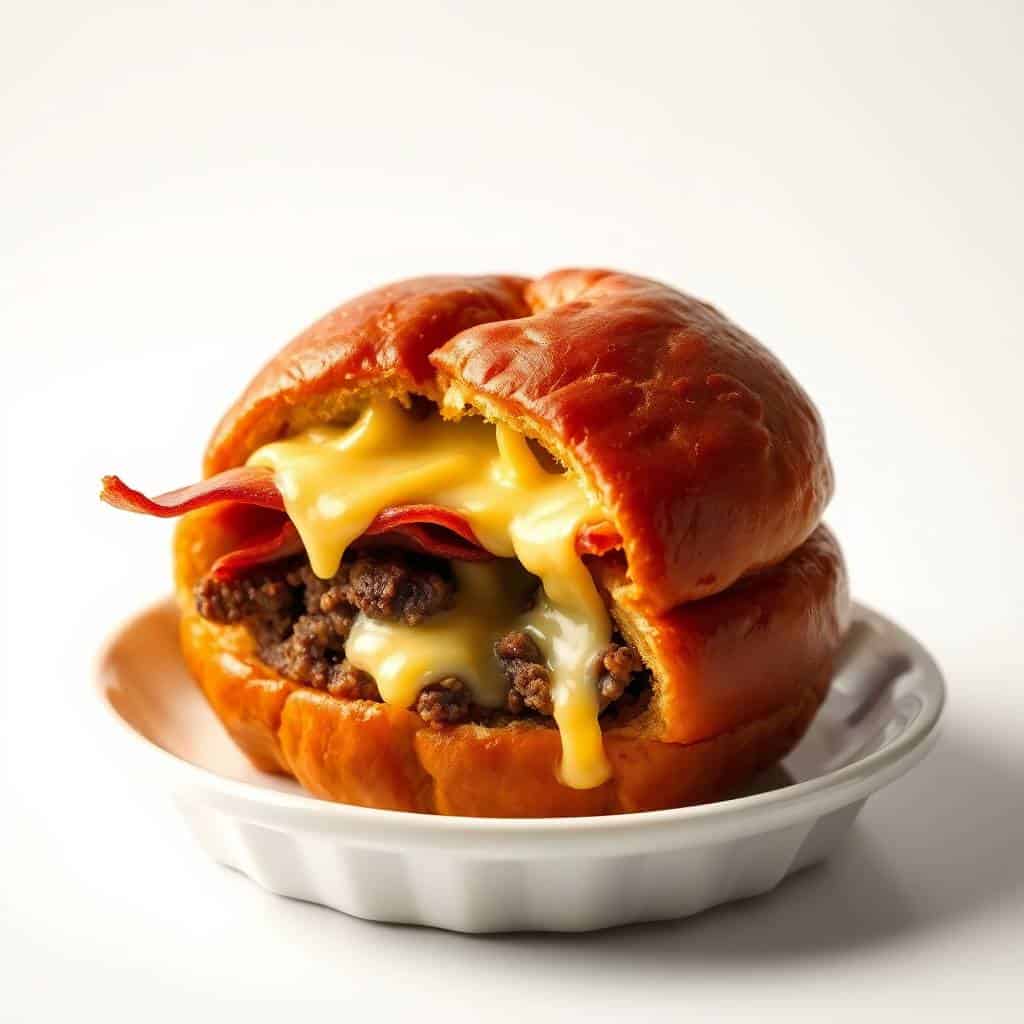
My husband doesn't really love anything that sounds gimmicky — except for these. The first time I described maple bacon cheeseburger bombs to him, he made a face like I'd suggested something weird. Then he ate three in one sitting and asked when I was making them again.
What makes these work is the maple syrup on the bacon — it's not a lot, just 2 tablespoons, but it does something to the salty, smoky bacon that makes the whole filling feel balanced. The beef stays juicy inside the dough, the cheese gets properly melty, and the biscuit crust goes golden and slightly crisp on the outside. I use a tube of refrigerated biscuit dough from Walmart or Pillsbury — nothing fancy, nothing homemade. These are a weeknight dinner, not a weekend project.
I make these when I need something that feeds everyone without complaint. My kids eat them without fuss, my husband eats them without asking what's in them, and they're portable enough that I've packed them in lunchboxes the next day. If you're looking for something along the same lines for a party spread, my BBQ Sausage Bites sit right next to these on the table whenever I'm feeding a crowd.
One thing I'll say upfront: let your filling cool before you assemble. I skipped that step the first time and ended up with soggy, half-collapsed bombs that leaked cheese all over the baking sheet. Still tasted fine, but looked like a mess. Give the beef and bacon five minutes to cool down — it makes a real difference.
Why You'll Love This Recipe
- The maple-bacon filling is genuinely different: It's not just a cheeseburger inside dough — the maple syrup on the bacon adds a slight sweetness that plays off the savory beef in a way that makes people stop and go "wait, what is that?" I've tried versions without the maple and they're fine, but they're not the same. Two tablespoons is all it takes.
- One tube of biscuit dough, done: I don't make my own dough for these. A standard can of refrigerated biscuit dough from any grocery store gives you eight rounds, which is exactly eight bombs. No rolling, no resting, no extra flour on the counter. The whole prep takes maybe 20 minutes before they go in the oven.
- They pack well for lunches: Zainab takes these in her lunchbox and actually eats them cold without complaining, which tells me everything I need to know. They hold their shape once cooled and don't go soggy the way sandwiches do. I usually make eight and plan for at least two to disappear as leftovers the next day.
- Beginner-friendly assembly: You're essentially just spooning filling into a dough circle and pinching it shut. If you've ever made dumplings or stuffed anything in dough, you can do this. Even if you haven't, it takes about ten seconds per bomb to get it right. The egg wash does most of the cosmetic work.
- You can make them a day ahead: Assemble the bombs, cover the tray with plastic wrap, and refrigerate overnight. Bake them fresh the next day. I've done this before a family gathering and it worked perfectly — I just added two extra minutes to the baking time because the filling was cold from the fridge.
Ingredients
- 1 lb ground beef
- ½ teaspoon salt
- ¼ teaspoon black pepper
- ½ teaspoon garlic powder
- 1 cup shredded cheddar cheese
- 8 strips cooked bacon, crumbled
- 1 can refrigerated biscuit dough (8 pieces — Pillsbury Grands or similar)
- 2 tablespoons maple syrup, plus more for drizzling at the end
- 1 egg, beaten (for egg wash)
- Sesame seeds (optional, for topping)
Directions
- Preheat and prep your tray: Heat your oven to 375°F (190°C) and line a baking sheet with parchment paper. The parchment matters here — any cheese that leaks out during baking will stick and burn without it.
- Cook the beef: In a skillet over medium heat, cook the ground beef until browned all the way through. Season with salt, pepper, and garlic powder while it's cooking. Drain the excess fat and let the meat cool for about five minutes. Don't skip the cooling — hot filling makes the dough soft and prone to tearing.
- Mix in the cheese and bacon: Toss the shredded cheddar and crumbled bacon into the cooled beef. Drizzle the 2 tablespoons of maple syrup over everything and stir it through. The maple coats the bacon pieces and gets distributed through the filling.
- Flatten the dough rounds: Open the biscuit dough and separate it into eight rounds. Use your fingers or a rolling pin to flatten each one slightly — you want them wide enough to hold a generous spoonful of filling with about an inch of dough to spare around the edges.
- Fill and seal: Spoon about 2–3 tablespoons of the beef mixture into the center of each dough round. Don't overfill — I learned the hard way that more filling does not mean a better bomb, it means a burst bomb. Pull the edges of the dough up and over the filling, pinching them together firmly at the top. Flip each bomb seam-side down onto the baking sheet.
- Egg wash and toppings: Brush the top of each bomb with beaten egg. This is what gives them that glossy golden finish when they come out of the oven. Sprinkle sesame seeds on top if you're using them.
- Bake: Bake for 18–20 minutes, until the tops are deep golden brown. Let them sit for three or four minutes before serving — the filling is very hot straight out of the oven. Drizzle with a little extra maple syrup right before you bring them to the table if you want that extra sweetness on top.

Tips for Success
- Cool the filling before assembling: I said it above and I'll say it again because I ignored this the first time and regretted it. Warm filling softens the dough from the inside before it even hits the oven. Five minutes of cooling makes the whole thing easier to work with and keeps the bombs from going soggy at the bottom.
- Don't overfill: Two to three tablespoons of filling is enough. Any more and you won't be able to seal the dough properly, and the bomb will split open in the oven. The filling will look modest going in — that's fine. The dough puffs up around it and everything evens out.
- Pinch the seam hard and place seam-side down: When I press the dough edges together, I give it an extra twist-and-pinch at the very top. Then I flip it immediately seam-side down so gravity helps hold it shut during baking. Bombs that go into the oven seam-side up tend to pop open.
- Use room-temperature egg for the wash: A cold egg straight from the fridge can drag and pull on the dough surface when you brush it, which sometimes tears the top. I take the egg out when I start cooking the beef so it's closer to room temp by assembly time. Small thing, but it makes brushing much smoother.
- Give the bombs space on the tray: They puff up as they bake. If you crowd them too close together, the sides won't brown properly — they'll stay pale and doughy where they're touching. I space mine about two inches apart on the sheet pan. If you're doubling the recipe, use two trays.
Variations
- Add a pickle slice inside: This is my favourite variation. A small slice of dill pickle tucked in with the filling gives it that actual cheeseburger taste — the tangy vinegar hits right after the sweet maple and it works really well. I use bread-and-butter pickle chips, which are sweeter than dill, and my husband prefers those.
- Swap the maple for BBQ sauce: Instead of glazing the bacon with maple syrup, toss the crumbled bacon with a tablespoon of your favourite BBQ sauce before mixing it into the filling. The smokiness comes through differently — more like a BBQ burger than a sweet-savory bomb. Both versions are good; they're just different. My BBQ Sausage Bites use a similar flavour profile if you want a second option for the same table.
- Try a different cheese: Cheddar is what I use most often, but pepper jack adds heat and mozzarella gives you that stretchy pull when you bite in. I've also used a Mexican blend from Costco and it was excellent. Whatever you have in the fridge will work — just make sure it's shredded and not sliced, so it mixes evenly through the filling.
- Make mini versions for a party: Cut each biscuit dough round in half and use a smaller spoonful of filling — you'll get about 16 bite-sized bombs from one can. Reduce the baking time to 12–14 minutes and check them early. These work really well as a party snack alongside something like my Creamy Oven Baked Chicken Taquitos when you're laying out a spread.
- Use ground turkey instead of beef: I've made these with ground turkey when that's what I had in the fridge. The filling is a little lighter in flavour, so I add an extra pinch of garlic powder and a splash of Worcestershire sauce to make up for it. Works fine, and the maple-bacon flavour still comes through clearly.
Serving and Storage
Serving
Serve these warm, about three to five minutes out of the oven. They're hot inside right after baking and need a moment. I put out a small bowl of ranch dressing, ketchup, or spicy mayo for dipping — ranch is the family favourite. They also go well with a simple green salad if you want to make it a full dinner, or alongside oven fries if the kids are involved in the decision. If you're serving them as part of a bigger spread, they hold at room temperature for about 30 minutes without getting soggy.
Storage
Store leftovers in an airtight container in the fridge for up to 3 days. To reheat, put them in the oven at 350°F for about 8 minutes — this keeps the outside crisp instead of turning soft the way a microwave would. If you're using an air fryer, 325°F for five minutes works well. I don't recommend freezing them after baking because the dough gets a bit rubbery when it thaws, but you can assemble them unbaked, cover tightly, and freeze for up to one month. Bake from frozen at 375°F and add about 8 extra minutes to the time.

Frequently Asked Questions
Can I assemble these ahead of time and bake later?
Yes, and I do this regularly. Assemble the bombs, place them seam-side down on the lined baking sheet, cover with plastic wrap, and refrigerate for up to 24 hours. When you're ready to bake, brush with the egg wash right before they go in the oven. Add two extra minutes to the baking time since the filling will be cold from the fridge.
Can I use puff pastry instead of biscuit dough?
You can. Puff pastry gives you a flakier, more layered exterior — almost like a hand pie. The sealing is trickier because puff pastry needs to be pressed firmly or it separates at the edges. I'd recommend using a fork to crimp the seam if you go that route. Start checking at 15 minutes since puff pastry can brown faster than biscuit dough.
What's the best cheese for melting inside these?
Cheddar is my default because it melts cleanly and has enough flavour to stand up to the maple-bacon. Monterey Jack or mozzarella give you a stretchier melt if that's what you're after. Avoid anything pre-sliced — it doesn't distribute as evenly through the filling. Shredded is the way to go, and if you're buying a block and shredding it yourself, let it sit out for 10 minutes first so it mixes in without clumping.
Why did my bombs burst open in the oven?
Two reasons, usually: overfilling or a weak seal. Keep the filling to about 2–3 tablespoons per bomb and make sure you're pinching the dough edges together firmly before flipping them seam-side down. Hot filling going into the dough also weakens it before baking, so let the beef and bacon cool for five minutes first. I had several burst bombs my first few tries — once I started cooling the filling and being less generous with the portion, the problem stopped.
Can I freeze these before baking?
Yes — this is actually the better freezing method compared to freezing after baking. Assemble the bombs, place them on a tray, and freeze until solid (about two hours). Then transfer to a freezer bag and store for up to one month. Bake from frozen at 375°F for about 25–28 minutes, checking that the inside is hot and the dough is golden. No need to thaw first.
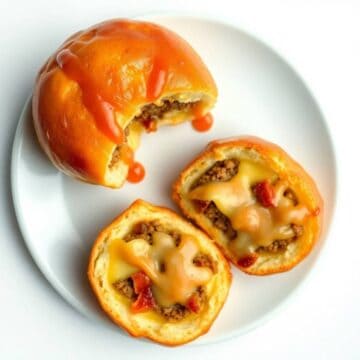
MAPLE BACON CHEESEBURGER BOMB
Ingredients
- 1 lb ground beef
- ½ teaspoon salt
- ¼ teaspoon black pepper
- ½ teaspoon garlic powder
- 1 cup shredded cheddar cheese
- 8 strips cooked bacon crumbled
- 1 can refrigerated biscuit dough 8 pieces
- 2 tablespoons maple syrup plus more for drizzling
- 1 egg for egg wash
- Sesame seeds optional
Instructions
- Preheat oven to 375°F (190°C). Line a baking sheet with parchment paper.
- Cook beef in a skillet over medium heat until browned. Season with salt, pepper, and garlic powder. Drain excess fat and let cool slightly.
- Mix cheese and bacon into the cooled beef mixture.
- Flatten biscuit dough rounds slightly. Spoon beef mixture into the center of each round. Drizzle with a little maple syrup.
- Wrap dough around filling and pinch to seal. Place seam-side down on the baking sheet.
- Brush tops with beaten egg and sprinkle with sesame seeds if desired.
- Bake for 18–20 minutes, or until golden brown. Drizzle with more maple syrup before serving.
Notes
- Make Ahead: Prepare bombs, cover, and refrigerate for up to 24 hours before baking.
- Flavor Tip: Swap maple syrup with honey or BBQ sauce for a different flavor twist.
- Serving Suggestion: Serve with pickles, dipping sauce, or a side salad for a complete meal.
- Storage Tips: Store leftovers in an airtight container in the fridge for 2 days. Reheat in the oven for best texture.
Final Thoughts
These have become one of those recipes I come back to more than I expected. I made them the first time as a one-off experiment, and now they show up at least once a month — sometimes as dinner, sometimes as a game-day snack, sometimes just because someone in the house mentions them and I have ground beef in the fridge. The whole thing, start to finish, takes under 45 minutes including the cooling time for the filling.
What I like most about them is that they don't require much thought once you've made them once. The ratios are forgiving, the dough does most of the work, and the maple-bacon filling is consistent every time. I've served these to people who said they weren't big cheeseburger fans and watched them eat two. I'm not making any promises, but that's a decent track record.
If you're planning a bigger spread and want something to bake alongside these, my Creamy Oven Baked Chicken Taquitos come out of the oven at a similar temperature and time, which makes the logistics easy. And if you need something sweet to finish the meal, my Salted Caramel Butter Bars are what I reach for when I want something simple that still feels like a proper dessert.
Make them once and you'll know whether they belong in your regular rotation. My guess is they will. 🍔✨
If you liked this recipe, these are worth a look too:
- BBQ Sausage Bites — great alongside these for a party spread
- Creamy Oven Baked Chicken Taquitos — another handheld dinner the whole family eats without argument
- Salted Caramel Butter Bars — my go-to when I need a quick dessert after a sav




Comments
No Comments