
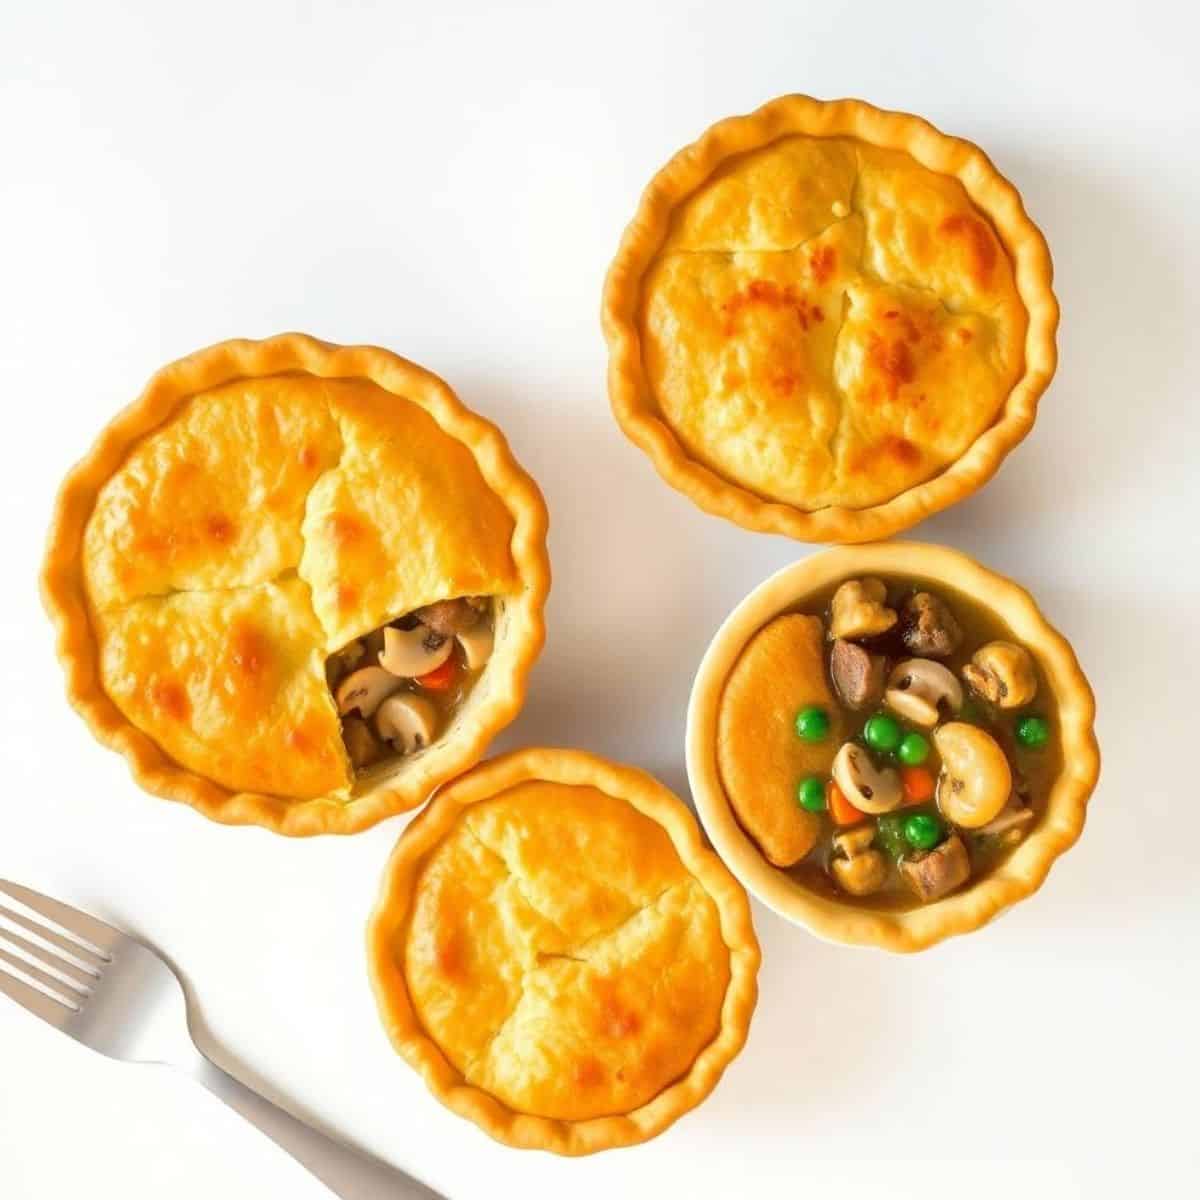
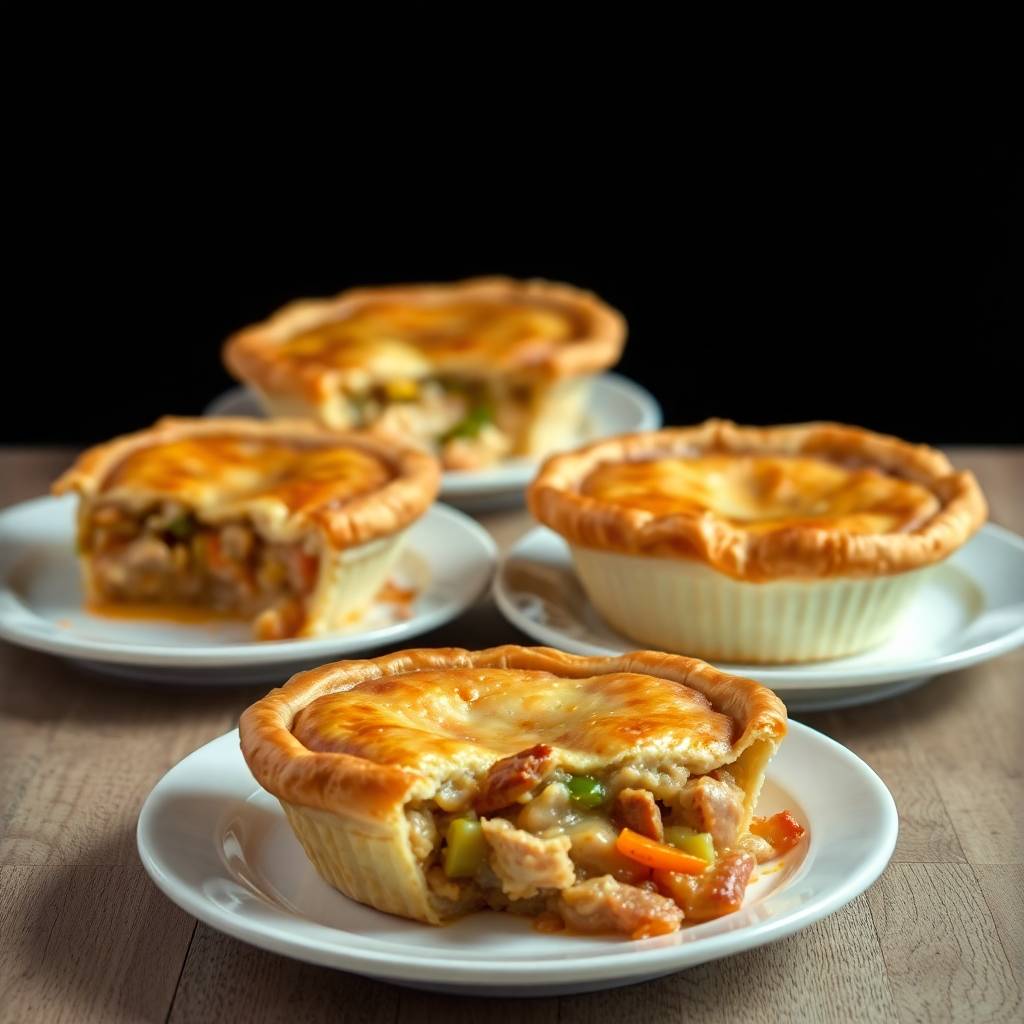
A golden, flaky-crusted pot pie pulled from the oven and set on the table while still bubbling and fragrant is one of the most deeply satisfying comfort food moments in home cooking — the steam that escapes when the first spoonful breaks through the crust, the rich, creamy filling that pools around the edges of the serving bowl, the contrast between the shattering pastry and the tender filling beneath it. Pot pie is the recipe that makes every person at the table feel genuinely taken care of, the dish that smells like everything good about winter cooking, and the casserole that produces the most enthusiastic responses of any recipe I have served in thirty years of cooking for people I love.
This post covers four genuinely different pot pie variations that represent the full range of what this format can achieve — the classic chicken pot pie that is the gold standard of American comfort food; a turkey pot pie that is the single best use of Thanksgiving leftovers available; a beef and stout pot pie with a deeply rich, wine-dark filling and a dramatic puff pastry top; and a vegetable and white bean pot pie that is so genuinely satisfying and deeply flavored that the absence of meat is genuinely imperceptible. Every version uses the same foundational technique and every version produces a filling that is rich, deeply seasoned, and perfectly complemented by whatever pastry surrounds it.
This post also covers the crust options in detail — homemade flaky pie crust for the most impressive result, store-bought refrigerated pie crust for the most practical weeknight approach, puff pastry for the most dramatic visual, and biscuit topping for the most casual and fastest assembly. Every crust option works with every filling and every combination has its particular strengths and best occasions.
Let's make the pot pie that earns the most enthusiastic responses of the entire comfort food season!
WHY YOU WILL LOVE THIS RECIPE
- The Most Complete Comfort Food Experience in One Dish: Pot pie delivers protein, vegetables, a rich sauce, and a flaky pastry crust simultaneously in a single serving — there is no need for sides, no need for bread, and no need for anything beyond the pot pie itself to constitute a complete and deeply satisfying meal. The combination of textures — shattering pastry, creamy filling, tender protein, and soft vegetables — in every spoonful is genuinely more interesting and more satisfying than any component eaten separately.
- Four Variations That Are Each Genuinely Outstanding: Chicken pot pie, turkey pot pie, beef and stout pot pie, and vegetarian diet white bean pot pie — each is a complete, deeply satisfying recipe rather than a minor variation of the same base. The technique is identical across all four but the flavor profiles are dramatically different, which means this post gives you four genuinely different comfort food dinners to rotate through the cold-weather season rather than one recipe repeated four times.
- Make-Ahead Friendly in Every Stage: The filling can be made up to 3 days ahead and refrigerated. The assembled unbaked pot pie can be refrigerated for 24 hours or frozen for 3 months before baking. Having a frozen, completely assembled pot pie in the freezer is one of the most valuable food safety nets available — pull it out, bake it directly from frozen with extended baking time, and have a genuinely impressive dinner on a night when cooking was genuinely not possible.
- The Best Use of Leftover Rotisserie Chicken and Thanksgiving Turkey: Both the chicken and turkey variations are outstanding applications for leftover cooked protein — the pot pie filling's rich, creamy sauce transforms plain leftover chicken or turkey into something that tastes genuinely fresh, genuinely special, and genuinely worthy of the effort of making a crust. A turkey pot pie made from Thanksgiving leftovers on the Saturday after Thanksgiving is one of the most beloved secondary meal traditions in American cooking.
- Multiple Crust Options for Every Skill Level and Schedule: Homemade flaky pie crust, store-bought refrigerated pie crust, puff pastry, and drop biscuit topping — the filling is identical across all four crust options and the difference is entirely in the time and skill investment of the pastry component. A store-bought pie crust or puff pastry produces a genuinely excellent pot pie in 30 minutes of total preparation; a homemade crust requires 45 additional minutes but produces a result that is genuinely worth every minute of the effort.
- Individual Pot Pies Are the Most Impressive Dinner Party Presentation: The same filling portioned into individual oven-safe ramekins or cast iron skillets, each topped with its own pastry crust, produces a pot pie presentation that is genuinely stunning at a dinner party table — each guest receives their own personal pot pie, the steam release from each individual crust at the table is a genuinely theatrical moment, and the practical advantage of individual portions that require no serving is significant for dinner party hosts.
THE FOUNDATION — CLASSIC POT PIE FILLING TECHNIQUE
Every pot pie variation in this post uses the same foundational technique for the filling. Mastering this technique produces outstanding results across all four variations.
The roux is the foundation: Every pot pie filling begins with a butter and flour roux — fat and starch cooked together until the raw flour smell disappears (1–2 minutes) before any liquid is added. This roux is what thickens the filling to a properly coating, spoon-clinging consistency. A filling without a roux is thin and watery; a filling with properly developed roux is silky, coating, and rich.
The filling must be properly seasoned before it goes under the crust: Once the crust is on and baking begins, there is no opportunity to adjust seasoning. Taste the filling aggressively before covering — it should taste almost too bold and well-seasoned before baking because the pastry slightly dilutes the flavors during eating and the cold filling emerging from refrigeration mutes flavors slightly before it heats through.
The filling must be completely cool before the pastry goes on: Hot filling on pastry crust begins melting the fat in the dough before it reaches the oven, producing a soggy crust that never achieves proper flakiness. Cool or room-temperature filling going under pastry ensures the fat stays solid until the oven heat triggers the steam and flakiness process correctly.
CRUST OPTIONS
Homemade Flaky Pie Crust: Combine 2.5 cups all-purpose flour, 1 teaspoon salt, and 1 tablespoon sugar. Cut in 1 cup (2 sticks) cold butter cut into small cubes until the mixture resembles coarse sand with pea-sized butter pieces remaining. Add ice water 1 tablespoon at a time (6–8 tablespoons total) until the dough just holds together. Divide in half, flatten into disks, wrap, and refrigerate 1 hour minimum. The cold fat is what produces flakiness — warm or softened butter produces a mealy, crumbly crust. Roll out on a floured surface to ⅛-inch thickness.
Store-Bought Pie Crust: One package of refrigerated pie crust (contains two rounds) provides both the bottom and top crust for a standard pot pie. Allow to come to room temperature for 15 minutes before unrolling. Store-bought pie crust produces a reliably good result with zero preparation time and is the recommended approach for weeknight pot pies.
Puff Pastry: One sheet of thawed puff pastry placed over the filling and crimped to the dish edge produces the most dramatic visual — the pastry puffs dramatically in the oven and creates a golden, shatteringly flaky top that is visually spectacular. Use puff pastry as a top-crust only (no bottom crust) for the cleanest presentation. Cut decorative shapes or score the surface for steam venting rather than cutting basic vent slits.
Drop Biscuit Topping: Combine 1.5 cups flour, 1 tablespoon baking powder, ½ teaspoon salt, and 6 tablespoons cold butter cut in until crumbly. Stir in ¾ cup cold buttermilk until just combined. Drop by large spoonfuls across the top of the hot filling and bake at 425°F for 20–25 minutes until deeply golden. This topping is the fastest, most casual option and the best choice for a skillet pot pie served at the table.
VARIATION 1: CLASSIC CHICKEN POT PIE
INGREDIENTS
- 3 cups cooked shredded or cubed chicken (rotisserie is ideal)
- ½ cup unsalted butter
- 1 large onion, diced
- 3 stalks celery, diced
- 3 carrots, diced
- 4 cloves garlic, minced
- ⅓ cup all-purpose flour
- 2 cups chicken broth
- ¾ cup heavy cream or whole milk
- 1 cup frozen peas
- 1 teaspoon fresh thyme or ½ teaspoon dried
- 1 teaspoon fresh rosemary, finely chopped, or ¼ teaspoon dried
- Salt, black pepper, and a grating of fresh nutmeg
- 1 egg, beaten with 1 tablespoon water for egg wash
DIRECTIONS
- Step No.1: Make the filling
Melt butter in a large, heavy saucepan over medium heat. Add onion, celery, and carrots and cook 8–10 minutes until softened and the onion is golden. Add garlic, thyme, and rosemary and cook 1 minute. Sprinkle flour over the vegetables and stir continuously for 1–2 minutes until the raw flour smell disappears — the mixture will look like a paste coating the vegetables. Add chicken broth in a slow, steady stream while whisking continuously to prevent lumps. Add heavy cream. Bring to a gentle simmer, stirring, for 4–5 minutes until the sauce thickens to a consistency that coats the back of a spoon. Remove from heat. Add shredded chicken, frozen peas, salt, pepper, and nutmeg. Taste aggressively and adjust seasoning. Allow to cool to room temperature — minimum 30 minutes, or refrigerate for up to 3 days. - Step No.2: Assemble and bake
Preheat oven to 375°F. For a double-crust pie: line a 9-inch deep-dish pie plate or a 2-quart baking dish with the bottom crust, trimming to a 1-inch overhang. Pour the cooled filling into the crust. Place the top crust over the filling, fold the edge of the top crust under the edge of the bottom crust, and crimp together firmly. Cut 4–6 small vent slits in the top crust for steam to escape. Brush the entire top crust surface with egg wash for a golden, shiny result. For a top-crust-only version: pour filling directly into a greased baking dish and lay the pastry over the top, pressing the edges to the dish rim. Egg wash and vent. Bake at 375°F for 45–55 minutes until the crust is deeply golden and the filling is visibly bubbling through the vents. Rest 10–15 minutes before serving.
VARIATION 2: TURKEY POT PIE (PERFECT FOR THANKSGIVING LEFTOVERS)
Use the exact chicken pot pie recipe, substituting 3 cups of leftover Thanksgiving turkey (dark and white meat mixed, roughly shredded) for the chicken. Add ½ cup of leftover gravy if available — stir it into the cream sauce for additional depth and a more deeply turkey-flavored filling. Include any leftover roasted vegetables from Thanksgiving (roasted sweet potato, green beans, or Brussels sprouts) as part of the vegetable component. The turkey pot pie made from Thanksgiving leftovers is genuinely one of the best secondary meal traditions in American food culture — the combination of the rich, herb-scented turkey filling and the flaky crust is extraordinary and justifies deliberately cooking extra turkey specifically to have enough for pot pie on Saturday. Find more leftover turkey ideas in our Thanksgiving dinner ideas.
VARIATION 3: BEEF AND STOUT POT PIE WITH PUFF PASTRY
INGREDIENTS
- 2 lbs beef chuck, cut into ¾-inch cubes and braised until tender (use leftover beef stew or braise specifically for this pot pie)
- 6 oz thick-cut bacon, cut into 1-inch pieces
- 1 large onion, diced
- 3 carrots, diced
- 8 oz cremini mushrooms, quartered
- 4 cloves garlic, minced
- ¼ cup all-purpose flour
- 1 cup Guinness or stout beer
- 1.5 cups beef broth
- 1 tablespoon Worcestershire sauce
- 1 tablespoon tomato paste
- Fresh thyme, rosemary, and bay leaves
- Salt and black pepper
- 1 sheet puff pastry, thawed
DIRECTIONS
- Step No.1: Make the beef filling
Cook bacon in a large Dutch oven until crispy. Remove bacon and set aside. In the bacon fat, sauté onion and carrots for 6 minutes. Add mushrooms and cook until golden, 4–5 minutes. Add garlic and tomato paste and cook 2 minutes. Sprinkle flour over everything and stir 1–2 minutes. Deglaze with Guinness, scraping up all fond. Add beef broth, Worcestershire, thyme, rosemary, and bay leaves. If using raw beef, add seasoned, seared cubed chuck at this point and simmer covered for 1.5–2 hours until tender. If using pre-braised beef, add it to the sauce and simmer for 20 minutes to meld flavors. Add bacon back to the filling. Remove bay leaves. Filling should be thick, dark, and deeply savory. Season very aggressively. Cool completely. - Step No.2: Assemble with puff pastry and bake
Preheat oven to 400°F. Spoon cooled beef filling into a 9x13 baking dish or individual oven-safe dishes. Roll thawed puff pastry on a lightly floured surface and cut to fit over the dish, leaving 1 inch overhang. Press the overhang firmly to the rim of the dish. Brush entirely with egg wash. Score decorative lines across the surface with a sharp knife — this scoring creates defined puff layers and an attractive pattern when the pastry rises. Cut 3–4 small slits for steam. Bake at 400°F for 25–30 minutes until the pastry is dramatically puffed, golden brown throughout, and the filling is visibly bubbling at the edges. The dramatic puff of the pastry over the dark, rich beef filling is one of the most visually impressive pot pie presentations available. Rest 10 minutes before serving.
VARIATION 4: VEGETARIAN ROASTED VEGETABLE AND WHITE BEAN POT PIE
Use the classic chicken pot pie filling technique with these modifications: replace chicken with 2 cans (15 oz each) of drained and rinsed cannellini beans and 2 cups of roasted mixed vegetables (sweet potato, butternut squash, parsnips, and leeks roasted at 425°F until golden). Replace chicken broth with vegetable broth. Add 2 tablespoons of nutritional yeast to the roux for a subtle, savory depth that replaces some of the umami that chicken contributes. Use the same herb profile — thyme, rosemary, and a grating of nutmeg. The white beans provide protein and a creamy, substantial body that makes the filling genuinely filling. Add 2 cups of fresh spinach stirred into the hot filling at the very end and allowing it to wilt before cooling. This vegetarian pot pie is genuinely, completely satisfying — the combination of creamy beans, sweet roasted vegetables, and rich herb sauce under flaky pastry is one of the most deeply comforting vegetarian main courses available. Find more vegetarian ideas in our vegetarian dinner recipes.
TIPS FOR SUCCESS
- Cool the Filling Completely Before Adding Pastry: This is the most critical technique rule for pot pie and the one most frequently ignored. Hot filling placed under pastry begins melting the butter fat in the dough before the oven heat can work correctly — the result is a soggy, greasy bottom crust that never achieves flakiness. The filling must be genuinely at room temperature or cold before any pastry is placed on top. Make the filling the day before and refrigerate overnight for the most foolproof result, or spread it on a sheet pan after cooking to cool it rapidly in 20–30 minutes if time is short.
- The Filling Must Be Properly Thick Before It Goes Under the Crust: A filling that is too thin produces a runny, soupy pot pie where the filling pools at the bottom and the pastry floats rather than sitting on a substantial, cohesive filling. The filling should hold its shape when a spoonful is placed on a plate — it should not run or spread significantly. If the filling is thinner than this, return it to the heat and simmer uncovered for 5–8 minutes to reduce and concentrate, or stir in a tablespoon of cornstarch dissolved in cold water and simmer 3 minutes until thickened.
- Egg Wash Is What Produces the Golden, Shiny Crust: A pastry top without egg wash bakes to a pale, matte, slightly dull surface that doesn't communicate the visual appeal of a well-made pot pie. One egg beaten with one tablespoon of water brushed over the entire pastry surface produces the deep, burnished golden color that makes a pot pie look genuinely beautiful. For a deeper golden color, add a pinch of sugar to the egg wash. For a shinier finish, substitute heavy cream for the water in the egg wash. Apply the egg wash immediately before the pie goes into the oven — not as a make-ahead step, as refrigerated egg wash can make the pastry soggy.
- Cut Vent Slits That Actually Allow Steam to Escape: Decorative vent slits that are too small or too shallow seal during baking and don't allow steam to escape — the trapped steam creates a pressure that pushes the crust up from the filling and produces a dome of pastry with an air gap between the crust and the filling rather than the characteristic intimate contact between golden crust and filling surface that defines a great pot pie. Cut vents that are at least 1 inch long and cut through the full thickness of the pastry. Four to six vents across the top surface are sufficient for a standard 9-inch pot pie.
- Bake Until the Filling Is Visibly Bubbling — Not Just Until the Crust Is Golden: The crust can reach full golden color before the filling is fully heated through, particularly when starting from a cold refrigerated filling. The visual indicator that a pot pie is properly done is filling bubbling through the vents or around the edges — bubbling filling means the entire interior has reached a temperature where it is fully heated and the starch in the sauce has fully gelatinized for the correct thick, coating consistency. If the crust is golden but no bubbling is visible at 50 minutes, tent the crust loosely with foil to prevent over-browning and continue baking until bubbling is evident.
- Rest the Pot Pie Before Serving: The filling immediately from the oven is extremely hot and very loose — a pot pie served immediately after baking produces a filling that runs across the plate and a crust that lifts off rather than staying anchored to the filling as each portion is served. A 10–15 minute rest allows the filling to firm slightly as it loses a little heat, producing portions that hold their structure on the plate with the crust maintaining contact with the filling rather than floating free of it.
SERVING AND STORAGE
Serving
Bring the pot pie to the table whole after resting so every guest can see the golden crust before the first serving breaks through it — this presentation moment is one of the most genuinely impressive in home cooking. Use a large, sharp spoon to cut through the crust and scoop each portion, ensuring every serving includes crust, filling, and vegetables. For double-crust pot pies, a sharp knife cut in a cross pattern before scooping portions keeps the crust in coherent pieces with each serving. The pot pie needs no side dishes — it is a complete meal. A simple green salad alongside provides freshness if desired.
Storage
Baked pot pie stores refrigerated covered for up to 3 days — the crust softens progressively during refrigeration from the moisture of the filling, but reheated at 350°F uncovered for 20–25 minutes restores significant crispiness to the crust surface. The filling reheats beautifully. For freezing the unbaked assembled pot pie: cover tightly and freeze for up to 3 months — bake directly from frozen at 375°F, tenting with foil for the first 45 minutes to prevent over-browning the crust before the filling heats through, then removing the foil and baking 20–25 more minutes until golden and bubbling. Total frozen bake time: 65–70 minutes. The filling alone freezes excellently for up to 3 months — thaw, reheat, add fresh pastry, and bake as directed for a freezer pot pie that tastes completely freshly made.

FAQ
A soggy bottom crust on pot pie is caused by one of three things: filling that was too hot when the pastry was applied (the heat melts the fat in the dough before the oven can create flakiness), filling that is too thin and watery (the excess liquid soaks up into the bottom crust during baking), or insufficient oven temperature at the beginning of baking (the pastry needs initial high heat to set its fat structure quickly). Solutions: always use completely cooled filling; ensure the filling is properly thick before covering; bake on the lowest oven rack for the first 20 minutes to maximize direct heat on the bottom crust; and brush the bottom crust with egg white before adding filling to create a moisture barrier.
Yes — pot pie filling is best made ahead. Make the filling up to 3 days ahead, cool completely, and refrigerate in an airtight container. The filling actually improves over 24 hours as the flavors develop and the sauce thickens slightly from refrigeration. When ready to assemble, the filling can go directly from the refrigerator under the pastry since it is already cold — this is the most reliable method for preventing a soggy bottom crust. The only adjustment needed is adding 5–10 minutes to the total baking time since the filling starts cold and requires slightly longer to reach full bubbling temperature.
Yes — store-bought refrigerated pie crust produces genuinely excellent pot pie results and is the recommended approach for weeknight pot pie making. Allow the refrigerated crust to come to room temperature for 15–20 minutes before unrolling to prevent cracking. One package (containing two rounds) provides both the bottom and top crust for a standard 9-inch pot pie. For a top-crust-only pot pie, one package provides two top crusts which can be used for two separate pots or stored refrigerated for up to one week. Store-bought crust produces very comparable results to homemade for most people's purposes and eliminates the most skill-intensive step in the pot pie preparation process.
Freeze the assembled, unbaked pot pie for the best result — baked and then frozen pot pie produces a softer crust on reheating, while unbaked frozen pot pie produces a fresher, crisper crust after its extended bake time. Assemble the complete pot pie including pastry crust, wrap tightly in plastic wrap then foil, label with date, and freeze for up to 3 months. To bake from frozen: preheat oven to 375°F, unwrap the frozen pot pie, brush with egg wash, tent loosely with foil, and bake 45 minutes covered followed by 20–25 minutes uncovered until the crust is deeply golden and the filling is visibly bubbling through the vents. Do not thaw before baking — the frozen filling baking slowly through the pastry produces a better result than thawed filling going under pastry for a standard bake time.
Pot pie and shepherd's pie are both single-dish savory pies with a filling and a topping but they differ fundamentally in three ways: the daily protein needs, the topping, and the cooking tradition. Pot pie contains any protein (chicken, turkey, beef, vegetables) in a cream sauce and is topped with pastry crust — flaky pie dough, puff pastry, or biscuits. Shepherd's pie contains ground or minced lamb (or beef, in which case it is technically called cottage pie) in a gravy-based filling and is topped with mashed potato rather than pastry. Shepherd's pie is British in origin; pot pie is American and Canadian. Both are excellent comfort foods with no overlap in eating experience despite the shared concept of a savory filling with a topping baked in the oven.
These classic pot pie variations give you a complete, four-season comfort food repertoire — from the classic chicken pot pie that defines the genre to the dramatic beef and stout puff pastry version that makes every dinner guest stop and stare.
Try the beef and stout version with puff pastry for the most visually dramatic presentation, or the vegetarian white bean version for the most genuinely surprising result. Pair with our chicken and rice casserole, our King Ranch chicken, and our tuna casserole for the complete comfort food casserole collection. 🥧🍗✨

CLASSIC POT PIE VARIATIONS (CHICKEN, TURKEY, BEEF, AND VEGETARIAN)
Equipment
- Pie dish or ramekins
- Large skillet
- Saucepan
- Oven
Ingredients
Base Crust:
- 2 sheets pie crust store-bought or homemade
Creamy Filling Base:
- 4 tablespoon butter
- ¼ cup all-purpose flour
- 2 cups milk
- 1 cup chicken or vegetable broth
- 1 teaspoon salt
- ½ teaspoon black pepper
Vegetables:
- 1 cup carrots diced
- 1 cup peas
- ½ cup celery diced
- 1 onion diced
Protein Options:
- 2 cups cooked chicken, turkey, or beef or omit for vegetarian
Vegetarian Option Add-Ins:
- 1 cup mushrooms sliced
- 1 cup potatoes diced and cooked
Instructions
Make Filling Base:
- Melt butter in a skillet, whisk in flour, and cook for 1–2 minutes. Slowly add milk and broth, whisking until thick and creamy.
Add Vegetables:
- Stir in carrots, peas, celery, onion, salt, and pepper. Cook until slightly tender.
Add Protein (Choose Variation):
- Stir in chicken, turkey, beef, or mushrooms/potatoes for vegetarian version.
Assemble Pot Pie:
- Place bottom crust in pie dish, add filling, then cover with top crust. Seal edges and cut small slits on top.
Bake:
- Bake at 375°F (190°C) for 35–40 minutes until crust is golden brown and filling is bubbling.
Serve:
- Let cool for 10 minutes before slicing and serving warm.
Notes
- Use rotisserie chicken for quick prep.
- Vegetarian version tastes great with extra mushrooms.
- Let filling thicken before assembling for best texture.




Comments
No Comments