
Homemade Peppermint Patties are a delicious, refreshing treat that’s easy to make and perfect for the holidays or any time you’re craving a minty, chocolatey indulgence. It’s a fun recipe to make with family or friends.
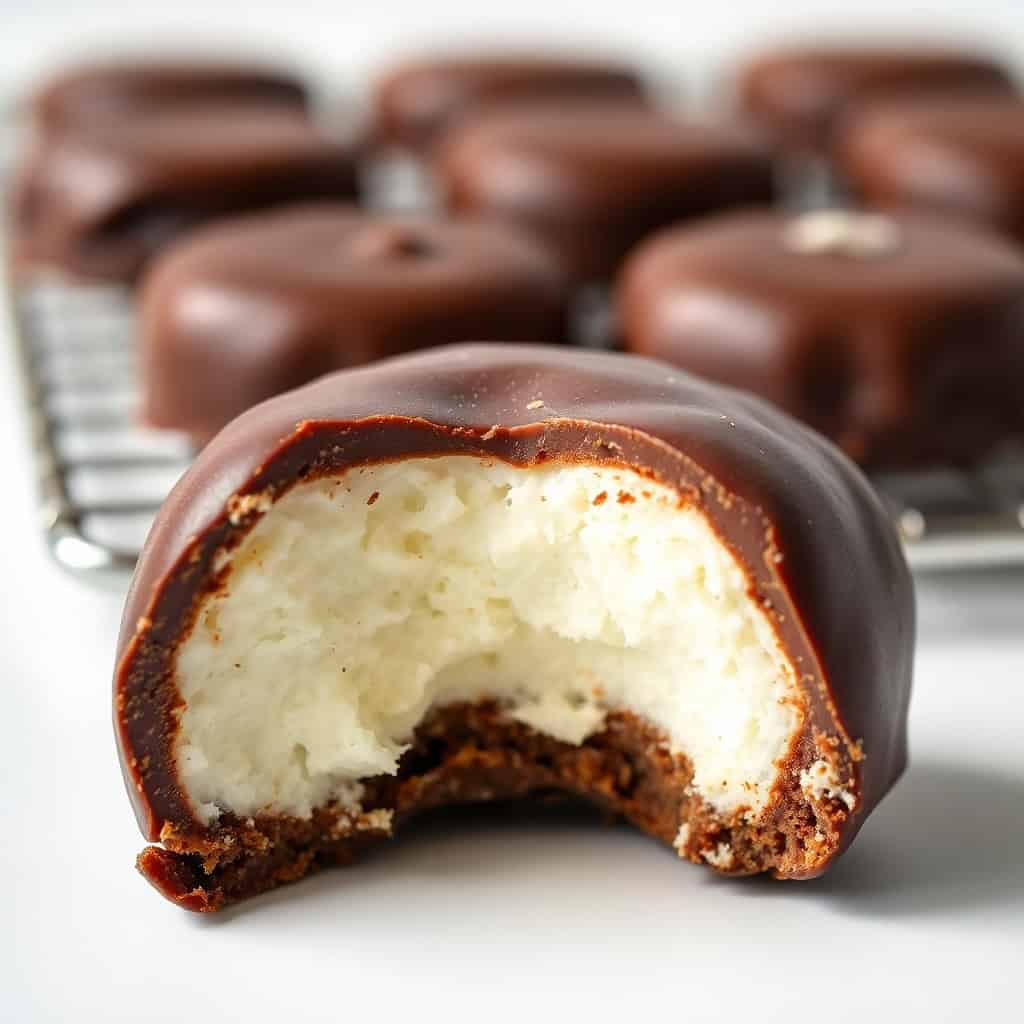
These sweet treats feature a smooth, creamy peppermint center that’s coated in rich dark chocolate for the perfect balance of flavors. Making these at home allows you to customize the sweetness and flavor to your liking.
The peppermint center is soft and melt-in-your-mouth, while the dark chocolate coating adds a touch of bitterness to balance the sweetness of the filling. These homemade peppermint patties are similar to the classic candy.
Whether you’re looking for a gift to give to loved ones or simply want a treat to enjoy, homemade peppermint patties are a great option. The recipe is simple and requires just a few ingredients and is fun to make at home.
These peppermint patties are perfect for after-dinner mints, holiday candy platters, or a sweet snack whenever you want to treat yourself. Let’s dive into how you can make these irresistible peppermint candies at home!

Why You Will Love This Recipe
- Refreshing and Sweet: The creamy peppermint filling provides a fresh and sweet contrast to the rich dark chocolate coating, making it a perfect after-dinner treat.
- Easy to Make: This recipe requires minimal ingredients and is simple to prepare, making it a fun and quick treat to make at home.
- Customizable: You can adjust the sweetness of the peppermint filling or use different types of chocolate to suit your taste preferences.
- Perfect for Gifting: Homemade peppermint patties make an excellent DIY gift for friends and family, especially during the holidays.
- No-Bake: The recipe requires no baking, so it's easy to make even when you're short on time.
Ingredients
- 2 ½ cups powdered sugar
- 2 tablespoon unsalted butter, softened
- 2 tablespoon milk
- 1 ½ teaspoon pure peppermint extract
- 1 ½ cups dark chocolate (or semi-sweet chocolate), chopped
- 1 tablespoon coconut oil (for thinning the chocolate)
Directions
- Step No.1: Make the peppermint filling
In a large bowl, combine the powdered sugar, softened butter, milk, and peppermint extract. Mix until smooth and creamy. The mixture should form a thick, dough-like consistency.
- Step No.2: Shape the peppermint centers
Roll the peppermint mixture into small balls, about 1-inch in diameter, and flatten them into discs using your fingers or the back of a spoon. Place the discs on a baking sheet lined with parchment paper.
- Step No.3: Freeze the peppermint centers
Place the peppermint discs in the freezer for at least 30 minutes, or until they are firm. This will help them hold their shape when dipped in chocolate.
- Step No.4: Prepare the chocolate coating
While the peppermint centers are freezing food safely, melt the chopped dark chocolate and coconut oil together.
- You can melt them in a heatproof bowl set over a pot of simmering water (double boiler) or in the microwave in 30-second intervals, stirring until smooth.
- Step No.5: Coat the peppermint patties
Once the peppermint discs are firm, dip each one into the melted chocolate, ensuring it is fully coated. Use a fork to lift the patties out of the chocolate and allow the excess to drip off.
- Step No.6: Set and cool
Place the chocolate-coated peppermint patties back on the parchment paper and let them cool at room temperature for 1 hour. You can also place them in the refrigerator to speed up the process.
- Step No.7: Serve and enjoy
Once the chocolate is fully set, your homemade peppermint patties are ready to enjoy! Store them in an airtight container at room temperature or in the fridge for up to 1 week.

Tips for Success
- Use High-Quality Chocolate: For the best flavor, use high-quality dark chocolate, as it will make the coating much more flavorful and smooth.
- Adjust the Peppermint Flavor: If you prefer a stronger peppermint taste, you can add more peppermint extract to the filling, but be careful not to add too much, as peppermint extract can be overpowering.
- Work Quickly with the Chocolate: When dipping the peppermint discs in chocolate, work quickly to prevent the filling from softening too much.
- Let Them Cool Completely: Make sure the chocolate coating has fully set before serving or storing the peppermint patties. This ensures they don’t stick together.
Variations
- Milk Chocolate Version: If you prefer milk chocolate over dark chocolate, you can substitute the dark chocolate with milk chocolate for a sweeter taste.
- Add a Crunch: To add texture, dip the edges of the patties in crushed nuts (such as almonds or hazelnuts) or sprinkles for a fun twist.
- Use White Chocolate: For a different flavor profile, try using white chocolate for the coating for a sweeter and creamier option.
- Peppermint Patty Bark: For a simpler version, spread the peppermint filling into an even layer on a baking sheet, pour the melted chocolate over it, and refrigerate to set. Break it into pieces once set.
Serving and Storage
Serving
Serve these homemade peppermint patties on a platter for a delightful dessert or keep them in a decorative jar to give as a thoughtful gift.
Storage
Store your homemade peppermint patties in an airtight container at room temperature for up to 1 week. For longer storage, keep them in the refrigerator for up to 2 weeks.
FAQ
Yes, you can experiment with different extracts, such as vanilla or chocolate mint, for a unique flavor twist. Just keep in mind that peppermint is the traditional flavor for this recipe.
Yes, you can crush candy canes and mix them into the filling for added texture and a festive touch. Just make sure to adjust the sugar levels accordingly.
Yes, these peppermint patties can be made ahead of time and stored in an airtight container in the fridge for up to 2 weeks.
Yes, you can use white chocolate, milk chocolate, or even a chocolate coating that’s suitable for dipping. Just make sure it’s melted thoroughly before dipping.
Homemade Peppermint Patties are a delightful treat that’s easy to make and perfect for any occasion.
With their creamy peppermint center and rich chocolate coating, these minty sweets are a refreshing indulgence that everyone will love.
Whether you're making them for the holidays or just as a sweet snack, homemade peppermint patties are an irresistible and customizable dessert.
With just a few simple ingredients and a bit of patience, you can create a delicious homemade candy that tastes just as good (if not better) than store-bought versions.
Enjoy these delightful peppermint patties as a gift, at parties, or just as a treat for yourself!


HOMEMADE PEPPERMINT PATTIES
Ingredients
- 2 ½ cups powdered sugar
- 1 ½ tablespoon unsweetened coconut milk or milk of choice
- 2 teaspoon peppermint extract
- ¼ cup softened unsalted butter
- 8 oz dark chocolate or semi-sweet chocolate, chopped
- 1 tablespoon coconut oil optional, for smooth coating
Instructions
- In a medium bowl, combine the powdered sugar, coconut milk (or milk of choice), and peppermint extract. Stir until smooth and thick.
- Add the softened butter and mix until well combined.
- Roll the mixture into small balls (about 1 teaspoon of filling per ball), then flatten them slightly into discs using your fingers.
- Place the discs on a parchment-lined baking sheet and refrigerate for at least 30 minutes until firm.
- Meanwhile, melt the dark chocolate in a heatproof bowl over a double boiler or in the microwave, stirring every 20-30 seconds until smooth.
- Stir in the coconut oil if you want a smoother and shinier chocolate coating.
- Once the peppermint discs are firm, dip each one into the melted chocolate, coating completely. Return to the parchment paper and let any excess chocolate drip off.
- Place the chocolate-coated patties back on the baking sheet and refrigerate for 30 minutes to set the chocolate.
- Serve chilled or at room temperature and enjoy!
Notes
- For a dairy-free version, use dairy-free butter and coconut milk or almond milk.
- You can use milk chocolate if you prefer a sweeter flavor or dark chocolate for a richer, more intense taste.
- Store the peppermint patties in an airtight container in the refrigerator for up to 2 weeks.
- To make the patties more festive, dip them in white chocolate instead of dark chocolate and sprinkle with crushed candy canes.
- If you want to add a bit more texture, you can sprinkle some crushed nuts (like almonds or pistachios) on top of the chocolate coating before it hardens.
- These make great gifts! Just pack them in a cute box or jar with a ribbon for a homemade treat anyone would love.





Comments
No Comments