
I made sliders for the first time at a birthday party we threw for my husband, and I genuinely underestimated how fast twelve people can demolish a tray of mini burgers. I had made what I thought was a generous batch — twenty-four patties — and they were gone in about fifteen minutes flat. I stood there staring at an empty tray wondering if I'd imagined making them.
What I love about this recipe is how little it asks of you. The ingredient list is short, the technique is simple, and the whole thing comes together in under thirty minutes. The key is using 80/20 ground beef and not overworking the meat — I'll explain both of those things in more detail below, but those two things alone are what separate a juicy slider from a dense, sad little puck.
My husband is a proper burger person. He grew up on them and has opinions about every detail — the bun-to-patty ratio, how the cheese is melted, whether the pickles go on top or bottom. Saad, my eight-year-old, just wants ketchup and absolutely no onions. These sliders have become one of the few recipes that actually makes everyone at this table happy at the same time, which is no small thing.
One thing to know before you start: these go fast. I always make the full batch of twelve and there are rarely leftovers. If you're feeding a crowd or pairing them with lighter sides, I'd honestly suggest doubling the batch. And if you're looking for something fun to serve alongside them on a party spread, my Air Fryer Cheesy Taco Bombs work brilliantly next to these — same casual, build-your-own energy.

Why You'll Love This Recipe
- They're done in under 30 minutes: From the time I season the beef to the time I'm putting patties on buns, this takes maybe 25 minutes. The patties cook fast because they're small, the buns toast in two minutes, and you don't need any fancy equipment. On weeknights when I have zero bandwidth, this is genuinely one of my go-to options.
- Everyone builds their own: I put out a little tray of toppings — pickles, ketchup, mustard, sliced onions, lettuce — and people do whatever they want. This is what saves me at parties. I don't have to assemble twelve different sliders to order; people are happy doing it themselves. Saad gets his plain-with-ketchup version, my husband loads his with everything, and I get to actually eat mine while it's still warm.
- The cheese melts properly: I know that sounds like a small thing, but badly melted cheese on a burger is genuinely sad. The trick of adding cheese in the last 30 seconds and covering the pan with a lid — I didn't always do this and the difference is real. You get that soft, draped, slightly gooey melt instead of a cold slab sitting on top of a hot patty.
- No grill required: I make these on a heavy cast iron skillet most of the time. A regular skillet works fine too. You don't need outdoor space, you don't need to wait for charcoal to heat up, and you get a really good sear from a hot pan on the stovetop. The grilled version is great if you have one, but the skillet version is what I make 90% of the time.
- The toasted bun makes a real difference: I skipped this step once when I was rushing and immediately regretted it. A soft, untoasted slider bun gets soggy the second you add a juicy patty and any sauce. The two minutes it takes to butter and toast the buns in the pan is completely worth it — you get a little crunch, a little butteriness, and a bun that actually holds together until the last bite.
Ingredients
- 1½ lbs ground beef (80/20 blend — this fat ratio is important, don't go leaner)
- 1 teaspoon salt
- ½ teaspoon black pepper
- ½ teaspoon garlic powder
- ½ teaspoon onion powder
- 12 slider buns (I use the Kings Hawaiian dinner rolls from Costco — they're sweet and soft and work great)
- 6 slices American cheese, halved (or cheddar if you prefer a sharper flavor)
- 2 tablespoons butter, melted (for toasting buns)
- Optional toppings: pickles, ketchup, mustard, mayo, lettuce, tomato, grilled onions
Directions
- Step 1: Heat your pan or grill — Get your skillet or grill up to medium-high heat before the beef ever touches it. A hot surface is what gives you that good brown sear rather than a grey, steamed patty. I let my cast iron sit on medium-high for about two minutes before I start cooking.
- Step 2: Season and shape the patties — Place the ground beef in a bowl and add the salt, pepper, garlic powder, and onion powder. Mix gently — just enough to distribute the seasoning — then divide into 12 equal portions. Shape each into a flat round patty slightly wider than your buns, since they'll shrink a little as they cook. Press a small thumbprint indent in the center of each one; this keeps them from puffing up in the middle.
- Step 3: Cook the patties — Cook for 3-4 minutes per side over medium-high heat. Don't press them down with your spatula while they're cooking — I know it's tempting, but pressing squeezes out the juices and you end up with a drier patty. Flip once and leave them alone.
- Step 4: Add the cheese — In the last 30-60 seconds of cooking, place half a slice of cheese on each patty. Cover the pan with a lid or a large piece of foil for about 30 seconds. The trapped steam melts the cheese evenly without you having to do anything extra.
- Step 5: Toast the buns — In a separate pan (or on the same grill, pushed to a cooler zone), brush the cut sides of the buns with melted butter and toast them cut-side down for about 1-2 minutes until they're golden. Keep an eye on them — they can go from golden to burnt faster than you'd expect.
- Step 6: Assemble and serve — Place each cheesy patty on a bottom bun, add whatever toppings you like, and cover with the top bun. Serve immediately while everything is still hot and the cheese is still soft.

Tips for Success
- Don't overwork the meat: The first time I made these I mixed the seasoning in pretty thoroughly — treated it like meatballs, basically. The patties came out dense and a little tough. Ground beef for burgers needs gentle handling: add your seasoning and mix just until it's distributed, then stop. The less you work it, the more tender the final patty.
- Use 80/20 beef, not leaner: I know some people try to make burgers with 90/10 or even 93/7 ground beef because it feels healthier. The problem is that fat is where the juiciness and flavor come from. With leaner beef, the patties cook down to dry little discs. The 80/20 blend is what you want here — you can find it at any Walmart or Costco, usually labeled as "regular ground beef."
- Make the patties wider than the bun: This is something I had to learn by eating too many sliders where the patty was smaller than the bun and every bite was half bread. Shape your patties to be about half an inch wider than the bun diameter. They'll shrink as they cook and you'll end up with a patty that actually fills the bun edge to edge.
- Cook in batches if you need to: It's tempting to cram all twelve patties into one pan, but if they're touching each other they'll steam instead of sear. You want space around each patty. I cook in two batches of six — the first batch rests under foil while the second batch cooks, and they're still warm and juicy when I serve everything together.
- Prep your toppings before you start cooking: Sliders cook fast and they need to be served fast. If I'm still slicing tomatoes while the patties are sitting cooling on the pan, I've already lost. Get all your toppings out and ready before you heat the skillet — it takes five minutes and it means everything is on the table while the burgers are still hot.
Variations
- Bacon Cheeseburger Sliders: Cook a few strips of bacon until crispy, break them in half, and lay a piece on top of the cheese before you close the lid to melt it. The smoky, salty bacon with the melted cheese and soft bun is really hard to argue with. My husband's standard order is this version, always.
- Spicy Jalapeño Sliders: Swap American cheese for pepper jack and add a few thin jalapeño slices on top before you melt the cheese. If you want more heat, add a thin smear of sriracha mayo inside the bun. This is a great option for a party where you want to give people a "mild" tray and a "spicy" tray.
- BBQ Sliders: Brush the top of each patty with your favorite BBQ sauce in the last minute of cooking instead of relying on ketchup. Add a small spoonful of store-bought coleslaw on top before closing the bun. The combination of sweet BBQ, juicy beef, and cool crunchy slaw is genuinely one of my favorite things to eat in summer.
- Hawaiian Sliders: Use sweet Hawaiian rolls instead of regular slider buns — the King's Hawaiian ones from most grocery stores are exactly what you want. Add a thin slice of grilled or canned pineapple to each slider. It sounds unusual but the sweetness of the roll and pineapple against the savory beef is genuinely good. This version always gets the most questions at parties.
- Veggie Sliders: If you've got vegetarians at the table, portobello mushroom caps work surprisingly well as a patty substitute. Brush them with olive oil, season with salt and garlic powder, and grill or pan-fry for about 4-5 minutes per side. Top with Swiss cheese and you have a slider that holds its own. I'm not a vegetarian but I make a tray of these alongside the beef ones whenever my sister-in-law visits.
Serving and Storage
Serving
Serve sliders immediately off the skillet while the cheese is still soft and the buns are warm. I put the assembled patties on a tray in the center of the table and let everyone build their own from a spread of toppings. Fries work great alongside these — either homemade or a bag of frozen fries from the oven. For a lighter spread, a simple green salad or a bowl of chips rounds things out without adding much work. If you want a full party table, my Air Fryer Cheesy Taco Bombs and a platter of these sliders together disappear faster than almost anything else I've served.
Storage
Store leftover patties and buns separately — patties in an airtight container in the fridge for up to 3 days, buns in a zip-lock bag at room temperature. Reheat patties in a skillet over medium heat for 2-3 minutes per side, or in the microwave with a damp paper towel on top to keep them from drying out. You can also freeze cooked patties: wrap each one individually in plastic wrap, put them in a freezer bag, and freeze for up to 2 months. Reheat from frozen in a 350°F oven for about 15 minutes or until heated through. Don't assemble sliders and store them whole — soggy buns are genuinely depressing.

Frequently Asked Questions
Can I shape the patties ahead of time?
Yes, and I actually recommend it when I'm hosting. Shape your patties, lay them on a plate or tray, cover tightly with plastic wrap, and refrigerate for up to 24 hours. Pull them out about 10 minutes before cooking so they're not ice-cold going into the pan — a very cold patty can end up overcooked on the outside before the center is done.
Can I freeze cooked slider patties?
You can. Let the cooked patties cool completely, wrap each one individually in plastic wrap or foil, and store in a freezer bag for up to 2 months. Reheat in a 350°F oven for about 12-15 minutes or until warmed through. I'd say they're about 85% as good reheated as they are fresh — totally fine for a quick weeknight dinner, just not quite what you'd serve at a party.
What's the best cheese for sliders?
American cheese melts the best — it gets that soft, gooey drape that's classic for burgers. Cheddar is a close second and gives you a sharper flavor. Pepper jack works great for a spicier slider. Whatever you use, make sure to add it in the last 30-60 seconds of cooking and cover the pan — that's what gets you a proper melt rather than a barely-softened slice.
How do I keep the patties from puffing up in the middle?
Press a small thumbprint indent into the center of each raw patty before it goes in the pan. As the beef cooks it contracts, and without the indent the center puffs up into a dome. The indent compensates for that contraction and you end up with a flat patty that sits evenly on the bun. It's a small thing but it makes the whole slider easier to eat.
Can I bake these instead of cooking them on the stovetop?
Yes — baking is actually a great option if you're making a large batch. Arrange the shaped patties on a rimmed sheet pan, season them, and bake at 400°F for about 10-12 minutes, flipping once halfway through. You won't get the same crust as a hot skillet, but the patties cook evenly and you can do 12 at once without babysitting them. I use this method when I'm making sliders for a bigger crowd and I need my stovetop free for other things.
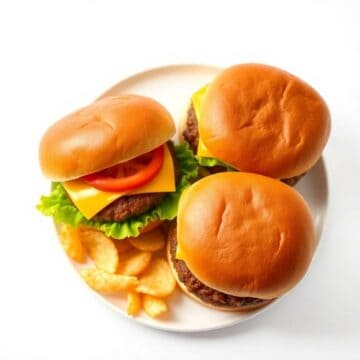
CLASSIC AMERICAN SLIDERS
Ingredients
- 1½ lbs ground beef 80/20 blend
- 1 teaspoon salt
- ½ teaspoon black pepper
- ½ teaspoon garlic powder
- ½ teaspoon onion powder
- 12 slider buns
- 6 slices American cheese halved
- 2 tablespoons butter melted
- Optional toppings: pickles ketchup, mustard, mayo, lettuce, tomato, grilled onions
Instructions
Preheat Grill or Skillet:
- Heat grill or skillet over medium-high heat.
Form Patties:
- Divide ground beef into 12 equal portions and shape into small patties slightly larger than the buns. Season both sides with salt, pepper, garlic powder, and onion powder.
Cook Patties:
- Grill or cook patties for 3–4 minutes per side, or until cooked through. During the last minute, place half a cheese slice on each patty to melt.
Toast Buns:
- Brush slider buns with melted butter and toast lightly on the grill or skillet until golden.
Assemble Sliders:
- Place each patty on a bottom bun and top with your favourite toppings. Cover with top bun and serve warm.
Notes
- Make Ahead: Shape patties in advance and refrigerate until ready to cook.
- Mini Party Bar: Serve toppings on the side so guests can build their own sliders.
- Cheese Swaps: Try cheddar, Swiss, or pepper jack for variety.
- Slider Hack: Bake patties in a sheet pan for easy bulk cooking.
- Serving Suggestion: Great with fries, chips, or a side salad.
This is one of those recipes I keep coming back to because it's genuinely low-stress. The ingredient list is short, the technique isn't complicated, and the result is something people actually get excited about. I've made these for birthdays, for game nights, for a random Tuesday when I needed dinner in twenty minutes and there was ground beef in the fridge.
What I appreciate most is that they scale up easily. I've doubled the batch without any issues — just cook in more rounds and keep the finished patties warm in a low oven (around 200°F) while you finish the rest. The toasted bun step is the one I'd tell you never to skip, even when you're in a rush. It takes two minutes and it changes the whole eating experience.
If you're building out a spread and want something sweet to finish the meal, my 15 No-Bake Summer Desserts roundup has some really easy options that don't require turning the oven on — which is exactly what you want after standing over a hot skillet making a double batch of sliders.
Make these once and you'll have the hang of it completely. After that it's just muscle memory — season, shape, sear, cheese, toast, assemble. We make them at least twice a month in this



Comments
No Comments