
I made my first Chocolate Lava Cakes for a dinner party years ago, convinced the recipe was going to be far more technically demanding than it turned out to be. What I discovered is that the molten center — the element that looks most like a professional pastry technique — is achieved simply by underbaking the center on purpose. The edges set firm and cake-like while the center stays warm and fluid. The entire technique rests on timing, and once you find the right time for your specific oven, this recipe is nearly impossible to get wrong.
What makes these taste genuinely extraordinary is the quality and quantity of the chocolate. This recipe uses bittersweet dark chocolate — at least 60% cocoa — melted with butter, combined with eggs whisked with powdered sugar until light and pale, then brought together with just enough flour to hold the outer cake structure together while leaving the interior entirely fluid. The result is intensely, uncompromisingly chocolatey — not sweet with a chocolate note, but genuinely rich dark chocolate with a barely-sweet edge that stops conversation at the table.
I make these for romantic dinners at home, dinner party dessert courses, and any occasion where I want to create a moment at the table. Inverting the ramekin and watching the molten center flow out never fails to get a reaction. For more chocolate desserts that create real impact, see my Chocolate Covered Strawberry Layer Cake and my Gooey Brownie Pie.
27 minutes total, 4 servings, and a result that looks like it came from a restaurant kitchen. Let me walk you through every step.
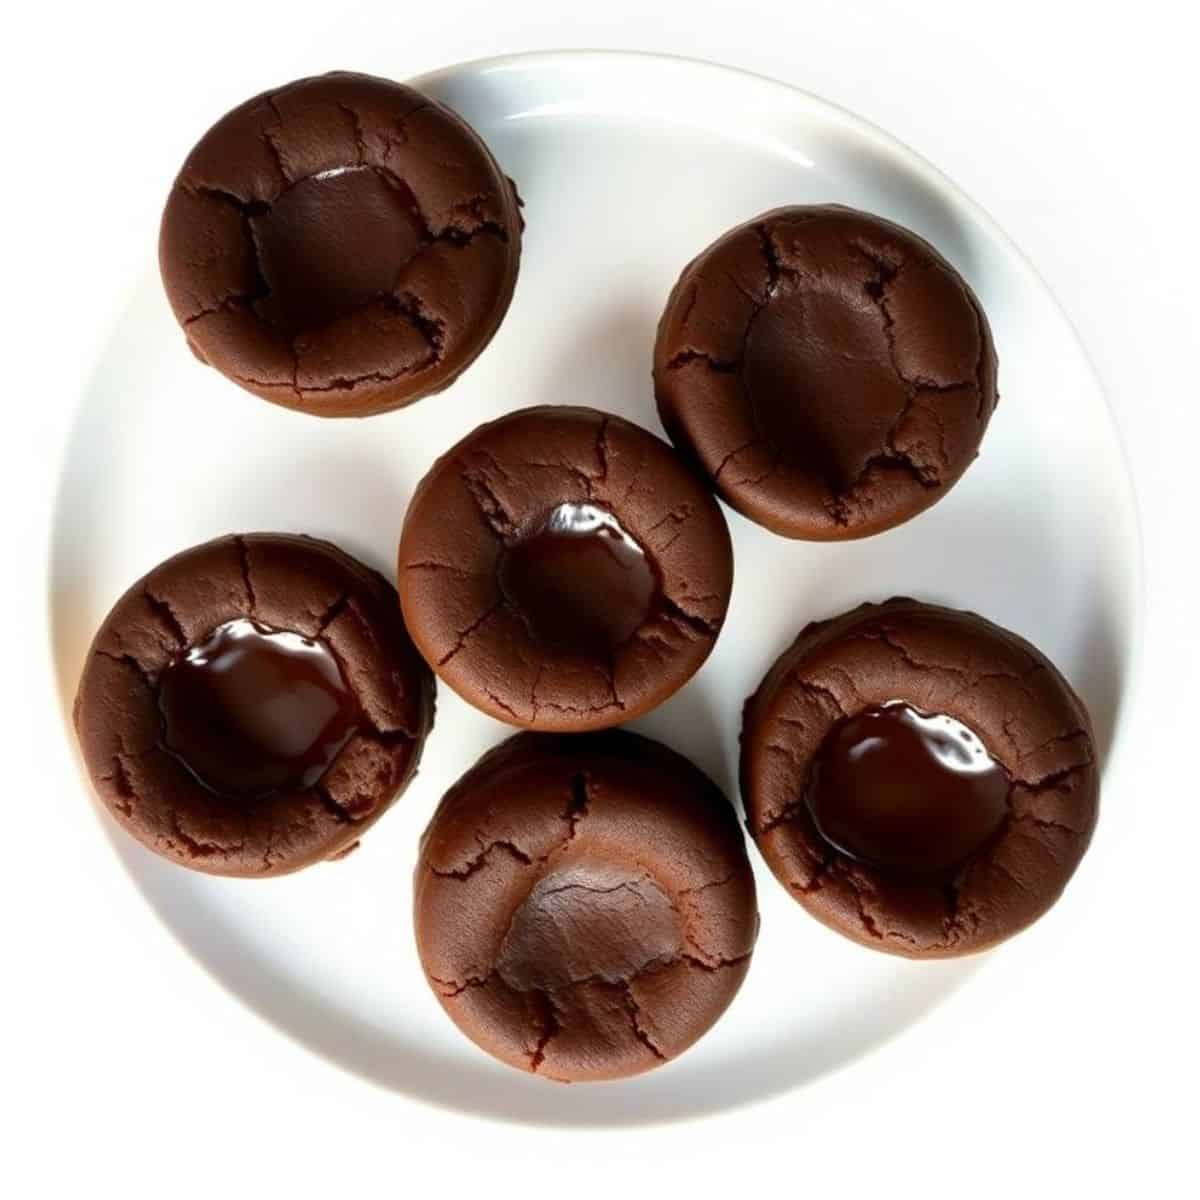
WHY YOU WILL LOVE THIS RECIPE
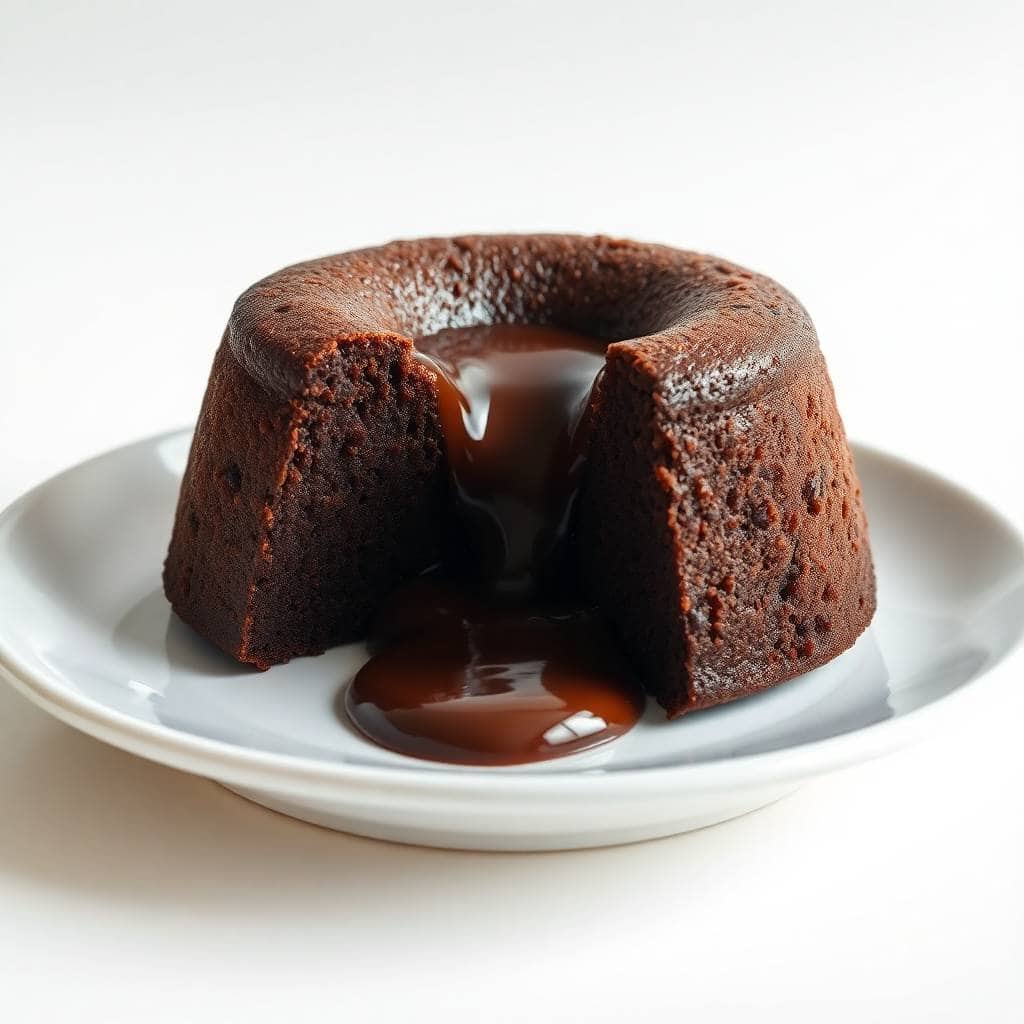
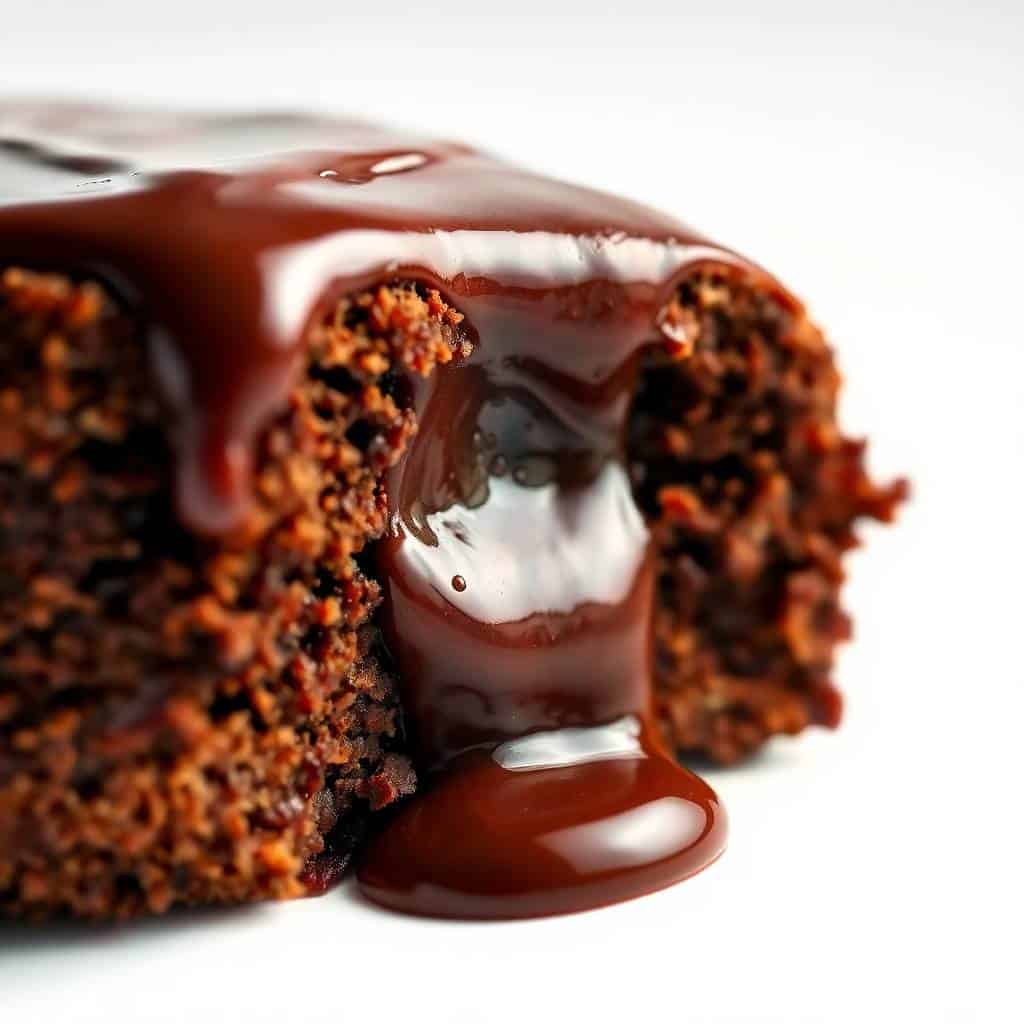
- The Molten Center Is Achievable for Any Home Baker: The flowing chocolate center that pours out when you cut into the cake looks like a complex pastry technique. It is not. It is achieved purely by precise timing — baking long enough for the exterior to set firmly but not long enough for the center to cook through. Once you identify the right bake time for your oven using the test cake method below, you can replicate this result consistently every single time.
- Intensely Chocolatey from Real Dark Chocolate: Unlike recipes that rely on cocoa powder, this recipe is built on real bittersweet dark chocolate melted with butter. The flavor is deep, rich, and genuinely complex — not simply sweet. Using at least 60% cocoa dark chocolate is essential; lower cocoa percentages produce a sweeter, blander result that misses the point of this dessert entirely.
- Make-Ahead Batter for Last-Minute Baking: The batter can be prepared hours ahead, poured into the greased ramekins, and refrigerated. When guests are finishing the main course, slide the ramekins into the preheated oven. In 12 minutes — the exact time it takes to clear the table and bring out dessert plates — the lava cakes are ready. This make-ahead window is what makes them genuinely practical for entertaining.
- Five Pantry Ingredients, Restaurant-Quality Result: Butter, dark chocolate, eggs, powdered sugar, and flour. That is the entire ingredient list beyond vanilla and salt. No specialty equipment, no pastry training, no complicated multi-step technique. Five ingredients and correct timing produce the most dramatically impressive dessert in my repertoire.
- Ready in Under 30 Minutes: From first mixing bowl to plated dessert in 27 minutes. Prep takes about 15 minutes — melting the chocolate, whisking the eggs, combining and dividing into ramekins. The bake is 12 minutes. Plating takes 1 minute. This is the fastest restaurant-quality dessert I know how to make from scratch.
- Freezer-Friendly Unbaked Batter for Future Use: Pour batter into greased ramekins, cover tightly, and freeze for up to 2 months. Bake directly from frozen at 425°F — add 2 to 3 extra minutes to the standard bake time. Lava cakes on demand with zero day-of preparation. For more go-to chocolate desserts, see my Chocolate Cookies and my Chocolate Cupcakes for Two.
INGREDIENTS
- ½ cup unsalted butter, plus extra softened butter for greasing the ramekins
- 4 oz bittersweet chocolate, at least 60% cocoa, chopped (bar chocolate gives a smoother melt than chips — do not substitute milk chocolate; the center will be too sweet and too thick)
- 1 cup powdered sugar (dissolves completely into the egg mixture for a smoother batter than granulated sugar)
- 2 large eggs
- 2 large egg yolks (the extra yolks add richness and contribute to the lava texture)
- 6 tablespoons all-purpose flour (just enough to hold the exterior together — more flour produces a fully baked center)
- 1 teaspoon vanilla extract
- Pinch of salt
- Unsweetened cocoa powder for dusting the ramekins
- Powdered sugar for dusting, vanilla ice cream, or fresh berries for serving (optional)
DIRECTIONS
- Step No.1: Prepare the Ramekins. Preheat oven to 425°F (220°C). Generously butter four 6-ounce ramekins, coating the bottom and all sides completely. Dust each ramekin with cocoa powder, tilting to coat all surfaces, then tap out the excess. This butter-and-cocoa coating is what allows the cakes to release cleanly when inverted — do not skip or rush this step. Poorly greased ramekins produce torn, stuck cakes that cannot be saved.
- Step No.2: Melt the Chocolate and Butter. Combine the butter and chopped chocolate in a microwave-safe bowl. Microwave in 20-second increments, stirring thoroughly between each, until fully melted and completely smooth. Alternatively, melt over a double boiler on the stovetop over low heat, stirring constantly. Let the mixture cool for about 5 minutes before proceeding — adding it hot to the eggs will scramble them.
- Step No.3: Whisk the Eggs and Sugar. In a large bowl, whisk together the eggs, egg yolks, and powdered sugar vigorously until the mixture is slightly thickened, pale yellow, and completely smooth — about 1 to 2 minutes by hand. This step ensures the powdered sugar is fully dissolved and incorporates a small amount of air into the batter that helps the exterior set properly during baking.
- Step No.4: Combine the Mixtures. Pour the slightly cooled chocolate-butter mixture into the egg-sugar mixture and stir gently until just combined and smooth. Add the vanilla extract and a pinch of salt. Fold in the flour just until no dry streaks remain — do not overmix. The batter should be glossy, smooth, and pourable.
- Step No.5: Fill the Ramekins. Divide the batter evenly among the four prepared ramekins — they should be about three-quarters full. At this point the ramekins can be baked immediately or covered with plastic wrap and refrigerated for up to several hours. If refrigerating, remove from the fridge 15 minutes before baking to take the chill off slightly.
- Step No.6: Bake and Serve Immediately. Place the ramekins on a baking sheet and bake at 425°F for 12 minutes. The edges should look set and be pulling away slightly from the sides of the ramekin. The centers should still look slightly jiggly when the pan is gently shaken. Remove from the oven, rest for exactly 1 minute, then run a thin knife around the inside edge of each ramekin, invert onto individual serving plates, lift the ramekin, and serve immediately with a dusting of powdered sugar or a scoop of vanilla ice cream alongside.
TIPS FOR SUCCESS
- Use High-Quality Dark Chocolate — Not Chips: The chocolate is the primary flavor and its quality is immediately perceptible in the finished cake. Use bittersweet bar chocolate with at least 60% cocoa, chopped into pieces. Chips contain stabilizers that prevent smooth melting and can produce a slightly grainy batter. The chocolate you choose determines the entire flavor of this dessert — use the best you have.
- Bake One Test Cake First: This is the single most important tip for this recipe. Every oven runs differently and the difference between a perfectly molten center and a fully baked one can be just 1 to 2 minutes. Bake a single test ramekin first and check the center after inverting. If it is fully set with no flow, reduce the bake time by 1 minute for the remaining cakes. Once you have your oven's number, this recipe is completely reliable.
- Grease the Ramekins Thoroughly — Every Surface: A poorly greased ramekin will stick and the cake will tear rather than release cleanly when inverted. Use softened butter — not melted, which drips before it can coat properly — applied generously to every surface including the rim. After buttering, dust completely with cocoa powder so every surface is coated. Tap out the excess. When done correctly, the inverted cake slides out in one clean motion.
- Never Overbake: The molten center is achieved specifically by removing the cakes while the center is still liquid. Once the interior cooks through, you have a regular chocolate cake — perfectly edible but not what this recipe is designed to be. If you are unsure, always err toward underbaking by 1 minute rather than overbaking. An underbaked lava cake still has a warm, fudgy center. An overbaked one is simply a dense chocolate cake.
- Rest for Exactly 1 Minute Before Inverting: Inverting the ramekin immediately from the oven risks the outer cake being too fragile to hold together on the plate. A 1-minute rest allows the exterior to firm up just enough to release cleanly. More than 2 minutes allows the center to begin setting — the window is narrow but consistent once you know your timing.
- Serve Immediately — Have Everything Ready Before Baking: The molten center continues to set from residual heat even after the ramekin is removed from the oven. The window between perfect lava and an overset center is about 3 to 4 minutes after inverting. Have your plates warmed, your garnishes prepped, and your guests seated before you pull the ramekins out of the oven.
VARIATIONS
- Espresso-Infused Lava Cakes: Dissolve ½ teaspoon of instant espresso powder into the melted chocolate-butter mixture before combining with the eggs. Espresso amplifies the chocolate flavor significantly without making the cakes taste like coffee — the finished cake tastes more intensely, deeply chocolatey than the original. This is my standard addition and I use it in every batch I make.
- Peanut Butter Center: Before baking, press a frozen teaspoon of peanut butter into the center of each filled ramekin just below the surface of the batter. During baking the peanut butter stays soft and becomes the "lava" rather than the chocolate. The combination of warm chocolate cake and a peanut butter center is one of the most satisfying dessert combinations I have ever made. See my Chocolate Peanut Butter Cookies for another version of this pairing.
- Orange Chocolate Lava Cakes: Add 1 teaspoon of freshly grated orange zest to the batter along with the vanilla extract. The citrus brightens the richness of the dark chocolate and adds an aromatic complexity that makes each bite feel more layered. A classic pairing that works especially well with 70% or higher cocoa chocolate and pairs beautifully with a small scoop of orange sorbet alongside.
- White Chocolate Lava Cakes: Replace the dark chocolate entirely with good-quality white chocolate. White chocolate lava cakes are sweeter, creamier, and more delicate in flavor — they pair beautifully with fresh raspberries and a dusting of freeze-dried raspberry powder for a visually striking and well-balanced dessert that is quite different in character from the original.
- Spiced Chocolate: Add ½ teaspoon of ground cinnamon and a very small pinch of cayenne pepper to the dry ingredients. The warm spices amplify the chocolate and create a Mexican chocolate-inspired version with a lingering gentle heat that builds after each bite. The spice is subtle but unmistakable and makes this variation feel genuinely distinctive. Serve with a scoop of cinnamon ice cream for a complete flavor story.
SERVING AND STORAGE
Serving
Serve immediately after inverting onto plates while the center is still warm and flowing. A scoop of good vanilla ice cream placed alongside — not on top, where it would melt too fast — creates a hot-and-cold contrast that is one of the best dessert experiences there is. Fresh raspberries or sliced strawberries add color and a fruity tartness that cuts through the richness beautifully. A dusting of powdered sugar over the top completes the presentation with minimal effort.
Storage
Lava cakes are best served immediately — the molten center sets as the cakes cool and cannot be restored once fully firm. Baked leftovers can be covered and refrigerated for up to 1 day; reheat gently in the microwave for 20 to 30 seconds, noting the center will be set rather than molten on reheating. To freeze for future use, pour unbaked batter into greased ramekins, cover tightly with plastic wrap, and freeze for up to 2 months. Bake directly from frozen at 425°F, adding 2 to 3 extra minutes to the standard bake time.
Yes — preparing the batter ahead is one of the best features of this recipe for entertaining. Make the batter, pour into the greased and cocoa-dusted ramekins, cover tightly with plastic wrap, and refrigerate for up to several hours. Remove from the refrigerator 15 minutes before baking to take the chill off slightly. Bake as directed, adding 1 extra minute to compensate for the slightly cooler batter. This is exactly how I make them for dinner parties every time.
A fully baked center almost always means the cakes were overbaked by 1 to 2 minutes. Every oven runs at a slightly different actual temperature versus what the dial says, and the difference between molten and fully set can be as little as 1 minute. Always bake a single test ramekin first before committing the full batch — if the center is fully set, reduce bake time by 1 minute for the rest. Also verify your oven is actually reaching 425°F using an oven thermometer.
Ramekins are strongly recommended because their tall straight sides create the correct ratio of exterior-to-center during baking. A well-greased muffin tin works as a substitute — fill each cavity about two-thirds full and reduce the bake time by 1 to 2 minutes since the shallower depth changes heat distribution. The cakes will be shorter and slightly less dramatic when inverted but will still have a molten center if timed correctly.
Bittersweet dark chocolate with at least 60% cocoa content is the standard. 70% or 72% produces a more intensely chocolatey, less sweet result that serious chocolate lovers strongly prefer. Do not use milk chocolate — it is too sweet and the center does not have the right fluid consistency when molten. Bar chocolate melts more smoothly than chips and is the right choice here for the smoothest possible batter and the cleanest lava flow.
Yes — freeze unbaked batter in greased and cocoa-dusted ramekins, covered tightly with plastic wrap, for up to 2 months. Bake directly from frozen at 425°F, adding 2 to 3 extra minutes to the standard 12-minute time. The molten center effect works just as well from frozen batter as from fresh, making this one of the most practical freezer desserts you can keep on hand. Do not freeze baked lava cakes — the texture suffers significantly on reheating and the molten center cannot be restored.
Chocolate Lava Cakes are the dessert that earns the most reactions of anything I make — and once you understand that the technique is simply about precise timing rather than complex skill, you will make these on repeat. The test cake method takes the uncertainty out of it entirely and gives you a reliable result every single time.
Leave a comment below and tell me what you served alongside yours — vanilla ice cream is the classic answer but I love hearing what people try! For more decadent chocolate desserts, see my Chocolate Covered Strawberry Layer Cake, my Dark Chocolate and Strawberry Cupcakes, and my 33 Best Valentine's Day Desserts.
CHOCOLATE LAVA CAKES
Ingredients
For the Lava Cakes:
- ½ cup unsalted butter plus extra for greasing
- 4 oz bittersweet chocolate chopped
- 1 cup powdered sugar
- 2 large eggs
- 2 egg yolks
- 6 tablespoon all-purpose flour
- 1 teaspoon vanilla extract
- powdered sugar for dusting optional
Instructions
Prep Ramekins:
- Preheat oven to 425°F (220°C). Grease four 6-ounce ramekins with butter and dust with cocoa powder.
Melt Chocolate:
- Melt butter and chocolate together in a microwave or double boiler until smooth. Let cool slightly.
Prepare Batter:
- Whisk eggs, egg yolks, powdered sugar, and vanilla until light and thick. Fold in chocolate mixture and flour gently.
Fill Ramekins:
- Divide batter evenly among prepared ramekins.
Bake and Serve:
- Bake for 12 minutes until edges are firm but centers are soft. Let sit 1 minute, then invert onto plates.
Garnish:
- Dust with powdered sugar or serve with ice cream if desired.
Notes
- Make Ahead: Batter can be prepared and refrigerated for a few hours.
- Variations: Add a pinch of espresso powder for richer chocolate flavor.
- Serving Suggestions: Serve warm with vanilla ice cream or berries.
- Allergy-Friendly: Use dairy-free chocolate and butter substitutes if needed.
- Storage Tips: Best served immediately; leftovers can be refrigerated for 1 day but centers may firm up.





Comments
No Comments