
The first time I made Chocolate Cookies from scratch, I was convinced I needed a complicated recipe with a 24-hour chill time and specialty ingredients. I was completely wrong. These cookies — built on basic pantry staples with no overnight rest required — deliver a fudgy, deeply chocolatey result that tastes like the best part of a brownie in handheld, chewy-cookie form. I have been making this same recipe ever since that first batch disappeared within an hour of cooling.
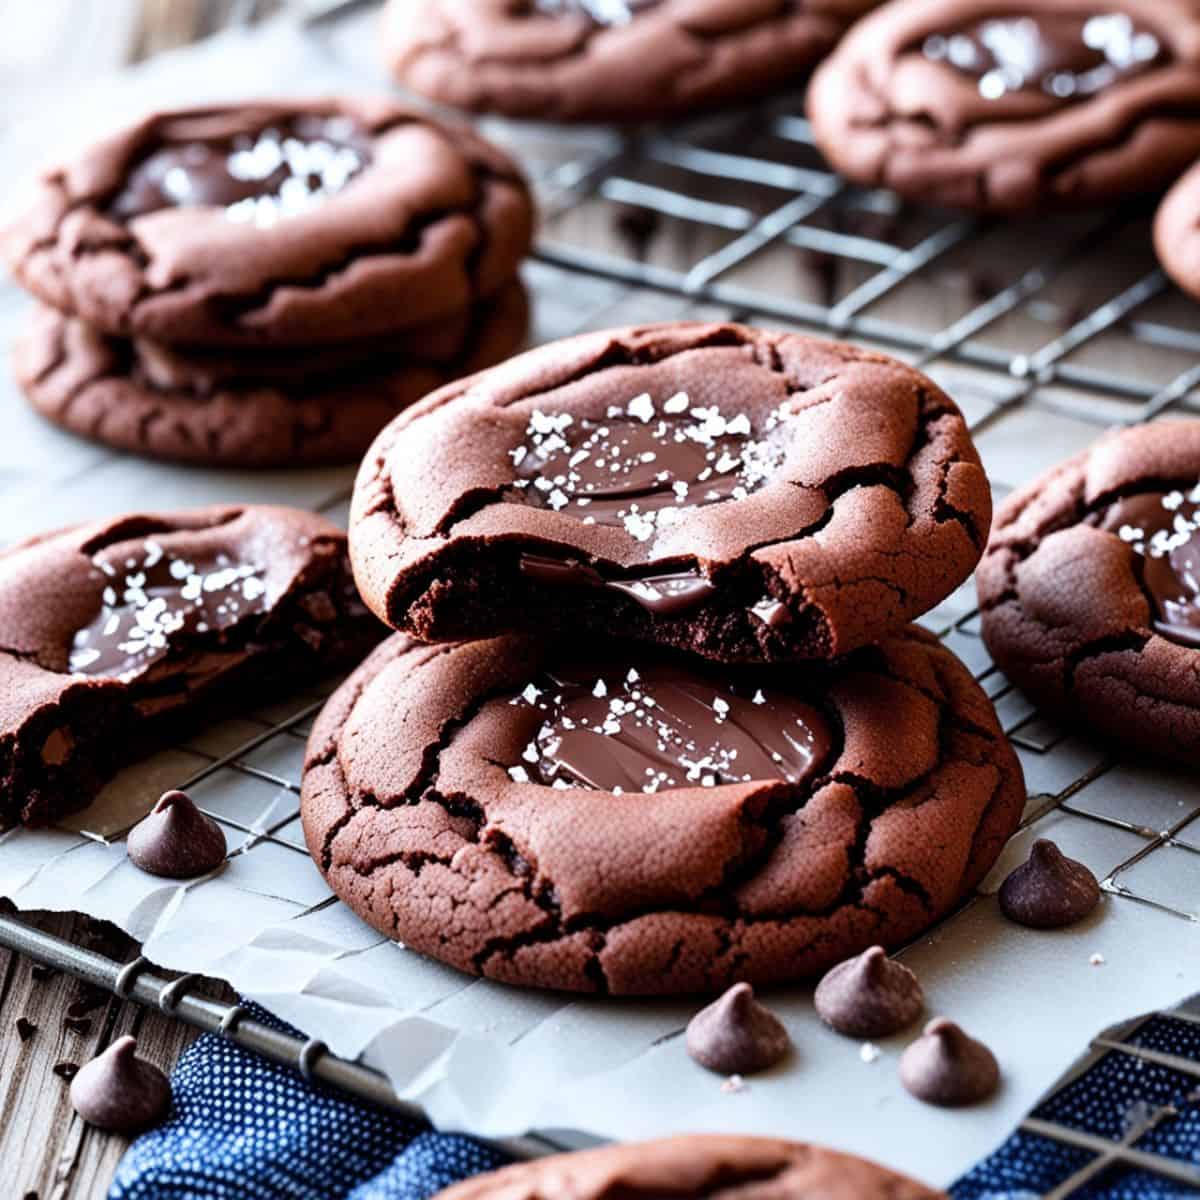
What makes these genuinely different from a standard chocolate chip cookie is the ratio of cocoa powder to flour. A full half cup of unsweetened cocoa creates a denser, richer dough — more fudge than cake — before a single chip is folded in. The semi-sweet chips melt into pockets of soft chocolate during baking that firm up just enough as they cool to give you that pull-apart chew. The optional dark chocolate chunks make it even more indulgent.
I bake a batch of these any time we have guests and they disappear within the hour every single time. My kids request them for after-school snacks, my husband eats them straight off the pan, and I have brought them to enough gatherings to know they are always the first thing gone from the dessert table. They pair beautifully with cold milk, coffee, or a scoop of vanilla ice cream for a proper dessert. For more chocolate baking ideas, try my Chocolate Chunk Pecan Pudding Cookies and my Maraschino Cherry Chocolate Chip Cookies.
Ready in under 30 minutes, no chilling required, and entirely foolproof. Let me show you exactly how to make them.
WHY YOU WILL LOVE THIS RECIPE
- Fudgy Brownie-Like Texture in Every Bite: The high cocoa-to-flour ratio creates a denser, chewier cookie than a standard recipe — soft and fudgy at the center with slightly crisp edges. Even after fully cooling, the centers stay soft in the way a brownie edge does. I have tested this recipe at different ratios and this is the one that consistently produces the texture I want.
- Real Cocoa Depth — Not Just Sweet: These taste genuinely chocolatey rather than simply sugary. The unsweetened cocoa provides the backbone of flavor, and the semi-sweet chips add pockets of melted chocolate rather than additional sweetness. Good-quality cocoa — Dutch-process or natural — makes a real, noticeable difference in the depth of flavor compared to any boxed mix.
- Ready in Under 30 Minutes: No chilling, no resting, no complicated steps. From mixing bowl to cooling rack in about 25 minutes — 10 minutes to make the batter and 8 to 10 minutes to bake. This is my go-to recipe when I need something homemade fast and it never lets me down.
- Endlessly Customizable with Mix-Ins: The base dough is a canvas. I fold in dark chocolate chunks for extra pools of melted chocolate, chopped walnuts for crunch, or press flaky sea salt onto the tops before baking for a sweet-salty contrast that is genuinely addictive. You can also swap the chips for white chocolate, peanut butter chips, or dried cherries for a completely different cookie from the same base. Also try my Chocolate Peanut Butter Cookies for another variation.
- Freezer-Friendly Dough for Anytime Baking: I almost always make a double batch and freeze half the dough balls on a sheet pan, then transfer to a bag once solid. They bake directly from frozen in 12 to 13 minutes — fresh cookies on demand with zero extra effort. This is my standard approach and there is always cookie dough ready in my freezer.
- Reliably Consistent Every Single Time: I have made this recipe more times than I can count and it has never failed me. The measurements are forgiving, the technique is simple, and the result is consistent. For more ideas from my dessert collection, see my 27 Easy Homemade Cake Recipes and my Gooey Brownie Pie.
INGREDIENTS
- 1 ¾ cups all-purpose flour (spoon-and-level to avoid packing; too much flour creates dry, crumbly cookies)
- ½ cup unsweetened cocoa powder (Dutch-process gives deeper color and smoother flavor; natural cocoa gives a sharper, more acidic chocolate note — both work well)
- 1 teaspoon baking soda
- ½ teaspoon salt
- ½ cup unsalted butter, softened to room temperature (room temp butter creams properly; cold butter won't incorporate air; warm or melted butter makes flat cookies)
- 1 cup granulated sugar
- 1 large egg
- 1 teaspoon vanilla extract
- 1 cup semi-sweet chocolate chips
- ¼ cup dark chocolate chunks, optional (adds extra pockets of melted chocolate and a more dramatic visual)
DIRECTIONS
- Step No.1: Preheat and Prep. Preheat your oven to 350°F (175°C). Line two baking sheets with parchment paper. Parchment prevents sticking and promotes even browning on the bottom — do not substitute foil, which conducts heat too aggressively and burns the bottoms.
- Step No.2: Mix the Dry Ingredients. In a medium bowl, whisk together the flour, cocoa powder, baking soda, and salt until fully combined with no cocoa clumps remaining. Sifting the cocoa first is optional but eliminates any lumps that can create uneven color and texture.
- Step No.3: Cream Butter and Sugar. In a large mixing bowl, beat the softened butter and granulated sugar together until light, fluffy, and noticeably paler — about 2 to 3 minutes with a hand mixer. This step incorporates air into the dough and is what gives the cookies their lift and tender crumb. Do not rush it.
- Step No.4: Add Egg and Vanilla. Add the egg and vanilla extract to the butter mixture and beat until fully combined and smooth. The dough will look slightly glossy at this stage — that is correct.
- Step No.5: Combine and Fold. Gradually add the dry ingredients to the wet mixture, stirring until no dry flour streaks remain. Mix just until combined — overmixing develops gluten and produces tough cookies. Fold in the chocolate chips and optional dark chunks.
- Step No.6: Portion and Bake. Scoop tablespoon-sized portions of dough, roll into balls, and place on the prepared baking sheets with about 2 inches between each. Flatten the tops slightly with the back of a spoon. Bake for 8 to 10 minutes — edges should be set, centers should still look slightly underdone. They will firm up during the resting period on the pan.
- Step No.7: Rest and Cool. Let the cookies rest on the baking sheet for 5 full minutes before transferring to a wire rack. The cookies finish setting during this period — moving them too early causes them to fall apart. Best served warm when chips are still soft, but equally good at room temperature.

TIPS FOR SUCCESS
- Spoon-and-Level Your Flour: Scooping the measuring cup directly into the flour bag packs it and can add up to 25% extra flour, resulting in dry, crumbly cookies. Spoon flour into the cup and level with a straight edge. This single habit makes the biggest difference in final texture.
- Chill If the Dough Is Too Soft: In warm kitchens, butter can soften the dough to the point where cookies spread too thin and flat in the oven. If the dough feels very soft or sticky after mixing, refrigerate for 20 to 30 minutes before portioning. Cold dough holds its shape better and produces taller, thicker cookies.
- Pull Them Out While Centers Look Underdone: This is the most important tip for chewy cookies. The centers should look slightly soft and matte — not wet, but not fully set — when you remove them from the oven. Carryover heat finishes the job during the 5-minute rest. Cookies that look done in the oven will be overbaked and dry once cooled.
- Add a Teaspoon of Instant Espresso Powder: A small amount dissolved into the batter does not make the cookies taste like coffee — it deepens the chocolate flavor significantly. This is a trick I use in every chocolate bake I do and the difference in depth is noticeable every single time.
- Bake One Test Cookie First: Ovens vary significantly and the difference between 8 and 11 minutes can mean the difference between fudgy and dry. I always bake a single test cookie to calibrate timing for my specific oven before committing the full batch. It takes 10 extra minutes and can save an entire bake.
- Press Flaky Sea Salt on Top Before Baking: A pinch of flaky sea salt pressed onto each dough ball before the oven creates a sweet-salty contrast that elevates these from good to genuinely extraordinary. I started doing this after tasting a bakery version and wondering what made theirs taste different — this was the entire answer.
VARIATIONS
- Double Chocolate: Add an extra tablespoon of cocoa powder to the dough and replace half the semi-sweet chips with white chocolate chips. The contrast between the dark cocoa base and the sweet white chocolate is striking visually and in flavor — a more dramatic, bakery-style result from the same simple base.
- Nutty Chocolate: Fold in ½ cup of coarsely chopped walnuts, pecans, or toasted almonds along with the chips. Toast the nuts first in a dry pan for 3 to 4 minutes to bring out their natural oils — the flavor improvement is significant. The crunch against the fudgy cookie is one of my favorite texture combinations in any bake. Also try my Chocolate Chunk Pecan Pudding Cookies.
- Mint Chocolate: Add ½ teaspoon of pure peppermint extract alongside the vanilla. The cooling mint cuts through the richness of the cocoa and makes these particularly popular around the holidays. Replace the semi-sweet chips with chocolate mint chips for an even stronger result.
- Gluten-Free: Swap the all-purpose flour for a 1:1 gluten-free flour blend containing xanthan gum. Add 1 tablespoon of cornstarch alongside the flour blend to replicate the chewiness that gluten normally provides. The texture will be slightly softer but the flavor holds up very well.
- Chunky Chocolate: Use chopped chocolate bars instead of chips entirely. Bar chocolate contains more cocoa butter than chips and melts into larger, more dramatic pools of chocolate in the bake rather than holding a chip shape. Every bite becomes more indulgent — a worthwhile upgrade for a special occasion batch.
SERVING AND STORAGE
Serving
Serve warm from the oven while chips are still soft, or at room temperature once fully cooled. They pair beautifully with cold milk, coffee, or a scoop of vanilla ice cream pressed between two cookies for a simple ice cream sandwich. For a full chocolate dessert spread, serve alongside my Chocolate Lava Cakes and my Big Chocolate M&M Cookies.
Storage
Store baked cookies in an airtight container at room temperature for up to 5 days — the cocoa retains moisture well and they stay soft throughout. To freeze baked cookies, layer between sheets of parchment in a sealed bag for up to 3 months; thaw at room temperature for 20 minutes. For the freshest possible result, freeze raw dough balls and bake directly from frozen at 350°F for 12 to 13 minutes — identical in taste to a freshly mixed batch.
Yes, and it is worth trying. Brown sugar adds molasses which deepens the flavor and makes the cookies slightly chewier and more moist. You can swap all the granulated sugar for brown sugar, or use half of each — half granulated for structure and spread, half brown for flavor and chew. The cookies will be slightly darker and noticeably richer in flavor.
Yes — melted and cooled coconut oil can substitute 1:1 for the butter. The texture will be slightly different; coconut oil produces a crisper, thinner cookie since it does not cream air the way butter does. Make sure the coconut oil is fully melted and cooled to room temperature before adding to the batter to avoid scrambling the egg.
The edges should look set and dry while the centers still look slightly soft and matte — not wet, but not fully firm. The cookies continue to cook on the hot pan during the 5-minute rest after the oven, so they should not look done when you pull them out. Cookies that look fully set in the oven will be dry and overbaked once they cool.
Absolutely — this is the best way to always have fresh cookies available. Scoop into balls, freeze on a parchment-lined sheet until solid, then transfer to a sealed bag. Bake directly from frozen at 350°F for 12 to 13 minutes with no thawing needed. The result is identical to freshly made dough and the frozen balls keep for up to 3 months.
Flat cookies are almost always caused by butter that was too soft or melted before creaming, a dough that was too warm, or too little flour. Make sure butter is softened to room temperature — cool enough to hold a fingerprint but not shiny. If your kitchen is warm and the dough feels soft, refrigerate for 20 to 30 minutes before baking. Also check that your baking soda is fresh — expired leavening produces flat, dense results.
These Chocolate Cookies are the recipe I return to again and again — fudgy centers, crisp edges, deep cocoa flavor, and that pull-apart chew that makes it impossible to stop at one. All the tips above cover every common pitfall so your first batch comes out exactly right.
Leave a comment below and let me know which variation you tried. For more cookie baking, see my NYC Red Velvet Cookies, my Rice Krispie Chocolate Chip Cookies, and my Peanut Butter Caramel Cookies.

CHOCOLATE COOKIES
Ingredients
- 1 ¼ cups all-purpose flour
- ½ teaspoon baking soda
- ¼ teaspoon salt
- ½ cup unsalted butter softened
- 1 cup granulated sugar
- 1 large egg
- 1 teaspoon large egg
- ½ cup unsweetened cocoa powder
- ½ cup chocolate chips
Instructions
- Preheat the oven to 350°F (175°C).
- In a small bowl, whisk together flour, baking soda, and salt.
- In a large bowl, cream together the softened butter and granulated sugar until light and fluffy.
- Add the egg and vanilla extract, and mix until combined.
- Gradually stir in the dry ingredients and cocoa powder, mixing until just combined.
- Fold in chocolate chips.
- Scoop tablespoon-sized portions of dough and place them onto a baking sheet, leaving space between each cookie.
- Bake for 10-12 minutes or until the edges are set but the centers are still soft.
- Allow cookies to cool on the baking sheet for a few minutes before transferring them to a wire rack to cool completely.
Notes
- Make Ahead: You can prepare the dough ahead of time and refrigerate for up to 3 days or freeze for up to 3 months. Bake directly from the fridge or freezer, adding a couple of extra minutes to the baking time.
- Customizing the Flavor: For a richer flavor, add a teaspoon of instant coffee granules to the dough. You can also mix in chopped nuts or swap the chocolate chips for white chocolate or peanut butter chips.
- Serving Suggestions: These cookies are great served with a glass of milk or paired with ice cream for a cookie sandwich. You can also enjoy them on their own as a treat.
- Allergy-Friendly Options: To make these cookies dairy-free, substitute the butter with a dairy-free alternative, and use dairy-free chocolate chips. For gluten-free cookies, swap the all-purpose flour with a gluten-free flour blend.
- Storage Tips: Store the cookies in an airtight container at room temperature for up to 1 week. For longer storage, freeze the cookies for up to 3 months.






Comments
No Comments