
I made these for Valentine's Day last year on a whim, and the batch of eight giant cookies was gone by the next morning. Not because I shared them generously — mostly because Saad kept walking past the counter and breaking off pieces "just to check if they were still good." They were. They very much were.
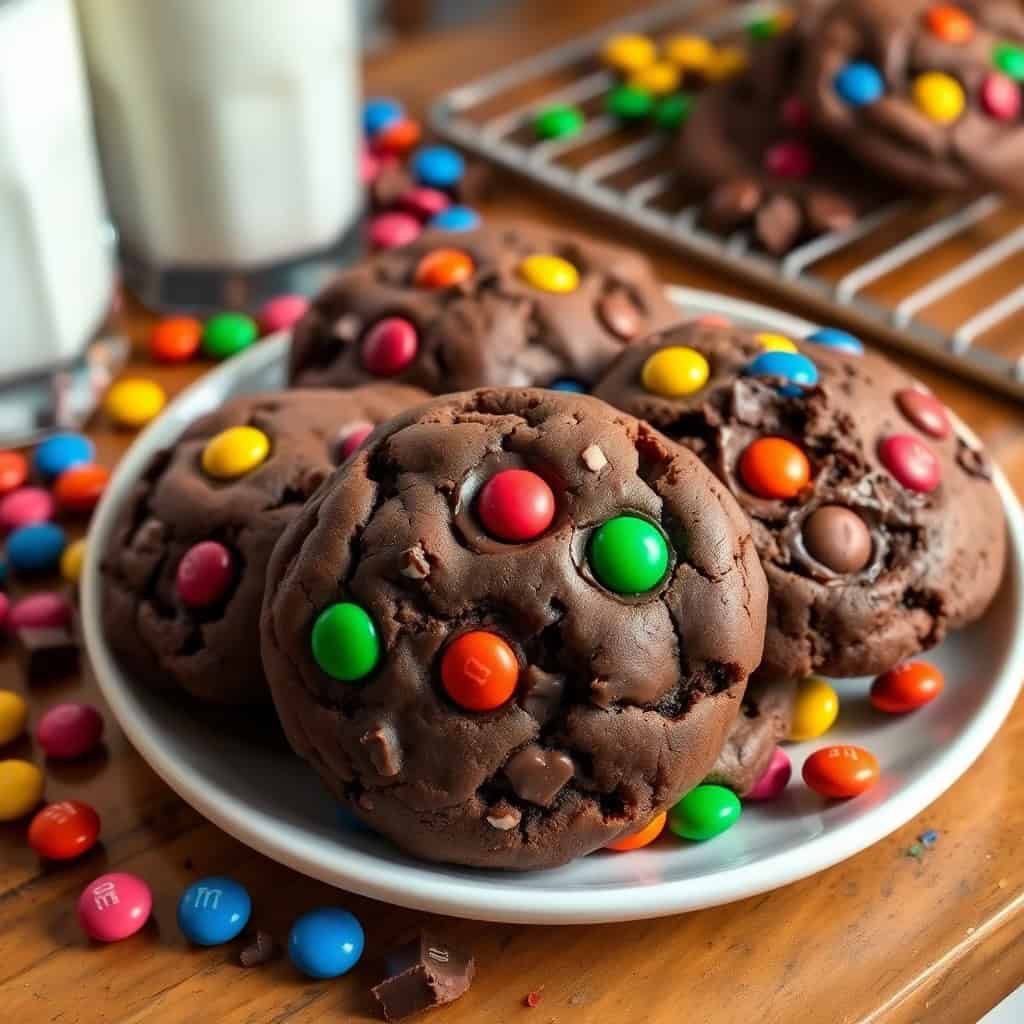
What I like about this recipe is that it's not trying to be subtle. There are chocolate chips in the dough and M&Ms pressed into the top, and the cookies are big enough that you actually get a proper chewy center with crisp edges in the same bite. I've made plenty of chocolate chip cookies over the years — including my Maraschino Cherry Chocolate Chip Cookies which my husband is obsessed with — but these Valentine's Day ones have become the February tradition in our house. The red and pink M&Ms make them feel festive without any extra effort.
The one thing I'll warn you about upfront: the dough needs to chill. At least 2 hours, ideally overnight. I know that's annoying when you want cookies now, but I skipped it the first time I made these and they spread into flat chocolate puddles. Thin and crispy is not what we're going for here. Make the dough the night before and you'll thank yourself.
I use a large cookie scoop — the kind that holds about ¼ cup of dough — and I space them well apart on the pan because they do spread even with the chilling. You'll get about 12 to 14 cookies from a batch, which sounds like a lot until you realize how fast they disappear. I usually make a double batch and freeze half the dough balls so I can bake fresh cookies any time without starting from scratch.

Why You'll Love This Recipe
- Two kinds of chocolate in every bite: There are semi-sweet chocolate chips melted into the dough itself, plus the M&Ms on top give you that candy-shell crunch. If you want to go even further, the optional dark chocolate chunks add a slightly bitter depth that keeps these from being one-note sweet. I almost always add them.
- Giant size means a real chewy center: Small cookies cook through too fast — you end up with uniform crunch all the way across. With ¼ cup of dough per cookie, the edges set and go slightly crisp while the middle stays soft and dense. That contrast is the whole point. Don't be tempted to make them smaller unless you're okay with a different texture.
- The dough freezes beautifully: I scoop the chilled dough into balls, freeze them solid on a baking sheet, then transfer to a zip-lock bag. On any random Tuesday when someone (Saad) decides he needs cookies urgently, I pull out three or four frozen balls, bake from frozen with a couple of extra minutes, and they come out just as good as fresh. It's one of my favorite kitchen shortcuts.
- Valentine's Day M&Ms are easy to find: Walmart, Target, and most grocery stores stock the red and pink M&Ms from late January through February 14th. Costco sometimes sells them in bigger bags if you want to make multiple batches. Outside of February, regular M&Ms work perfectly — the red ones just make it feel more Valentine's-appropriate.
- No stand mixer required: I don't own a $400 KitchenAid. I use a handheld electric mixer I got from Walmart for about $20, and it does the job fine. If you don't even have that, you can cream softened butter and sugar by hand with a wooden spoon — it takes about 5 minutes of elbow grease but it works.
Ingredients
- 1 cup (2 sticks) unsalted butter, softened but still slightly cool
- ¾ cup granulated sugar
- ¾ cup packed light brown sugar
- 2 large eggs
- 2 teaspoons vanilla extract
- 2¼ cups all-purpose flour
- 1 teaspoon baking soda
- 1 teaspoon salt
- 1 cup semi-sweet chocolate chips
- 1 cup milk chocolate M&Ms (Valentine's Day themed if you can find them)
- ½ cup dark chocolate chunks (optional, but I almost always add these)
Directions
- Cream the butter and sugars: In a large bowl, beat the softened butter, granulated sugar, and brown sugar together for about 2 to 3 minutes until light and fluffy. The butter should be soft but not greasy or melted — slightly cool butter gives the cookies more structure so they don't flatten out in the oven.
- Add eggs and vanilla: Beat in the eggs one at a time, then mix in the vanilla extract. Scrape down the sides of the bowl and mix again briefly so everything is evenly combined.
- Mix the dry ingredients: In a separate bowl, whisk together the flour, baking soda, and salt. Doing this separately means the baking soda gets evenly distributed before it hits the wet ingredients.
- Combine wet and dry: Add the dry ingredients to the wet ingredients gradually, mixing on low speed until just combined. Stop as soon as you don't see dry flour anymore — overmixing develops the gluten and makes cookies tough instead of tender.
- Fold in the chocolate: Stir in the chocolate chips, M&Ms, and dark chocolate chunks if using. Reserve about ½ cup of M&Ms to press onto the tops of the cookies before baking — it makes them look much better and ensures you get M&Ms in every visible bite.
- Chill the dough: Cover the bowl with plastic wrap and refrigerate for at least 2 hours, or overnight if you can manage it. This step is not optional — chilling firms the fat in the dough so the cookies hold their shape and don't spread into pancakes. It also deepens the flavor.
- Preheat and prep: When you're ready to bake, preheat the oven to 375°F (190°C) and line your baking sheets with parchment paper. Let the dough sit out for 5 to 10 minutes so it's scoopable.
- Scoop and top: Use a large cookie scoop (about ¼ cup of dough) and place the balls at least 3 inches apart on the lined baking sheet — these spread. Press a few of the reserved M&Ms onto the top of each dough ball so they sit right on the surface.
- Bake: Bake for 12 to 15 minutes, until the edges are golden brown and set but the centers still look slightly underdone. They'll firm up as they cool. Pulling them out a minute or two early is what keeps them chewy — once the center looks fully set in the oven, you've gone too far.
- Cool: Let the cookies rest on the baking sheet for at least 5 minutes before moving them — they're fragile straight out of the oven. Transfer to a wire rack and let them cool for another 10 minutes before eating, or as long as you can stand to wait.
Tips for Success
- Don't skip the chill: I know I already said this in the directions, but it's worth repeating because I ignored it the first time and genuinely regretted it. The cookies spread so thin they were basically chocolate lace. The chill firms up the butter so the dough holds its shape in the oven. Two hours minimum, overnight is better.
- Butter temperature matters: "Softened" means it holds a thumbprint but doesn't squish through your fingers. If your butter is too warm or actually melted, even chilling the dough won't fully save you — the cookies will still spread more than you want. I take my butter out of the fridge about 30 to 45 minutes before I start, depending on how warm my kitchen is.
- Bake one test cookie first: Every oven is different. My oven runs hot, so I always bake one cookie alone first to check the timing before committing the whole batch. It's a small thing but it's saved me from over-baking a full tray more than once. The test cookie also lets you check if your dough is at the right consistency after chilling.
- Pull them out when they look underdone: The center should look a little soft and shiny when you open the oven door. That's correct. Carryover heat from the pan finishes the baking as they cool. I made the mistake of leaving them in until they looked fully set once, and they came out dry and hard by the next day. Slightly underbaked is the move here.
- Press extra M&Ms on right when they come out: If any M&Ms fell off or look sparse after baking, press a few fresh ones onto the top of each cookie while they're still warm and soft. They'll stick as the cookie cools. It makes a big difference in how they look, especially if you're giving them as a gift.
Variations
- All dark chocolate: Swap the semi-sweet chips for dark chocolate chips and skip the milk chocolate M&Ms in favor of the dark chocolate variety. The result is less sweet and more intensely chocolatey. My husband prefers this version — he finds the standard one a bit sweet, though the kids disagree loudly.
- Add chopped walnuts or pecans: Stir in ½ cup of roughly chopped walnuts or pecans along with the chocolate. The nuts add a slightly bitter contrast that keeps the sweetness in check. Toast them in a dry pan for 3 to 4 minutes first if you have the time — it makes a noticeable difference in flavor.
- Peanut butter chips instead of dark chocolate chunks: Replace the optional dark chocolate chunks with peanut butter chips for a chocolate-peanut butter combo. Reese's Pieces also work here and look great mixed in with the M&Ms. I've made this version for school snack days and it goes fast.
- Sea salt finish: Before the cookies go into the oven, sprinkle a tiny pinch of flaky sea salt on top of each dough ball. Maldon works well, or whatever flaky salt you have. It cuts through the sweetness and makes them taste more complex. This is my personal favorite way to serve them to adults.
- Different holiday M&Ms: This recipe isn't limited to Valentine's Day — the same dough works with any seasonal M&Ms. I've made it with Halloween orange and black M&Ms, Christmas red and green, and plain brown bag M&Ms when I just want cookies and there's no holiday in sight. The Chocolate Snowball Cookies on the site use a totally different base but are another good option if you're doing a holiday cookie tin.
Serving and Storage
Serving
These are best served slightly warm or at room temperature on the same day they're baked. If they've been sitting for a day, 10 seconds in the microwave brings them back to soft and gooey. A glass of cold milk is the obvious pairing. If you're putting them out at a Valentine's Day gathering, stack them on a plate as-is — the red and pink M&Ms do all the decorating for you.
Storage
Store baked cookies in an airtight container at room temperature for up to 5 days. They're best in the first 2 days. If you want to keep them soft longer, tuck a slice of plain white bread into the container — the cookies absorb the moisture from the bread and stay soft longer. For longer storage, freeze baked cookies in a zip-lock bag for up to 3 months and thaw at room temperature. Better yet, freeze the raw dough balls and bake from frozen — add 2 to 3 extra minutes to the baking time. The frozen dough keeps for up to 3 months and gives you fresh-baked cookies whenever you want them.

Frequently Asked Questions
Can I make the dough ahead of time?
Yes, and I'd actually recommend it. The dough keeps in the fridge for up to 2 days covered, and the flavor genuinely improves the longer it sits. If you've already scooped the dough into balls, you can refrigerate those on the parchment-lined baking sheet and just bake them straight from the fridge when you're ready.
Why did my cookies spread out flat?
Almost always it's one of three things: the butter was too soft or partially melted, the dough wasn't chilled long enough, or the baking sheet was warm from a previous batch. Make sure your butter is genuinely cool-soft, chill the dough for at least 2 hours, and let your baking sheet cool completely between batches.
Can I freeze the baked cookies?
You can, and they freeze well for up to 3 months in an airtight bag. That said, I prefer freezing the raw dough balls instead of the baked cookies — baked from frozen they come out tasting fresher than thawed baked ones. Either way works if you need to plan ahead.
Can I make smaller cookies with this dough?
Absolutely. Use a standard 2-tablespoon scoop instead of the ¼ cup scoop, and reduce the baking time to about 9 to 11 minutes. Keep in mind you'll lose some of that signature thick-and-chewy center — smaller cookies cook through faster and tend to have more uniform texture. Still good, just different.
Do the M&Ms melt in the oven?
The ones mixed into the dough will soften and the shells may crack a bit, which is fine — you still get the chocolate. The ones pressed on top before baking mostly hold their shape because they're sitting on the surface rather than buried in hot dough. That's another reason I reserve some for topping rather than mixing them all in.

BIG CHOCOLATE M&M VALENTINE’S DAY COOKIES
Ingredients
- 1 cup (2 sticks) unsalted butter, softened but still slightly cool
- ¾ cup granulated sugar
- ¾ cup packed light brown sugar
- 2 large eggs
- 2 teaspoons vanilla extract
- 2 ¼ cups all-purpose flour
- 1 teaspoon baking soda
- 1 teaspoon salt
- 1 cup milk chocolate M&Ms (Valentine's Day themed, if available)
- ½ cup dark chocolate chunks (optional, for extra chocolate flavor)
- 1 cup semi-sweet chocolate chips
Instructions
- Cream butter and sugars: In a large bowl, cream together the softened butter, granulated sugar, and brown sugar until light and fluffy,1 about 2-3 minutes using an electric mixer.
- Add eggs and vanilla: Beat in the eggs one at a time, then stir in the vanilla extract.
- Combine dry ingredients: In a separate bowl, whisk together the flour, baking soda, and salt.
- Combine wet and dry ingredients: Gradually add the dry ingredients to the wet ingredients, mixing on low speed until just combined. Do not overmix.
- Add chocolate: Stir in the chocolate chips, M&Ms, and dark chocolate chunks (if using).
- Chill the dough: Cover the dough and refrigerate for at least 2 hours, or preferably overnight. This chilling period is crucial for preventing spreading and enhancing the flavor.
- Preheat and prepare: Preheat oven to 375°F (190°C). Line baking sheets with parchment paper.
- Scoop and bake: Use a large cookie scoop (about ¼ cup) to scoop the dough onto the prepared baking sheets, leaving at least 2 inches between cookies.
- Bake: Bake for 12-15 minutes, or until the edges are golden brown and the centers are still slightly soft. Be careful not to overbake.
- Cool: Let the cookies cool on the baking sheets for a few minutes before transferring them to a wire rack to cool completely.
Notes
- Chilling: Chilling the dough is essential for preventing the cookies from spreading too much and for developing the flavors. Don't skip this step!
- Large Cookies: These are meant to be BIG cookies. Using a large scoop ensures that you get the desired size.
- M&M Placement: For a prettier presentation, you can reserve some M&Ms and gently press them into the tops of the cookies before baking.
- Chocolate Variations: You can use different types of chocolate chips or chunks, such as milk chocolate, dark chocolate, or white chocolate.
- Storage: Store cooled cookies in an airtight container at room temperature for up to 5 days.
These have become my February staple at this point. I make a batch the night before Valentine's Day — dough in the fridge overnight — and bake them fresh in the morning. The house smells incredible and the kids wake up to warm cookies, which is about the best start to any day I can think of. I've also packaged them in little cellophane bags with ribbon for school parties and they always get eaten before I even make it to the door.
If you're putting together a dessert spread for Valentine's Day, these pair well with something a little lighter alongside them. I sometimes make a smaller no-bake treat to go with — the contrast in texture helps. And if you're making these for a crowd rather than just your household, double the batch. I'm serious. One batch disappears faster than you'd expect.
The thing I keep coming back to with these cookies is how straightforward the whole process is once you accept the chilling step. Mix, chill, scoop, bake. The hardest part is waiting for them to cool enough to eat without burning your mouth — and in this house, nobody has ever successfully managed that. 🍪❤️
If you're in a cookie mood, here are a few more recipes from the site worth trying:
- Maraschino Cherry Chocolate Chip Cookies — another chunky, loaded cookie that my husband requests constantly
- Chocolate Snowball Cookies — great for holiday tins and completely different texture from these
-
{"@context":"https://schema.org","@type":"Article","headline":"BIG CHOCOLATE M&M VALENTINE’S DAY COOKIES","description":"These giant, chewy chocolate M&M cookies are the perfect Valentine's Day treat! Packed with chocolate chips and colorful M&Ms.","datePublished":"2025-02-08T16:34:37+00:00","dateModified":"2025-03-27T21:29:07+00:00","author":{"@type":"Person","name":"Sana Umer","url":"https://forfoodiefriends.com/about/","description":"Self-taught home cook with 10+ years of kitchen experience. Mom of two who develops every recipe in her own kitchen.","jobTitle":"Recipe Developer & Food Blogger","image":"https://forfoodiefriends.com/wp-content/uploads/sana-umer-author-photo.jpg"},"publisher":{"@type":"Organization","name":"For Foodie Friends","url":"https://forfoodiefriends.com/","logo":{"@type":"ImageObject","url":"https://forfoodiefriends.com/wp-content/uploads/forfoodiefriends-logo.png"}},"mainEntityOfPage":{"@type":"WebPage","@id":"https://forfoodiefriends.com/big-chocolate-mm-valentines-day-cookies/"},"image":"https://forfoodiefriends.com/wp-content/uploads/2025/02/BIG-CHOCOLATE-MM-VALENTINES-DAY-COOKIES-1.jpg"}






Comments
No Comments