
Saad asked for these three weeks in a row before I finally stopped eyeballing the recipe and wrote it down properly. They're chocolate snowball cookies — small, round, dusted in powdered sugar until they look like little snowballs — and they disappear from the plate faster than anything else I bake at this time of year. I've been making some version of this recipe for about five years now, and I still get excited when I pull them out of the oven.
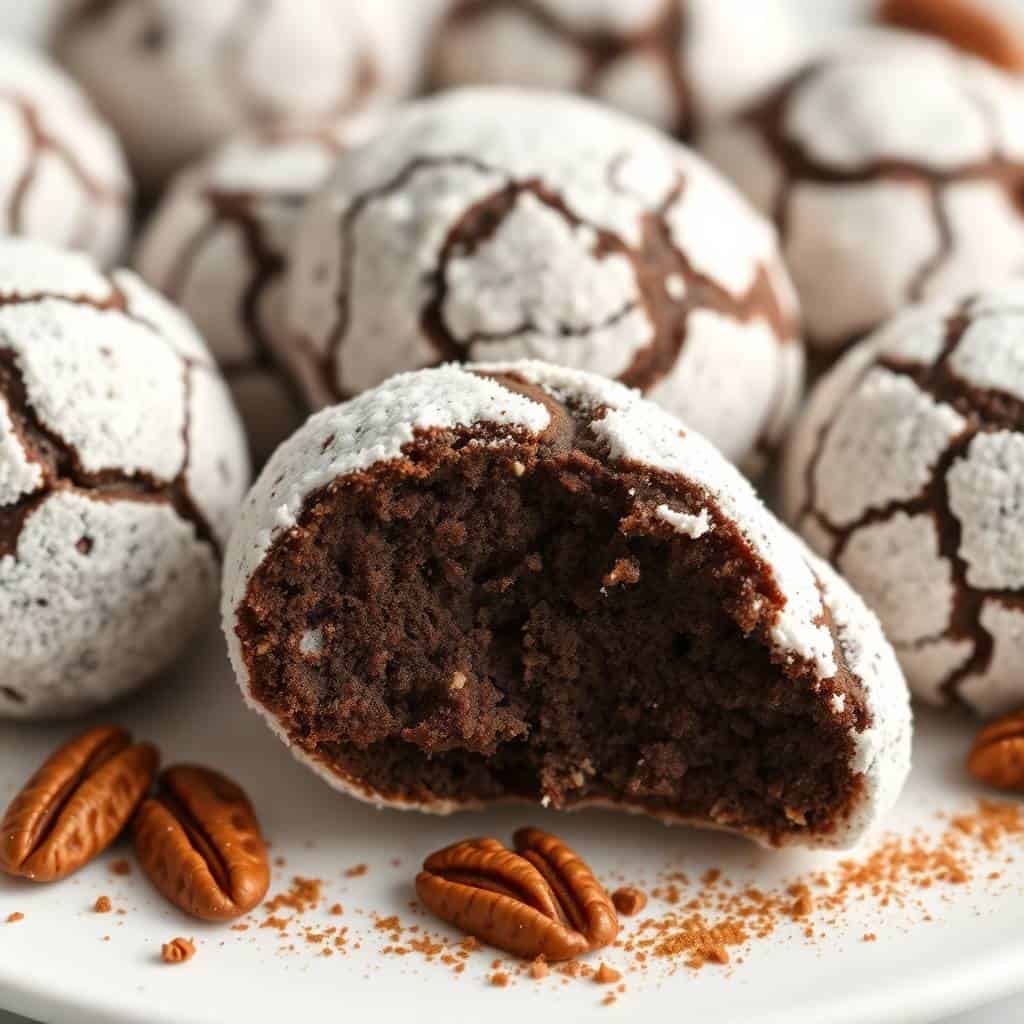
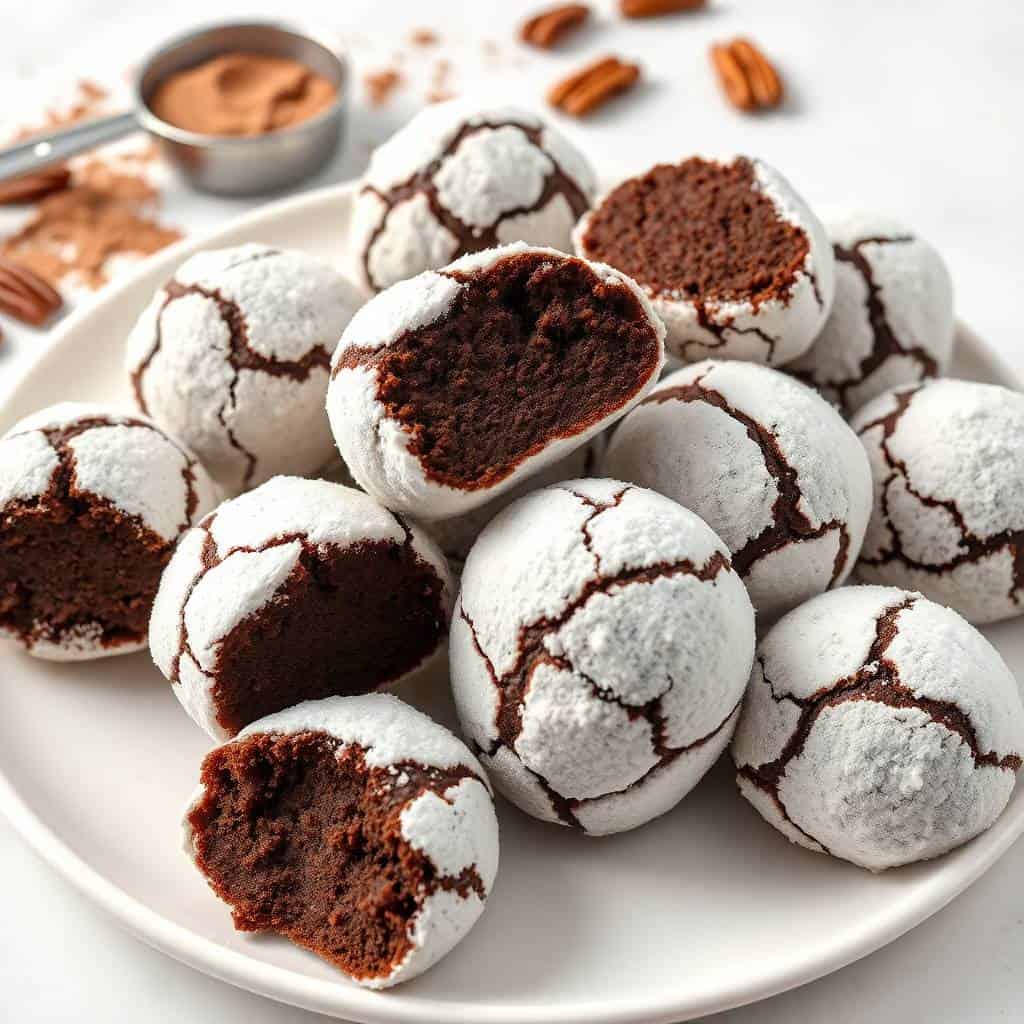
What makes these work is the double roll in powdered sugar. You roll them once while they're still warm so the sugar melts in slightly and clings, then roll them again once they've cooled completely for that proper snowy finish. It sounds like a small thing, but skipping that second roll means you end up with patchy cookies that look like they got caught in light drizzle, not an actual snowstorm. The cocoa in the dough is deep and slightly bitter, which balances the sweetness from all that powdered sugar coating.
These have become my go-to for holiday baking alongside my Christmas Shortbread Cookie Bites — I usually make both in one afternoon and box them up together. The snowball cookies are the ones that go first. Zainab loves them cold from the fridge the next morning, which honestly might be the best way to eat them. The texture firms up overnight and the cocoa flavor gets even more pronounced.
One thing to set expectations on: this dough is soft. If your kitchen is warm or your butter was a little too melted (which has happened to me), the dough will be sticky and frustrating to roll. Just put it in the fridge for 20-30 minutes and it becomes totally manageable. Don't skip that step if the dough is giving you trouble — it saves a lot of mess.

Why You'll Love This Recipe
- The cocoa flavor is genuinely deep: A full half cup of unsweetened cocoa powder goes into the dough, so these aren't just vaguely chocolatey — they actually taste like chocolate. I use regular unsweetened cocoa from the baking aisle (whatever's at Walmart or Aldi), and it does the job. If you want something more intense, Dutch-process cocoa takes them to another level entirely.
- They come together with minimal equipment: I don't own a stand mixer. I make these with a hand mixer, and I've also made them with just a wooden spoon and some patience. The dough doesn't need to be beaten to death — you just want the butter and sugar creamy, then fold in the dry ingredients. No special tools required.
- They're a reliable make-ahead cookie: You can roll the dough into balls, freeze them on a sheet pan, transfer to a freezer bag, and bake them weeks later. I do a big batch of this in late November so I always have cookie dough ready when we have unexpected guests during December. Bake straight from frozen and add two minutes to the time.
- The texture is unlike a regular cookie: These aren't chewy, they're not crunchy — they're crumbly and tender, almost like a chocolate shortbread in ball form. That melt-in-your-mouth quality comes from the butter-to-flour ratio. It's very specific and intentional, so don't cut the butter down thinking you'll make them healthier. You won't — you'll just get a different cookie.
- Kids go absolutely wild for the powdered sugar coating: My two have been known to eat the powdered sugar off the outside first, then look at me expectantly for more. The double-roll method means there's a proper thick coating that doesn't rub off all over your hands immediately. They look beautiful on a holiday tray and they're genuinely fun to eat.
Ingredients
- 1 ¾ cups all-purpose flour
- ½ cup unsweetened cocoa powder
- 1 teaspoon baking powder
- ¼ teaspoon salt
- ½ cup unsalted butter, softened to room temperature
- ¾ cup powdered sugar, plus extra for rolling (I keep about 1 cup extra set aside)
- 1 teaspoon vanilla extract
- 1 large egg
- ½ cup mini chocolate chips (optional, but Saad insists on them)
- 1 tablespoon milk (optional — add only if your dough feels too dry)
Directions
- Preheat and prep: Heat your oven to 350°F (175°C) and line a baking sheet with parchment paper. I use a regular sheet pan — nothing fancy — and the parchment keeps cleanup simple and stops the bottoms from overbrowning.
- Whisk the dry ingredients: In a medium bowl, whisk together the flour, cocoa powder, baking powder, and salt. Whisking is important here rather than just stirring — it distributes the baking powder and breaks up any cocoa lumps before they meet the butter.
- Cream the butter and sugar: In a large bowl, beat the softened butter and powdered sugar together until light and fluffy, about 2-3 minutes. The mixture should look pale and creamy. If your butter wasn't fully at room temperature, it will look a bit grainy — which is fine, just beat it a little longer.
- Add the egg and vanilla: Add the egg and vanilla extract and mix until fully combined. The dough will look glossy and smooth at this point.
- Add the dry ingredients: Gradually add the dry ingredient mixture to the butter mixture, mixing until just combined. If the dough feels very stiff, add the tablespoon of milk. Don't overmix — stop as soon as there are no dry streaks. Fold in the mini chocolate chips now if you're using them.
- Chill if needed: If the dough feels soft or sticky, cover the bowl and refrigerate for 20-30 minutes. This is especially important in a warm kitchen. Cold dough rolls into clean, round balls much more easily.
- Roll and bake: Roll the dough into 1-inch balls and space them about 2 inches apart on your prepared baking sheet. Bake for 12-15 minutes, until the edges look set. The centers will still appear slightly soft — that's correct. They firm up as they cool, and overbaking them will make them dry instead of crumbly.
- First powdered sugar roll: Let the cookies cool on the sheet for 5 minutes. While they're still warm (not hot), roll each one in powdered sugar until fully coated. Transfer to a wire rack to cool completely.
- Second powdered sugar roll: Once the cookies are completely cool, roll them in powdered sugar a second time. This gives them the proper thick, snowy finish. Don't skip this step if you want them to look the part.
Tips for Success
- Butter temperature actually matters here: I know everyone says this and it sounds like fussy chef advice, but with these cookies it genuinely affects the texture. Too cold and the butter won't cream properly — you'll end up with lumps. Too warm (soft enough that it squishes when you poke it) and the dough gets greasy and spreads in the oven. You want it soft enough to leave an indent with your finger, but still holding its shape. I leave mine out for 30-40 minutes before I start.
- Watch them closely at the 12-minute mark: The first time I made these I set a timer for 15 minutes and walked away. They came out on the dry side — still edible, but that melt-in-your-mouth quality was gone. These cookies don't look done when they're done. The edges set and the surface might look slightly matte, but the centers will still look soft. Pull them at that point. They continue to set on the hot pan for the next five minutes.
- Roll in powdered sugar at the right moment: Too hot and the sugar dissolves into a sticky glaze instead of a proper coating. Too cold and the sugar doesn't adhere well, and you get a thin dusting that rubs off immediately. Five minutes out of the oven is the sweet spot — warm enough to hold the sugar, cool enough not to melt it completely. Set a small timer if you need to.
- Use a cookie scoop if you have one: I have a cheap 1-tablespoon cookie scoop from a kitchen supply store — it cost me about $8 and it's one of my most-used tools. It makes the balls uniform in size, which means they all bake at the same rate. If you roll by hand, try to keep them consistent — golf ball-sized is too big, marble-sized is too small. Aim for roughly 1 inch.
Variations
- Nutty chocolate snowballs: Fold ½ cup of finely chopped walnuts or pecans into the dough along with (or instead of) the chocolate chips. The nuts add a slight crunch that contrasts nicely with the soft, crumbly cookie. I chop them fairly small — large pieces make the balls harder to roll neatly. My husband prefers this version and always picks them out of the box first.
- Chocolate mint snowballs: Add ½ teaspoon of peppermint extract along with the vanilla. Start with ¼ teaspoon if you're not sure — peppermint extract is potent and can take over very quickly. This version is especially good on a holiday tray alongside my Chocolate Rum Truffles — the flavors complement each other and they look great together.
- Spiced chocolate snowballs: Add ½ teaspoon of cinnamon and a very small pinch of cayenne pepper to the dry ingredients. It sounds odd but the warmth from the spice cuts through the sweetness of the powdered sugar in a really interesting way. This version is inspired by Mexican hot chocolate, and it works. I'd skip the chocolate chips in this one so the spice comes through clearly.
- Dark cocoa version: Swap the regular unsweetened cocoa powder for Dutch-process or dark cocoa powder. The cookies come out a deep, almost black color and have a much more intense, slightly smoky chocolate flavor. If you've had Oreos and wondered how to get that dark cocoa thing going in a homemade cookie, this is it. Dutch-process cocoa is available at Trader Joe's and most Walmart baking aisles.
Serving and Storage
Serving
These cookies are best served at room temperature on the day they're made, but they honestly hold up well for several days. I put them on a plate alongside shortbread or my Homemade Chocolate Orange Sticks for a chocolate-heavy holiday spread that always gets compliments. They look great in a cookie tin or a small cellophane bag tied with a ribbon if you're gifting them. Serve with tea, coffee, or hot cocoa — the powdered sugar coating means they go well with a hot drink that can balance the sweetness.
Storage
Store cooled cookies in an airtight container at room temperature for up to 5 days. They may need a light re-dust of powdered sugar before serving if the coating has absorbed or settled. For freezing the baked cookies, layer them between sheets of parchment paper in an airtight container and freeze for up to 2 months — thaw at room temperature for 30 minutes before serving. For freezing unbaked dough balls, freeze them on a sheet pan first until solid, then transfer to a freezer bag. Bake from frozen at 350°F, adding 2 extra minutes to the bake time.
Frequently Asked Questions
Can I make the dough ahead of time?
Yes — the dough keeps in the fridge for up to 2 days, wrapped tightly in plastic wrap. When you're ready to bake, let it sit at room temperature for 10 minutes so it's easier to roll. You can also freeze the dough balls for up to 3 months and bake directly from frozen, adding about 2 extra minutes to the bake time.
My dough is too soft and sticky to roll — what do I do?
Refrigerate it. 20-30 minutes in the fridge is usually enough to firm it up. This happens more often in warm kitchens or if the butter was slightly too soft when you started. Don't add more flour to compensate — it changes the texture of the finished cookie.
Can I add chocolate chips to the dough?
Yes, and I usually do. Use ½ cup of mini chocolate chips rather than regular-sized ones — they distribute more evenly through the dough and don't make the balls lumpy or hard to roll. Fold them in at the end, just before shaping.
Can I substitute the cocoa powder with melted chocolate?
You can, but the texture will change. Melted chocolate adds more fat and moisture to the dough, which means softer, slightly fudgier cookies. They'll be less crumbly and more brownie-like in texture. If you try it, start with about 2 ounces of melted dark chocolate and reduce the butter slightly to compensate for the added fat.
How do I keep the powdered sugar coating from disappearing?
The double-roll method is the key. Roll once while the cookies are still warm so the sugar bonds to the surface, then roll again once they're fully cool for a thick outer layer. If you're storing them for more than a day or two, keep a small bowl of powdered sugar nearby and give them a quick re-roll before serving — takes 30 seconds and makes a big difference in how they look.

These chocolate snowball cookies have genuinely earned a permanent spot in my holiday baking rotation. They're one of those recipes where the result looks like you put in a lot more effort than you actually did — and that's exactly what I need in December when there's a hundred other things happening. I make a double batch every time now because a single batch disappears within two days, and I've learned my lesson about not having enough.
If you're building out a holiday cookie tray, I'd pair these with my Christmas Shortbread Cookie Bites — the contrast between buttery vanilla shortbread and deep chocolate snowballs looks great and covers two very different flavour notes. And if you want to put together a more ambitious chocolate-forward dessert spread, the Chocolate Rum Truffles work beautifully alongside these.
What I keep coming back to with this recipe is how much the texture matters. It's not a cookie you bite through — it sort of dissolves, which sounds strange but is actually the thing that makes it special. Get the butter at the right temperature, don't overbake, and do both powdered sugar rolls. Those three things and you've got it. 🍫❄️

CHOCOLATE SNOWBALL COOKIES
Ingredients
- 1 ¾ cups all-purpose flour
- ½ cup unsweetened cocoa powder
- 1 teaspoon baking powder
- ¼ teaspoon salt
- ½ cup unsalted butter softened
- ¾ cup powdered sugar plus extra for rolling
- 1 teaspoon vanilla extract
- 1 large egg
- ½ cup mini chocolate chips optional
- 1 tablespoon milk optional, for added softness
Instructions
- Preheat the oven to 350°F (175°C) and line a baking sheet with parchment paper.
- In a medium bowl, whisk together the flour, cocoa powder, baking powder, and salt. Set aside.
- In a large bowl, beat the softened butter and powdered sugar until light and fluffy, about 2-3 minutes.
- Add the egg and vanilla extract, and continue mixing until fully incorporated.
- Gradually add the dry ingredients to the wet ingredients, mixing until just combined. If the dough is too thick, add 1 tablespoon of milk to soften it.
- Fold in the mini chocolate chips (if using) for an extra chocolatey bite.
- Roll the dough into 1-inch balls and place them on the prepared baking sheet, spacing them about 2 inches apart.
- Bake for 12-15 minutes, or until the edges are set but the center is still soft.
- Allow the cookies to cool on the baking sheet for 5 minutes, then roll them in powdered sugar while they are still warm.
- Once cooled, roll them again in powdered sugar for an extra snowy finish.
Notes
- These cookies can be stored in an airtight container for up to 5 days.
- If you want a more intense chocolate flavor, you can use dark cocoa powder or add a few more mini chocolate chips.
- For an even richer flavor, you can replace the mini chocolate chips with finely chopped dark chocolate.
- You can freeze the dough and bake later for up to 3 months. Roll the dough into balls, freeze them on a baking sheet, and then store them in a freezer bag. Bake directly from frozen, adding an extra minute or two to the baking time.
- To make them extra festive, add a pinch of cinnamon to the dough for a warm spice flavor.
If you liked these, here are a few more recipes from my kitchen you might want to try next:
- Christmas Shortbread Cookie Bites (Buttery, Melt-in-Your-Mouth Holiday Treats)
- Chocolate Rum Truffles (No-Bake, Make-Ahead Holiday Treat)
- Homemade Chocolate Orange Sticks
- Brownies or Blondies
- Apple Cream Cheese Strudel (Flaky, Creamy Fall Pastry)





Comments
No Comments