
Valentine's Day in our house is less about the flowers and more about what's coming out of the oven. My husband has learned over the years that the best thing he can do on February 14th is stay out of the kitchen and let me work — because I take Valentine's Day desserts seriously. We're talking red velvet everything, chocolate-dipped strawberries, heart-shaped cookies cooling on the counter, and at least one thing I tried the week before just to make sure it was good enough to repeat. This is my favorite kind of cooking: the kind that's entirely justified by the occasion.
What I look for in a Valentine's dessert is simple: it has to look like you meant it, and it has to taste even better than it looks. I'm not interested in recipes that require a pastry degree or a candy thermometer and three hours of babysitting. The best Valentine's Day desserts are ones you can actually pull off on a weeknight — maybe after the kids are in bed, maybe with a glass of something fizzy on the counter beside you. I also think variety matters here. Not everyone wants a full cake. Sometimes you want a single-serve mug cake. Sometimes a pile of truffles is exactly right. I pulled this list together with all of that in mind. If you're looking for more chocolate inspiration, my chocolate dessert roundup is a good place to start.
This list covers a lot of ground — in a good way. You'll find classic red velvet cake pops, a no-bake chocolate caramel tart that I've already made twice this month, strawberry cheesecake cookies that Zainab claimed as her personal contribution to the holiday (she just ate them, she didn't make them), and even gluten-free and vegan options so nobody gets left out. There are also some unexpected picks in here, like the Baci di Dama cookies and the Cinnamon Red Hot Biscotti — both worth your time. If you're also planning a Valentine's breakfast spread, my Valentine's Day breakfast ideas post has you covered, and my strawberry desserts roundup pairs well with half the recipes on this list.
Here are the 34 recipes I keep coming back to — pick one, pick five, or make a whole dessert table out of them. No judgment either way.
Top 34 Valentine's Day Dessert Recipes
33. Valentine's Day Baci di Dama Cookies

Baci di Dama means "lady's kisses" in Italian, and honestly, the name alone is enough reason to make these for Valentine's Day. Two crispy hazelnut butter cookies sandwiched together with a smear of dark chocolate — they're delicate, nutty, and just rich enough to feel special without being over the top. I tried these for the first time a couple of years ago and completely messed up the texture because I over-processed the hazelnuts into paste instead of a fine crumb. Once I got that right, everything clicked. These look elegant on a plate but they're not complicated once you understand what you're going for.
Ingredients
- 1 cup hazelnuts, toasted and skins removed
- 1 cup all-purpose flour
- ½ cup powdered sugar
- ½ cup (1 stick) cold unsalted butter, cubed
- ¼ teaspoon salt
- 3 oz dark chocolate (70% cocoa), finely chopped
- 1 tablespoon heavy cream
Instructions
- Pulse toasted hazelnuts in a food processor until they resemble fine breadcrumbs — stop before they turn into butter. Add flour, powdered sugar, and salt and pulse briefly to combine.
- Add cold butter cubes and pulse until the mixture just comes together into a crumbly dough. Wrap in plastic and refrigerate for 30 minutes.
- Preheat oven to 325°F. Roll dough into small balls (about ¾ inch each) and place on a parchment-lined baking sheet. Bake 14-16 minutes until very lightly golden. Let cool completely on the pan.
- Make the chocolate filling: heat cream until just simmering, pour over chopped chocolate, and stir until smooth. Let it thicken for 10 minutes.
- Sandwich two cookies together with a small dab of chocolate filling. Let set at room temperature for 30 minutes before serving.
Tips
- Tip: No food processor? Place toasted hazelnuts in a zip-lock bag and crush with a rolling pin — it takes a couple of minutes but works well enough.
- Tip: These cookies keep for up to 5 days in an airtight container at room temperature, making them a great make-ahead Valentine's treat.
- Tip: If you can't find hazelnuts, blanched almonds work here too — the texture is slightly different but still delicious.
32. Easy Brownie Truffles
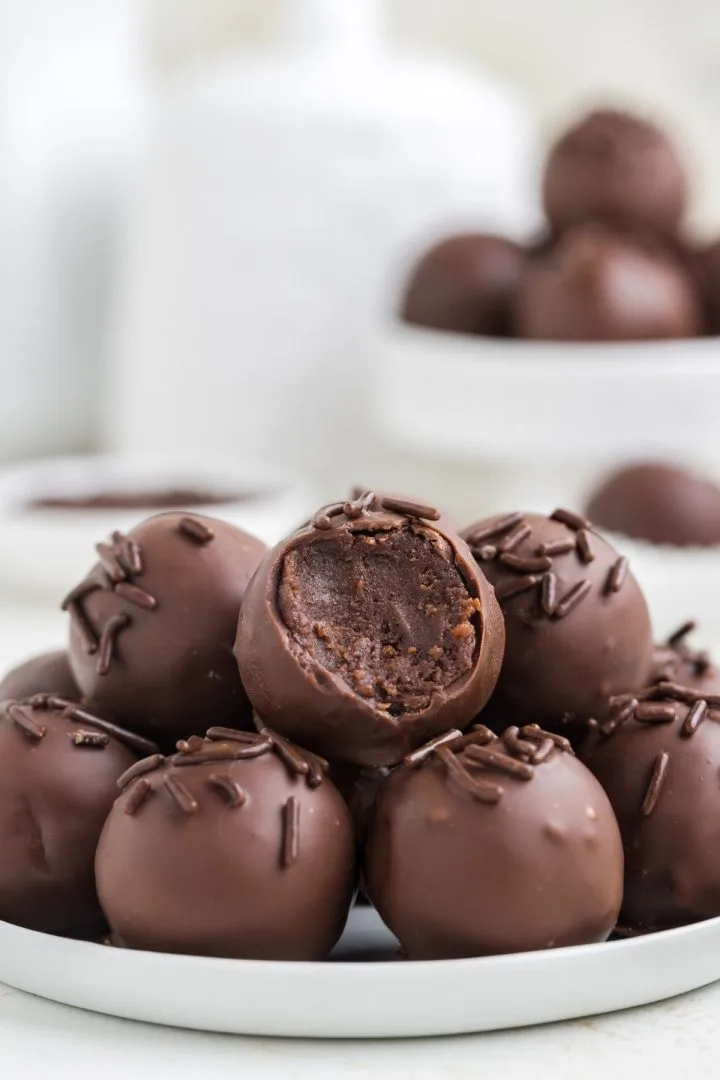
These brownie truffles are one of those things that look way more impressive than the effort involved. You bake a pan of brownies, crumble them up, roll them into balls, and coat them in melted chocolate. That's genuinely it. What you end up with is a fudgy, dense truffle with a crisp chocolate shell that holds its shape at room temperature — perfect for gifting in a little box or setting out on a plate. Saad helped me roll these one year and proudly announced they looked "professional." Coming from a nine-year-old, I'll take it.
Ingredients
- 1 batch baked brownies (from a box or homemade, cooled completely)
- 2 tablespoons cream cheese, softened (helps bind if brownies are crumbly)
- 10 oz semi-sweet chocolate chips or chopped chocolate
- 1 tablespoon coconut oil or vegetable shortening (for smoother coating)
- Sprinkles, crushed nuts, or flaky sea salt for topping (optional)
Instructions
- Crumble the cooled brownies into a large bowl. If they're very moist and fudgy, you can skip the cream cheese. If they're drier, add the cream cheese and mix until everything holds together when pressed.
- Roll the mixture into 1-inch balls and place on a parchment-lined baking sheet. Refrigerate for at least 30 minutes so they firm up — this makes dipping much easier.
- Melt chocolate chips and coconut oil together in a microwave in 30-second bursts, stirring between each, until smooth.
- Dip each brownie ball into the melted chocolate using a fork, let the excess drip off, then place back on the parchment sheet. Add toppings immediately before the chocolate sets.
- Let the truffles set at room temperature for 20 minutes or refrigerate for 10 minutes. Store in an airtight container for up to a week.
Tips
- Tip: A box of Ghirardelli brownie mix from Walmart or Costco works perfectly here — no need to make brownies from scratch for this recipe.
- Tip: Keep the brownie balls cold while you work in batches — warm balls will crack the chocolate coating as it sets.
- Tip: For Valentine's Day, use pink or red sprinkles on top while the chocolate is still wet — it takes about 10 seconds and makes them look completely festive.
31. Strawberry Nutella Crepes
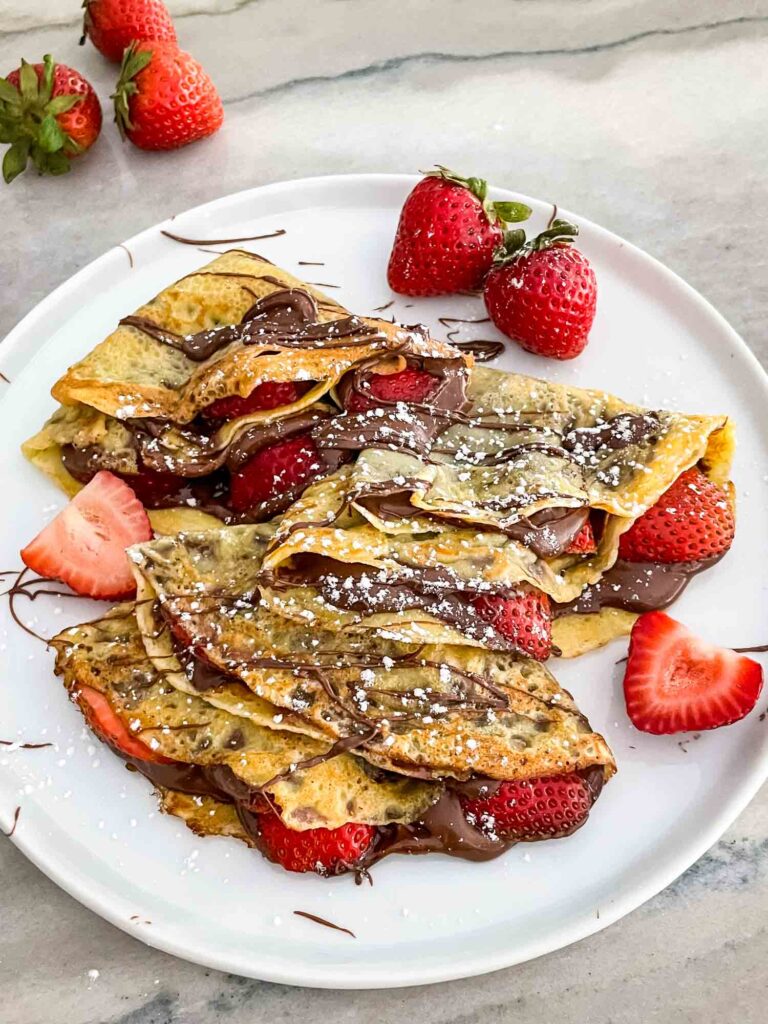
Crepes feel like a restaurant dessert but they're genuinely one of the easier things to make at home once you stop being afraid of them. The batter comes together in a blender in about two minutes, and the cooking goes fast once your pan is properly hot. Fill them with sliced fresh strawberries and a generous spread of Nutella, fold into quarters, and dust with powdered sugar — it looks romantic and tastes even better. My husband actually requests these more than the kids do, which tells you everything.
Ingredients
- 1 cup all-purpose flour
- 2 large eggs
- 1½ cups whole milk
- 2 tablespoons unsalted butter, melted, plus more for the pan
- 1 tablespoon sugar
- ¼ teaspoon salt
- ½ cup Nutella (or more — no judgment)
- 1½ cups fresh strawberries, hulled and sliced
- Powdered sugar for dusting
Instructions
- Blend flour, eggs, milk, melted butter, sugar, and salt together until completely smooth. Let the batter rest for at least 20 minutes — this relaxes the gluten and gives you more tender crepes.
- Heat a 9 or 10-inch non-stick skillet over medium heat. Brush lightly with butter. Pour about ¼ cup of batter into the center and immediately swirl the pan to spread it into a thin, even circle.
- Cook 1-2 minutes until the edges look dry and the bottom is lightly golden. Flip carefully with a thin spatula and cook another 30 seconds. Transfer to a plate and repeat with remaining batter.
- Spread each crepe with a thin layer of Nutella, add a few slices of fresh strawberries down the center, then fold in half and in half again into a triangle shape.
- Dust with powdered sugar just before serving. Serve warm for the best experience.
Tips
- Tip: The first crepe almost always looks rough — that's just the pan calibrating to the right temperature. Eat it yourself in the kitchen and carry on.
- Tip: Crepe batter can be made the night before and stored covered in the fridge — just give it a stir before using.
- Tip: If strawberries aren't in season and taste bland, toss them with a teaspoon of sugar and let them sit for 10 minutes — it draws out the juices and makes a big difference.
30. No Bake Chocolate Caramel Tart

No-bake desserts earn their place on this list for one reason: you can make them ahead without worrying about timing anything on Valentine's evening. This tart has a buttery Oreo crust, a layer of thick salted caramel, and a smooth dark chocolate ganache on top — three components that sound complicated but each one takes about five minutes to put together. The hardest part is waiting for it to set in the fridge. I make a double batch of the caramel layer because it disappears fast and I always want more on my slice.
Ingredients
- 24 Oreo cookies (about 2 cups crushed)
- 4 tablespoons unsalted butter, melted
- 1 cup store-bought caramel sauce (or dulce de leche)
- ½ teaspoon flaky sea salt
- 8 oz dark or semi-sweet chocolate, finely chopped
- ¾ cup heavy cream
- 1 tablespoon unsalted butter (for the ganache — makes it glossy)
Instructions
- Crush Oreos in a food processor (or in a zip-lock bag with a rolling pin) into fine crumbs. Mix with melted butter until it resembles wet sand. Press firmly into the bottom and sides of a 9-inch tart pan. Refrigerate for 20 minutes.
- Pour caramel sauce over the chilled crust and spread into an even layer. Sprinkle with flaky sea salt. Return to the fridge for 15 minutes to firm up slightly.
- Make the ganache: heat heavy cream in a small saucepan until just simmering. Pour over chopped chocolate and butter in a bowl. Let sit 2 minutes, then stir from the center outward until completely smooth and glossy.
- Pour the ganache over the caramel layer and smooth the top with a spatula. Refrigerate for at least 2 hours until fully set.
- Remove from the fridge 15 minutes before serving — the ganache slices much more cleanly when it's not ice cold. Garnish with an extra pinch of flaky salt if you like.
Tips
- Tip: Trader Joe's or Aldi both carry good quality dark chocolate bars that work perfectly in this ganache — you don't need anything fancy.
- Tip: This tart can be made the day before Valentine's Day and kept covered in the fridge — the flavors actually improve overnight.
- Tip: No tart pan? Press the crust into a standard 9-inch pie dish — it won't have the same sharp edges but it tastes identical.
29. Red Velvet Chocolate Chip Cookies

Red velvet as a cookie — it took me a while to come around to the idea, but once I tried it I understood immediately why people go crazy for these. They're soft and chewy in the center with that signature deep red color that makes them look almost too pretty to eat, and then the chocolate chips just make the whole thing richer and more indulgent. The cocoa in the dough keeps them from being too sweet, which I really appreciate. These are genuinely one of the easiest cookies on this list — no chilling required, no fancy decorating, just bold color and great flavor.
Ingredients
- 1 ½ cups all-purpose flour
- 2 tablespoons unsweetened cocoa powder
- 1 teaspoon baking soda
- ¼ teaspoon salt
- ½ cup (1 stick) unsalted butter, softened
- ¾ cup granulated sugar
- ¼ cup packed brown sugar
- 1 large egg
- 1 tablespoon red food coloring (gel or liquid)
- 1 teaspoon vanilla extract
- 1 cup semi-sweet chocolate chips
Instructions
- Preheat oven to 350°F and line two baking sheets with parchment paper.
- Whisk together flour, cocoa powder, baking soda, and salt in a bowl and set aside.
- Beat softened butter with both sugars until light and fluffy, about 2 minutes. Add the egg, red food coloring, and vanilla extract and mix until combined.
- Stir the dry ingredients into the wet ingredients until just combined — don't overmix. Fold in the chocolate chips.
- Scoop rounded tablespoons of dough onto the prepared baking sheets, spacing them about 2 inches apart. Bake for 10-12 minutes until the edges are set but the centers still look slightly underdone. They'll firm up as they cool.
Tips
- Tip: Gel food coloring gives a deeper, more vibrant red than liquid — worth grabbing from Walmart's baking aisle if you can.
- Tip: Pull them out when they look slightly underbaked — that's the key to keeping them soft and chewy once cooled.
- Tip: Press a few extra chocolate chips on top right before baking for a bakery-style look that photographs beautifully.
28. Strawberry Cheesecake Cookies
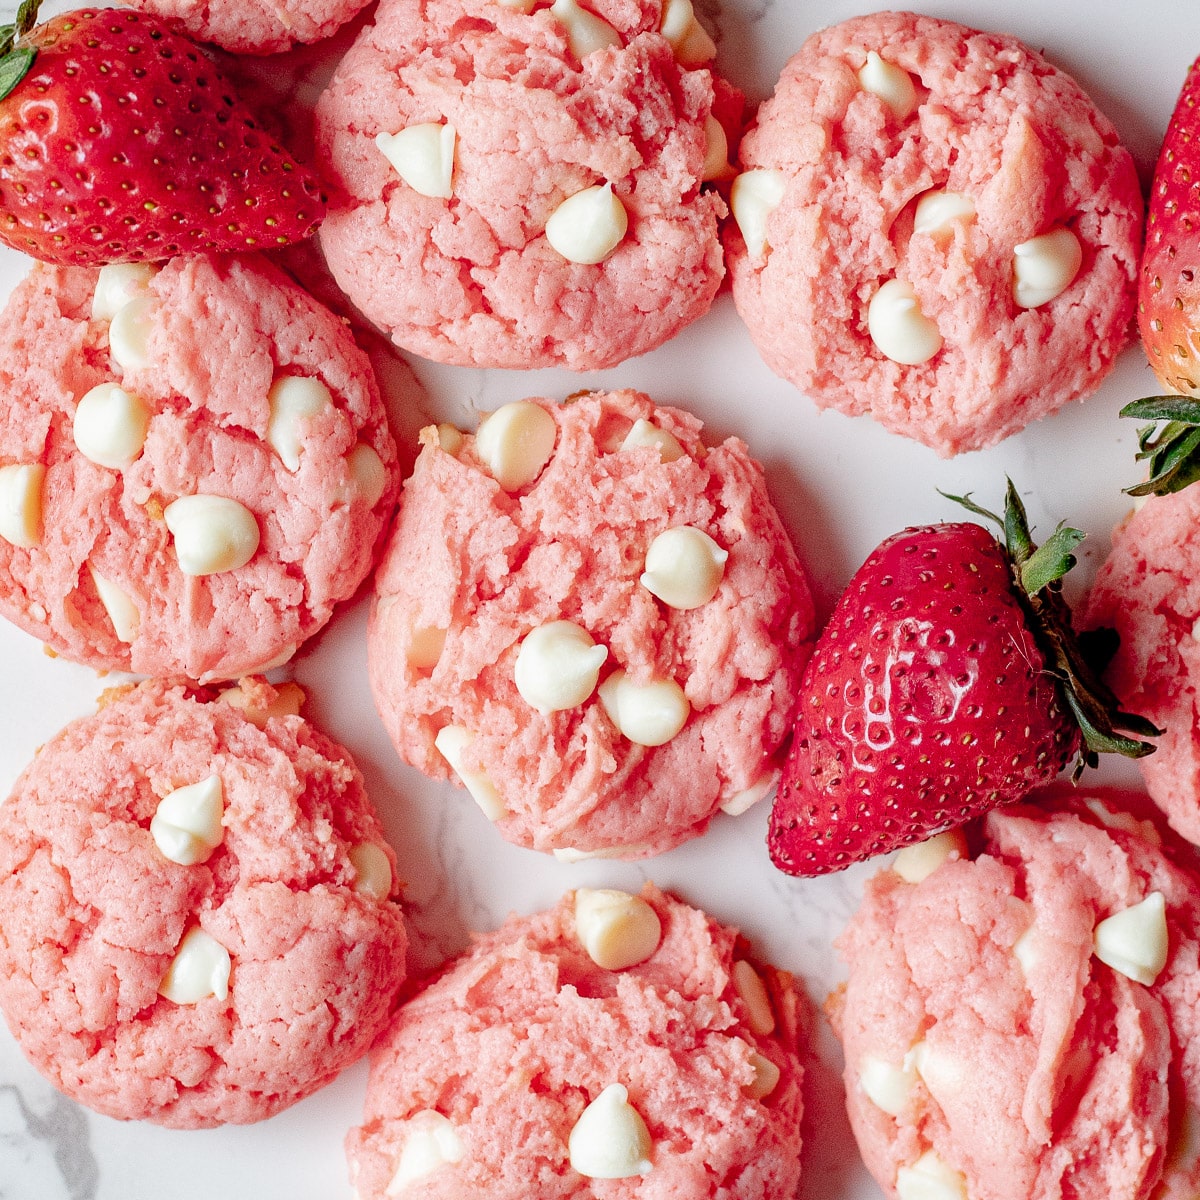
These are the kind of cookies that make people stop and ask what's in them, because the texture is different from your standard cookie — there's cream cheese in the dough, which makes them almost pillowy and slightly tangy in the best way. The strawberry flavor comes through clearly, whether you use freeze-dried strawberries folded in or a swirl of jam on top. They taste like a cheesecake and a cookie had a baby, and that's genuinely a good thing. If you're putting together a Valentine's Day dessert table, these bring something different from the usual chocolate-heavy options.
Ingredients
- 1 ½ cups all-purpose flour
- ½ teaspoon baking powder
- ¼ teaspoon salt
- 4 oz cream cheese, softened to room temperature
- ¼ cup (½ stick) unsalted butter, softened
- ¾ cup granulated sugar
- 1 large egg
- 1 teaspoon vanilla extract
- ½ cup freeze-dried strawberries, crushed (or ¼ cup strawberry jam swirled on top)
- 2 tablespoons pink or red sprinkles, optional
Instructions
- Preheat oven to 375°F and line baking sheets with parchment. Whisk together flour, baking powder, and salt in a bowl.
- Beat the softened cream cheese and butter together until smooth and creamy. Add sugar and beat for another minute. Mix in the egg and vanilla extract.
- Stir the dry ingredients into the wet ingredients until a soft dough forms. Fold in the crushed freeze-dried strawberries.
- Scoop heaping tablespoons of dough onto the prepared baking sheet, spacing 2 inches apart. Flatten slightly with the back of a spoon. Add sprinkles if using.
- Bake for 11-13 minutes until the edges are just set and the tops look barely done. Cool on the pan for 5 minutes before transferring — they're delicate while warm.
Tips
- Tip: Cold cream cheese will not cream properly — let it sit out for at least 20 minutes before you start. I've tried to rush this and ended up with lumpy dough.
- Tip: Freeze-dried strawberries (find them at Trader Joe's or Target) give a more concentrated flavor than fresh, which can make the dough too wet.
- Tip: These cookies keep well in the fridge for up to 4 days — the texture actually gets a little better on day two.
27. Valentine's Heart Sugar Cookies
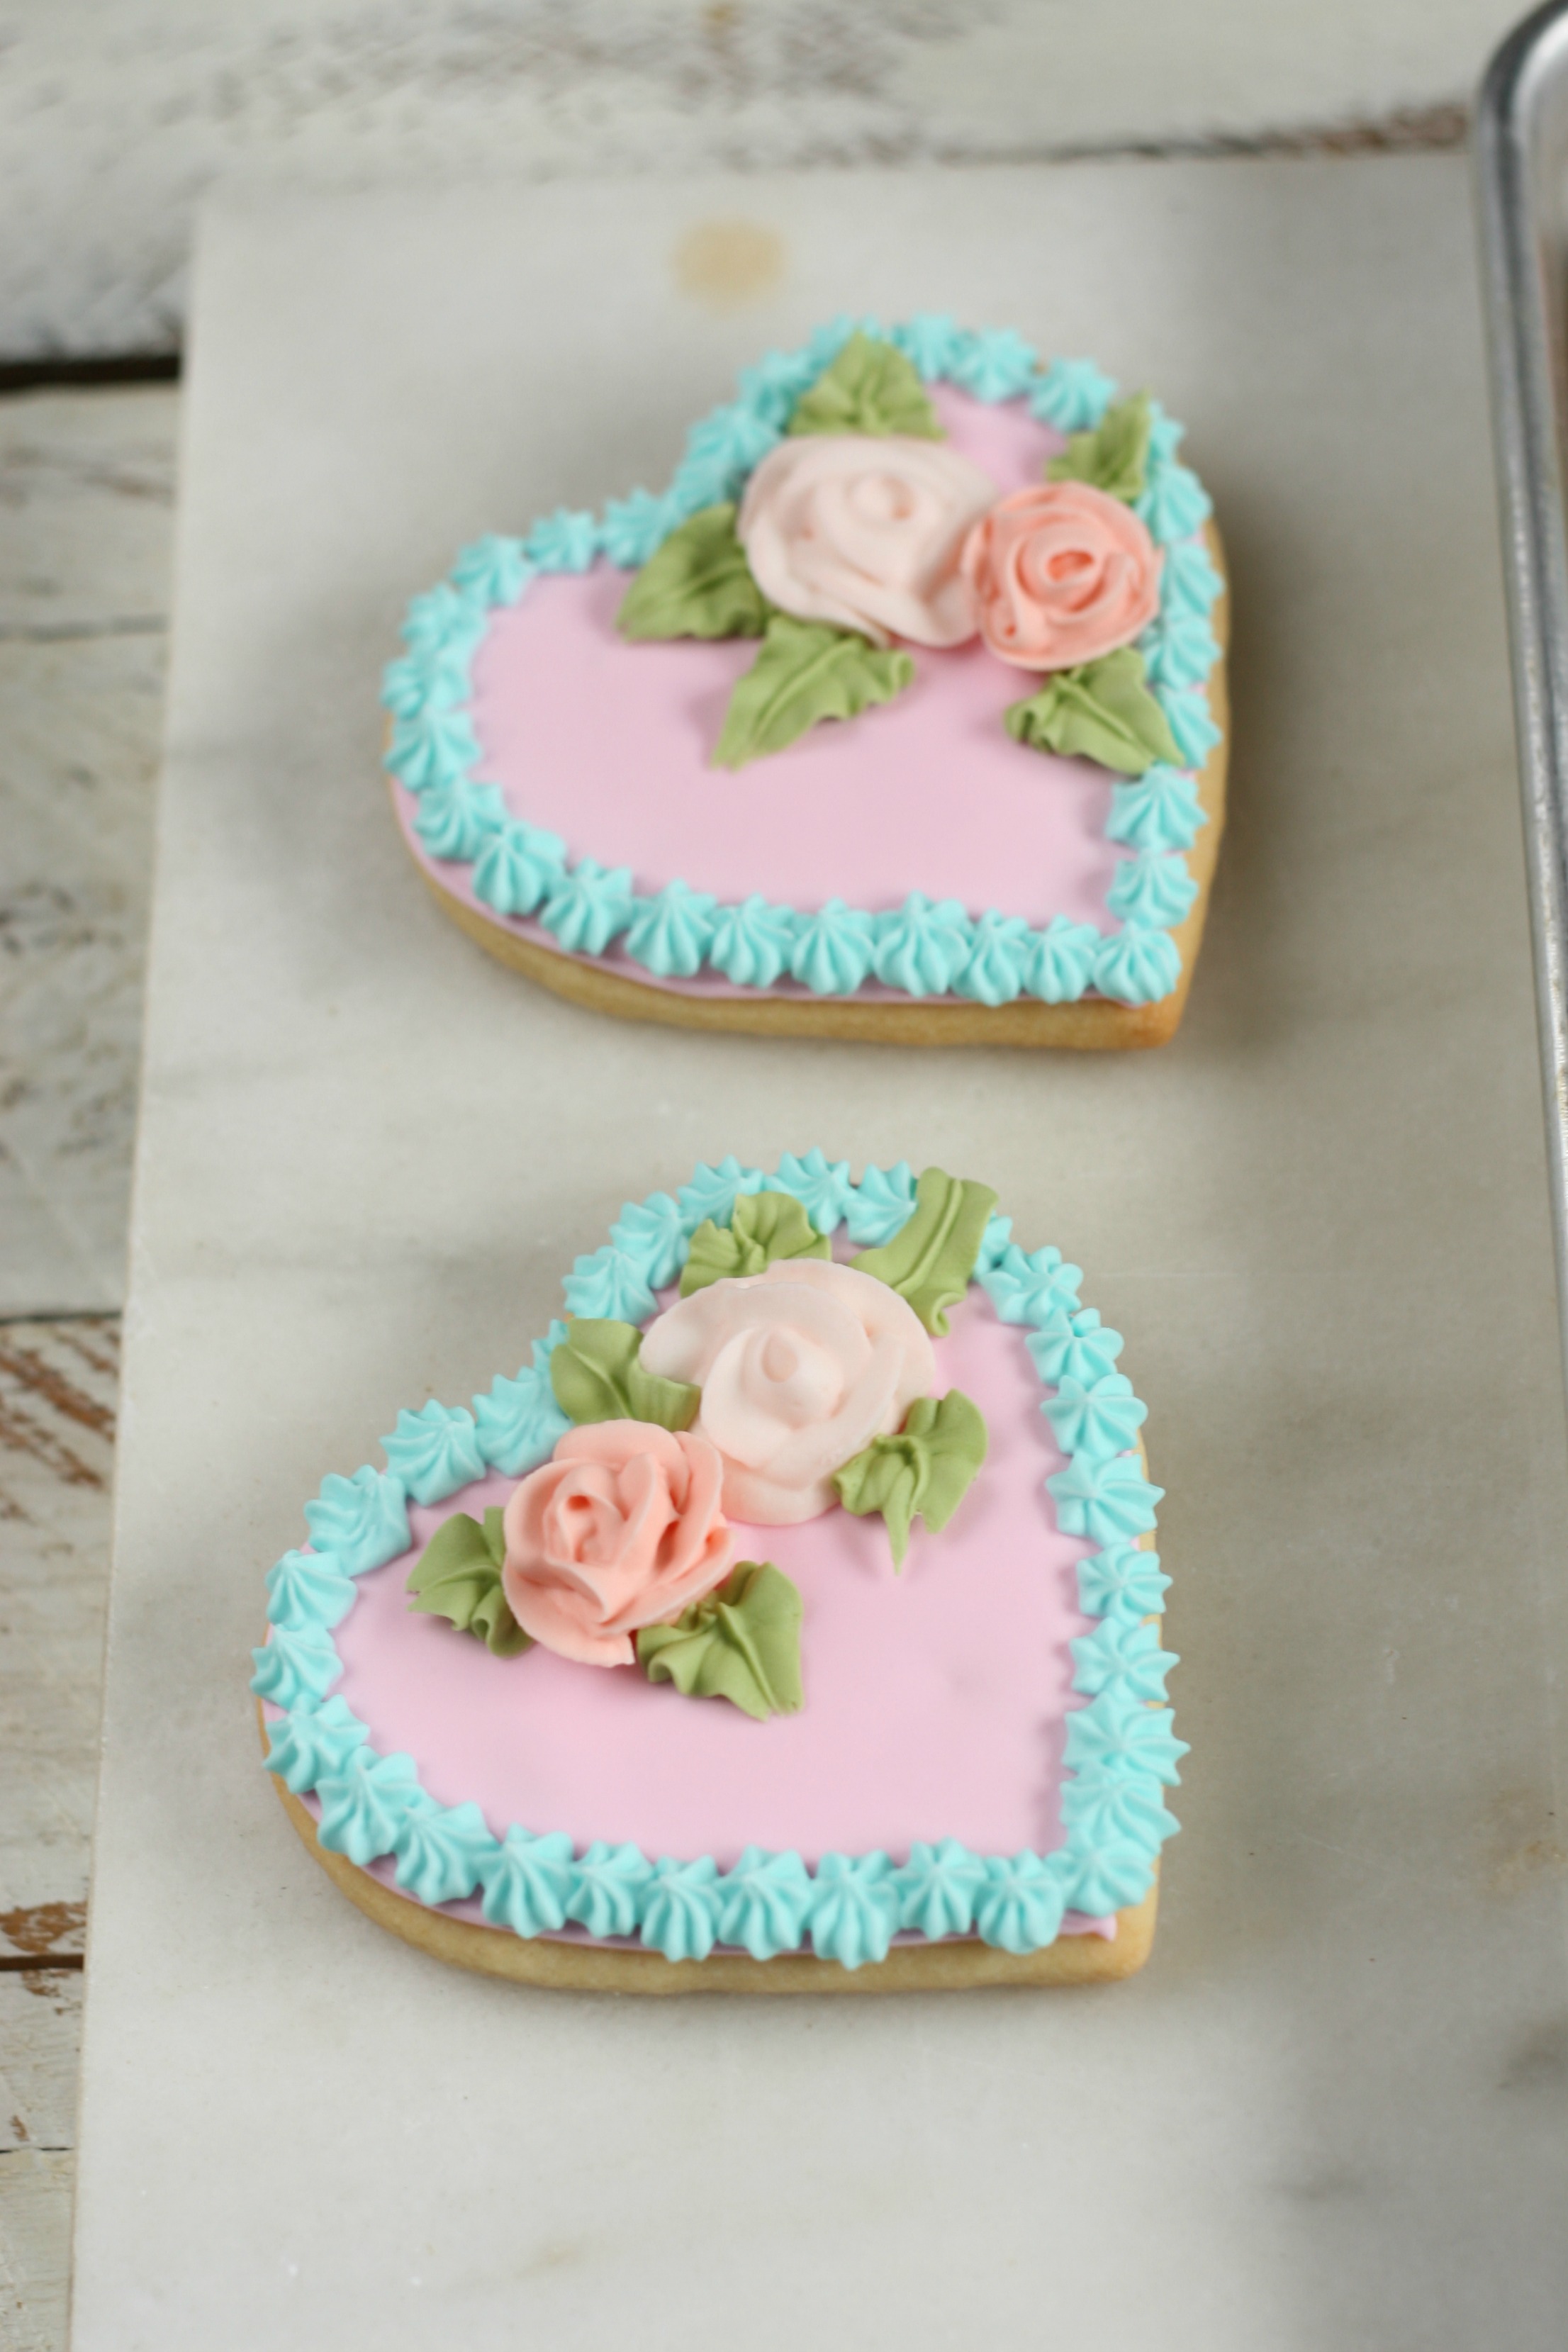
There's something about a decorated heart sugar cookie that just says Valentine's Day more than almost anything else on this list. The dough rolls out beautifully, holds its shape during baking, and gives you a clean canvas for royal icing in pinks, reds, and whites. Zainab and I make these together every year — she does the decorating while I handle the icing consistency, and somehow it always turns into a two-hour project that neither of us minds. If decorating with royal icing feels intimidating, even a simple glaze with sprinkles on top makes these look lovely. Check out our big chocolate M&M Valentine's Day cookies if you want something a little more low-effort but still festive.
Ingredients
- 3 cups all-purpose flour
- 1 teaspoon baking powder
- ½ teaspoon salt
- 1 cup (2 sticks) unsalted butter, softened
- 1 cup granulated sugar
- 1 large egg
- 1 ½ teaspoons vanilla extract
- 1 tablespoon milk
- For royal icing: 2 cups powdered sugar, 1 ½ tablespoons meringue powder, 3-4 tablespoons water, gel food coloring in red and pink
Instructions
- Whisk together flour, baking powder, and salt. In a separate bowl, beat butter and sugar until pale and fluffy, then mix in the egg, vanilla, and milk.
- Gradually stir the flour mixture into the butter mixture until a smooth dough forms. Divide into two discs, wrap in plastic wrap, and refrigerate for at least 1 hour — cold dough holds its shape much better.
- Preheat oven to 350°F. Roll dough out on a lightly floured surface to about ¼-inch thickness. Cut with heart-shaped cookie cutters and place on parchment-lined baking sheets.
- Bake for 9-11 minutes until the edges are just barely golden. The cookies should look almost underdone in the center — they'll set as they cool. Let cool completely before decorating.
- For the royal icing, whisk meringue powder with powdered sugar, then add water one tablespoon at a time until you reach a pipeable consistency. Divide and color as desired. Decorate cooled cookies and let icing set for 1-2 hours before stacking.
Tips
- Tip: Don't skip the chilling step — I did once when I was in a hurry and the hearts spread into blobs in the oven. An hour in the fridge makes all the difference.
- Tip: If you don't have meringue powder, a simple glaze of powdered sugar plus a splash of milk works fine and still looks pretty with sprinkles on top.
- Tip: Make the dough up to 3 days ahead and keep it wrapped in the fridge — it actually makes your Valentine's Day baking much less stressful.
26. Cream Puffs
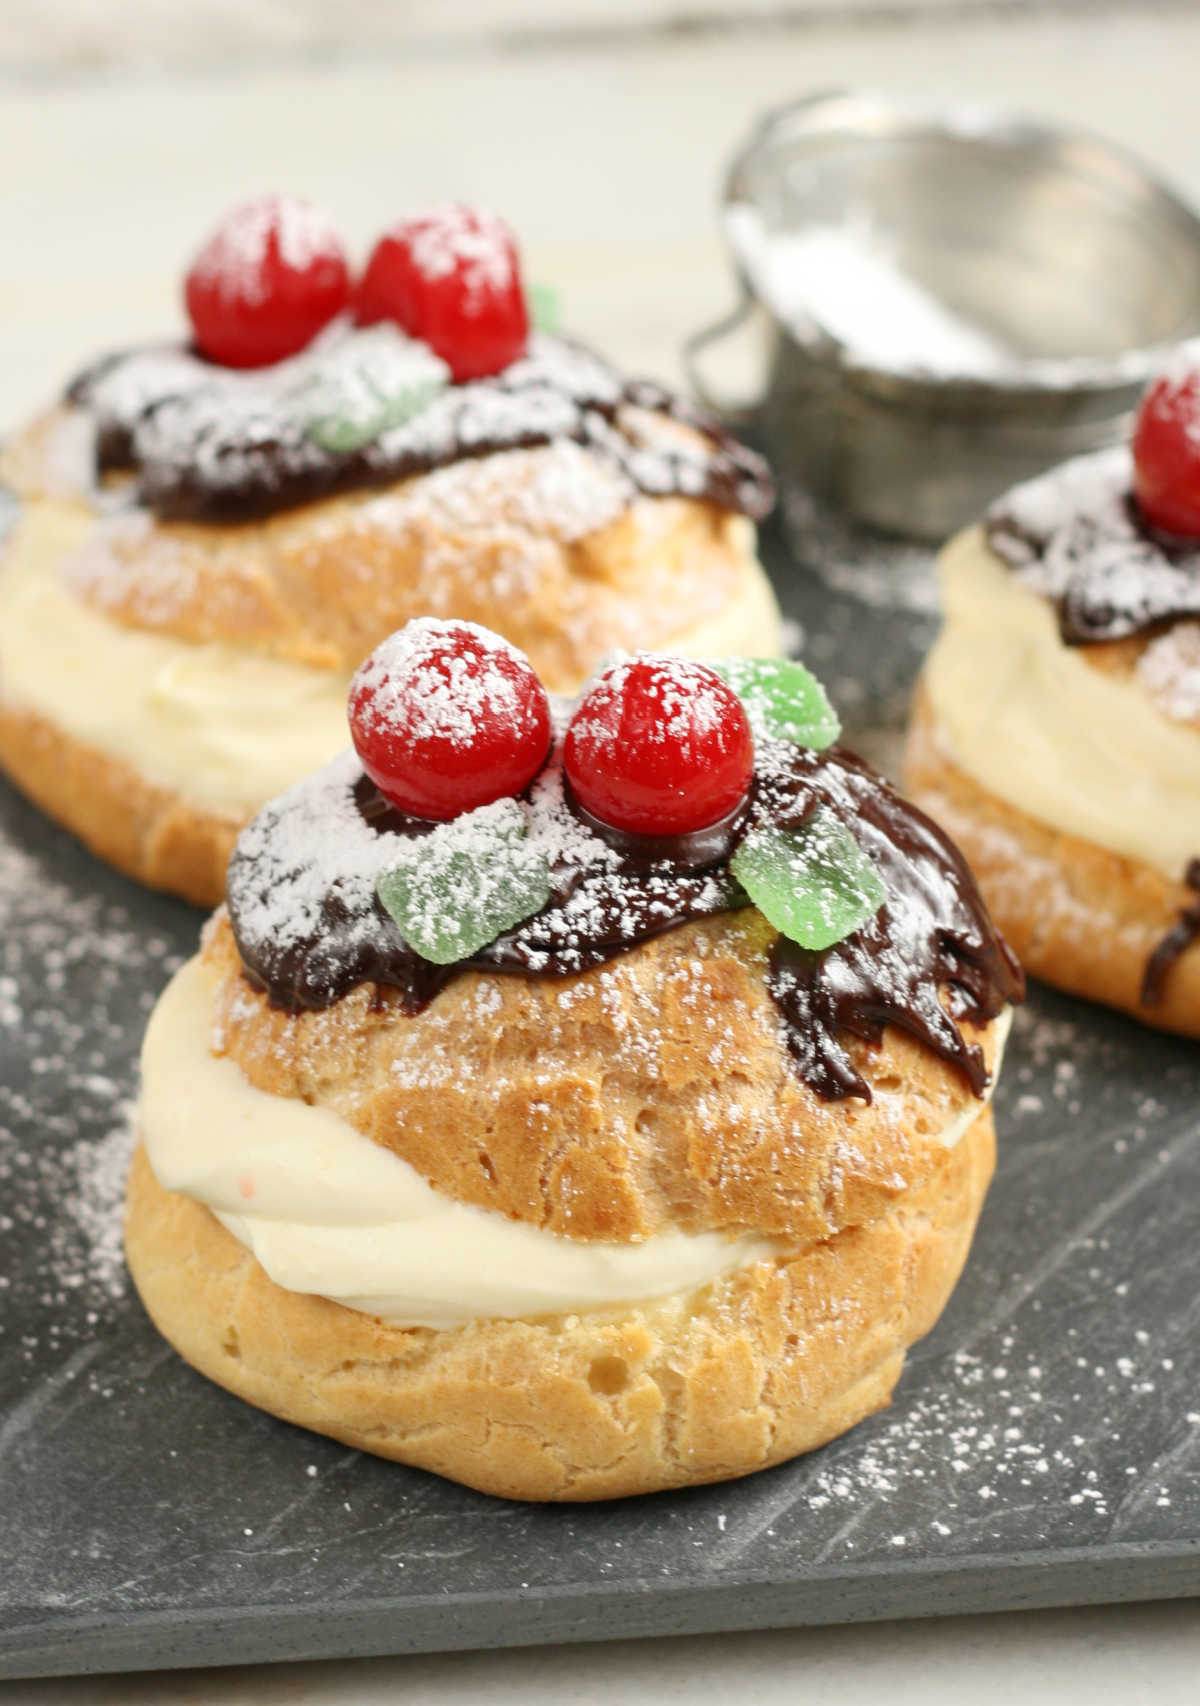
Cream puffs have a reputation for being difficult, and I'll be honest — the first time I made choux pastry I was convinced I'd ruined it because the dough looked wrong at every stage. But once you understand that the dough is supposed to be stiff, then glossy, then pipeable, it clicks. The shells bake up golden and hollow, and you fill them with a simple vanilla pastry cream or lightly sweetened whipped cream. Pile them on a tiered stand dusted with powdered sugar for Valentine's Day and they look genuinely impressive with not as much work as people assume.
Ingredients
- 1 cup water
- ½ cup (1 stick) unsalted butter, cut into pieces
- 1 teaspoon granulated sugar
- ¼ teaspoon salt
- 1 cup all-purpose flour
- 4 large eggs, at room temperature
- For the filling: 2 cups heavy whipping cream, 3 tablespoons powdered sugar, 1 teaspoon vanilla extract
- Extra powdered sugar for dusting
Instructions
- Preheat oven to 400°F and line a baking sheet with parchment. Combine water, butter, sugar, and salt in a medium saucepan over medium heat and bring to a full boil.
- Add all the flour at once and stir vigorously with a wooden spoon until the dough pulls away from the sides and forms a smooth ball, about 1-2 minutes. Remove from heat and let cool for 5 minutes.
- Beat in the eggs one at a time, stirring hard after each addition until fully incorporated. The dough will look slippery and separated at first — keep stirring and it will come together into a smooth, glossy paste.
- Drop heaping tablespoons (or pipe using a zip-lock bag with the corner snipped) onto the baking sheet, spacing 2 inches apart. Bake for 25-30 minutes until deep golden brown. Do not open the oven early or they'll collapse. Cool completely on a wire rack.
- Beat heavy cream with powdered sugar and vanilla until stiff peaks form. Slice the cooled puffs in half, fill generously with whipped cream, replace the tops, and dust with powdered sugar before serving.
Tips
- Tip: Room temperature eggs are non-negotiable here — cold eggs won't incorporate properly and the shells won't puff correctly.
- Tip: Bake until they're genuinely deep golden — pale puffs will deflate once they come out of the oven. Give them the full time.
- Tip: Fill the shells just before serving so they stay crisp — filled cream puffs sitting in the fridge for hours go soft quickly.
25. Homemade Strawberry Heart Pop Tarts

I grew up in Pakistan where Pop Tarts weren't a thing, so I came to them late — my kids introduced me. When I saw a homemade heart-shaped version, I immediately wanted to try it, and now I think the homemade version makes the store-bought ones look sad in comparison. The pastry is flaky and buttery, the strawberry jam filling is jammy and just sweet enough, and the icing on top with sprinkles makes them look like something out of a bakery window. You can also check out our homemade heart-shaped strawberry pop tarts for our own version of this recipe. These take a little patience but nothing technically difficult — just rolling, cutting, filling, and crimping.
Ingredients
- 2 ½ cups all-purpose flour
- 1 tablespoon granulated sugar
- 1 teaspoon salt
- 1 cup (2 sticks) cold unsalted butter, cut into small cubes
- 6-8 tablespoons ice cold water
- ¾ cup strawberry jam or preserves
- 1 egg + 1 tablespoon water (egg wash)
- For icing: 1 cup powdered sugar, 2-3 tablespoons milk, pink gel food coloring, Valentine's sprinkles
Instructions
- Mix flour, sugar, and salt in a large bowl. Cut in the cold butter using a pastry cutter or your fingertips until the mixture resembles coarse crumbs with some pea-sized pieces remaining. Add ice water one tablespoon at a time, mixing until the dough just comes together. Divide in half, flatten into discs, wrap, and refrigerate for 30 minutes.
- Preheat oven to 375°F. Roll one disc of dough out on a lightly floured surface to about ⅛-inch thickness. Cut out heart shapes using a large heart cookie cutter — you need pairs, so cut an even number. Repeat with the second disc.
- Place half the hearts on a parchment-lined baking sheet. Spoon about 1 tablespoon of strawberry jam into the center of each, leaving a ½-inch border around the edges. Brush the border with egg wash.
- Place a second heart on top of each filled one and press the edges firmly together. Use a fork to crimp all around the edges to seal. Poke 2-3 small holes in the tops with a toothpick to let steam escape. Brush tops with egg wash.
- Bake for 22-26 minutes until golden brown. Cool completely. Whisk powdered sugar with milk and a drop of pink food coloring until smooth. Spread icing over cooled pop tarts and immediately add sprinkles before the icing sets.
Tips
- Tip: Keep everything cold — cold butter, cold water, cold dough. Warm dough makes tough, dense pastry instead of flaky layers.
- Tip: Don't overfill — too much jam and the seal breaks in the oven and you get leaks everywhere. One tablespoon is enough.
- Tip: These can be assembled the night before and kept unbaked in the fridge — just add 2-3 extra minutes to the bake time straight from cold.
24. Cinnamon Red Hot Biscotti Cookies
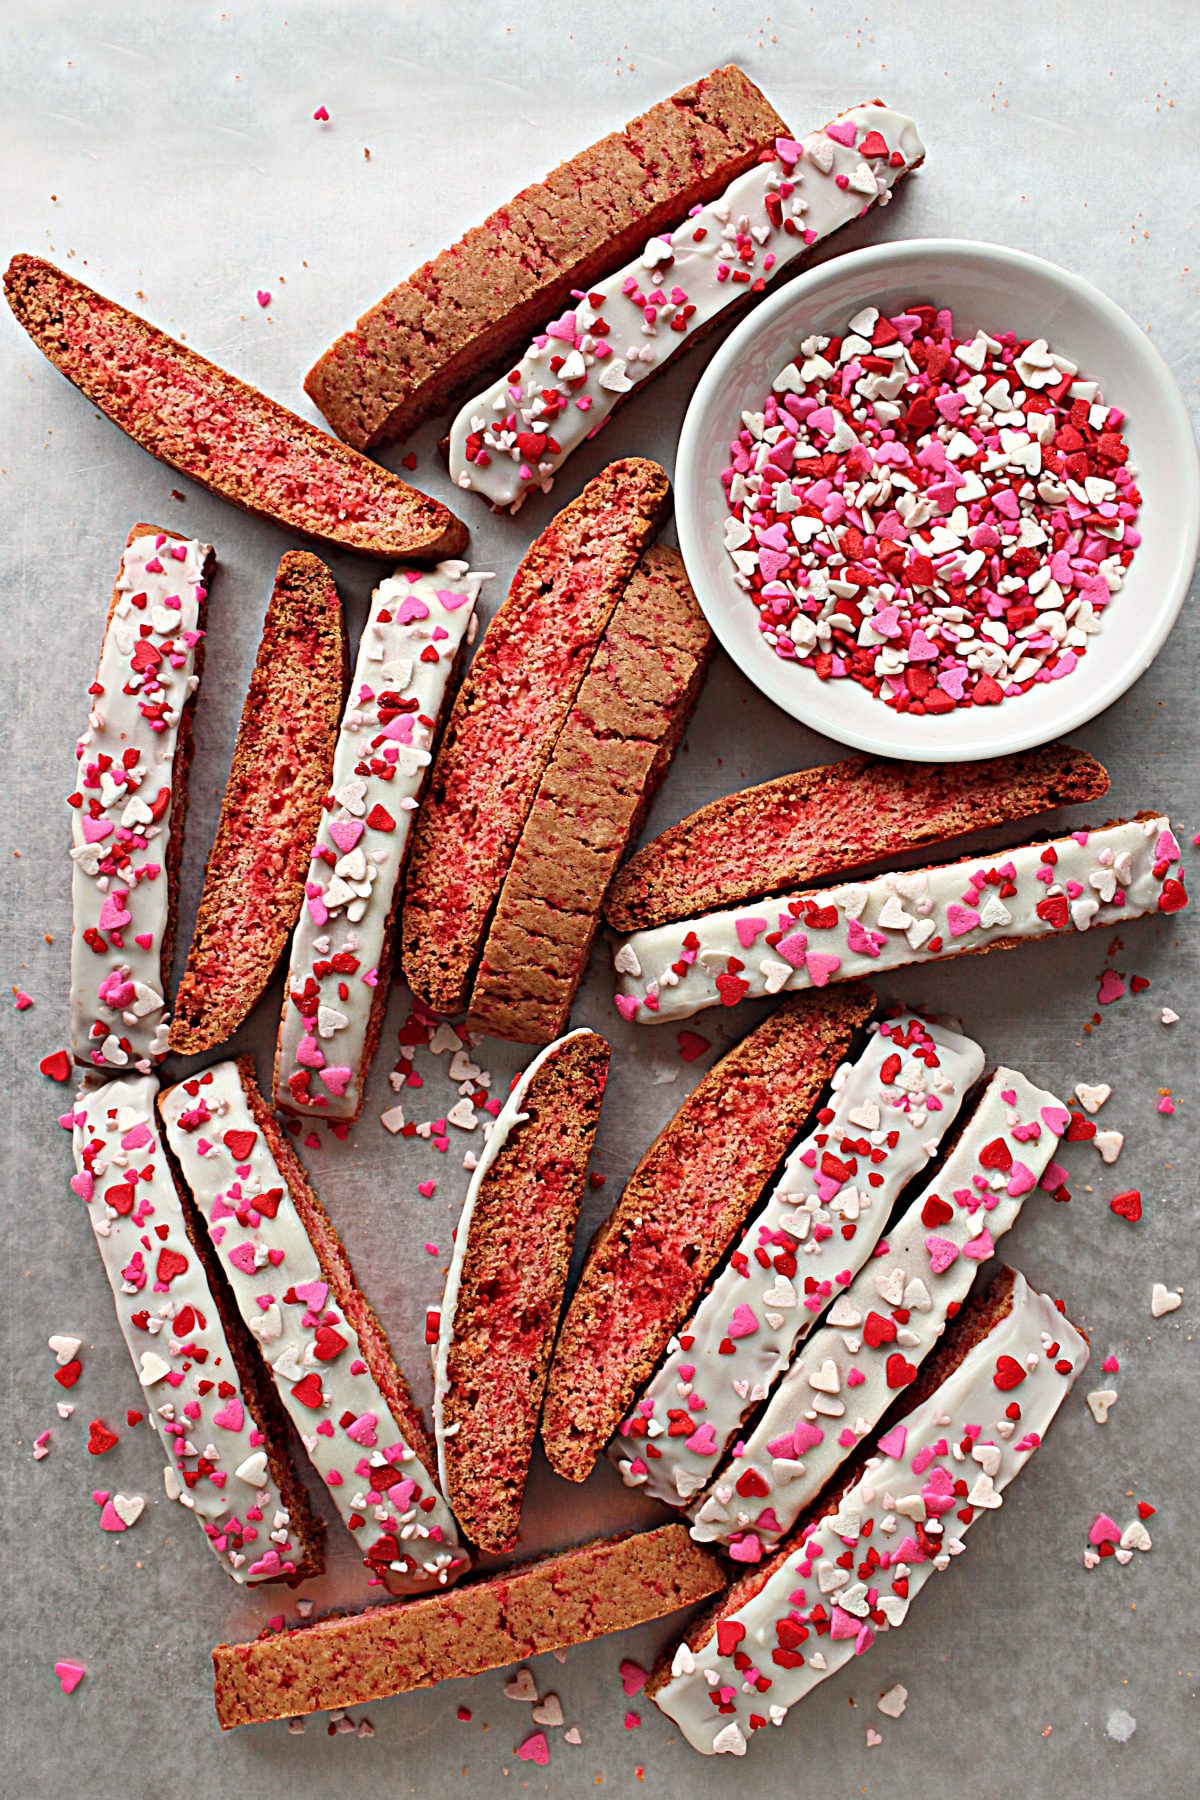
Biscotti always feels a little fancy, but this version is actually very doable — and the red hot cinnamon candy element makes it completely unexpected for Valentine's Day. The candies melt into the dough as it bakes, leaving little pockets of spicy-sweet flavor and a gorgeous rosy color throughout. I made a batch on a whim one February morning and ended up dunking pieces into my tea for three days straight. If you've never baked biscotti before, don't be nervous — the twice-baking method is more forgiving than it sounds.
Ingredients
- 2 cups all-purpose flour
- 1 teaspoon baking powder
- ¼ teaspoon salt
- ¾ cup granulated sugar
- 3 large eggs
- 1 teaspoon vanilla extract
- 1 teaspoon cinnamon
- ½ cup Red Hot cinnamon candies (found in the candy aisle at Walmart or Target)
Instructions
- Preheat your oven to 350°F. Line a baking sheet with parchment paper.
- Whisk together flour, baking powder, salt, and cinnamon in a medium bowl. Set aside.
- In a large bowl, beat eggs and sugar together until light and slightly thickened, about 2 minutes. Mix in vanilla extract.
- Stir the dry ingredients into the wet ingredients until a stiff dough forms, then fold in the Red Hot candies.
- Shape the dough into a log roughly 12 inches long and 3 inches wide on the prepared baking sheet. Bake for 28-30 minutes until firm and lightly golden. Cool for 15 minutes.
- Slice the log on a slight diagonal into ¾-inch thick pieces. Lay them cut-side down on the baking sheet and bake again at 325°F for 10-12 minutes per side, until dry and crisp. Cool completely on a wire rack before storing.
Tips
- Tip: The dough will be sticky — wet your hands slightly before shaping the log and it'll be much easier to handle.
- Tip: Don't slice while the log is still hot or the pieces will crumble. The 15-minute rest is not optional.
- Tip: Biscotti keeps well in an airtight container for up to two weeks, which makes it a great make-ahead gift or treat to have on hand through the holiday.
23. Strawberry Shortbread Cookies
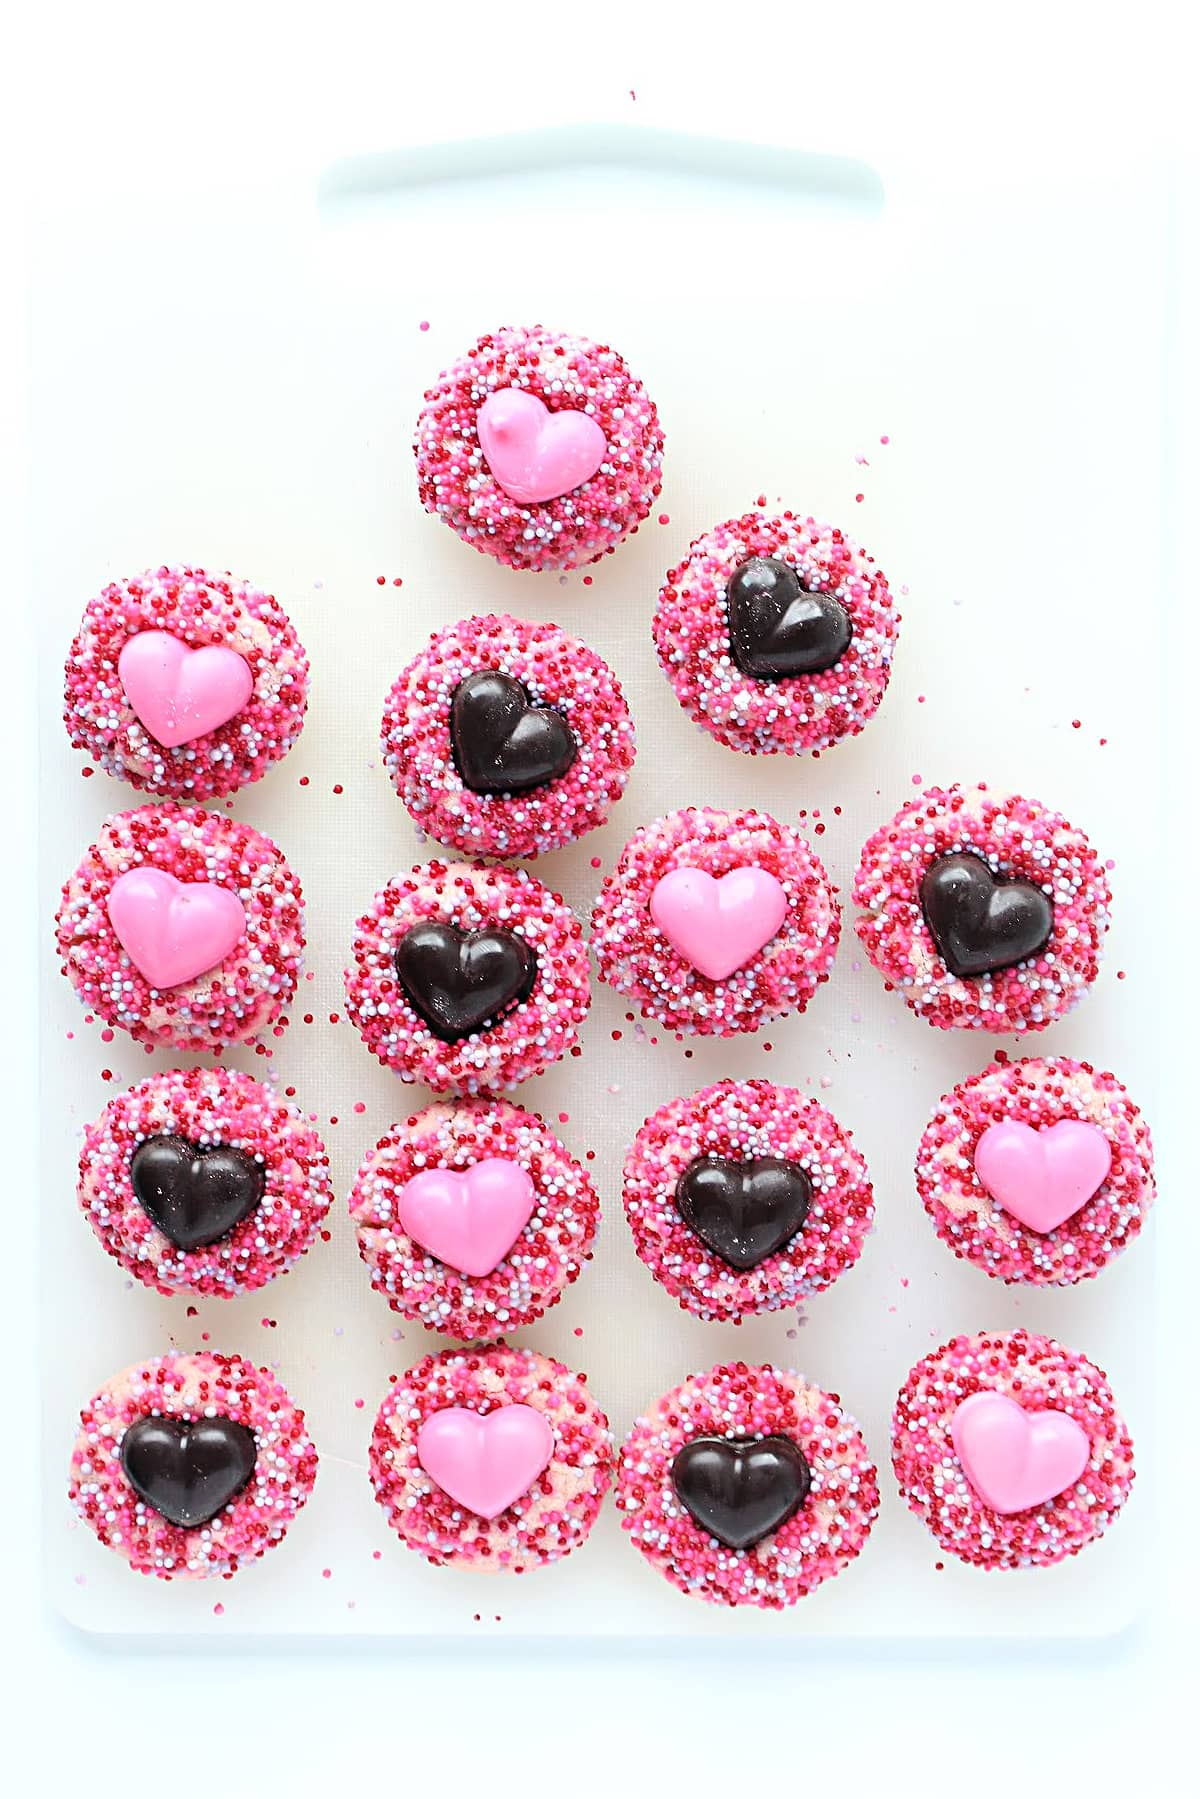
Shortbread is one of those things that looks plain until you bite into it — and these strawberry ones are anything but plain. The freeze-dried strawberry powder worked into the dough gives them a real strawberry flavor without any added moisture, which is the key to keeping that signature crumbly, melt-in-your-mouth texture. They come out pale pink and delicate, exactly the kind of thing you'd want to wrap up in a little bag and give someone on Valentine's Day. If you love shortbread, also check out my raspberry swirl shortbread cookies — that recipe is just as simple and just as good.
Ingredients
- 1 cup (2 sticks) unsalted butter, softened to room temperature
- ½ cup powdered sugar, sifted
- 1 teaspoon vanilla extract
- 2 cups all-purpose flour
- ¼ teaspoon salt
- ¼ cup freeze-dried strawberries, ground to a fine powder (pulse in a blender or food processor — or crush in a zip-lock bag with a rolling pin)
- 2 tablespoons white sanding sugar or sparkling sugar for rolling (optional but pretty)
Instructions
- Beat the softened butter and powdered sugar together until light and fluffy, about 3 minutes. Mix in the vanilla extract.
- Add the flour, salt, and strawberry powder to the butter mixture and mix until the dough just comes together. Don't overwork it.
- Shape the dough into a log about 2 inches in diameter, roll it in the sanding sugar if using, then wrap tightly in plastic wrap. Refrigerate for at least 1 hour (or overnight).
- Preheat oven to 325°F. Slice the chilled log into ¼-inch rounds and place on a parchment-lined baking sheet about 1 inch apart.
- Bake for 14-16 minutes until the edges are just barely set — you don't want them to brown. Cool on the pan for 5 minutes before transferring.
Tips
- Tip: Butter temperature matters a lot here — too cold and the dough won't come together, too warm and it'll be greasy. Aim for butter that holds a finger indent but isn't shiny.
- Tip: Freeze-dried strawberries are easy to find at Trader Joe's, Walmart, or Aldi — they're usually near the oatmeal or dried fruit section.
- Tip: The log of dough can be frozen for up to a month. Slice and bake straight from frozen — just add 2-3 minutes to the bake time.
22. Strawberry Cream Trifle

A trifle is one of those desserts that looks like you spent hours on it when really you're just stacking things in a bowl. This strawberry cream version has that stunning layered look — fluffy whipped cream, soft cake pieces, and fresh sliced strawberries repeating all the way up — and every spoonful hits every texture at once. I've made this for gatherings where I needed something that traveled well and fed a crowd, and it never fails to get comments. You can use store-bought pound cake from Costco or Walmart to save time, and it works just as well as homemade.
Ingredients
- 1 pound cake (store-bought or homemade), cut into 1-inch cubes
- 2 lbs fresh strawberries, hulled and sliced
- 3 tablespoons granulated sugar (for macerating the strawberries)
- 2 cups heavy whipping cream
- 3 tablespoons powdered sugar
- 1 teaspoon vanilla extract
- 1 package (3.4 oz) instant vanilla pudding mix + 2 cups cold milk (optional, for a creamier filling layer)
Instructions
- Toss the sliced strawberries with granulated sugar in a bowl and let them sit for 20-30 minutes. They'll release their juices and become syrupy — this is what soaks into the cake layers.
- If using pudding, whisk the instant pudding mix with cold milk until thick, about 2 minutes. Refrigerate while you prep the rest.
- Whip the heavy cream with powdered sugar and vanilla until stiff peaks form. Don't overwhip or it'll go grainy.
- In a large trifle bowl or deep glass dish, layer in this order: cake cubes, a spoonful of the strawberry juice, strawberries, pudding (if using), whipped cream. Repeat the layers until you reach the top.
- Finish with a generous layer of whipped cream and a few whole or halved strawberries for decoration. Refrigerate for at least 2 hours before serving so the layers settle and soak together.
Tips
- Tip: Assemble this the night before and refrigerate overnight — the flavors meld together beautifully and it's one less thing to do the day of.
- Tip: If you don't have a trifle bowl, a large glass mixing bowl or even individual mason jars work perfectly for a more personal presentation.
- Tip: Add a drizzle of strawberry jam thinned with a little water between layers if your strawberries aren't very sweet — it adds depth without any extra effort.
21. Insanely Good Double Cherry Chip Bundt Cake
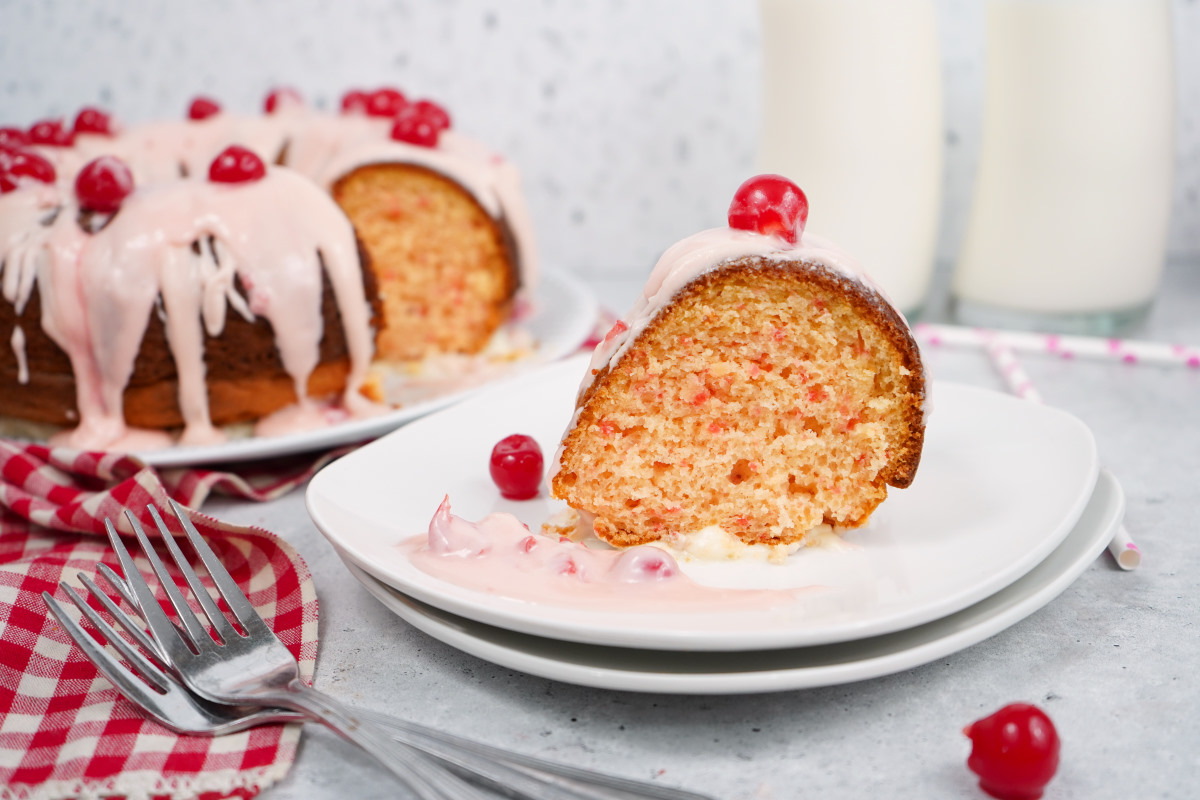
Bundt cakes are one of my go-to bakes when I need something that looks impressive but doesn't require much fuss — the pan does all the decorative work. This cherry chip version starts with a cherry chip cake mix and gets a double dose of cherry flavor from maraschino cherries folded into the batter, so it comes out bright pink and genuinely fruity. You can check out my easy marble bundt cake if you want another no-fuss bundt option, but for Valentine's Day this cherry one is hard to beat — it's festive without trying too hard.
Ingredients
- 1 box (15.25 oz) cherry chip cake mix
- 1 box (3.4 oz) instant cheesecake or vanilla pudding mix
- 4 large eggs
- ½ cup vegetable oil
- 1 cup sour cream
- 1 jar (10 oz) maraschino cherries, drained and roughly chopped (reserve 2 tablespoons of the juice)
- 1 cup powdered sugar (for glaze)
- 2-3 tablespoons reserved cherry juice or milk (for glaze)
Instructions
- Preheat oven to 350°F. Grease and flour a 10-12 cup bundt pan thoroughly — get into every groove or the cake will stick.
- In a large bowl, combine the cake mix, pudding mix, eggs, oil, and sour cream. Mix until smooth, about 2 minutes. The batter will be thick.
- Fold in the chopped maraschino cherries and reserved cherry juice. Pour batter evenly into the prepared bundt pan.
- Bake for 45-55 minutes until a toothpick inserted in the thickest part comes out clean. Cool in the pan for 15 minutes, then invert onto a wire rack to cool completely.
- Whisk powdered sugar with cherry juice or milk until you have a pourable glaze. Drizzle over the cooled cake and let it set for 10 minutes before slicing.
Tips
- Tip: Pat the chopped cherries dry with a paper towel before folding them in — excess moisture can cause them to sink to the bottom of the cake.
- Tip: Don't rush the cooling step before inverting — 15 minutes in the pan lets the cake firm up enough that it releases cleanly without breaking.
- Tip: Cherry chip cake mix isn't always easy to find — if your store doesn't carry it, a white or vanilla cake mix plus 2 teaspoons of almond extract gets you very close.
20. Easy Strawberry Pie Filling Parfait Cups
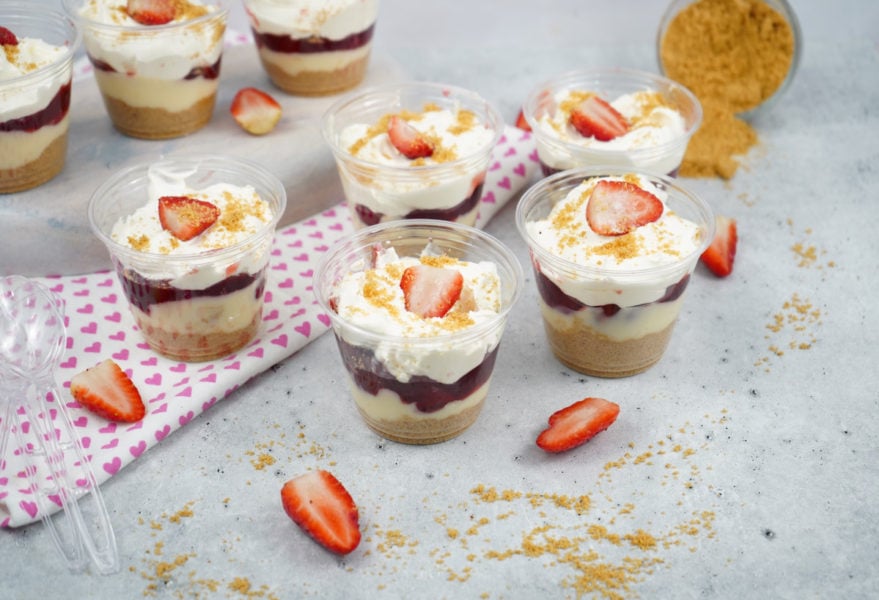
Some nights you just need a dessert that comes together in ten minutes and still looks like you put in some effort — these parfait cups are that dessert. Canned strawberry pie filling layered with whipped cream and crumbled graham crackers gives you something that looks pretty in individual cups and tastes genuinely good without any baking at all. Zainab is the one who got me into making these — she loves anything served in her own little cup. I make a double batch because one each is never enough, and they disappear before I even sit down.
Ingredients
- 1 can (21 oz) strawberry pie filling
- 2 cups heavy whipping cream
- 3 tablespoons powdered sugar
- 1 teaspoon vanilla extract
- 8 full graham crackers, crushed into crumbs (about 1 cup)
- 2 tablespoons melted butter (to mix with crumbs for a more cohesive base, optional)
- Fresh strawberry slices for garnish (optional)
Instructions
- Whip the heavy cream with powdered sugar and vanilla until stiff peaks form. Keep refrigerated until you're ready to assemble.
- If using butter with the graham crumbs, mix them together until the crumbs hold together slightly. Otherwise, use the crumbs as-is for a looser layer.
- In individual clear cups or glasses, layer in this order: graham cracker crumbs, whipped cream, strawberry pie filling. Repeat the layers at least once more, ending with a dollop of whipped cream on top.
- Top with a fresh strawberry slice and a pinch of extra graham crumbs. Refrigerate for at least 30 minutes before serving so everything settles and the flavors come together.
Tips
- Tip: Clear plastic cups from the dollar store work great here — you get to see all the layers and they're easy to serve at a party or give as individual desserts.
- Tip: You can swap the strawberry pie filling for fresh strawberries macerated with a little sugar if you prefer — just let them sit for 30 minutes first to get syrupy.
- Tip: These can be assembled up to 4 hours ahead and kept covered in the fridge — any longer and the graham cracker layer gets too soft, which isn't the end of the world but loses some texture.
19. Valentine's Day Hot Chocolate Bombs

I'd seen hot chocolate bombs all over Instagram for two winters before I finally tried making them. My first attempt the shells cracked because I didn't let the chocolate set properly before unmolding — lesson learned the hard way. Once I figured out the technique, these became one of my favorite things to gift. Drop one of these little chocolate spheres into a mug, pour hot milk over it, and watch it melt open to release cocoa powder and marshmallows — it's genuinely fun to watch and even more fun to drink. For Valentine's Day, use pink and red candy melts and they look like the most impressive gift you've ever given, even though the whole process takes under an hour.
Ingredients
- 1½ cups pink or red candy melts (about 8 oz)
- 3 tablespoons hot cocoa mix, divided
- ½ cup mini marshmallows, divided
- White chocolate or additional candy melts, for drizzling
- Sprinkles, for decorating
- Hot milk, for serving (about 1 cup per bomb)
Instructions
- Melt candy melts in a microwave-safe bowl in 30-second intervals, stirring between each, until fully smooth. Spoon about 1½ tablespoons of melted chocolate into each cavity of a silicone half-sphere mold (about 2-inch diameter), spreading it up the sides evenly with the back of a spoon.
- Refrigerate the mold for 15–20 minutes until the shells are fully set and firm. Carefully pop them out — if they crack, your layer was too thin; try to aim for an even coat with no thin spots.
- Fill half the shells with 1½ teaspoons of hot cocoa mix and a small handful of mini marshmallows. Heat a flat plate in the microwave for 30 seconds, then gently press an empty shell onto the warm plate for 2–3 seconds to slightly melt the rim. Press it onto a filled shell to seal the bomb together.
- Drizzle with melted white chocolate and add sprinkles immediately before it sets. To use, place a bomb in a mug and pour 1 cup of hot milk over it — watch it open and stir to combine.
Tips
- Tip: Work quickly when sealing the two halves — the warmed rim sets fast. Have your filled shells ready to go before you heat the plate.
- Tip: These make beautiful gifts — wrap each bomb individually in a small cellophane bag tied with a red ribbon and store at room temperature for up to 2 weeks.
- Tip: If you can't find candy melts, use good-quality white chocolate chips tinted with oil-based food coloring — water-based food dye will cause chocolate to seize.
18. Buttermilk Crepes (Ukrainian Blini)
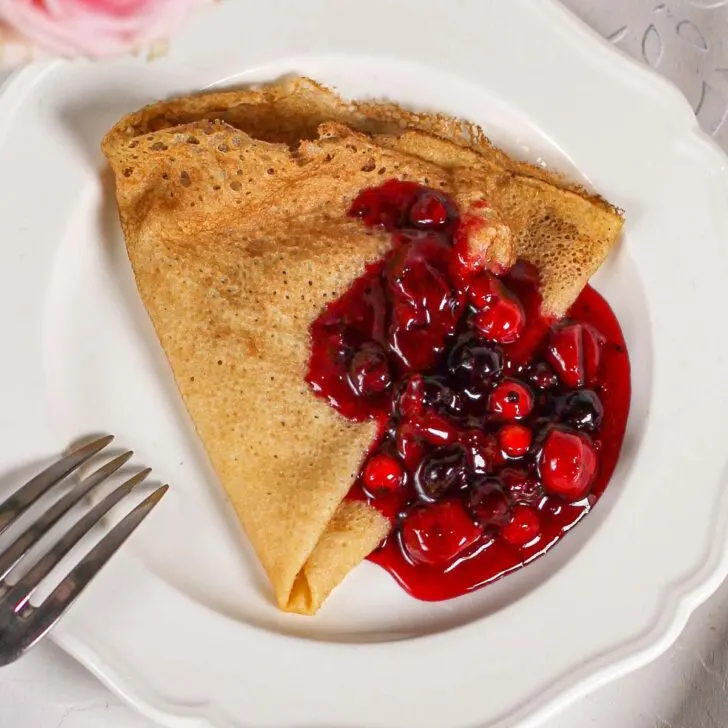
Crepes have always felt romantic to me — there's something about the thin, delicate layers and the slow, deliberate process of making them that just fits Valentine's Day better than a rushed cookie. These buttermilk blini are softer and slightly more tender than a standard French crepe, and the buttermilk gives them a very subtle tang that works beautifully with sweet fillings. I like to set out a spread — sliced strawberries, whipped cream, Nutella, a little jar of jam — and let everyone build their own. It turns dessert into an event. For a Valentine's dinner at home, this is genuinely one of the most impressive things you can put on the table, and it costs almost nothing to make.
Ingredients
- 1 cup all-purpose flour
- 1 tablespoon granulated sugar
- ¼ teaspoon salt
- 1 cup buttermilk
- 2 large eggs
- 2 tablespoons unsalted butter, melted, plus more for the pan
- ½ teaspoon vanilla extract
Instructions
- Whisk together flour, sugar, and salt in a bowl. In a separate bowl, whisk buttermilk, eggs, melted butter, and vanilla. Pour the wet ingredients into the dry and whisk until smooth with no lumps. Let the batter rest for 15 minutes — this relaxes the gluten and gives you more tender crepes.
- Heat a 9- or 10-inch nonstick skillet over medium heat and brush lightly with butter. Pour about ¼ cup of batter into the center, immediately lifting the pan and swirling it to spread the batter into a thin, even circle.
- Cook for 1–2 minutes until the edges look dry and the bottom is lightly golden. Flip carefully with a thin spatula and cook for another 30 seconds. Slide onto a plate and repeat with remaining batter, stacking crepes as you go.
- Serve warm with your choice of fillings: fresh strawberries and whipped cream, Nutella and banana, or a simple dusting of powdered sugar with a squeeze of lemon.
Tips
- Tip: No buttermilk? Mix 1 cup regular milk with 1 tablespoon of white vinegar or lemon juice, stir, and let it sit for 5 minutes — it works almost identically.
- Tip: The first crepe almost always comes out ugly — that's the pan seasoning itself. Don't stress, just eat it as the cook's snack and carry on.
- Tip: Crepes can be made a day ahead and stacked with parchment between them, then wrapped and refrigerated. Reheat in the skillet for 30 seconds per side before serving.
17. Easy Red Velvet Mug Cake for Two
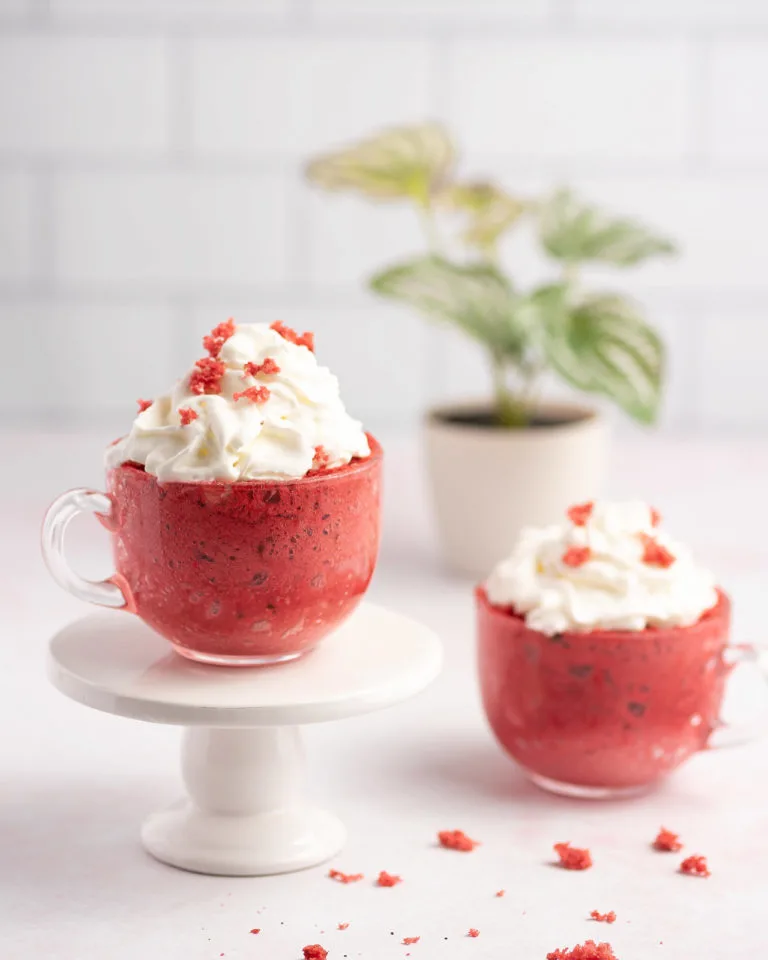
Some nights you don't want to bake a whole cake, clean up a mixing bowl, or wait an hour. This red velvet mug cake is exactly for those nights — it comes together in under 5 minutes and bakes in the microwave in about 90 seconds. It's soft, chocolatey, and genuinely satisfying, especially when you drop a spoonful of cream cheese frosting on top while it's still warm. I keep this one in my back pocket for when we've had a long day and both my husband and I just want something sweet without the effort. The "for two" part means you split it straight from the mug — which is either very romantic or very practical, depending on your evening.
Ingredients
- 4 tablespoons all-purpose flour
- 4 tablespoons granulated sugar
- 2 tablespoons unsweetened cocoa powder
- ¼ teaspoon baking powder
- Pinch of salt
- 3 tablespoons whole milk
- 2 tablespoons vegetable oil
- ½ teaspoon red food coloring
- ¼ teaspoon vanilla extract
- 2 tablespoons cream cheese, softened, for topping
- 1 tablespoon powdered sugar, for topping
Instructions
- In a large microwave-safe mug (at least 12 oz), whisk together flour, sugar, cocoa powder, baking powder, and salt with a fork until combined.
- Add milk, oil, red food coloring, and vanilla. Stir well until the batter is smooth and no dry flour remains at the bottom — scrape the sides of the mug with the fork to catch any hiding pockets.
- Microwave on high for 60–90 seconds. Start checking at 60 seconds — the center should look just set and not wet. Every microwave is different, so check early rather than overcooking it, which makes it rubbery.
- While the cake cooks, stir together softened cream cheese and powdered sugar until smooth. Drop a spoonful on top of the warm cake and serve immediately with two spoons.
Tips
- Tip: Use a mug that's bigger than you think you need — the batter rises during cooking and a small mug will overflow and make a mess in your microwave.
- Tip: Gel food coloring gives a more vibrant red color than liquid — you'll need less of it, so start with ¼ teaspoon and add more if you want a deeper color.
- Tip: For an extra indulgent version, stir 1 tablespoon of mini chocolate chips into the batter before microwaving — they melt through the cake and add little pockets of chocolate.
16. Red Velvet Pancakes with Cream Cheese Glaze
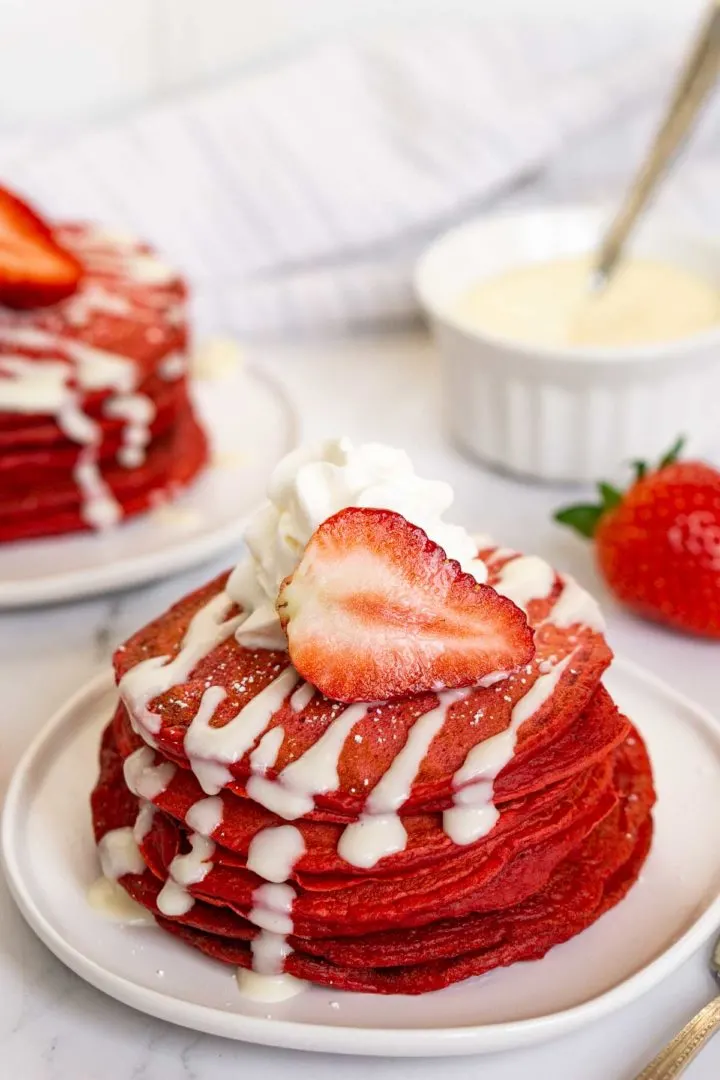
Red velvet pancakes with cream cheese glaze are my answer to "what do we do for Valentine's Day breakfast" — because in my house, a special breakfast often lands harder than a fancy dinner. These are genuinely fluffy, properly red, and the cream cheese glaze poured on top makes them feel like dessert even at 8 in the morning. Zainab saw me making these one February and now asks for them every single year, which tells you everything you need to know. The cream cheese glaze is the part that sets them apart — don't skip it or replace it with maple syrup, it really is the whole point.
Ingredients
- 1½ cups all-purpose flour
- 2 tablespoons unsweetened cocoa powder
- 2 tablespoons granulated sugar
- 1½ teaspoons baking powder
- ½ teaspoon baking soda
- ¼ teaspoon salt
- 1 cup buttermilk
- 1 large egg
- 2 tablespoons vegetable oil
- 1–2 teaspoons red food coloring
- 4 oz cream cheese, softened
- 1 cup powdered sugar
- 3–4 tablespoons milk, to thin the glaze
Instructions
- Make the cream cheese glaze first: beat softened cream cheese with a fork or hand mixer until smooth, then sift in powdered sugar and mix well. Add milk one tablespoon at a time until the glaze is pourable but not watery. Set aside.
- Whisk together flour, cocoa powder, sugar, baking powder, baking soda, and salt in a large bowl. In a separate bowl, whisk buttermilk, egg, oil, and red food coloring. Pour wet into dry and stir gently until just combined — a few small lumps are fine. Do not overmix or the pancakes will be tough.
- Heat a nonstick skillet or griddle over medium heat and grease lightly with butter or cooking spray. Pour about ¼ cup of batter per pancake. Cook until bubbles form on the surface and the edges look set, about 2–3 minutes. Flip and cook another 1–2 minutes.
- Stack pancakes on a plate and drizzle generously with the cream cheese glaze. Serve immediately with fresh strawberries on the side if you have them.
Tips
- Tip: The cream cheese for the glaze must be fully at room temperature — cold cream cheese will leave lumps in your glaze no matter how hard you beat it. Pull it out 30 minutes before you start.
- Tip: Keep finished pancakes warm in a 200°F oven on a baking sheet while you cook the rest of the batch — they stay fluffy and don't steam themselves soggy.
- Tip: Use gel food coloring for a more vivid red without affecting the batter consistency — liquid coloring works but you may need more of it to get a deep color.
15. Heart Shaped Chocolate Chip Cookies
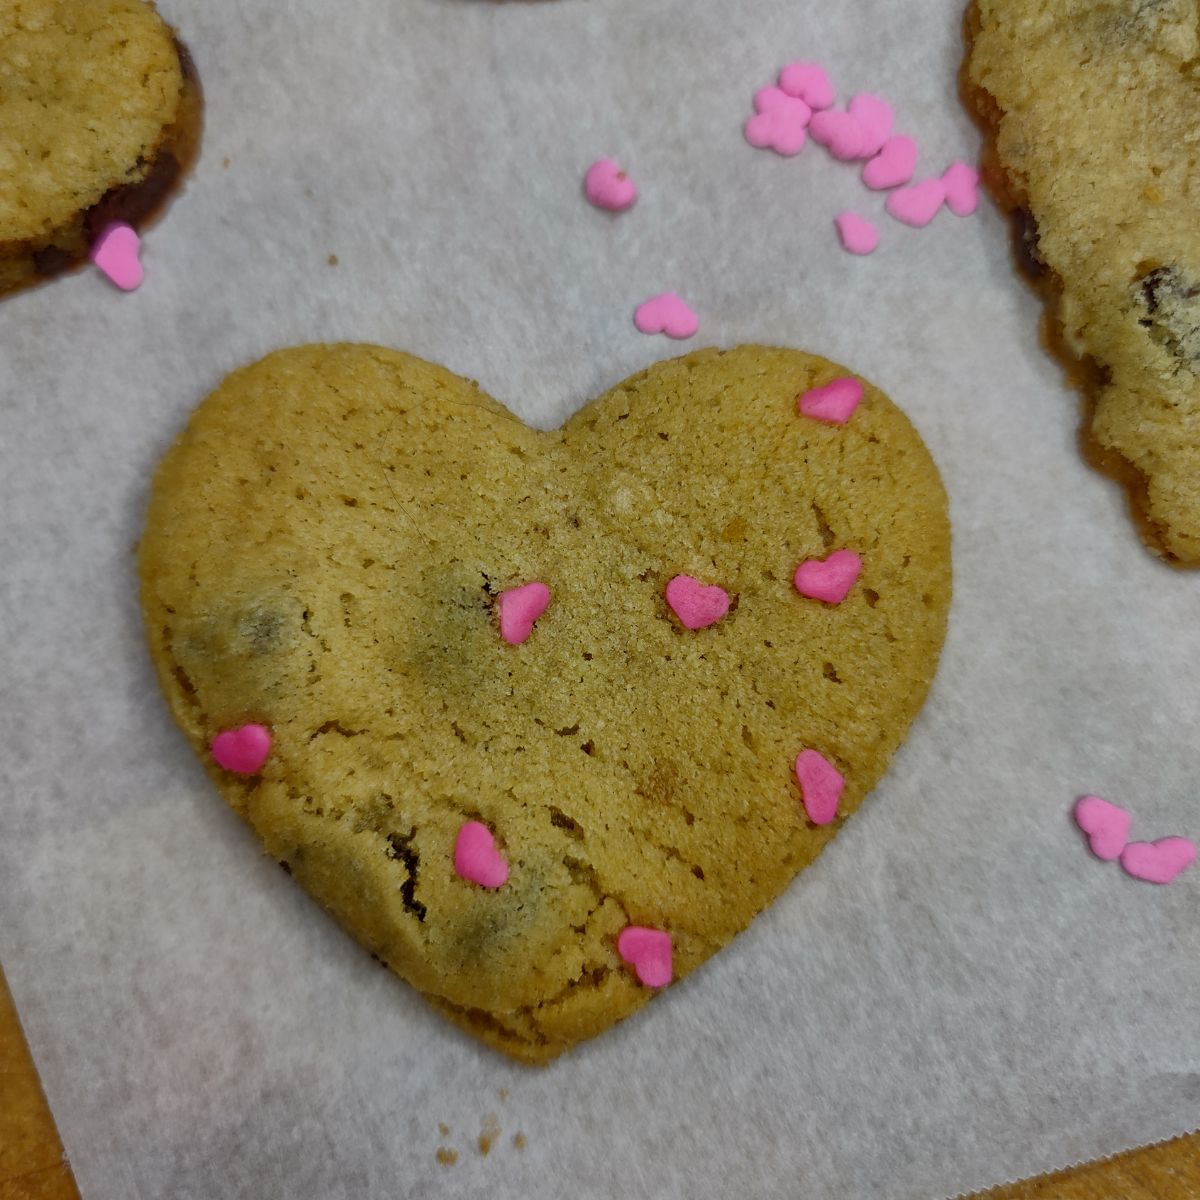
A classic chocolate chip cookie, cut into a heart shape — it sounds simple but it genuinely works as a Valentine's gift. The key is using a dough that holds its shape when baked, which means chilling it properly before cutting. I've made drop cookies a hundred times but the first time I tried to cut them into shapes, I didn't chill the dough long enough and they spread into blobs in the oven. Thirty minutes in the fridge before baking makes all the difference. These are the kind of thing Saad helps me make — he handles the heart cutter, I handle the oven — and they come out looking intentional and sweet without requiring any decorating skills.
Ingredients
- 2¼ cups all-purpose flour
- 1 teaspoon baking soda
- ½ teaspoon salt
- 1 cup (2 sticks) unsalted butter, softened to room temperature
- ¾ cup granulated sugar
- ¾ cup packed brown sugar
- 2 large eggs
- 2 teaspoons vanilla extract
- 2 cups semi-sweet chocolate chips
Instructions
- Whisk together flour, baking soda, and salt in a bowl and set aside. Beat softened butter with both sugars until light and fluffy, about 2–3 minutes by hand with a wooden spoon or using a hand mixer. Beat in eggs one at a time, then add vanilla.
- Gradually mix the flour mixture into the butter mixture until just combined, then fold in chocolate chips. Divide the dough in half, flatten each portion into a disc, wrap in plastic wrap, and refrigerate for at least 30 minutes (or up to 24 hours).
- Preheat oven to 375°F. On a lightly floured surface, roll chilled dough out to about ¼-inch thickness. Cut out heart shapes with a heart-shaped cookie cutter and transfer carefully to a parchment-lined baking sheet, spacing them about 1 inch apart.
- Bake for 9–11 minutes until the edges are just set and lightly golden — the centers will look slightly underdone, which is what you want for a soft cookie. Cool on the baking sheet for 5 minutes before transferring to a wire rack.
Tips
- Tip: Re-roll the dough scraps once, but not more than that — overworked dough gets tough. If you have leftover scraps after two rolls, just bake them as irregular shapes and call them "tester cookies."
- Tip: Press a few extra chocolate chips onto the tops of the cut-out cookies right before baking — it makes them look fuller and more photogenic, and no one complains about more chocolate.
- Tip: These keep well in an airtight container at room temperature for up to 4 days. Stack them with a piece of parchment between layers so the chocolate chips don't press into the cookies below.
14. Chocolate Strawberry Pie
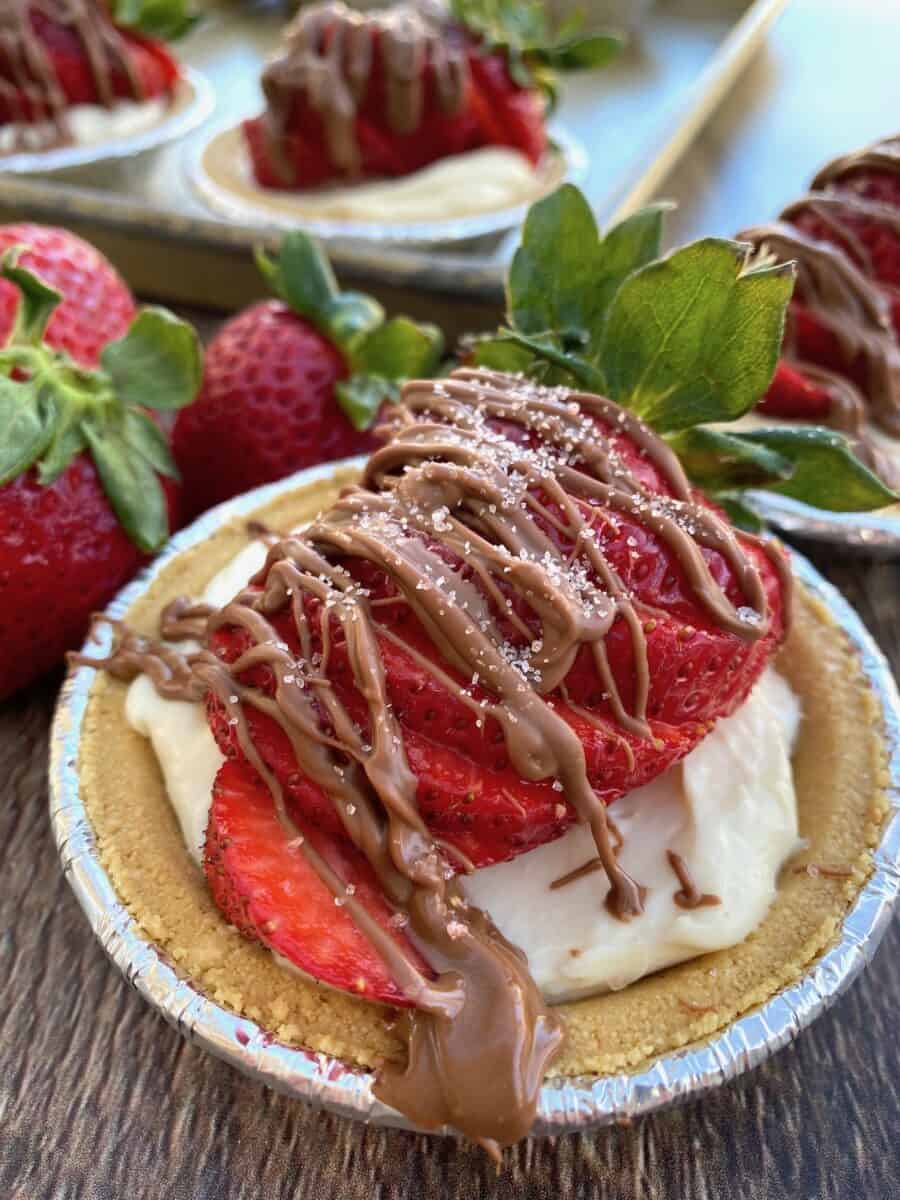
There's something about a chocolate pie topped with fresh strawberries that just looks like Valentine's Day in dessert form. The base is a rich, fudgy chocolate filling set in a buttery crust, and the strawberries on top do all the decorating for you — no piping bags required. I made this on a weeknight once when I had company coming and needed something that looked more impressive than the effort involved. It held up beautifully in the fridge overnight, which is exactly what you want when you're planning ahead for a special occasion.
Ingredients
- 1 pre-made or homemade 9-inch pie crust, blind baked and cooled
- 1 cup semi-sweet chocolate chips
- ½ cup heavy cream
- 2 tablespoons unsalted butter
- 1 teaspoon vanilla extract
- 2 cups fresh strawberries, hulled and halved
- 2 tablespoons strawberry jam or preserves (for glaze)
Instructions
- In a small saucepan over low heat, warm the heavy cream until it just begins to simmer. Remove from heat, add the chocolate chips and butter, and let sit for 2 minutes before stirring until smooth. Stir in the vanilla extract.
- Pour the chocolate ganache into the cooled pie crust and spread it evenly. Refrigerate for at least 2 hours, or until the filling is fully set and firm to the touch.
- Warm the strawberry jam in a small bowl for 20 seconds in the microwave and stir until smooth. Toss the halved strawberries gently in the glaze so they're lightly coated.
- Arrange the glazed strawberries over the set chocolate filling in whatever pattern you like — a spiral looks beautiful. Refrigerate until ready to serve, then slice and enjoy cold.
Tips
- Tip: Don't add the strawberries until a few hours before serving — they'll release juice and make the top watery if they sit too long.
- Tip: A Pillsbury pre-made crust from Walmart works perfectly here if you don't want to make your own — nobody will know the difference.
- Tip: For a darker, more intense chocolate flavor, swap the semi-sweet chips for bittersweet (60% cacao or higher).
13. Heart-Shaped Chocolate Chip Cookies
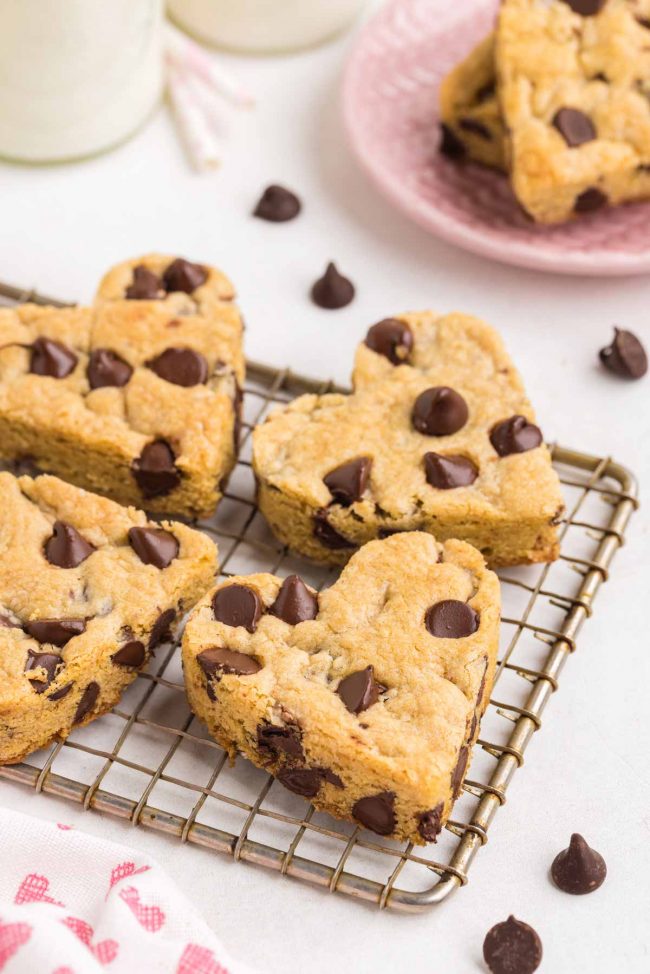
These are just chocolate chip cookies — the classic, everyone-loves-them kind — except you press them into heart shapes before baking, and suddenly they become a Valentine's gift. Zainab helped me make a batch of these last February and she was very serious about the heart shaping process. The dough is straightforward, no chilling required if you use the right ratios, and the result is a thick, chewy cookie with crisp edges and gooey chocolate pockets. Stack them in a cellophane bag with a ribbon and you have a homemade gift that cost almost nothing.
Ingredients
- 2¼ cups all-purpose flour
- 1 teaspoon baking soda
- 1 teaspoon salt
- 1 cup (2 sticks) unsalted butter, softened to room temperature
- ¾ cup granulated sugar
- ¾ cup packed brown sugar
- 2 large eggs
- 2 teaspoons vanilla extract
- 2 cups semi-sweet chocolate chips
Instructions
- Preheat oven to 375°F. Line two baking sheets with parchment paper. In a medium bowl, whisk together the flour, baking soda, and salt. Set aside.
- In a large bowl, beat the softened butter with both sugars until light and fluffy, about 2 minutes by hand or with a hand mixer. Add the eggs one at a time, then the vanilla, and beat until combined.
- Add the flour mixture to the butter mixture and stir until just combined — don't overmix. Fold in the chocolate chips.
- Scoop about 2 tablespoons of dough per cookie onto the prepared baking sheet. Use your fingers to gently shape each ball into a heart — pinch the top to form the two bumps and pull the bottom to a slight point. They'll spread a little, so keep the shape slightly exaggerated.
- Bake for 9–11 minutes until the edges are golden but the center still looks slightly underdone. They'll firm up as they cool. Let sit on the pan for 5 minutes before transferring.
Tips
- Tip: If the dough is too soft to shape cleanly, refrigerate it for 20 minutes — it makes the hearts much easier to form and they hold their shape better in the oven.
- Tip: Press a few extra chocolate chips onto the top of each cookie right before baking — the visible chips on top make them look more photogenic.
- Tip: These keep well in an airtight container for up to 4 days, so you can bake them the day before Valentine's Day without stressing.
12. Red Velvet Banana Pudding
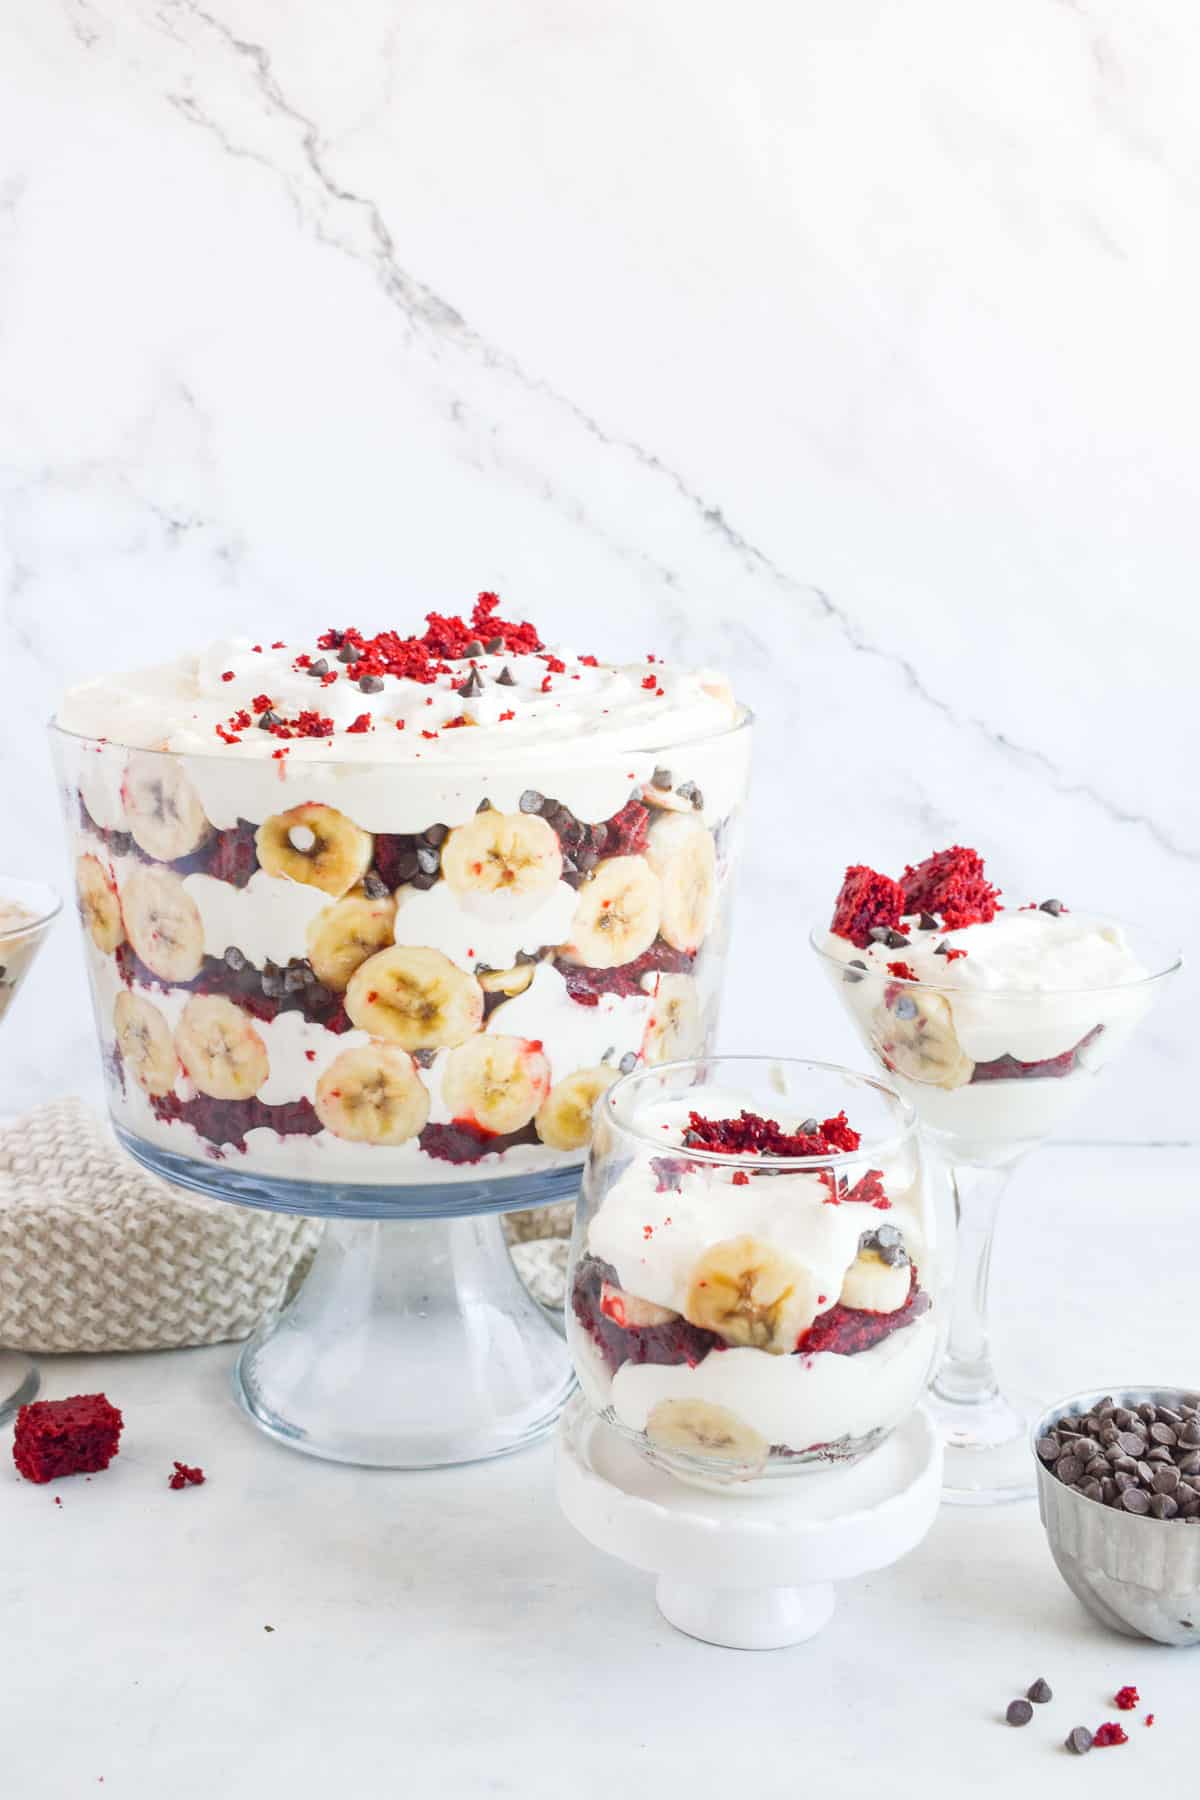
This one surprised me. I wasn't sure red velvet cake and banana pudding needed to meet each other, but the combination is genuinely great — the cocoa-tinged, slightly tangy cake layers against the creamy vanilla pudding and fresh banana slices just works. The red color makes it feel very Valentine's without having to do anything elaborate. It's a layered dessert, which means it looks stunning in a trifle dish or individual glass cups, and it actually gets better the longer it sits in the fridge as the layers meld together.
Ingredients
- 1 box red velvet cake mix, plus eggs, oil, and water as directed on the box
- 2 boxes (3.4 oz each) instant vanilla pudding mix
- 3 cups whole milk
- 1 cup heavy whipping cream
- 8 oz cream cheese, softened
- 1 cup powdered sugar
- 1 teaspoon vanilla extract
- 4 ripe bananas, sliced
- Whipped cream for topping
Instructions
- Bake the red velvet cake according to package directions in a 9x13-inch pan. Let it cool completely, then crumble it into rough chunks. Set aside.
- Whisk together the instant pudding mix and whole milk in a large bowl for 2 minutes. Let it sit for 5 minutes to thicken.
- In a separate bowl, beat the cream cheese until smooth. Add the powdered sugar and vanilla, then slowly mix in the heavy whipping cream and beat until thick and fluffy. Fold this mixture into the thickened pudding until combined.
- In a large trifle dish or individual serving glasses, layer red velvet cake crumbles, sliced bananas, and the pudding cream mixture. Repeat the layers until you reach the top, finishing with the pudding mixture.
- Cover and refrigerate for at least 4 hours, or overnight. Top with whipped cream just before serving.
Tips
- Tip: Make the red velvet cake a day ahead so it has time to cool and crumble cleanly — warm cake turns mushy when layered.
- Tip: Toss the banana slices in a tiny squeeze of lemon juice to keep them from browning if you're assembling this more than a few hours ahead.
- Tip: Individual glasses or mason jars make beautiful single-serve portions — great for a Valentine's dinner where you want things to feel a little special without a lot of fuss.
11. Strawberry White Chocolate Pie
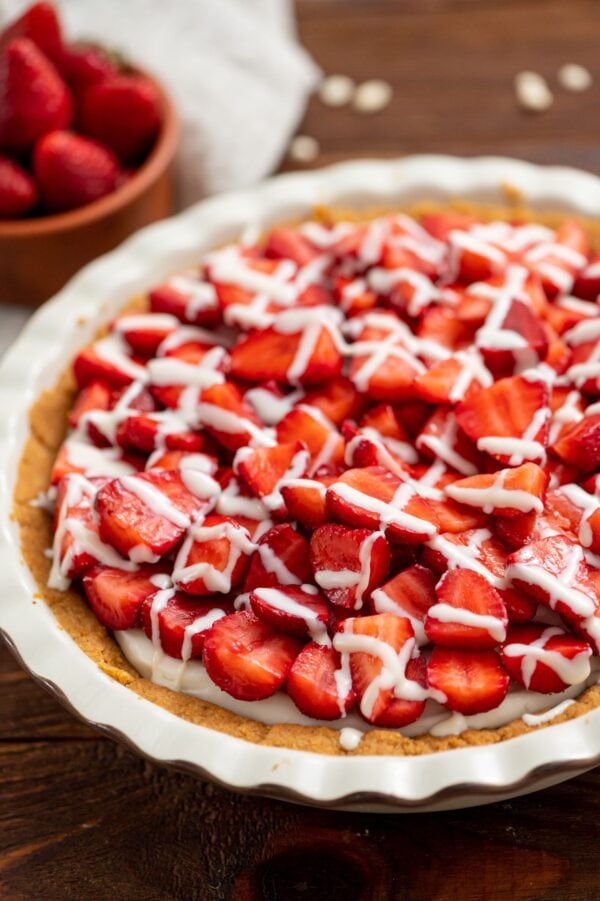
White chocolate and strawberry is a combination that doesn't get enough credit. This pie has a creamy, lightly sweet white chocolate filling in a buttery graham cracker crust, topped with fresh strawberries. It's not as heavy as a traditional chocolate pie, which makes it a good choice if you're serving a big Valentine's dinner and want a dessert that feels indulgent without knocking everyone out. The filling sets up firm enough to slice cleanly, and the pink-red strawberries on top make it look genuinely pretty on the table.
Ingredients
- 1½ cups graham cracker crumbs (about 10 full crackers)
- ⅓ cup unsalted butter, melted
- 2 tablespoons granulated sugar
- 8 oz white chocolate chips or chopped white chocolate
- 8 oz cream cheese, softened
- 1 cup heavy whipping cream
- 1 teaspoon vanilla extract
- 2 cups fresh strawberries, sliced or halved
- 2 tablespoons strawberry jam (for glaze, optional)
Instructions
- Preheat oven to 350°F. Mix graham cracker crumbs, melted butter, and sugar together until it resembles wet sand. Press firmly into the bottom and sides of a 9-inch pie pan. Bake for 8 minutes, then cool completely.
- Melt the white chocolate in a microwave-safe bowl in 30-second intervals, stirring between each, until smooth. Let it cool for 10 minutes — it should be lukewarm, not hot, before adding to the cream cheese.
- Beat the softened cream cheese until smooth and fluffy, about 2 minutes. Pour in the cooled melted white chocolate and vanilla, and beat until fully combined.
- In a separate bowl, whip the heavy cream to stiff peaks. Gently fold the whipped cream into the cream cheese mixture in two additions, keeping it light and airy.
- Spread the filling into the cooled crust. Refrigerate for at least 3 hours until set. Top with fresh strawberries and a drizzle of warmed strawberry jam glaze right before serving.
Tips
- Tip: Make sure the cream cheese is fully at room temperature before beating — cold cream cheese lumps up and those lumps don't smooth out. Give it at least 30 minutes on the counter.
- Tip: Don't skip cooling the melted white chocolate before adding it to the cream cheese — if it's too warm, it'll melt the cream cheese and make the filling runny.
- Tip: A store-bought graham cracker crust from Walmart saves a step if you're short on time — the filling is where all the effort goes anyway.
10. Easy Valentine's Day Cookies

These are the cookies you make when you want something festive but you don't want to spend three hours on royal icing. The base is a soft sugar cookie — the kind that stays tender in the middle — and the decorating is simple: pink and red frosting, sprinkles, maybe a few candy hearts pressed in. I make a double batch because they disappear fast, especially with kids involved. They're also the kind of cookie that works for a classroom Valentine's party or a cookie exchange without anyone feeling like you didn't try.
Ingredients
- 2¾ cups all-purpose flour
- 1 teaspoon baking soda
- ½ teaspoon baking powder
- ½ teaspoon salt
- 1 cup unsalted butter, softened
- 1½ cups granulated sugar
- 1 large egg
- 1 teaspoon vanilla extract
- 2 cups powdered sugar (for frosting)
- 3–4 tablespoons milk (for frosting)
- Pink and red food coloring
- Valentine's sprinkles for decorating
Instructions
- Preheat oven to 375°F. Whisk together flour, baking soda, baking powder, and salt in a bowl. In a separate large bowl, beat the butter and sugar together until light and fluffy. Beat in the egg and vanilla.
- Gradually stir the flour mixture into the butter mixture until a soft dough forms. If the dough feels sticky, refrigerate for 15 minutes before scooping.
- Scoop rounded tablespoons of dough onto parchment-lined baking sheets, spacing them about 2 inches apart. Bake for 8–10 minutes until the edges are just barely golden. The centers should still look soft — they'll set as they cool. Don't overbake.
- Let the cookies cool completely on the pan before frosting — at least 20 minutes. Mix powdered sugar with milk one tablespoon at a time until you reach a thick but spreadable consistency. Divide and tint with pink and red food coloring.
- Spread frosting on each cooled cookie using a butter knife or small offset spatula, then immediately add sprinkles before the frosting sets. Let the frosting firm up for 30 minutes before stacking or packaging.
Tips
- Tip: Pull the cookies out when they still look slightly underdone in the center — the residual heat from the pan finishes them perfectly and keeps them soft for days.
- Tip: Wilton gel food coloring (available at Walmart or craft stores) gives you a much more vivid pink and red than liquid food coloring, and you need far less of it.
- Tip: These freeze beautifully unfrosted — bake ahead, freeze in a zip-lock bag, then thaw and frost the day you need them.
9. Strawberry Sugar Cookies
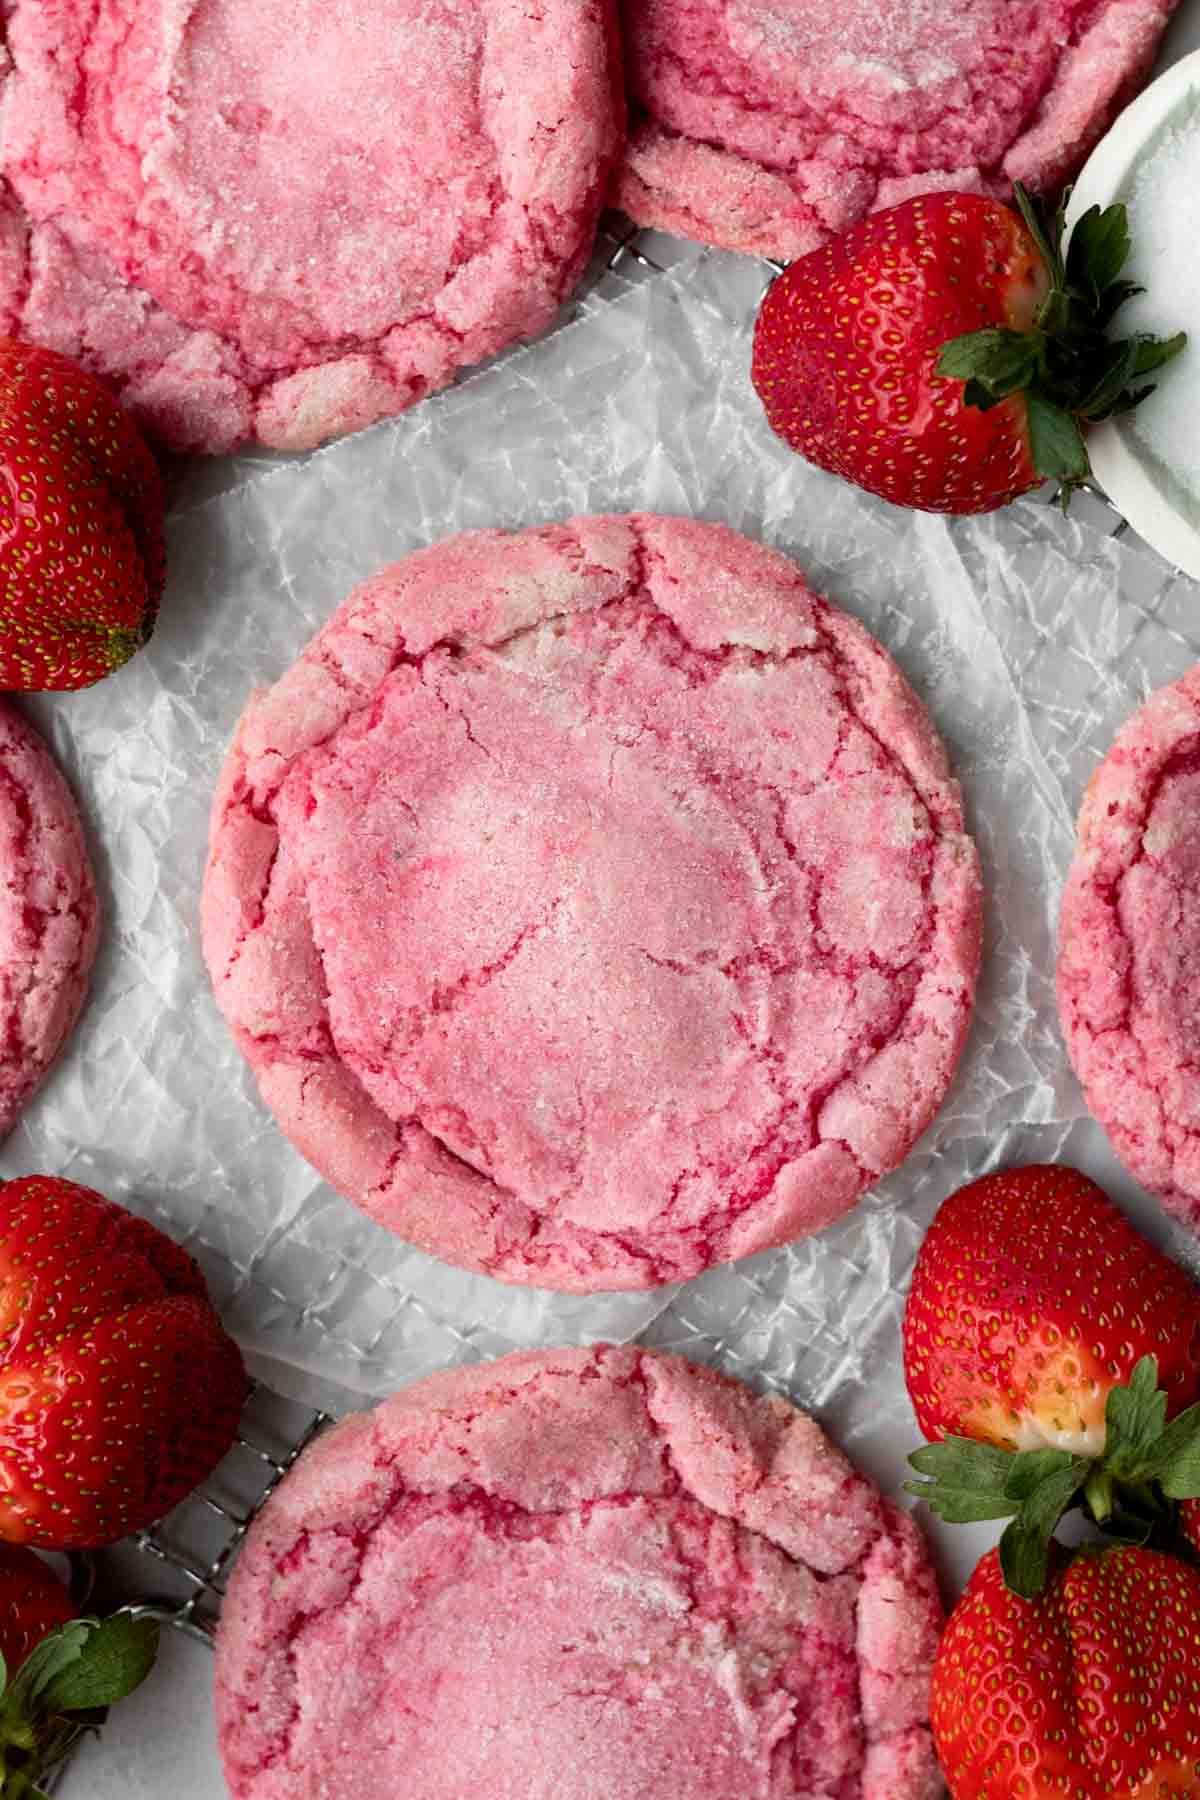
Sugar cookies are one of those things I've been making for years, but adding real strawberry flavor to the dough changed everything. These come out soft in the center, just barely crisp at the edges, and that natural pink hue means zero food coloring drama. I brought these to Zainab's class last Valentine's Day and the teacher asked me for the recipe, which honestly made my whole week. They look like you spent a lot of effort but the dough comes together in one bowl.
Ingredients
- 2 ½ cups all-purpose flour
- ½ teaspoon baking powder
- ¼ teaspoon salt
- 1 cup unsalted butter, softened to room temperature
- 1 cup granulated sugar
- 1 large egg
- 3 tablespoons freeze-dried strawberry powder (blend freeze-dried strawberries in a blender)
- 1 teaspoon vanilla extract
- 2 tablespoons strawberry jam (for extra flavor, optional)
- Pink sanding sugar or sprinkles, for rolling
Instructions
- Preheat oven to 350°F. Line two baking sheets with parchment paper.
- Whisk together flour, baking powder, and salt in a bowl and set aside.
- Beat softened butter and sugar together until light and fluffy, about 2-3 minutes. Add the egg, vanilla, strawberry powder, and jam if using, and mix until combined.
- Gradually add the flour mixture and stir until a soft dough forms. Refrigerate the dough for 30 minutes — this keeps the cookies from spreading too much.
- Scoop dough into 1½-tablespoon balls, roll in sanding sugar, and place 2 inches apart on prepared baking sheets. Flatten slightly with your palm.
- Bake for 10-12 minutes until edges are just set but centers still look slightly underdone. They firm up as they cool. Cool on the pan for 5 minutes before transferring.
Tips
- Tip: Freeze-dried strawberries are available at Trader Joe's, Target, or Walmart — they blend into powder in seconds and give a much more concentrated flavor than fresh berries without adding extra moisture.
- Tip: Don't skip the chilling step. I rushed it once and the cookies spread into flat discs — still edible but not the soft, thick result you're going for.
- Tip: These store well in an airtight container at room temperature for up to 4 days, so you can bake them the day before Valentine's Day without any stress.
8. Valentine's Day Chocolate Chip Skillet Cookie
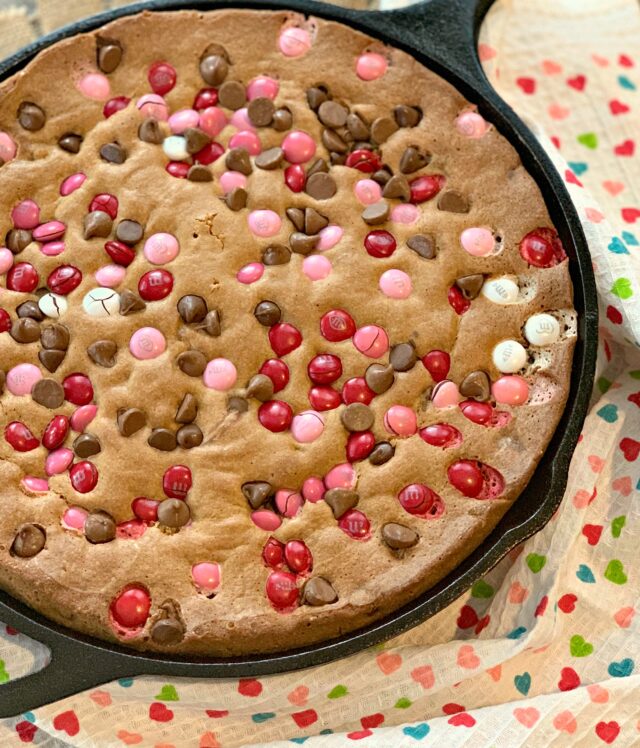
One giant skillet cookie is so much more fun than a tray of individual ones — especially on Valentine's Day when you want something warm, gooey, and completely over-the-top. You bake it right in your cast iron skillet or an oven-safe pan, pull it out when the center is still soft, and eat it straight from the pan with scoops of vanilla ice cream melting into the chocolate chips. My husband thinks this is the most romantic dessert I've ever made, which tells you everything about him. If you want a no-bake cookie alternative, I've got you covered elsewhere — but for a warm, decadent Valentine's treat, this skillet version wins every time.
Ingredients
- ½ cup unsalted butter, melted and slightly cooled
- ½ cup granulated sugar
- ¼ cup packed brown sugar
- 1 large egg plus 1 egg yolk
- 2 teaspoons vanilla extract
- 1 ¼ cups all-purpose flour
- ½ teaspoon baking soda
- ½ teaspoon salt
- 1 cup semi-sweet chocolate chips, divided
- Red and pink heart-shaped sprinkles or M&Ms for topping
Instructions
- Preheat oven to 350°F. Grease a 10-inch cast iron skillet (or an oven-safe pan) with butter or cooking spray.
- In a large bowl, whisk together the melted butter, granulated sugar, and brown sugar until smooth. Add the egg, egg yolk, and vanilla and whisk until the mixture looks glossy and slightly thickened.
- Stir in flour, baking soda, and salt until just combined — don't overmix. Fold in ¾ cup of the chocolate chips.
- Spread the dough evenly into the prepared skillet. Scatter the remaining chocolate chips and any Valentine's sprinkles or M&Ms over the top.
- Bake for 20-24 minutes until the edges are golden and set but the center still looks slightly underdone and glossy. It will continue to set as it cools in the hot pan.
- Serve warm directly from the skillet with vanilla ice cream on top.
Tips
- Tip: The extra egg yolk is what gives this cookie its fudgy, brownie-like texture rather than a cakey one — don't skip it.
- Tip: If you don't have a cast iron skillet, an 8-inch square baking pan works fine — just reduce the bake time by 2-3 minutes and check early.
- Tip: Pull it out when it looks like it needs another two minutes. I always second-guess myself and leave it too long — slightly underbaked is the goal here.
7. Strawberry Jello Parfaits
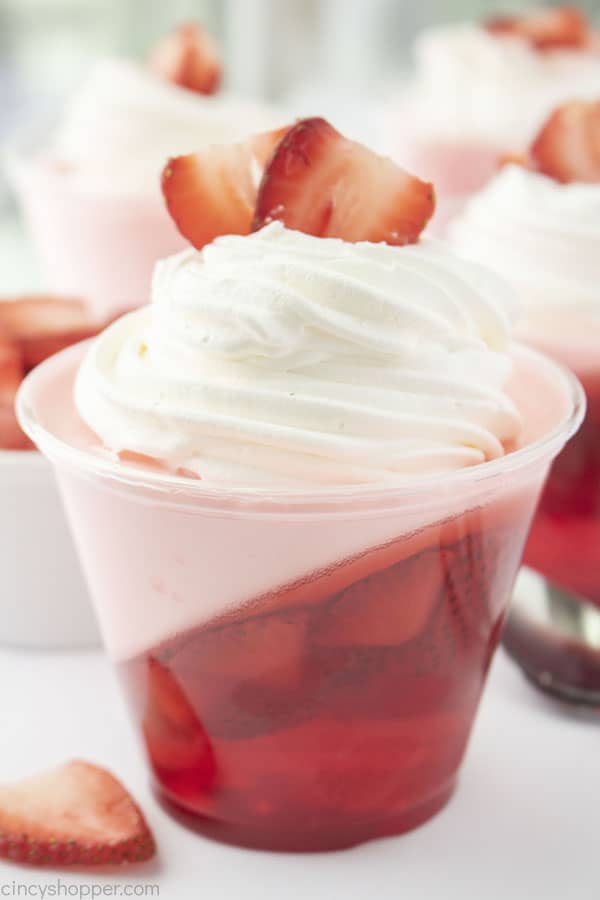
There's something about a layered Jello parfait that feels both nostalgic and genuinely festive at the same time. The deep red Jello layer, the fluffy whipped cream in the middle, and fresh strawberries on top make these look like they came from a proper dessert bar — but they take about 15 minutes of actual work and then the fridge does the rest. I love these for Valentine's Day specifically because you can make them the night before, stick them in the fridge in individual glasses, and they're ready to go the next day with zero stress. If you enjoy layered desserts, my tiramisu parfait is another one worth bookmarking.
Ingredients
- 1 box (3 oz) strawberry Jello
- 1 cup boiling water
- 1 cup cold water
- 1 cup fresh strawberries, hulled and sliced
- 1 cup heavy whipping cream
- 2 tablespoons powdered sugar
- ½ teaspoon vanilla extract
- Extra strawberries and sprinkles for garnish
Instructions
- Dissolve the Jello powder in 1 cup of boiling water and stir for 2 minutes until fully dissolved. Stir in the cold water. Pour into a shallow dish and refrigerate for 2-3 hours until fully set.
- Once set, cut the Jello into small cubes using a knife or break it up with a fork into chunky pieces.
- Whip the heavy cream with powdered sugar and vanilla until soft peaks form. Don't overwhip — you want it fluffy and spoonable, not stiff.
- Layer in glasses: start with Jello cubes, then sliced strawberries, then a generous spoonful of whipped cream. Repeat layers if your glasses are tall enough.
- Top with a fresh strawberry and a pinch of sprinkles. Refrigerate until ready to serve.
Tips
- Tip: Make the Jello the night before so it's fully set and cold when you assemble — trying to cut warm or partially set Jello is a frustrating mess.
- Tip: Cool Whip works as a swap for homemade whipped cream if you're short on time — just thaw it in the fridge first and it layers beautifully.
- Tip: Use clear glasses or mason jars to show off the layers — the red and white contrast is half the charm of this dessert.
6. Valentine's Day Pancakes (Heart Shaped Pancakes)
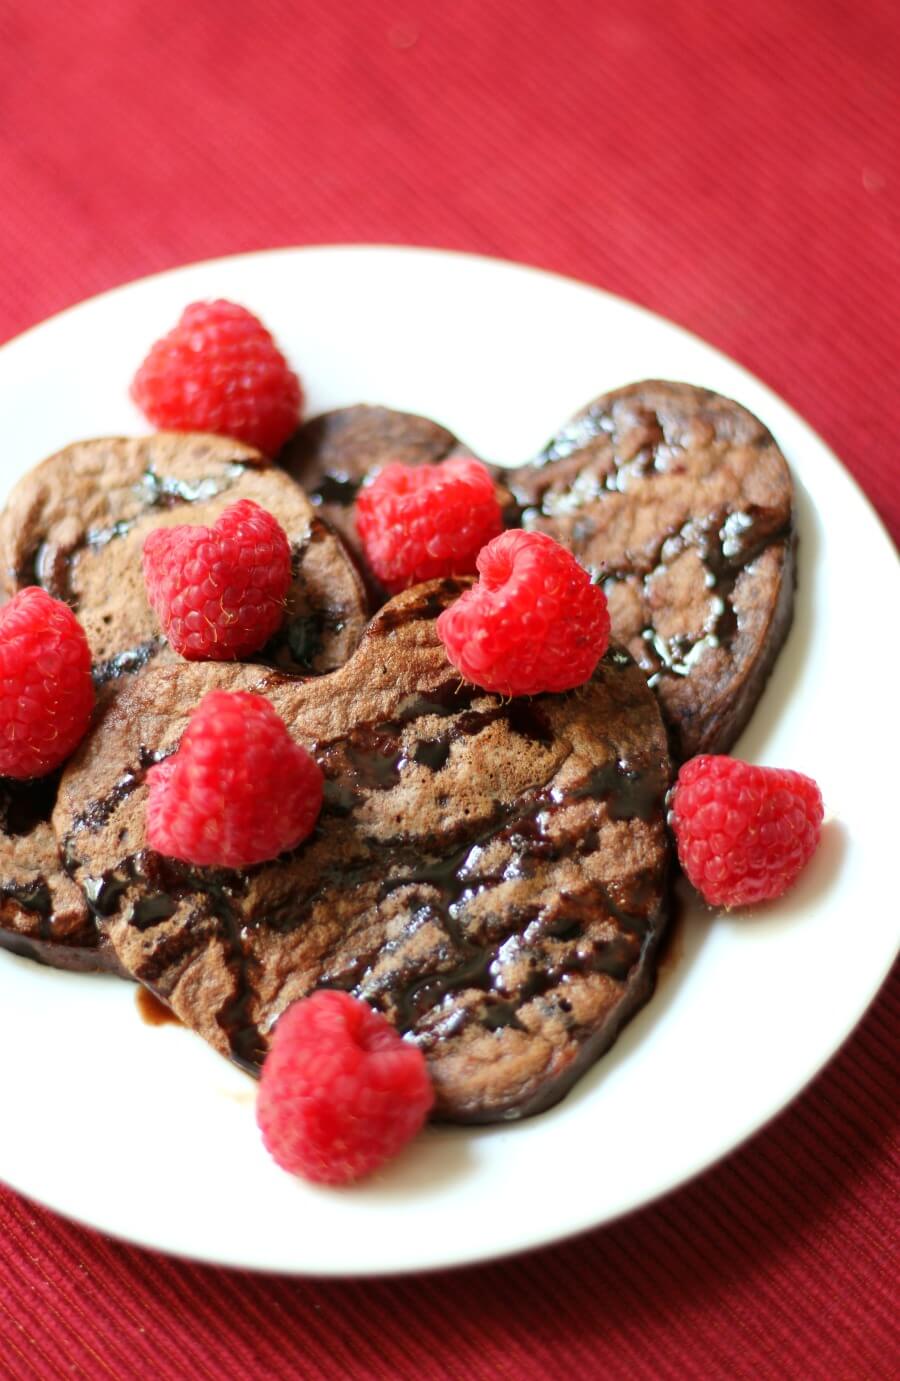
Breakfast for dessert on Valentine's Day is completely valid in my house, and these heart-shaped pancakes are the reason. They're fluffy, slightly chocolatey or berry-flavored depending on how you make them, and the heart shape makes kids go absolutely wild. The trick is using a heart-shaped cookie cutter right in the pan — you pour the batter inside it, wait for bubbles, remove the cutter, then flip. It takes a little patience but it's not as complicated as it sounds. I've made these with Saad and Zainab on Valentine's morning and it turned into one of those memories I actually want to keep.
Ingredients
- 1 ½ cups all-purpose flour (or gluten-free 1:1 flour blend)
- 2 tablespoons granulated sugar
- 2 teaspoons baking powder
- ¼ teaspoon salt
- 1 cup milk (dairy or non-dairy both work)
- 1 large egg
- 2 tablespoons melted butter or neutral oil
- 1 teaspoon vanilla extract
- 2-3 drops red or pink food coloring (optional)
- Fresh berries, maple syrup, and whipped cream for serving
Instructions
- Whisk together flour, sugar, baking powder, and salt in a large bowl. In a separate bowl, whisk the milk, egg, melted butter, and vanilla. Add food coloring if using.
- Pour the wet ingredients into the dry and stir until just combined — lumps are fine. Overmixing makes tough pancakes. Let the batter rest for 5 minutes.
- Heat a non-stick skillet or griddle over medium-low heat and lightly grease with butter. Place a greased metal heart-shaped cookie cutter (about 3-4 inches) in the pan.
- Pour about ¼ cup of batter slowly into the center of the cutter. Cook until bubbles form on the surface and edges look set, about 2-3 minutes. Carefully remove the cutter using tongs (it'll be hot), then flip the pancake and cook another 1-2 minutes.
- Repeat with remaining batter, greasing the cutter between each pancake. Serve stacked with fresh berries, whipped cream, and warm maple syrup.
Tips
- Tip: Grease the inside of the cookie cutter generously before each pancake — if you skip this, the batter sticks to the sides and the heart shape tears when you remove the cutter.
- Tip: Cook on medium-low, not medium-high. High heat burns the outside before the inside sets, and you'll lose the shape when you flip.
- Tip: No heart cutter? Pour batter into a rough heart shape freehand — it won't be perfect but kids honestly don't care as long as it's vaguely heart-ish and has syrup on it.
5. Gluten-Free Red Velvet Cupcakes (Vegan, Allergy-Free)
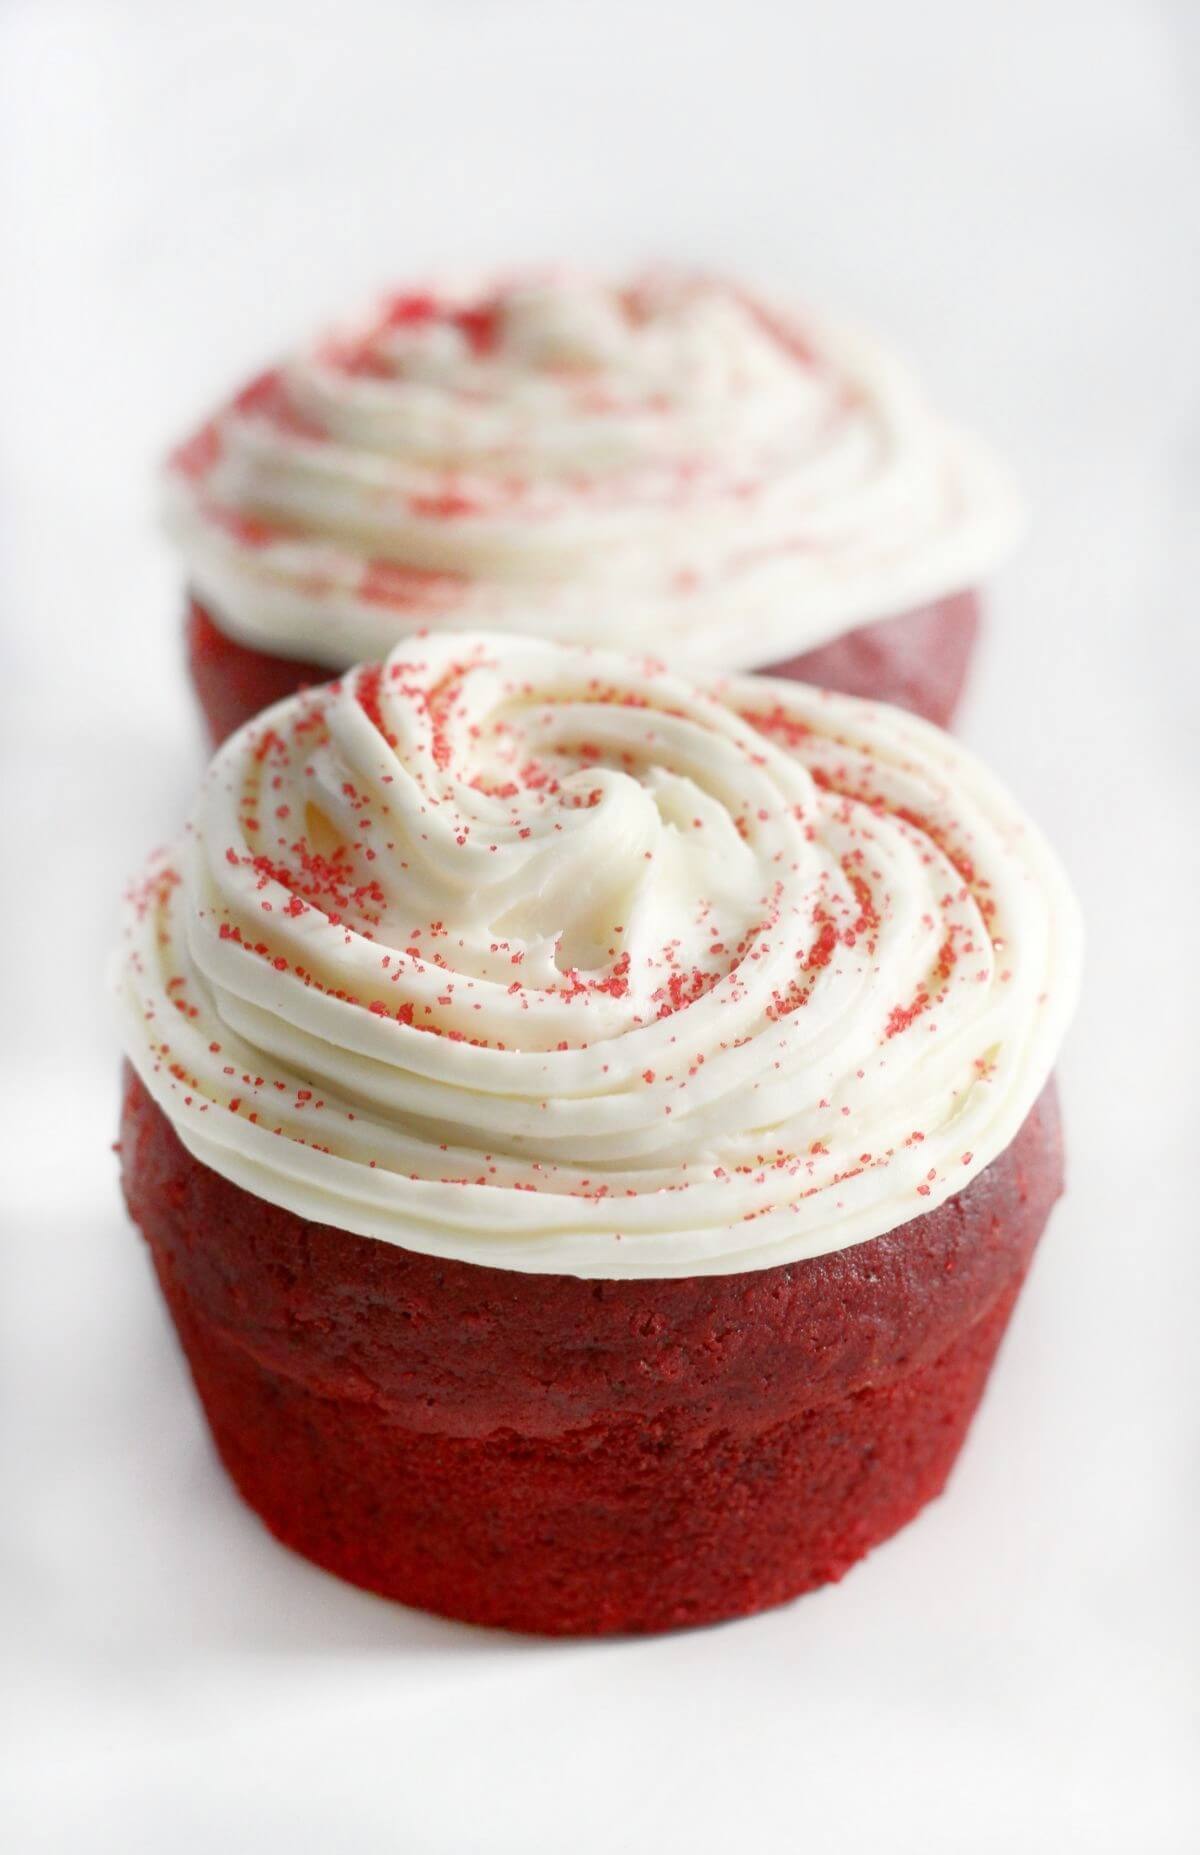
I'll be honest — I was skeptical about a gluten-free, vegan red velvet cupcake. I've had too many "allergy-friendly" baked goods that were dense, gummy, or just sad. But this version genuinely surprised me. The crumb is soft and moist, the red color is bold without being garish, and the frosting on top is creamy enough that nobody at the table asked any questions. This is the recipe to make when someone in your group has dietary restrictions and you don't want them to feel like they're eating the "special" cupcake while everyone else gets the good ones. Everyone gets the good one here.
Ingredients
- 1 ½ cups gluten-free 1:1 all-purpose flour blend (like Bob's Red Mill or King Arthur)
- 1 cup granulated sugar
- 2 tablespoons unsweetened cocoa powder
- 1 teaspoon baking soda
- ½ teaspoon salt
- 1 cup unsweetened non-dairy milk (oat milk or almond milk)
- 1 tablespoon apple cider vinegar
- ⅓ cup neutral oil (like avocado or sunflower)
- 1 teaspoon vanilla extract
- 1-2 tablespoons red food coloring (or beet powder for natural color)
- For frosting: 1 cup vegan butter, softened + 2 cups powdered sugar + 1 teaspoon vanilla + 1-2 tablespoons non-dairy milk
Instructions
- Preheat oven to 350°F and line a 12-cup muffin tin with cupcake liners.
- Combine the non-dairy milk and apple cider vinegar in a bowl and let sit for 5 minutes — this creates a vegan "buttermilk" that helps the cupcakes rise and stay moist.
- Whisk together the gluten-free flour, sugar, cocoa powder, baking soda, and salt in a large bowl.
- Add the oil, vanilla, and red food coloring to the buttermilk mixture and stir. Pour wet ingredients into dry and stir until smooth. GF batters can look a little thicker than usual — that's normal.
- Divide batter evenly among the liners, filling each about ¾ full. Bake for 20-22 minutes until a toothpick inserted in the center comes out clean. Cool completely before frosting.
- Beat vegan butter until fluffy, then gradually add powdered sugar, vanilla, and enough non-dairy milk to reach a spreadable consistency. Pipe or spread onto cooled cupcakes.
Tips
- Tip: Make absolutely sure your cupcakes are fully cooled before frosting — vegan butter frosting melts faster than regular buttercream and will slide right off a warm cupcake.
- Tip: Beet powder gives a natural red color without food dye — start with 1 tablespoon and add more if you want a deeper red. It doesn't add any beet flavor once baked.
- Tip: These keep well in the fridge for up to 3 days — just bring them to room temperature for 20 minutes before serving so the frosting softens back up.
30. Gluten-Free Valentine's Day Heart Cookies (Vegan, Allergy-Free)

I started making these when Zainab's classmate had a dairy and egg allergy and I wanted to send something to her class Valentine's party that every single kid could eat. These cookies are gluten-free, vegan, and free of the most common allergens — but they don't taste like a compromise. The dough holds its shape beautifully when cut into hearts, and they bake up with a slightly crisp edge and tender center. If you've got someone at your table with dietary restrictions, this is the recipe to reach for first.
Ingredients
- 2 cups gluten-free 1:1 baking flour (Bob's Red Mill or King Arthur work well)
- ½ teaspoon baking powder
- ¼ teaspoon salt
- ½ cup coconut oil, solid (not melted)
- ½ cup powdered sugar
- 3 tablespoons unsweetened applesauce (acts as the egg replacer)
- 1 teaspoon pure vanilla extract
- 2–3 tablespoons dairy-free milk (oat milk or almond milk), as needed
- Natural red or pink food coloring (optional, for festive look)
Instructions
- In a large bowl, whisk together the gluten-free flour, baking powder, and salt until combined.
- Add the solid coconut oil and powdered sugar and work together with a fork or your fingers until the mixture resembles coarse crumbs.
- Mix in the applesauce and vanilla extract. Add dairy-free milk one tablespoon at a time until the dough comes together and is firm but not sticky. Add a drop or two of food coloring here if using.
- Wrap the dough in plastic wrap and chill in the fridge for 30 minutes — this step is important for gluten-free dough as it firms up and makes rolling much easier.
- Preheat your oven to 350°F. Roll the chilled dough out on a lightly floured surface to about ¼-inch thickness and cut out heart shapes. Place on a parchment-lined baking sheet.
- Bake for 10–12 minutes until the edges are just barely golden. Let cool completely on the pan before moving — gluten-free cookies are fragile when hot.
Tips
- Tip: Don't skip the chilling time. Gluten-free dough needs it to hold its shape when cutting — I learned that the hard way after my first batch spread into unrecognizable blobs.
- Tip: Dust your heart cutter with a little gluten-free flour between cuts to keep the edges clean and sharp.
- Tip: Once cooled, decorate with a simple glaze made from powdered sugar and dairy-free milk for a finished look that kids absolutely love.
31. Heart Thumbprint Cookies with Jam
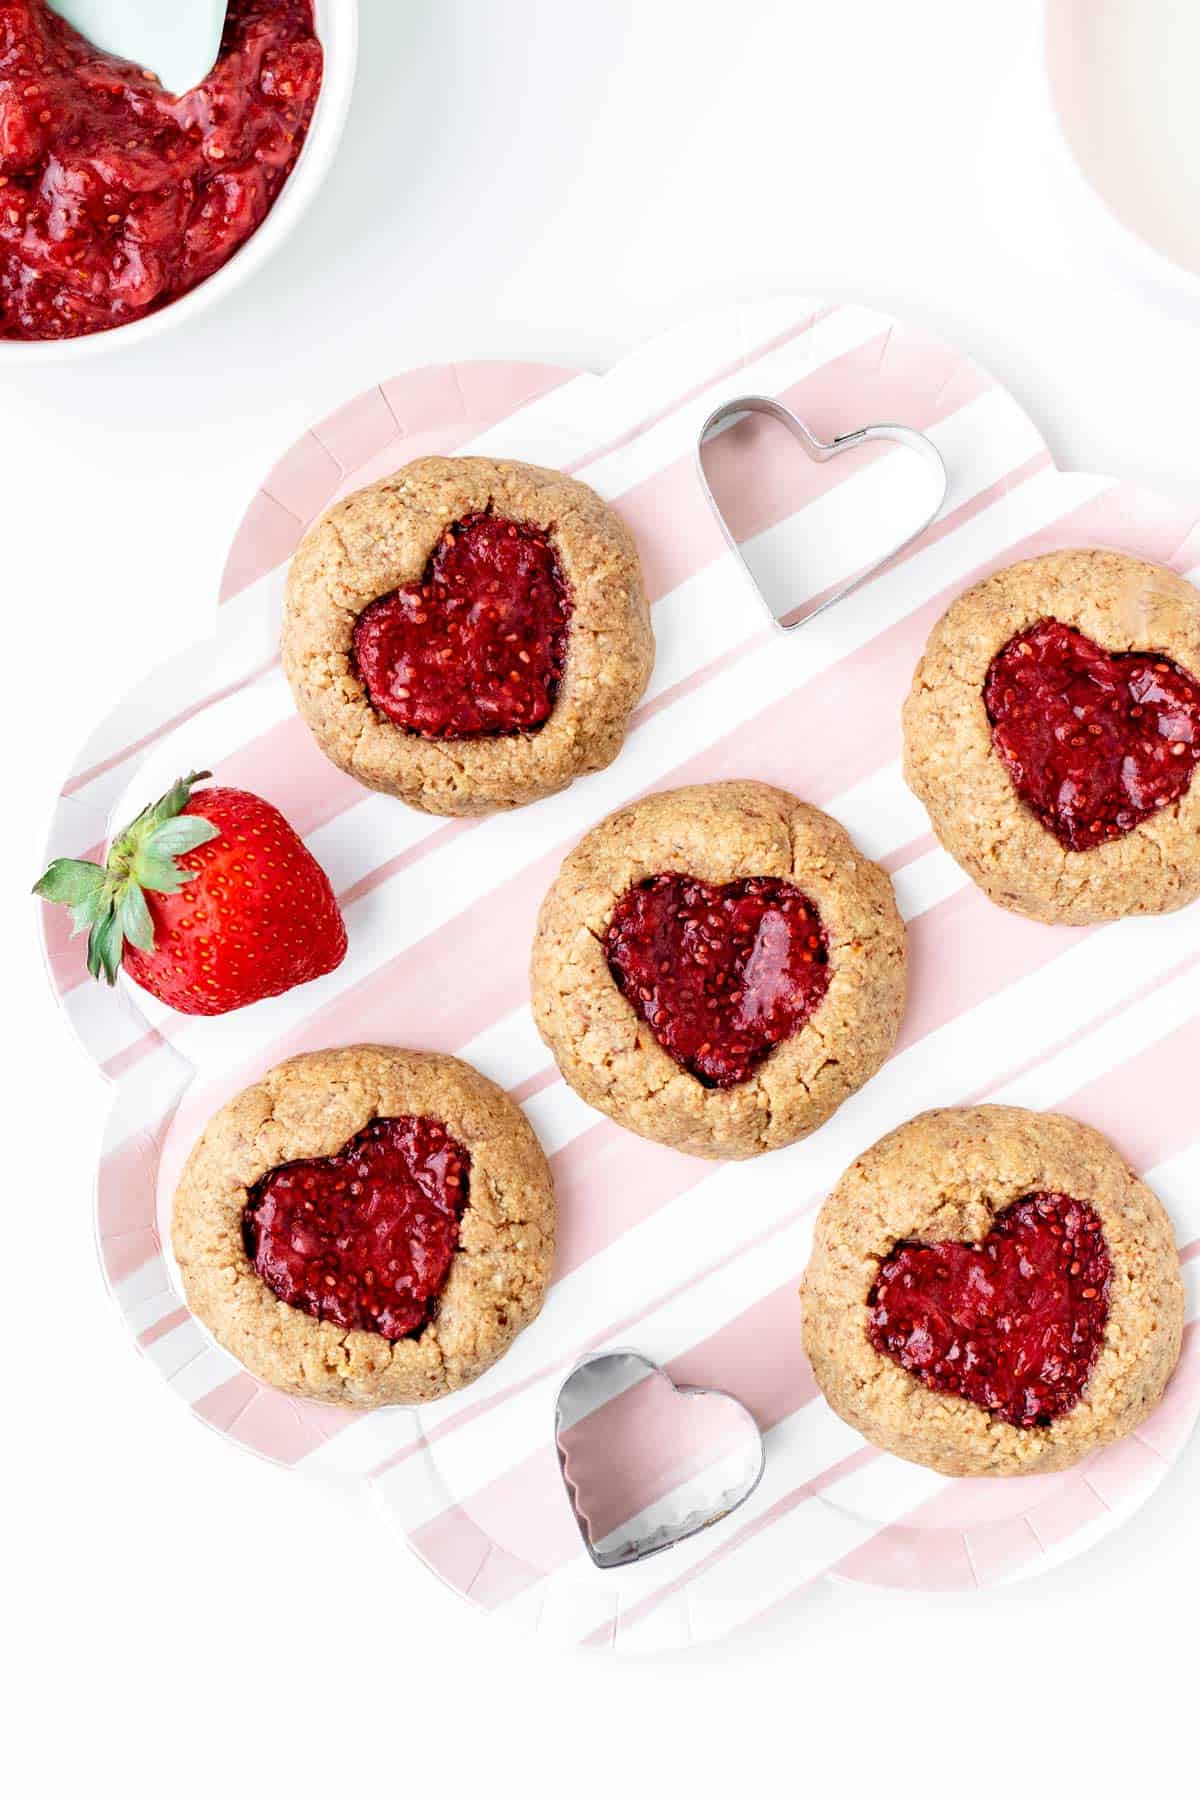
Thumbprint cookies are one of those things that look far more impressive than the effort they actually take, which makes them a perfect Valentine's Day project. These ones are shaped into little hearts — you press the indent with your thumb, pinch the top into a point, and suddenly you have something that looks bakery-level. Fill them with strawberry jam, raspberry preserves, or even a swirl of Nutella if you're feeling indulgent. The buttery shortbread base is what makes them, though — don't rush it.
Ingredients
- 1 cup (2 sticks) unsalted butter, softened to room temperature
- ⅔ cup powdered sugar
- 1 teaspoon pure vanilla extract
- ¼ teaspoon almond extract (optional, but lovely)
- 2 cups all-purpose flour
- ¼ teaspoon salt
- ⅓ cup strawberry or raspberry jam (seedless works best)
Instructions
- Beat the softened butter and powdered sugar together until light and fluffy, about 3 minutes. Mix in vanilla and almond extract.
- Add the flour and salt and mix until a soft dough forms. Wrap in plastic wrap and refrigerate for 30 minutes.
- Preheat oven to 350°F. Roll dough into 1-inch balls and place on a parchment-lined baking sheet. Press your thumb into the center of each ball, then pinch the top edge slightly to form a heart shape.
- Fill each indent with about ½ teaspoon of jam — don't overfill or it will bubble over the sides during baking.
- Bake for 12–14 minutes until the edges are barely golden. The cookies will look underdone in the center — that's fine. Let them cool completely on the pan.
Tips
- Tip: If the dough cracks when you press the thumbprint, it's too cold — let it sit at room temperature for 5 minutes and try again.
- Tip: Seedless jam gives the cleanest look and texture inside the cookie — chunky preserves tend to bubble unevenly.
- Tip: These store beautifully in an airtight container at room temperature for up to 4 days, which means you can bake them a day ahead without any stress.
32. Chocolate Cherry Dump Cake
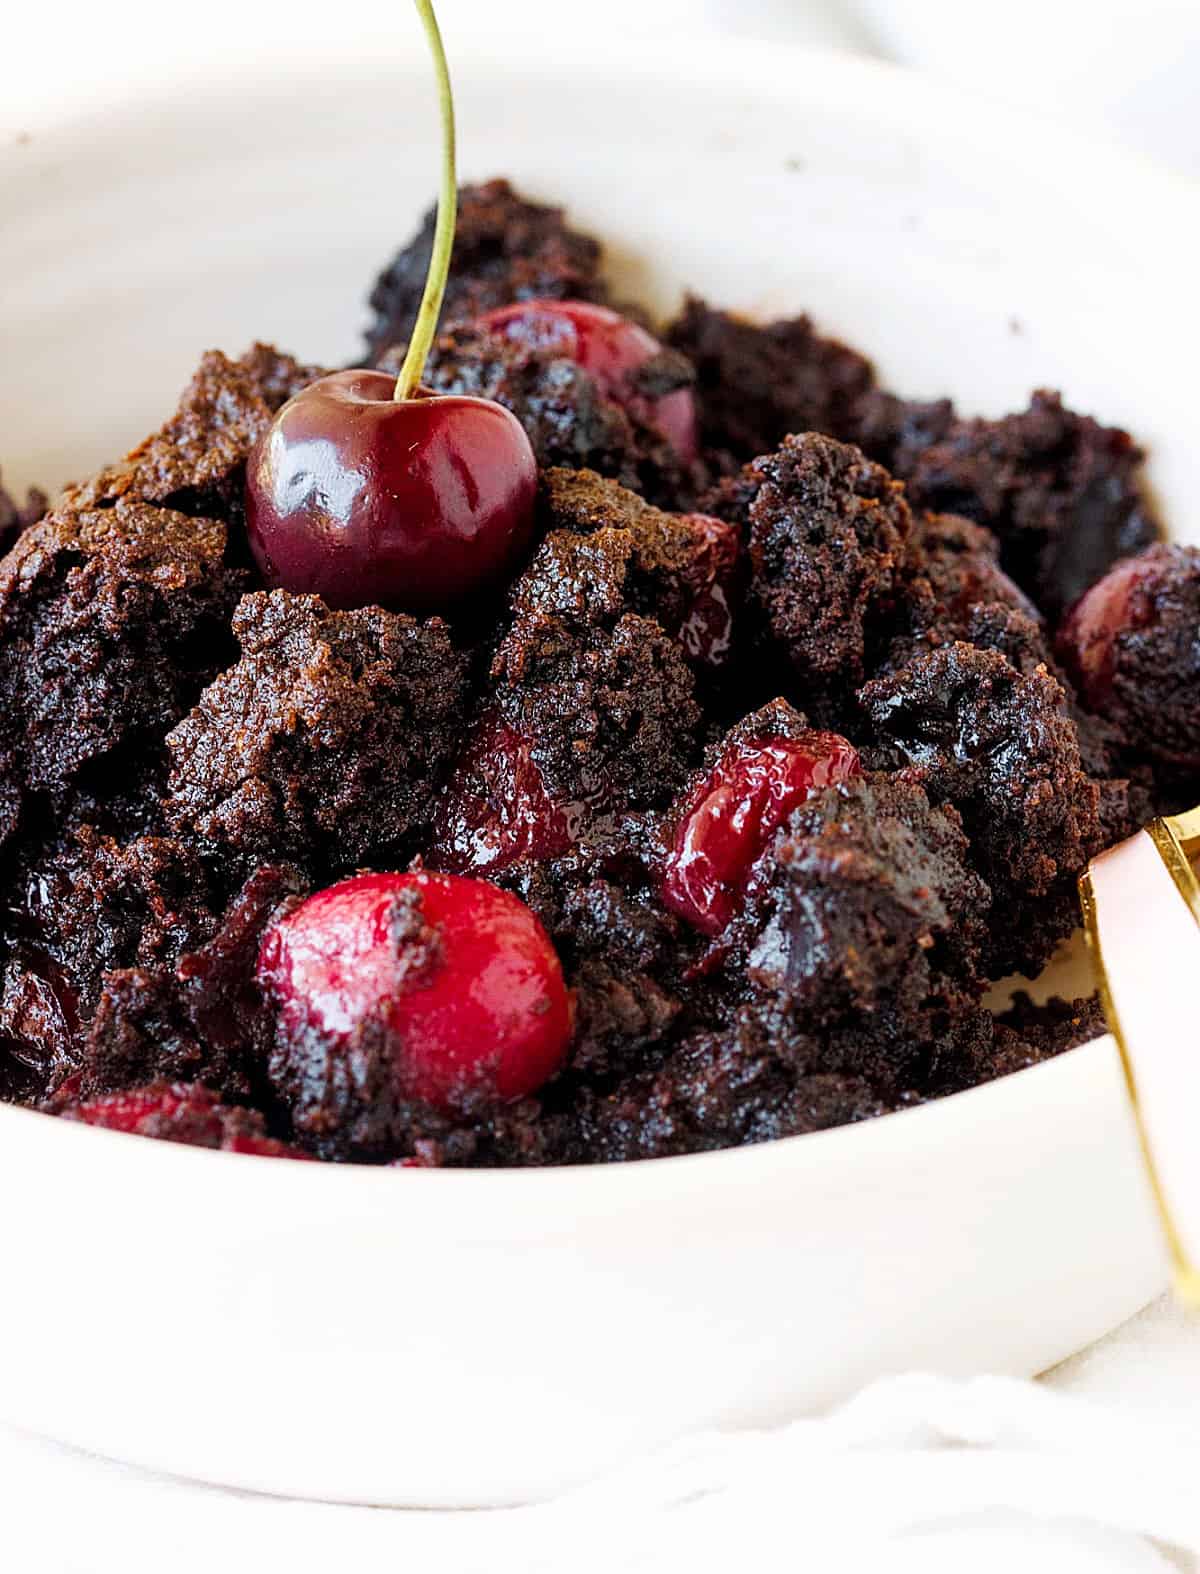
The name is not flattering, but the result absolutely is. A dump cake is exactly what it sounds like — you layer everything into a baking dish, dump butter on top, and let the oven do all the work. This chocolate cherry version is genuinely one of the most low-effort impressive desserts I've made. The cherries bubble up through the chocolate cake mix into something that tastes like a cross between a cobbler and a fudgy brownie. Serve it warm with a scoop of vanilla ice cream and nobody will believe how little work went into it.
Ingredients
- 1 can (21 oz) cherry pie filling
- 1 can (15 oz) tart cherries in juice, drained
- 1 box (15.25 oz) chocolate fudge cake mix, dry
- ½ cup (1 stick) unsalted butter, cut into thin slices
- ½ cup semi-sweet chocolate chips
- Vanilla ice cream or whipped cream, for serving
Instructions
- Preheat oven to 350°F. Lightly grease a 9x13-inch baking dish.
- Spread the cherry pie filling evenly across the bottom of the dish. Top with the drained tart cherries and spread to combine.
- Sprinkle the dry chocolate cake mix evenly over the cherry layer — do not stir. Scatter the chocolate chips over the top of the dry mix.
- Lay the butter slices evenly across the top, covering as much of the surface as possible. The butter melts down through the dry cake mix as it bakes, creating the topping.
- Bake for 45–50 minutes until the top is set and the cherry filling is bubbling around the edges. Let cool for at least 10 minutes before serving warm with ice cream.
Tips
- Tip: Cover any dry spots of cake mix with extra butter slices — any powder that doesn't get enough butter stays dry and powdery after baking, and that's the one thing to avoid.
- Tip: If you want a deeper chocolate flavor, use a dark chocolate cake mix instead of regular chocolate fudge — both work, but dark chocolate with cherries is a combination worth trying.
- Tip: Leftovers reheat beautifully in the microwave for 45 seconds — the texture stays soft and the cherries stay jammy.
33. Red Velvet Cake Pops
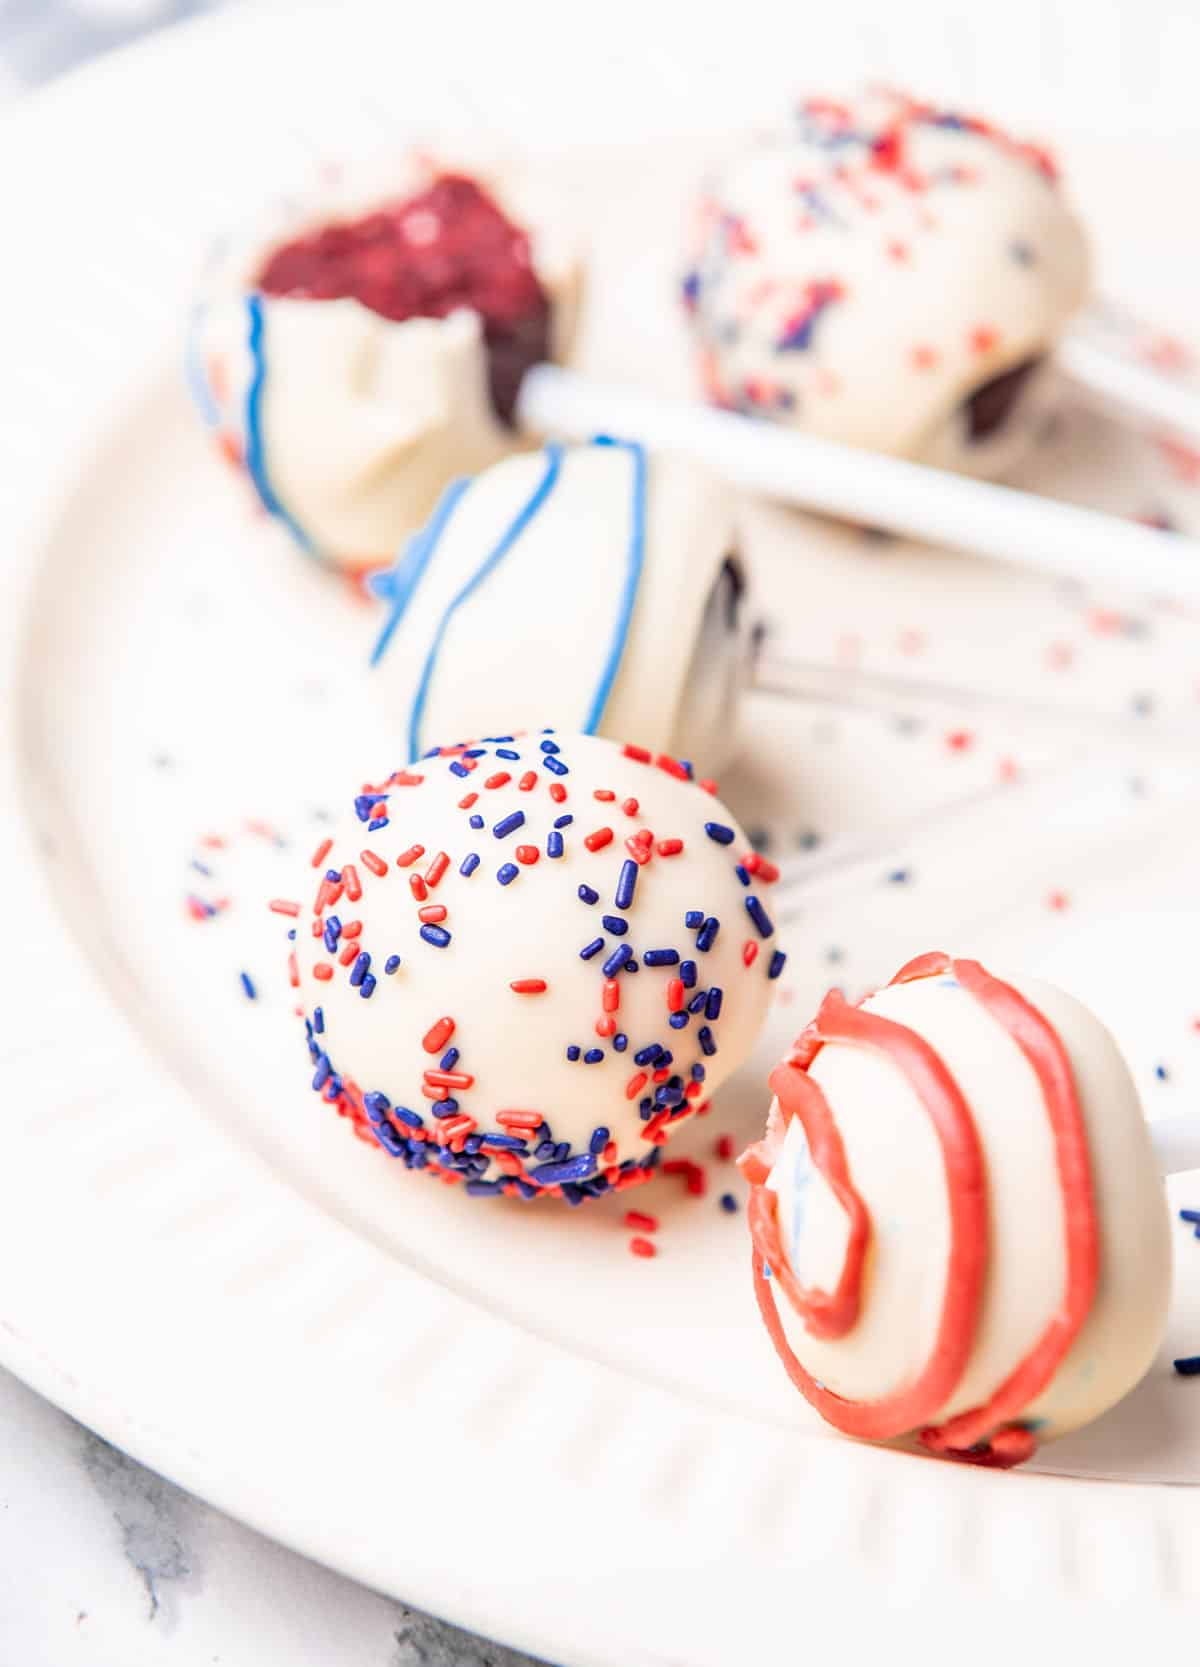
Cake pops feel like a lot of work until you realize the process is mostly just crumbling cake and rolling balls — which, honestly, is kind of fun and very forgiving. These red velvet ones are the ones I make a double batch of, because they disappear before I've even set them all in the stand. The deep red color against the white chocolate coating looks genuinely beautiful, and the cream cheese mixed through the cake crumbles gives every bite that classic red velvet tang. Stick them in a foam block or a glass of sugar to display, and they become a centerpiece as much as a dessert.
Ingredients
- 1 baked red velvet cake (from a 9x13 pan — boxed mix works perfectly here)
- 4 oz cream cheese, softened to room temperature
- ½ cup powdered sugar
- 1 teaspoon vanilla extract
- 12 oz white chocolate chips or white candy melts
- 1 tablespoon coconut oil or vegetable shortening (for thinning the coating)
- Red sprinkles or pink sanding sugar, for decorating
- 30 lollipop sticks
Instructions
- Let the baked cake cool completely, then crumble it into fine crumbs in a large bowl — no chunks. Beat together the softened cream cheese, powdered sugar, and vanilla separately until smooth, then mix into the cake crumbs until evenly combined. The mixture should hold together when you press it.
- Roll the mixture into 1½-inch balls and place on a parchment-lined baking sheet. Freeze for 20–25 minutes until firm — this is what keeps them from falling off the stick when you dip them.
- Melt the white chocolate chips and coconut oil together in a microwave-safe bowl in 30-second intervals, stirring between each, until completely smooth. Dip the tip of each lollipop stick about ½ inch into the chocolate, then insert it into the center of a cake ball. Return to the freezer for 5 minutes to set the stick.
- Dip each cake pop straight down into the melted chocolate, letting excess drip off by gently tapping your wrist — don't swirl or the pop can slide off the stick. Immediately add sprinkles before the coating sets.
- Stand upright in a foam block or prop in a tall glass and let the coating set fully at room temperature, about 15 minutes. Refrigerate until ready to serve.
Tips
- Tip: Keep the remaining cake balls in the freezer while you dip — if they warm up too much, they'll crack the coating or slip off the stick.
- Tip: If your melted chocolate is too thick for smooth dipping, add another teaspoon of coconut oil and stir — thinner coating gives a cleaner finish.
- Tip: These can be made 2 days ahead and stored in an airtight container in the fridge — just bring them to room temperature for 10 minutes before serving so the coating isn't ice-cold.
Thirty-four desserts later and I still can't pick a favorite — that's the honest truth. Some weeks I'm in full chocolate mode and I go straight for the molten lava cakes. Other times I want something lighter, something pink and pretty that Zainab will squeal about when she sees it on the counter. That's the whole point of a list like this: not every Valentine's Day looks the same, and your dessert table shouldn't either. Whether you're cooking for two, for a full house, or just for yourself with a good show on in the background, there's something here that fits.
One thing I've learned after making Valentine's desserts for years is that the ones people remember aren't always the most elaborate. The strawberry cheesecake bars I threw together last minute because I ran out of time? My husband still talks about those. The fancy layered chocolate raspberry torte I spent three hours on? He ate it and moved on. So don't pressure yourself into the hardest recipe on this list. Pick the one that sounds fun to make — that's the energy that actually comes through in the food.
I hope this list gives you something to work with, whether Valentine's Day is a big deal in your house or just a good excuse to make something sweet on a Tuesday. Save a few of these, come back when the week gets busy, and make whatever feels right. That's how I use lists like this — not as a checklist, but as a starting point. 🍫❤️✨
More Recipes You'll Want to Bookmark
- Browse All Recipe Roundups — a full archive of every roundup on the site, organized by category
- Chocolate Dessert Recipes — if the chocolate recipes in this list caught your eye, start here
- Easy Cake Recipes — no-fuss cakes that actually work, great for celebrating any occasion
- No-Bake Dessert Recipes — when you want something sweet without turning the oven on
- Strawberry Recipes — because strawberries and Valentine's Day go together every single time
Frequently Asked Questions
Which of these Valentine's Day desserts can I make ahead of time?
Most of the no-bake options — cheesecake bars, truffles, chocolate bark, and mousse cups — can be made one to two days ahead and kept covered in the fridge. Cookies and brownies also hold up well stored in an airtight container at room temperature for up to three days. I'd hold off on anything with fresh whipped cream topping until the day you're serving it, though — that one doesn't wait well.
What's the easiest dessert on this list for a beginner baker?
Honestly, chocolate bark or strawberry truffles are where I'd send anyone who's nervous about baking. You melt chocolate, you add toppings or dip things, you let it set — that's basically it. No oven timing, no worrying about whether a cake is done in the middle. If you've never made a Valentine's dessert before, start with one of those and build confidence from there.
Can I make these desserts without a stand mixer?
Yes — I don't own one either. A hand mixer handles most of the whipping and beating tasks on this list. For things like cookie dough or brownie batter, a wooden spoon and a little elbow grease works completely fine. The only thing that genuinely needs a hand mixer is whipped cream or a meringue — a fork won't get you there in any reasonable amount of time.
Which desserts work well for a Valentine's Day dinner party, not just for two?
Anything that scales up easily — brownies, cookies, bark, and cheesecake bars are your best friends for a crowd. I'd also look at the mousse cups or mini trifles because you can make them in individual portions ahead of time and they look impressive without extra effort at serving. Lava cakes are romantic but tricky in big batches because the timing is so specific, so I'd save those for a smaller group.
How do I store leftover Valentine's Day desserts?
It depends on the dessert, but a good rule of thumb: anything with dairy (cheesecake, mousse, cream-based desserts) goes in the fridge in an airtight container and keeps for three to four days. Cookies, brownies, and bark store at room temperature in a sealed container for up to five days. Truffles are best kept in the fridge if your kitchen runs warm. And if something has fresh fruit on top, eat it within a day — fruit weeps and makes everything soggy fast.
Share This Post!
If this list helped you figure out what to make this Valentine's Day, pin it or share it with someone who's still deciding — you might save them a last-minute panic. 💝🍫





Kelly Krebs says
Yum! These recipes are perfect for Valentine’s Day and I can’t wait to make them. Thanks for sharing!!
Sana Umer says
You're so welcome! I'm thrilled you love these recipes. They’re perfect for celebrating Valentine’s Day. Enjoy making and sharing them!