
I made these for the first time on a Friday night when I had a pound of ground beef, one tube of crescent dough, and two kids who would not stop asking for burgers. I didn't have buns. I didn't want to go to the store. So I rolled everything up, sliced it into rounds, and put it in the oven — and honestly, it was one of those accidental wins that I've been repeating ever since. Saad ate four of them before I even got the dipping sauces out.
What makes these work is the combination of a properly seasoned beef filling with the ketchup and mustard already cooked in, so every single bite tastes like a cheeseburger. I'm not trying to reinvent the burger — this is just a different shape, and that shape happens to be fantastic for parties, after-school snacks, or when you want something that travels well. The crescent dough does most of the heavy lifting; it bakes up flaky and buttery around the filling without needing any special technique.
My family eats these at every gathering now. My husband likes them with a side of burger sauce; the kids want plain ketchup. When I make these for guests, I always double the batch — a single tube of dough disappears faster than I expect, and I've been caught short more than once. If you're looking for something easy to bring to a game day spread alongside something like these Crack Chicken Tenders, these pinwheels belong on the same platter.
One thing to know going in: these are at their absolute best fresh out of the oven. The dough is flaky and the cheese is properly melted. They're still fine at room temperature, but if you can time it so they come out 10 minutes before people arrive, do that. I'll walk you through everything below.
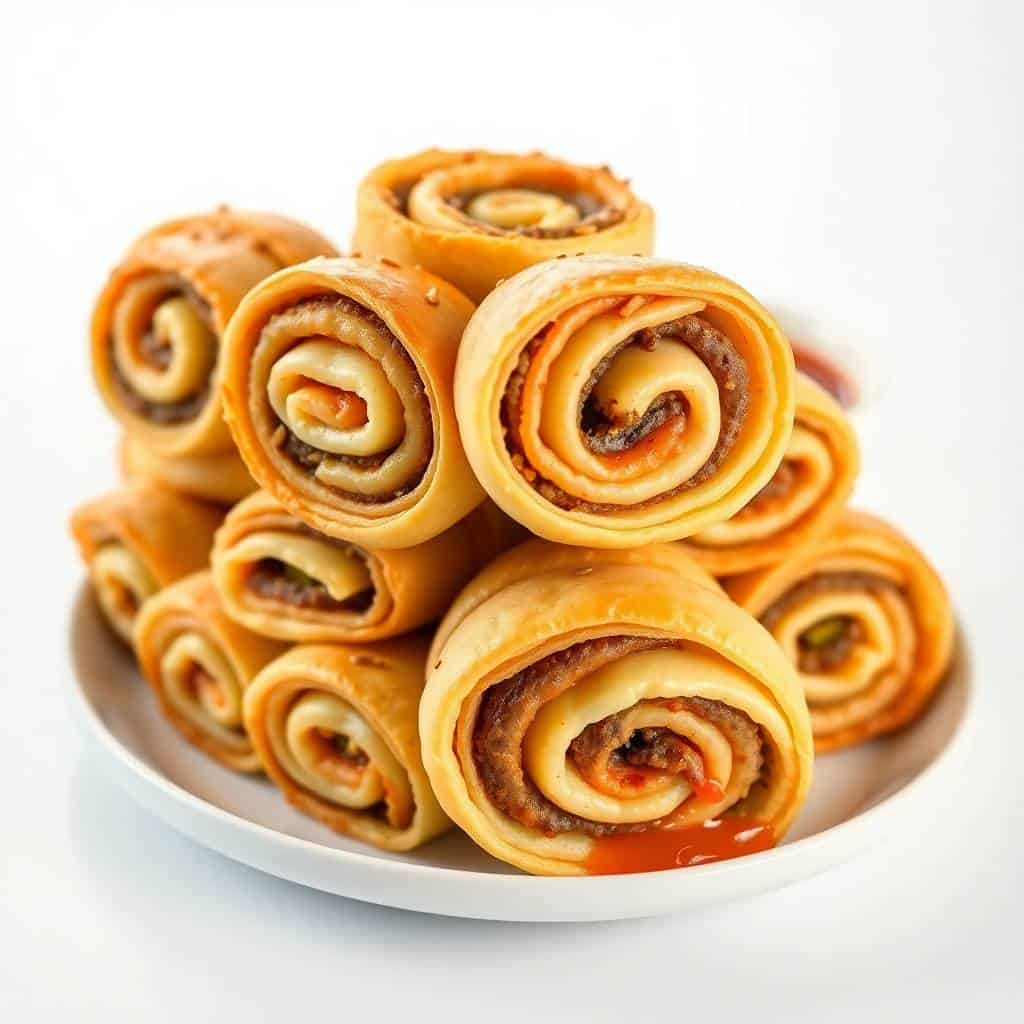
Why You'll Love This Recipe
- The flavour is actually there: The ketchup and mustard go into the beef while it's still in the pan, so the filling tastes seasoned all the way through — not like plain ground beef wrapped in dough. I tried it without the condiments in the filling once and it was noticeably flat. Now I always cook them in. That's the step that makes this taste like a real cheeseburger instead of just beef in a roll.
- One tube of dough, no fuss: You're using refrigerated crescent roll dough from any grocery store — I get mine from Walmart or Aldi. There's no yeast, no proofing, no rolling from scratch. The hardest part is sealing the perforations so you have a solid sheet of dough to work with. Takes about 30 seconds.
- Kids actually eat them: I know that sounds obvious, but I have one child who inspects every meal before committing. The spiral shape helps — it's fun to look at, and because the cheese is melted through the inside, there's no obvious vegetable to pick out. Zainab also loves the leftovers cold the next day, which I don't fully understand but I'm not arguing with it.
- They hold together well for parties: Pinwheels are a good party food specifically because they don't fall apart in your hand and they don't drip. I've brought these to birthday parties and get-togethers where people were eating standing up, and nobody had a mess situation. That matters when you're the one who brought the food.
- You can make them ahead: Assemble the whole log, wrap it in plastic wrap, and refrigerate for up to a night before baking. The next day, slice and bake. This is genuinely useful when you're hosting and don't want to be stuck in the kitchen while everyone else is at the table.
Ingredients
- 1 lb ground beef
- ½ small onion, finely chopped
- ½ teaspoon garlic powder
- ½ teaspoon onion powder
- Salt and pepper, to taste
- 1 tablespoon ketchup
- 1 tablespoon yellow mustard
- 1 cup shredded cheddar cheese
- 1 can (8 oz) refrigerated crescent roll dough (or pizza dough)
- 1 egg, beaten (for egg wash)
- 1 tablespoon sesame seeds (optional)
- Ketchup, mustard, or burger sauce for dipping
Directions
- Cook the beef: In a skillet over medium heat, cook the ground beef and chopped onion until the beef is fully browned. Drain the excess fat — I skip this step sometimes and regret it every time because soggy pinwheels are real. Stir in the garlic powder, onion powder, salt, pepper, ketchup, and mustard, then remove from heat and let it cool for about 5 minutes before assembling.
- Preheat the oven and prep the dough: Preheat your oven to 375°F (190°C) and line a baking sheet with parchment paper. Unroll the crescent dough onto a lightly floured surface and press all the perforations together firmly with your fingers to make one solid rectangle — gaps will let the filling leak out, so take an extra minute here.
- Spread the filling: Spoon the cooled beef mixture evenly over the dough, leaving about a half-inch border on the far long edge so you have something clean to seal with. Sprinkle the shredded cheddar generously over the beef — this is not the place to be stingy with cheese.
- Roll and chill: Starting from the long side closest to you, roll the dough into a tight log. Wrap it in plastic wrap and refrigerate for 10 minutes. This step is optional but it makes slicing so much cleaner — the log firms up and the rounds keep their shape instead of smooshing.
- Slice and arrange: Using a sharp serrated knife, slice the log into 1-inch rounds. Lay them flat on the parchment-lined baking sheet with a little space between each one. Brush the tops with beaten egg and sprinkle sesame seeds on top if you like.
- Bake: Bake for 15–20 minutes until the tops are golden brown and the cheese is bubbling. Keep an eye on them in the last few minutes — crescent dough goes from golden to overdone faster than you'd think. Let them cool for 2–3 minutes before serving.
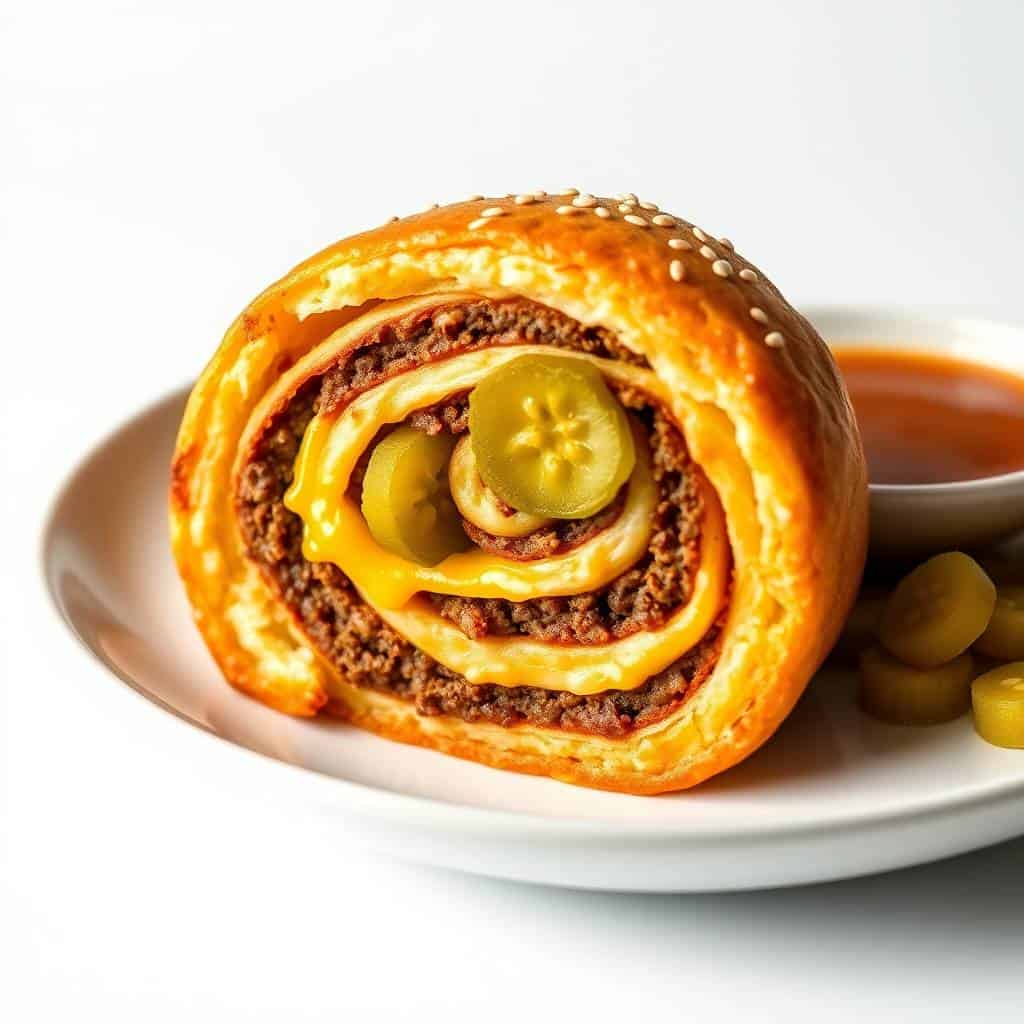
Tips for Success
- Drain the beef properly: After browning, tilt the pan and spoon out the rendered fat, or transfer the meat to a paper towel-lined plate for a minute. The first time I made these I didn't bother, and the bottom of the pinwheels was greasy and didn't crisp up. It also makes the filling loose, which causes everything to slide when you try to roll the log. One extra step, big difference.
- Don't skip pressing the dough seams: Crescent roll dough has perforations where the individual triangles are scored. If you leave those gaps open, the filling seeps through and you end up with a mess on the baking sheet. Press firmly with your fingertips all the way across before you spread anything on it. I run my palm along it once more for good measure.
- Let the filling cool before assembling: Hot filling on crescent dough makes it soft and hard to work with. It also starts partially cooking the dough before it gets into the oven, which throws off the timing. Five minutes off the heat is all you need — use that time to prep your baking sheet and get the dough unrolled.
- Use a serrated knife to slice: A straight-edged knife drags through the dough and squashes the spiral. A serrated knife cuts through cleanly with a gentle sawing motion. If your log is still soft despite chilling, wipe the knife between cuts so dough doesn't build up on the blade and start tearing.
- Don't overcrowd the baking sheet: Leave at least an inch between each pinwheel so the heat can circulate and the edges get a little color. When I'm making a double batch I use two sheet pans rather than trying to cram everything onto one. It only takes a few extra minutes and the pinwheels come out much better.
Variations
- Bacon cheeseburger version: Cook 3–4 strips of bacon until crispy, crumble them up, and mix into the beef filling before rolling. The smokiness changes the whole vibe in a really good way. My husband discovered this variation when I had leftover bacon in the fridge and now he asks for it specifically. It's worth the extra step.
- Add pickles to the filling: Finely chop some dill pickles — about 2 tablespoons — and scatter them over the beef before you add the cheese. It gives that briny, tangy note that you'd get from a proper burger. Pat the pickles dry first with a paper towel so they don't add extra moisture to the filling.
- Swap the cheese: Cheddar is my default but American cheese gives you that classic fast-food melt, and pepper jack adds a mild heat that works well if you're serving these to adults. If you want to try something more interesting, a layer of Homemade Boursin Cheese spread directly on the dough before the beef goes on is genuinely fantastic.
- Ground turkey or chicken: This isn't authentic cheeseburger territory, I know, but if you're avoiding red meat it works fine. Season the turkey or chicken a little more aggressively — an extra pinch of smoked paprika and a small splash of Worcestershire sauce help compensate for the lower fat content. Don't skip the ketchup and mustard in the filling.
- Burger sauce drizzle after baking: Mix equal parts mayo and ketchup with a splash of pickle brine and a pinch of paprika, and drizzle it over the pinwheels right before serving. It's a small thing but it ties everything together and makes the platter look finished. My kids ignore it; the adults at my table always ask what it is.
Serving and Storage
Serving
Serve these warm, 2–3 minutes out of the oven, with small bowls of ketchup, mustard, and burger sauce on the side. I usually arrange them cut-side up on a wooden board so the spiral shows. For a fuller spread, these sit alongside Slow Cooker Dr. Pepper Pulled Pork really well — the two together cover a whole game day table without much effort. If you're packing them in lunchboxes, they're still good at room temperature and don't get soggy.
Storage
Store leftovers in an airtight container in the fridge for up to 3 days. To reheat, use an oven or air fryer at 350°F (175°C) for about 5 minutes — the microwave works in a pinch but makes the dough soft instead of flaky. For freezing, bake them first, let them cool completely, then freeze in a single layer before transferring to a bag. Reheat from frozen at 350°F for 10–15 minutes. I'd skip refrigerating unbaked sliced rounds — they get a bit sad sitting raw and cut; better to freeze the whole unsliced log and thaw it overnight before slicing and baking.

Frequently Asked Questions
Can I make these ahead of time?
Yes — assemble the log, wrap it tightly in plastic wrap, and refrigerate for up to 24 hours before slicing and baking. This actually makes slicing cleaner because the log has fully chilled. Just add 2–3 extra minutes to the bake time if the dough goes into the oven straight from a cold fridge.
Can I freeze cheeseburger pinwheels?
Freeze them after baking, not before. Let them cool completely, freeze in a single layer on a baking sheet, then transfer to a zip-lock bag. Reheat from frozen in the oven at 350°F (175°C) for 10–15 minutes until heated through. The texture holds up well — the dough won't be quite as flaky as fresh-baked but it's still good.
What can I use instead of crescent roll dough?
Refrigerated pizza dough works well and gives you a slightly chewier, more bread-like pinwheel. Puff pastry is another option if you want a flakier, richer result — just watch the bake time because puff pastry browns faster. Both are usually available in the refrigerated section at most grocery stores.
How do I keep the pinwheels from falling apart when I slice them?
Two things help: chilling the log for at least 10 minutes before slicing, and using a sharp serrated knife with a gentle sawing motion rather than pressing straight down. Also make sure you rolled the log tightly when you assembled it — a loose roll is the main reason slices fall apart before they get to the baking sheet.
Can I make these gluten-free?
Some brands do make gluten-free crescent-style dough — Pillsbury has had a version, and it's worth checking the freezer section at Walmart or Whole Foods. Make sure your ketchup and mustard are also certified gluten-free (most are, but it's worth checking the label). The rest of the ingredients are naturally gluten-free.

CHEESEBURGER PINWHEELS
Ingredients
- 1 lb ground beef
- ½ small onion finely chopped
- 1 tablespoon ketchup
- 1 tablespoon yellow mustard
- Salt and pepper to taste
- 1 cup shredded cheddar cheese
- 1 can 8 oz refrigerated crescent roll dough or pizza dough
- 1 egg beaten (for egg wash)
- Sesame seeds optional, for topping
Instructions
Cook Beef Mixture:
- In a skillet over medium heat, cook ground beef and onion until browned. Drain excess grease. Stir in ketchup, mustard, salt, and pepper. Let cool slightly.
Prepare Dough:
- Roll out crescent or pizza dough into a rectangle on a lightly floured surface. Press seams together if using crescent dough.
Assemble Pinwheels:
- Spread the beef mixture evenly over the dough, then sprinkle with cheddar cheese. Roll up tightly from the long side and slice into 1-inch rounds.
Bake:
- Place pinwheels on a lined baking sheet. Brush tops with beaten egg and sprinkle with sesame seeds if using. Bake at 375°F (190°C) for 15–20 minutes or until golden brown.
Serve:
- Serve warm with ketchup, mustard, or dipping sauce of choice.
Notes
- Make Ahead: Prepare and refrigerate before baking; bake when ready to serve.
- Variations: Add pickles, bacon bits, or use pepper jack for a spicy kick.
- Serving Suggestions: Perfect for game days, lunchboxes, or casual dinners.
- Allergy-Friendly: Contains gluten and dairy; substitute as needed.
I keep coming back to this recipe because it solves a specific problem I have often: I want to bring something to a gathering that people will actually eat, that I can make in under 45 minutes, and that doesn't require me to find specialty ingredients. One tube of crescent dough, one pound of ground beef, a cup of shredded cheddar — that's most of it. Everything else is pantry stuff.
The thing I genuinely like about these is that they look more impressive than the effort involved. People always ask me what they are when I set them on a table, which is the best possible outcome for something this straightforward. If you want to round out the dessert side of that same party table, my Chocolate Chip Cookie Dough Truffles are the thing I always make alongside these — no baking required and they disappear at exactly the same rate.
If you try these, let me know in the comments how they turned out — and if you tried any of the variations I mentioned. The bacon version especially. I want to know if you liked it as much as my husband did. 🍔✨
If you liked this recipe, these are worth checking out next:
- Crack Chicken Tenders — another crowd-friendly finger food that pairs well with dipping sauces
- Slow Cooker Dr. Pepper Pulled Pork — for when you want something hands-off that feeds a bigger group
- Homemade Boursin Cheese — great as a spread layered under the beef filling in the variation I mentioned
- Chocolate Chip Cookie Dough Truffles — the no-bake dessert I always bring alongside savory appetizers
- No-Bake Vanilla Tiramisu Roll — another make-ahead option if you want something more impressive for the dessert table




Comments
No Comments