
I've been making some version of sloppy joes for years — it's one of those dinners that shows up when the fridge is low and everyone is hungry. But a while back I started thinking about how the flavors in a Philly cheesesteak are basically the same building blocks: beef, peppers, onions, cheese. So I just combined them. The result is this pan of saucy, cheesy beef that my family now requests at least twice a month.
What makes this work is the order of things. You soften the peppers and onion first so they get a little sweet and silky, then you brown the beef right on top of them. The Worcestershire sauce and beef broth go in together and they do most of the flavor heavy-lifting — you don't need a long list of spices. When you turn off the heat and stir in the provolone, it melts into the meat mixture in a way that feels almost luxurious for a 30-minute weeknight dinner.
My husband makes this disappear faster than almost anything else I cook. He'll eat it on toasted hoagie rolls, and if there's any left over he'll heat it up and put it on a bun for lunch the next day. Saad ate two sandwiches the first time I made it, which in 10-year-old language means "make this again immediately." If you're looking for more ground beef dinners that come together fast, my Creamy Ranch Beef and Sweet Corn Bowtie Casserole is another weeknight staple in our house.
One thing I'll say upfront: I always toast the buns. The first time I made this I didn't bother, and the bottoms turned soggy within about two minutes of filling them. A quick toast in a dry skillet or under the broiler for a minute makes a real difference. Also, let the filling simmer long enough to thicken properly — if it looks too loose, just give it another two minutes and it'll come together.
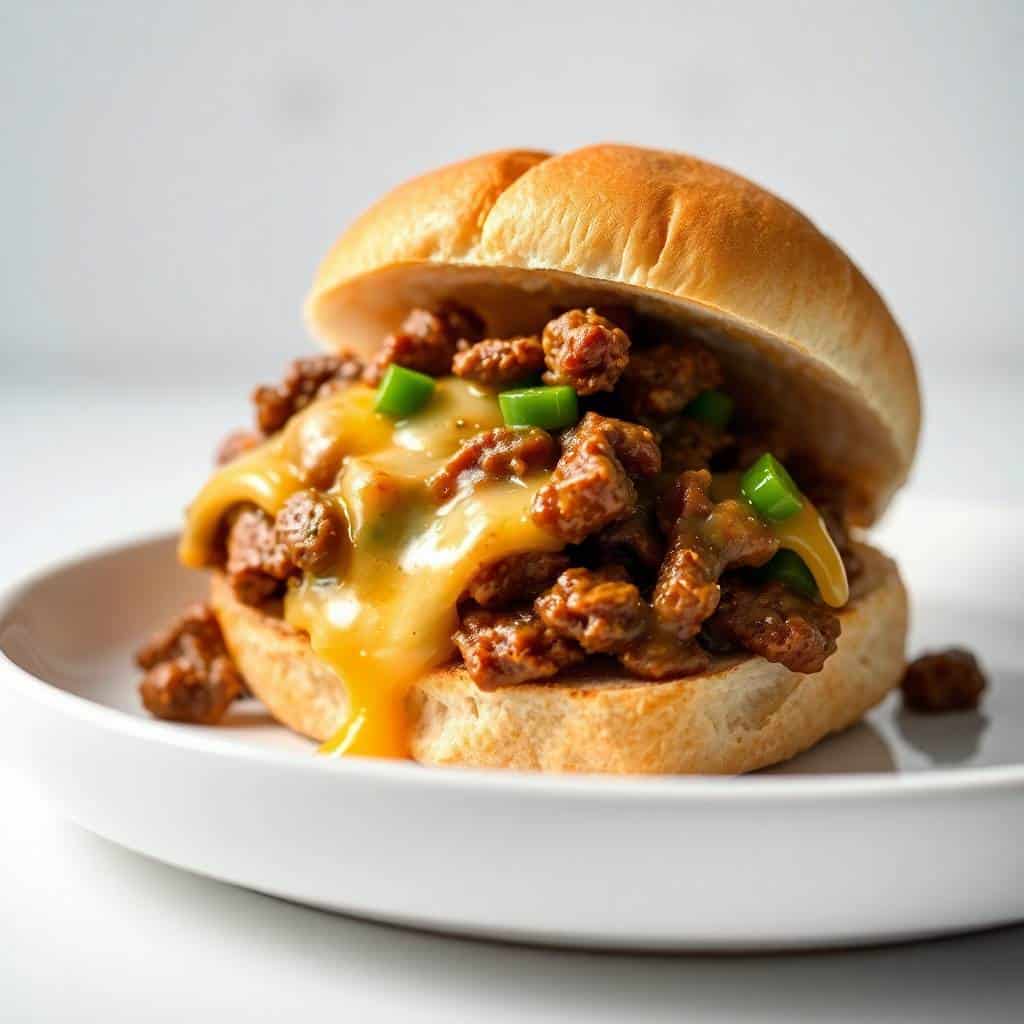
Why You'll Love This Recipe
- It's a genuine one-pan dinner: Everything — the vegetables, the beef, the sauce — happens in a single skillet. I use a 12-inch cast iron pan but any heavy skillet will do. By the time the filling is ready, I've already cleaned the cutting board and I'm just waiting on the pan. On school nights that matters more than I can say.
- Ready in 30 minutes from cold start: I've timed this. If you start with a cold skillet and unprepped vegetables, you're eating in about 28-30 minutes. That's including chopping the onion and pepper, which takes me maybe 5 minutes. It's the kind of meal I can decide to make at 6pm and not stress about.
- The cheese actually melts INTO the filling: You're not just putting a slice of cheese on top of the bun and hoping it melts. You stir shredded provolone or mozzarella directly into the hot beef mixture off the heat, and it becomes part of the filling. Every bite gets cheese, not just the top half of the sandwich.
- No specialty ingredients required: Everything here is available at any Walmart or Aldi — ground beef, a bell pepper, an onion, Worcestershire sauce, beef broth, ketchup, and shredded cheese. I've made this on a Friday when the fridge was nearly empty and it still worked. You don't need a specific cut of beef or a specialty cheese.
- The leftovers are genuinely good: I make a double batch most of the time because the filling keeps well in the fridge for 4 days. My husband reheats it in a small pan and says it tastes better the second day when the flavors have had time to settle. It also freezes well if you want to get ahead on meals.
Ingredients
- 1 lb ground beef
- 1 tablespoon olive oil
- 1 small onion, finely diced
- 1 green bell pepper, finely diced
- 2 cloves garlic, minced (or 1 teaspoon garlic powder in a pinch)
- 1 tablespoon Worcestershire sauce
- ¾ cup beef broth
- 1 tablespoon ketchup
- ½ teaspoon salt
- ¼ teaspoon black pepper
- 1 tablespoon cornstarch dissolved in 1 tablespoon cold water (optional, for thickening)
- 6 hamburger buns or hoagie rolls, toasted
- 6 slices provolone cheese, or 1 cup shredded provolone or mozzarella
Directions
- Step 1: Soften the vegetables — Heat the olive oil in a large skillet over medium heat. Add the diced onion and bell pepper and cook for 4–5 minutes, stirring occasionally, until softened and starting to go slightly golden at the edges. This step matters — if you rush it, the vegetables stay sharp and a bit harsh in flavor.
- Step 2: Brown the beef — Add the ground beef and garlic to the pan. Break the beef up with a wooden spoon or spatula as it cooks. Cook for 5–6 minutes until fully browned with no pink remaining. If there's a lot of fat in the pan, tilt it and spoon off the excess — you want a little fat for flavor but not a greasy filling.
- Step 3: Build the sauce — Stir in the Worcestershire sauce, beef broth, ketchup, salt, and black pepper. Give everything a good stir to combine. Let it simmer uncovered for 5–7 minutes, stirring occasionally, until the liquid reduces and the mixture thickens into a saucy consistency.
- Step 4: Thicken if needed — If the filling still looks too loose after simmering, stir the cornstarch into 1 tablespoon of cold water until smooth, then pour it into the pan. Stir constantly for about 1 minute until the filling thickens. This isn't always necessary — depends on how much water is in your beef.
- Step 5: Melt in the cheese — Turn off the heat. Add the shredded provolone or mozzarella directly into the beef mixture and stir until fully melted and incorporated. The residual heat in the pan is enough — you don't need to turn the burner back on.
- Step 6: Assemble and serve — Spoon the hot filling generously onto toasted buns. Serve right away while the cheese is still melty. If you want to do individual slices of provolone on top instead, lay a slice on each filled bun and it'll melt from the heat of the filling.
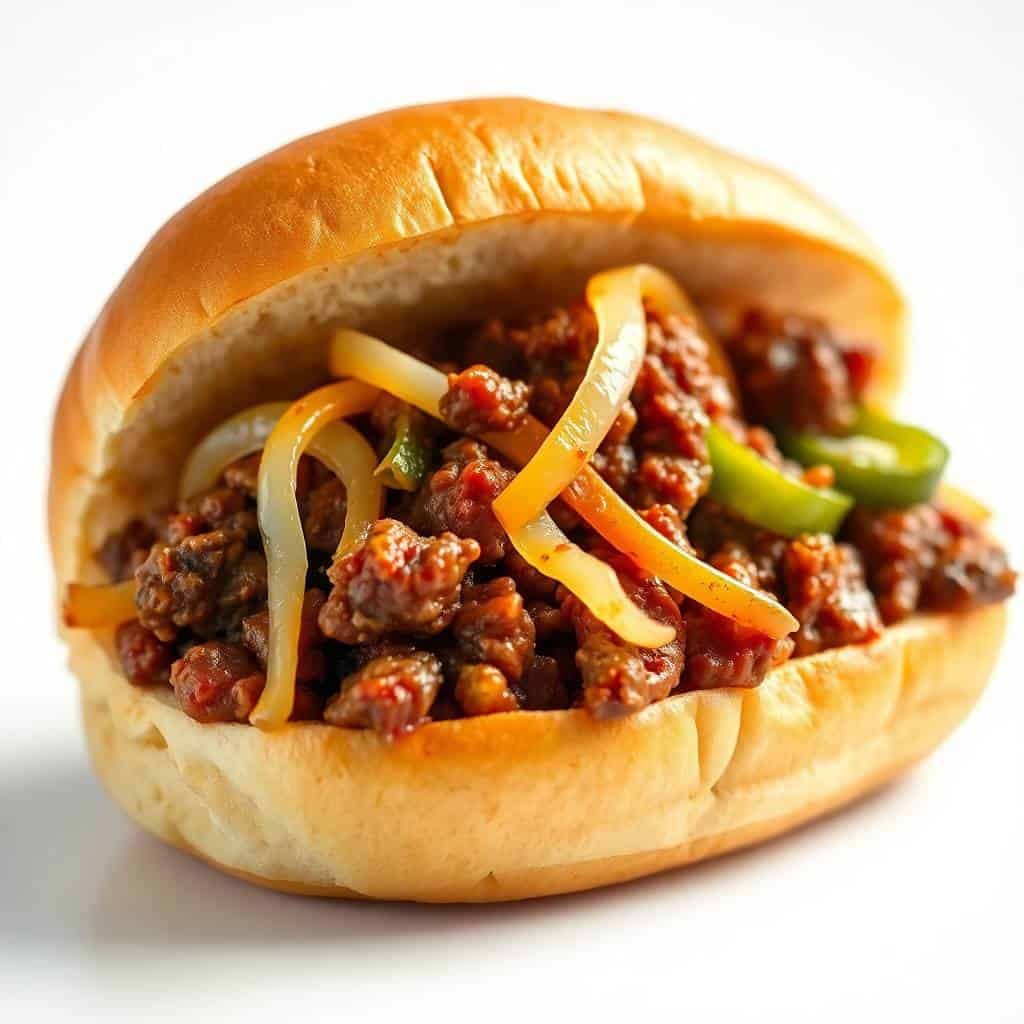
Tips for Success
- Toast the buns — seriously: I skipped this the first time and the buns were soggy in about two minutes. A soft bun can't hold up to a wet filling. I either put them cut-side down in a dry skillet for 60 seconds or slide them under the broiler on a sheet pan for a minute. Either way works. Once toasted, they stay firm long enough to actually eat without falling apart.
- Don't skip draining the fat: Depending on the fat percentage of your ground beef, you might have quite a bit of rendered fat in the pan after browning. If you leave it all in, the final filling will be greasy and the sauce won't thicken properly. I tilt the pan and use a large spoon to remove most of it, leaving just a thin coating in the pan.
- Shred your own cheese if you can: Pre-shredded cheese has a coating on it that prevents clumping in the bag but also makes it melt a little slower and less smoothly. If you buy a block of provolone and shred it yourself, it melts into the beef mixture much more evenly. Takes two extra minutes and it's worth it. I learned this after a few batches where the cheese stayed a bit stringy instead of silky.
- Let it simmer uncovered: Some people put a lid on during simmering to speed things up, but that traps steam and keeps the filling too watery. Leave the pan uncovered so the liquid reduces properly. If after 7 minutes it still looks thin, just give it a couple more minutes — it'll get there.
- Finely dice the vegetables: This isn't a stew where chunky vegetables are welcome. You want small, fine dice on the onion and pepper so they soften quickly and blend into the filling. If you dice them too large they stay crunchy and separate from the beef instead of becoming part of it. A sharp knife and about 5 minutes of prep is all you need.
Variations
- Add mushrooms: I sometimes add half a cup of finely diced cremini mushrooms to the pan with the peppers and onions. They cook down a lot so they almost disappear into the filling, but they add a savory depth that makes the whole thing taste like it cooked for longer than it did. My husband prefers this version. Just make sure to dice them small so they blend in rather than sitting in chunks.
- Use ground turkey: This works well — just be a little more careful about draining fat since turkey is leaner and can go dry faster. Add an extra tablespoon of beef broth if the filling starts looking too tight. The flavor is slightly lighter than beef but still really good, especially if you use provolone which has enough flavor to compensate.
- Make it spicy: My husband adds a pinch of crushed red pepper flakes to his portion every single time. If your family likes heat, stir in half a teaspoon of red pepper flakes when you add the Worcestershire sauce. You can also add a few dashes of hot sauce at the end. It doesn't change the overall character of the dish — just gives it a little back-of-the-throat warmth.
- Serve as sliders: Instead of full-size buns, use dinner rolls or slider buns and make a tray for a party or game night. I put the filling in a bowl in the middle and let people build their own. This is not a traditional Pakistani thing at all — but slider nights have become a real thing in our house when we have friends over, and this filling works perfectly for it.
- Try different cheeses: Provolone is my go-to, but white American cheese melts even more smoothly if you can find it (it's common at Walmart deli counters). Swiss gives it a slightly nuttier taste. Pepper jack adds heat without you needing to add anything else. I've tried them all at different points — honestly, whatever melting cheese you have in the fridge will work.
Serving and Storage
Serving
Serve the filling hot, right after stirring in the cheese, on toasted buns or hoagie rolls. On the side I usually put out a bag of chips, some dill pickles, or a simple coleslaw. If I'm feeding the kids alongside something more substantial, a bowl of Creamy Baked Mac and Cheese on the side turns this into a full spread that nobody at my table will complain about. These sandwiches don't sit well — assemble them right before eating, not 20 minutes ahead.
Storage
Store the filling (not the assembled sandwiches) in an airtight container in the fridge for up to 4 days. To reheat, put it in a small skillet over medium-low heat with a splash of beef broth or water to loosen it back up — the cheese can make it clump together in the fridge. The microwave works too, just stir it halfway through. The filling also freezes well for up to 3 months; thaw it overnight in the fridge before reheating. Always store the buns separately at room temperature.

Frequently Asked Questions
Can I make the filling ahead of time?
Yes, and it actually tastes better the next day once the flavors have had a chance to settle. Make the filling completely, let it cool, and store it in an airtight container in the fridge for up to 4 days. When you're ready to eat, reheat it in a skillet with a small splash of beef broth to loosen it up, then serve on freshly toasted buns.
What's the best cheese to use for this?
Provolone is my first choice — it melts smoothly and has a mild savory flavor that works well with the beef. Mozzarella is a close second and probably easier to find shredded at any grocery store. White American cheese (available at most deli counters) melts the most silkily of all. Whatever you use, shredding it yourself from a block gives a better melt than pre-shredded.
Can I freeze the filling?
Yes. Let the filling cool completely, then transfer to a freezer-safe container or zip-lock bag and freeze for up to 3 months. Thaw overnight in the fridge before reheating. The texture holds up well — I've done this plenty of times when I make a double batch and want easy dinners for the following week.
How do I keep the buns from getting soggy?
Toast them. That's really the whole answer. Put the buns cut-side down in a dry skillet over medium heat for about 60 seconds, or slide them under the broiler on a sheet pan for a minute. The toasted surface creates a barrier that slows down soaking. Also, assemble the sandwiches right before eating — don't fill them 10 minutes ahead and let them sit.
Can I use ground turkey instead of beef?
Absolutely. Ground turkey works well here — it's leaner so the filling will be a bit less rich, but the Worcestershire sauce and beef broth carry enough flavor that it still tastes great. Because turkey has less fat, I add an extra tablespoon or two of broth if the filling starts looking dry during simmering. Provolone or mozzarella both melt just as well on the turkey version.

PHILLY CHEESESTEAK SLOPPY JOES
Ingredients
- 1 lb ground beef
- 1 tablespoon olive oil
- 1 small onion finely chopped
- 1 green bell pepper diced
- 1 teaspoon garlic powder
- 1 tablespoon Worcestershire sauce
- ¾ cup beef broth
- 1 tablespoon ketchup
- Salt and pepper to taste
- 6 hamburger buns
- 6 slices provolone cheese or 1 cup shredded
Instructions
Cook the Beef:
- In a large skillet, heat olive oil over medium heat. Add ground beef and cook until browned, breaking it apart as it cooks. Drain excess fat.
Add Veggies and Seasoning:
- Add chopped onion and bell pepper. Cook for 3–4 minutes until softened. Stir in garlic powder, Worcestershire sauce, ketchup, and beef broth. Simmer for 5–7 minutes until thickened. Season with salt and pepper to taste.
Add Cheese:
- Turn off the heat and stir in shredded provolone, or top each bun with a slice.
Assemble Sandwiches:
- Spoon the beef mixture onto hamburger buns. Serve warm.
Notes
Prepare the meat mixture ahead and reheat when ready to serve. Store in the fridge for up to 3 days. Custom Flavors:
Add mushrooms, red peppers, or hot sauce for your own flavour twist. Serving Suggestions:
Serve with fries, a green salad, or coleslaw for a complete meal. Allergy-Friendly Options:
Use gluten-free buns and dairy-free cheese if needed. Storage Tips:
Store leftover meat mixture in an airtight container in the refrigerator for up to 3 days. Reheat before assembling.
This is genuinely one of those dinners I reach for when I need something fast and satisfying and I don't want to think too hard about it. Everything comes from ingredients I almost always have — a pound of ground beef, a bell pepper, an onion, some cheese. It's not a recipe that requires much planning or any special equipment. I make it in the same heavy skillet I use for everything else, with a wooden spoon I've had for years.
I know this isn't a traditional Philly cheesesteak — real ones are made with thinly shaved ribeye on a hoagie roll with Cheez Whiz, and I'm not trying to replicate that exactly. This is my weeknight interpretation using ground beef, and my family likes it just as much. That's the honest version of this recipe.
If you're having people over and want a low-effort spread, make a double batch of this filling and set out a tray of toasted slider buns alongside something sweet for dessert — my Homemade Snickerdoodle Cheesecake Bars are an easy make-ahead option that pairs well with casual dinners like this one. The combination of a warm, savory sandwich and a sweet bar dessert is something my family never gets tired of.
If you make this, I hope it becomes a regular in your weeknight rotation the way it has in mine. Toast those buns, don't skip the simmer, and stir that cheese in off the heat. That's really all there is to it. 🥩🧀✨
{"@context":"https://schema.org","@type":"Article","headline":"PHILLY CHEESESTEAK SLOPPY JOES","description":"Philly Cheesesteak Sloppy Joes are juicy, cheesy, and loaded with flavour—an easy dinner twist on a classic sandwich.","datePublished":"2025-06-22T14:38:06+00:00","dateModified":"2026-05-03T21:11:53+00:00","author":{"@type":"Person","name":"Sana Umer","url":"https://forfoodiefriends.com/about/","description":"Self-taught home cook with 10+ years of kitchen experience. Mom of two who develops every recipe in her own kitchen.","jobTitle":"Recipe Developer & Food Blogger","image":"https://forfoodiefriends.com/wp-content/uploads/sana-umer-author-photo.jpg"},"publisher":{"@type":"Organization","name":"For Foodie Friends","url":"https://forfoodiefriends.com/","logo":{"@type":"ImageObject","url":"https://forfoodiefriends.com/wp-content/uploads/forfoodiefriends-logo.png"}},"mainEntityOfPage":{"@type":"WebPage","@id":"https://forfoodiefriends.com/philly-cheesesteak-sloppy-joes/"},"image":"https://forfoodiefriends.com/wp-content/uploads/2025/06/PHILLY-CHEESESTEAK-SLOPPY-JOES.jpg"}




Comments
No Comments