
The first time I made snickerdoodle cheesecake bars, I was trying to solve a specific problem: I wanted to bring something to a holiday cookie exchange that did not look like every other tray on the table. A standard snickerdoodle felt too ordinary, a full cheesecake felt too fussy to transport, and then it occurred to me — what if the two lived together in the same pan? The result was exactly what I hoped for and considerably better than I expected. The cinnamon sugar cookie base softens under the creamy cheesecake filling and the whole thing comes out of the oven smelling like the best possible version of a December kitchen.
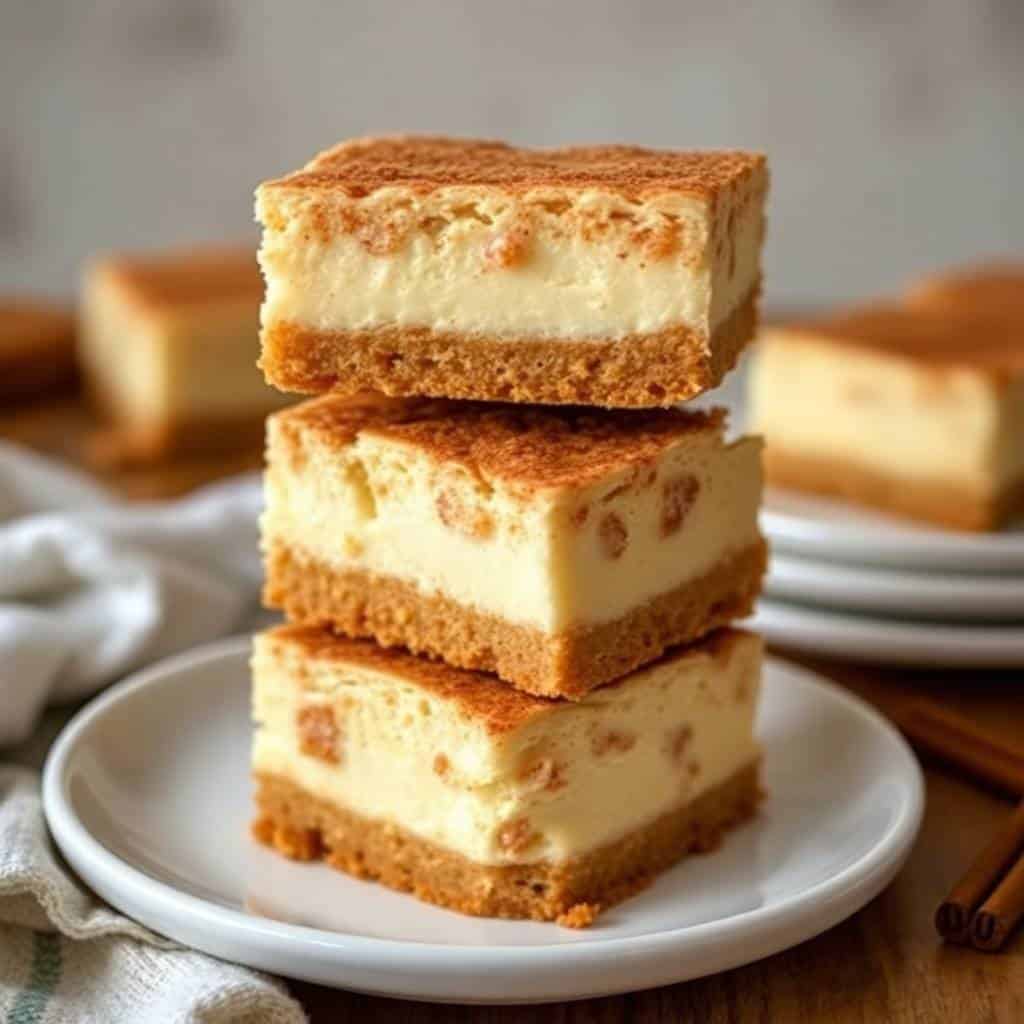
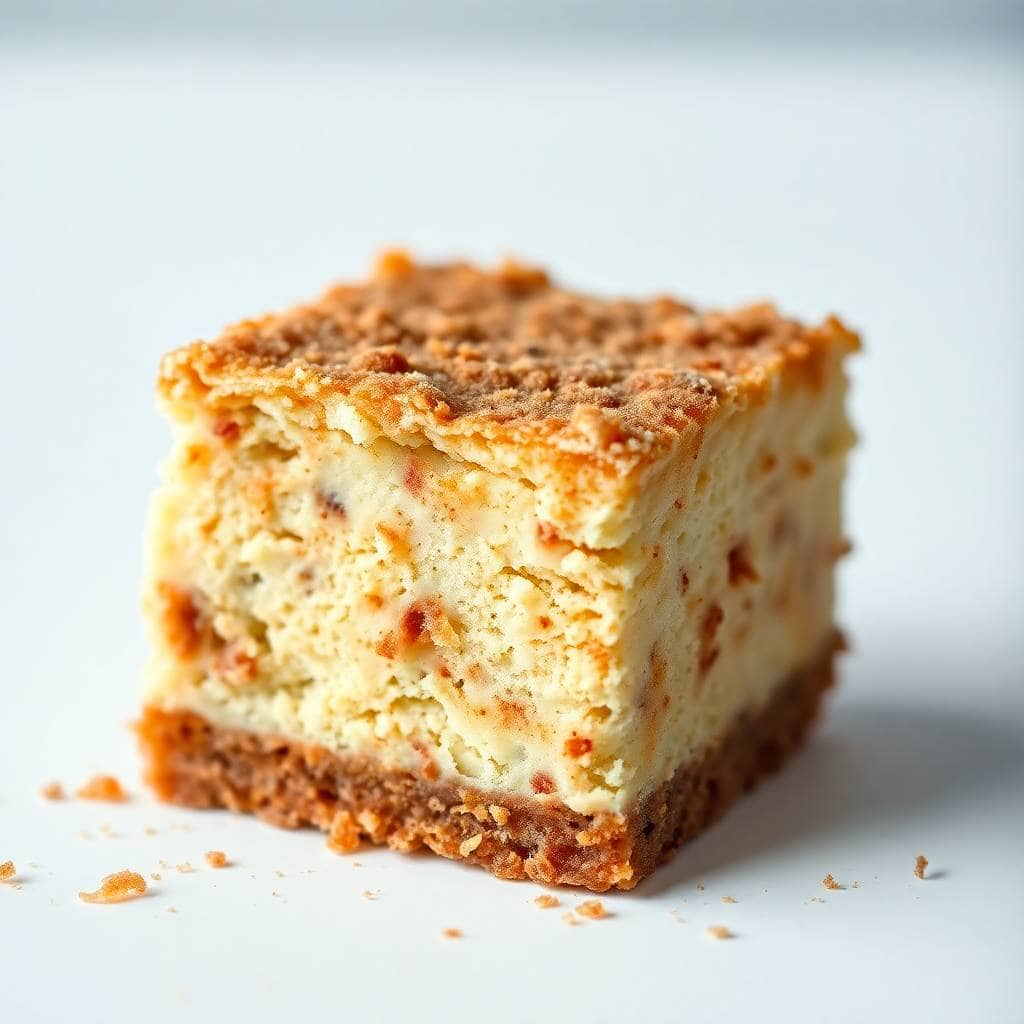
What makes this recipe genuinely different from a standard bar cookie is the layering. The bottom two-thirds of the snickerdoodle dough forms a soft, chewy base that bakes up with just enough structure to hold everything above it. The cream cheese filling — smooth, lightly sweet, and barely set — sits in the middle. Then the remaining dough goes on top in rough spoonfuls, not a complete layer but a deliberate patchwork that lets the filling peek through and the cinnamon sugar sprinkle coat everything unevenly in the most satisfying way. Every bar looks slightly different from the one next to it, which somehow makes the whole tray look more considered rather than less.
These bars work for any occasion where you need something that travels well, slices cleanly after chilling, and impresses without requiring significant technique. They hold beautifully in the refrigerator for five days and freeze well for two months, which means one baking session solves multiple situations. I have brought them to potlucks, packed them in lunchboxes, and left them on the counter for the week with a note not to touch them — a note that was completely ignored by everyone in the household, which I consider the highest form of endorsement.
Let me show you exactly how to make them.
WHY YOU WILL LOVE THIS RECIPE
- Best of both worlds: The snickerdoodle cookie base and the creamy cheesecake filling work together in a way that makes every bite more satisfying than either one alone. The cream of tartar gives the cookie layer that signature tang that you recognise immediately as a snickerdoodle rather than a generic sugar cookie base.
- Made for gatherings: These bars slice into clean, even squares after chilling and hold their shape at room temperature for several hours, which makes them genuinely practical for dessert trays, potlucks, and holiday cookie exchanges where things need to look presentable after being transported.
- Genuinely easy to make: No water bath, no springform pan, no piping bags. The dough and filling both come together with a hand mixer in under 15 minutes of active preparation, and the oven and refrigerator do the rest of the work.
- The cinnamon sugar topping is essential: The mixture of granulated sugar and cinnamon sprinkled over the top before baking creates a slightly crunchy, caramelised finish that contrasts with the soft layers underneath. This is the detail that makes the bars look bakery-made rather than homemade in the best possible way.
- Freezer-friendly and make-ahead: These bars freeze exceptionally well for up to two months, which means you can bake a full batch, cut them into squares, layer between parchment, and freeze them — then pull out exactly as many as you need. They thaw in the refrigerator overnight with no change in texture or flavour.
- Universally loved: In my experience, snickerdoodle cheesecake bars are one of those recipes where children are enthusiastic about them for the cinnamon sweetness and adults appreciate the more restrained cream cheese filling that prevents the whole thing from being cloyingly sweet. There is very rarely a bar left at the end of any occasion where these appear.
INGREDIENTS
For the cookie base and topping:
- 1 cup unsalted butter, softened to room temperature
- 1½ cups granulated sugar
- 2 large eggs, at room temperature
- 1 teaspoon pure vanilla extract
- 2¾ cups all-purpose flour
- 1 teaspoon cream of tartar (this is what gives snickerdoodles their signature tang — do not substitute)
- ½ teaspoon baking soda
- ¼ teaspoon fine salt
For the cheesecake filling:
- 2 packages (8 oz each / 16 oz total) full-fat cream cheese, softened to room temperature
- ½ cup granulated sugar
- 1 large egg, at room temperature
- 1 teaspoon pure vanilla extract
For the cinnamon sugar topping:
- 2 tablespoons granulated sugar
- 1 teaspoon ground cinnamon
DIRECTIONS
- Step No.1: Preheat the oven and prepare the pan. Preheat your oven to 350°F (175°C). Line a 9×13-inch baking pan with parchment paper, leaving a generous overhang on both long sides — this creates handles that make lifting the entire slab of bars out of the pan completely effortless once they have chilled.
- Step No.2: Make the cookie dough base. In a large bowl, beat the softened butter and granulated sugar together with a hand or stand mixer on medium speed for 3–4 minutes until genuinely light, pale, and fluffy — this step is what creates the tender, soft texture in the base layer, so do not rush it. Add the eggs one at a time, beating well after each addition. Add the vanilla extract and beat until incorporated.
- Step No.3: Add the dry ingredients. In a separate bowl, whisk together the flour, cream of tartar, baking soda, and salt until evenly combined. Add the dry ingredients to the butter mixture gradually, mixing on low speed until a soft, pliable dough forms. It will be slightly sticky — this is correct. Do not add extra flour to make it less sticky or the base will be tough rather than soft and chewy.
- Step No.4: Make the cheesecake filling. In a medium bowl, beat the softened cream cheese with a mixer on medium speed until completely smooth with absolutely no lumps — any lumps at this stage will remain in the finished filling. Add the sugar, egg, and vanilla extract. Beat until just smooth and combined. Stop mixing the moment it looks smooth — overmixing the cheesecake filling incorporates air that causes cracks during baking.
- Step No.5: Build the base layer. Scoop approximately two-thirds of the cookie dough into the prepared pan. Using lightly dampened fingertips or the bottom of a flat measuring cup, press the dough into an even, uniform layer that completely covers the bottom of the pan with no gaps. The even base is what ensures every bar has the same cookie-to-cheesecake ratio — take a moment to get it right.
- Step No.6: Add the cheesecake filling. Pour the cream cheese filling over the pressed cookie base. Use a spatula to spread it in a smooth, even layer all the way to the edges. The filling should be completely uniform — any thick or thin spots will be visible in the finished bars.
- Step No.7: Add the top cookie layer. Drop the remaining one-third of the cookie dough in rough teaspoon-sized spoonfuls over the top of the cheesecake filling. Do not attempt to cover the filling completely — the intentional gaps and rustic appearance are part of the design and allow the filling to peek through after baking. Gently flatten each spoonful slightly with your fingertip.
- Step No.8: Sprinkle the cinnamon sugar topping. Combine the 2 tablespoons of granulated sugar with 1 teaspoon of ground cinnamon in a small bowl. Sprinkle the mixture generously and evenly over the entire surface of the bars — over the exposed dough spoonfuls and over the visible cream cheese filling. This layer is what creates the signature snickerdoodle appearance and the slightly caramelised, lightly crunchy topping that makes these bars so distinctive.
- Step No.9: Bake and then chill. Bake for 30–35 minutes until the centre is fully set and no longer jiggly when the pan is gently shaken, the edges are golden and pulling away from the sides slightly, and the top dough spoonfuls are lightly golden. Do not underbake — an underbaked centre will not set properly even after chilling. Remove from the oven and allow to cool completely at room temperature, then refrigerate for a minimum of 2 hours before slicing. The refrigeration step is not optional — it is what produces the clean, even cuts and the firm, sliceable texture that makes these bars genuinely satisfying to eat.
TIPS FOR SUCCESS
- Room temperature ingredients are non-negotiable. Both the butter and the cream cheese must be fully softened to room temperature before you begin — cold butter will not cream properly and will produce a dense, heavy cookie base, while cold cream cheese will produce a lumpy filling regardless of how long you beat it. Take them out of the refrigerator at least an hour before you plan to bake, and plan for two hours in summer conditions if your kitchen runs cold.
- Do not overmix the cheesecake filling. The single most common cause of cracked cheesecake is overmixing — excess air incorporated into the filling expands in the oven and then collapses as it cools, creating cracks across the surface. Beat the filling on medium-low speed and stop the moment it looks smooth and uniform. Scrape the bowl once and check — if it looks combined, stop immediately.
- The refrigeration step produces genuinely better bars. Cutting into the bars while they are still warm produces ragged, messy cuts and a filling that has not fully set. Refrigerating for the full 2 hours allows the cheesecake layer to firm to a consistency where it slices cleanly with a sharp knife. For the absolute cleanest cuts, refrigerate overnight rather than just 2 hours — the texture improves significantly with extended chilling.
- Line the pan generously with parchment. The parchment overhang is genuinely useful — it allows you to lift the entire slab of bars onto a cutting board where you can see exactly what you are doing when you slice. Trying to cut bars directly in the pan always produces uneven results and damaged edges. Spend an extra 30 seconds getting the parchment positioned correctly before you press in the dough.
- Press the base layer evenly. An uneven base layer means some bars will have a very thin cookie foundation that breaks when lifted and others will have a thick, dense base that overwhelms the filling. Use the flat bottom of a glass or measuring cup lightly dusted with flour to create a uniformly pressed base, then check the edges and corners specifically — these areas tend to be thinner and need extra attention.
- Customise the spice level to your preference. The standard cinnamon sugar topping is a classic starting point, but these bars also work beautifully with a quarter teaspoon of nutmeg mixed into the cinnamon sugar, or a pinch of cardamom for something more aromatic. Try a small batch variation if you want to experiment before committing the whole pan.
- Let them sit out briefly before serving. Bars served directly from the refrigerator are quite firm and the cream cheese filling can taste slightly cold and dense rather than creamy. Letting them sit at room temperature for 10–15 minutes before serving brings the filling to the ideal temperature where it is soft, silky, and genuinely satisfying rather than cold and solid.
VARIATIONS
- Pumpkin spice version: Add ¼ cup of pumpkin purée and 1 teaspoon of pumpkin pie spice to the cheesecake filling and reduce the vanilla to ½ teaspoon. The pumpkin purée colours the filling a warm, deep gold and the spices create an autumn-appropriate version that pairs especially well with the cinnamon topping. Reduce the egg to a single large egg and add 1 extra tablespoon of flour to the filling to compensate for the additional moisture from the pumpkin.
- Gluten-free adaptation: Substitute the all-purpose flour with a quality 1:1 gluten-free flour blend — King Arthur Measure for Measure and Bob's Red Mill 1-to-1 both work well in this recipe. The texture of the cookie base will be slightly denser and the bars may need an extra 3–5 minutes of bake time, so begin checking at the 33-minute mark and watch for the centre to be set before pulling from the oven.
- Chocolate chip swirl: Stir ½ cup of mini chocolate chips into the cheesecake filling before spreading over the base layer. The mini size works significantly better than standard chips here — they distribute more evenly throughout the filling and every square gets chocolate in every bite rather than only the squares that happened to land on a large chip.
- Maple snickerdoodle: Replace the vanilla extract in the cheesecake filling with 1 teaspoon of pure maple extract and reduce the cinnamon in the topping to ½ teaspoon. The maple adds a warm, caramel-adjacent note that works exceptionally well against the cream cheese tang and makes the bars taste distinctively autumnal. Use pure maple extract rather than artificial for the best result — the artificial version has a sharpness that is noticeable in a delicate filling.
- Berry cheesecake bars: Drop a tablespoon of raspberry or strawberry jam in small pools over the cheesecake filling before adding the top cookie dough layer, then use a skewer or knife to swirl the jam very gently through the filling. The jam creates a fruity, visually striking swirl pattern that becomes visible when the bars are sliced, and the tartness of the berry contrasts well with the sweet cinnamon cookie layers.
- Nutty crunch topping: Mix ½ cup of finely chopped toasted pecans or walnuts into the cinnamon sugar topping before sprinkling over the bars. The nuts create a genuinely crunchy, textural contrast to the soft cookie and creamy filling layers below, and the toasted nut flavour pairs exceptionally well with cinnamon. Toast the nuts in a dry pan for 3–4 minutes before chopping to bring out their full flavour.
- Mini cheesecake bites: Press the dough into a lightly greased 24-cup mini muffin tin rather than a 9×13 pan — 1 teaspoon of dough per cup for the base, followed by 1 teaspoon of cheesecake filling, then a small spoonful of dough on top. Sprinkle cinnamon sugar over each one and bake for 18–22 minutes. The individual portions are ideal for parties and dessert tables and considerably easier to serve without a knife or spatula.
SERVING AND STORAGE
Serve these bars chilled directly from the refrigerator for the cleanest slices and firmest texture, or let them sit at room temperature for 10–15 minutes before serving for a creamier, silkier filling that more closely resembles the texture of a warm cheesecake. Both serving temperatures are genuinely good — the chilled version is cleaner and more structured while the slightly warmed version is richer and more indulgent. For parties and gatherings, pull them from the refrigerator about 15 minutes before you plan to serve — this gives you time to slice them neatly while still cold, and they will be at the ideal temperature by the time guests reach them. A sharp knife wiped clean between each cut produces the neatest results.
Store cut bars in an airtight container in the refrigerator for up to 5 days — place a sheet of parchment paper between layers if stacking to prevent the cinnamon sugar topping from transferring to the bar below. For longer storage, freeze the bars in a single layer on a parchment-lined baking sheet until solid, then transfer to an airtight freezer bag or container with parchment between each layer. They keep in the freezer for up to 2 months. To thaw, transfer to the refrigerator overnight and allow to come to temperature naturally — do not thaw at room temperature or in the microwave, as the cheesecake filling will become grainy and separate.
FAQ
Yes, store-bought snickerdoodle or sugar cookie dough will work in this recipe and makes an even faster version. However, homemade dough produces a noticeably better result — the cream of tartar in the from-scratch dough creates the signature tangy flavour that defines a snickerdoodle, and the texture of a homemade base is softer and more tender than most commercial doughs. If you do use store-bought dough, you may need to add a teaspoon of cream of tartar to the dough and adjust the bake time slightly, beginning to check for doneness at the 25-minute mark since commercial doughs often bake faster than homemade.
The most reliable indicator is the jiggle test — gently shake the pan and observe the centre. A fully baked bar should feel set throughout with no liquid movement. The very centre may have a very slight wobble, which is acceptable as it will firm up completely during the chilling period. The edges should be golden and pulling slightly from the sides of the pan, and the top cookie dough spoonfuls should be lightly golden across their surface. Do not rely on colour alone as the cinnamon sugar topping browns quickly and may look done before the filling has fully set below it.
A hand mixer works perfectly for both the cookie dough and the cheesecake filling in this recipe. For the cookie dough, start on low speed when adding the flour to prevent a cloud of flour from escaping the bowl, then increase to medium once the flour is partially incorporated. For the cheesecake filling, keep the speed at medium-low and stop frequently to scrape the bowl to ensure no lumps of cream cheese are left unmixed at the bottom. The entire recipe comes together very easily with a hand mixer and the results are identical to a stand mixer.
Cream of tartar is technically skippable but it is the ingredient that makes these taste genuinely like snickerdoodles rather than standard sugar cookie bars. The cream of tartar adds the characteristic slight tang and also reacts with the baking soda to produce a specific leavening action that affects the texture of the cookie layer. If you do not have it on hand, you can substitute 1 teaspoon of fresh lemon juice stirred into the butter mixture before adding the flour — this replicates the acidic component reasonably well. White wine vinegar in the same quantity also works. The texture will be very slightly different but the flavour impact is minimal.
The most important factor in clean slicing is temperature — bars that have been thoroughly chilled for at least 2 hours, and ideally overnight, slice significantly more cleanly than bars that are still warm or only partially chilled. Use the sharpest knife you have and wipe the blade completely clean with a damp cloth between every single cut. Running the blade under warm water and drying it before each cut also helps the knife move through the filling more smoothly. Lift the entire slab out of the pan using the parchment paper overhang onto a cutting board before slicing — cutting in the pan always produces less even results than cutting on a flat, stable surface.
These homemade snickerdoodle cheesecake bars have become one of my most reliable recipes — the kind of thing I come back to repeatedly because it genuinely works every time and people genuinely love them. The combination of the chewy, cream-of-tartar-laced cookie base with the smooth cheesecake filling and the caramelised cinnamon sugar topping produces something that is more satisfying than the sum of its parts, and the recipe is straightforward enough that it does not feel like a project even on a busy day.
Whether you make them for a holiday tray, a potluck, or simply for the week ahead, they hold beautifully in the refrigerator and freeze well for future moments when you need something homemade without any same-day effort. The variations are genuinely worth exploring once you have made the original — the pumpkin version in autumn and the berry swirl in summer have both become seasonal favourites in our house that different members of the family request specifically rather than just appreciating when they appear.
If you make these, I would love to know how they turned out — particularly which variation you tried first. Leave a comment below and let me know.

HOMEMADE SNICKERDOODLE CHEESECAKE BARS
Ingredients
For the Snickerdoodle Dough:
- 2½ cups all-purpose flour
- 1 teaspoon baking soda
- ½ teaspoon salt
- 1 teaspoon ground cinnamon
- ½ cup unsalted butter softened
- ½ cup shortening
- 1½ cups granulated sugar
- 2 large eggs
- 1 teaspoon vanilla extract
For the Cheesecake Filling:
- 2 8 oz packages cream cheese, softened
- ½ cup granulated sugar
- 1 large egg
- 1 teaspoon vanilla extract
For the Cinnamon Sugar Topping:
- 2 tablespoons granulated sugar
- 1 teaspoon ground cinnamon
Instructions
Preheat Oven:
- Preheat your oven to 350°F (175°C). Line a 9x13-inch baking pan with parchment paper or lightly grease it.
Make the Dough:
- In a medium bowl, whisk flour, baking soda, salt, and cinnamon. In a large bowl, beat butter, shortening, and sugar until fluffy. Add eggs and vanilla; mix until combined. Gradually add dry ingredients to form a soft dough.
Prepare the Cheesecake Filling:
- In another bowl, beat cream cheese and sugar until smooth. Add egg and vanilla; mix until creamy.
Assemble the Bars:
- Press half the dough into the prepared pan. Spread the cheesecake mixture over the dough layer. Drop small pieces of remaining dough over the top. Flatten gently.
Add Topping:
- Mix cinnamon and sugar together, then sprinkle evenly over the top.
Bake:
- Bake for 35–40 minutes or until the top is golden and the centre is set. Cool completely in the pan.
Chill & Slice:
- Refrigerate for at least 2 hours before slicing into bars for clean edges.
Notes
Bars can be made a day in advance and stored in the fridge until ready to serve. Customizing the Flavor:
Add a pinch of nutmeg or a splash of almond extract to the dough for a twist. Swirl in raspberry jam to the cheesecake layer if desired. Serving Suggestions:
Serve chilled or at room temperature. Delicious on a holiday dessert tray or with hot coffee. Allergy-Friendly Options:
Use dairy-free cream cheese and butter alternatives if needed. Substitute gluten-free flour blend if avoiding gluten. Storage Tips:
Refrigerate bars in an airtight container for up to 5 days. Freeze for longer storage, up to 1 month.





Comments
No Comments