
If you love chocolate chip cookies but want to take them to the next level, these Mini Chocolate Chip Cookie Cups with Candy Topping are the perfect treat!
These bite-sized delights feature a soft and chewy cookie cup filled with a deliciously sweet center and topped with your favorite candies for an extra layer of indulgence.
Whether you're baking for a party, holiday gathering, or just to satisfy your sweet tooth, these cookie cups are guaranteed to be a hit!
With a crispy outer shell, a gooey chocolate chip interior, and a variety of candy toppings, these mini treats combine all the best flavors and textures into one delightful dessert.
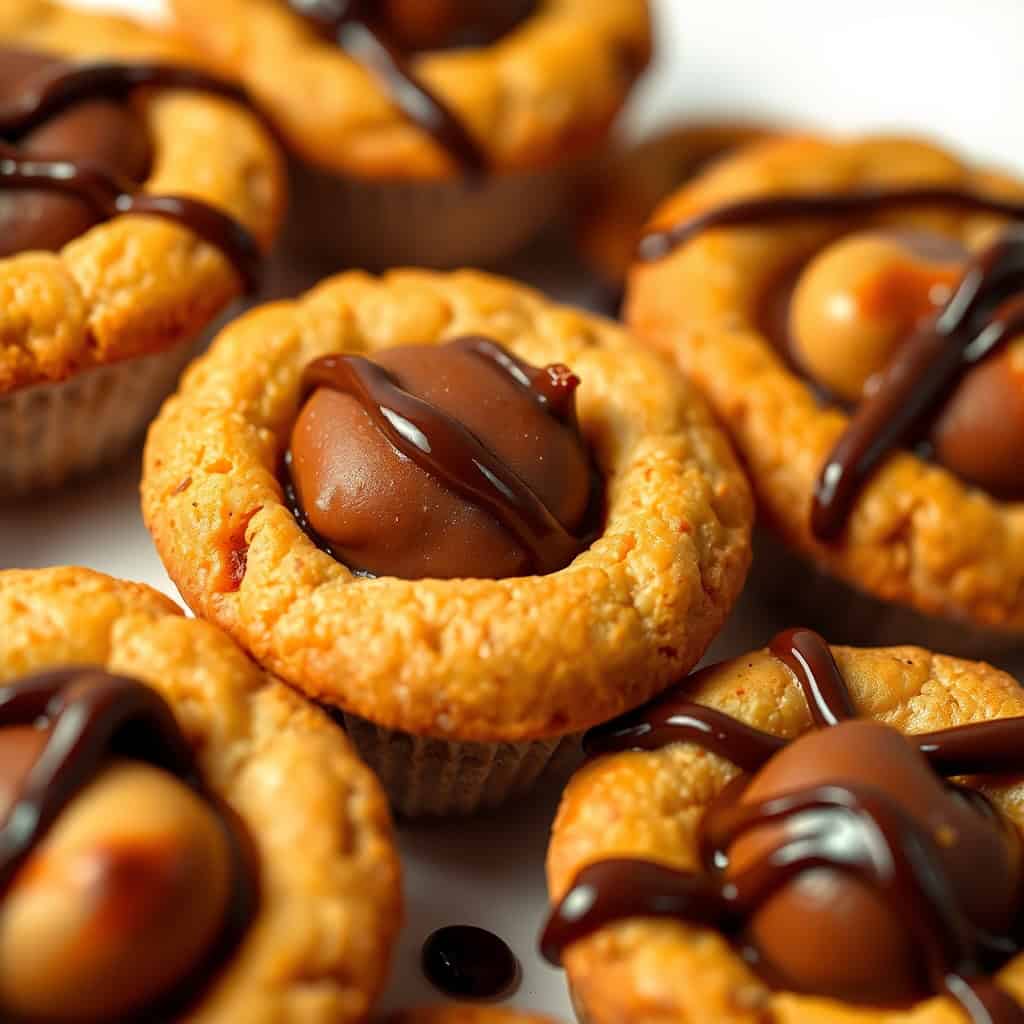
Plus, they're easy to make and highly customizable, so you can mix and match flavors to suit your taste preferences.
Why You'll Love This Recipe
- Perfectly Portioned Treats: These cookie cups are the ideal size for snacking and sharing.
- Customizable Toppings: Add your favorite candies to create a unique treat every time.
- Soft, Chewy, and Crispy: The perfect combination of textures in every bite.
- Easy to Make: Simple ingredients and step-by-step directions make this recipe accessible for all skill levels.
- Great for Parties and Gifts: These mini treats are a hit at gatherings and make for adorable edible gifts.
Ingredients
For the Cookie Cups:
- 1 ½ cups all-purpose flour
- ½ teaspoon baking soda
- ½ teaspoon salt
- ½ cup unsalted butter, softened
- ½ cup brown sugar, packed
- ¼ cup granulated sugar
- 1 large egg
- 1 teaspoon vanilla extract
- ¾ cup mini chocolate chips
For the Toppings:
- 12 mini peanut butter cups
- 12 mini caramel chocolates
- 12 chocolate candies (such as M&M's or Reese’s Pieces)
- ¼ cup melted chocolate (for drizzling, optional)
Directions
- Step 1: Preheat the Oven
Preheat your oven to 350°F (175°C). Grease a mini muffin tin to prevent sticking.
- Step 2: Prepare the Cookie Doug
In a medium bowl, whisk together the flour, baking soda, and salt.
- Set aside. In a large mixing bowl, beat the softened butter, brown sugar, and granulated sugar until light and fluffy.
- Add the egg and vanilla extract, mixing until fully incorporated.
- Gradually add the dry ingredient mixture to the wet ingredients, stirring until a cohesive dough forms. Fold in the mini chocolate chips.
- Step 3: Form the Cookie Cups
Scoop about 1 tablespoon of dough into each mini muffin tin cup, pressing down slightly to form a small well in the center.
- Step 4: Bake the Cookie Cups
Bake for 10-12 minutes, or until the edges are golden brown.
- Remove from the oven and immediately press a mini peanut butter cup, caramel chocolate, or chocolate candy into the center of each cookie cup.
- Step 5: Let Cool and Set
Allow the cookie cups to cool in the muffin tin for about 5 minutes before transferring them to a wire rack.
- If desired, drizzle with melted chocolate for an extra decadent touch.
Serving and Storage
Serving Suggestions
- Serve these cookie cups warm for a gooey center.
- Pair with a scoop of vanilla ice cream for an indulgent dessert.
- Arrange on a platter for a colorful and festive party treat.
Storage
- Room Temperature: Store in an airtight container for up to 4 days.
- Refrigerator: Keep in a sealed container for up to a week.
- Freezing: Freeze cookie cups in an airtight container for up to 2 months. Thaw at room temperature before serving.
Tips for Success
- Use Quality Chocolate: High-quality chocolate chips and candy will enhance the flavor.
- Press the Candies Gently: Be sure to press the toppings into the warm cookies gently so they stay in place without flattening the cups.
- Don’t Overbake: Slightly underbaking keeps the cookie cups soft and chewy.
- Try Different Fillings: Swap out peanut butter cups for caramel-filled chocolates or other favorite candies.
- Make It a Gift: Package these in a decorative box for a fun and delicious homemade gift.
Variations
- White Chocolate Drizzle: Drizzle melted white chocolate over the cooled cookie cups for an elegant touch.
- Nutty Twist: Add crushed nuts on top for a crunchy contrast.
- Salted Caramel Delight: Drizzle salted caramel over the cookie cups before serving.
- Double Chocolate: Use chocolate cookie dough instead of classic cookie dough for extra chocolatey goodness.
- Holiday-Themed Cookie Cups: Decorate with festive sprinkles or holiday-themed candies for special occasions.
FAQs
A: Yes! Store them in an airtight container, and reheat slightly for the best texture.
A: Yes, but you may need to increase the baking time and use larger chocolate toppings.
A: Absolutely! While homemade dough gives the best flavor, store-bought dough works in a pinch.
A: Press them into the cookies right after baking but avoid putting them in the oven again.
A: Yes! Use a 1:1 gluten-free flour blend for best results.
Conclusion
Mini Chocolate Chip Cookie Cups with Candy Topping are the ultimate treat for cookie lovers and candy enthusiasts alike.
With their rich, buttery cookie base and sweet, melty centers, they’re sure to be a hit at any gathering.
These bite-sized delights are perfect for parties, holidays, or just satisfying your sweet tooth with a homemade indulgence.
Try them out today and have fun experimenting with different candy toppings to create your own personalized version of these irresistible cookie cups!

MINI CHOCOLATE CHIP COOKIE CUPS WITH CANY TOPPING
Ingredients
- 1 ½ cups all-purpose flour
- ½ teaspoon baking soda
- ¼ teaspoon salt
- ½ cup unsalted butter, softened
- ½ cup granulated sugar
- ½ cup packed brown sugar
- 1 large egg
- 1 teaspoon vanilla extract
- 1 cup mini chocolate chips
- ½ cup assorted candy (e.g., M&M's, Reese’s Pieces, Skittles)
Instructions
- Preheat Oven & Prepare Pan:Preheat oven to 350°F (175°C) and grease a mini muffin tin.
- Mix Dry Ingredients:In a bowl, combine flour, baking soda, and salt. Set aside.
- Cream Butter & Sugars:In a large bowl, cream together butter, granulated sugar, and brown sugar until smooth. Add the egg and vanilla extract, mixing until combined.
- Add Dry Ingredients: Gradually add the dry ingredients to the wet mixture, mixing until fully combined. Stir in the mini chocolate chips.
- Form Cookie Cups: Scoop tablespoon-sized portions of dough into the mini muffin tin, pressing the dough down slightly to form small cups.
- Bake: Bake for 10-12 minutes, or until the edges are golden and the center is slightly soft.
- Add Candy: As soon as the cookie cups come out of the oven, gently press a piece of candy (M&M's or any preferred candy) into the center of each cup.
- Cool & Serve: Allow the cookie cups to cool in the tin for 5 minutes, then transfer to a wire rack to cool completely.
Notes
- Make Ahead: Cookie dough can be prepared in advance and stored in the fridge for up to 24 hours before baking.
- Customizing the Flavor: Feel free to swap mini chocolate chips for milk or dark chocolate chips. Add nuts like walnuts or almonds for crunch.
- Serving Suggestions: Serve these mini cookie cups at parties, holiday gatherings, or as a fun after-school snack. Pair with a glass of milk or a scoop of ice cream.
- Storage Tips: Store in an airtight container at room temperature for up to 5 days. For longer storage, freeze for up to 2 months and thaw before serving.






Comments
No Comments