
Christmas dinner in our house is never just about the main. Honestly, the sides are the whole reason I start planning weeks ahead — the creamy mashed potatoes, the roasted vegetables, the stuffing that nobody can stop eating straight from the pan. I've made some version of this meal every year for the past decade, and every year I'm still tweaking something. Last Christmas I swapped regular mashed potatoes for a crispy air fryer smashed potato situation and my husband looked at me like I'd solved a problem he didn't know existed.
What makes a Christmas side dish actually worth the oven space? For me it comes down to a few things: it has to hold up on a crowded table, it has to be possible to prep some of it ahead, and it has to feel special enough for the occasion without requiring restaurant equipment or ingredients I have to drive across three cities to find. A good side dish should also work alongside whatever main you're serving — whether that's a roast, a turkey, or in my case, sometimes a very confused mix of both because my family can never agree.
This list has 27 recipes covering just about every direction you might want to go — Pomme Dauphinoise scalloped potatoes if you want something luxurious and French, Southern baked mac and cheese if the kids have veto power at your table, Cranberry Fluff Salad if you need something that doubles as a crowd-pleasing sweet side, and Patatas Bravas if you want to do something unexpected this year. If you're also thinking about starters and drinks, I have a post on Christmas punch recipes and another on Christmas appetizers that are worth bookmarking alongside this one.
Here are the 27 Christmas side dishes I keep coming back to — pick whatever fits your table, your oven situation, and how ambitious you're feeling this year.

27. Mushroom Cauliflower Rice Risotto
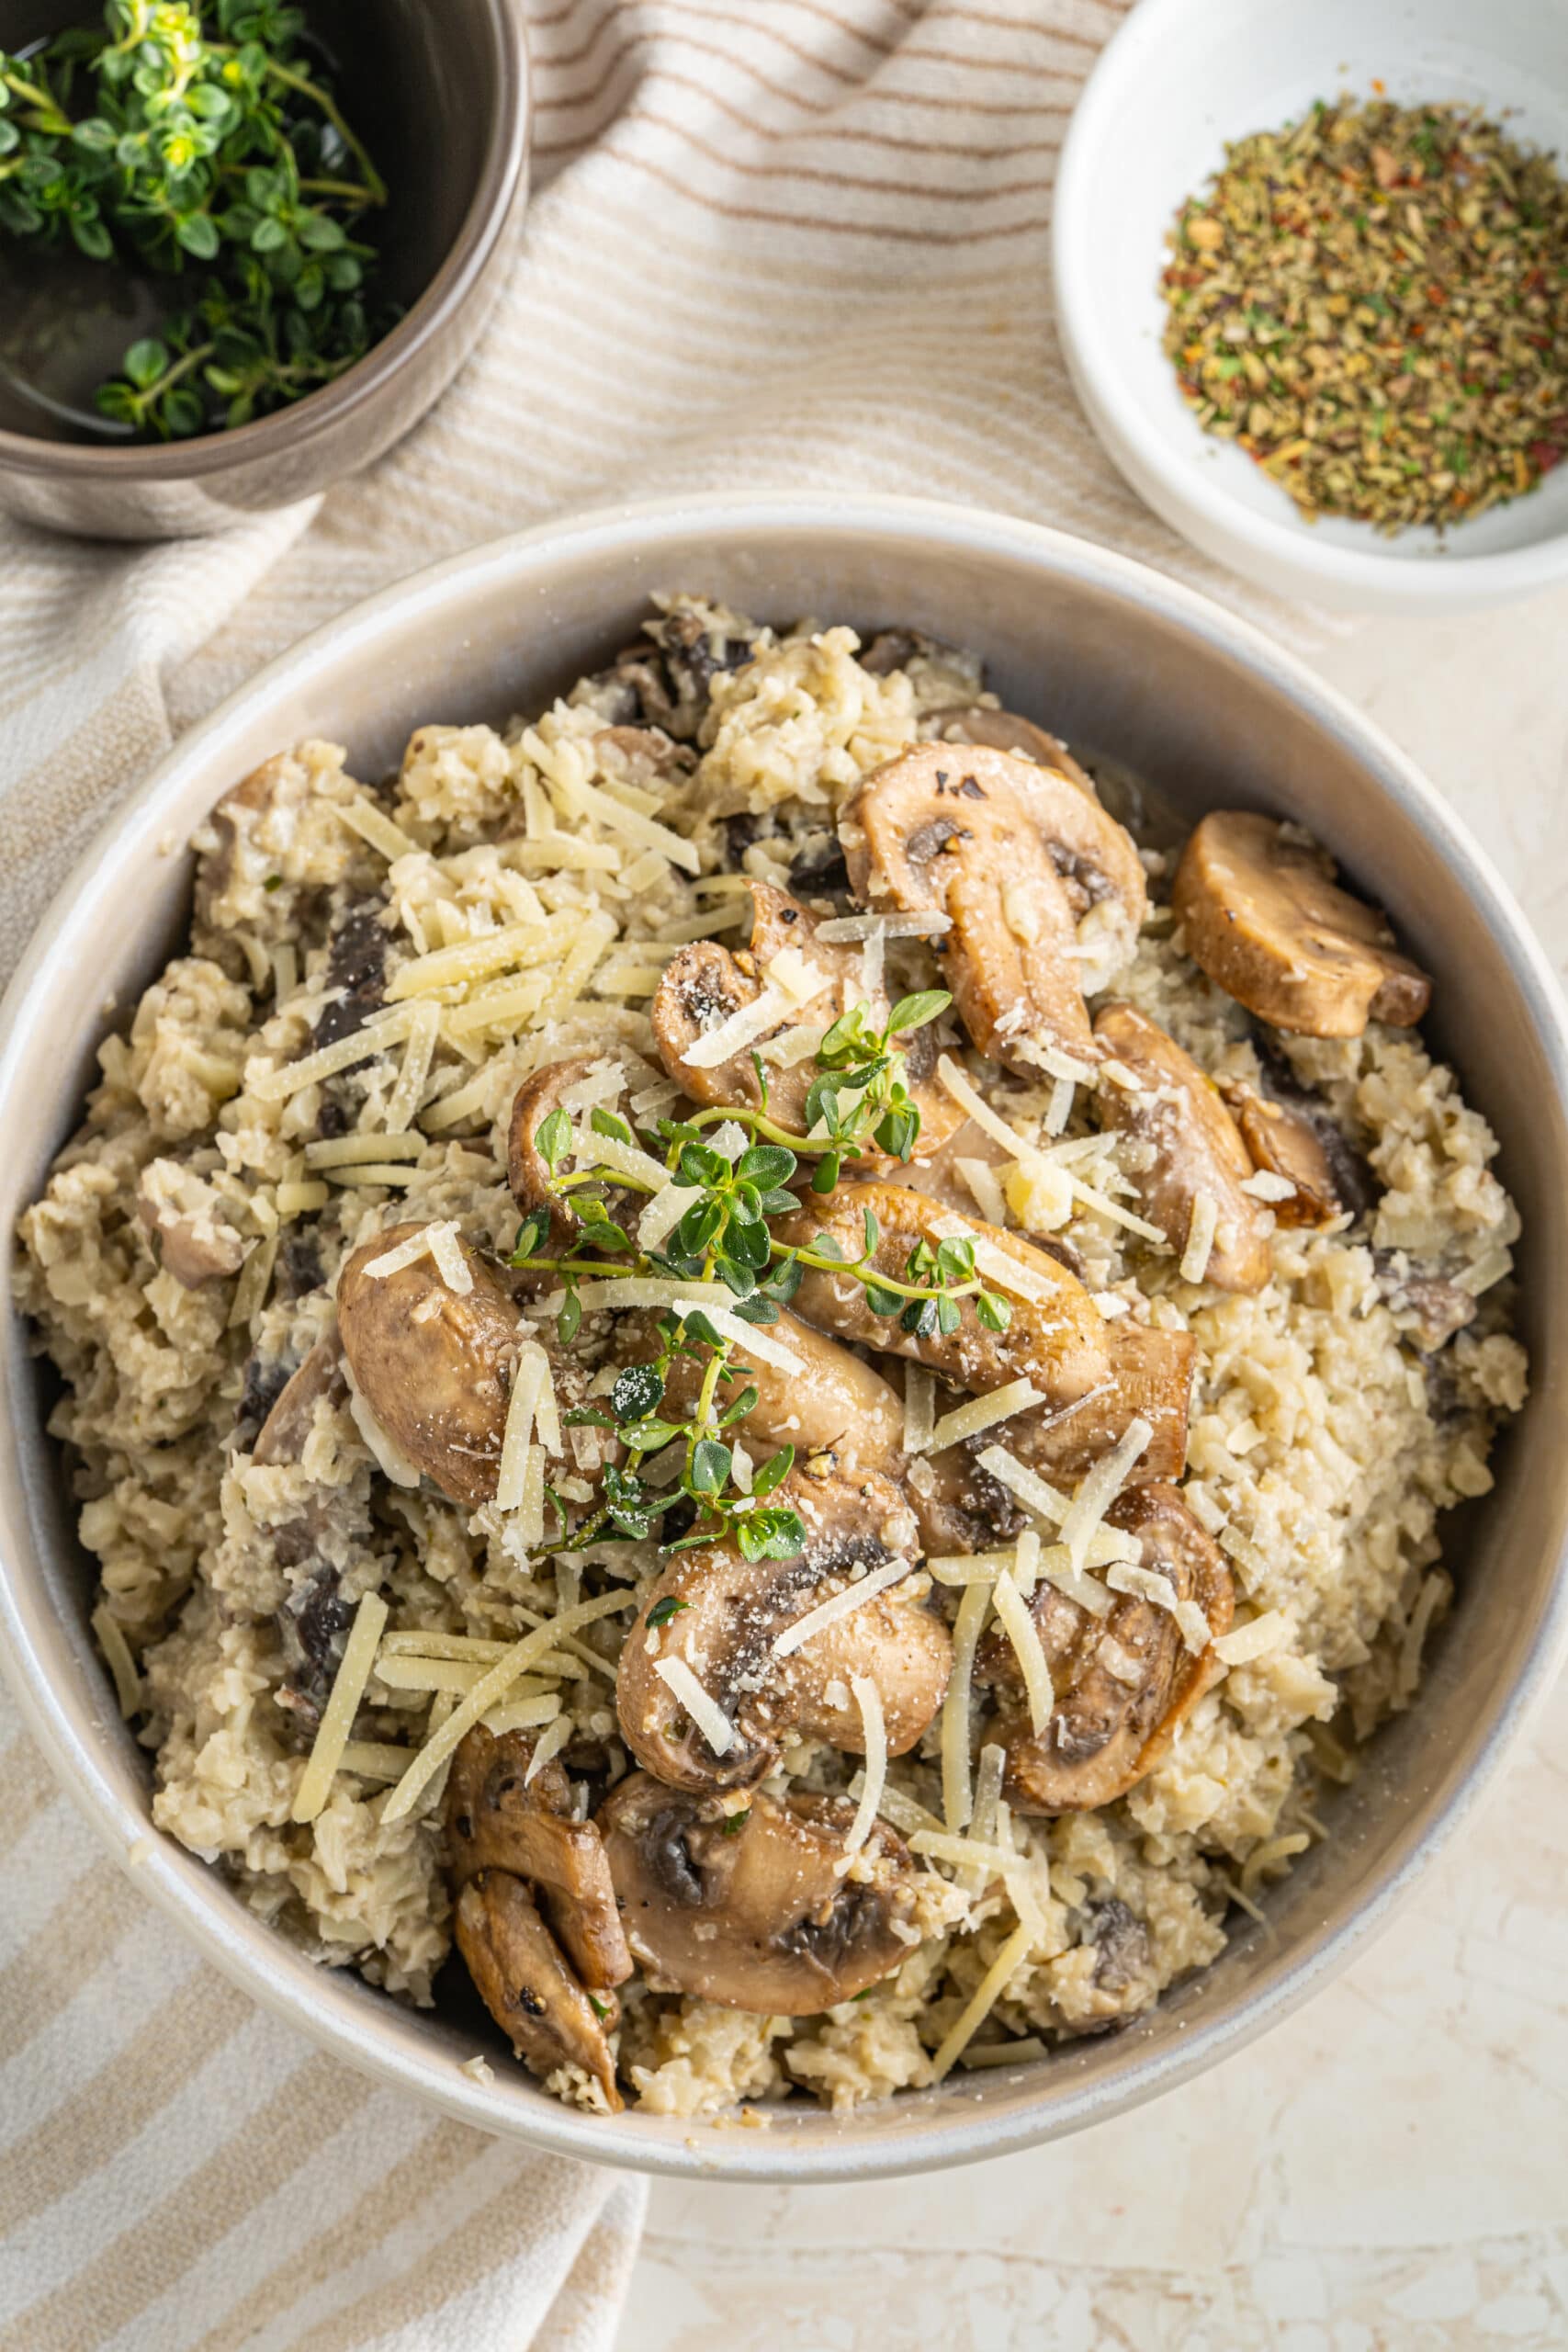
I was skeptical the first time I tried making cauliflower rice into something resembling risotto — I genuinely thought it would taste like sad, watery vegetables. I was wrong. When you cook it down with mushrooms, a splash of white wine, and some good parmesan, it gets surprisingly creamy and rich. It's not traditional risotto, and I won't pretend it is, but it earns its spot on the Christmas table as a lighter option that still feels indulgent. If you're cooking for someone who's watching carbs or just wants something a little different alongside the heavier dishes, this is the one.
Ingredients
- 1 medium head cauliflower, riced (or 4 cups store-bought cauliflower rice)
- 8 oz cremini or baby bella mushrooms, sliced
- 3 cloves garlic, minced
- 1 small yellow onion, finely diced
- 2 tablespoons olive oil
- ¼ cup dry white wine (or vegetable broth)
- ½ cup vegetable broth
- ⅓ cup grated parmesan cheese
- 2 tablespoons heavy cream (or cream cheese for extra richness)
- Salt and black pepper to taste
- Fresh thyme or parsley for garnish
Instructions
- Heat olive oil in a large skillet over medium-high heat. Add onion and cook for 3-4 minutes until softened, then add garlic and cook another 30 seconds.
- Add mushrooms and cook undisturbed for 2-3 minutes to get some color on them before stirring. Season with salt and pepper. Cook until mushrooms are golden and most of their liquid has evaporated, about 5-6 minutes total.
- Pour in the white wine and stir, scraping up any browned bits from the pan. Let it cook off for about 1 minute.
- Add the cauliflower rice and vegetable broth. Stir to combine, then cook over medium heat for 5-7 minutes until the cauliflower is tender and most of the liquid is absorbed.
- Stir in parmesan and heavy cream. Taste and adjust seasoning. Serve immediately, garnished with fresh thyme or parsley.
Tips
- Tip: Don't skip the step of letting mushrooms brown before stirring — that color is where the flavor comes from. Crowding the pan and stirring immediately gives you steamed, rubbery mushrooms instead.
- Tip: If your cauliflower rice is frozen, thaw and squeeze out as much moisture as possible before adding it to the pan — otherwise the whole dish turns watery.
- Tip: This dish does not hold well — serve it right away. It gets a bit soggy if it sits too long, so time it as a last-minute addition to your Christmas spread.
26. Easy Oven Roasted Carrots
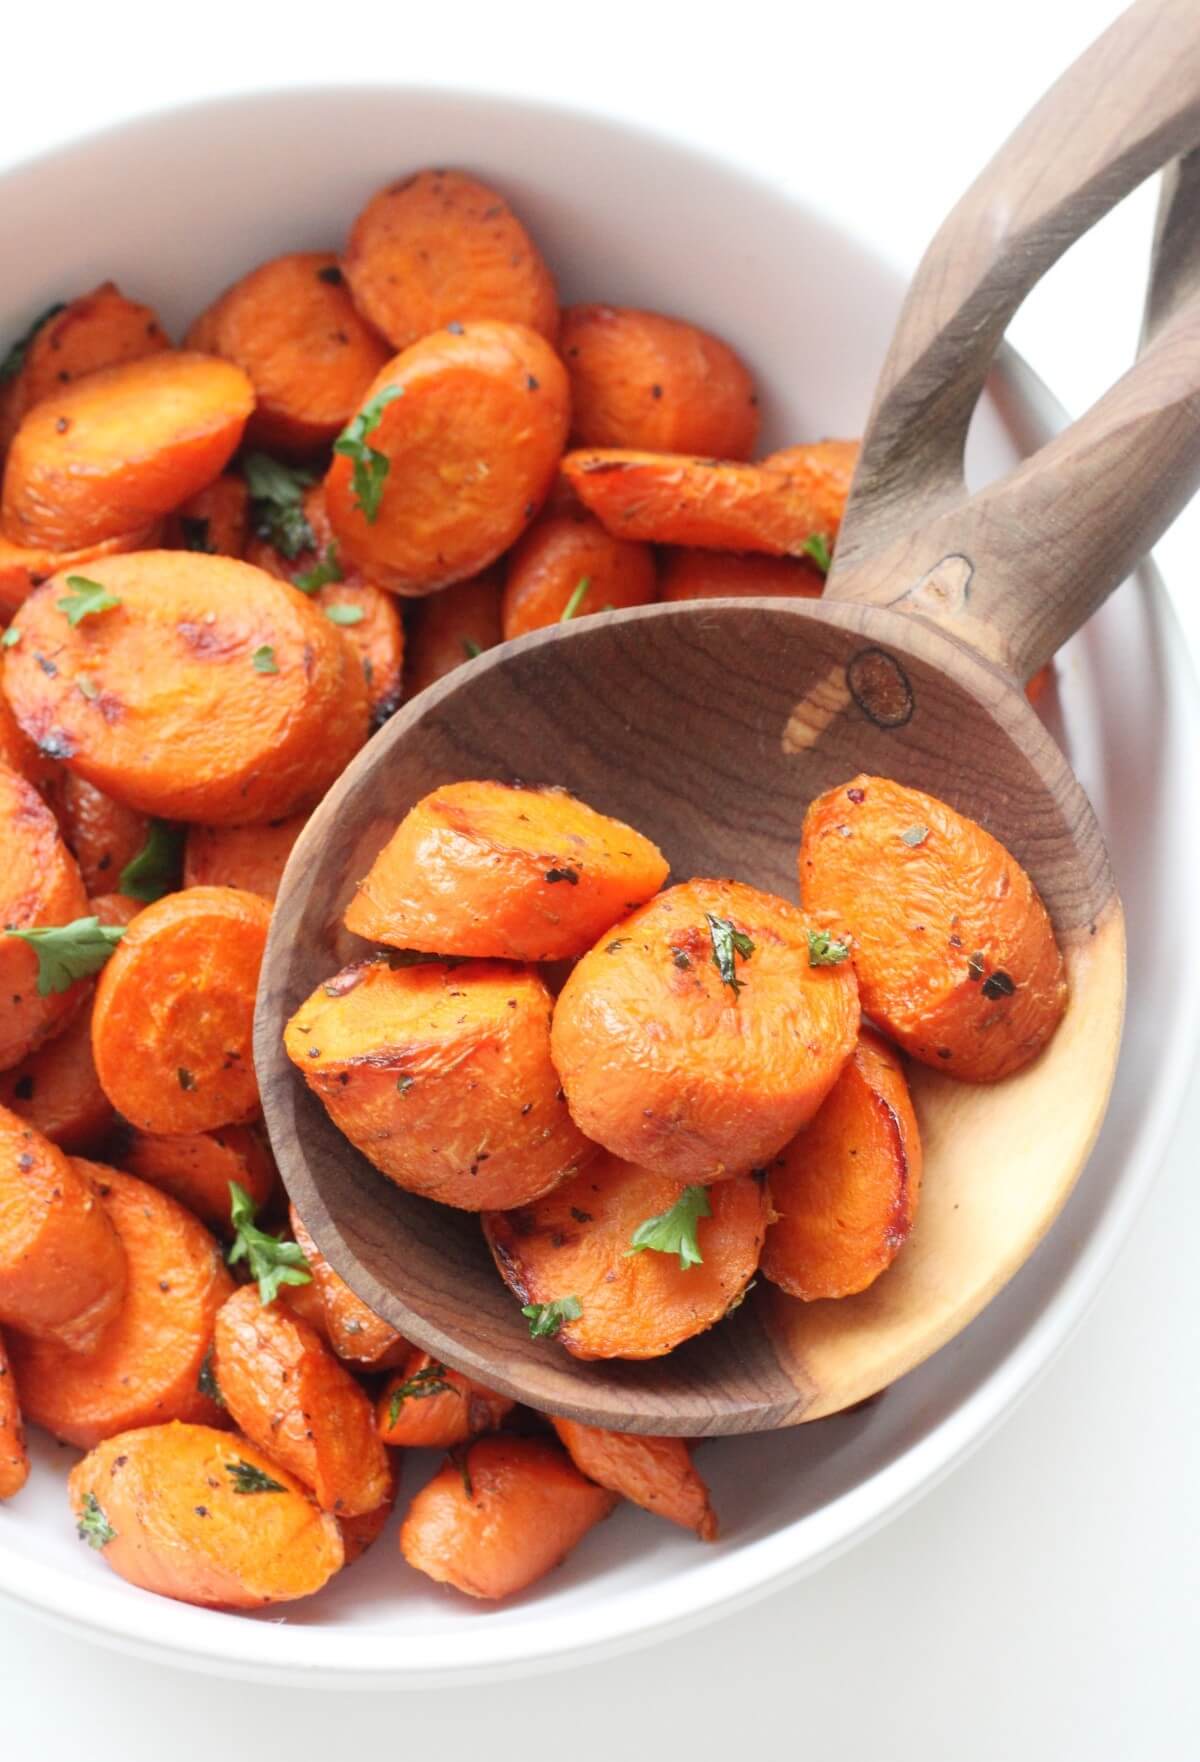
Roasted carrots are one of those side dishes that look effortless but taste like you put in real effort — which is exactly what you want on Christmas when you're already juggling six other things in the kitchen. The oven does all the work: high heat, a little olive oil, and the natural sugars in the carrots caramelize into something genuinely good. I like cutting mine on a diagonal so there's more surface area to brown. Zainab actually requests these more than any other vegetable I make, which says a lot coming from a child who normally treats vegetables like a personal insult.
Ingredients
- 1½ lbs carrots, peeled and cut on the diagonal into ½-inch pieces
- 2 tablespoons olive oil
- ½ teaspoon garlic powder
- ½ teaspoon dried thyme (or fresh if you have it)
- ½ teaspoon salt
- ¼ teaspoon black pepper
- 1 tablespoon honey or maple syrup (optional, for extra caramelization)
- Fresh parsley for garnish
Instructions
- Preheat oven to 425°F. Line a large sheet pan with parchment paper or foil.
- Toss carrots with olive oil, garlic powder, thyme, salt, and pepper directly on the pan. Drizzle with honey or maple syrup if using. Spread into a single layer — don't pile them or they'll steam instead of roast.
- Roast for 20-25 minutes, flipping once halfway through, until the edges are caramelized and the carrots are fork-tender.
- Garnish with fresh parsley and serve immediately.
Tips
- Tip: Cut the carrots as uniformly as possible so they cook evenly — if some pieces are much thicker than others, the thin ones will burn before the thick ones are done.
- Tip: Baby carrots from Walmart or Costco work fine here — just cut them in half lengthwise so they roast instead of steam.
- Tip: You can season these the night before and keep them in the fridge — just roast right before serving for best texture.
25. Ridiculously Good Mashed Potatoes

Mashed potatoes sound simple until you've made a gluey, gummy batch by over-working them — which I did for years before I figured out what I was doing wrong. The key is **warm butter and warm cream**, not cold, and stopping as soon as everything is combined. These come out smooth, rich, and properly seasoned, the kind of mashed potatoes that make people ask what your secret is. I make a double batch at Christmas because they disappear before I've even finished plating everything else. No stand mixer needed — a good potato masher and a strong arm gets you there.
Ingredients
- 3 lbs Yukon Gold potatoes, peeled and cut into 2-inch chunks
- 6 tablespoons unsalted butter, cut into pieces and warmed
- ¾ cup heavy cream or whole milk, warmed
- 1½ teaspoons salt, plus more for boiling water
- ½ teaspoon white or black pepper
- 2 tablespoons cream cheese (optional, for extra richness)
- Chives or parsley for garnish
Instructions
- Place potato chunks in a large pot and cover with cold water. Add a generous pinch of salt. Bring to a boil and cook for 15-18 minutes until completely tender when pierced with a fork.
- Drain potatoes well, then return them to the hot pot and let them sit over low heat for 1-2 minutes to steam off excess moisture — this makes the mash less watery.
- Mash the potatoes with a potato masher until mostly smooth. Add the warm butter and cream cheese if using, and stir to incorporate.
- Pour in warm cream gradually, stirring gently until you reach your desired consistency. Season with salt and pepper. Stop mixing as soon as it comes together — over-mixing makes them gluey.
- Transfer to a serving bowl, top with a pat of butter, and garnish with chives or parsley.
Tips
- Tip: Yukon Golds are the best potato for mashing — they're naturally buttery and creamy. Russets work too but need a little more fat to get the same texture.
- Tip: Never add cold dairy to hot potatoes — it tightens the starch and makes them stiff. Warm your cream and butter first, even just 30 seconds in the microwave.
- Tip: To keep them warm while the rest of dinner comes together, transfer to an oven-safe bowl, cover with foil, and keep in a 200°F oven for up to 30 minutes.
24. Corn Soufflé
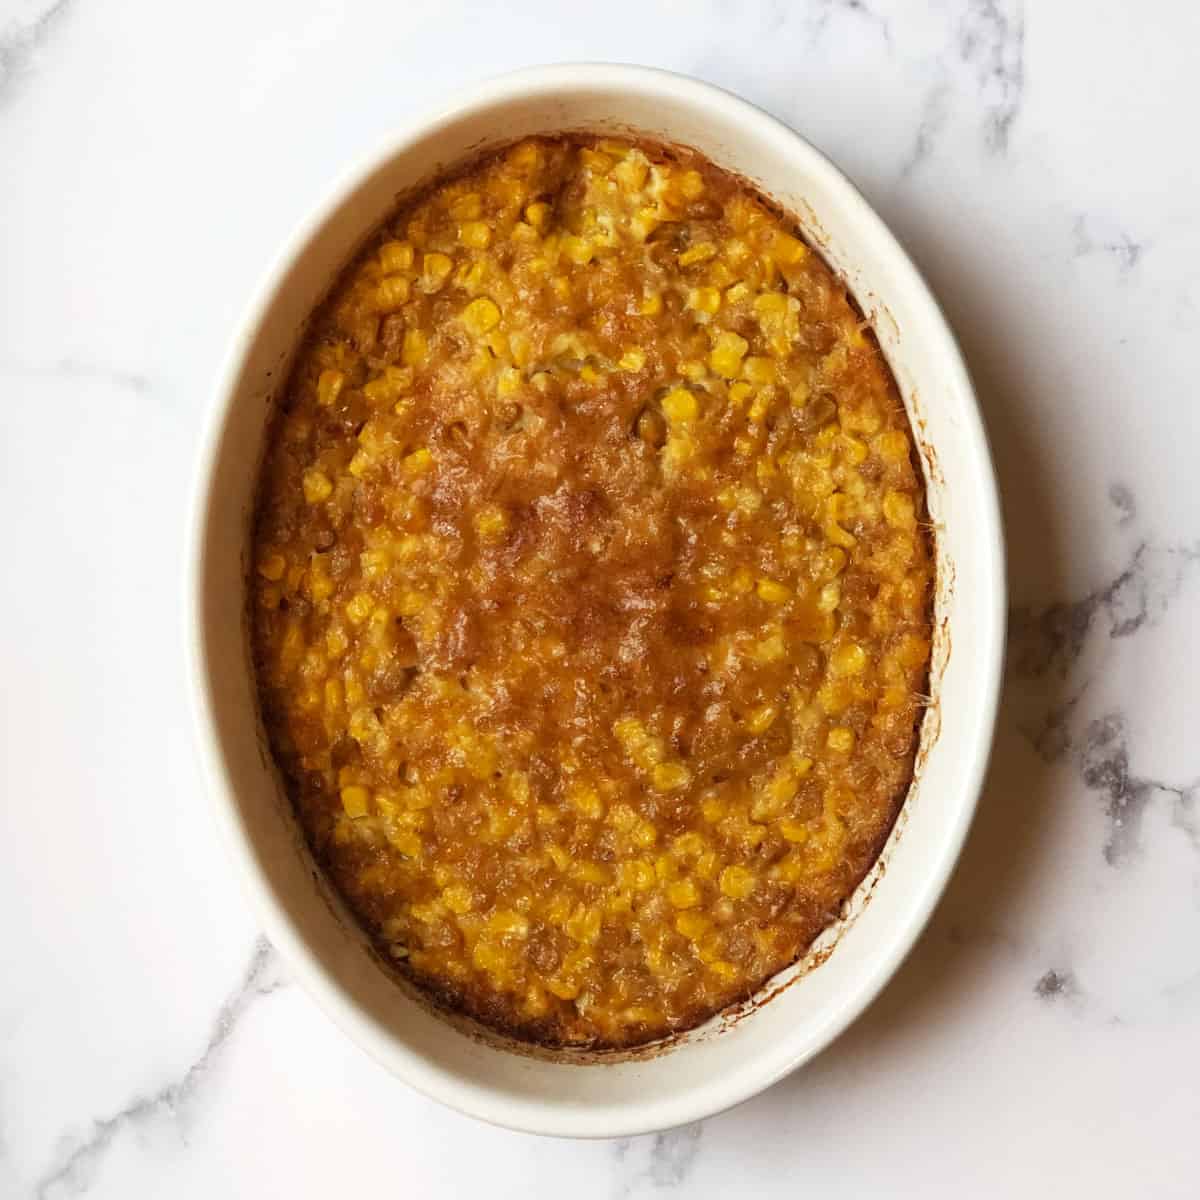
This is not a fussy French soufflé that deflates if you breathe wrong near the oven — it's an American-style corn casserole that puffs up golden and custardy and tastes like something between a corn pudding and a really good cornbread. The name sounds intimidating but it's genuinely one of the easier things on this list. Everything goes into one bowl, stirs together in about five minutes, and bakes while you handle other parts of the meal. My husband, who grew up eating plain boiled corn, declared this the better option the first time I made it.
Ingredients
- 1 can (15 oz) whole kernel corn, drained
- 1 can (14.75 oz) creamed corn
- 1 box (8.5 oz) Jiffy corn muffin mix
- 1 cup sour cream
- ½ cup (1 stick) unsalted butter, melted
- 2 eggs, beaten
- ½ teaspoon salt
- Optional: ½ cup shredded cheddar cheese for topping
Instructions
- Preheat oven to 350°F. Grease a 9x13-inch baking dish with butter or cooking spray.
- In a large bowl, combine both cans of corn, corn muffin mix, sour cream, melted butter, beaten eggs, and salt. Stir until just combined — don't overmix.
- Pour batter into the prepared baking dish. If using cheddar, sprinkle it over the top.
- Bake for 45-50 minutes until the top is golden brown and the center is just set — it should jiggle slightly but not be liquid. A toothpick inserted in the center should come out mostly clean.
- Let rest for 5-10 minutes before serving. It will firm up slightly as it cools.
Tips
- Tip: Jiffy corn muffin mix is available at Walmart, Kroger, and most major grocery stores — it's usually under $1 a box and is the backbone of this recipe. Don't substitute regular cornmeal without adjusting the recipe.
- Tip: You can assemble this the night before, cover, and refrigerate unbaked. Add 5-10 extra minutes to the bake time if going straight from fridge to oven.
- Tip: Don't overbake — the middle should have a slight wobble when you pull it out. It continues cooking as it rests and you'll end up with a dry, crumbly texture if you wait for a completely firm center.
23. Scalloped Turnips Au Gratin
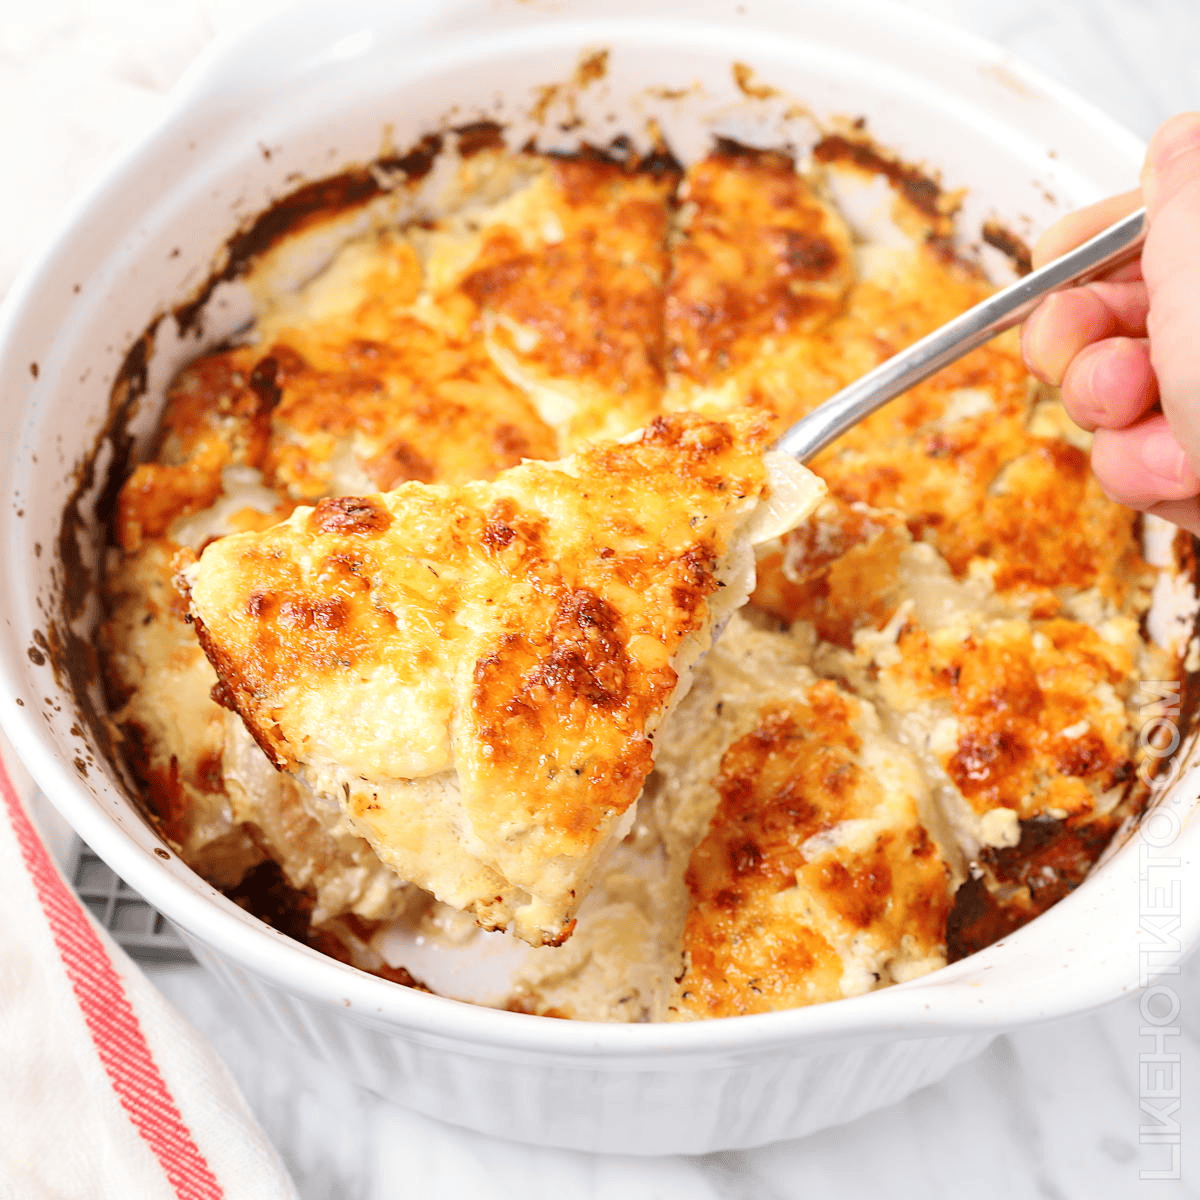
Turnips don't get nearly enough credit — they're cheap, they hold up beautifully in the oven, and when you slice them thin and bake them in a **creamy cheese sauce**, they taste far more elegant than their reputation suggests. This is the dish I put on the table when I want something that looks like it took effort but didn't empty my grocery budget. Think of it as a cousin to potato gratin — same rich, bubbly, golden-topped result, just with a slightly earthier, more complex flavor underneath. It's a good conversation starter too, because nobody expects turnips to be this good.
Ingredients
- 2 lbs turnips, peeled and thinly sliced (about ⅛-inch thick)
- 2 tablespoons unsalted butter
- 2 cloves garlic, minced
- 2 tablespoons all-purpose flour
- 1½ cups whole milk
- ½ cup heavy cream
- 1 cup shredded Gruyère cheese (or sharp cheddar as a substitute)
- ½ teaspoon salt
- ¼ teaspoon black pepper
- ¼ teaspoon nutmeg
- ¼ cup additional shredded cheese for topping
Instructions
- Preheat oven to 375°F. Grease a 9x13-inch or similar baking dish.
- In a saucepan over medium heat, melt butter and sauté garlic for 30 seconds. Whisk in flour and cook for 1 minute to remove the raw flour taste. Gradually whisk in milk and cream, stirring constantly until the sauce thickens, about 4-5 minutes.
- Remove from heat and stir in ¾ cup of the cheese, salt, pepper, and nutmeg until smooth.
- Layer half the turnip slices in the baking dish, overlapping slightly. Pour half the sauce over the top. Repeat with remaining turnips and sauce. Sprinkle remaining cheese over the top.
- Cover with foil and bake for 35 minutes. Remove foil and bake another 20-25 minutes until the top is golden and bubbly and the turnips are completely tender when pierced with a knife.
- Let rest for 10 minutes before serving — this helps the sauce set slightly so it's not runny when you scoop it.
Tips
- Tip: Slice the turnips as uniformly thin as possible — a mandoline slicer (under $20 at Walmart) makes this much faster and more even, but a sharp knife and patience works too.
- Tip: Gruyère is ideal here for its nutty, melty qualities, but if you can't find it or it's out of budget, sharp white cheddar is a solid substitute that still gives you great flavor.
- Tip: This can be assembled completely the day before, covered tightly, and refrigerated. Bake from cold adding about 10 extra minutes to the covered portion of the bake time.
22. Healthy Broccoli Casserole
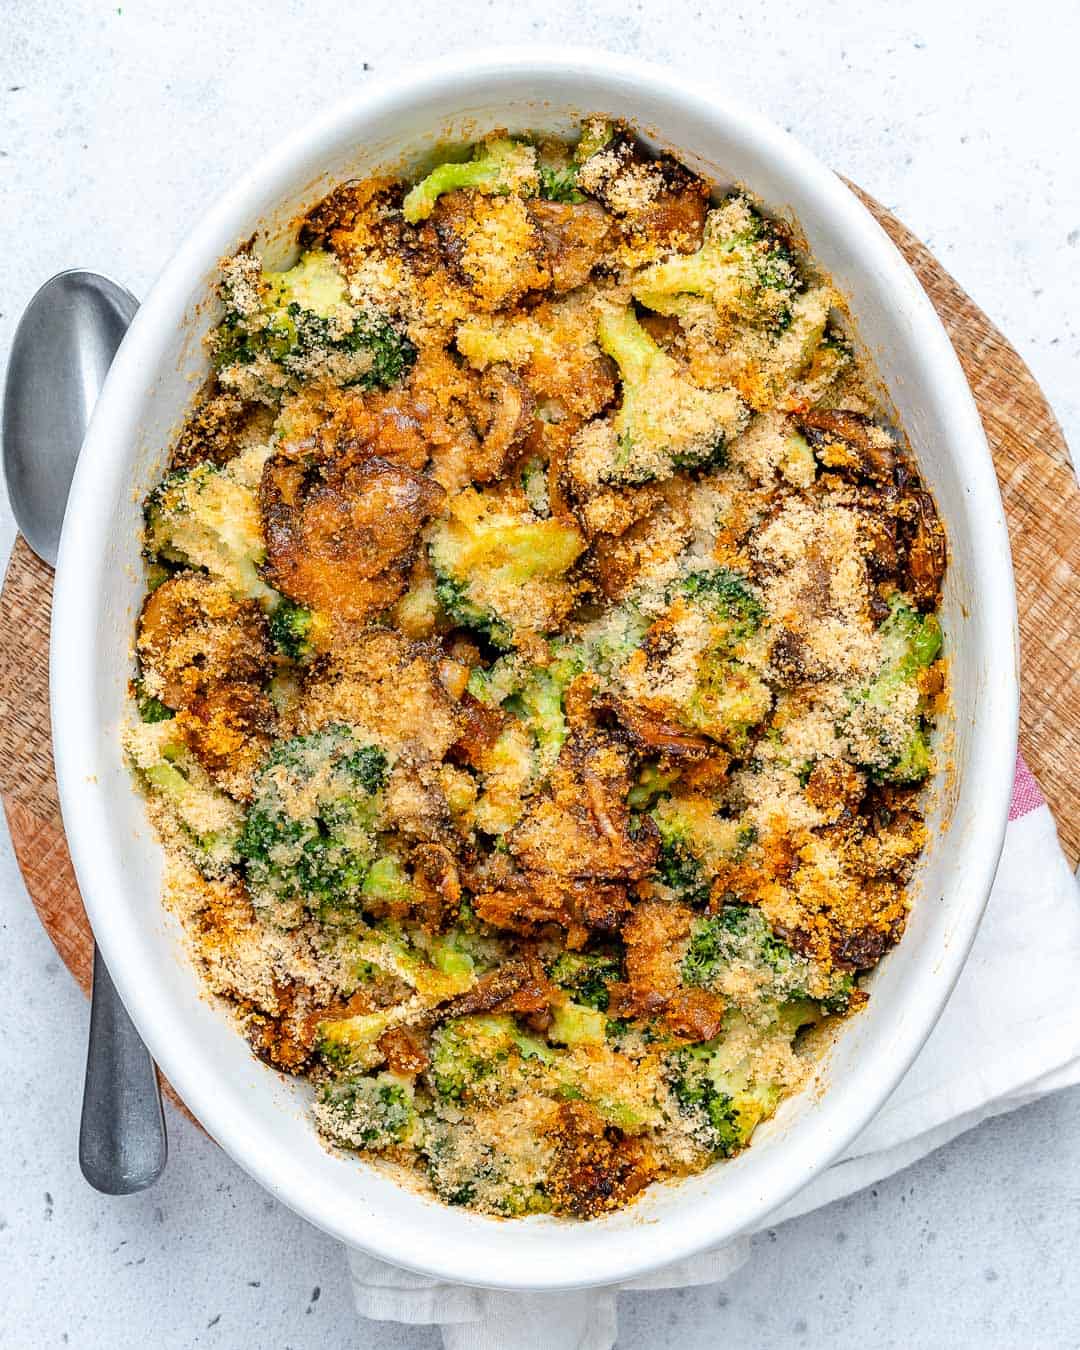
I always feel like Christmas dinner tables are loaded with heavy dishes, so having one genuinely lighter option feels like a relief rather than an afterthought. This broccoli casserole uses a lightened-up creamy cheese sauce — still satisfying, still bubbly and golden on top — but without the heaviness of a traditional cream-of-something-soup base. I've made versions of this for years and my family doesn't even miss the heavier original. It holds its own right next to the turkey.
Ingredients
- 5 cups fresh broccoli florets (about 2 medium heads)
- 1 tablespoon olive oil
- 3 cloves garlic, minced
- 2 tablespoons all-purpose flour
- 1 cup low-sodium chicken broth (or vegetable broth)
- ¾ cup plain Greek yogurt (or light sour cream)
- 1½ cups shredded sharp cheddar cheese, divided
- ½ teaspoon onion powder
- Salt and black pepper to taste
- ¼ cup whole wheat breadcrumbs (optional, for topping)
Instructions
- Preheat your oven to 375°F. Steam or blanch the broccoli florets for 3-4 minutes until just tender but still bright green, then drain well and set aside.
- In a medium saucepan over medium heat, warm the olive oil and sauté the garlic for 1 minute. Whisk in the flour and cook for another minute, then gradually add the broth, whisking constantly until smooth and slightly thickened, about 3 minutes.
- Remove the pan from heat and stir in the Greek yogurt, 1 cup of the cheddar, onion powder, salt, and pepper until the cheese melts and the sauce is smooth.
- Fold the broccoli into the sauce and transfer everything to a lightly greased 9x13 inch baking dish. Top with the remaining ½ cup cheddar and breadcrumbs if using.
- Bake uncovered for 20-25 minutes until bubbly and golden on top. Let it rest 5 minutes before serving.
Tips
- Tip: Don't skip draining the broccoli well — any extra water thins out the sauce and you end up with a soupy casserole instead of a creamy one.
- Tip: Shred the cheddar yourself from a block rather than using pre-shredded — the anti-caking coating on bagged cheese makes the sauce less smooth.
- Tip: This can be assembled the night before and refrigerated unbaked — just add 5-8 extra minutes to the baking time if going straight from the fridge.
21. Southern Baked Mac and Cheese
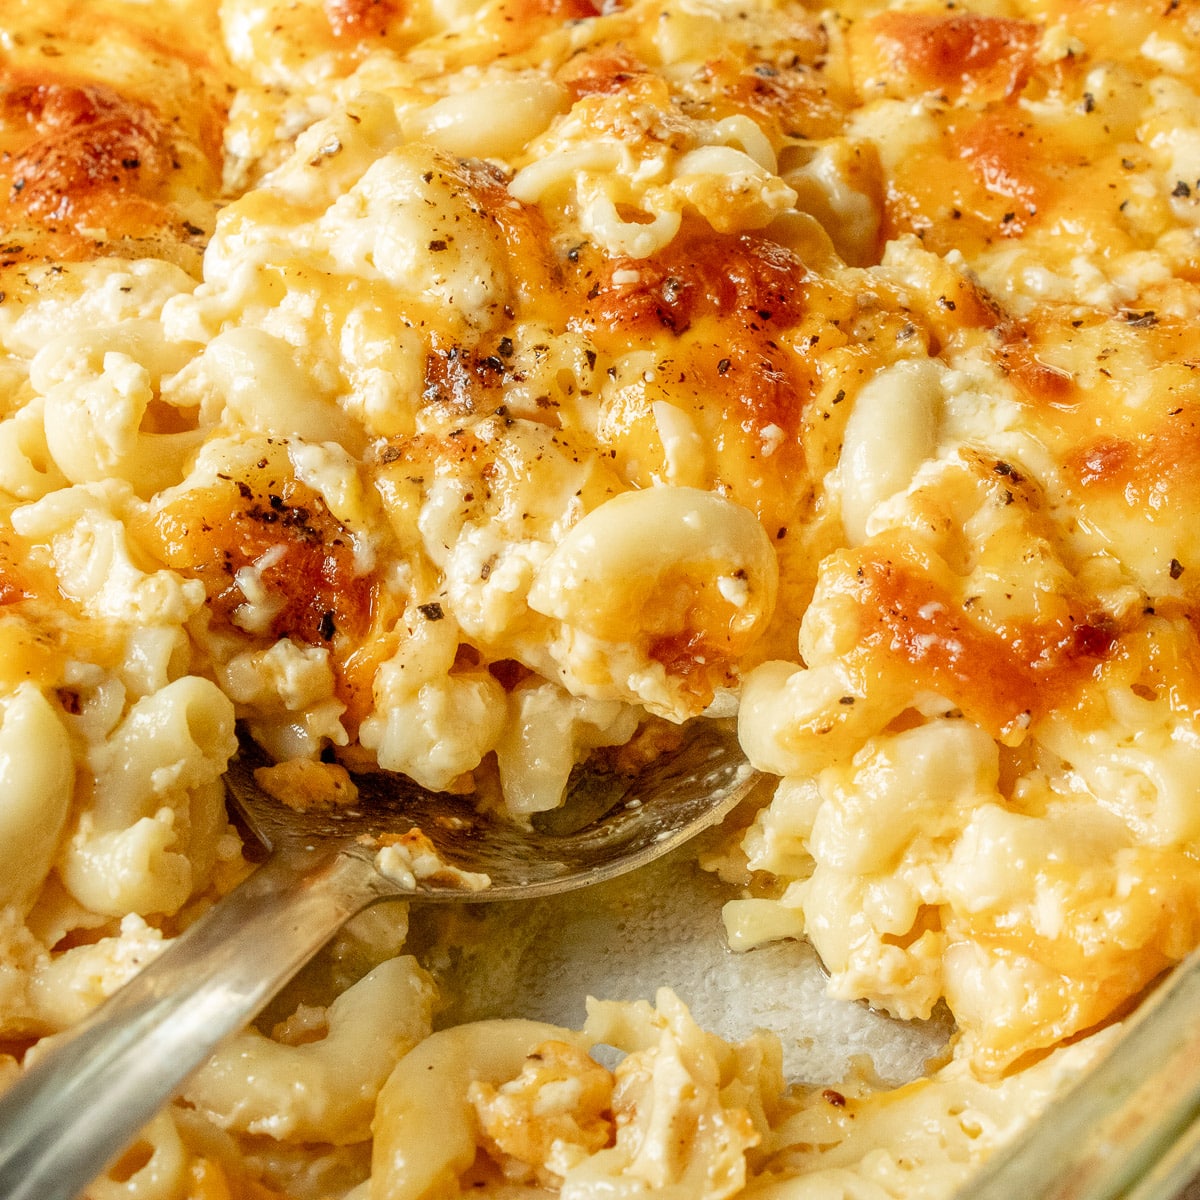
Southern baked mac and cheese is a completely different creature from the stovetop version — it's denser, richer, almost custard-like in the middle with a golden crust on top. The secret is the evaporated milk, which gives it that distinct creamy texture you can't get from regular milk alone. I tried this for the first time a couple of years ago and I genuinely didn't understand why I'd been making the other kind my whole life. Saad declared it the best mac and cheese he'd ever eaten, which is high praise from a very opinionated eight-year-old.
Ingredients
- 1 lb elbow macaroni
- 1 can (12 oz) evaporated milk
- 1½ cups whole milk
- 3 large eggs
- ½ cup (1 stick) unsalted butter, melted
- 3 cups shredded sharp cheddar cheese, divided
- 1 cup shredded Colby Jack cheese
- 1 teaspoon salt
- ½ teaspoon black pepper
- ½ teaspoon paprika
Instructions
- Preheat oven to 350°F. Cook the macaroni according to package directions until just al dente — don't overcook it here because it continues cooking in the oven. Drain and set aside.
- In a large bowl, whisk together the evaporated milk, whole milk, eggs, melted butter, salt, pepper, and paprika until well combined.
- Grease a 9x13 inch baking dish. Layer half the macaroni, then scatter half the cheeses over it. Add the remaining macaroni, then pour the milk-egg mixture evenly over everything.
- Top with the remaining cheddar cheese and a light dusting of paprika. Bake uncovered for 35-40 minutes until the top is golden and the center is just set — it should have a very slight wobble.
- Let it rest at least 10 minutes before cutting and serving. This step is not optional — it needs time to firm up or it'll fall apart on the plate.
Tips
- Tip: Use room temperature eggs and milk — cold dairy mixed with warm pasta can cause the eggs to scramble slightly, which you don't want.
- Tip: A mix of cheeses gives better flavor than all one type — sharp cheddar for tang, Colby Jack for melt. You can find both at Walmart or Costco in block form.
- Tip: This reheats beautifully the next day with a splash of milk stirred in before microwaving — so it's actually a good make-ahead option for Christmas Day.
20. Creamy Keto Brussels Sprouts with Bacon
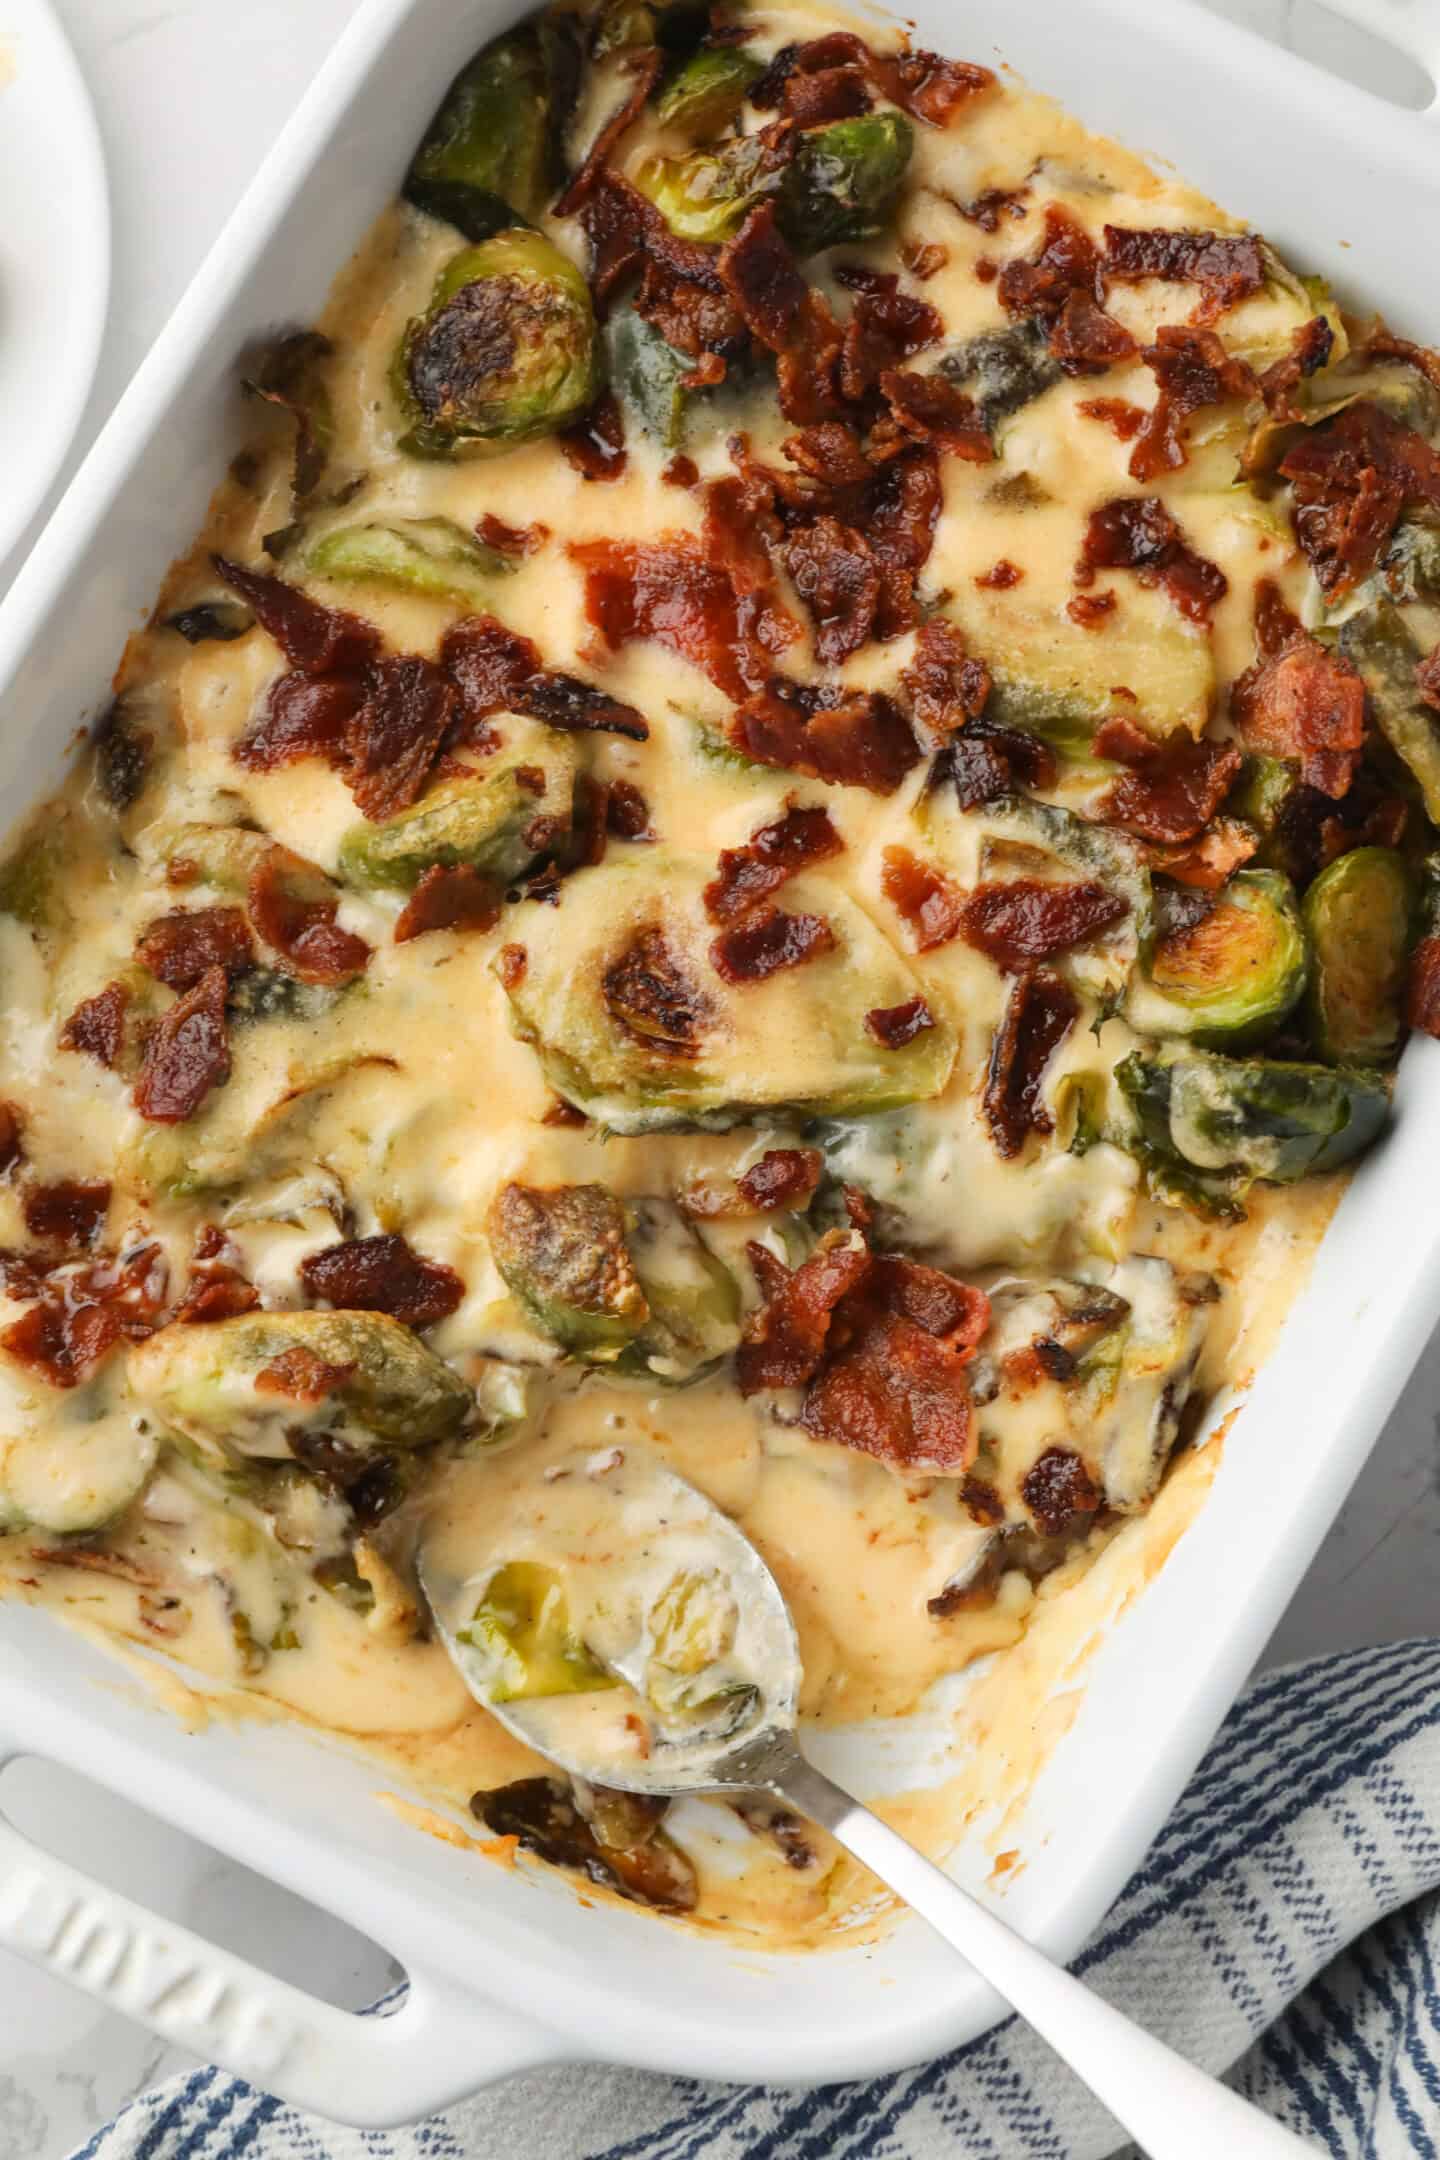
Brussels sprouts have a reputation problem they don't deserve. When you roast them until they're slightly caramelized and then toss them in a garlicky cream sauce with crispy bacon, even the skeptics at the table come back for seconds. This recipe is naturally low-carb which makes it a good option if you've got guests watching their carbs, but honestly even if nobody at your table is eating keto, this dish earns its place on the Christmas spread on flavor alone. The bacon fat does a lot of heavy lifting here — don't drain it all.
Ingredients
- 1½ lbs Brussels sprouts, trimmed and halved
- 6 strips thick-cut bacon, chopped
- 4 cloves garlic, minced
- ¾ cup heavy cream
- ½ cup grated Parmesan cheese
- 1 tablespoon olive oil
- ½ teaspoon red pepper flakes (optional)
- Salt and black pepper to taste
Instructions
- In a large oven-safe skillet over medium heat, cook the chopped bacon until crispy. Remove the bacon with a slotted spoon and set aside, leaving about 1 tablespoon of bacon fat in the pan.
- Add the olive oil to the same pan and increase heat to medium-high. Add the Brussels sprouts cut-side down in a single layer. Cook undisturbed for 4-5 minutes until deeply golden on the cut side, then stir and cook another 3 minutes.
- Push the sprouts to the sides, add the garlic to the center of the pan, and sauté for 30 seconds until fragrant. Pour in the heavy cream and stir everything together.
- Reduce heat to medium-low and simmer for 4-5 minutes, stirring occasionally, until the cream thickens slightly and coats the sprouts. Stir in the Parmesan and red pepper flakes if using.
- Season with salt and pepper, then scatter the crispy bacon over the top before serving.
Tips
- Tip: Don't crowd the skillet when searing the sprouts — if they're piled on top of each other they steam instead of caramelize, and you lose that nutty golden flavor entirely.
- Tip: The cream sauce thickens as it cools, so pull it off the heat just before it looks done — it'll be perfect by the time it hits the table.
- Tip: If you can't find thick-cut bacon, regular bacon works fine — just watch it closely because it crisps up faster.
19. Christmas Wreath Charcuterie Board
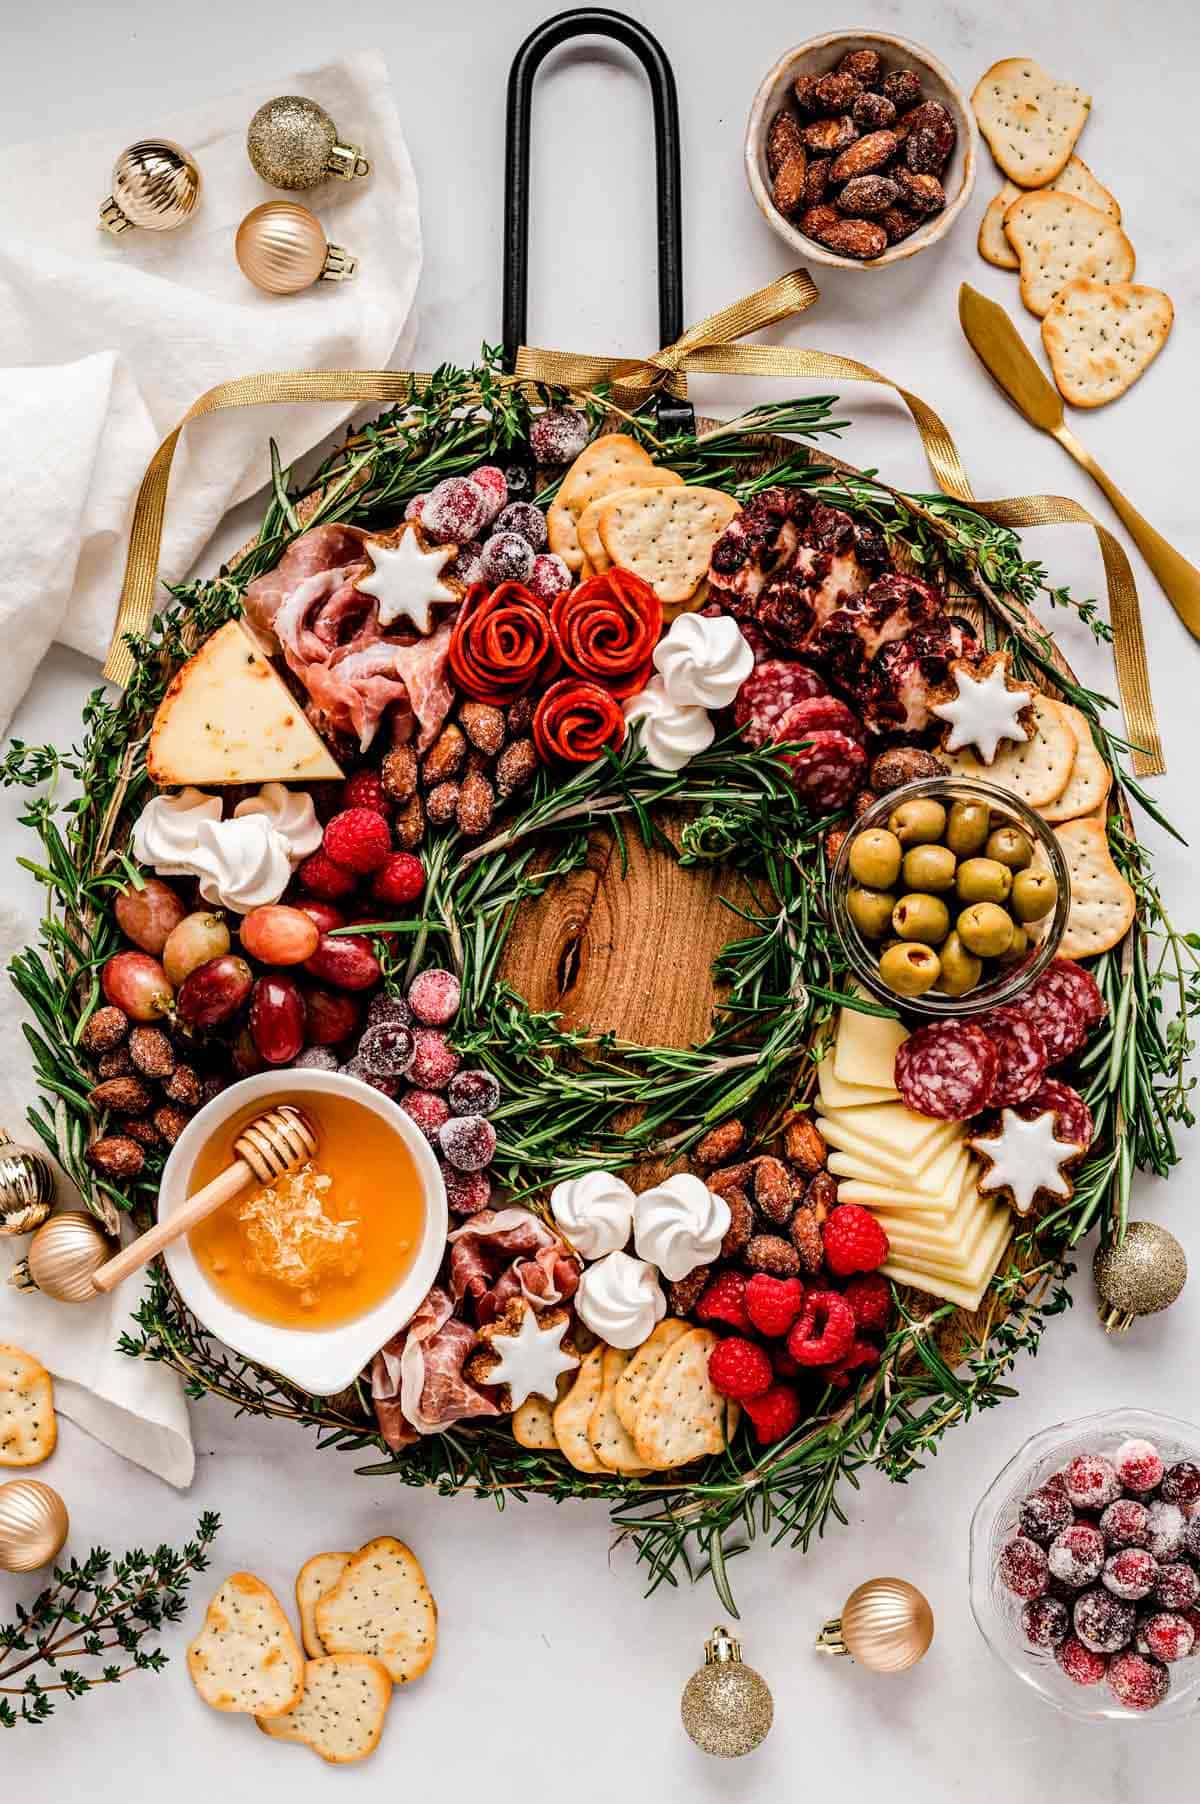
This is the thing I put out when guests arrive and nobody has eaten yet — it buys time, it looks stunning, and it requires zero cooking. The charcuterie board is arranged into a wreath shape using rosemary sprigs as the "greenery," with meats, cheeses, and little pops of red from cranberries and strawberries making it genuinely look like a Christmas decoration. It takes maybe 20 minutes to put together and gets more compliments than most things I actually cook. I build mine on a large round wooden board — nothing fancy, mine was about $12 from Walmart.
Ingredients
- 6 oz thinly sliced salami or pepperoni, folded into rosettes
- 6 oz prosciutto or ham, loosely folded
- 4 oz sharp cheddar, cubed or sliced
- 4 oz Havarti or Gouda, sliced
- 1 cup fresh strawberries
- ½ cup dried cranberries
- ½ cup green grapes
- ½ cup mixed nuts (almonds, cashews)
- Several fresh rosemary sprigs (for the "wreath" greenery)
- Crackers of your choice (Trader Joe's water crackers work well)
- Small bow made from ribbon (optional, for decoration)
Instructions
- On a large round wooden board, lay down a ring of fresh rosemary sprigs in a wreath shape, leaving the center of the board empty. This is your base — everything else gets layered on top of and around it.
- Fold the salami slices into small rosettes by folding each slice in half twice, then arrange them in clusters along the wreath. Loosely fold the prosciutto and tuck it in between the salami clusters.
- Add the cheese cubes and slices in between the meat clusters, distributing them evenly around the ring so every section has a mix.
- Fill in the gaps with strawberries, dried cranberries, green grapes, and nuts — aim for pops of red and green throughout to keep the wreath look going. Tuck crackers around the outer edge.
- Add a small ribbon bow at the bottom of the wreath shape if you want the full effect. Serve immediately or refrigerate loosely covered for up to 2 hours before guests arrive.
Tips
- Tip: Start with the rosemary base and the larger items first, then fill gaps with smaller things like cranberries and nuts — it's much easier to build this way than trying to arrange everything at once.
- Tip: Pull the cheeses out of the fridge 20-30 minutes before serving — cold cheese is harder to slice and has less flavor than cheese at room temperature.
- Tip: If fresh rosemary isn't available at your grocery store, fresh thyme sprigs or even washed kale leaves can fill the same visual role as the wreath greenery.
18. Easy Christmas Fruit Salad
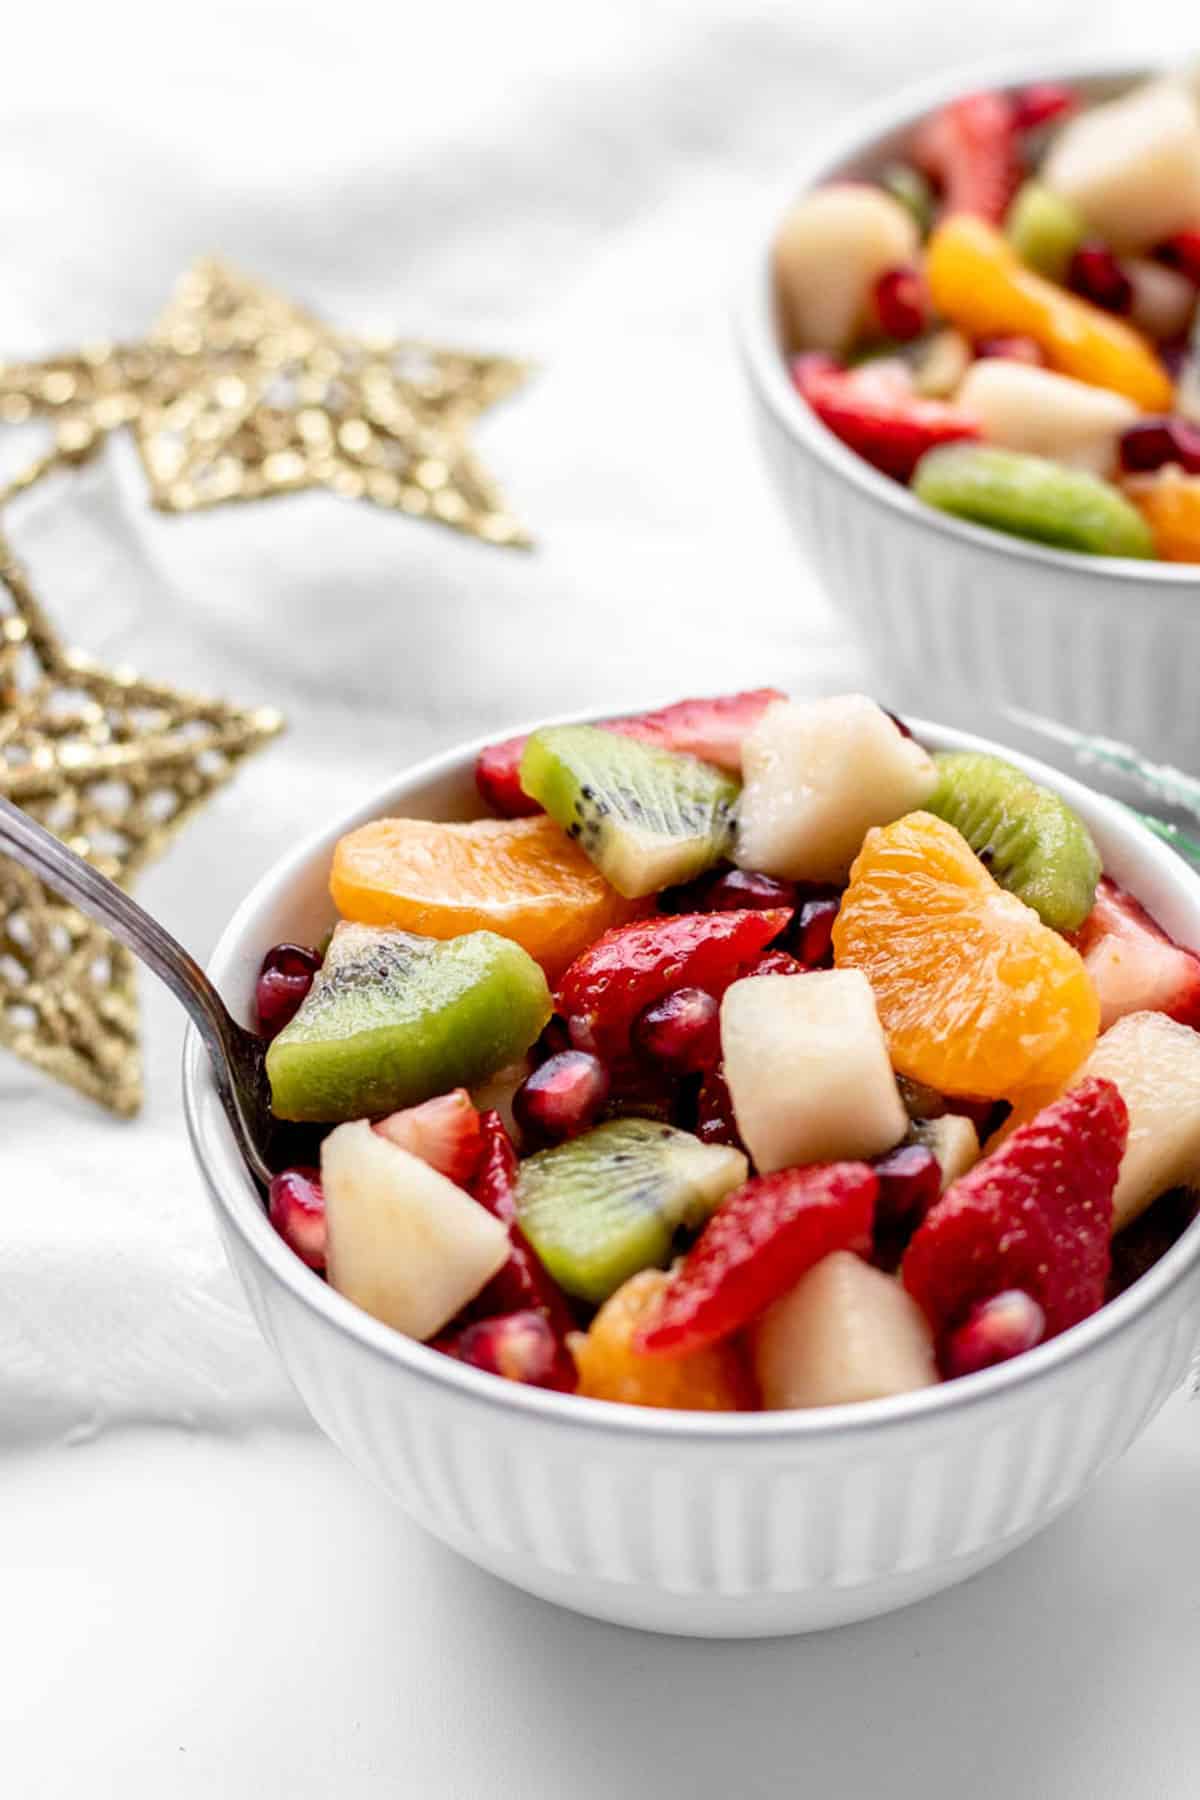
Christmas dinner can get very beige very quickly — turkey, mashed potatoes, stuffing, rolls — and this fruit salad is the bright, colorful side dish that cuts through all of that. It leans into the red and green color theme naturally: strawberries, pomegranate seeds, kiwi, green grapes. A simple honey-lime dressing keeps everything fresh and just sweet enough without turning it into dessert. I make a double batch because it disappears faster than anything else on the table, and it genuinely takes about ten minutes to put together.
Ingredients
- 2 cups strawberries, hulled and halved
- 1 cup green grapes, halved
- 1 cup red grapes, halved
- 3 kiwis, peeled and sliced into half-moons
- 1 cup fresh blueberries
- ½ cup pomegranate arils (seeds)
- 2 tablespoons honey
- 2 tablespoons fresh lime juice (about 1 lime)
- ½ teaspoon lime zest
- Fresh mint leaves for garnish (optional)
Instructions
- Wash and prep all the fruit. Combine the strawberries, green and red grapes, kiwi, blueberries, and pomegranate arils in a large serving bowl.
- In a small bowl, whisk together the honey, lime juice, and lime zest until the honey fully dissolves into the juice.
- Pour the dressing over the fruit and toss gently to coat — use a light hand here so you don't crush the softer fruits like the strawberries.
- Taste and adjust — if your fruits are very sweet, skip the honey; if they're tart, add a tiny bit more. Scatter fresh mint leaves over the top if using, and serve immediately or refrigerate for up to 4 hours.
Tips
- Tip: Add the dressing no more than 30 minutes before serving if you want the fruit to stay firm — the lime juice starts drawing out moisture over time and the salad gets watery.
- Tip: Pomegranate arils are available pre-packaged at Trader Joe's and Costco in December — saves you the mess of breaking down the whole fruit yourself.
- Tip: For a slightly more festive version, a tablespoon of orange liqueur or a splash of ginger ale stirred in just before serving adds a nice holiday lift without making it a full dessert.
13. Patatas Bravas (Spanish Fried Potatoes)

I know this one sounds unexpected on a Christmas table, but hear me out — if your family gets tired of the same potato dishes every year, Patatas Bravas is the move. Crispy cubed potatoes fried until golden, then hit with a smoky, spicy tomato sauce that has just enough heat to wake everyone up. It's a Spanish tapas classic, and yes, I make my own version that's not entirely authentic, but it works every single time. Put it out as a starter before the main meal and watch it disappear before you've even sat down.
Ingredients
- 2 lbs Yukon Gold potatoes, cut into 1-inch cubes
- 3 tablespoons olive oil, plus more for frying
- 1 teaspoon salt
- 1 can (14 oz) crushed tomatoes
- 3 cloves garlic, minced
- 1 teaspoon smoked paprika
- ½ teaspoon cayenne pepper (reduce to ¼ teaspoon for less heat)
- 1 teaspoon red wine vinegar
- Fresh parsley, chopped, for serving
Instructions
- Heat about ½ inch of oil in a heavy skillet over medium-high heat. Add the potato cubes in a single layer (work in batches) and fry for 8–10 minutes, turning occasionally, until golden and crispy on all sides. Drain on paper towels and season with salt immediately.
- In a small saucepan, heat 1 tablespoon of olive oil over medium heat. Add the minced garlic and cook for 1 minute until fragrant, then stir in the crushed tomatoes, smoked paprika, and cayenne.
- Simmer the sauce for 10 minutes until it thickens slightly, then stir in the red wine vinegar and taste for seasoning.
- Arrange the fried potatoes on a serving plate, spoon the bravas sauce generously over the top, and scatter fresh parsley over everything. Serve immediately.
Tips
- Tip: Pat the potato cubes completely dry before frying — any moisture will make the oil splatter and the potatoes won't crisp properly.
- Tip: The bravas sauce can be made a day ahead and refrigerated — just warm it through before serving.
- Tip: If you want to cut down on oil, roast the potato cubes at 425°F for 30–35 minutes instead of frying — you lose a little crispiness but it's still very good.
14. Green Beans with Brown Sugar and Dijon Mustard

Green beans are the side dish that almost every Christmas table has — and almost every Christmas table forgets to make interesting. This version fixes that. The brown sugar and Dijon mustard combination sounds a little odd until you taste it, and then it makes complete sense — the mustard cuts through the sweetness, the sugar caramelizes slightly in the pan, and the beans stay tender with just enough bite. It comes together in under 15 minutes, which on Christmas day when the oven is already packed full, is exactly what you need. I serve these alongside our Thanksgiving side dishes roundup favorites too — they work on any holiday table.
Ingredients
- 1 lb fresh green beans, trimmed (or frozen, thawed and patted dry)
- 2 tablespoons unsalted butter
- 2 cloves garlic, minced
- 2 tablespoons brown sugar, packed
- 1 tablespoon Dijon mustard
- 1 tablespoon soy sauce
- Salt and black pepper to taste
Instructions
- Blanch the green beans in a large pot of salted boiling water for 3–4 minutes until just tender but still bright green. Drain and immediately transfer to a bowl of ice water to stop the cooking, then drain again and pat dry.
- In a large skillet over medium heat, melt the butter. Add the garlic and cook for 1 minute until fragrant, stirring so it doesn't burn.
- Stir in the brown sugar, Dijon mustard, and soy sauce. Let the mixture bubble for about 1 minute until slightly thickened.
- Add the green beans to the skillet and toss to coat evenly in the glaze. Cook for 2–3 more minutes until heated through and the glaze clings to the beans. Season with salt and pepper and serve hot.
Tips
- Tip: You can blanch the green beans up to a day ahead — store them in the fridge until you're ready to make the glaze, then it only takes 5 minutes to finish the dish.
- Tip: Don't skip the ice bath after blanching — it's what keeps the beans that vivid green color instead of turning dull and army-colored.
- Tip: Whole grain mustard works as a swap for Dijon if that's what you have — it gives a slightly different texture but the flavor is just as good.
15. Best Creamy Sweet Mashed Potatoes Recipe

My husband didn't grow up eating sweet potatoes the way I did — in Pakistan we'd use them in chaats and street food — so the first time I made this mash, he wasn't sure about it. He went back for seconds. That's really all I need to say. These creamy mashed sweet potatoes are buttery, slightly sweet, and warmly spiced with cinnamon and a touch of nutmeg. They feel indulgent without being over the top, and they sit beautifully next to anything savory on the Christmas plate — roast chicken, ham, whatever you're making. I use a regular potato masher and don't bother with anything fancier.
Ingredients
- 3 lbs sweet potatoes (about 4 medium), peeled and cut into chunks
- 4 tablespoons unsalted butter
- ⅓ cup heavy cream (or whole milk for a lighter version)
- 2 tablespoons brown sugar or pure maple syrup
- ½ teaspoon cinnamon
- ¼ teaspoon nutmeg
- ½ teaspoon salt
- Fresh thyme leaves, for garnish
Instructions
- Place the sweet potato chunks in a large pot and cover with cold water. Bring to a boil over high heat, then reduce to a simmer and cook for 15–18 minutes until completely tender when pierced with a fork.
- Drain well and return the potatoes to the hot pot for 1–2 minutes, shaking gently over low heat to evaporate any excess moisture — this is what keeps your mash from going watery.
- Add the butter and let it melt into the hot potatoes, then add the cream, brown sugar, cinnamon, nutmeg, and salt. Mash everything together until smooth and creamy.
- Taste and adjust — more salt, more sweetness, whatever it needs. Transfer to a serving bowl and finish with a few fresh thyme leaves on top.
Tips
- Tip: Warm your cream before adding it — cold cream makes the mash stiffen up and you end up overworking it trying to get it smooth again.
- Tip: This reheats really well — make it the day before, store covered in the fridge, and warm gently on the stove with a splash of extra cream stirred in.
- Tip: If you want it even smoother, push the mashed potatoes through a fine mesh strainer — but honestly a regular masher gets you 90% of the way there with zero extra dishes.
16. Mexican Chicken Salad
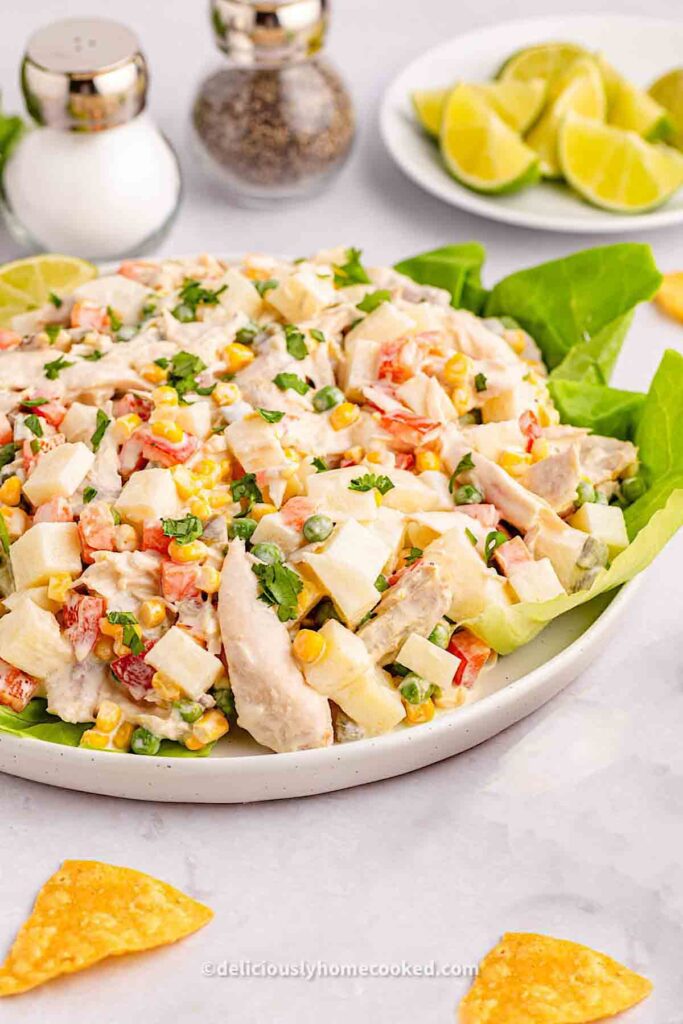
Not every Christmas side needs to be hot and heavy — this Mexican chicken salad earns its spot on the table as the fresh, bright thing that cuts through all the rich roasts and creamy mashes. Shredded chicken, corn, black beans, avocado, cherry tomatoes, and a lime-cumin dressing that pulls it all together. It's the dish I bring out when the table already looks crowded and I need something that can sit at room temperature without suffering for it. If your guests want something lighter between the heavier plates, this is it. Check out my simple chicken salad recipes roundup for more ideas in this style.
Ingredients
- 2 cups cooked chicken, shredded (rotisserie chicken works great here)
- 1 can (15 oz) black beans, drained and rinsed
- 1 cup corn kernels (canned or thawed frozen)
- 1 cup cherry tomatoes, halved
- 1 large avocado, diced
- ¼ cup red onion, finely diced
- ¼ cup fresh cilantro, roughly chopped (omit if your crowd doesn't like cilantro)
- 3 tablespoons olive oil
- 2 tablespoons fresh lime juice
- 1 teaspoon cumin
- ½ teaspoon chili powder
- Salt and black pepper to taste
Instructions
- In a small bowl, whisk together the olive oil, lime juice, cumin, chili powder, salt, and pepper to make the dressing. Taste it — it should be tangy and bright with a little warmth from the spices.
- In a large bowl, combine the shredded chicken, black beans, corn, cherry tomatoes, red onion, and cilantro. Toss gently to mix.
- Pour the dressing over the salad and toss to coat everything evenly. Add the diced avocado last and fold in gently so it doesn't mash.
- Serve immediately, or cover and refrigerate for up to 1 hour before serving — add the avocado right before serving if making ahead.
Tips
- Tip: A store-bought rotisserie chicken from Costco or Walmart makes this completely effortless — shred it while it's still warm and it falls apart easily.
- Tip: Soak the diced red onion in cold water for 10 minutes before adding it — takes the sharp raw edge off without losing the crunch.
- Tip: This doubles easily and travels well in a covered container — a good option if you're bringing a dish to someone else's Christmas gathering.
17. Caramelized Brussels Sprouts with Honey Glaze

Zainab used to refuse Brussels sprouts on sight. Then I started making them this way and she started asking for them by name — so I'm counting that as a win. The secret is getting the pan genuinely hot before the sprouts go in, so they caramelize properly rather than steam and turn soft. The honey glaze goes on in the last couple of minutes so it doesn't burn, and it gives the outer leaves this sticky, lacquered finish that's completely different from the boiled Brussels sprouts most people grew up dreading. This is the recipe that converts Brussels sprouts skeptics, and I've seen it happen more than once at my own table.
Ingredients
- 1½ lbs Brussels sprouts, trimmed and halved
- 3 tablespoons olive oil
- ½ teaspoon salt
- ¼ teaspoon black pepper
- 3 tablespoons honey
- 1 tablespoon balsamic vinegar
- 2 cloves garlic, minced
- Pinch of red pepper flakes (optional)
Instructions
- Heat the olive oil in a large heavy skillet over medium-high heat until it shimmers. Place the Brussels sprouts cut-side down in a single layer — don't crowd them or they'll steam instead of brown. Work in two batches if needed.
- Cook without stirring for 4–5 minutes until the cut sides are deeply golden and caramelized. Season with salt and pepper, then stir and cook for another 3–4 minutes until the sprouts are tender throughout.
- Add the garlic and red pepper flakes (if using) and stir for 30 seconds. Then pour in the honey and balsamic vinegar and toss everything quickly to coat.
- Cook for 1–2 more minutes until the glaze thickens and coats the sprouts. Transfer to a serving dish and serve straight away — they're best hot.
Tips
- Tip: The pan needs to be properly hot before the sprouts go in — if the oil isn't shimmering, wait. A lukewarm pan is what gives you pale, soggy sprouts instead of caramelized ones.
- Tip: Don't add the honey too early — it burns quickly over high heat. Wait until the sprouts are already cooked through before adding the glaze.
- Tip: These also work well roasted in the oven at 425°F for 20–25 minutes — toss with the honey glaze in the last 5 minutes of roasting if you prefer that method.
8. Pomme Dauphinoise – Gruyère & Parmesan Scalloped Potatoes
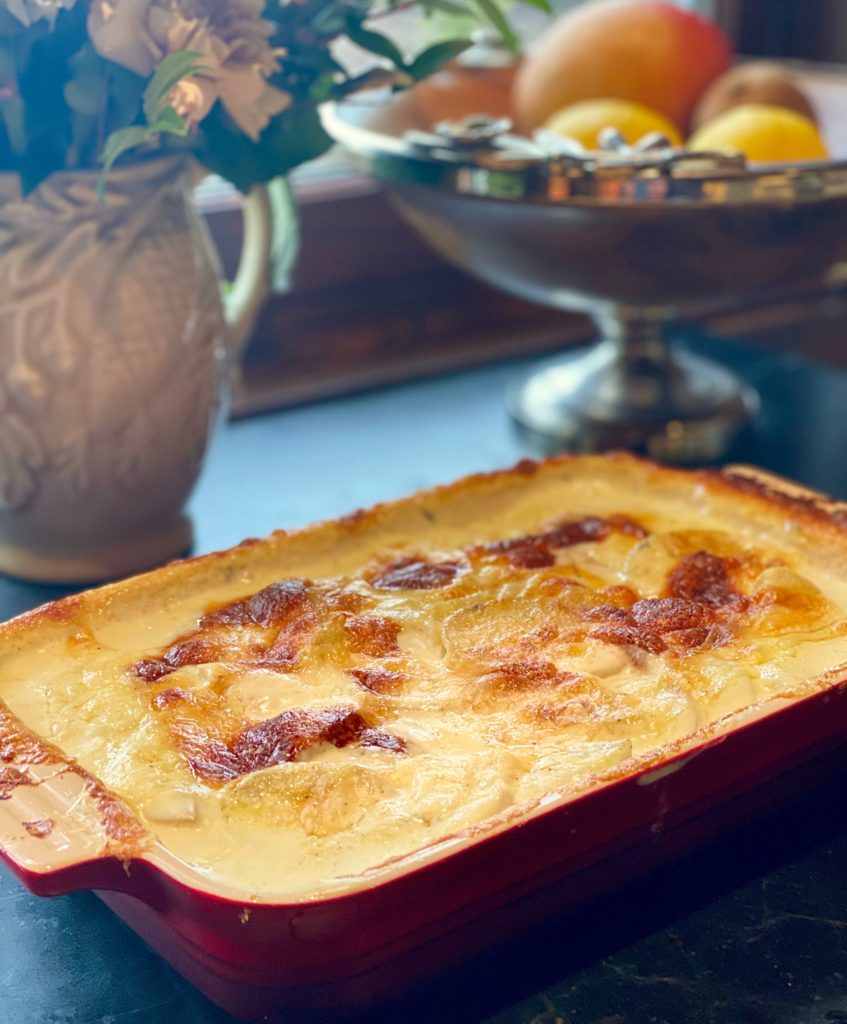
I'll be honest — I didn't grow up with scalloped potatoes. In Pakistan, potatoes get curried or fried, not bathed in cream and cheese and baked until they're practically melting. But the first time I made this version, with both Gruyère and Parmesan, my husband ate three helpings and didn't say a single word the whole time. That told me everything. This is classic French Pomme Dauphinoise done properly — layers of thinly sliced potato, heavy cream, and two cheeses that melt into something gloriously golden on top. It's rich, yes, but it's Christmas. If there's ever a time for it, it's now.
Ingredients
- 2 lbs Yukon Gold potatoes, peeled and sliced ⅛-inch thin
- 1½ cups heavy cream
- ½ cup whole milk
- 2 garlic cloves, minced
- 1 cup Gruyère cheese, grated
- ½ cup Parmesan cheese, finely grated
- 1 teaspoon salt
- ½ teaspoon black pepper
- ¼ teaspoon freshly grated nutmeg
- 1 tablespoon unsalted butter, for greasing the dish
Instructions
- Preheat your oven to 350°F. Butter a 9x13-inch baking dish generously.
- In a saucepan over medium heat, combine the cream, milk, garlic, salt, pepper, and nutmeg. Warm until just steaming — don't let it boil. Remove from heat.
- Layer half the potato slices in the buttered dish, overlapping slightly. Pour half the cream mixture over them and scatter half the Gruyère on top.
- Repeat with the remaining potato slices, cream, and Gruyère. Finish by sprinkling the Parmesan evenly over the top — this is what gives you that gorgeous crust.
- Cover tightly with foil and bake for 45 minutes. Remove the foil and bake for another 25-30 minutes until the top is deep golden and the potatoes are completely tender when pierced with a knife.
- Let it rest for 10 minutes before serving — this helps the layers set so it doesn't collapse when you scoop it out.
Tips
- Tip: If you can't find Gruyère, Swiss cheese works as a substitute — it's milder but still melts beautifully.
- Tip: Slice the potatoes as evenly as possible so they cook at the same rate — a mandoline is ideal, but a sharp knife and patience get you there too.
- Tip: This dish can be assembled the night before, covered, and refrigerated. Add an extra 10 minutes to the covered baking time if going straight from fridge to oven.
9. Creamy Grape Salad
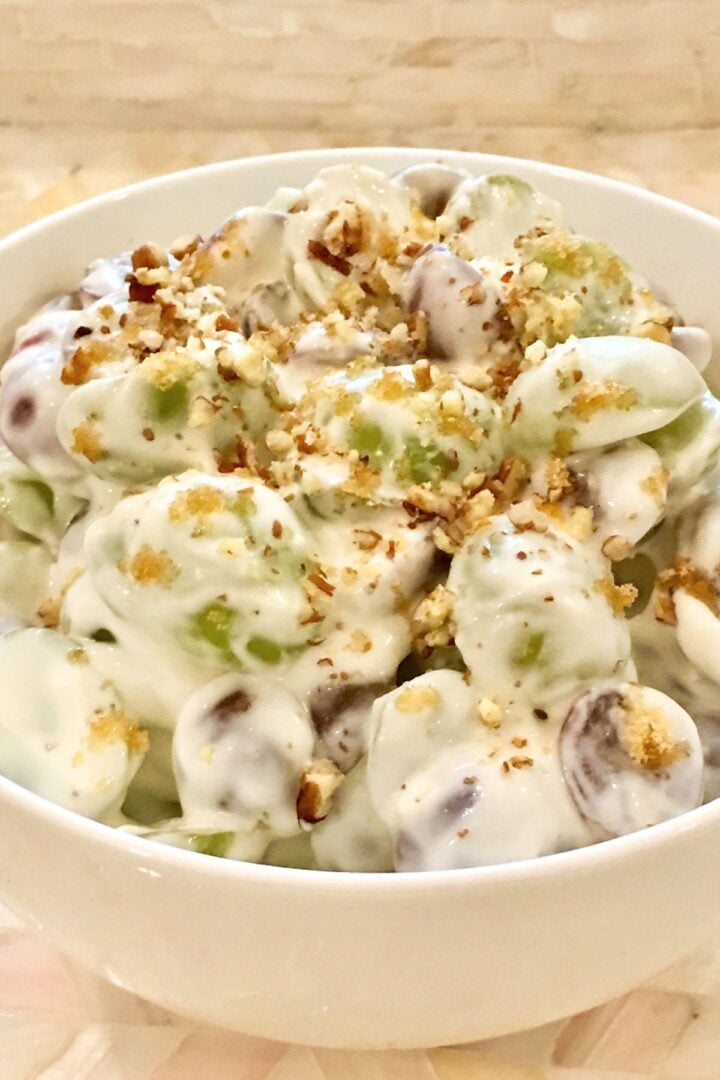
This one surprised me. I'd never considered grapes as the star of a side dish — they were always just the thing you picked at from a fruit bowl while waiting for dinner. But this creamy grape salad with its cream cheese and sour cream dressing, finished with a brown sugar crumble, is genuinely something people fight over at holiday tables. It sits beautifully between a dessert and a side dish, which actually makes it perfect for Christmas when the whole menu is a little indulgent anyway. Zainab asks for this one specifically — she calls it "the sweet one."
Ingredients
- 2 lbs seedless grapes (red and green mixed)
- 8 oz cream cheese, softened to room temperature
- 1 cup sour cream
- ⅓ cup powdered sugar
- 1 teaspoon vanilla extract
- 3 tablespoons brown sugar
- 3 tablespoons chopped pecans or walnuts (optional but good)
Instructions
- Wash and dry the grapes thoroughly — any extra water will thin out the dressing. Pull them off the stems and place them in a large bowl.
- In a separate bowl, beat the softened cream cheese until smooth. Add the sour cream, powdered sugar, and vanilla extract and mix until completely combined and creamy.
- Pour the cream cheese mixture over the grapes and fold gently until every grape is coated. Transfer to a serving dish.
- Sprinkle the brown sugar and chopped pecans evenly over the top. Refrigerate for at least 1 hour before serving so the flavors come together.
Tips
- Tip: Cold cream cheese will not mix smoothly — let it sit out for at least 20 minutes before you start. I've learned this the hard way with lumpy results.
- Tip: Add the brown sugar and nuts right before serving rather than the night before, so they stay a little crunchy on top instead of dissolving into the dressing.
- Tip: Using both red and green grapes isn't just for looks — the flavor difference adds a nice balance of sweet and slightly tart.
10. Easy Southern Dressing (Stuffing) in the Air Fryer

Oven space on Christmas Day is prime real estate — you've got the roast, the potatoes, the casserole, and suddenly nowhere to put the stuffing. That's where the air fryer comes in, and this Southern-style cornbread dressing is proof that it genuinely works. The outside gets crispy the way it should, while the inside stays soft and savory with celery, onion, and herbs running through it. If you're new to Southern dressing vs. stuffing — dressing is baked separately, not inside the bird, and the cornbread base gives it a slightly denser, more crumbly texture that I actually prefer. Check out more ideas on the air fryer recipes page if you want to keep that appliance busy this holiday season.
Ingredients
- 4 cups crumbled cornbread (day-old works best)
- 2 cups cubed white bread, dried out
- 1 cup celery, finely diced
- 1 cup yellow onion, finely diced
- 3 tablespoons unsalted butter
- 2 cups chicken broth (or vegetable broth)
- 2 eggs, beaten
- 1 teaspoon dried sage
- 1 teaspoon dried thyme
- ½ teaspoon salt and ½ teaspoon black pepper
Instructions
- Melt the butter in a skillet over medium heat. Sauté the celery and onion for 5-6 minutes until softened and translucent. Remove from heat and let cool slightly.
- In a large bowl, combine the crumbled cornbread and dried white bread. Add the sautéed vegetables, sage, thyme, salt, and pepper. Stir to combine.
- Pour the chicken broth over the bread mixture a little at a time, stirring as you go — you want it moist but not soupy. Add the beaten eggs and mix until everything holds together.
- Grease a small baking pan or air fryer-safe dish that fits your air fryer. Press the dressing in evenly. Air fry at 350°F for 20-25 minutes until the top is golden and the center is set.
- Let it rest for 5 minutes before scooping and serving.
Tips
- Tip: Day-old or slightly stale cornbread absorbs the broth much better than fresh — if yours is fresh, spread it on a sheet pan and dry it in a 250°F oven for 20 minutes first.
- Tip: Air fryer sizes vary a lot, so you may need to cook this in batches if your basket is small. A 6-quart air fryer can handle a standard 8x8 pan if you have one that fits.
- Tip: For extra flavor, swap out ¼ cup of the broth for pan drippings if you have them from your roast.
11. Simple Italian Chickpea Salad
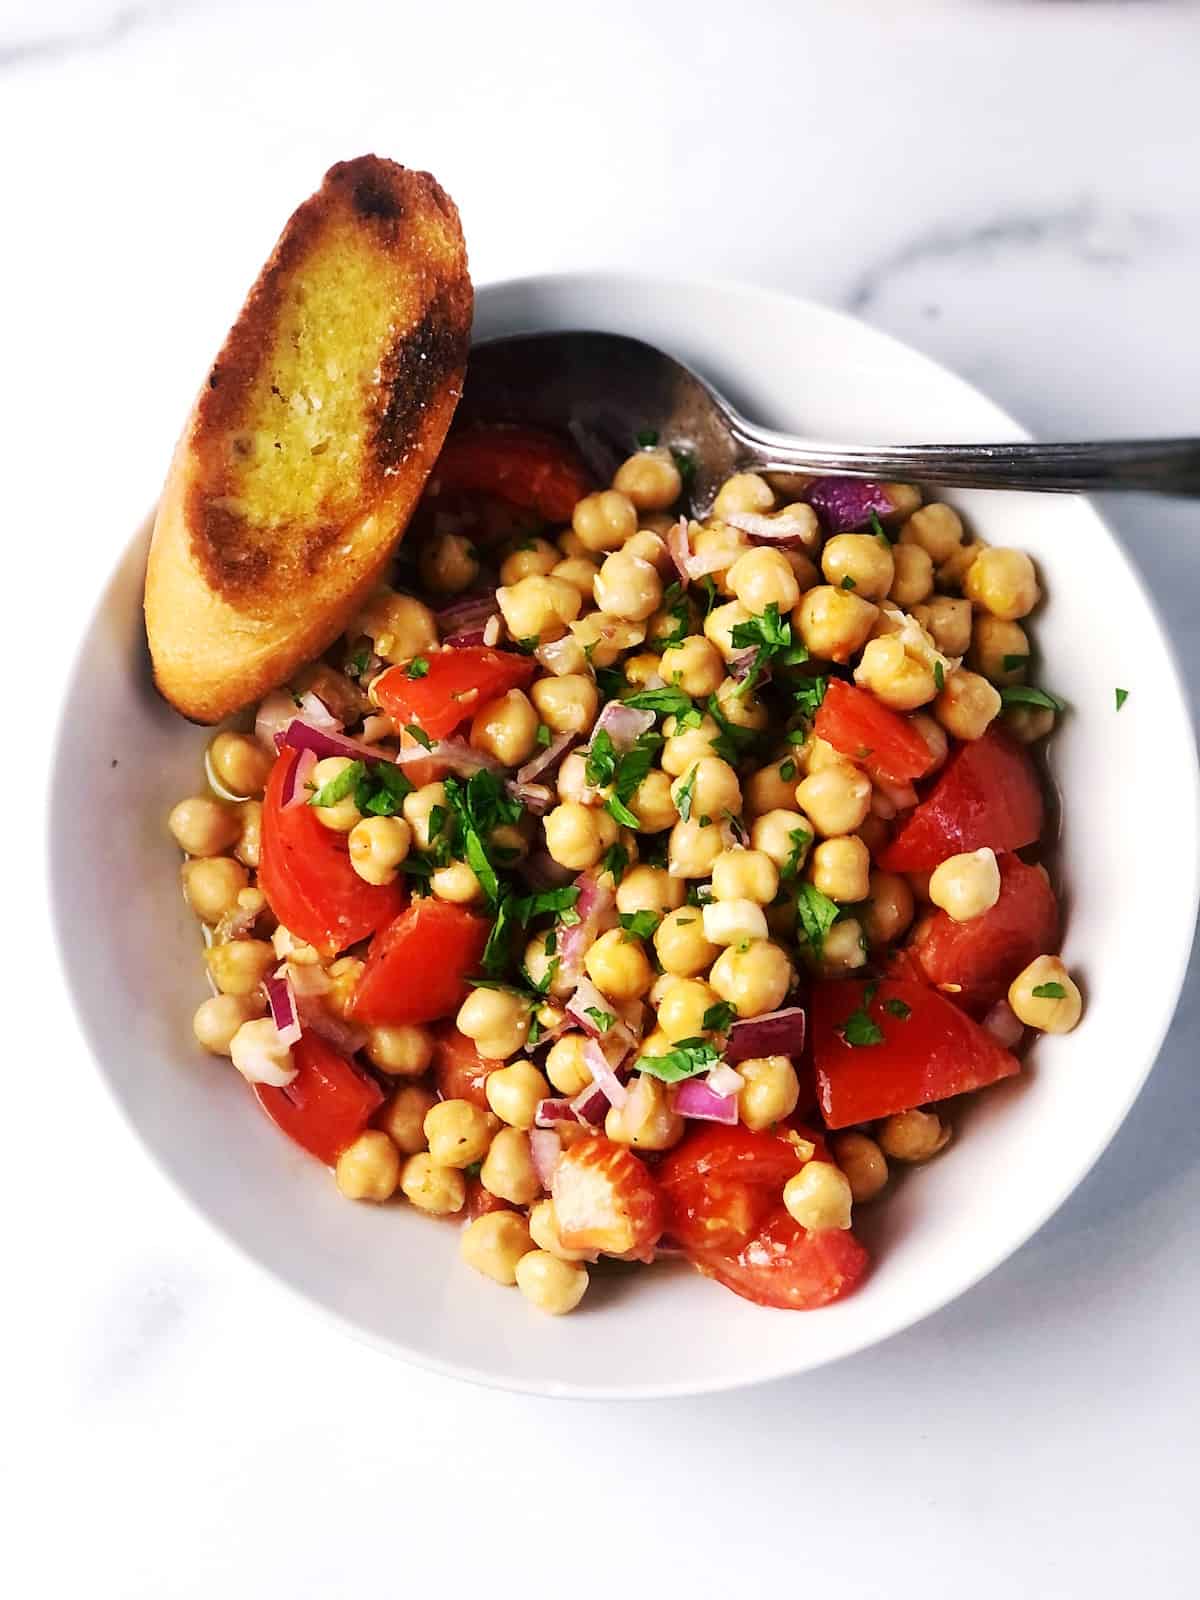
Every Christmas table needs something that isn't heavy — one dish that cuts through all the cream and butter and gives you something bright and fresh. This Italian chickpea salad is that dish. It comes together in about 10 minutes, needs no cooking, and actually gets better as it sits in the fridge, which makes it ideal for prepping the day before. The combination of chickpeas, roasted red peppers, olives, red onion, and a sharp red wine vinaigrette is bold enough to hold its own next to all the richer sides on the table. Honestly, this isn't authentic Italian — it's a straightforward home-cook version using pantry staples you can grab from any Walmart or Aldi.
Ingredients
- 2 cans (15 oz each) chickpeas, drained and rinsed
- 1 cup cherry tomatoes, halved
- ½ cup roasted red peppers, chopped (from a jar is fine)
- ⅓ cup Kalamata olives, pitted and halved
- ¼ cup red onion, thinly sliced
- ¼ cup fresh parsley, roughly chopped
- 3 tablespoons extra-virgin olive oil
- 2 tablespoons red wine vinegar
- 1 teaspoon dried oregano
- Salt and black pepper to taste
Instructions
- Drain and rinse the chickpeas well. If you have time, pat them dry with a paper towel — it helps the dressing stick rather than sliding off.
- In a large bowl, combine the chickpeas, cherry tomatoes, roasted red peppers, olives, red onion, and parsley.
- In a small bowl or jar, whisk together the olive oil, red wine vinegar, oregano, salt, and pepper. Taste it before you add it — adjust the vinegar if you want more tang.
- Pour the dressing over the salad and toss until everything is evenly coated. Cover and refrigerate for at least 30 minutes before serving so the chickpeas absorb the flavors.
Tips
- Tip: If Kalamata olives aren't your thing, regular black olives from a can work fine — the flavor is milder but it still ties the salad together.
- Tip: Make this the day before and store it covered in the fridge — the chickpeas soak up the dressing overnight and the whole thing tastes even better the next day.
- Tip: A handful of crumbled feta stirred in just before serving adds a nice salty, creamy note if you want to make it a little more substantial.
12. Butternut Squash au Gratin
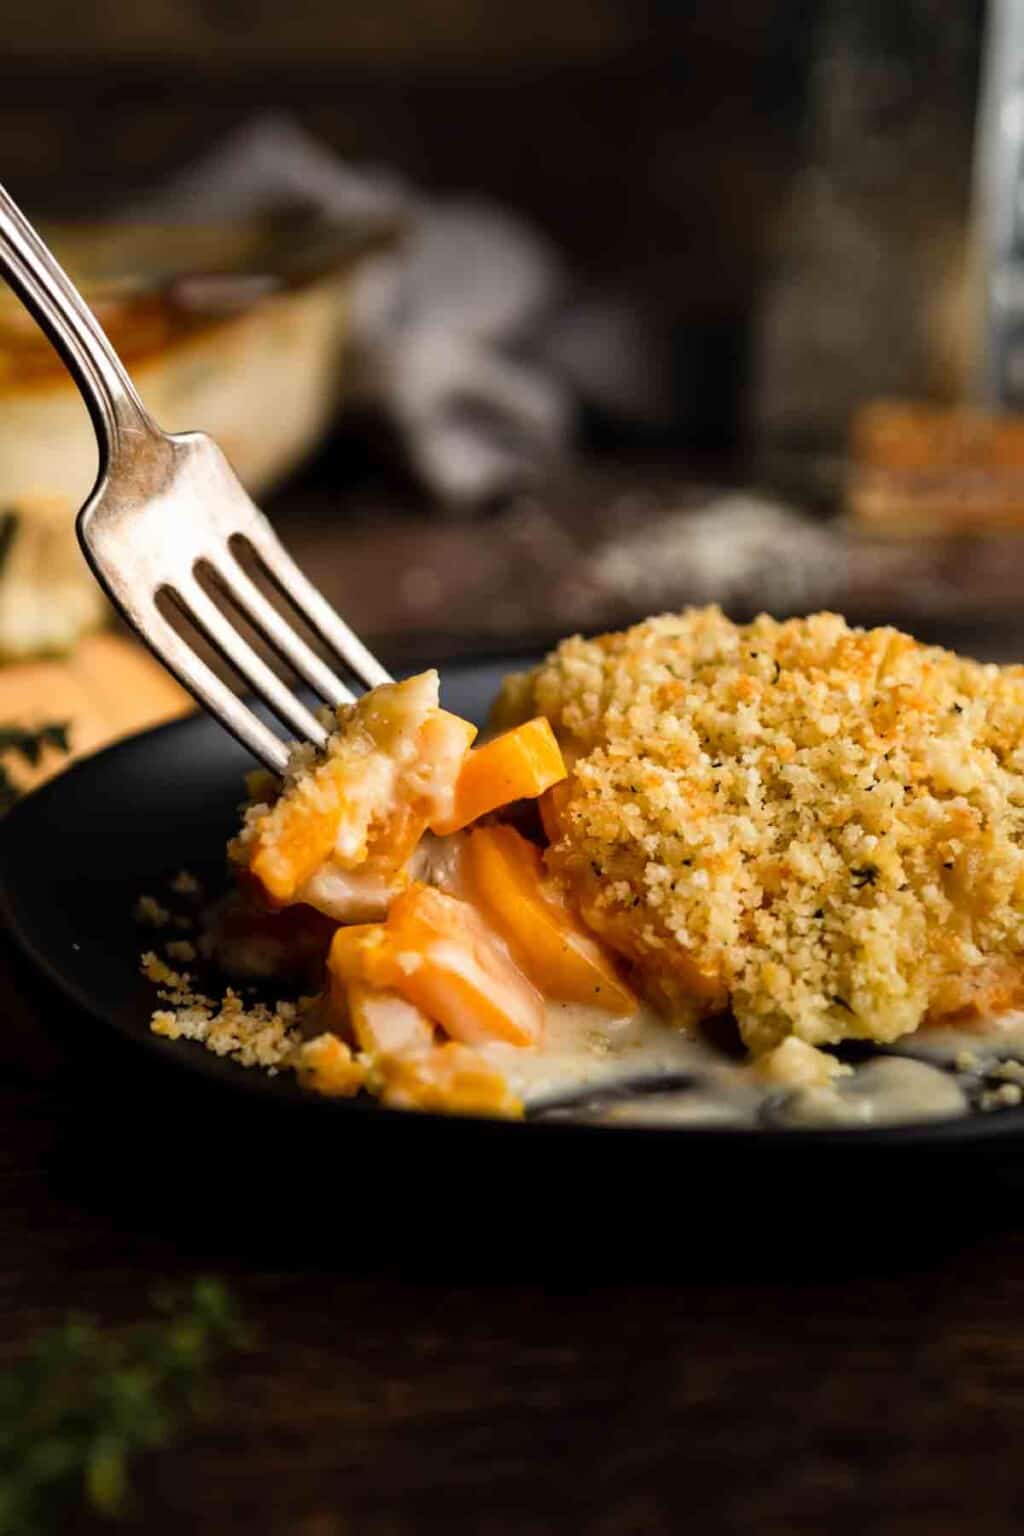
If scalloped potatoes feel like too much of the same thing alongside the Pomme Dauphinoise, this butternut squash au gratin gives you all the same creamy, cheesy, golden-topped satisfaction but with a completely different flavor profile. The squash goes soft and almost sweet as it bakes, and that sweetness plays brilliantly against the sharp cheese on top. It looks stunning on the table — that deep orange layered under a bubbling golden crust is exactly the kind of thing that makes people stop and take a photo before they eat. I use pre-cut butternut squash from the store whenever I can find it because breaking down a whole squash is honestly one of my least favorite kitchen tasks.
Ingredients
- 2 lbs butternut squash, peeled and sliced ¼-inch thin
- 1 cup heavy cream
- ½ cup chicken or vegetable broth
- 2 garlic cloves, minced
- 1 tablespoon fresh thyme leaves (or 1 teaspoon dried)
- 1 cup sharp white cheddar or Gruyère, grated
- ¼ cup Parmesan, grated
- ¼ teaspoon nutmeg
- 1 teaspoon salt and ½ teaspoon black pepper
- 1 tablespoon butter, for the dish
Instructions
- Preheat your oven to 375°F. Butter a 9x13-inch or similar baking dish.
- In a small saucepan, combine the cream, broth, garlic, thyme, nutmeg, salt, and pepper. Warm over medium-low heat until just steaming. Don't boil it — you just want the garlic to infuse into the cream.
- Layer half the butternut squash slices in the buttered dish, overlapping like shingles. Pour half the cream mixture over the top and scatter half the cheddar (or Gruyère) over it.
- Repeat with the remaining squash and cream. Top with the remaining cheddar and all of the Parmesan — this layer is your crust so don't hold back.
- Cover with foil and bake for 35 minutes. Remove foil and bake for another 20-25 minutes until the top is deeply golden and the squash is completely tender.
- Rest for 10 minutes before serving. The cream will thicken as it cools and the dish will hold together much better.
Tips
- Tip: Pre-cut butternut squash from Costco or Trader Joe's saves a lot of time and effort — just slice it to the right thickness when you get home.
- Tip: Sharp white cheddar gives a bolder flavor than mild cheddar here — it balances the natural sweetness of the squash much better.
- Tip: If your squash slices are uneven in thickness, the thinner ones may get too soft before the thicker ones are done — aim for consistency when slicing.
3. Cornbread Dressing
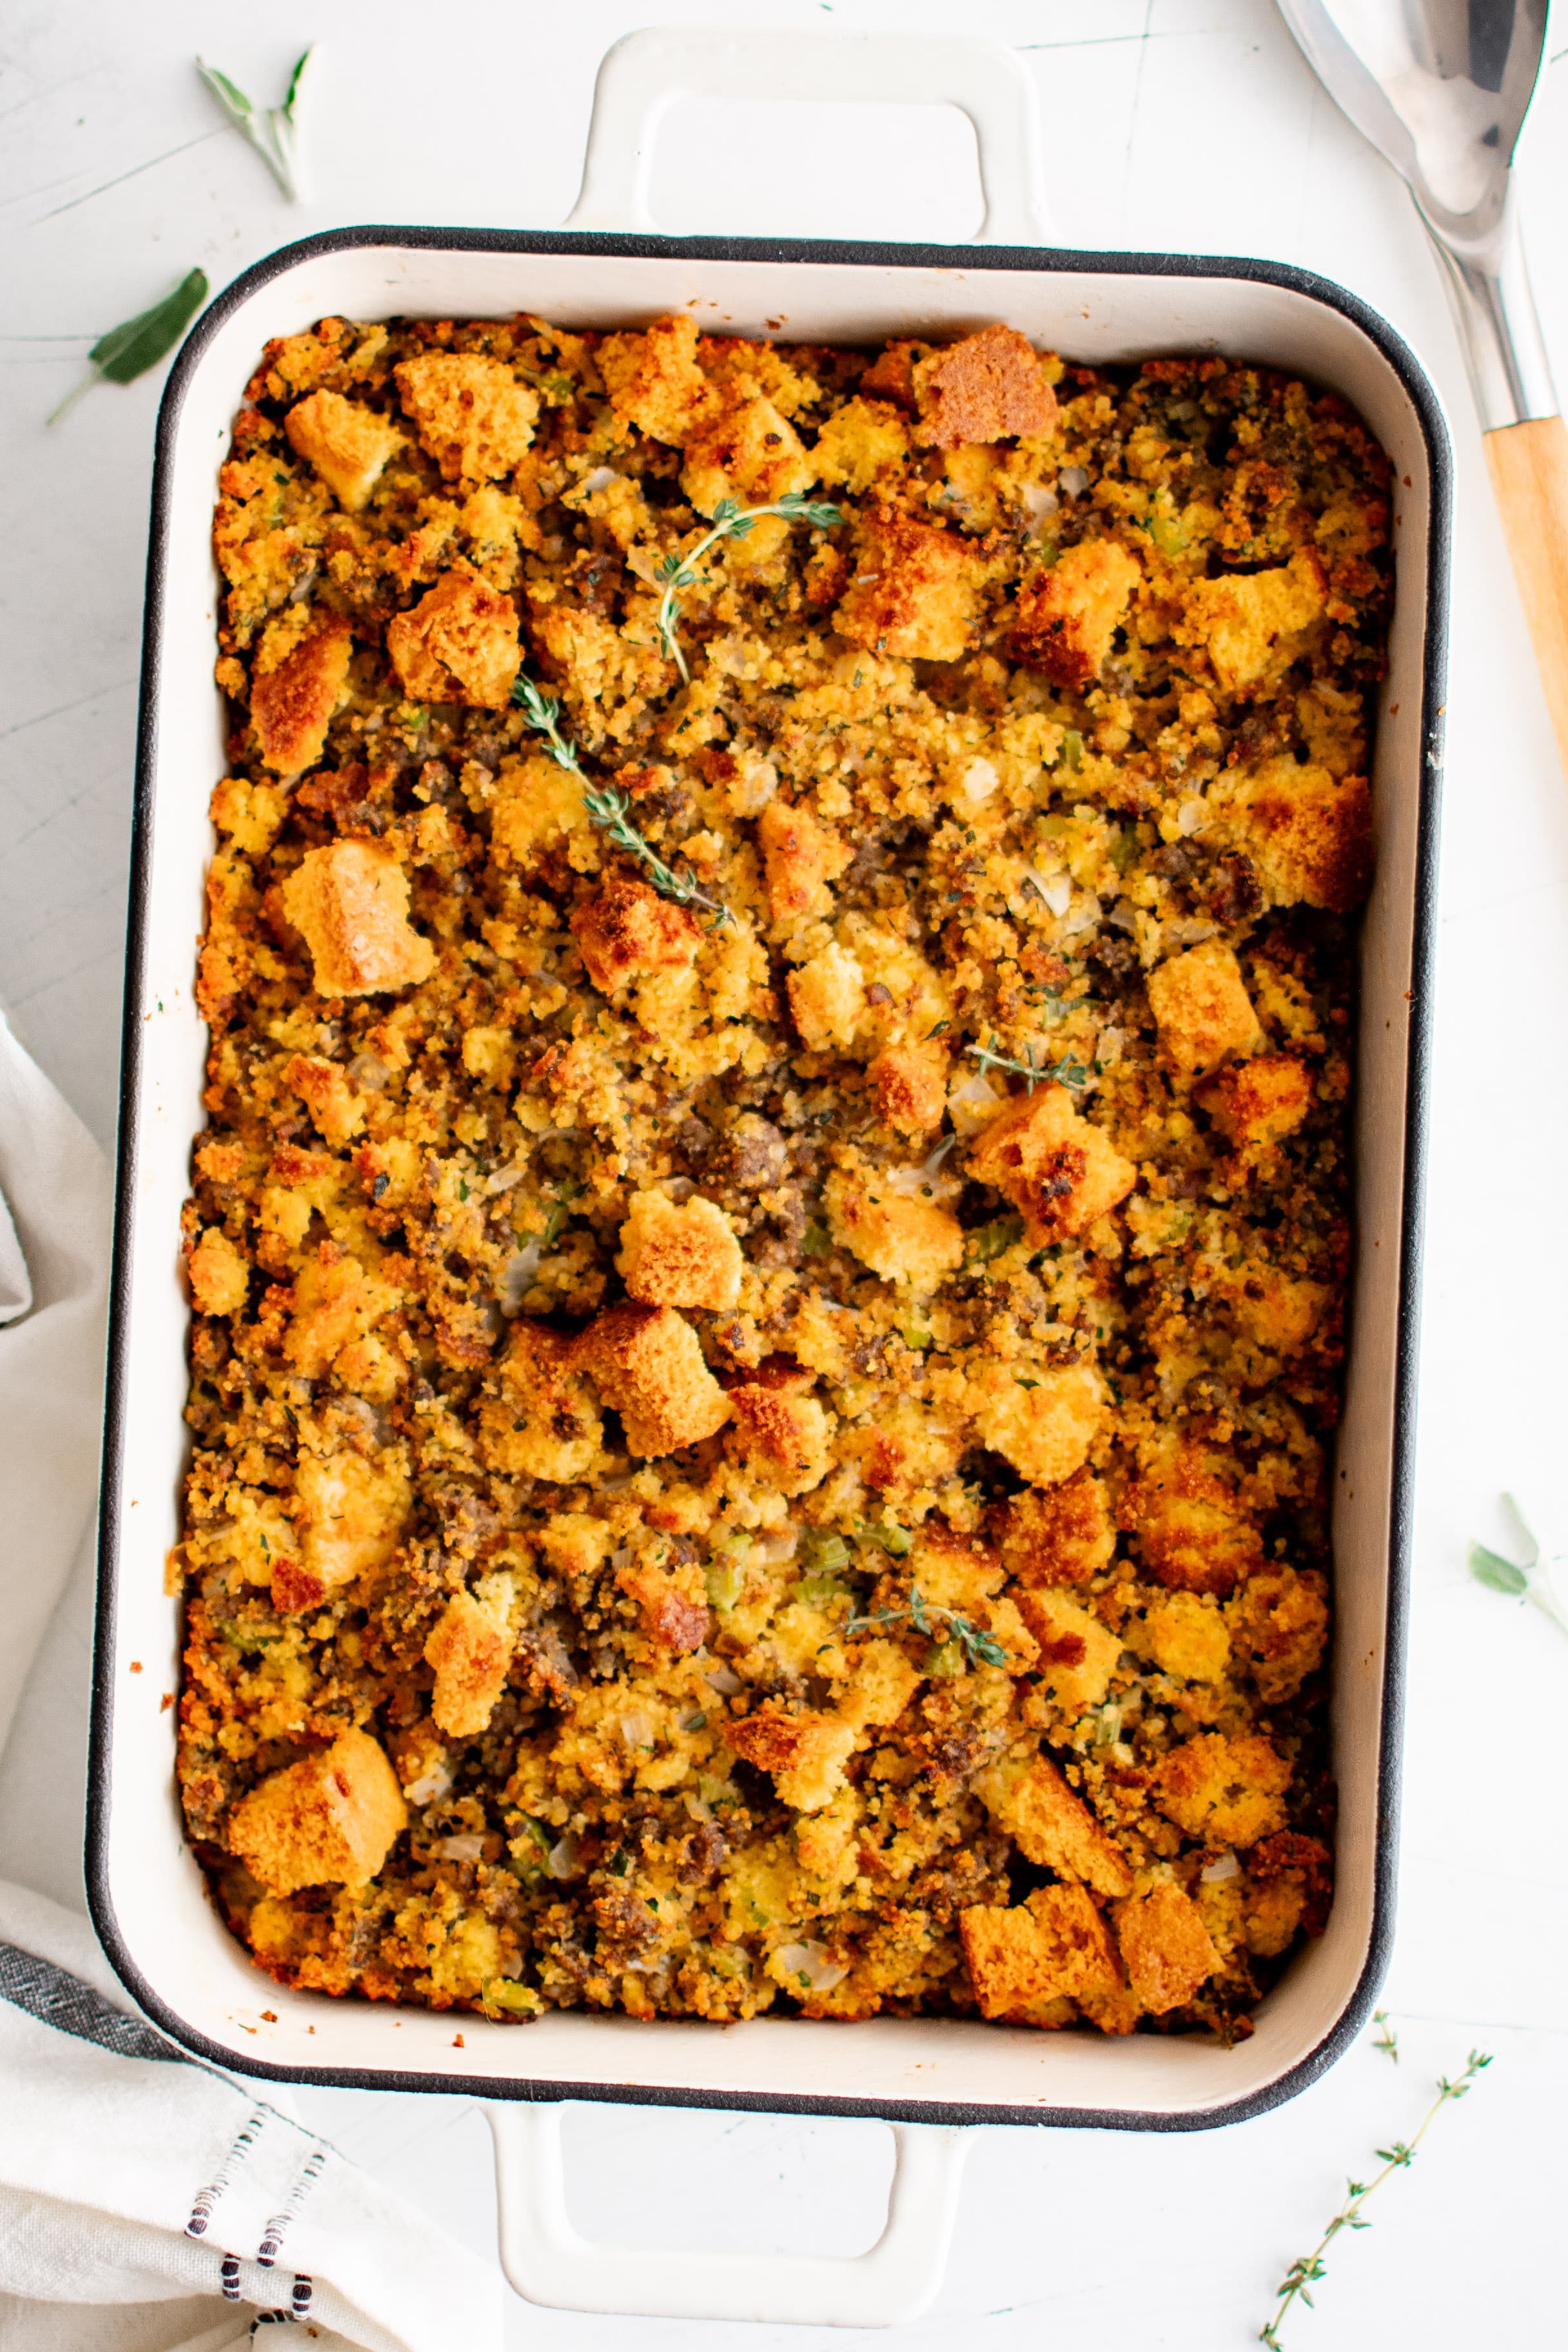
Cornbread dressing was completely new to me — growing up in Pakistan, we didn't do stuffing or dressing of any kind. The first time I made this, I underestimated how much broth it needed and ended up with something dry and crumbly. Second attempt, I was more generous with the liquid and it came out golden on top, moist in the middle, and genuinely satisfying. It's the kind of dish that smells like the holidays from the moment it goes into the oven — sage, celery, onion, warm broth. This earns a permanent spot on my Christmas table now.
Ingredients
- 1 pan (about 8 cups) crumbled cornbread, day-old or dried out
- 1 cup celery, diced (about 3 stalks)
- 1 medium yellow onion, diced
- 4 tablespoons unsalted butter
- 2 cups chicken broth (use vegetable broth to keep it vegetarian)
- 2 large eggs, beaten
- 1 teaspoon dried sage
- 1 teaspoon dried thyme
- ½ teaspoon salt, plus more to taste
- ½ teaspoon black pepper
Instructions
- Preheat your oven to 350°F. Grease a 9x13 inch baking dish and set aside.
- Melt butter in a skillet over medium heat. Add the diced onion and celery and cook for 5-7 minutes until softened and lightly golden.
- In a large bowl, combine the crumbled cornbread, cooked vegetables, sage, thyme, salt, and pepper. Toss gently to mix.
- Pour the beaten eggs and chicken broth over the cornbread mixture. Stir until everything is moistened — the mixture should be wet but not soupy. Add a splash more broth if it looks dry.
- Transfer to the prepared baking dish and bake uncovered for 40-45 minutes, until the top is golden brown and the center is set.
Tips
- Tip: Day-old or slightly dried-out cornbread absorbs the broth much better than fresh — leave it out uncovered overnight if you can.
- Tip: You can assemble this the night before, cover it, and refrigerate. Just add 10 extra minutes to the bake time if going straight from the fridge.
- Tip: Store-bought cornbread from Jiffy mix works perfectly here — no need to make it from scratch unless you want to.
4. Easy Creamed Spinach (Best Steakhouse Recipe)
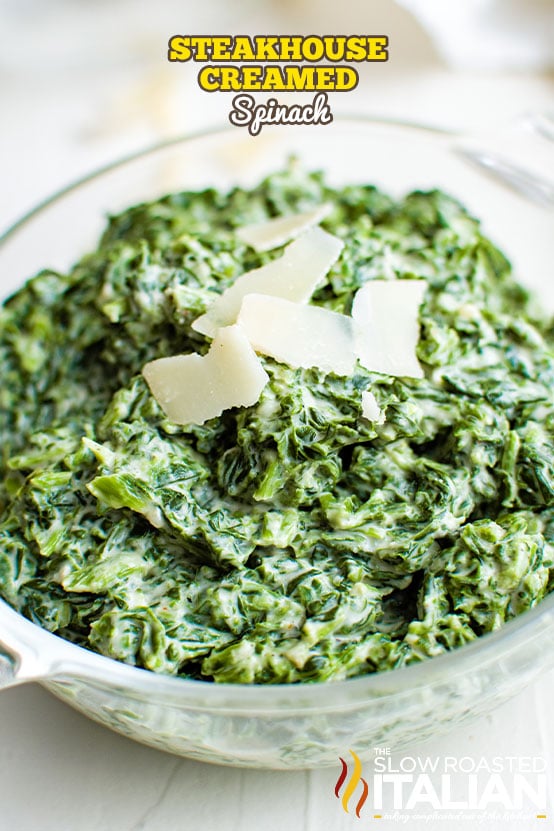
My husband loves a good steakhouse-style dinner at home, and this creamed spinach is what makes the whole plate feel complete. It's rich and velvety — the kind of side dish that you keep spooning onto your plate even when you think you're done. The nutmeg and Parmesan combination is what sets it apart from a plain cream sauce; it has this quiet warmth that makes everything taste more considered. It comes together in under 20 minutes too, which matters a lot on Christmas when the oven is already running three other things.
Ingredients
- 2 lbs fresh baby spinach (or three 10 oz frozen packages, thawed and squeezed very dry)
- 3 tablespoons unsalted butter
- 3 cloves garlic, minced
- 2 tablespoons all-purpose flour
- 1 cup heavy cream
- ½ cup whole milk
- ½ cup freshly grated Parmesan cheese
- ¼ teaspoon ground nutmeg
- Salt and black pepper to taste
Instructions
- If using fresh spinach, wilt it in batches in a large pot over medium-high heat with just the water clinging to the leaves. Once wilted, transfer to a colander and press out as much liquid as possible. Roughly chop and set aside.
- In the same pot, melt butter over medium heat. Add the minced garlic and cook for 1 minute until fragrant, stirring so it doesn't burn.
- Whisk in the flour and cook for 1-2 minutes to get rid of the raw flour taste. Slowly pour in the heavy cream and milk, whisking constantly until the sauce is smooth and begins to thicken, about 3-4 minutes.
- Stir in the Parmesan and nutmeg. Season with salt and pepper. Add the chopped spinach and fold everything together until well coated. Serve immediately.
Tips
- Tip: Squeezing the spinach thoroughly is the most important step — if you skip it, the extra water will thin out your cream sauce and it won't coat properly.
- Tip: Freshly grated Parmesan melts much more smoothly than the pre-shredded kind from a bag — worth the extra two minutes of grating.
- Tip: This reheats well the next day over low heat with a splash of milk stirred in to loosen the sauce back up.
5. Roasted Brussels Sprouts with Bacon
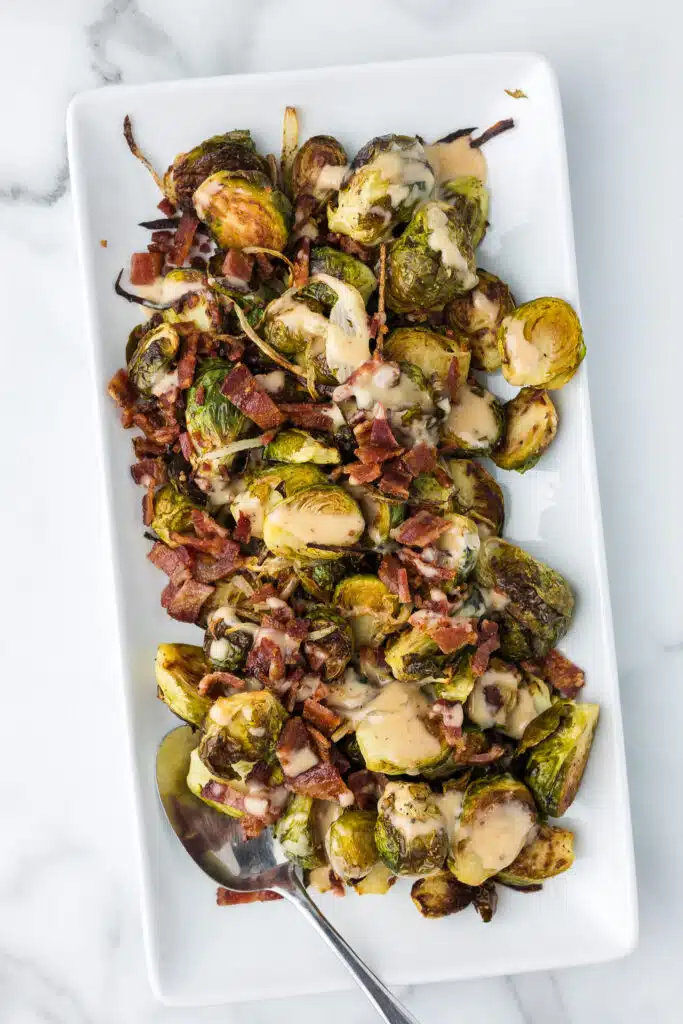
I'll be honest — Brussels sprouts have a reputation problem. I avoided them for years. Then I roasted them with bacon and everything changed. The high heat caramelizes the cut edges of the sprouts into something almost nutty, and the bacon fat does the rest of the work. This is the side dish that converts people. I've served it to guests who swore they hated Brussels sprouts and watched them go back for seconds without a word. The key is getting the oven hot and not overcrowding the pan.
Ingredients
- 1½ lbs Brussels sprouts, trimmed and halved
- 6 strips bacon, cut into ½-inch pieces
- 3 tablespoons olive oil
- 4 cloves garlic, minced
- ½ teaspoon salt
- ½ teaspoon black pepper
- 1 tablespoon balsamic vinegar (optional, but I always add it)
Instructions
- Preheat oven to 425°F. Line a large sheet pan with foil for easier cleanup.
- Toss the halved Brussels sprouts with olive oil, garlic, salt, and pepper. Spread them cut-side down in a single layer on the sheet pan — don't pile them up or they'll steam instead of roast.
- Scatter the bacon pieces evenly over the sprouts. Roast for 20-25 minutes, flipping halfway through, until the sprouts are caramelized and the bacon is crispy.
- Remove from the oven and drizzle with balsamic vinegar if using. Toss once and serve immediately.
Tips
- Tip: If your sprouts are very large, cut them into quarters instead of halves so they cook through evenly before the edges burn.
- Tip: Use two sheet pans if needed — overcrowding is the number one reason Brussels sprouts come out soggy instead of crispy.
- Tip: For a vegetarian version, skip the bacon and add a handful of chopped walnuts in the last 5 minutes of roasting for crunch.
6. Roasted Mashed Cauliflower
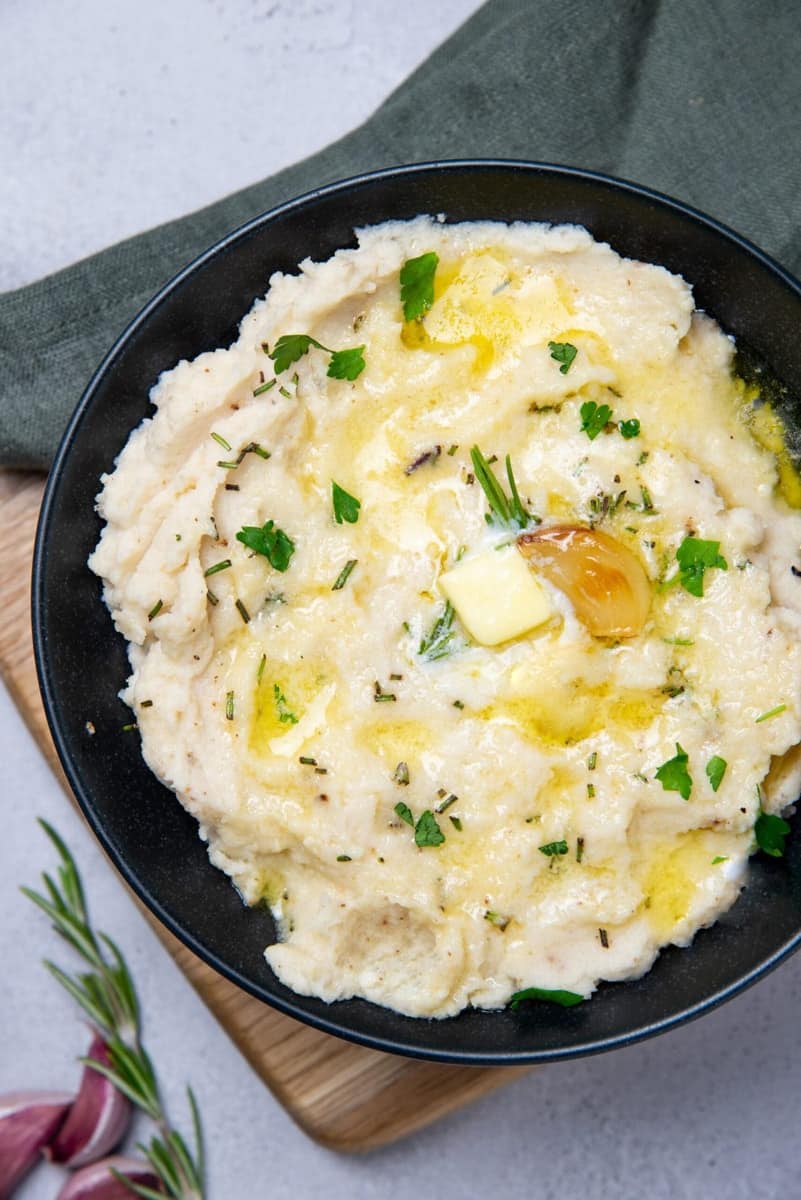
I started making this when I was trying to lighten up the Christmas table a little — you know how every dish ends up being cream and butter and more cream. Roasting the cauliflower first before mashing it is the move that makes all the difference; it concentrates the flavor and gets rid of the watery blandness that plain steamed cauliflower has. The result is something silky, garlicky, and genuinely satisfying — not just a sad stand-in for mashed potatoes, but a dish worth making on its own merits. It's also completely vegan if you use olive oil instead of butter.
Ingredients
- 1 large head cauliflower, cut into florets (about 6-7 cups)
- 4 cloves garlic, peeled and left whole
- 3 tablespoons olive oil, divided
- 2 tablespoons unsalted butter (or vegan butter)
- ¼ cup vegetable broth or warm water, as needed
- ½ teaspoon salt, plus more to taste
- ¼ teaspoon black pepper
- Fresh chives or parsley for garnish
Instructions
- Preheat oven to 425°F. Toss cauliflower florets and whole garlic cloves with 2 tablespoons of olive oil, salt, and pepper. Spread on a sheet pan in a single layer.
- Roast for 25-30 minutes, flipping once halfway through, until the cauliflower is deeply golden at the edges and tender all the way through.
- Transfer the roasted cauliflower and garlic to a food processor or blender. Add butter and the remaining tablespoon of olive oil. Blend until smooth, adding vegetable broth a splash at a time to reach your desired consistency. If you don't have a food processor, mash by hand with a potato masher — it'll be chunkier but still delicious.
- Taste and adjust salt. Transfer to a serving bowl and top with fresh chives or parsley.
Tips
- Tip: Don't skip the roasting step — steaming and then mashing gives you something watery and flat. The roasting is what builds the flavor.
- Tip: For an even richer result, stir in 2 tablespoons of cream cheese or sour cream when blending.
- Tip: This can be made a day ahead and reheated gently in a saucepan over low heat with a splash of broth to loosen it up.
7. Apple Sausage Stuffing
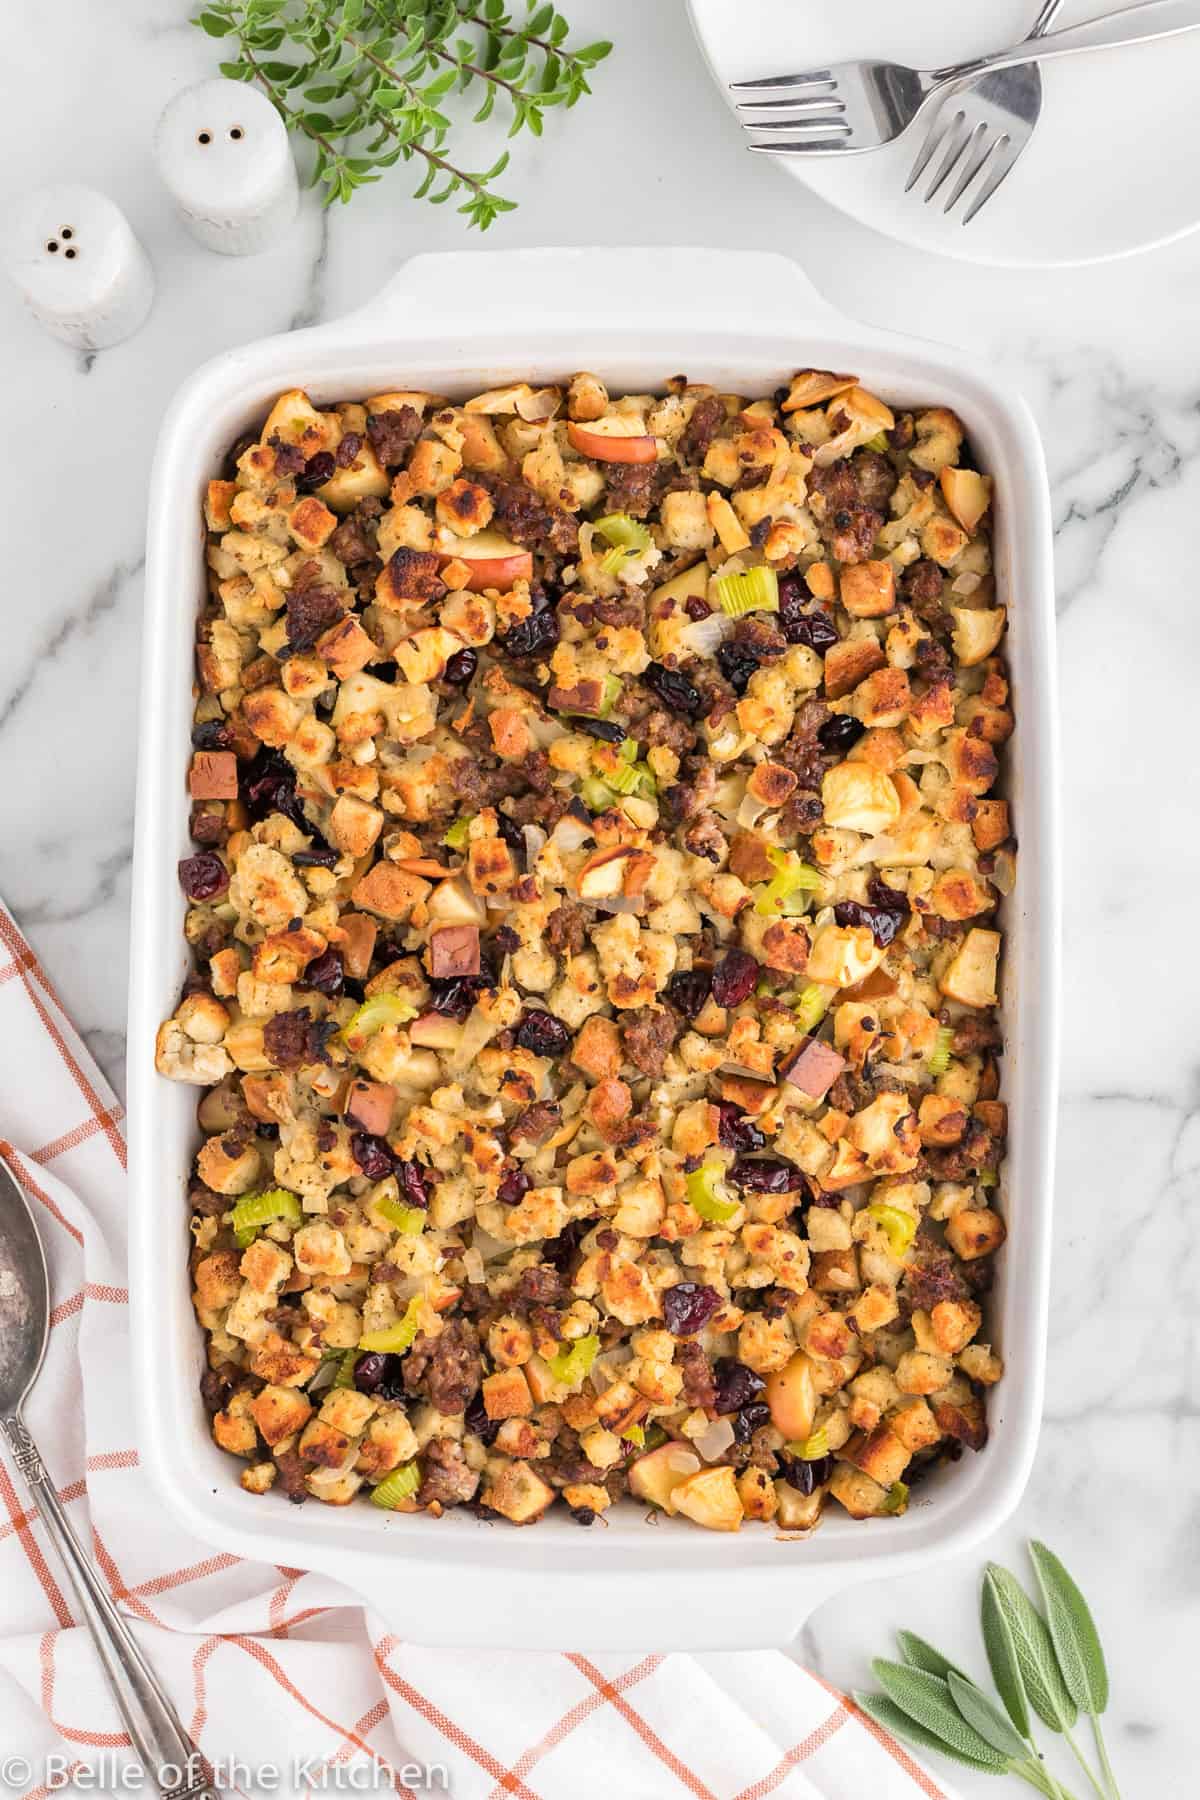
Stuffing with apple in it sounds odd if you haven't tried it, but the apple chunks do something really smart — they balance out the saltiness of the sausage and add little pockets of sweetness that make the whole dish feel more interesting than plain bread stuffing. I use a mild Italian sausage from Walmart, nothing fancy, and it works perfectly. Zainab picked out every apple piece the first time I made this, which told me exactly how much she likes it. The rest of us ate it fast enough that it didn't matter.
Ingredients
- 1 lb mild Italian pork sausage, casings removed
- 2 medium apples (Granny Smith or Honeycrisp), peeled and diced into ½-inch chunks
- 1 cup celery, diced
- 1 medium onion, diced
- 4 tablespoons unsalted butter
- 10 cups cubed bread (about 1 loaf), dried out overnight or toasted in the oven
- 2–2½ cups chicken broth
- 1 teaspoon dried sage
- 1 teaspoon dried thyme
- Salt and black pepper to taste
Instructions
- Preheat oven to 350°F. Grease a 9x13 inch baking dish and set aside.
- In a large skillet over medium-high heat, cook the sausage, breaking it up as it browns, about 6-8 minutes. Remove with a slotted spoon and set aside, leaving the drippings in the pan.
- Add butter to the same skillet. Cook the onion and celery over medium heat for 5 minutes until softened. Add the diced apple and cook for another 2-3 minutes until just slightly tender. Stir in the sage and thyme.
- In a large bowl, combine the dried bread cubes, cooked sausage, and vegetable mixture. Pour 2 cups of chicken broth over everything and toss gently. The bread should be moistened but not soggy — add the remaining broth gradually if needed. Season with salt and pepper.
- Transfer to the prepared baking dish, cover with foil, and bake for 30 minutes. Remove foil and bake an additional 15-20 minutes until the top is golden and slightly crisp.
Tips
- Tip: Granny Smith apples hold their shape better during baking; Honeycrisp will get softer and sweeter. Both work — just depends on what texture you prefer.
- Tip: This stuffing can be fully assembled the evening before and refrigerated unbaked. Pull it out 30 minutes before baking so it's not ice cold going into the oven.
- Tip: A sourdough or French bread loaf works best here — softer sandwich bread tends to turn mushy rather than giving you those nice chewy bites.
26. Super Crispy Air Fryer Smashed Potatoes

I came to smashed potatoes late — I always thought roasted potatoes were good enough, so why bother with the extra step? Then I tried smashing them and getting them into the air fryer and I genuinely can't go back. The outsides get shatteringly crispy while the centers stay fluffy and soft, and that contrast is everything. These are the kind of side dish that disappear before the main course even hits the table. If your air fryer basket is small, work in batches — don't crowd them or you'll lose the crunch.
Ingredients
- 1½ lbs small baby potatoes (Yukon gold or red work great)
- 3 tablespoons olive oil
- 1 teaspoon garlic powder
- 1 teaspoon smoked paprika
- ½ teaspoon onion powder
- ¾ teaspoon kosher salt
- ¼ teaspoon black pepper
- 2 tablespoons fresh parsley, chopped (for serving)
Instructions
- Boil the baby potatoes in salted water for 15–18 minutes until just fork-tender — you want them cooked through but not falling apart.
- Drain and let them sit for 5 minutes to steam dry. Place them on a cutting board and use the bottom of a glass or a flat spatula to smash each one to about ½ inch thick.
- In a small bowl, mix together olive oil, garlic powder, smoked paprika, onion powder, salt, and pepper. Brush or drizzle this mixture generously over both sides of each smashed potato.
- Preheat your air fryer to 400°F. Working in batches, place potatoes in a single layer in the basket and air fry for 12–15 minutes, flipping once halfway, until the edges are deep golden and crispy.
- Transfer to a serving plate, scatter with fresh parsley, and serve immediately while the crunch is at its peak.
Tips
- Tip: The drying step matters — wet potatoes steam instead of crisp. Give them a full 5 minutes after draining before you smash.
- Tip: No air fryer? Roast these on a sheet pan at 425°F for about 20–25 minutes, flipping once. Still very good, just slightly less crunchy on the edges.
- Tip: You can boil the potatoes a day ahead and refrigerate them — smash and air fry right before serving for a head start on Christmas day prep.
27. Cranberry Fluff Salad
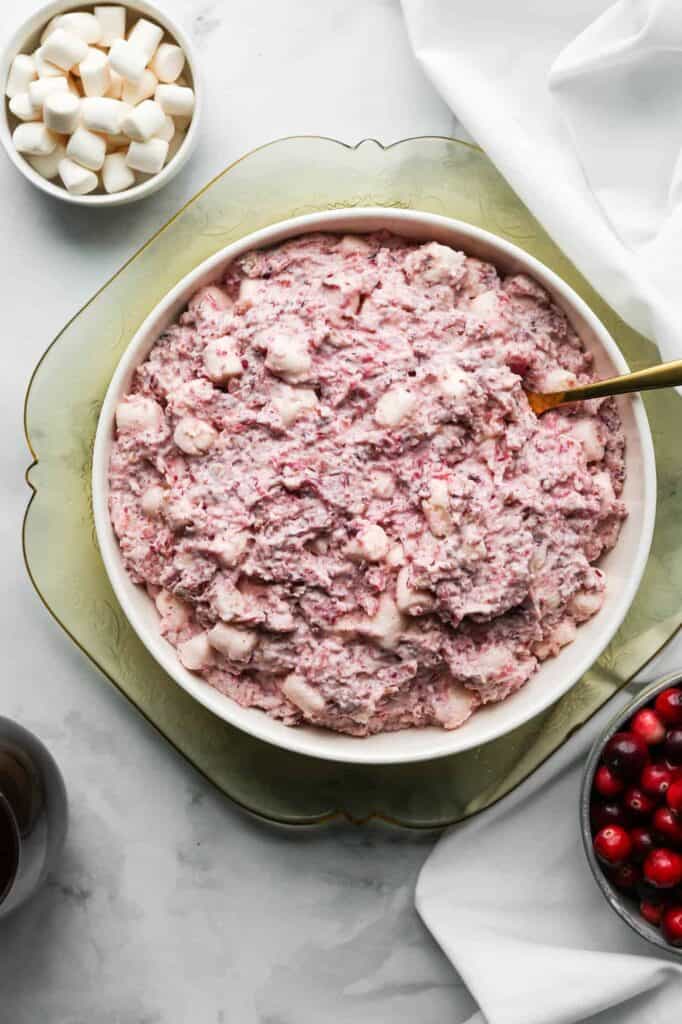
Growing up in Pakistan, we didn't have anything called a "fluff salad" — the first time I saw this at a Christmas potluck here I genuinely wasn't sure what to make of it. Then I tried it and understood immediately why it shows up on every holiday table. It's sweet, tangy, and impossibly light, with fresh cranberries folded into whipped cream and studded with mini marshmallows. It's not pretending to be a health food. It's a festive, crowd-pleasing, no-bake side that takes maybe 15 minutes to put together and always gets eaten completely. Saad called it "pink cloud food" the first time I made it, and honestly that's a fair description.
Ingredients
- 12 oz fresh cranberries, coarsely chopped
- ¾ cup granulated sugar
- 2 cups miniature marshmallows
- 1 cup heavy whipping cream, whipped to stiff peaks (or 2 cups Cool Whip thawed)
- 1 can (8 oz) crushed pineapple, well drained
- ½ cup pecans or walnuts, roughly chopped (optional)
Instructions
- Coarsely chop the fresh cranberries in a food processor (or by hand with a sharp knife) — you want small pieces, not a paste. Transfer to a bowl, stir in the sugar, and let them sit for at least 30 minutes so the sugar draws out the juice and takes the edge off the tartness.
- After 30 minutes, drain off any excess liquid that has pooled in the bowl — this keeps your fluff from getting watery.
- Stir in the drained crushed pineapple and mini marshmallows until evenly combined.
- Fold in the whipped cream gently — don't stir aggressively or you'll deflate it. Add the chopped nuts if using and fold through once more.
- Cover and refrigerate for at least 2 hours before serving. Overnight is even better — the marshmallows soften slightly and everything melds together beautifully.
Tips
- Tip: Don't skip draining the cranberry-sugar mixture and the pineapple — excess liquid is the main reason this dish turns watery instead of fluffy.
- Tip: Cool Whip works perfectly here if you don't want to whip cream from scratch — use the full 8 oz tub.
- Tip: This is a great make-ahead dish — assemble it the night before Christmas and it's one less thing to think about on the day itself.
Twenty-seven recipes is a lot to look at, but here's how I use a list like this: I pick one or two things I've never tried, keep two or three of my reliable standbys, and call it a Christmas table. You don't need to make all of them. You need to make the ones that fit your oven, your family, and your actual time on the 25th. That's the only rule I follow.
Saad always lobbies for the mashed potatoes — every year, same kid, same argument. Zainab wants the roasted carrots because they're sweet. My husband will eat whatever I put in front of him without complaint, which honestly makes him my favorite dinner guest. The point is, a good Christmas spread isn't about impressing anyone. It's about the table being full and the people around it being fed. These 27 sides will get you there.
I hope at least a handful of these earn a permanent spot on your holiday table the way they have on mine. If you try one and it works, save it. Write it down. Dog-ear the page. That's how a family food tradition actually starts — not with a perfect plan, just a dish someone loved enough to make again. 🎄✨🍽️
More Holiday Recipes From My Kitchen
- Christmas Dinner Recipes — if the sides are sorted, here's where to find your main dish ideas too
- Christmas Dessert Recipes — because no Christmas table ends without something sweet
- Christmas Appetizers — the snacks people graze on before the real meal; these disappear fast
- Holiday Punch Recipes — drinks for the table, both with and without alcohol
- Easy Weeknight Dinners — for the week after Christmas when nobody wants to cook anything complicated
Frequently Asked Questions
How many side dishes do you actually need for Christmas dinner?
Honestly, three or four solid ones is plenty. I usually do one starchy side, one vegetable, one salad or something lighter, and one wild card that changes every year. More than five and you're just stressing yourself out with a full oven and cold food. Pick the ones that can be made ahead or held warm, and don't overload yourself.
Which of these Christmas side dishes can be made the day before?
Most of the casseroles, gratins, and stuffing-style dishes actually taste better the next day once everything melds together. Mashed potatoes reheat well with a splash of warm cream stirred in. Roasted vegetables are the trickiest — I prefer to prep them the night before (cut, seasoned, on the pan) and roast them fresh on the day. Salads and anything with fresh herbs should definitely be done the day-of.
What's a good Christmas side dish for someone who doesn't eat meat?
Most of the vegetable sides and potato dishes on this list are naturally meat-free. The roasted Brussels sprouts, garlic green beans, mashed sweet potatoes, and any of the salads work well for vegetarian guests. Just double-check that you're using vegetable stock instead of chicken stock wherever a recipe calls for it — that's usually the only swap needed.
Can I make Christmas side dishes if I only have one oven?
Yes — and this is something I deal with every year. The trick is to pick sides with different cooking temperatures or methods so they're not all competing for oven space at the same time. Do your stovetop sides (mashed potatoes, creamed spinach, sautéed green beans) while the oven is busy with the main. Casseroles can go in while the main rests. I always map out oven timing the night before so I'm not panicking on the day.
Which side dish from this list is the easiest for a beginner cook?
Roasted vegetables are my go-to answer for anyone new to cooking. You cut things up, toss them in olive oil, salt, and pepper, and put them in a hot oven. That's genuinely it. Mashed potatoes are also very forgiving — even if you over-mash them a little, warm cream and butter will rescue them almost every time. Start simple and you'll be fine.
Share This Post!
If this list helped you plan your Christmas table, save it to Pinterest or share it with whoever's in charge of sides this year — they'll thank you for it. 🎄✨
View More Recipes here Recipe Roundups





Comments
No Comments