
Summer in our house means the grill is on, the kids are outside until dark, and I'm in the kitchen trying to figure out what to put next to the chicken. Summer side dishes are where I actually spend most of my cooking energy this time of year — not on the main, but on the things that fill out the table. A great side dish can turn a simple grilled piece of meat into a full meal, and when it's hot outside, you want something that doesn't require you to stand over a stove for an hour. That's the standard I've been holding these to for years.
What makes a summer side actually worth making? For me it comes down to three things: it has to be fast, it has to taste good at room temperature (because outdoor eating doesn't wait for anything), and it has to work with whatever else is already on the menu. A side that wilts after ten minutes or needs to be eaten immediately off the stove doesn't really function at a picnic or a backyard dinner. If you're building your warm-weather meal rotation, I also have some thoughts on summer salad recipes that pair really well with these sides.
This list has twenty-six recipes — everything from a German Cucumber Salad that takes about ten minutes to throw together, to a Frito Corn Salad that Zainab started requesting specifically for every barbecue we host, to a Burrata Salad with Roasted Tomatoes that looks way more impressive than the effort it takes. There are pasta salads, bean salads, slaws, a few tomato-heavy options for when the summer tomatoes are actually good, and some vegetable sides that work equally well hot or cold. If you're planning a bigger spread, my BBQ side dishes roundup and my notes on easy picnic food ideas cover even more ground.
Here are the twenty-six I keep coming back to — pick whatever fits your table this week.

Top 26 Easy Summer Side Dishes
25. German Cucumber Salad

I made this salad on a whim one afternoon when I had too many cucumbers sitting in the fridge and zero energy to do anything complicated. The dressing is creamy and tangy at the same time — a mix of sour cream, vinegar, and dill that somehow tastes like it took effort even though it really didn't. It's light enough to sit next to anything grilled without competing, and it actually gets better after 20 minutes in the fridge when the cucumbers soak up the dressing. If you've never tried German-style cucumber salad before, this is a great entry point.
Ingredients
- 2 large English cucumbers, thinly sliced
- ½ teaspoon salt (for drawing out moisture)
- ½ cup sour cream (or plain Greek yogurt)
- 2 tablespoons white wine vinegar
- 1 teaspoon sugar
- 2 tablespoons fresh dill, chopped (or 1 teaspoon dried dill)
- ¼ small red onion, very thinly sliced
- Black pepper to taste
Instructions
- Toss the sliced cucumbers with salt in a colander and let them sit for 15 minutes. This pulls out excess water so your dressing doesn't end up watery and thin.
- Pat the cucumbers dry with a paper towel, then transfer to a large bowl with the sliced red onion.
- In a small bowl, whisk together the sour cream, white wine vinegar, sugar, dill, and black pepper until smooth.
- Pour the dressing over the cucumbers and toss gently to coat everything. Taste and adjust salt or vinegar as needed.
- Refrigerate for at least 20 minutes before serving so the flavors come together. Serve cold.
Tips
- Tip: Don't skip salting the cucumbers first — it's the step that keeps the salad from becoming a soggy mess after 30 minutes on the table.
- Tip: A mandoline makes the slicing very fast and gives you even, thin slices — but a sharp knife works perfectly well if you don't own one.
- Tip: This keeps in the fridge for up to 2 days, though it gets a bit more liquid over time. Just drain a little before serving if needed.
24. Asparagus Orzo with Peas

Orzo is one of those ingredients I always have in my pantry because it cooks in about 8 minutes and makes any dish look more put-together than it actually is. This version with asparagus and peas is genuinely one of the prettiest side dishes I put on the table in summer — all that green looks like you tried hard. It works warm or at room temperature, which makes it great for a picnic or backyard dinner where things sit out for a while. A squeeze of lemon at the end ties everything together.
Ingredients
- 1 cup dry orzo pasta
- 1 bunch asparagus (about 1 lb), woody ends snapped off, cut into 1-inch pieces
- 1 cup frozen peas, thawed
- 2 tablespoons olive oil
- 2 cloves garlic, minced
- Zest and juice of 1 lemon
- ¼ cup Parmesan, grated (optional but recommended)
- Salt and black pepper to taste
- Fresh mint or basil leaves for garnish (optional)
Instructions
- Cook orzo in well-salted boiling water according to package directions, usually about 8 minutes. In the last 2 minutes of cooking, add the asparagus pieces directly to the pot. Drain everything together.
- While the orzo drains, heat olive oil in the same pot over medium heat. Add garlic and cook for about 1 minute until fragrant — don't let it brown.
- Return the orzo and asparagus to the pot along with the thawed peas. Toss everything together over low heat for about a minute.
- Remove from heat and stir in lemon zest, lemon juice, and Parmesan. Season generously with salt and pepper.
- Taste and adjust seasoning. Serve warm or at room temperature, scattered with fresh herbs if you have them.
Tips
- Tip: Cook the asparagus in the pasta water in the last 2 minutes rather than separately — it saves a pot and the asparagus comes out tender without getting mushy.
- Tip: If you're making this ahead for a picnic, hold off on the lemon juice until right before serving so it stays bright and fresh-tasting.
- Tip: No Parmesan on hand? A small handful of crumbled feta works really well here too and gives it a slightly saltier, tangier edge.
23. Pesto Gnocchi
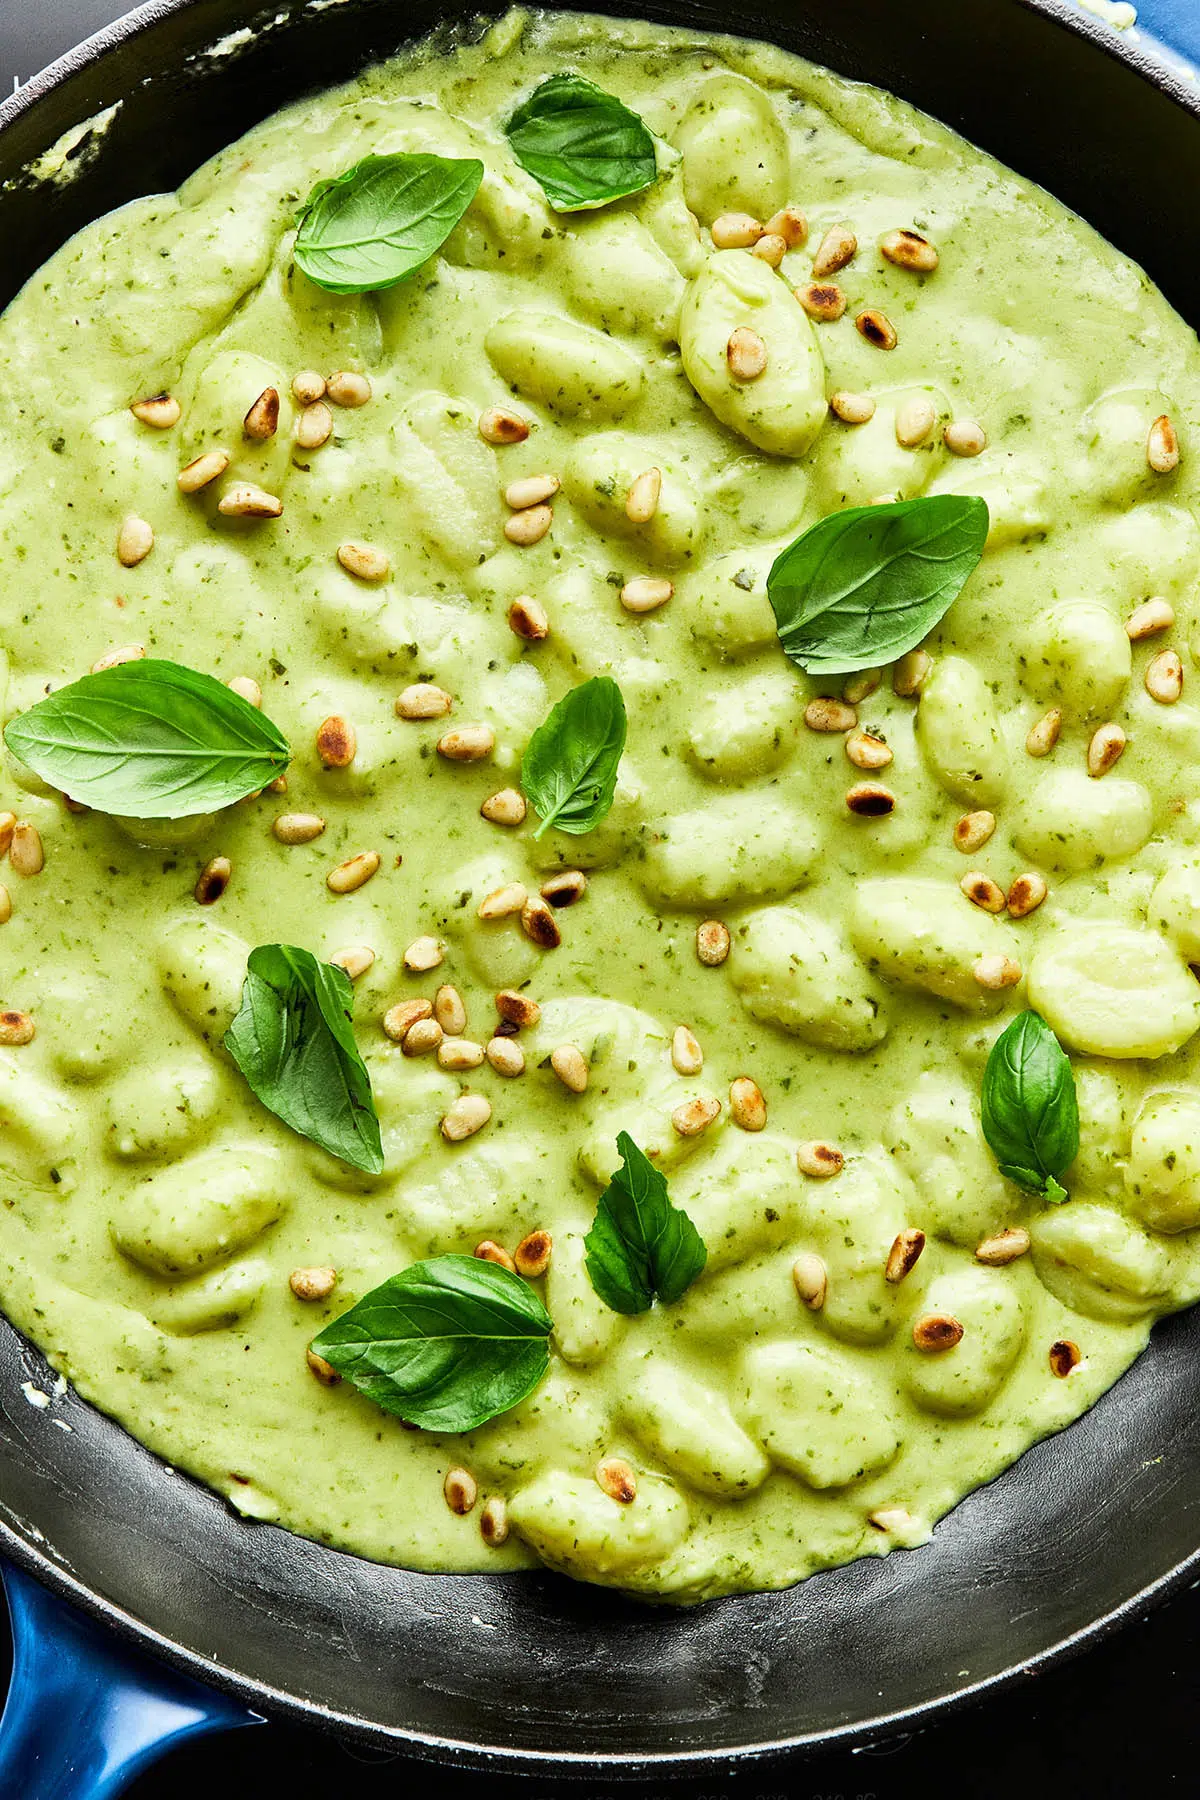
Shelf-stable gnocchi from Trader Joe's or Walmart is one of those pantry shortcuts I'm completely unapologetic about. You pan-fry it until the outside gets slightly crispy, toss it with pesto, and you have a side dish that feels way more impressive than the five minutes it took. I won't pretend this is authentic Italian — it's very much my quick weeknight version — but my family has never once complained. Zainab actually requests this more than anything else when I ask what she wants with grilled chicken.
Ingredients
- 1 lb shelf-stable or refrigerated gnocchi
- 2 tablespoons olive oil
- 3 tablespoons basil pesto (store-bought is fine)
- 2 tablespoons heavy cream (optional, for a creamier sauce)
- ¼ cup Parmesan, grated
- Salt and black pepper to taste
- Fresh basil leaves for garnish
Instructions
- Heat olive oil in a large skillet over medium-high heat. Add gnocchi in a single layer — don't stir for the first 2 minutes so they develop a golden crust on one side.
- Toss the gnocchi and cook for another 2-3 minutes until they're golden and slightly crispy in spots. Reduce heat to medium-low.
- Add pesto and heavy cream (if using) and toss to coat evenly. Cook for 1 more minute until the sauce clings to the gnocchi.
- Remove from heat, season with salt and pepper, and scatter Parmesan and fresh basil over the top. Serve immediately.
Tips
- Tip: Don't boil the gnocchi first when pan-frying — go straight from package to pan. The direct heat gives you that lightly crispy exterior that makes this dish worth making.
- Tip: Pesto varies a lot in saltiness depending on the brand, so taste before adding any extra salt at the end.
- Tip: This is best eaten right away — gnocchi gets a bit gummy as it sits, so don't make it too far ahead if you can help it.
22. White Bean Antipasto Salad
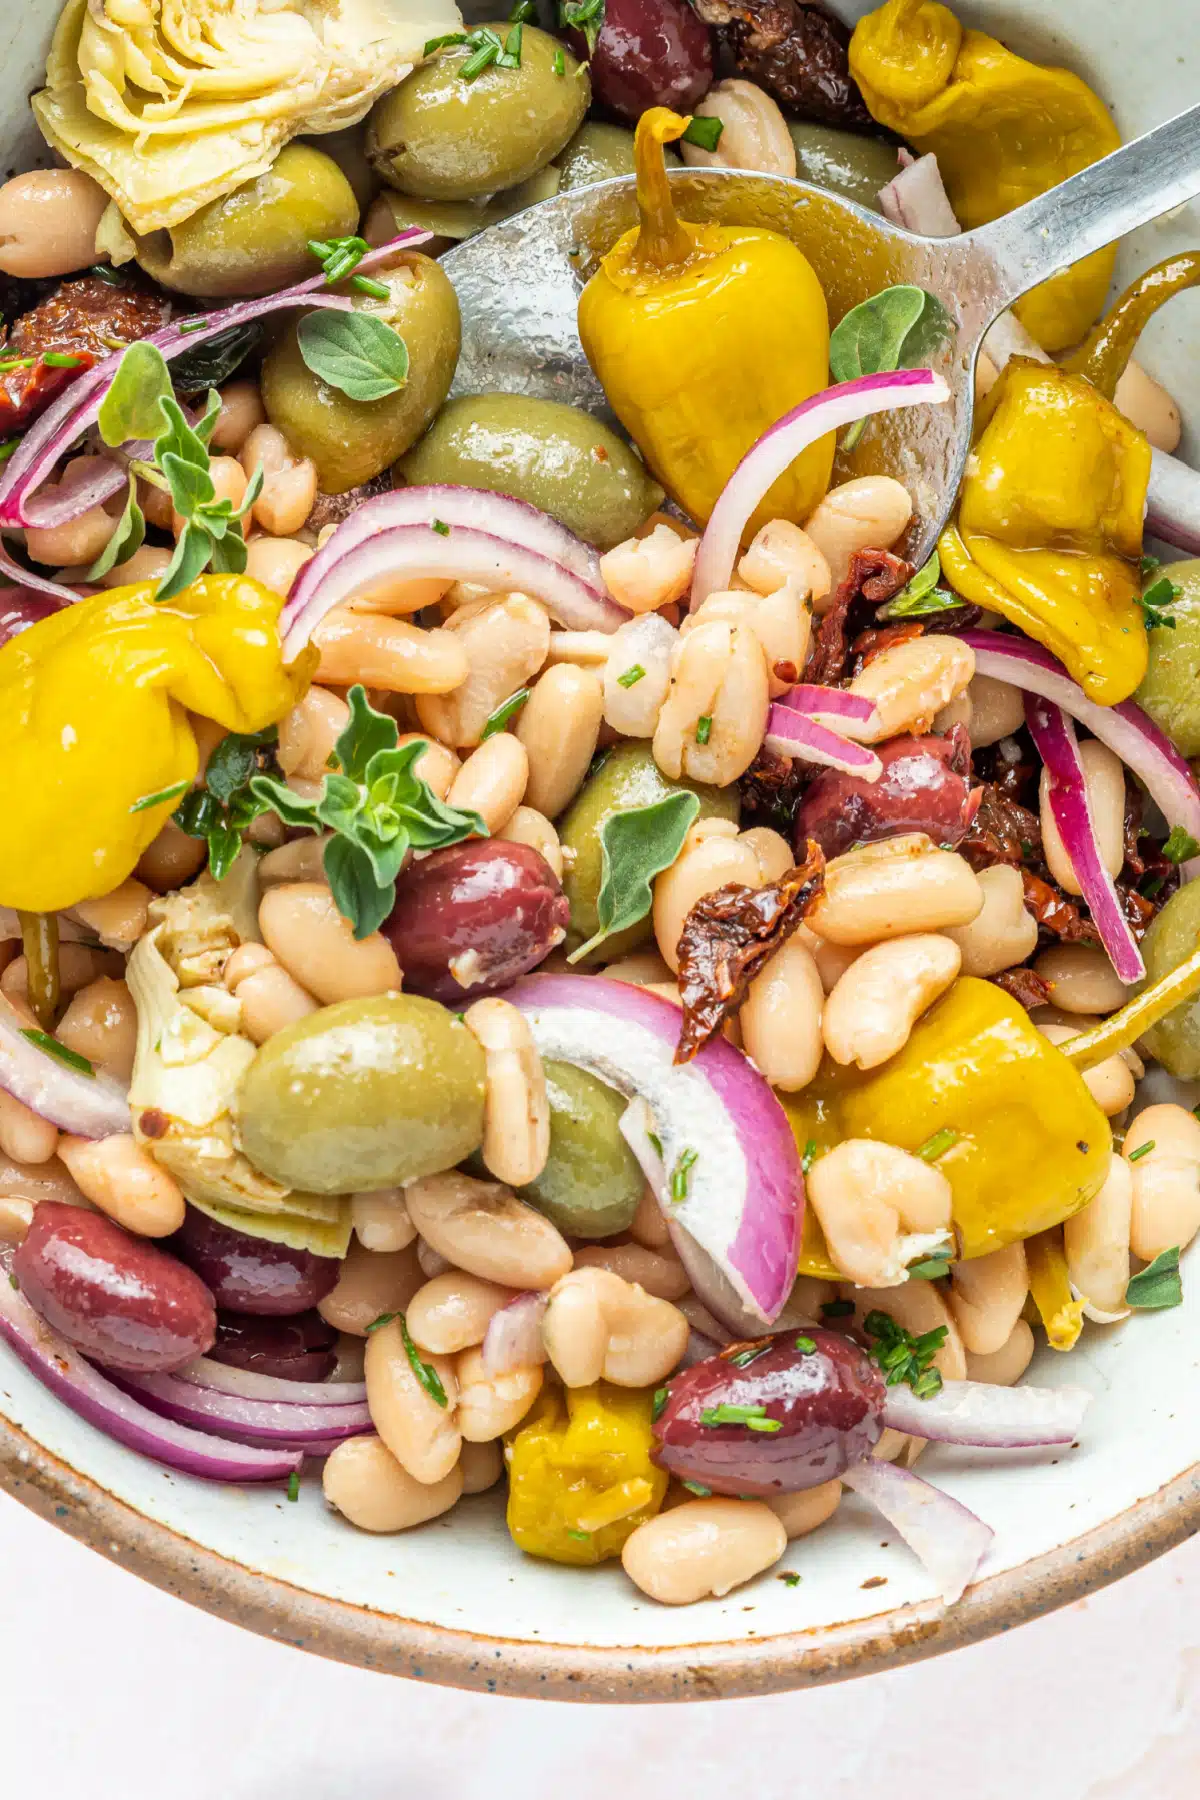
This salad is the one I bring to potlucks when I don't know what the main dish is going to be, because it goes with absolutely everything. White beans are hearty enough that this holds up for hours on a table without wilting, and the combination of olives, roasted peppers, and artichoke hearts gives you all the bold, briny antipasto flavors in a format that's actually filling. I use a can of cannellini beans from Walmart and whatever jarred antipasto items I have — it comes together in under 10 minutes with no cooking required. It's the kind of side dish that makes people think you planned ahead.
Ingredients
- 1 can (15 oz) cannellini beans, drained and rinsed
- ½ cup Kalamata olives, halved
- ½ cup jarred roasted red peppers, drained and chopped
- ½ cup marinated artichoke hearts, drained and roughly chopped
- ¼ cup sun-dried tomatoes in oil, drained and sliced
- ¼ cup fresh parsley, chopped
- 3 tablespoons olive oil
- 2 tablespoons red wine vinegar
- 1 teaspoon dried oregano
- Salt and black pepper to taste
Instructions
- Add the drained cannellini beans, olives, roasted peppers, artichoke hearts, sun-dried tomatoes, and parsley to a large bowl.
- In a small bowl, whisk together olive oil, red wine vinegar, and dried oregano. Pour over the salad and toss gently so the beans don't break apart.
- Taste before adding salt — the olives and artichokes are already salty, so you may not need much. Add black pepper and adjust vinegar to your preference.
- Let the salad sit for at least 10 minutes before serving so the beans absorb the dressing. Serve at room temperature or slightly chilled.
Tips
- Tip: This salad is very forgiving — swap in whatever jarred antipasto items you have. Pepperoncini, green olives, or marinated mushrooms all work well here.
- Tip: Make it up to a day ahead and store covered in the fridge. The flavors deepen overnight and it honestly tastes better the next day.
- Tip: A handful of crumbled feta stirred in right before serving adds a creamy element that takes this from simple to really satisfying.
17. Simple Chickpea Salad

Growing up, chickpeas were always in our kitchen — but we cooked them in curry, never in a cold salad. This version converted me. It's just canned chickpeas tossed with crisp cucumber, tomato, red onion, fresh parsley, and a simple lemon-olive oil dressing. The whole thing takes maybe ten minutes, and it holds up well in the fridge for a couple of days, which makes it great for packing alongside lunches or setting out at a barbecue. I've started keeping a batch ready in summer because it goes with almost everything — grilled chicken, burgers, rice, whatever.
Ingredients
- 2 cans (15 oz each) chickpeas, drained and rinsed
- 1 cup cherry tomatoes, halved
- 1 medium cucumber, diced
- ¼ cup red onion, finely diced
- ⅓ cup fresh parsley, roughly chopped
- 3 tablespoons olive oil
- 2 tablespoons fresh lemon juice
- 1 teaspoon cumin
- ½ teaspoon garlic powder
- Salt and black pepper to taste
Instructions
- Drain and rinse the chickpeas well, then pat them dry with a paper towel — this helps the dressing actually stick instead of sliding off.
- Add chickpeas, tomatoes, cucumber, red onion, and parsley to a large bowl.
- Whisk together the olive oil, lemon juice, cumin, garlic powder, salt, and pepper in a small bowl or jar.
- Pour the dressing over the salad and toss everything together. Taste and adjust salt or lemon as needed.
- Let it sit for at least 10 minutes before serving so the chickpeas absorb the dressing. Serve at room temperature or chilled.
Tips
- Tip: If you find raw red onion too sharp, soak the diced onion in cold water for 5 minutes before adding — it mellows the bite significantly.
- Tip: This salad keeps in the fridge for up to 3 days in a sealed container, and honestly tastes better on day two once everything has marinated.
- Tip: Add a crumble of feta cheese on top if you want something a little more substantial — it works really well with the lemon dressing.
18. Quick Refrigerator Pickled Beets
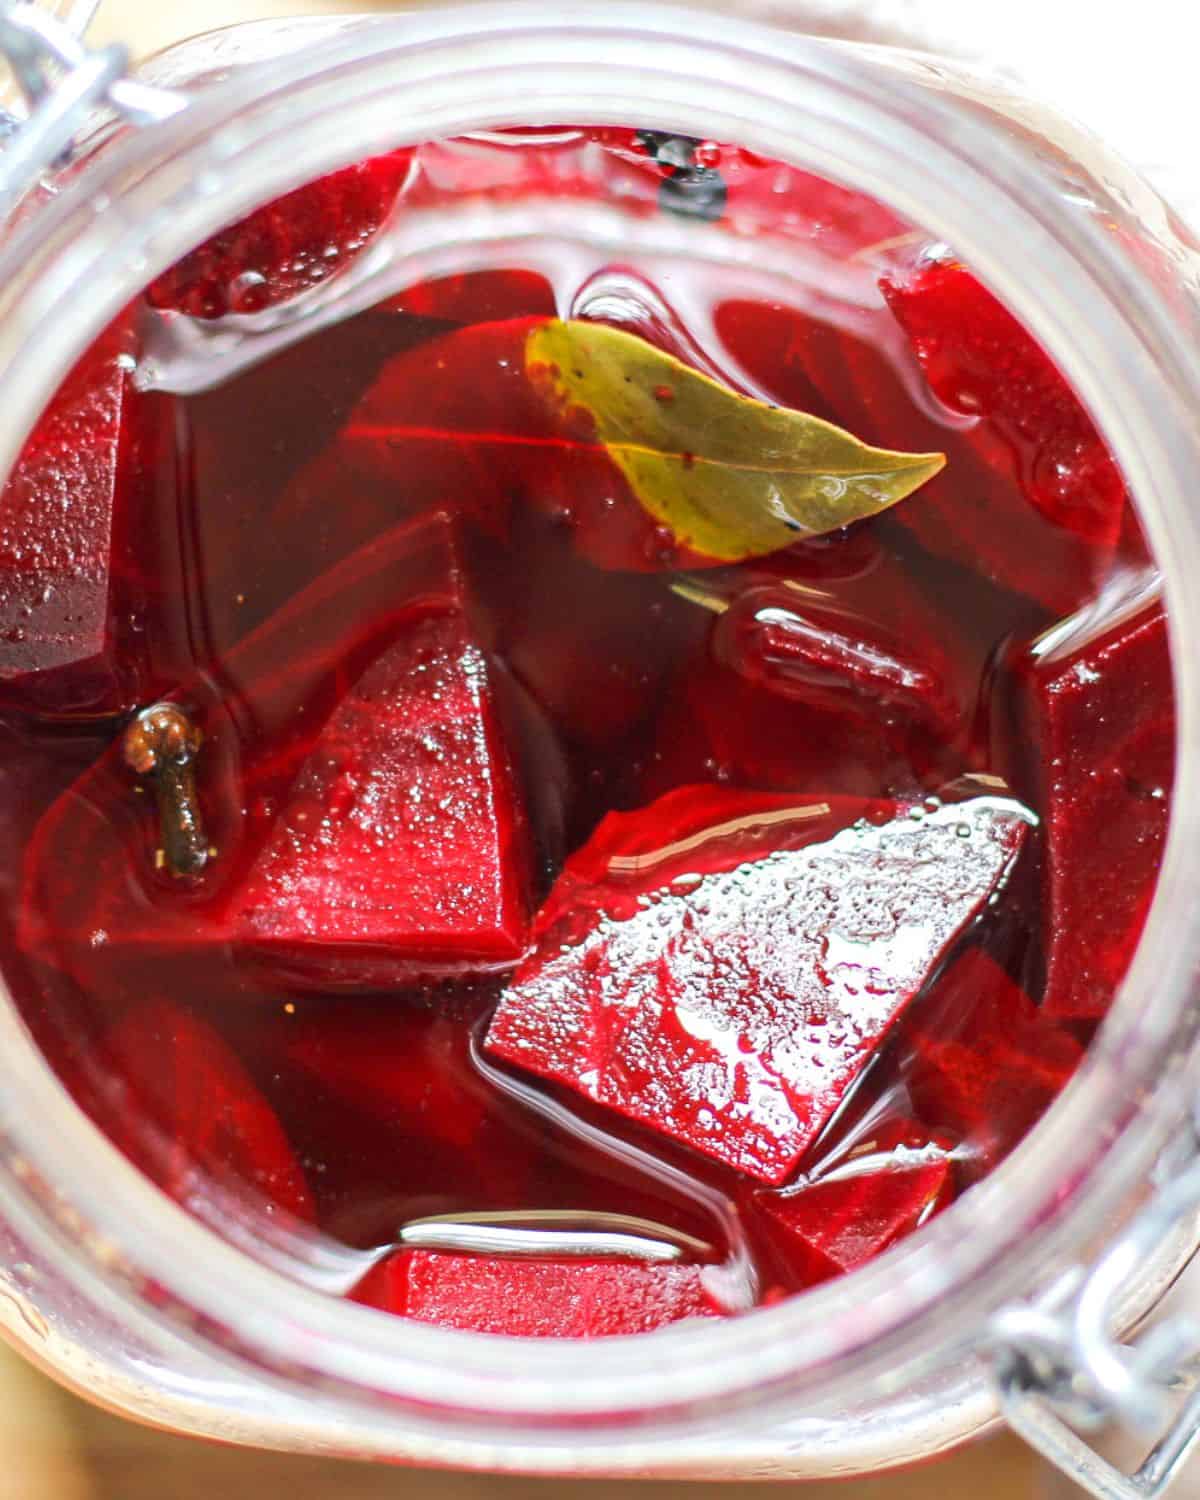
I'll be honest — I avoided beets for years. They felt complicated and earthy and I didn't know what to do with them. Then I tried quick refrigerator pickled beets and everything changed. You cook the beets, slice them, and pour a simple vinegar brine over them. No canning equipment, no special jars, no complicated process. Just a few hours in the fridge and you have something tangy and deeply colored that makes any plate look striking. They're great on grain bowls, alongside grilled meats, or just eaten straight from the jar when no one's watching.
Ingredients
- 1½ lbs fresh beets (about 4 medium), scrubbed
- ¾ cup white vinegar or apple cider vinegar
- ¾ cup water
- 3 tablespoons sugar
- 1 teaspoon salt
- ½ teaspoon whole black peppercorns
- 2 garlic cloves, lightly smashed
Instructions
- Place the whole beets in a pot, cover with water, and boil for 35–45 minutes until a knife slides in easily. Drain and let them cool enough to handle.
- Peel the beets — the skins slip right off with your fingers once they're cooked. Slice into ¼-inch rounds or wedges.
- In a small saucepan, combine vinegar, water, sugar, and salt. Heat over medium, stirring until the sugar dissolves. Remove from heat.
- Pack the beet slices into a clean glass jar or container. Add the peppercorns and smashed garlic cloves.
- Pour the warm brine over the beets, making sure they're fully submerged. Let cool to room temperature, then seal and refrigerate for at least 2 hours before serving.
Tips
- Tip: Wear gloves when peeling beets — the color stains your hands (and your cutting board) something fierce. I learned this the hard way before a dinner party.
- Tip: These keep in the fridge for up to 2 weeks, so make a big batch at the start of the week and use them across multiple meals.
- Tip: If you're short on time, canned beets work as a shortcut — just skip the cooking step and go straight to packing and brining.
19. Easy Sautéed Balsamic Asparagus with Parmesan

Asparagus intimidated me for a while — I kept either undercooking it (squeaky and raw-tasting) or overcooking it until it went limp and grey. Sautéing it in a hot skillet fixed both problems. You get tender-crisp spears with a little caramelization, and then the balsamic glaze and freshly grated Parmesan take it somewhere really nice. This comes together in under fifteen minutes and looks like you put in way more effort than you actually did. It's become my go-to when I need a quick vegetable side that doesn't feel like an afterthought.
Ingredients
- 1 lb asparagus, woody ends trimmed
- 2 tablespoons olive oil
- 3 garlic cloves, minced
- 2 tablespoons balsamic vinegar
- 1 teaspoon honey
- ¼ cup freshly grated Parmesan cheese
- Salt and black pepper to taste
- Lemon wedge for serving (optional)
Instructions
- Heat olive oil in a large skillet over medium-high heat. Make sure the pan is properly hot before adding the asparagus — this is what gives you color instead of steaming.
- Add asparagus in a single layer. Cook without moving for 2–3 minutes, then toss and cook another 2 minutes until bright green and just tender.
- Add the minced garlic and cook for 30 seconds, stirring constantly so it doesn't burn.
- Mix the balsamic vinegar and honey together, then pour over the asparagus. Toss to coat and let it cook for 1 minute until slightly reduced and glossy.
- Season with salt and pepper, transfer to a plate, and shower with freshly grated Parmesan. Serve immediately with a squeeze of lemon if you like.
Tips
- Tip: Thinner asparagus spears cook faster — if yours are thick, give them an extra minute or two and check by piercing with a fork near the base.
- Tip: Don't use pre-grated Parmesan from a can here — the freshly grated stuff melts better and makes a real difference in the final dish.
- Tip: If you don't have balsamic vinegar, a splash of soy sauce and a little brown sugar gives a similar savory-sweet glaze in a pinch.
20. Bacon Fried Corn

Saad is not a vegetable person, but he will eat this without complaint — and that tells you everything you need to know. Sweet corn kernels get cooked in bacon drippings until they blister and caramelize at the edges, and then the crumbled bacon gets stirred back in at the end. It's one of those sides that doesn't need anything else to be good, but I've started adding a pinch of smoked paprika and a little butter at the finish because once you go there, there's no going back. It works great alongside burgers, ribs, or anything coming off the grill.
Ingredients
- 6 slices thick-cut bacon, chopped
- 4 cups corn kernels, fresh or frozen (thawed and patted dry)
- ½ cup yellow onion, diced
- 2 garlic cloves, minced
- 1 tablespoon butter
- ½ teaspoon smoked paprika
- Salt and black pepper to taste
- 2 tablespoons fresh parsley, chopped (for serving)
Instructions
- Cook the chopped bacon in a large heavy skillet over medium heat until crispy. Remove with a slotted spoon and set aside, leaving the drippings in the pan.
- Add the diced onion to the bacon drippings and cook for 3–4 minutes until softened. Add the garlic and cook for another 30 seconds.
- Turn the heat up to medium-high, then add the corn in an even layer. Let it sit without stirring for 2–3 minutes so it gets some char on the bottom.
- Stir, then let it sit again for another 2 minutes. You want some blistered, slightly golden kernels throughout.
- Stir in the butter, smoked paprika, salt, and pepper. Add the bacon back in, toss everything together, and top with fresh parsley before serving.
Tips
- Tip: Pat the corn kernels completely dry before adding to the pan — any moisture will steam them instead of frying, and you won't get that caramelized color.
- Tip: Fresh corn cut straight from the cob in summer is noticeably sweeter than frozen, so if it's corn season, use it — four medium ears will give you roughly 4 cups.
- Tip: A cast iron skillet works best here for the most even heat and the best crust on the corn, but a regular heavy stainless or nonstick skillet will do the job too.
21. Burrata Salad with Roasted Tomatoes
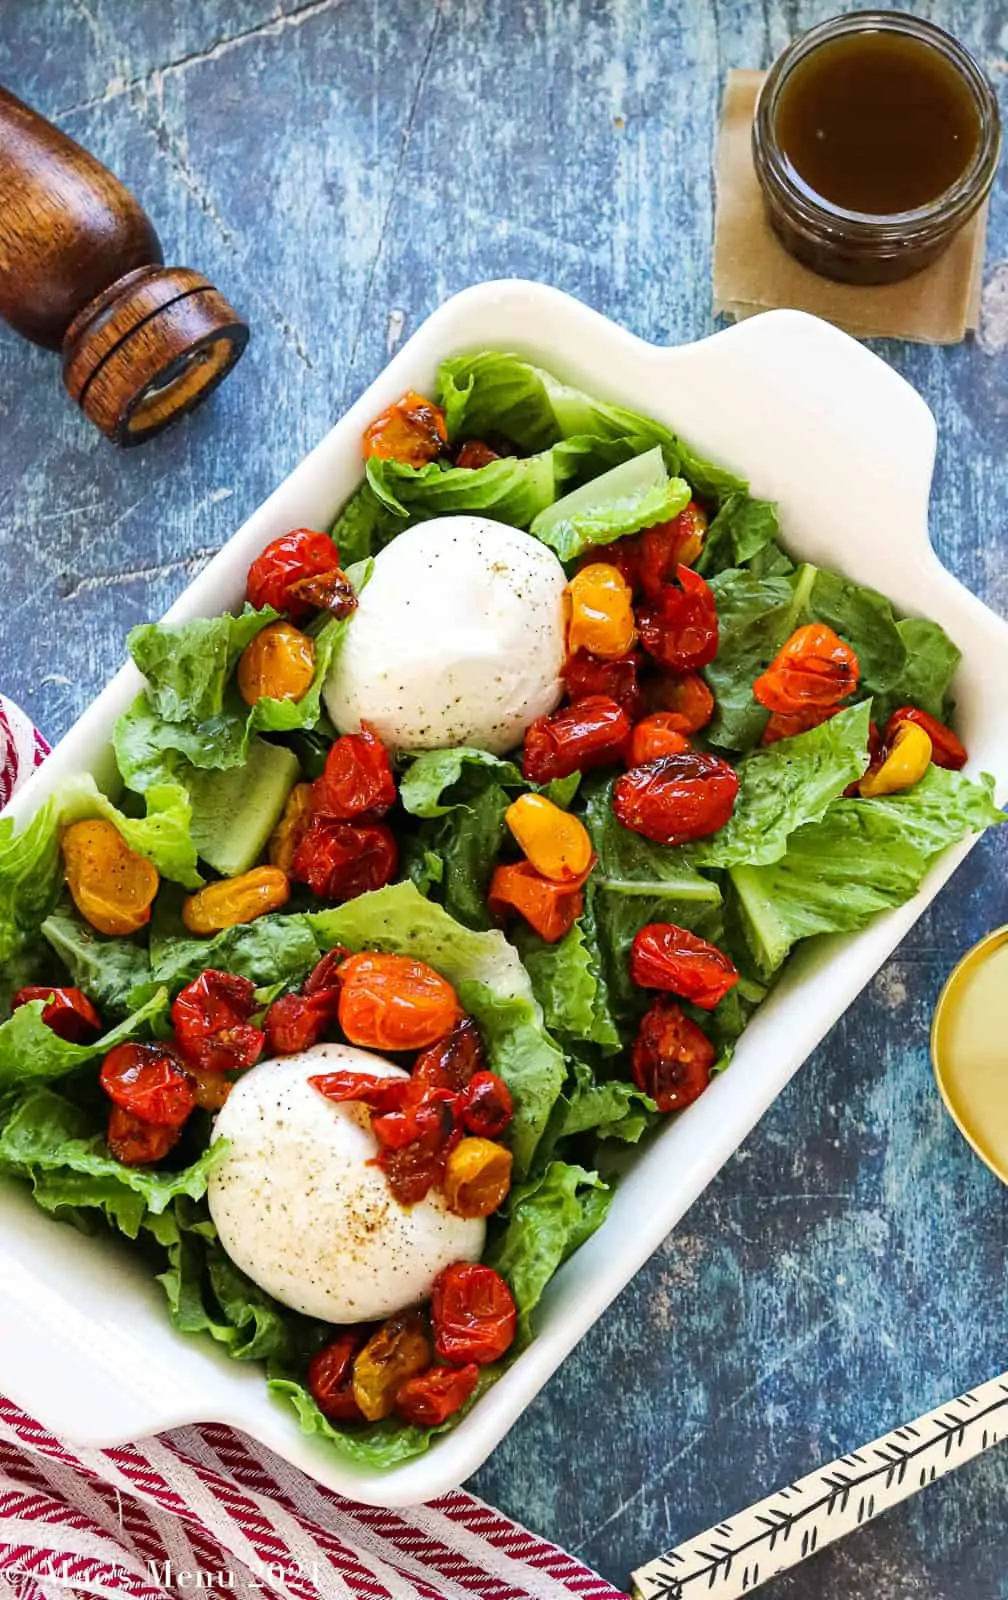
I didn't grow up eating burrata — it's not exactly common in Pakistani kitchens — but the first time I tried it at a friend's house in summer I understood immediately why people make such a fuss about it. That soft, creamy interior against roasted tomatoes is genuinely one of the best combinations in summer eating. Roasting the tomatoes concentrates their sweetness and adds a slight jammy quality that raw tomatoes just can't match. Tear the burrata open at the table so the cream spills over everything, drizzle with good olive oil, and finish with flaky salt and fresh basil. It's a side dish that also works as a starter and requires almost no cooking skill — just good ingredients.
Ingredients
- 2 cups cherry tomatoes or small heirloom tomatoes, halved
- 3 tablespoons olive oil, divided
- 3 garlic cloves, minced
- ½ teaspoon dried oregano
- Salt and black pepper to taste
- 2 balls fresh burrata cheese (about 4 oz each)
- ¼ cup fresh basil leaves
- 1 tablespoon balsamic glaze
- Flaky sea salt for finishing
Instructions
- Preheat your oven to 400°F. Toss the halved tomatoes with 2 tablespoons of the olive oil, minced garlic, oregano, salt, and pepper on a rimmed baking sheet.
- Roast for 20–25 minutes until the tomatoes are soft, slightly collapsed, and starting to caramelize at the edges. Let them cool for 10 minutes — you don't want to place them hot next to cold burrata.
- Arrange the roasted tomatoes on a serving plate or shallow bowl. Nestle the burrata balls in the center or on top.
- Drizzle with the remaining tablespoon of olive oil and the balsamic glaze. Scatter fresh basil leaves over everything.
- Finish with a pinch of flaky sea salt and serve immediately with crusty bread on the side for scooping up the cream.
Tips
- Tip: Take the burrata out of the fridge about 20 minutes before serving — room temperature burrata has a much softer, creamier texture than cold burrata straight from the package.
- Tip: Burrata is increasingly easy to find at Trader Joe's, Whole Foods, and most large grocery stores — look for it near the fresh mozzarella in the specialty cheese section.
- Tip: If you can't find burrata, fresh mozzarella torn into chunks works as a substitute — the texture is firmer but the flavor is still great with roasted tomatoes.
12. Frito Corn Salad
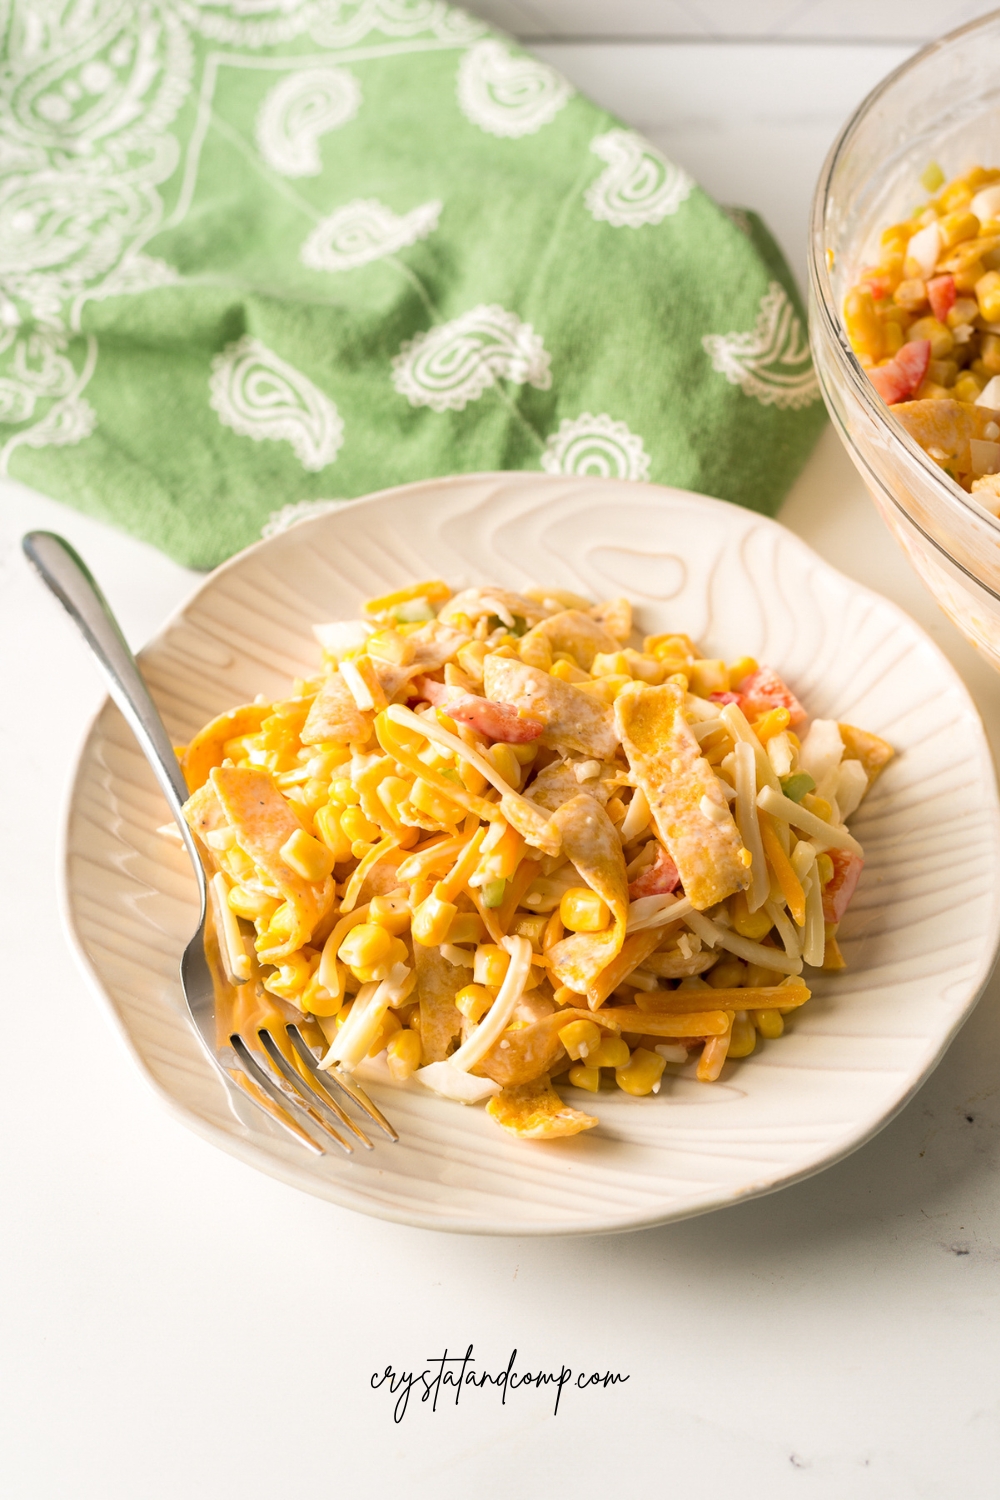
I made this for a neighborhood cookout last summer and half the people asked me for the recipe before they even finished their plate. It sounds a little odd — corn, Fritos, and a creamy dressing — but the combination works in a way that's hard to explain until you try it. The Fritos stay surprisingly crunchy even after you mix everything together, which is the whole point. Add the chips right before serving if you want maximum crunch, but honestly even after sitting for 20 minutes it's still really good.
Ingredients
- 2 cans (15 oz each) whole kernel corn, drained
- 1 cup shredded cheddar cheese
- ½ cup sour cream
- ½ cup mayonnaise
- ½ cup diced red onion
- 1 jalapeño, seeded and finely diced (optional)
- ½ teaspoon garlic powder
- Salt and black pepper to taste
- 1½ cups Frito corn chips
Instructions
- Drain the corn well and pat it dry with paper towels — excess moisture will water down the dressing.
- In a large bowl, whisk together the sour cream, mayonnaise, garlic powder, salt, and pepper until smooth.
- Add the corn, cheddar cheese, red onion, and jalapeño to the bowl and stir everything together until well coated.
- Refrigerate for at least 30 minutes to let the flavors come together.
- Right before serving, fold in the Fritos so they stay as crunchy as possible.
Tips
- Tip: Frozen corn that's been thawed and patted dry works even better than canned — slightly sweeter and less watery.
- Tip: If you can't find Fritos at your local store, any salted corn chip crushed lightly will do the same job.
- Tip: Make the base salad a day ahead and store it without the chips — stir them in just before you serve it.
13. Easy Creamy Pasta Salad

This is the pasta salad I make when I need something that travels well and feeds a crowd without much fuss. The dressing is mayonnaise-based but it doesn't feel heavy — the vinegar and mustard cut through and keep it from tasting like pure mayo. I load it with whatever vegetables I have: bell peppers, cucumbers, black olives, red onion. The key is to slightly undercook the pasta so it doesn't go mushy after sitting in the fridge overnight. Saad picks out the olives every single time, but he still eats two servings.
Ingredients
- 3 cups rotini or elbow pasta, uncooked
- 1 cup mayonnaise
- 2 tablespoons white wine vinegar (or apple cider vinegar)
- 1 teaspoon Dijon mustard
- 1 teaspoon sugar
- Salt and black pepper to taste
- 1 cup diced cucumber
- 1 cup diced red bell pepper
- ½ cup sliced black olives
- ⅓ cup diced red onion
- ½ cup shredded cheddar cheese (optional)
Instructions
- Cook the pasta 1-2 minutes less than the package directions — it should be just barely al dente. Drain, rinse with cold water, and let it cool completely.
- In a large bowl, whisk together the mayonnaise, vinegar, mustard, sugar, salt, and pepper until smooth and combined.
- Add the cooled pasta to the bowl along with the cucumber, bell pepper, olives, and red onion. Toss everything together until well coated.
- Stir in the shredded cheese if using, then taste and adjust salt, pepper, or vinegar as needed.
- Cover and refrigerate for at least 1 hour before serving — it gets better as it sits.
Tips
- Tip: The salad absorbs dressing as it sits in the fridge — if it looks dry the next day, stir in a spoonful of mayo and a splash of vinegar before serving.
- Tip: Rotini holds dressing better than elbow pasta because of all the ridges — worth grabbing if you have the option.
- Tip: Make this the night before a cookout — it genuinely tastes better after a full night in the fridge.
14. Asian Ramen Coleslaw
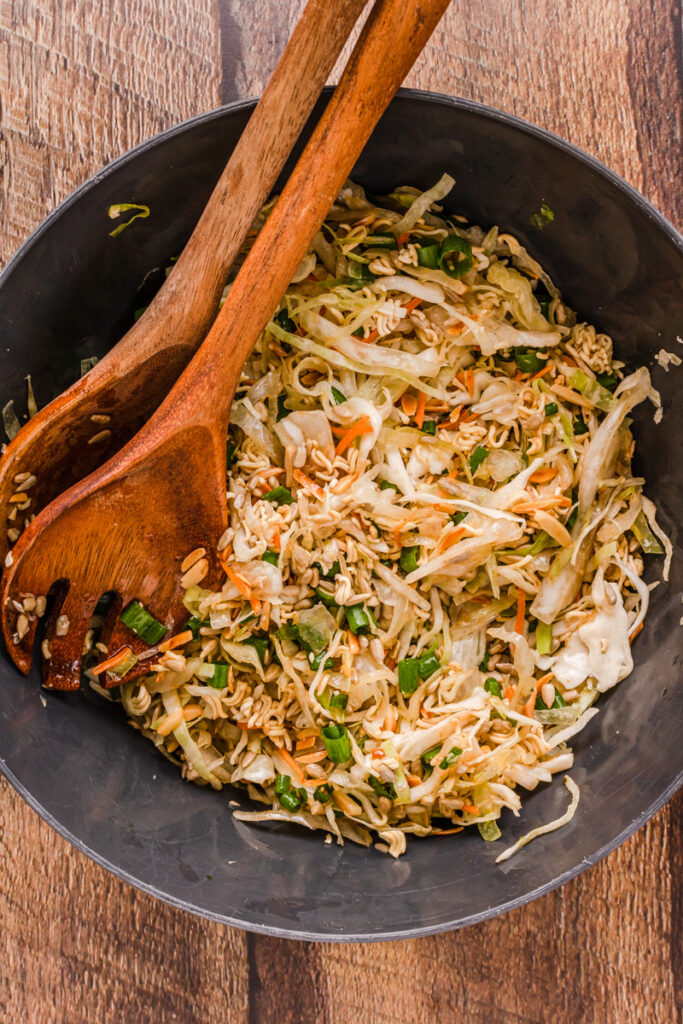
This one surprised me the first time I made it — I wasn't sure about crunching up dry ramen noodles and throwing them into a salad, but it completely works. The noodles soak up just enough dressing to soften slightly while still holding their texture, and the toasted sesame oil in the dressing ties everything together. It's a cookout side dish that goes next to burgers and grilled chicken just as comfortably as it would alongside dumplings. The sesame-soy dressing is the real star here — don't skip toasting the slivered almonds if you have five minutes to spare, it makes a real difference.
Ingredients
- 1 package (14 oz) coleslaw mix (shredded cabbage and carrots)
- 1 package (3 oz) chicken-flavored instant ramen noodles, crushed (discard or reserve seasoning packet)
- ½ cup slivered almonds, toasted
- 3 green onions, thinly sliced
- 3 tablespoons rice vinegar
- 2 tablespoons soy sauce
- 2 tablespoons vegetable oil
- 1 tablespoon sesame oil
- 1 tablespoon honey (or sugar)
- 1 teaspoon fresh ginger, grated (or ¼ teaspoon ground ginger)
Instructions
- Toast the slivered almonds in a dry skillet over medium heat for 3-4 minutes, stirring frequently, until lightly golden. Set aside to cool.
- Whisk together the rice vinegar, soy sauce, vegetable oil, sesame oil, honey, and ginger in a small bowl until the dressing is smooth.
- In a large bowl, combine the coleslaw mix, green onions, and toasted almonds.
- Pour the dressing over the slaw and toss well to coat everything evenly.
- Add the crushed ramen noodles right before serving and toss once more — adding them too early makes them soggy.
Tips
- Tip: If you want to prep ahead, keep the dressed slaw and the crushed noodles in separate containers — combine them at the table.
- Tip: A bag of pre-shredded coleslaw mix from Walmart or Costco saves you about 10 minutes and works perfectly here.
- Tip: Swap the almonds for sunflower seeds if anyone at the table has a nut allergy — the crunch is similar.
15. Air Fryer Sweet Potato Chunks
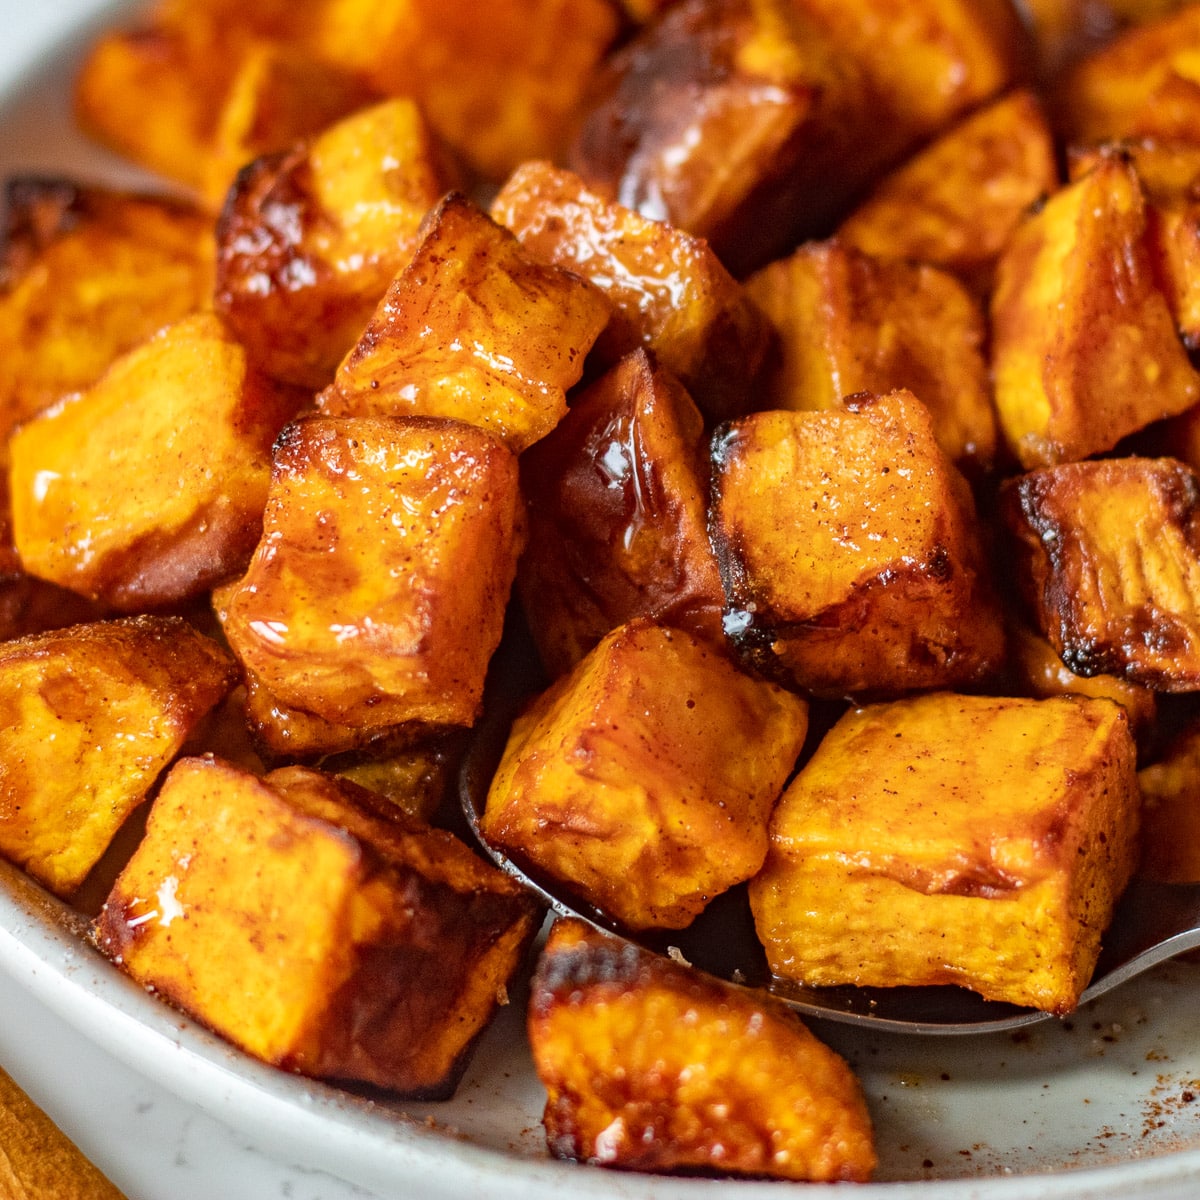
I was skeptical about sweet potatoes in the air fryer because I'd always roasted them in the oven, but the air fryer gets the edges properly caramelized in half the time without heating up my whole kitchen — which matters a lot in the middle of summer. The outside crisps up while the inside stays soft and almost creamy. Season them simply with olive oil, salt, and smoked paprika and they're done in about 15 minutes. If you don't have an air fryer, a hot oven at 425°F on a sheet pan works fine — just add 10 more minutes.
Ingredients
- 2 medium sweet potatoes, peeled and cut into 1-inch chunks
- 1½ tablespoons olive oil
- ½ teaspoon smoked paprika
- ½ teaspoon garlic powder
- ¼ teaspoon onion powder
- ½ teaspoon salt
- ¼ teaspoon black pepper
Instructions
- Preheat your air fryer to 400°F for 3 minutes.
- Toss the sweet potato chunks with olive oil, smoked paprika, garlic powder, onion powder, salt, and pepper in a bowl until every piece is coated.
- Arrange the chunks in a single layer in the air fryer basket — don't crowd them or they'll steam instead of crisp.
- Air fry at 400°F for 12-15 minutes, shaking the basket halfway through, until the edges are golden and slightly caramelized.
- Taste and adjust salt, then serve immediately.
Tips
- Tip: Cut your chunks as evenly as possible so they cook at the same rate — uneven pieces mean some burn while others are still underdone.
- Tip: A drizzle of honey or maple syrup right after they come out takes these from a simple side to something that tastes intentional.
- Tip: No air fryer? Roast on a parchment-lined sheet pan at 425°F for 25-28 minutes, flipping once halfway through.
16. Southwestern Black Bean and Corn Salad

This salad is one of those things that looks like a side dish but ends up being the thing everyone goes back for seconds of. Black beans, corn, bell pepper, red onion, cilantro — all tossed in a lime-cumin dressing that's sharp and a little smoky. It works alongside grilled chicken, stuffed into tacos, or scooped up with tortilla chips as a chunky dip. The whole thing comes together in about 10 minutes with no cooking at all, which makes it my go-to when the rest of the meal is already taking up all my attention.
Ingredients
- 1 can (15 oz) black beans, drained and rinsed
- 1½ cups corn kernels (frozen and thawed, canned and drained, or fresh)
- 1 red bell pepper, diced small
- ⅓ cup red onion, finely diced
- ¼ cup fresh cilantro, roughly chopped (leave out if you're not a cilantro person)
- 3 tablespoons fresh lime juice (about 2 limes)
- 2 tablespoons olive oil
- 1 teaspoon ground cumin
- ½ teaspoon chili powder
- ½ teaspoon garlic powder
- Salt to taste
Instructions
- Drain and rinse the black beans thoroughly, then spread them on a paper towel to absorb excess moisture so the dressing doesn't get watery.
- In a small bowl, whisk together the lime juice, olive oil, cumin, chili powder, garlic powder, and salt until combined.
- Add the black beans, corn, bell pepper, red onion, and cilantro to a large bowl and toss together.
- Pour the dressing over the salad and toss well until everything is evenly coated.
- Taste and adjust lime juice or salt, then serve immediately or refrigerate for up to 2 days — it actually gets better after an hour.
Tips
- Tip: If you have time, char the corn in a dry skillet for 3-4 minutes before adding it — the smoky flavor takes this salad to a completely different level.
- Tip: Add diced avocado right before serving if you want to make it more substantial — just don't mix it in too early or it'll go brown.
- Tip: This doubles easily and keeps well in the fridge — I make a big batch on Sunday and use it throughout the week as a quick lunch addition.
7. Black Bean Salad – Perfect BBQ Side Dish
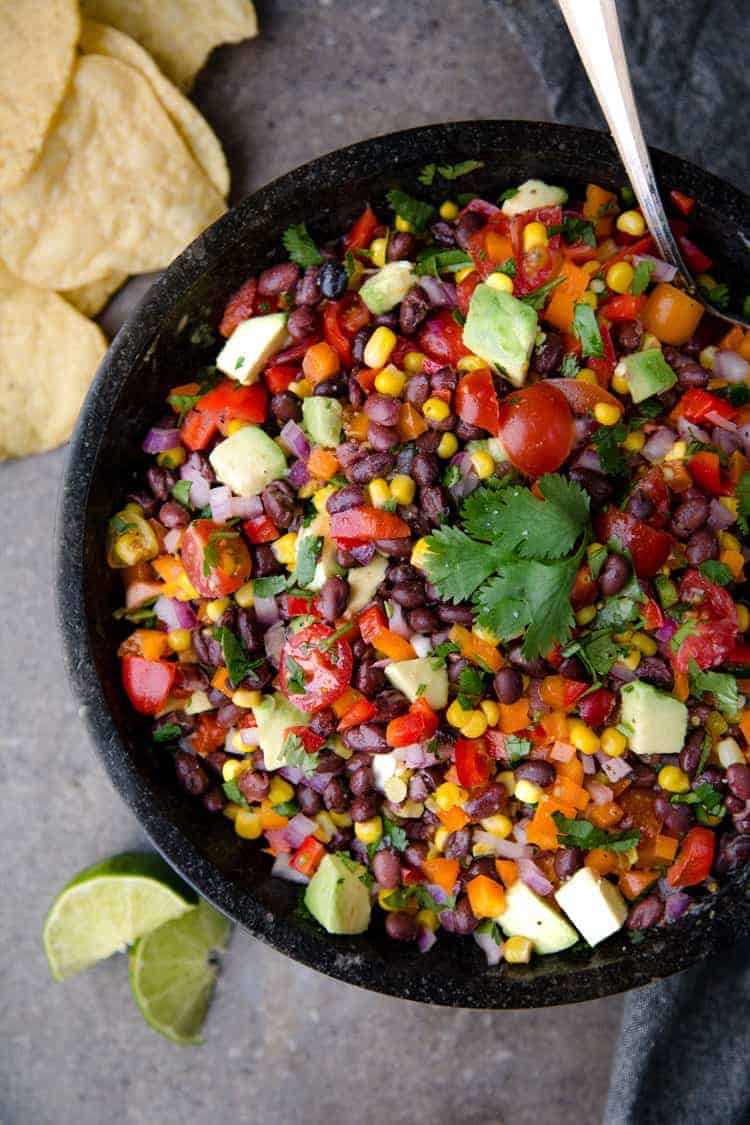
This black bean salad has no business being as satisfying as it is for something that takes ten minutes to throw together. Black beans, sweet corn, crunchy bell peppers, red onion, and a lime-cumin dressing — it's substantial enough to eat as a light lunch but works perfectly as a BBQ side that holds up on the table for hours. I started making this when I needed something that could sit out at a cookout without wilting, and it's never let me down. The longer it sits, the better it gets as everything soaks up that dressing.
Ingredients
- 2 cans (15 oz each) black beans, drained and rinsed
- 1 cup frozen corn, thawed (or 1 can whole kernel corn, drained)
- 1 red bell pepper, finely diced
- 1 orange or yellow bell pepper, finely diced
- ½ small red onion, finely diced
- ¼ cup fresh cilantro, roughly chopped
- 3 tablespoons olive oil
- 3 tablespoons fresh lime juice (about 2 limes)
- 1 teaspoon ground cumin
- ½ teaspoon garlic powder
- Salt and black pepper to taste
Instructions
- Drain and rinse the black beans thoroughly, then add to a large mixing bowl along with the corn, bell peppers, red onion, and cilantro.
- In a small bowl or jar, whisk together the olive oil, lime juice, cumin, garlic powder, salt, and pepper until combined.
- Pour the dressing over the salad and toss everything together until evenly coated.
- Taste and adjust salt and lime juice as needed. Let the salad sit for at least 15 minutes before serving so the flavors come together — or refrigerate up to 24 hours ahead.
Tips
- Tip: Not a cilantro fan? Fresh flat-leaf parsley works well here and keeps the freshness without the divisive flavor.
- Tip: Add diced avocado right before serving if you want extra creaminess — just don't mix it in too early or it'll turn brown.
- Tip: This keeps well in the fridge for 3 days in a sealed container, making it a solid meal-prep option for the week.
8. Cucumber Salad with Creamy Dill Dressing
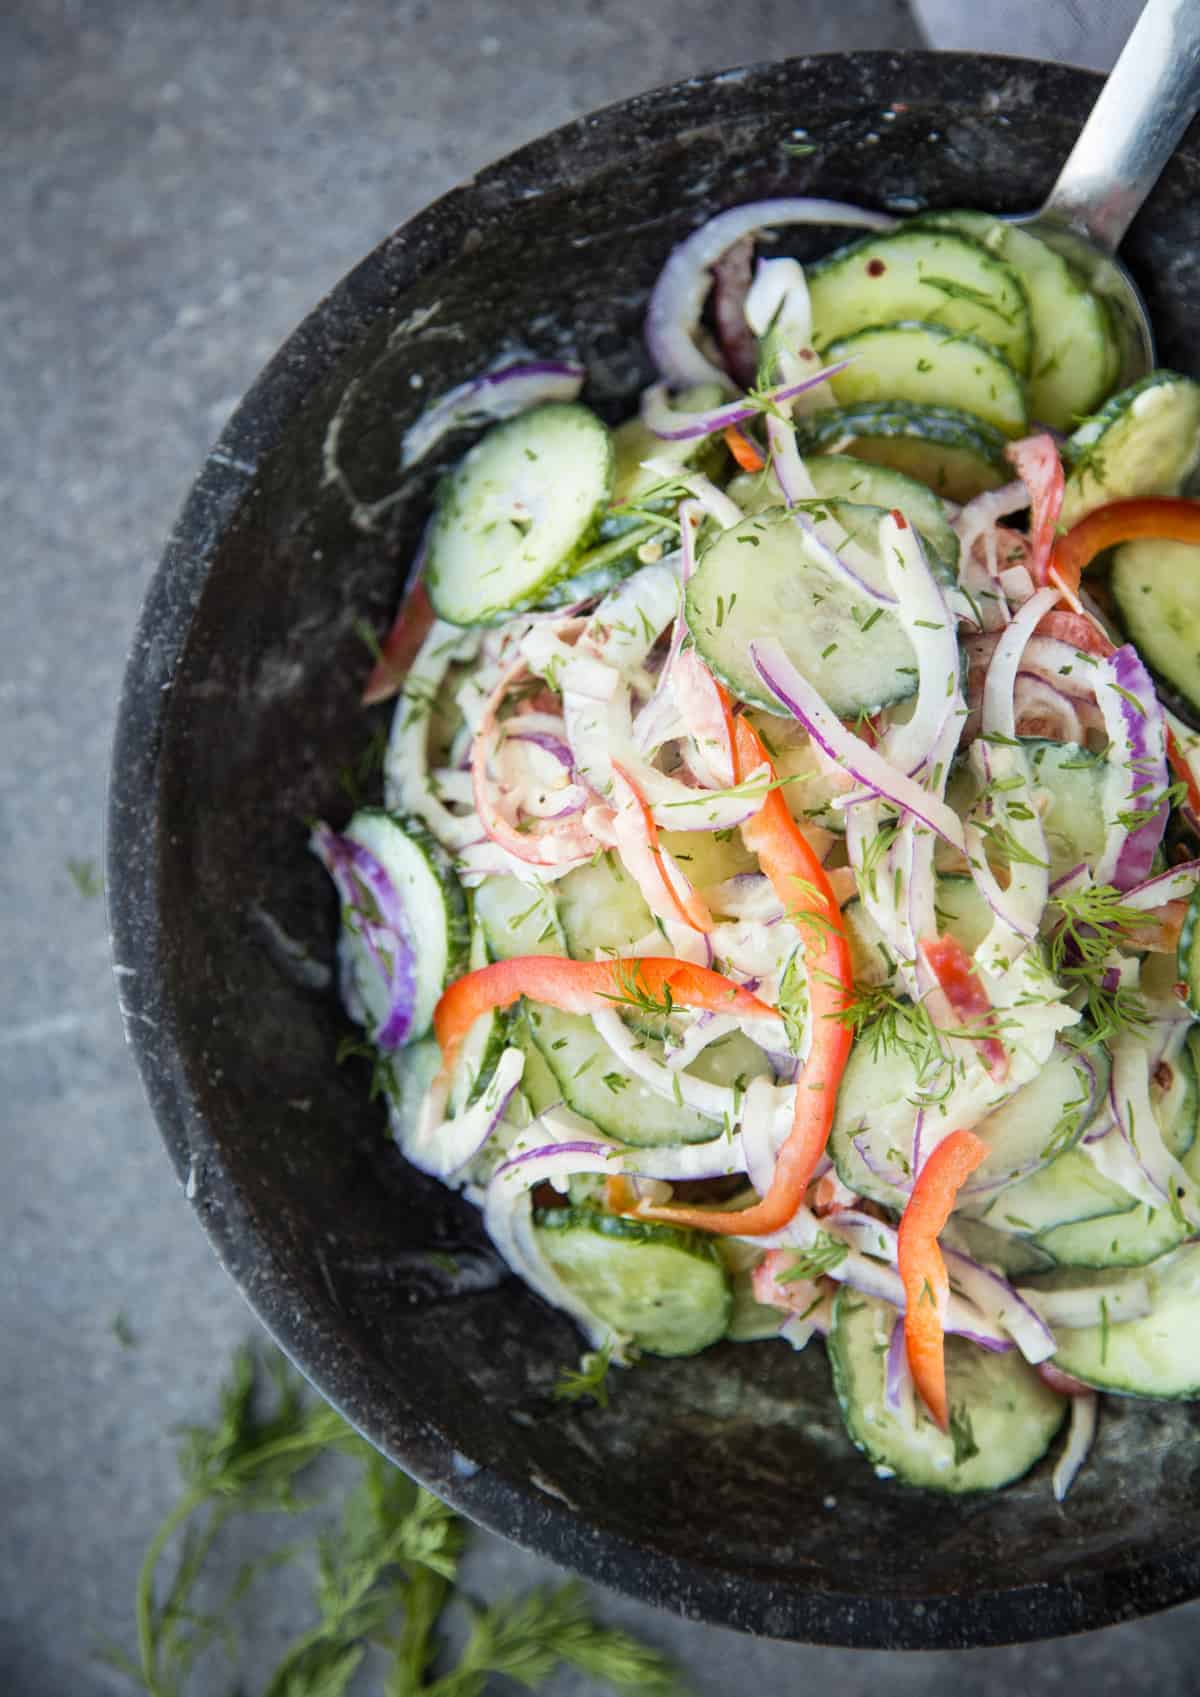
Cucumbers are one of those summer vegetables I always have too many of — and this creamy dill dressing is honestly the best thing I've found to do with them. The dressing is sour cream based, bright from fresh dill, and just tangy enough from a splash of white wine vinegar. It reminds me of something my mother-in-law makes, though she uses yogurt instead of sour cream — both versions are good, I'll say that. Thin-slice the cucumbers, salt them first so they don't water everything down, and you've got a side dish that feels cool and refreshing even on the hottest day.
Ingredients
- 2 large English cucumbers (or 4 Persian cucumbers), thinly sliced
- 1 teaspoon kosher salt (for drawing out moisture)
- ¼ small red onion, very thinly sliced
- ½ cup sour cream (or plain Greek yogurt)
- 2 tablespoons white wine vinegar
- 1 tablespoon fresh dill, chopped (or 1 teaspoon dried dill)
- 1 teaspoon sugar
- Salt and black pepper to taste
Instructions
- Place the sliced cucumbers in a colander, sprinkle with the teaspoon of salt, toss, and let them sit over the sink for 15–20 minutes. This draws out the excess water so your dressing doesn't get watery.
- Pat the cucumbers dry with paper towels, then add them to a bowl along with the sliced red onion.
- In a separate small bowl, whisk together the sour cream, white wine vinegar, dill, and sugar until smooth. Season with salt and pepper.
- Pour the dressing over the cucumbers and onions, toss to coat, and taste for seasoning. Serve immediately or refrigerate for up to 2 hours before serving.
Tips
- Tip: Don't skip the salting step — it makes a real difference. Cucumbers release a lot of water and skipping this gives you a soggy, diluted dressing.
- Tip: A mandoline makes quick work of thin, even cucumber slices — but a sharp knife works fine if you don't have one, just take your time.
- Tip: This is best served the same day. If you're making it ahead, store the dressing separately and toss right before serving.
9. Heirloom Tomato Salad

When heirloom tomatoes show up at the farmers market in July, this is what I make. No cooking, no complicated prep — just beautiful tomatoes sliced thick, a drizzle of good olive oil, a bit of flaky salt, fresh basil, and a splash of balsamic. The whole point of this salad is to let the tomatoes do the work, so it really only makes sense when they're at their peak. I've tried making it in winter with hothouse tomatoes and it's just not the same — save this one for summer when the tomatoes actually taste like something.
Ingredients
- 1½ lbs mixed heirloom tomatoes, sliced ¼-inch thick (use a mix of colors)
- 3 tablespoons extra-virgin olive oil
- 1 tablespoon balsamic vinegar (or balsamic glaze for a sweeter finish)
- ½ small shallot, very thinly sliced
- ¼ cup fresh basil leaves, torn
- Flaky sea salt (such as Maldon) and freshly cracked black pepper
- Optional: 2 oz fresh mozzarella, torn into pieces
Instructions
- Slice the heirloom tomatoes and arrange them in a single layer (or slightly overlapping) on a large flat plate or platter. Try to use a mix of colors for visual impact.
- Scatter the sliced shallot and torn basil leaves over the tomatoes. Add torn mozzarella if using.
- Drizzle generously with olive oil and balsamic vinegar. Finish with a good pinch of flaky salt and plenty of black pepper.
- Let the salad sit for 5–10 minutes before serving so the tomatoes release a little juice that mixes with the dressing — that's the best part.
Tips
- Tip: Use the best olive oil you have for this one — since there's almost no cooking, the quality of your ingredients is everything.
- Tip: Serve at room temperature, never cold. Refrigerating tomatoes kills their flavor and texture — keep them on the counter until you're ready.
- Tip: Can't find heirlooms? A mix of regular beefsteak and cherry tomatoes in different colors gets you close, especially mid-summer when they're sweet.
10. Italian Tomato Salad

This Italian tomato salad is different from the heirloom version above — it's chunkier, more dressed, and built to go alongside grilled meats or pasta at a summer dinner. Ripe tomatoes get roughly chopped and tossed with red onion, fresh basil, oregano, and a simple Italian dressing made from olive oil, red wine vinegar, and garlic. It's the kind of thing you'd find on the table at an Italian-American cookout, and once you make it you'll understand why it shows up there every summer. Everything is better after a 20-minute rest, so don't rush it to the table.
Ingredients
- 1½ lbs ripe tomatoes (roma, beefsteak, or a mix), cut into 1-inch chunks
- ½ small red onion, thinly sliced
- ¼ cup fresh basil leaves, torn or roughly chopped
- 1 teaspoon dried oregano
- 1 clove garlic, minced
- 3 tablespoons olive oil
- 1½ tablespoons red wine vinegar
- ½ teaspoon sugar (optional, to balance acidity)
- Salt and black pepper to taste
Instructions
- Chop the tomatoes into roughly 1-inch chunks and place them in a large bowl along with the sliced red onion and fresh basil.
- In a small bowl, whisk together the olive oil, red wine vinegar, minced garlic, oregano, sugar (if using), salt, and pepper.
- Pour the dressing over the tomatoes and toss gently to combine. Taste and adjust seasoning — you might want more vinegar or a pinch more salt.
- Let the salad rest at room temperature for at least 20 minutes before serving. The tomatoes will release their juices and the whole thing gets more flavorful as it sits.
Tips
- Tip: Add a handful of kalamata olives or sliced pepperoncini if you want a little more punch — both work beautifully here.
- Tip: This summer salad pairs especially well with grilled chicken or fish — the juices from the tomatoes act almost like a sauce.
- Tip: Leftovers are great the next day spooned over toasted bread — basically bruschetta at that point, and nobody complains.
11. Cottage Cheese Ranch Pasta Salad
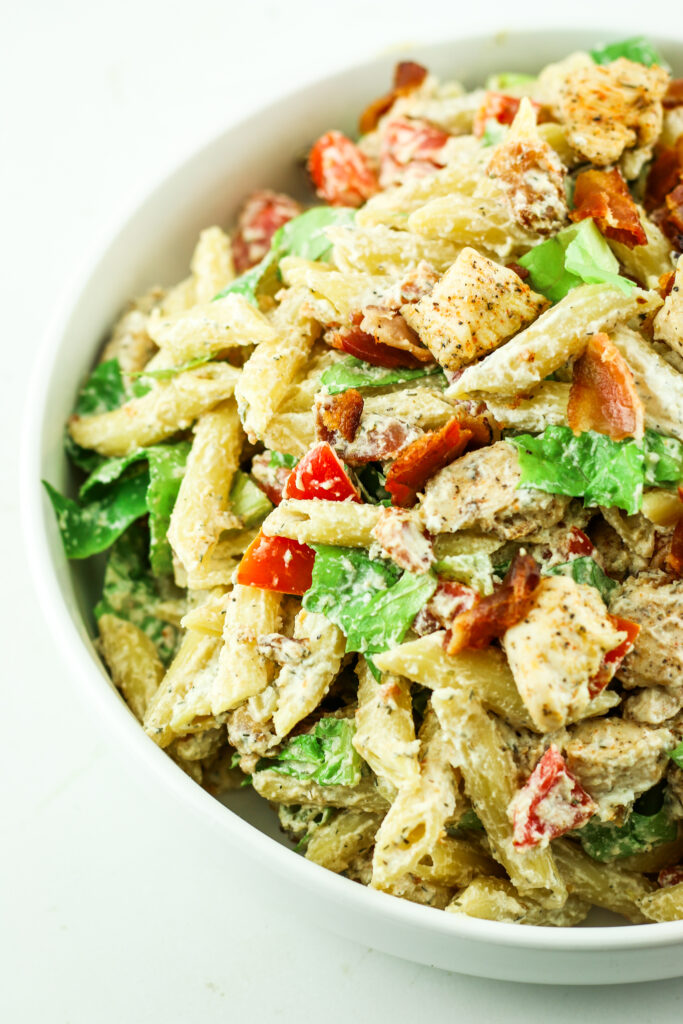
I was skeptical about this one the first time I saw cottage cheese in a pasta salad — it sounds odd, but it makes total sense once you try it. The cottage cheese blends into the dressing and gives you this creamy, protein-rich base that's lighter than a full mayo situation but still completely satisfying. Mix in a packet of ranch seasoning, some rotini, crunchy cucumber, cherry tomatoes, and cheddar, and you've got a pasta salad that Saad actually asks for by name. It's also a smart one to bring to potlucks because it doesn't get that heavy, greasy feel that some pasta salads develop after sitting out.
Ingredients
- 8 oz rotini pasta (or any short pasta)
- 1 cup full-fat or 2% cottage cheese
- ¼ cup mayonnaise
- 1 packet (1 oz) dry ranch seasoning mix
- 1 cup cherry tomatoes, halved
- 1 cup English cucumber, diced
- ½ cup shredded cheddar cheese
- ¼ cup sliced black olives (optional)
- 2 tablespoons fresh chives or green onion, sliced
- Salt and black pepper to taste
Instructions
- Cook the pasta according to package directions until al dente. Drain, rinse under cold water to stop the cooking, and let it cool completely before mixing — warm pasta will make the dressing runny.
- In a large bowl, stir together the cottage cheese, mayonnaise, and ranch seasoning until combined into a smooth-ish dressing. It doesn't need to be perfectly smooth — a little texture is fine.
- Add the cooled pasta, cherry tomatoes, cucumber, cheddar, olives (if using), and chives. Toss everything together until the pasta is well coated.
- Taste for seasoning, add salt and pepper as needed, and refrigerate for at least 30 minutes before serving. The pasta will absorb the dressing slightly as it chills, so give it another stir and add a splash of milk to loosen if needed.
Tips
- Tip: For a smoother dressing, blend the cottage cheese and mayo together for 30 seconds before adding the ranch seasoning — it makes the texture more uniform if that's your preference.
- Tip: This pasta salad keeps well in the fridge for up to 3 days — just stir before serving and add a small splash of milk or water if it's gotten too thick.
- Tip: Want to bulk it up into a full meal? Add diced grilled chicken or a can of drained chickpeas — both work well with the ranch flavor.
6. Spicy Cucumber and Onion Salad With Sriracha

I make a version of spicy cucumber salad that's very similar to this — it's one of those sides that disappears faster than anything else on the table. Cool, crisp cucumbers with sharp red onion and a hit of Sriracha is such a good combination. It takes about five minutes to throw together and it goes with practically everything — grilled chicken, burgers, rice. The first time I added Sriracha to cucumbers my husband looked skeptical. He went back for thirds.
Ingredients
- 2 medium cucumbers, thinly sliced
- ½ small red onion, very thinly sliced
- 1½ tablespoons Sriracha
- 1 tablespoon rice vinegar
- 1 teaspoon sesame oil
- 1 teaspoon soy sauce
- ½ teaspoon sugar
- 1 teaspoon sesame seeds, for garnish
- 2 green onions, sliced (optional)
Instructions
- Slice the cucumbers and red onion as thin as you can. If you have time, salt the cucumbers lightly and let them sit in a colander for 10 minutes, then pat dry — this keeps them from going watery.
- In a small bowl, whisk together the Sriracha, rice vinegar, sesame oil, soy sauce, and sugar until the sugar dissolves.
- Toss the cucumbers and onion with the dressing until everything is well coated.
- Garnish with sesame seeds and green onions. Serve immediately or refrigerate for up to 30 minutes before serving — it gets better as it sits a little.
Tips
- Tip: English cucumbers work best here since the skin is thinner and the seeds are smaller — but regular cucumbers from Walmart or Aldi are totally fine, just scoop the seeds out with a spoon first.
- Tip: If Sriracha is too hot for your crowd, start with 1 tablespoon and taste before adding more.
- Tip: Don't dress this too far in advance — after about an hour the cucumbers release liquid and the dressing thins out considerably.
5. Summer Slaw with Ginger Miso Dressing

I wasn't sure about miso in a slaw dressing the first time I tried it — it sounded unusual — but the combination of white miso, fresh ginger, and a little sesame is genuinely one of the better dressings I've made this summer. It's savory and slightly sweet and nothing like the usual creamy coleslaw you get at every BBQ. This version uses a shredded cabbage and carrot base which you can buy as a pre-shredded bag at Costco or Trader Joe's if you want to save time.
Ingredients
- 4 cups shredded green cabbage (or one 14-oz bag of coleslaw mix)
- 1 cup shredded purple cabbage
- 1 large carrot, julienned or grated
- 3 green onions, sliced
- 2 tablespoons white miso paste (find it in the refrigerated section at Whole Foods or Trader Joe's)
- 1 tablespoon fresh ginger, grated
- 2 tablespoons rice vinegar
- 1 tablespoon sesame oil
- 1 tablespoon honey (or maple syrup to keep it vegan)
- 1 tablespoon sesame seeds
Instructions
- Combine the green cabbage, purple cabbage, carrot, and green onions in a large bowl and toss together.
- In a small bowl, whisk together the miso paste, grated ginger, rice vinegar, sesame oil, and honey until smooth. The miso can be a bit stubborn — keep whisking and it'll come together.
- Pour the dressing over the slaw and toss well to coat everything evenly.
- Sprinkle sesame seeds over the top. Serve right away for maximum crunch, or refrigerate for up to 1 hour before serving.
Tips
- Tip: If you can't find white miso, yellow miso works fine — it's just a little stronger in flavor, so use 1½ tablespoons instead of 2.
- Tip: Add sliced snap peas, shredded edamame, or thin-sliced bell pepper if you want to bulk this up into more of a main dish salad.
- Tip: This slaw holds up better than mayo-based versions — it actually travels well to picnics without getting soggy.
4. Easy Messy Avocado Summer Salad
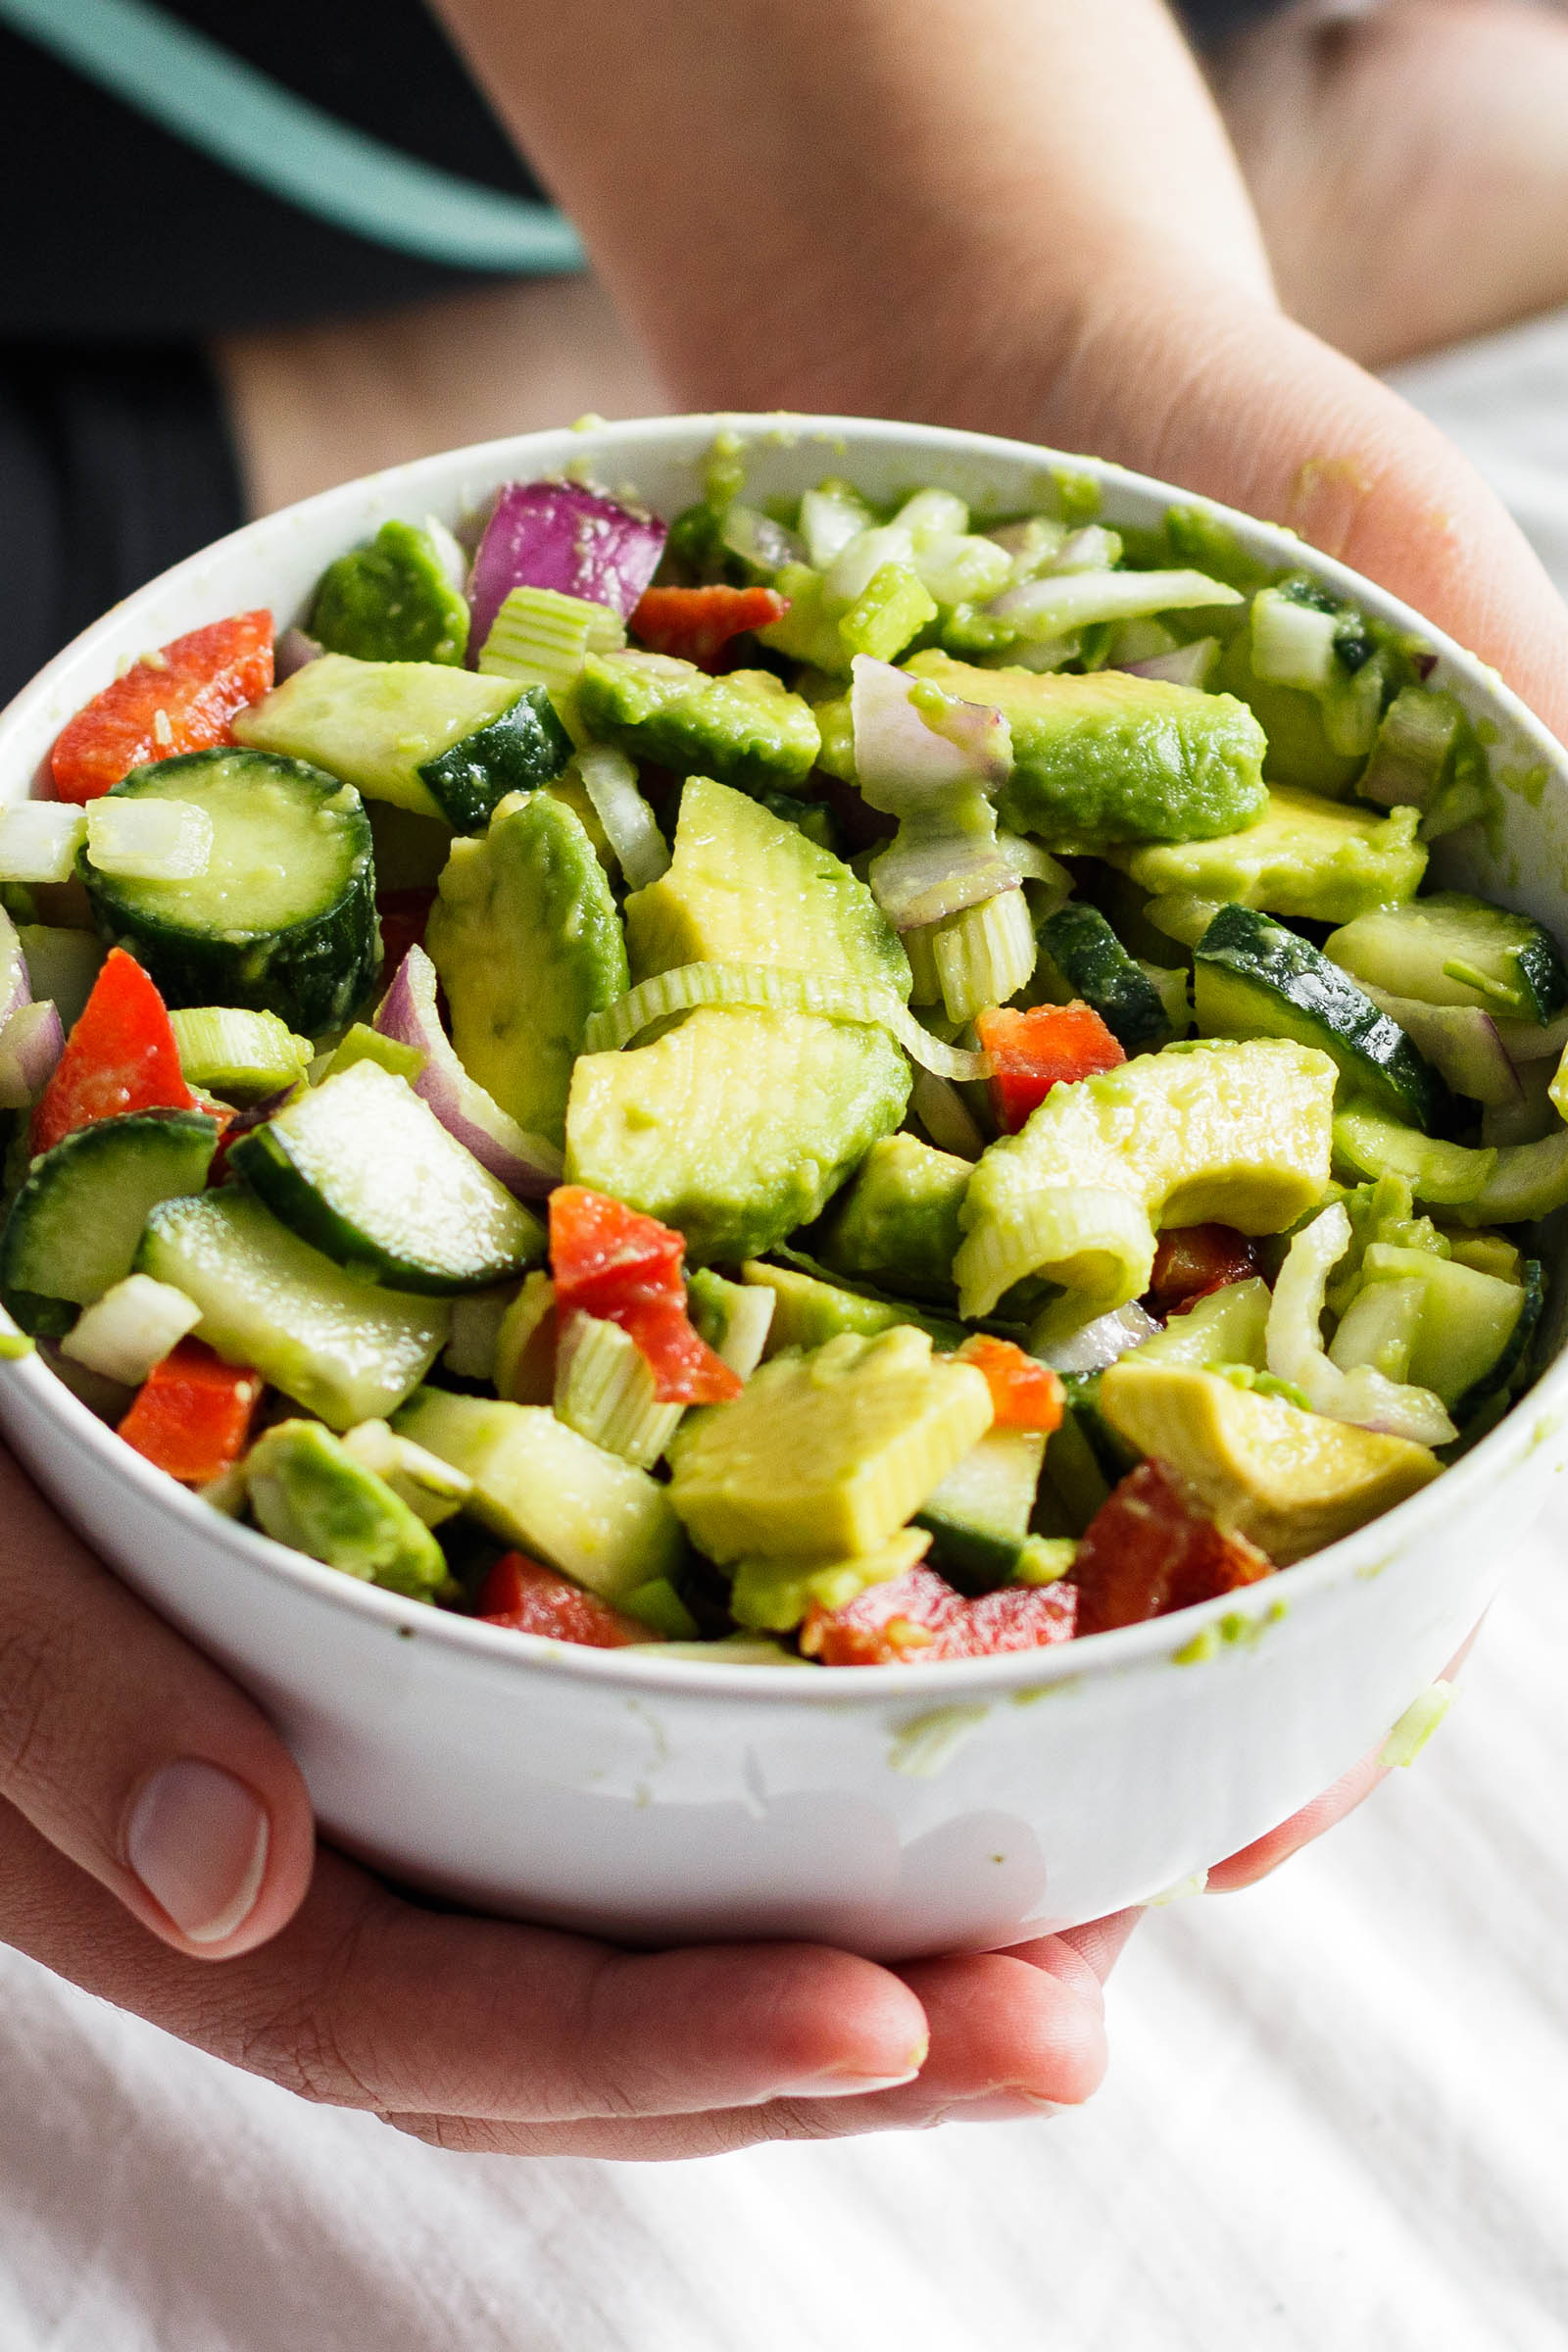
The name says it all — this isn't a precious, carefully arranged salad. You chop, toss, and eat. Ripe avocado, cherry tomatoes, cucumber, red onion, and a simple lemon dressing. It's vegan, it's keto-friendly, it works for Whole30 — basically it works for whoever shows up at your table. I make this when I need something fast and I know the avocados on my counter are about to turn on me.
Ingredients
- 2 ripe avocados, cubed
- 1 cup cherry tomatoes, halved
- 1 medium cucumber, diced
- ¼ small red onion, finely diced
- 2 tablespoons fresh lemon juice (about 1 lemon)
- 2 tablespoons olive oil
- ¼ teaspoon salt, or to taste
- ¼ teaspoon black pepper
- Small handful of fresh cilantro or parsley, roughly chopped
Instructions
- Chop the avocado, tomatoes, cucumber, and red onion and add them all to a large bowl. Don't stress about keeping the avocado pieces perfect — they'll break up a little when you toss, and that's fine.
- Drizzle the lemon juice and olive oil over the top, then season with salt and pepper.
- Gently toss everything together — use a big spoon and a light hand so the avocado doesn't turn to mush.
- Scatter the cilantro or parsley on top and serve immediately. This one doesn't keep well — the avocado browns — so make it right before you eat.
Tips
- Tip: The lemon juice does double duty — it adds flavor AND slows the browning of the avocado, so don't skip it or reduce it.
- Tip: Add a pinch of red pepper flakes or a few dashes of hot sauce if you like a little heat — it pairs really well with the avocado.
- Tip: If cilantro isn't your thing, fresh basil or flat-leaf parsley works just as well here.
3. Tomato Basil Feta Salad
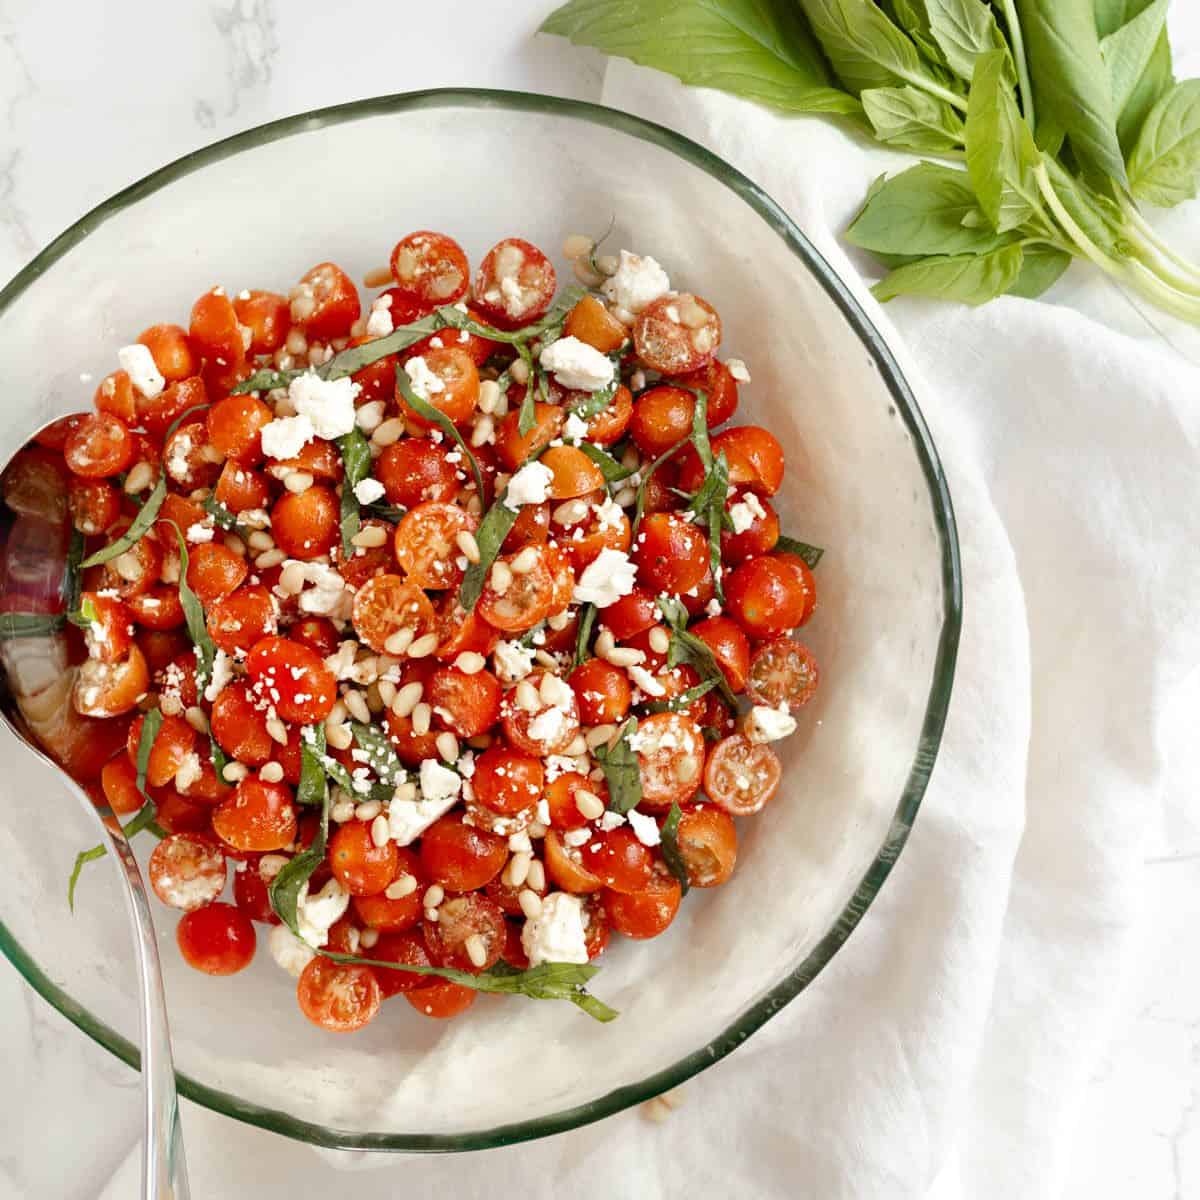
There's a reason this combination has been on tables forever — ripe summer tomatoes, fresh basil, and salty crumbled feta genuinely don't need much else. A drizzle of good olive oil, a splash of balsamic, and you're done. This isn't my attempt at authentic Italian cuisine — it's just a combination that works every single time, especially when you can find tomatoes that actually taste like tomatoes. Saad picks the feta out of his bowl, but everyone else in this house is happy.
Ingredients
- 1½ lbs ripe tomatoes (a mix of sizes and colors looks beautiful — heirloom, cherry, roma)
- ½ cup crumbled feta cheese
- ¼ cup fresh basil leaves, torn
- 3 tablespoons good-quality olive oil
- 1 tablespoon balsamic vinegar (or a drizzle of balsamic glaze from a squeeze bottle)
- ¼ teaspoon flaky sea salt
- ¼ teaspoon cracked black pepper
Instructions
- Slice the larger tomatoes into thick wedges and halve any cherry tomatoes. Spread them out on a wide, shallow plate or platter rather than a deep bowl — it shows off the tomatoes better and stops them from stewing in their own juice.
- Scatter the crumbled feta over the tomatoes, then tear the basil leaves and add those too.
- Drizzle the olive oil and balsamic evenly over everything. Season with flaky salt and cracked black pepper.
- Let it sit for 5 minutes before serving — the tomatoes release a little juice that mixes with the oil and vinegar into the best natural dressing.
Tips
- Tip: Room temperature tomatoes make all the difference — don't use refrigerated tomatoes here, cold kills their flavor completely.
- Tip: Block feta that you crumble yourself is creamier and less salty than the pre-crumbled kind in bags — worth the extra 30 seconds.
- Tip: Add thin-sliced red onion or a handful of Kalamata olives if you want to take this in a more Greek direction.
2. Strawberry Cucumber Salad
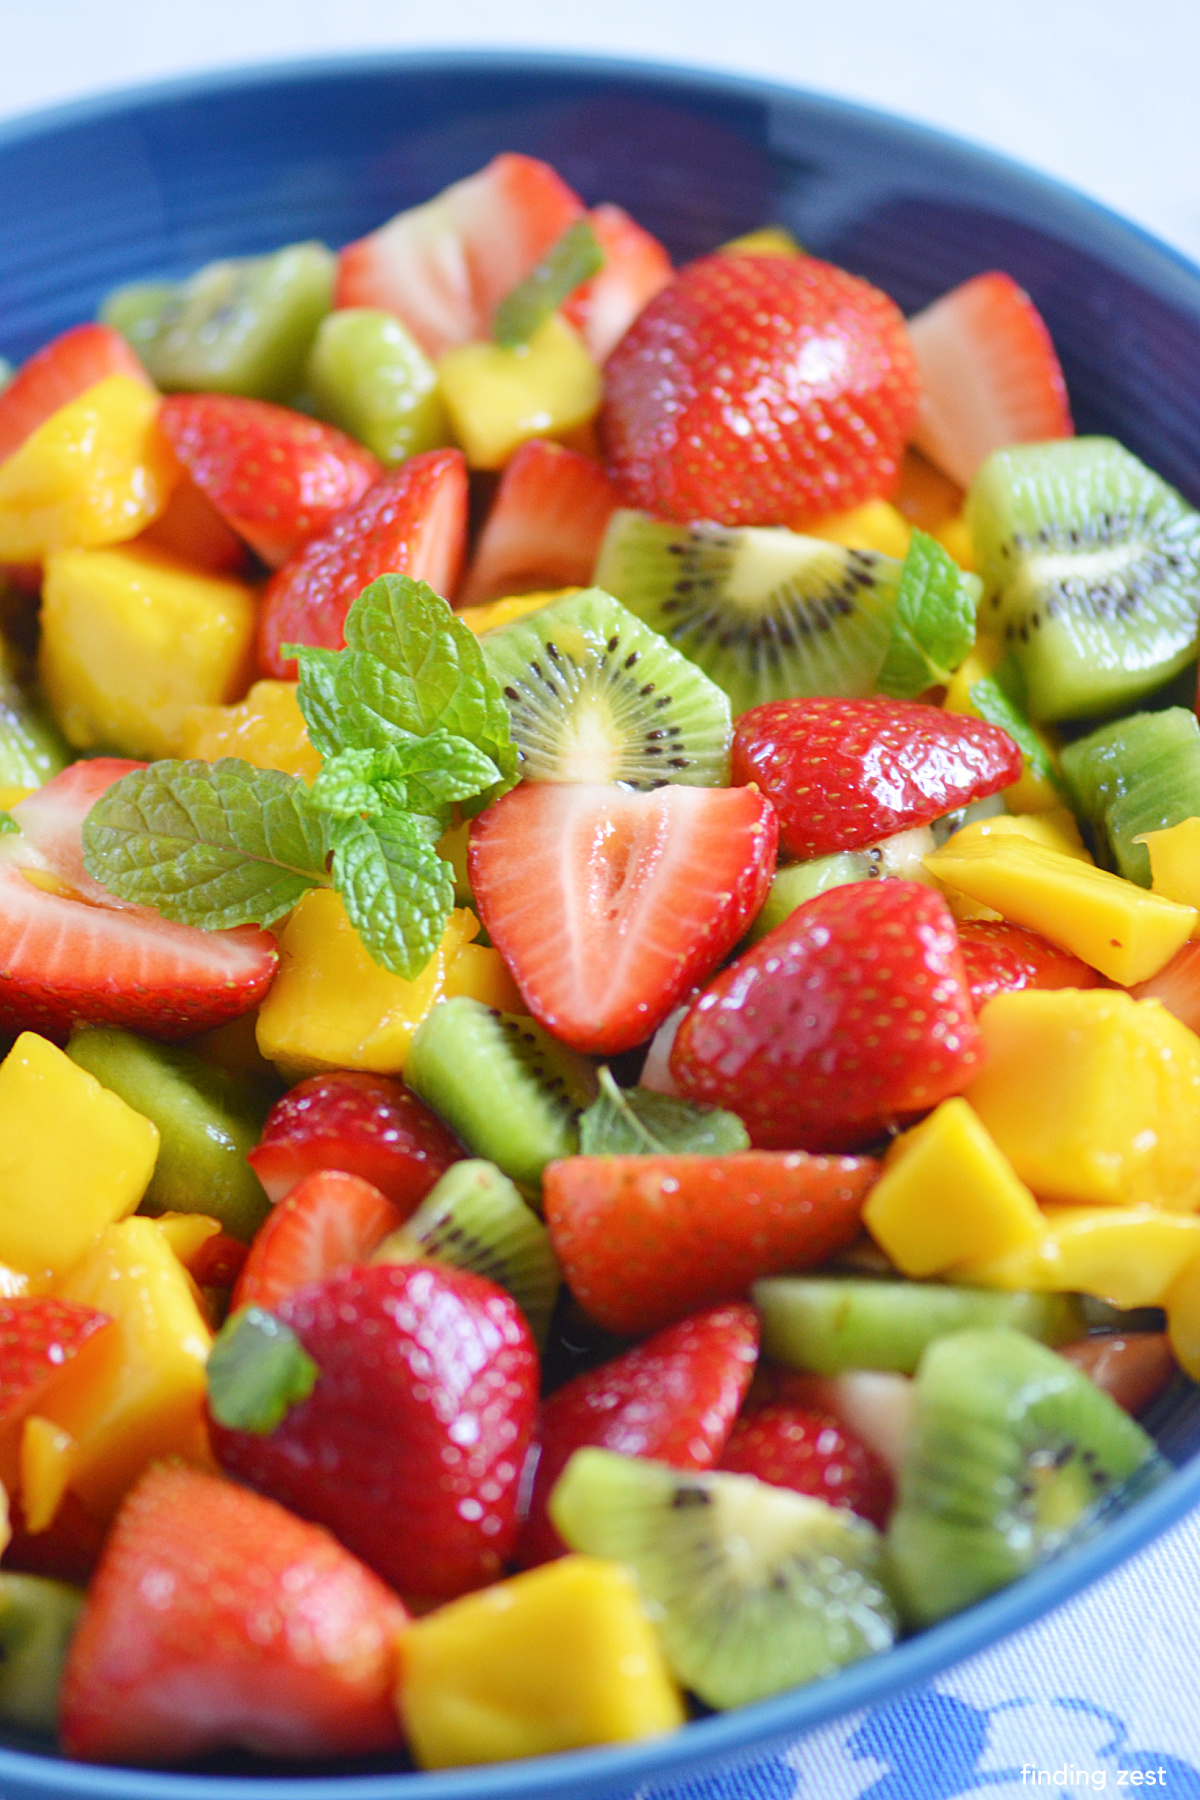
Sweet strawberries and cool cucumber sounds like an odd pairing until you try it — then it makes complete sense. The strawberries bring sweetness and a little tartness, the cucumber keeps everything fresh and hydrating, and a honey-lime dressing ties it all together. This is one of those sides that looks like you put more effort in than you actually did, which I always appreciate. It takes about ten minutes from fridge to table and it's genuinely one of the prettiest bowls you'll put out all summer.
Ingredients
- 1 lb fresh strawberries, hulled and sliced
- 1 English cucumber, thinly sliced into rounds or half-moons
- 2 tablespoons fresh lime juice
- 1 tablespoon honey
- 1 tablespoon fresh mint leaves, roughly torn
- Pinch of salt
- Optional: ¼ teaspoon chili flakes or Tajín for a little heat
Instructions
- Slice the strawberries and cucumber and add them to a medium bowl.
- In a small bowl, whisk together the lime juice, honey, and pinch of salt. Taste it — if your strawberries are already very sweet you might want a little extra lime.
- Pour the dressing over the fruit and cucumber and toss gently to coat.
- Scatter the torn mint leaves over the top. Add chili flakes or a sprinkle of Tajín if you're using it. Serve right away or chill for up to 30 minutes.
Tips
- Tip: Use the ripest strawberries you can find — this salad lives or dies by the quality of the fruit, so if it's not strawberry season, wait or use a different salad.
- Tip: Tajín (the chili-lime seasoning you'll find at Walmart in the spice aisle) sprinkled over the top makes this taste like something from a street food cart — highly recommend trying it at least once.
- Tip: Don't make this more than an hour ahead — the strawberries release juice and the salad gets a bit soupy if it sits too long.
25. Simple Strawberry Spring Mix Salad
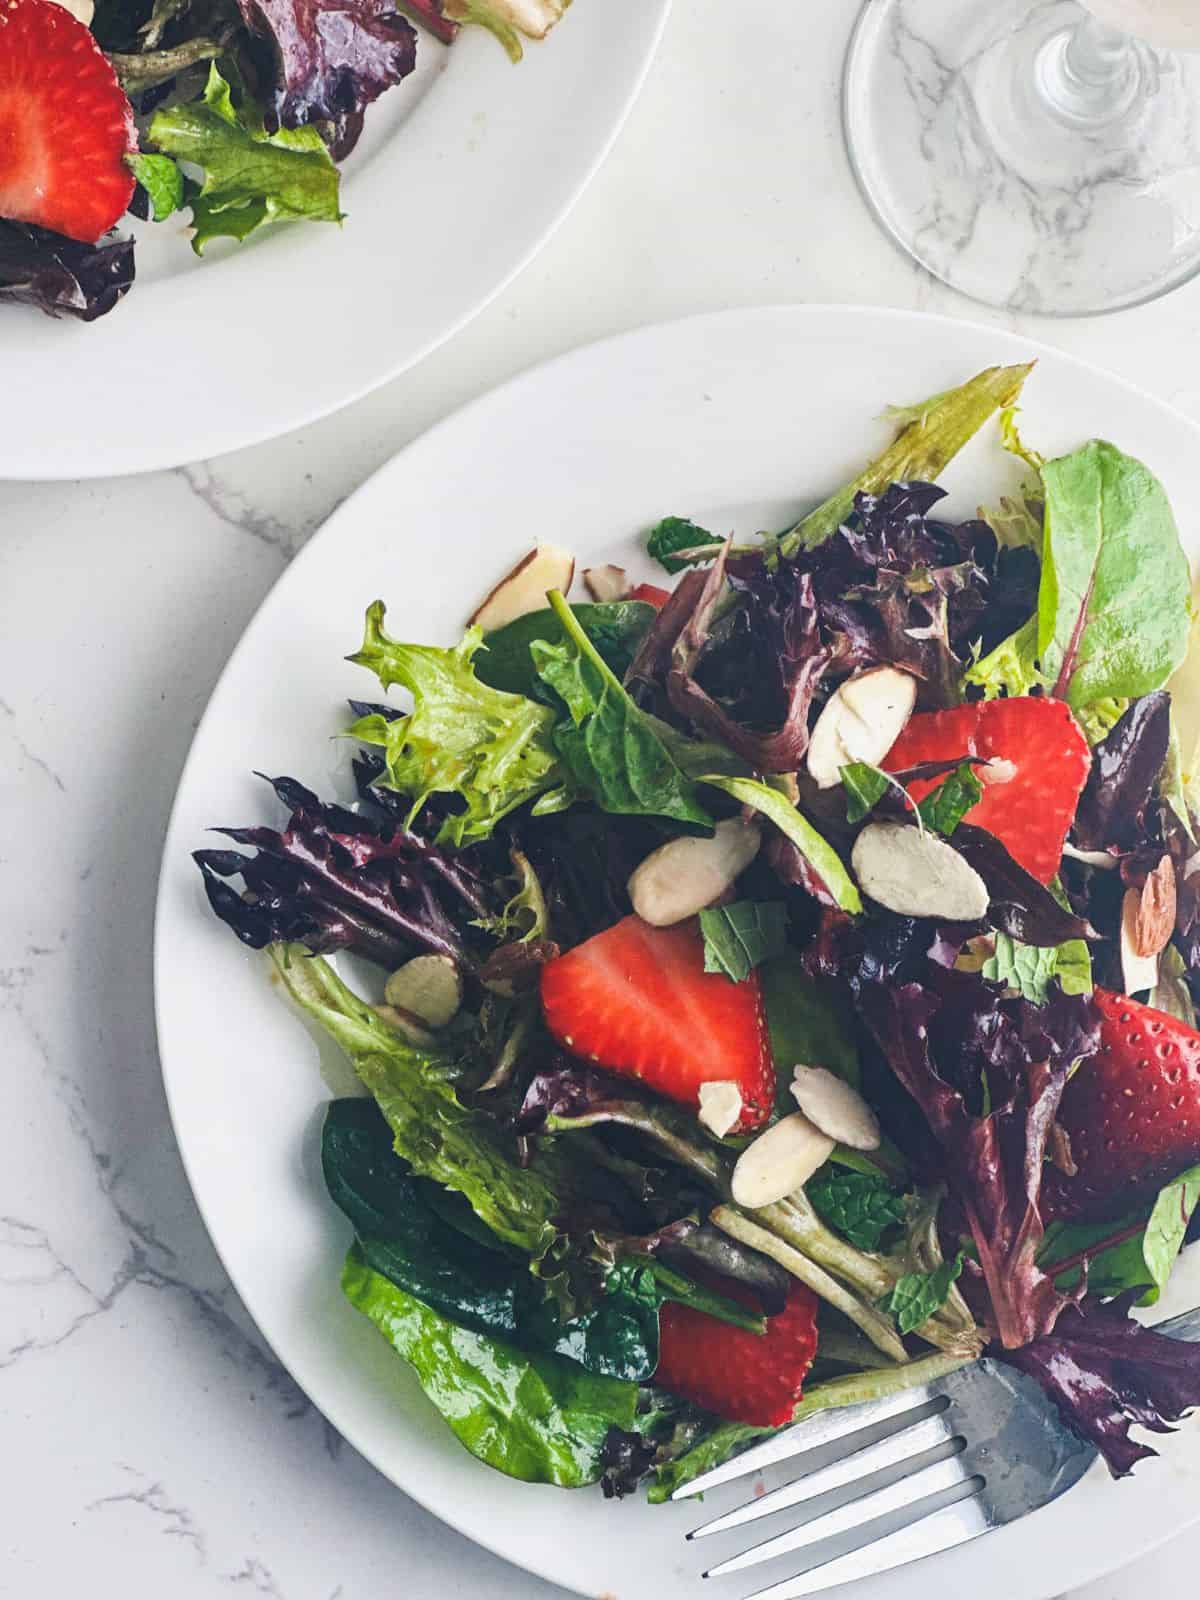
This is the salad I make when I want something on the table in under ten minutes and I still want it to look like I tried. Fresh strawberries over a bed of spring mix with a simple honey-balsamic dressing — it comes together so fast it almost feels like cheating. Zainab will eat a salad without complaint exactly twice a year, and this is one of those times. The sweetness of the berries does a lot of the heavy lifting here, so even people who claim they don't like salad tend to go back for seconds.
Ingredients
- 5 oz spring mix (one standard bag from Walmart or Trader Joe's works fine)
- 1½ cups fresh strawberries, hulled and sliced
- ¼ cup crumbled feta cheese
- ¼ cup candied pecans or walnuts (or plain toasted nuts if that's what you have)
- 3 tablespoons balsamic vinegar
- 2 tablespoons olive oil
- 1 tablespoon honey
- ¼ teaspoon salt
- ¼ teaspoon black pepper
Instructions
- In a small jar or bowl, whisk together the balsamic vinegar, olive oil, honey, salt, and pepper until combined. Taste and adjust — if it's too sharp, add a little more honey.
- Add the spring mix to a large salad bowl. Scatter the sliced strawberries, crumbled feta, and nuts over the top.
- Drizzle the dressing over the salad just before serving and toss gently so you don't bruise the greens. Serve immediately.
Tips
- Tip: If you're bringing this to a cookout, pack the dressing separately and toss on-site — dressed greens go limp fast in summer heat.
- Tip: Goat cheese works just as well as feta here if that's what you have — actually a little creamier and very good with the strawberries.
- Tip: Add sliced cucumber or avocado to bulk it up slightly if you're serving it alongside something light like grilled fish.
That's 26 side dishes — more than enough to get you through every cookout, potluck, and lazy weeknight dinner from June through August. Some of these I make on repeat all summer long (the corn salad barely makes it to the table before it's gone). Others are the ones I pull out when I actually want to impress someone without spending three hours in the kitchen. The point is, there's something here for every occasion, every schedule, and every crowd.
One thing I've learned after cooking summers' worth of these: don't overthink the side dish. The main gets all the attention — the grilled chicken, the ribs, the burgers — but honestly it's the sides that people keep talking about at the end of the night. A good pasta salad, a cold cucumber dish with a little kick, roasted potatoes that are crispy at the edges — that's what people remember. These recipes are simple on purpose. They're designed to let the fresh summer produce do the work.
If you try any of these, I'd genuinely love to know which ones land best with your family. And if you're already planning your next cookout menu, check out some of these other posts — they'll help you build the full spread without the stress. 🌽🍋☀️
More Recipes You Might Like
- Easy Pasta Salad Recipes — cold, make-ahead, and always a hit at summer gatherings
- Grilling Recipes — everything your side dishes deserve to sit next to on the plate
- Summer Salad Recipes — fresh, bright, and built for hot days when you don't want to turn the oven on
- Easy Potluck Recipes — if you're bringing a dish to someone else's cookout, start here
- Browse All Recipe Roundups — more curated lists across every meal type and season
Frequently Asked Questions
Which of these summer side dishes can I make ahead of time?
Most of the cold sides in this list — pasta salads, bean salads, slaws, and dips — actually taste better the next day after the flavors have had time to sit together. I usually make those the night before and just give them a quick stir before serving. The roasted and grilled sides are better fresh, but you can prep everything ahead and cook them right before you eat.
What are the easiest summer side dishes for a beginner cook?
Honestly, the no-cook sides are where I'd tell anyone starting out to begin. Cucumber salads, corn salads, simple slaws — you're mostly just chopping and mixing. No timing issues, no hot oven to manage, and they come together in under 15 minutes. Once you're comfortable with those, the sheet pan roasted vegetables are a good next step.
How do I keep cold side dishes from getting warm at an outdoor cookout?
This one I learned the hard way at a Fourth of July cookout where my pasta salad sat in the sun for two hours. Now I either keep the serving bowl set inside a larger bowl of ice, or I bring it out in two batches — half to start, half still cold in the cooler. If you're using a dish with mayo or dairy, don't let it sit out longer than about an hour in the heat.
Can I substitute fresh corn with canned or frozen corn in these recipes?
Yes, and I do it all the time outside of peak corn season. Canned corn (drained well) works fine in cold salads. Frozen corn is better for anything you're cooking — just thaw it first and pat it dry so it doesn't steam when it hits a hot pan. Fresh is obviously best when it's in season, but don't let the absence of it stop you from making these dishes.
How many of these side dishes do I need for a summer cookout for 10 people?
For 10 people I usually do 3 sides — one starchy (pasta or potato based), one vegetable, and one lighter salad or slaw. That gives people variety without you spending your whole Saturday cooking. I almost always double the starchy side because it's the one that runs out first. If kids are in the mix, make sure at least one side is something simple they'll actually eat.
Share This Post!
If this list helped you plan your summer cookout or potluck menu, save it to Pinterest or share it with someone who's hosting this weekend — it might save them a last-minute grocery store panic. 🌽☀️
View More Recipes here Recipe Roundups





Comments
No Comments