
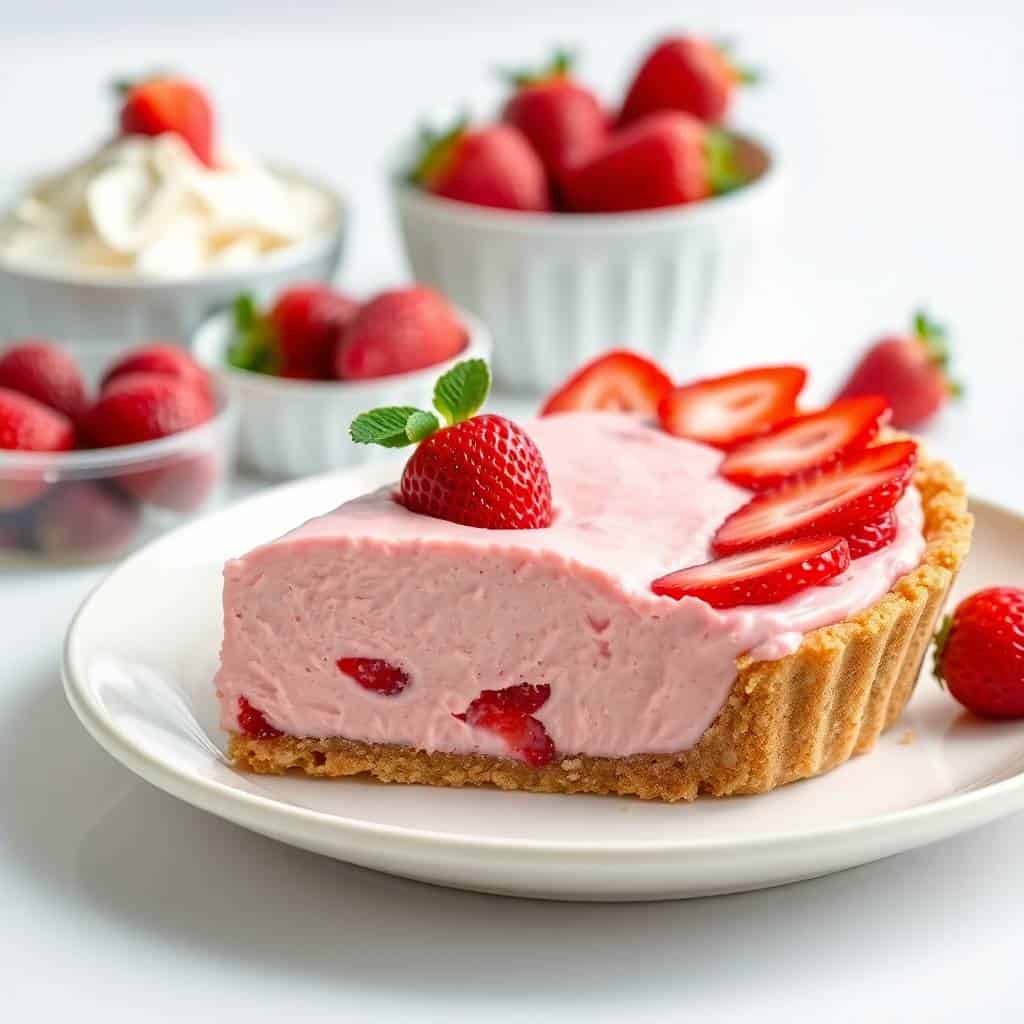
I made this strawberry icebox pie for the first time in the middle of a brutal July heat wave, when the thought of turning on the oven made me want to cry. No baking, no standing over a hot stove — just a cold, creamy pie that comes together in about 20 minutes of actual work and then does its thing in the fridge overnight. The first time I pulled it out the next morning, I honestly wasn't sure it had set properly. It had. It sliced cleanly, held its shape, and tasted like summer in every bite.
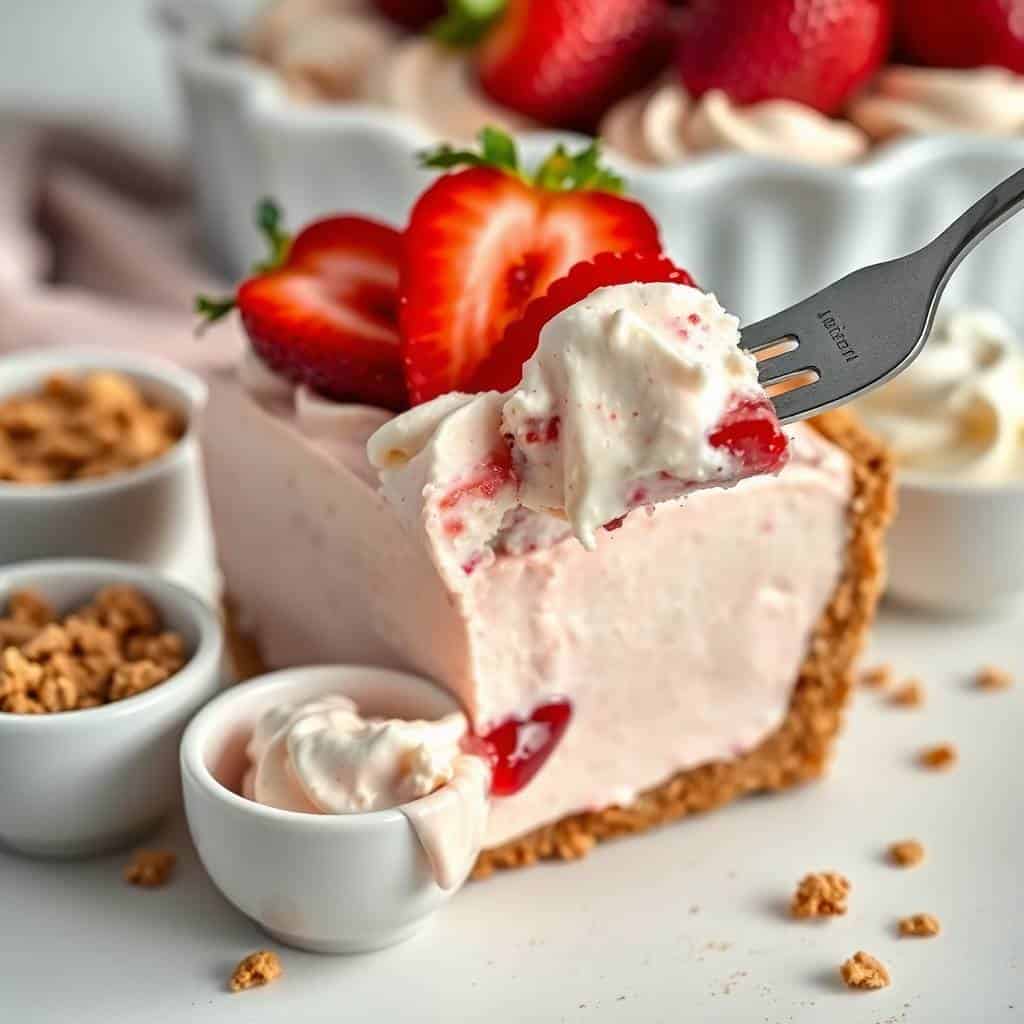
What makes this version work is the combination of whipped cream folded into the cream cheese filling, which makes it light instead of dense and cheesecake-heavy. I've seen some recipes that skip the whipped cream entirely and just use condensed milk and cream cheese — and those are fine, but they taste more like a dense cheesecake than a refreshing icebox pie. The whipped cream is what gives it that cloud-like, chilled texture that makes you go back for a second slice.
My kids both love this, but Zainab is the one who gets particularly excited about it — she asks me to make it every time strawberries are on sale at the grocery store. My husband likes his slice with extra whipped cream on top, which, honestly, same. I also love that I can prep this the night before a gathering and not think about dessert again until it's time to serve. If you need a stress-free make-ahead dessert for summer, this is it. You might also like my peanut butter cheesecake if you're a fan of no-bake, chilled desserts — it follows a similar method.
One thing I'll say upfront: don't rush the chill time. I once tried to serve it after just 3 hours because I was impatient, and the filling was still a little too soft to slice neatly. Six hours is the minimum. Overnight is better. Plan ahead and you'll have no problems.
Why You'll Love This Recipe
- No oven needed: This is a fully no-bake dessert, which is exactly why I reach for it in summer. When it's 95°F outside, the last thing I want to do is heat up my kitchen for a dessert. Everything comes together on the counter and then chills in the fridge — no baking, no broiling, no standing over a hot pan.
- Light and creamy, not heavy: Folding whipped cream into the filling makes the texture much lighter than a standard cheesecake. It's cool and airy, which is exactly what you want when the weather is warm. Even after a big meal, a slice of this doesn't feel overwhelming.
- Make it the night before: I genuinely love a dessert I can prep the evening before and forget about until it's time to serve. This pie needs at least 6 hours to set anyway, so making it the day before isn't just possible — it's actually ideal. Less stress the day of, and the pie tastes even better after a full night of chilling.
- Short ingredient list: You need cream cheese, sweetened condensed milk, heavy cream, strawberries, vanilla, lemon juice, and a handful of things for the crust. That's it. Most of it is available at any regular grocery store — no specialty ingredients, no obscure items, nothing you need to hunt down.
- Flexible crust options: Graham crackers are the classic choice, and that's what I use most often. But I've also made this with an Oreo crust when I was out of graham crackers and had half a pack of Oreos sitting in the pantry — and honestly, the chocolate version is incredible. Use whatever you have on hand.
Ingredients
- For the Crust:
- 1 ½ cups graham cracker crumbs
- ¼ cup granulated sugar
- 6 tablespoons unsalted butter, melted
- For the Filling:
- 1 package (8 oz) cream cheese, softened to room temperature
- 1 can (14 oz) sweetened condensed milk
- 1 teaspoon vanilla extract
- ¼ cup fresh lemon juice
- 1 ½ cups fresh strawberries, pureed (about 2 cups whole berries before blending)
- 1 cup heavy whipping cream, whipped to stiff peaks
- For Topping:
- Fresh strawberries, sliced
- Whipped cream (optional but recommended)
Directions
- Make the crust: Combine the graham cracker crumbs, sugar, and melted butter in a bowl and stir until everything is evenly moistened — it should look like wet sand. Press the mixture firmly into a 9-inch pie dish, pressing up the sides as well. Put it in the fridge for at least 15 minutes to firm up before adding the filling.
- Puree the strawberries: Blend the strawberries until smooth using a blender or food processor. If you don't have either, you can mash them thoroughly by hand with a fork — the texture will be slightly more rustic, but it still works. Set the puree aside.
- Beat the cream cheese: In a large bowl, beat the softened cream cheese with a hand mixer (or even a wooden spoon if yours is soft enough) until it's completely smooth with no lumps. This step matters — if the cream cheese is cold, you'll end up with little lumps in your filling that don't go away.
- Add the condensed milk, vanilla, and lemon juice: Pour in the sweetened condensed milk, vanilla extract, and lemon juice, and mix everything together until fully combined and smooth. The lemon juice isn't just for flavor — the acidity helps the filling set up properly.
- Fold in the strawberry puree and whipped cream: Stir the strawberry puree into the cream cheese mixture until fully incorporated. Then gently fold in the whipped cream using a spatula, being careful not to deflate it. This is what gives the pie its light, mousse-like texture — don't rush it.
- Assemble and chill: Pour the filling into the chilled crust and smooth the top with a spatula. Refrigerate for at least 6 hours, or overnight. I know it's hard to wait, but this is non-negotiable — the pie needs that time to set fully.
- Garnish and serve: Right before serving, top with sliced fresh strawberries and a generous amount of whipped cream if you like. Use a knife dipped in warm water to get clean, neat slices.
Tips for Success
- Take the cream cheese out early: I used to skip this step and wonder why my filling had tiny lumps in it. Cold cream cheese doesn't beat smooth — it stays slightly clumpy no matter how long you mix it. Let it sit on the counter for at least 30 minutes before you start, and it'll beat to a completely smooth base with minimal effort.
- Press the crust hard: The first time I made this, my crust crumbled apart when I tried to slice the pie. The problem was I hadn't pressed it firmly enough into the dish. Use the flat bottom of a measuring cup or a glass to really compact the crumb mixture — the crust should feel solid, not loose, before it goes in the fridge.
- Don't skip the lemon juice: It might seem like a small thing, but the lemon juice does two jobs here — it brightens the strawberry flavor and it helps the filling set up with a slightly firmer texture. I tried leaving it out once to see what would happen, and the filling was noticeably softer and flatter in flavor. Keep it in.
- Whip the cream to stiff peaks: You want the whipped cream to hold its shape before you fold it in. If it's under-whipped, it will deflate into the filling and you'll lose that light texture. Whip it in a cold bowl if possible — I stick my mixing bowl in the freezer for 10 minutes before whipping, especially in summer when my kitchen is warm.
- Add the toppings right before serving: I always wait until I'm about to cut and serve before I add the sliced strawberries and whipped cream on top. If you garnish too early, the strawberries release juice that makes the top of the pie look watery. A fresh garnish right before serving keeps everything looking nice and the berries tasting their best.
Variations
- Chocolate cookie crust: Swap the graham crackers for crushed Oreos (filling included) and skip the added sugar, since Oreos are sweet enough on their own. The combination of chocolate crust and strawberry filling is genuinely wonderful — it tastes like chocolate-covered strawberries in pie form. I've made this version for birthdays and it always gets more compliments than the classic.
- Strawberry-lime version: Replace the lemon juice with fresh lime juice for a slightly more tropical, tangy flavor. It's a small change but it really shifts the overall taste in an interesting direction — brighter and a little more tart. My husband actually prefers this version in summer.
- Mixed berry pie: Use a combination of strawberries, raspberries, and blueberries instead of all strawberries. I've done a half-and-half strawberry-raspberry blend that gives the filling a deeper pink color and a slightly more complex fruit flavor. Any combination of berries works well here — just keep the total pureed fruit amount the same.
- Mini individual pies: Line a muffin tin with cupcake liners, press a tablespoon or two of crust mixture into each one, and fill with the strawberry mixture. These set in the fridge just the same way. I make these for kids' parties or when I want to serve something that doesn't require slicing — you just peel off the liner and serve. Zainab loves helping me press the crusts into the liners for these.
- Dairy-free version: Use dairy-free cream cheese (the Philadelphia plant-based version works well if you can find it) and swap the sweetened condensed milk for sweetened condensed coconut milk, which is available at most larger grocery stores. Use full-fat coconut cream in place of the heavy whipping cream. It sets up slightly softer but the flavor is still really good — you get a subtle coconut note underneath the strawberry.
Serving and Storage
Serving
Serve the pie straight from the fridge — it should be cold when you cut into it. Let it sit out for no more than 10 minutes before slicing if it's been in the freezer compartment area of your fridge and feels very firm. Dip your knife in warm water and wipe it clean between cuts for neat slices. A dollop of whipped cream and a few fresh strawberry slices on each piece is all you need. If you're serving this at a summer gathering, it pairs well after a lighter meal — I've served it after my chicken Caesar pasta salad and it's a great combination.
Storage
Cover the pie tightly with plastic wrap or store it in a pie container and keep it in the refrigerator for up to 4 days. I don't recommend freezing this one — the cream cheese and whipped cream filling changes texture when frozen and thawed, going a bit grainy and separated. Keep it refrigerated and it stays in great shape. If you've already topped it with fresh strawberries before storage, those will release some juice after the first day, so it's better to add fresh garnish only to individual slices as you serve them.

Frequently Asked Questions
Can I use frozen strawberries instead of fresh ones?
You can, but thaw them completely first and drain off as much liquid as possible before blending. Frozen strawberries release a lot of water when they thaw, and if you blend them without draining, the filling will be too loose and won't set properly. Fresh strawberries give you a cleaner, brighter flavor and a better-textured filling — use them when they're in season and affordable.
How long does the pie need to chill before it's ready to eat?
At minimum, 6 hours. Overnight is better. I learned this the hard way — I tried cutting into it after 3 hours once and the filling was still too soft to hold its shape when sliced. If you're making it for an event, prep it the evening before and you'll have no issues at all.
What if I don't have a blender or food processor to puree the strawberries?
No blender needed — just mash the strawberries thoroughly with a fork until they're mostly smooth, then whisk them into the cream cheese mixture. The filling will have a slightly more rustic texture with small bits of berry, which honestly isn't a bad thing. It still tastes great and sets up just fine.
Can I make this pie gluten-free?
Yes — just swap the regular graham crackers for gluten-free graham crackers, which are available at most larger grocery stores or on Amazon. Brands like Kinnikinnick and Schar both make a decent gluten-free version. The rest of the filling ingredients are naturally gluten-free, so the crust is the only thing you need to swap out.
Can I make this pie a day ahead of time?
Yes, and I'd actually encourage it — making it the day before is the ideal approach. The pie sets up better after a full night in the fridge, and having it done ahead of time means you're not scrambling on the day of your gathering. Just hold off on adding the fresh strawberry topping until right before you serve it.
STRAWBERRY ICEBOX PIE
Ingredients
For the Crust:
- 1 ½ cups graham cracker crumbs
- ¼ cup granulated sugar
- 6 tablespoons unsalted butter melted
For the Filling:
- 1 package 8 oz cream cheese, softened
- 1 can 14 oz sweetened condensed milk
- 1 teaspoon vanilla extract
- 1 ½ cups fresh strawberries pureed
- 1 cup heavy whipping cream whipped
For Topping:
- Fresh strawberries sliced
- Whipped cream optional
Instructions
- Make the Crust: Combine graham cracker crumbs, sugar, and melted butter. Press into a 9-inch pie dish. Chill for 15 minutes.
- Prepare Filling: In a bowl, beat cream cheese until smooth. Add condensed milk, vanilla, and strawberry puree. Mix until well combined.
- Fold in Cream: Gently fold in whipped cream until fluffy and smooth.
- Assemble: Pour mixture into prepared crust. Smooth the top.
- Chill: Refrigerate for at least 4 hours or until firm.
- Serve: Top with sliced strawberries and whipped cream before serving.
Notes
- Make Ahead: Can be prepared a day in advance and kept chilled until serving.
- Serving Suggestions: Garnish with chocolate shavings or drizzle with strawberry sauce.
- Variations: Use an Oreo crust for a chocolate twist.
This is one of those recipes I keep coming back to every summer without fail. It doesn't require anything special — no stand mixer, no oven, no fancy technique. Just a bowl, a hand mixer, and a fridge. The whole process takes me about 20-25 minutes of active work, and then it just sits and does its thing overnight. I've made it for weeknight desserts, for backyard get-togethers, and once for a last-minute gathering when I needed something that looked impressive without actually being difficult.
I also want to mention — if you're a fan of no-bake, chilled desserts in general, my peanut butter cheesecake uses a similar approach and is another one my family requests constantly. Both are good recipes to have in your back pocket for summer. And if you're planning a full spread, I've found this pie works beautifully as the dessert course after something light and fresh like my chicken Caesar pasta salad — the whole meal feels effortless.
The thing I appreciate most about this pie is that it genuinely gets better the longer it chills. Make it before you go to bed, pull it out the next day, and the flavors have had time to settle and the texture is exactly what you want. I've made a double batch before when I knew I needed to feed a bigger crowd — two pies disappear just as fast as one. If strawberries are at peak season where you are right now, this is absolutely the time to make it. 🍓✨
If you liked this recipe, here are a few more you might want to try:
- Peanut Butter Cheesecake — another no-bake chilled dessert that's always a hit
- Easter Basket Cookies — a fun, festive treat that the kids love to help make
- Chicken Caesar Pasta Salad — a great no-fuss main course to serve before this pie
- Crab Cake Egg Rolls — if you're putting together a full summer spread, these make a great starter





Comments
No Comments