
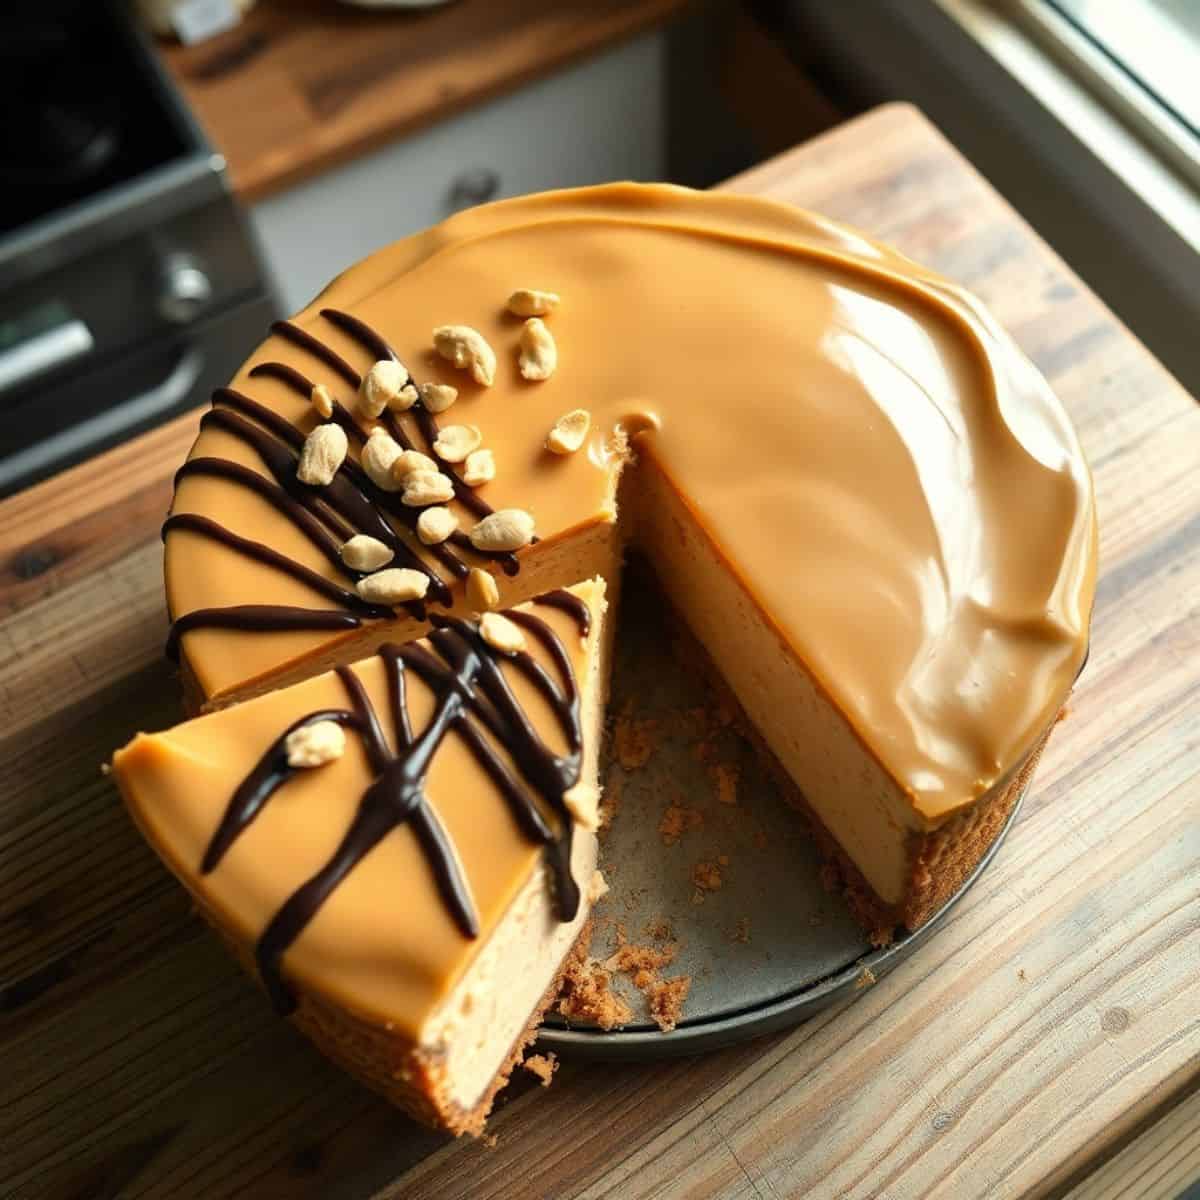
My husband doesn't really have a sweet tooth — except when there's cheesecake on the counter. And this peanut butter version? He once ate three slices before I'd even taken a photo. I had to make a second one just to have something to post.
What makes this cheesecake work is the ratio. A lot of peanut butter cheesecake recipes I've tried are either too dense or the peanut butter flavor gets lost behind the cream cheese. This one uses a full cup of creamy peanut butter in the filling, and you actually taste it in every bite. The graham cracker crust adds just enough saltiness to balance the richness. It's not trying to be subtle — it's a full peanut butter dessert and it owns that completely.
I make this one for birthdays and for the occasional "we need something to bring to dinner" moment. If you're putting together a cookout spread and need a dessert that travels well, this is the one — I've served it alongside my Flag Cake with Whipped Cream and Fresh Berries at summer gatherings and it holds up beautifully. Zainab asks for it every year on her birthday, no substitutions allowed.
One thing to know going in: this is not a quick dessert. The actual work takes maybe 30 minutes, but between the baking, the slow oven cool-down, and the overnight refrigerator chill, you're looking at a full day before it's ready to slice. Plan accordingly. Make it the night before you need it — it's actually better that way.
Why You'll Love This Recipe
- Real peanut butter flavor all the way through: A full cup of peanut butter goes into the filling, so this isn't a cheesecake that just hints at peanut butter. Every forkful tastes like it. I use Jif or Skippy — the standard creamy kind you find at any Walmart or Costco. Natural peanut butter with the oil separation can make the texture grainy, so I stick with the regular stuff.
- The texture is genuinely creamy, not heavy: The first time I made this, I overbaked it by about 10 minutes because I was nervous about the jiggly center. It came out too dense and a little grainy. Once I trusted the process — edges set, center still slightly wobbly — the texture was completely different. Smooth, almost mousse-like once it chills overnight. The key is not overbaking.
- Make-ahead friendly: I make a double batch for larger gatherings because one cheesecake disappears before half the guests have gone through the line. But even for a regular dinner party, the fact that this needs to chill overnight means it's already done before your guests arrive. No last-minute dessert stress. The fridge does the work while you sleep.
- No fancy equipment required: I don't have a stand mixer. I use a hand mixer I bought for about $20 years ago. It works perfectly for this. The most important thing is that your cream cheese is genuinely soft — if it's cold, no mixer in the world will save you from lumps. Let it sit out for at least an hour before you start.
- You can dress it up or keep it plain: On its own with just the filling, this cheesecake is already a complete dessert. But if you want to go further — chocolate ganache on top, chopped Reese's cups, a drizzle of caramel — it handles all of that without getting overloaded. I usually go with the simple peanut butter drizzle topping listed in the recipe. Zainab insists on Reese's cups scattered on top for her birthday version.
Ingredients
- For the Crust:
- 1 ½ cups graham cracker crumbs
- ¼ cup granulated sugar
- 6 tablespoons unsalted butter, melted
- For the Filling:
- 32 ounces (4 packages, 8 oz each) cream cheese, softened to room temperature
- 1 ½ cups granulated sugar
- 1 cup creamy peanut butter (Jif or Skippy — not natural/no-stir)
- 4 large eggs, at room temperature
- 1 teaspoon vanilla extract
- For the Peanut Butter Topping (Optional):
- ½ cup creamy peanut butter
- ¼ cup powdered sugar
- 2 tablespoons milk (add more if you want a thinner drizzle)
Directions
- Make the crust: Preheat your oven to 350°F (175°C). Mix the graham cracker crumbs, granulated sugar, and melted butter in a bowl until the crumbs look like wet sand. Press the mixture firmly into the bottom of a 9-inch springform pan — use the bottom of a flat glass to really pack it in. Bake for 8–10 minutes until lightly golden, then let it cool completely before adding the filling.
- Make the filling: Beat the softened cream cheese with a hand mixer on low speed until completely smooth — no lumps. This is where cold cream cheese will ruin you, so please let it sit out for a full hour first. Gradually add the granulated sugar and beat until combined, then increase to medium speed for about a minute until the mixture looks light.
- Add peanut butter: Beat in the creamy peanut butter until fully incorporated and the mixture is smooth. Scrape down the sides of the bowl as you go — peanut butter likes to hide along the edges.
- Add eggs and vanilla: Add the eggs one at a time on low speed, mixing just until each one disappears into the batter. Overmixing after the eggs go in introduces air, which causes cracks. Stir in the vanilla extract. The batter should look smooth and glossy.
- Bake the cheesecake: Pour the filling over the cooled crust. Bake for 50–60 minutes. The edges should look set and matte, but the center should still have a gentle jiggle when you nudge the pan — like Jell-O, not like liquid. Don't overbake it chasing a fully set center. It finishes setting in the fridge.
- Cool slowly: Turn off the oven and crack the door open a few inches. Leave the cheesecake in there for a full hour. This slow temperature drop is what prevents the top from cracking. Skipping this step is the most common mistake I see people make with cheesecakes.
- Chill overnight: Take the cheesecake out of the oven and let it cool to room temperature on the counter (about an hour more). Then cover the pan tightly with plastic wrap and refrigerate for at least 4 hours — overnight is really the move here. Don't rush this part.
- Make the topping (optional): Whisk together the peanut butter, powdered sugar, and milk until smooth. Add an extra splash of milk if you want it thin enough to drizzle rather than spread. Spoon or drizzle it over the chilled cheesecake right before serving.
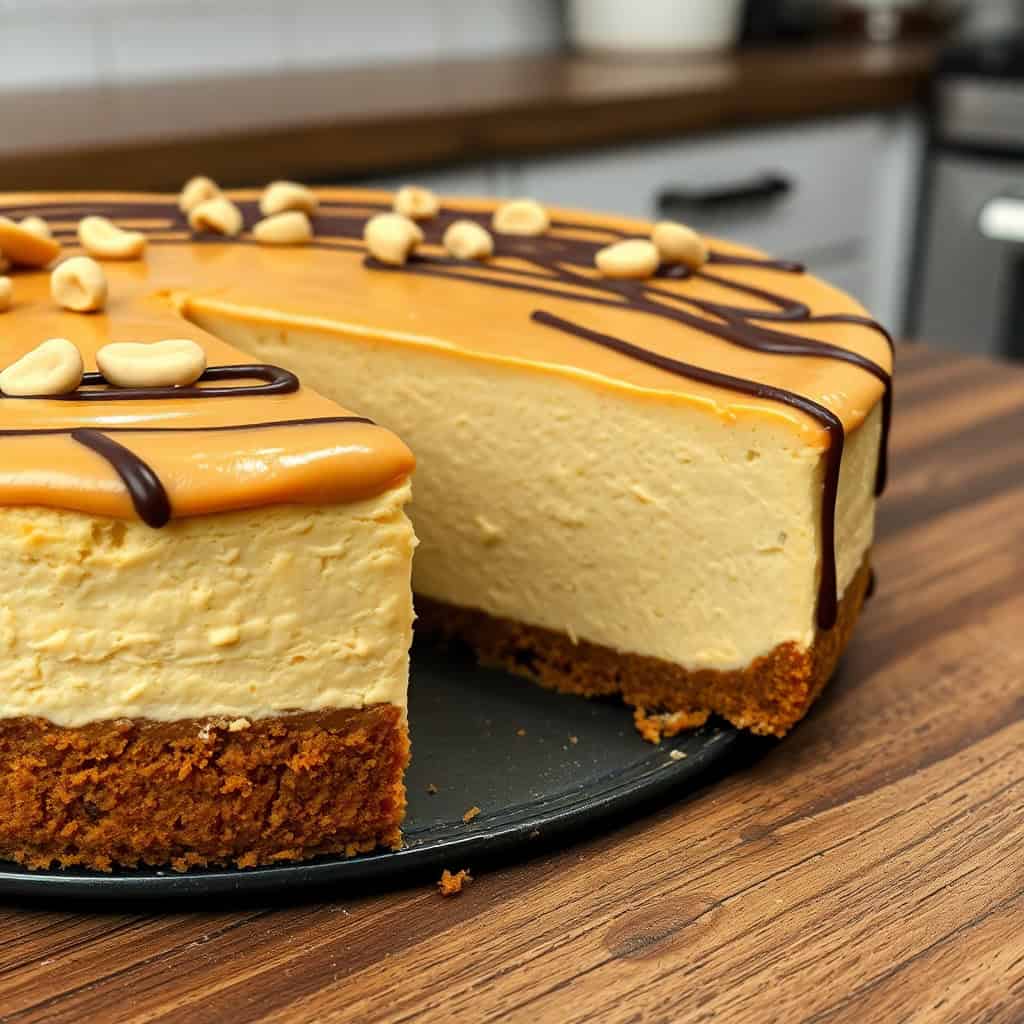
- Serve: Remove the springform pan sides carefully. Add any toppings you like — chopped peanut butter cups, whipped cream, chocolate sauce, chopped peanuts. Slice with a sharp knife, wiping the blade clean between cuts for tidy slices.
Tips for Success
- Room temperature everything, and I mean it: Cold cream cheese is the number one reason cheesecakes turn out lumpy. I learned this the hard way on my second attempt — I was impatient and pulled it straight from the fridge. The filling had tiny white clumps no matter how long I beat it. Now I set the cream cheese and eggs out a full hour before I start. If you forgot, you can microwave the cream cheese in 10-second bursts on low power until it's soft but not melted.
- Don't overmix once the eggs go in: Before the eggs, you can beat the filling as long as you need to get it smooth. After the eggs, switch to low speed and mix just until combined. Extra air in the batter puffs the cheesecake up during baking and then it collapses and cracks as it cools. Low and slow after the eggs.
- The jiggle test saves you from overbaking: Pull the cheesecake out when the outer 2 inches look set but the center still wobbles gently when you shake the pan. It feels wrong to take it out before it looks "done," but it will firm up completely in the fridge. The one time I baked until the whole top looked set, it came out with a slightly gummy, overcooked texture in the middle.
- Stick with regular creamy peanut butter: Natural peanut butter — the kind where the oil separates and you have to stir it — can make the cheesecake filling slightly grainy and can affect how it sets. I use Jif creamy every time. It's consistent, it mixes in smoothly, and the flavor is exactly what you want here. This isn't a place to experiment with the fancy stuff.
- Wipe the knife between slices: This sounds fussy but it makes a real difference in how the slices look. A warm, clean knife cuts through the creamy filling without dragging. I run mine under hot water and dry it with a paper towel before each cut. Takes five extra seconds and the slices come out clean instead of smeared.
Variations
- Chocolate peanut butter cheesecake: Add ¼ cup of unsweetened cocoa powder to the filling along with the peanut butter. You get that Reese's cup flavor in every bite — chocolate and peanut butter together in the filling itself. Top with a simple chocolate ganache (equal parts melted chocolate chips and warm heavy cream) poured over the chilled cheesecake. This is the version my husband requests most often.
- Oreo crust version: Swap the graham crackers for crushed Oreos (with the filling scraped out) mixed with melted butter. It gives the base a darker, more intense flavor that pairs really well with the peanut butter filling. Don't add extra sugar when using Oreos — they're already sweet enough. I've made this version for a few bake sales and it always goes first.
- Reese's cups cheesecake: Roughly chop about 1 cup of Reese's miniature peanut butter cups and fold them gently into the filling right before pouring it over the crust. Scatter more on top after chilling. This is Zainab's birthday version — she has been requesting it for three years straight. The cups soften slightly inside the filling and you get little pockets of chocolate in every slice.
- Salted caramel peanut butter cheesecake: Skip the peanut butter topping and drizzle store-bought salted caramel sauce over the chilled cheesecake instead. Sprinkle a small pinch of flaky sea salt on top. The salt cuts through the richness and makes the whole thing taste a little more sophisticated. This is the version I'd bring to a dinner party where I want it to look a bit fancy without much extra effort.
- Mini cheesecakes in a muffin tin: If you don't have a springform pan or you want individual portions, press the crust mixture into a lined muffin tin and fill each cup about ¾ full with the cheesecake batter. Reduce the baking time to about 20–25 minutes. These are great for a party where slicing feels like too much work. I've done this for school events when I needed something easy to hand out.
Serving and Storage
Serving
Serve this cheesecake cold, straight from the fridge. It slices cleanest when it's fully chilled — if it sits at room temperature for too long, the filling softens and the slices can get a little messy. I usually pull it out of the fridge right before I'm ready to slice and serve. Top it fresh with whatever garnishes you're using just before serving rather than the night before — that way the toppings stay looking good. If you're bringing it to a gathering, transport it in the springform pan with the sides still on and remove them just before serving. For a summer cookout spread, this cheesecake pairs well alongside something like a Black Forest Swiss Roll if you want to offer a chocolate option alongside.
Storage
Store leftover cheesecake covered in the refrigerator for up to 5 days. I press a piece of plastic wrap directly against any cut edges to stop them from drying out. To freeze, wrap the whole cheesecake (or individual slices) tightly in plastic wrap first, then in foil. It keeps well in the freezer for up to 3 months. Thaw overnight in the refrigerator — don't try to speed it up at room temperature or the texture suffers. Frozen and thawed slices are slightly less creamy than fresh, but they're still genuinely good.
Frequently Asked Questions
Can I make this cheesecake ahead of time?
Yes, and honestly you should. This cheesecake is better after it's had a full night in the fridge. The texture firms up and the flavor deepens. I almost always make it the day before I need it. You can make it up to two days ahead — just keep it covered in the fridge and add your toppings right before serving.
Why did my cheesecake crack on top?
The two most common reasons are overmixing after adding the eggs (which builds up air in the batter) and cooling too fast. Make sure you're mixing on low speed once the eggs go in, and that you're leaving the cheesecake in the turned-off oven with the door cracked for a full hour before taking it out. If it still cracks, the peanut butter topping covers everything anyway — no one will know.
Can I use natural peanut butter in this recipe?
I'd avoid it. Natural peanut butter — the kind where the oil floats to the top — can make the filling slightly grainy and affects how the cheesecake sets. Regular commercial creamy peanut butter like Jif or Skippy gives you a smoother, more consistent result. Crunchy peanut butter works fine if you like a bit of texture in the filling.
Can I freeze peanut butter cheesecake?
Yes. Wrap it tightly in plastic wrap and then foil, and it'll keep in the freezer for up to 3 months. Thaw it overnight in the refrigerator. The texture is very slightly softer than fresh, but it's still good. I've frozen individual slices when I know I won't finish the whole cheesecake — they thaw in about 8 hours in the fridge.
What can I use instead of a springform pan?
A regular 9-inch cake pan works in a pinch, but getting clean slices out is harder without the removable sides. Line the pan with parchment and leave some overhang so you can lift the whole cheesecake out once it's fully chilled. Alternatively, make mini cheesecakes in a muffin tin — they bake faster (about 20–25 minutes) and you don't need to worry about removing them from a large pan.
PEANUT BUTTER CHEESECAKE
Ingredients
Crust:
- 1 ½ cups graham cracker crumbs
- ¼ cup granulated sugar
- 6 tablespoons ¾ stick unsalted butter, melted
Filling:
- 32 ounces 4 packages cream cheese, softened to room temperature
- 1 ½ cups granulated sugar
- 1 cup creamy peanut butter
- 4 large eggs
- 1 teaspoon vanilla extract
Topping (optional):
- Chocolate ganache melted chocolate and heavy cream
- Peanut butter cups chopped
- Whipped cream
- Chopped peanuts
- Caramel sauce
Instructions
- Make the crust: Preheat oven to 350°F (175°C). In a medium bowl, combine the graham cracker crumbs, granulated sugar, and melted butter. Mix well until the crumbs are evenly moistened. Press the mixture firmly into the bottom of a 9-inch springform pan. Bake for 8-10 minutes, until lightly golden. Let cool completely.
- Make the filling: In a large bowl, beat the softened cream cheese until smooth and creamy. Gradually add the granulated sugar, beating on low speed until combined. Then, increase the speed to medium and beat until light and fluffy.
- Add peanut butter: Beat in the creamy peanut butter until well combined.
- Add eggs and vanilla: Beat in the eggs one at a time, mixing on low speed after each addition. Stir in the vanilla extract.
- Bake the cheesecake: Pour the peanut butter filling into the prepared graham cracker crust. Bake for 50-60 minutes, or until the edges are set and the center is just slightly jiggly.
- Cool and chill: Turn off the oven and leave the cheesecake in the oven with the door slightly ajar for 1 hour to cool slowly. Then, remove the cheesecake from the oven and let it cool completely to room temperature. Cover the pan with plastic wrap and refrigerate for at least 4 hours, or preferably overnight, to allow the cheesecake to set completely.
- Garnish and serve: Before serving, remove the sides of the springform pan. Top the cheesecake with your favorite toppings, such as chocolate ganache, chopped peanut butter cups, whipped cream, chopped peanuts, or caramel sauce.
Notes
- Cream Cheese: It is crucial that the cream cheese is softened to room temperature for a smooth and creamy filling.
- Peanut Butter: Use creamy peanut butter. Avoid using natural or "no-stir" peanut butter, as these can sometimes make the filling grainy.
- Baking Time: Baking times may vary slightly depending on your oven. The cheesecake is done when the edges are set and the center is just slightly jiggly.
- Cooling and Chilling: The slow cooling and chilling process is essential for preventing cracks and ensuring a smooth and creamy texture.
- Chocolate Peanut Butter Cheesecake: Add cocoa powder to the filling or swirl melted chocolate into the filling.
- Oreo Crust Peanut Butter Cheesecake: Use Oreo cookies instead of graham crackers for the crust. Remove the cream filling from the Oreos before crushing them.
- Reese's Peanut Butter Cheesecake: Use Reese's peanut butter cups in the filling and as a topping. Chop the peanut butter cups and fold them into the filling.
- Salted Caramel Peanut Butter Cheesecake: Drizzle salted caramel sauce over the top of the cheesecake.
- Peanut Butter Fudge Swirl Cheesecake: Swirl peanut butter fudge into the cheesecake filling.





Comments
No Comments