
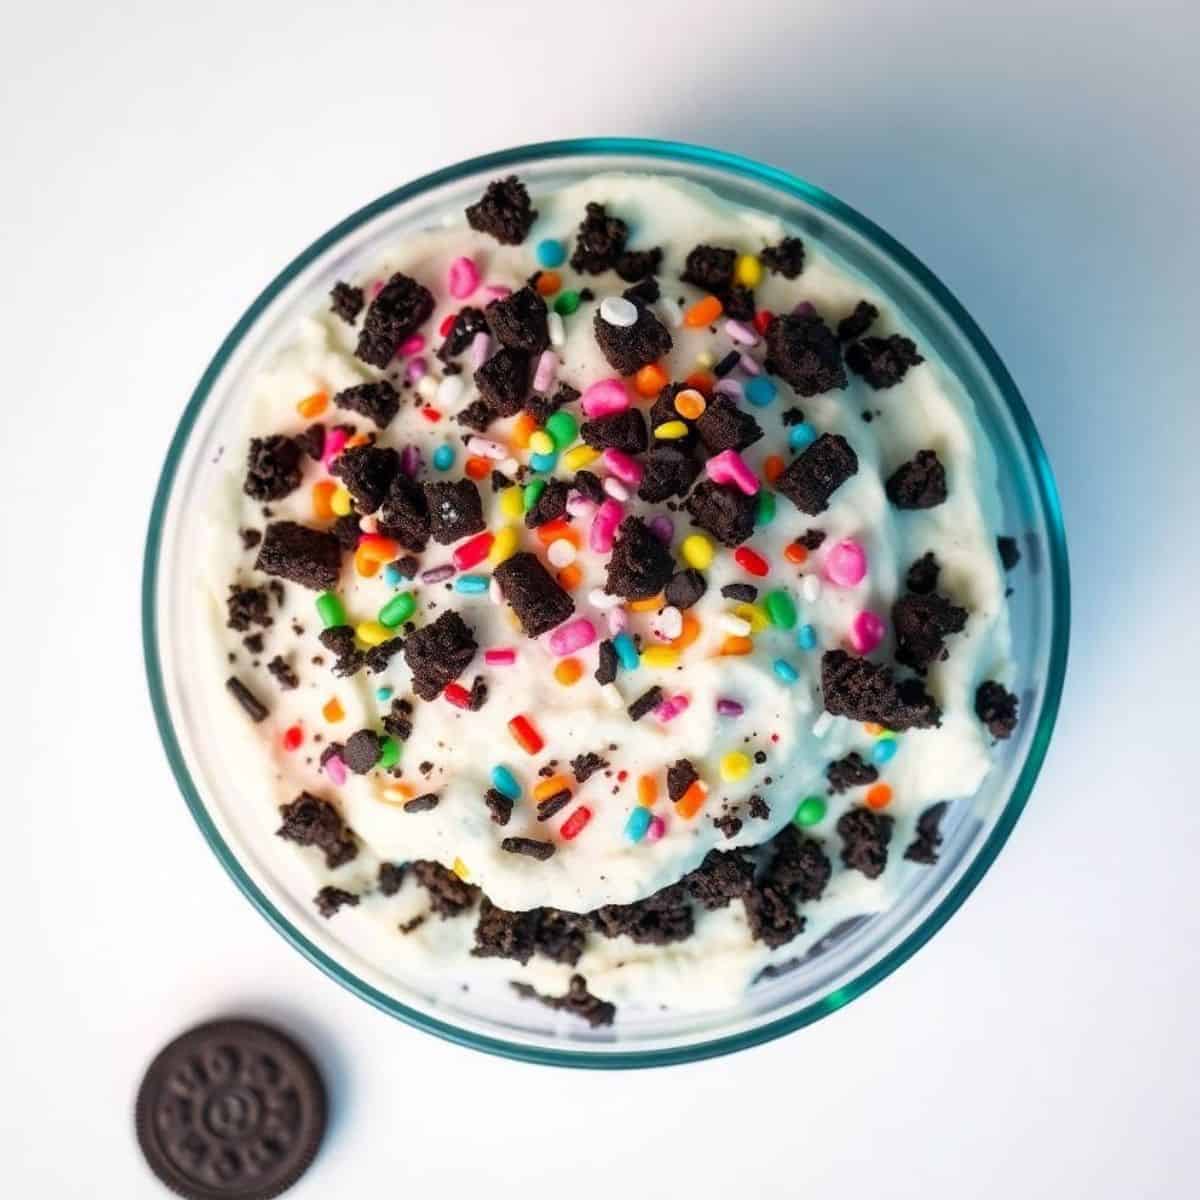
Imagine a dessert that’s as fun to make as it is to eat. This no-bake Funfetti Oreo icebox cake brings together colorful sprinkles, creamy layers, and chocolatey cookies. It’s an effortless treat for birthdays, or spontaneous sweet cravings.
The magic lies in its simplicity. You don’t need an oven or complicated techniques. Layers of crushed Oreos and sweet frosting meld perfectly in the refrigerator, creating a dessert that’s visually stunning and utterly indulgent.
Kids will be fascinated by the vibrant sprinkles throughout the creamy layers. Each slice offers a playful combination of textures, from crunchy cookies to smooth, sweet frosting, keeping everyone coming back for more.
It’s versatile enough to serve as a last-minute party dessert or a special homemade treat. With minimal prep and maximum flavor, this cake elevates casual gatherings to festive celebrations effortlessly.
Beyond taste, it’s customizable. You can adjust layers, add toppings, or experiment with different cookies. This cake turns ordinary ingredients into a delightful, crowd-pleasing masterpiece with zero baking stress.
WHY YOU WILL LOVE THIS RECIPE
- No-Bake Convenience: Skip the oven entirely; this cake comes together quickly and chills to perfection without baking effort.
- Funfetti Appeal: Colorful sprinkles throughout the layers make this dessert visually stunning and perfect for celebrations of all kinds.
- Crunchy Texture: Oreo layers provide satisfying crunch while creamy frosting keeps each bite soft and indulgent.
- Kid-Friendly: Children love the sprinkles, cookies, and creamy layers, making this a guaranteed hit at parties and family gatherings.
- Versatile Dessert: Perfect for birthdays, holidays, or casual treats, adapting easily to different occasions and presentation styles.
- Minimal Prep: With simple steps and few ingredients, even beginners can create an impressive dessert effortlessly.
INGREDIENTS
- 24 Oreo cookies, crushed
- 2 cups heavy whipping cream
- ½ cup powdered sugar
- 1 teaspoon vanilla extract
- 1 cup Funfetti cake mix or rainbow sprinkles
- Optional: additional crushed Oreos or sprinkles for topping
DIRECTIONS
- Step No.1: Prepare the whipped cream
In a large mixing bowl, beat the heavy whipping cream, powdered sugar, and vanilla extract until soft peaks form. This creamy mixture will hold your layers together beautifully.
- Step No.2: Crush the Oreos
Place Oreos in a food processor or zip-top bag and crush until fine crumbs form. Keep a few chunks for added texture if desired.
- Step No.3: Layer the cake
In a rectangular dish, spread a layer of crushed Oreos, followed by a layer of whipped cream. Sprinkle a small amount of Funfetti over the cream layer for color.
- Step No.4: Repeat layers
Alternate Oreo crumbs, whipped cream, and Funfetti until all ingredients are used, finishing with a layer of whipped cream and sprinkles on top.
- Step No.5: Chill the cake
Cover the dish and refrigerate for at least 4 hours or overnight. Chilling allows the layers to set and flavors to meld together perfectly.
- Step No.6: Serve and garnish
Before serving, garnish with extra Oreo crumbs or sprinkles if desired. Cut into squares and enjoy a colorful, creamy dessert.

TIPS FOR SUCCESS
- Use fresh cream: Fresh heavy cream whips better, giving a stable, fluffy texture for layering the cake perfectly.
- Chill equipment: For best results, chill the mixing bowl and beaters before whipping cream for firmer peaks.
- Layer evenly: Ensure each layer has an even amount of cookies and cream to maintain consistent taste and texture.
- Avoid overmixing: Overmixing whipped cream can cause it to collapse; stop once soft peaks form for best results.
- Refrigerate properly: Let the cake chill thoroughly to ensure layers set and slice cleanly.
- Use quality Oreos: Choose fresh Oreos for optimal crunch and flavor throughout the dessert.
- Add decorative toppings: Funfetti, sprinkles, or cookie chunks on top make presentation festive and enticing.
VARIATIONS
- Chocolate lovers: Swap Funfetti sprinkles for mini chocolate chips to create a rich, chocolatey version of this cake.
- Fruit twist: Add fresh berries between layers for a fruity, colorful, and slightly tart contrast to sweet cream.
- Peanut butter swirl: Incorporate a layer of peanut butter whipped cream for an indulgent flavor upgrade.
- Mini servings: Make individual portions in jars or cups for a fun, portable dessert option.
- Different cookies: Experiment with chocolate wafer or graham crackers instead of Oreos for unique textures and flavors.
- Frosting variations: Try cream cheese frosting or mascarpone for a tangy twist that complements the sweet layers.
- Themed sprinkles: Customize sprinkles to match holidays, parties, or celebrations for personalized fun in every slice.
SERVING AND STORAGE
Serving
Serve chilled in squares with extra sprinkles or cookie crumbs for a festive, colorful presentation perfect for any gathering.
Storage
Store in an airtight container in the refrigerator for up to 4 days to maintain creaminess and cookie crunch.

FAQ
Yes, prepare it a day in advance and refrigerate to let layers set perfectly before serving.
Full-fat heavy cream is recommended for stability; low-fat may not whip properly or hold layers.
Freezing is possible, but the whipped cream may change texture; thaw in the fridge before serving.
Absolutely! graham crackers, chocolate wafers, or other favorite cookies work well in this layered icebox cake.
Yes, use gluten-free Oreos or cookies and ensure Funfetti sprinkles are gluten-free for a safe alternative.
No bake Funfetti Oreo icebox cake is a perfect combination of convenience, flavor, and fun. Every layer offers a sweet, creamy, and crunchy bite that delights both children and adults.
Its playful appearance, thanks to colorful sprinkles, makes it ideal for parties, birthdays, or simply a homemade treat. Presentation is as simple as serving chilled squares.
The minimal preparation makes it accessible to beginners while impressing guests with its rich flavors and textures. Finally, this icebox cake proves that desserts don’t need baking.
With just a few ingredients, you can create a vibrant, indulgent, and memorable dessert that will have everyone asking for seconds. Beyond aesthetics, the recipe is versatile.

NO-BAKE FUNFETTI OREO ICEBOX CAKE
Ingredients
For the Cake:
- 24 cookies Oreo cookies crushed
- 16 oz cream cheese softened
- 2 cups heavy whipping cream
- ½ cup powdered sugar
- 1 tsp vanilla extract
- ½ cup rainbow sprinkles funfetti
Instructions
Prepare Whipped Cream Mixture:
- In a bowl, beat cream cheese, powdered sugar, and vanilla until smooth.
Whip Heavy Cream:
- In a separate bowl, whip heavy cream to stiff peaks and gently fold into cream cheese mixture.
Assemble Cake:
- In a 9x13-inch dish, layer crushed Oreos, cream mixture, and sprinkles. Repeat layers ending with cream and sprinkles on top.
Chill Cake:
- Cover and refrigerate for at least 4 hours or overnight until set.
Serve:
- Slice and serve chilled for a fun, colorful dessert.
Notes
- Make Ahead: Can be prepared a day ahead and chilled.
- Variations: Use chocolate or birthday cake sprinkles instead of rainbow.
- Serving Suggestions: Perfect for birthdays, parties, or summer desserts.
- Storage Tips: Store in the fridge for up to 3 days. Do not freeze.





Comments
No Comments