
Zainab asked me to make her birthday cake "the black one" — she'd seen a photo somewhere on my phone and decided that was the one. I'd never actually baked a black velvet cake before. I said yes, then immediately went and researched black cocoa powder for twenty minutes.
What I found out is that black velvet cake is basically a deeply chocolatey riff on red velvet — same tender, buttermilk crumb, same cream cheese frosting, but with black cocoa powder instead of red dye. Black cocoa is the stuff they use in Oreos. It has a mellow, dark chocolate flavor that isn't sharp or bitter, and it turns your batter an almost theatrical shade of near-black. The first time I baked it I was genuinely surprised opening the oven — it's striking in a way most cakes aren't.
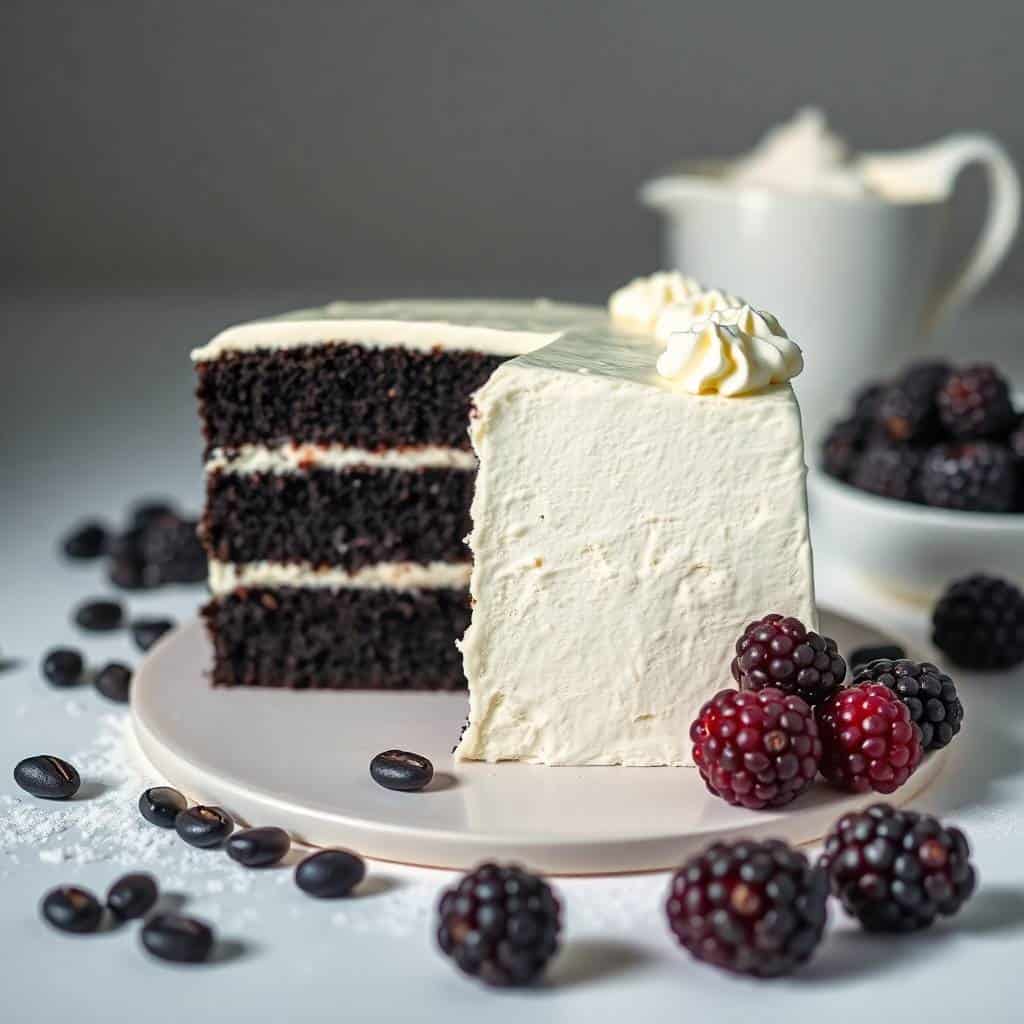
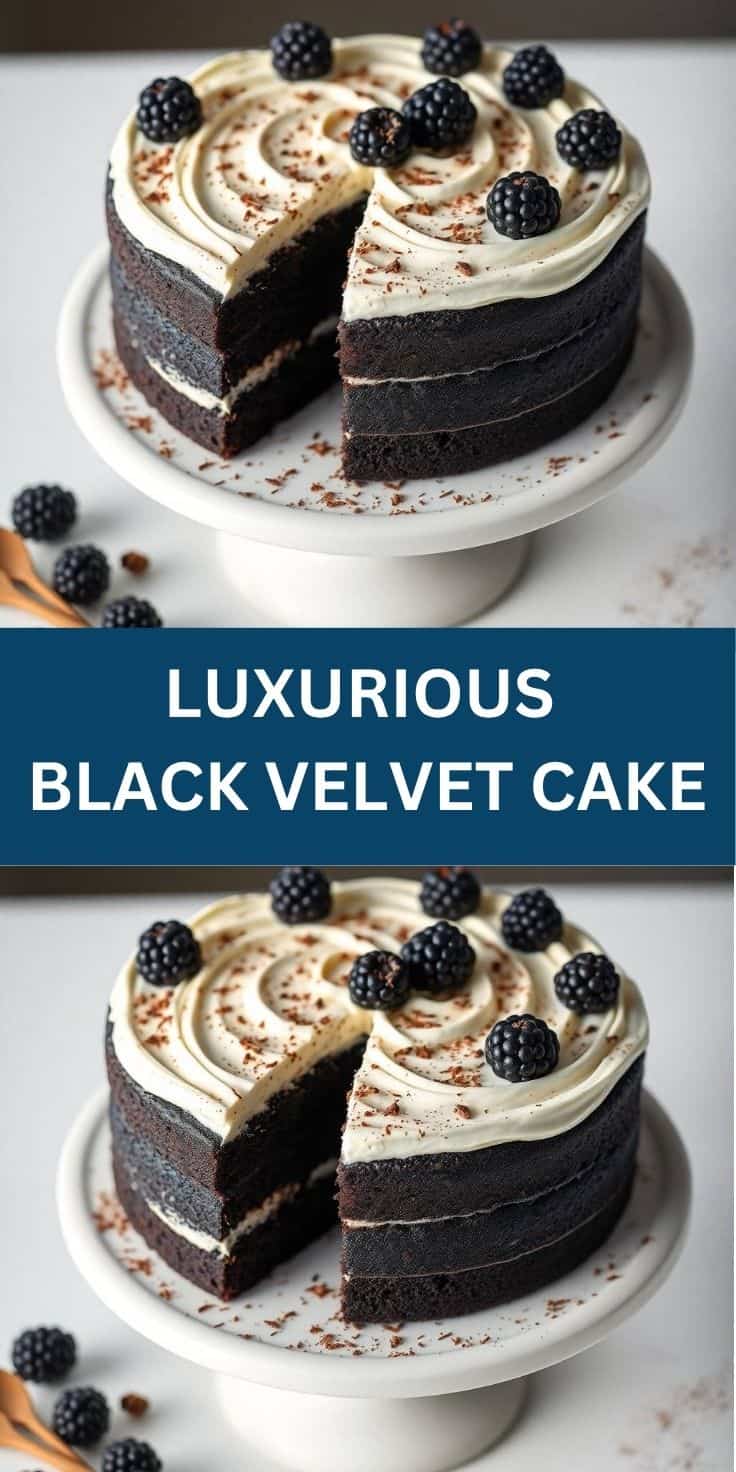
I make this one for celebrations now. It showed up for Zainab's birthday, then my husband's, then for a friend's dinner party where nobody could figure out what color the cake was until they cut into it. That moment — the slice coming out, the contrast of the dark cake against the white frosting — gets people every time. If you've made my Christmas crinkle cookies before and you like a dramatic-looking dessert, this one is worth the effort.
One thing to know upfront: black cocoa powder is what makes this cake actually black, not dark brown. You can find it on Amazon or sometimes at specialty baking stores — it's worth ordering ahead. Dutch-processed cocoa will give you a dark brown cake that's still delicious, but if you want the full visual effect, track down the black cocoa. King Arthur Baking sells it and so does Anthony's, which you can find on Amazon.
Why You'll Love This Recipe
- The color is genuinely dramatic: I don't say this lightly — this cake stops people mid-conversation. The near-black crumb against white cream cheese frosting looks like it came from a professional bakery, and it costs a fraction of what you'd pay for one. Zainab called it "the most beautiful cake ever" which, coming from a seven-year-old, is the highest praise I know.
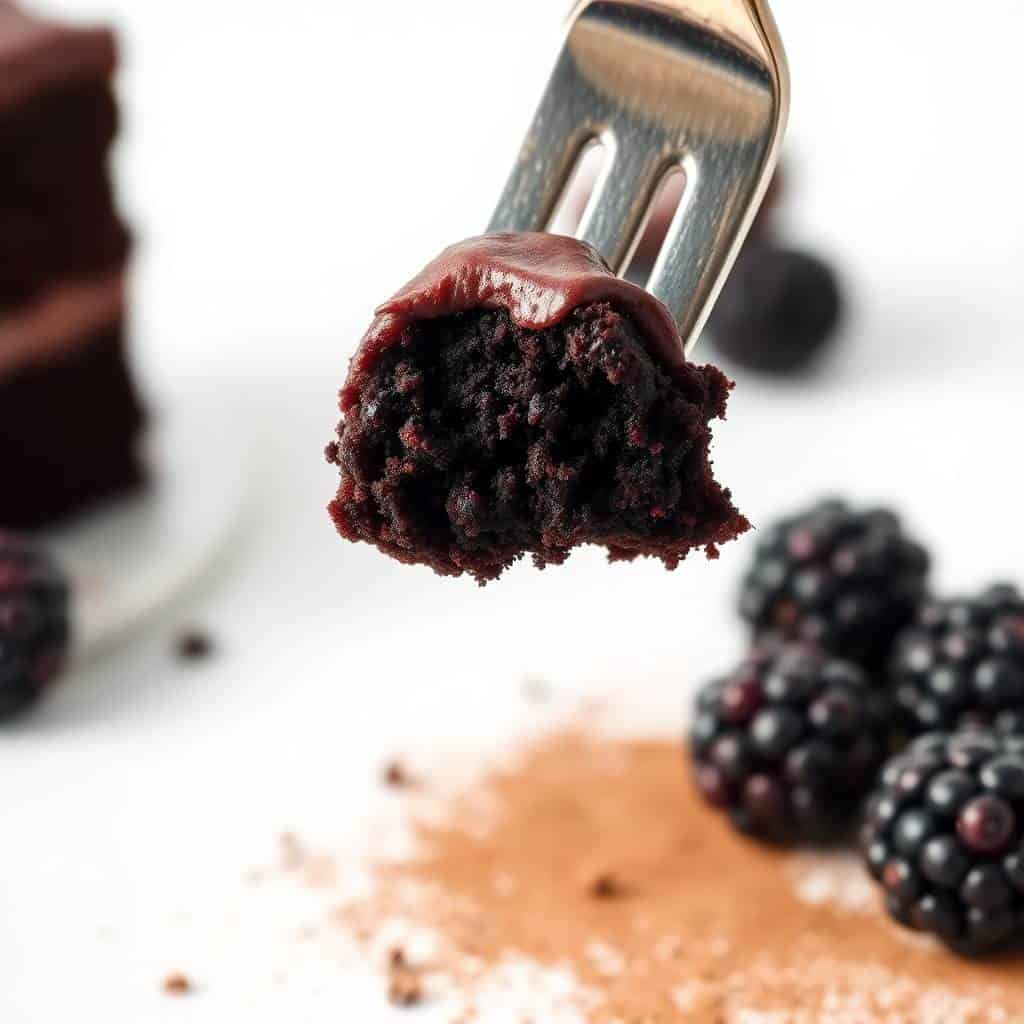
- The crumb is genuinely tender: Buttermilk and vegetable oil do a lot of work here. Oil keeps the cake moist even after two days in the fridge, where butter-based cakes sometimes go a little dense. The hot coffee (or hot water) in the batter also helps bloom the cocoa and keeps everything light.
- The cream cheese frosting balances everything: Black cocoa is mellow and slightly earthy — it's not the punchy bitterness of dark chocolate. The tangy cream cheese frosting cuts right through that and gives you something that tastes balanced rather than heavy. I don't add a ton of powdered sugar to my frosting because I don't want it too sweet — the amounts below give you a frosting that's creamy and slightly tangy, not cloying.
- You can make it ahead: I always bake the layers the day before and wrap them tightly. This actually improves the cake — the crumb has time to settle and the layers are firmer, which makes stacking and frosting much easier. The frosting can also be made the night before and kept covered in the fridge.
- It uses pantry staples you probably already have: Aside from the black cocoa powder, everything here is standard. Flour, eggs, oil, buttermilk, cream cheese. No special equipment either — I make this with a hand mixer and two round cake pans I got from Walmart. If you don't have a hand mixer, a wooden spoon and some patience will get you there.
Ingredients
- 1¾ cups all-purpose flour
- ¾ cup black cocoa powder (Dutch-processed works too — the cake will be dark brown rather than black)
- 2 cups granulated sugar
- 1½ teaspoons baking powder
- ½ teaspoon baking soda
- 1 teaspoon salt
- 2 large eggs, room temperature
- 1 cup buttermilk, room temperature
- ½ cup vegetable oil
- 2 teaspoons vanilla extract
- 1 cup hot water or hot coffee (coffee deepens the flavor — you won't taste it, but it helps)
For the Cream Cheese Frosting:
- 8 oz cream cheese (softened to room temperature — this is non-negotiable, cold cream cheese will clump)
- ½ cup unsalted butter, softened
- 3 cups powdered sugar
- 1 teaspoon vanilla extract
- Pinch of salt
Directions
- Preheat and prep your pans: Set your oven to 350°F (175°C). Grease two 9-inch round cake pans and line the bottoms with parchment paper. The parchment is important — black cocoa batters can stick more than you'd expect, and you don't want to lose half your cake bottom when you flip them out.
- Mix the dry ingredients: In a large bowl, whisk together the flour, black cocoa powder, sugar, baking powder, baking soda, and salt. I whisk for a full minute to make sure the cocoa is evenly distributed — clumps of cocoa in the batter can give you uneven color in the final cake.
- Mix the wet ingredients: In a separate bowl, beat the eggs, buttermilk, oil, and vanilla together until combined. It doesn't need to be perfectly smooth at this stage.
- Bring it together: Pour the wet ingredients into the dry and stir until just combined — a few streaks of flour are fine. Then stir in the hot water or coffee. The batter will be thin, almost pourable. That's correct. Don't panic.
- Bake: Divide the batter evenly between the two pans. Bake for 30–35 minutes, until a toothpick inserted in the center comes out clean. Don't open the oven before the 28-minute mark — I ruined my first attempt at a layer cake years ago by opening the oven too early and the center sank.
- Cool completely: Let the cakes cool in the pans for 10 minutes, then turn them out onto a wire rack and let them cool all the way to room temperature before frosting. If you're making these ahead, wrap the cooled layers tightly in plastic wrap overnight.
- Make the frosting: Beat the softened cream cheese and butter together until smooth, about 2 minutes. Gradually add the powdered sugar, then the vanilla and salt. Beat until light and fluffy. If it seems too thick, a tablespoon of milk will loosen it.
- Assemble: Place one cake layer on your plate or cake stand. Spread a generous layer of frosting on top. Add the second layer. Frost the top and sides. Refrigerate for at least 30 minutes before slicing — this helps the layers hold together when you cut through.
Tips for Success
- Use room temperature ingredients — especially the cream cheese: I learned this the hard way. Cold cream cheese goes lumpy in the frosting no matter how long you beat it. I set mine out on the counter about an hour before I start baking. Same goes for the eggs and buttermilk — room temperature ingredients incorporate into batter more smoothly and help the cake rise evenly.
- Don't overmix after combining wet and dry: I mix until the flour streaks just disappear, then stop. Overmixed batter develops gluten, which makes the cake dense and slightly chewy rather than tender. The batter will look thin and you might be tempted to keep going — resist.
- Use hot liquid, not warm: The hot water or coffee needs to be actually hot — freshly boiled or straight from a hot coffee pot. Hot liquid blooms the cocoa and dissolves the sugar more fully, which contributes to both the color and the moist texture. I've tested this with warm water and the cake is noticeably less tender.
- Weigh your pans before baking if you can: I use a kitchen scale to make sure each pan gets the same amount of batter. If one layer bakes thicker than the other, your assembled cake will lean. It's a small thing but it makes a real difference in the final look, especially if you're making this for a birthday or occasion.
- Chill before slicing: Thirty minutes in the fridge after frosting makes the whole cake easier to cut cleanly. If you slice it straight after frosting, the layers can slide. I usually frost it, put it back in the fridge while we eat dinner, then bring it out for dessert — about an hour later the layers are completely set.
Variations
- Add espresso to the frosting: A half teaspoon of espresso powder beaten into the cream cheese frosting adds a subtle depth that works really well against the black cocoa. It doesn't make the frosting taste like coffee — it just makes it taste more complex. My husband prefers it this way.
- Chocolate ganache instead of cream cheese frosting: Heat equal parts heavy cream and dark chocolate chips until the chocolate melts, stir until smooth, and let it cool until it's pourable but thickened. Pour it over the assembled cake and let it drip down the sides. This gives you a more intensely chocolatey result — less tangy, more decadent.
- Make it as cupcakes: This batter makes about 24 cupcakes. Fill liners two-thirds full and bake at 350°F for 18–20 minutes. The frosting recipe as written is enough to frost all of them generously. These are great for parties where you don't want to cut a whole cake — and they look incredible with the white frosting against the black cupcake.
- Vegan version: Replace the eggs with flax eggs (1 tablespoon ground flaxseed + 3 tablespoons water per egg, rested for 5 minutes). Use plant-based milk with a teaspoon of apple cider vinegar in place of buttermilk. Use vegan cream cheese and vegan butter in the frosting. The texture is slightly denser but it works. If you're into vegan baking, my vegan pink cinnamon rolls use a similar swap technique for reference.
- Add orange zest to the frosting: This sounds odd but it's genuinely one of my favorite versions. Add 1 teaspoon of finely grated orange zest to the frosting along with the vanilla. The citrus cuts through the richness and gives the whole cake a slightly unexpected brightness. I served this version at my friend's dinner party and three people asked for the recipe.
Serving and Storage
Serving
Bring the cake out of the fridge about 20–30 minutes before serving — cold cake isn't as tender and the frosting won't have the same creamy texture when it's straight from the refrigerator. I like to serve slices with fresh raspberries or strawberries on the side; the tartness works well with the dark cocoa. For a celebration, a few chocolate curls on top of the frosting make it look genuinely impressive for very little effort.
Storage
Because of the cream cheese frosting, this cake needs to be refrigerated. Store it covered — I use a cake dome or tent it loosely with foil — for up to 5 days. It actually tastes better on day 2 once everything has settled. If you want to freeze it, wrap individual slices tightly in plastic wrap, then foil, and freeze for up to 3 months. Thaw overnight in the fridge and bring to room temperature before eating. I don't recommend freezing the whole frosted cake — it's harder to thaw evenly and the frosting can weep.
Frequently Asked Questions
Where do I find black cocoa powder?
Amazon is the easiest option — Anthony's and King Arthur both sell it. Specialty baking stores sometimes carry it, but most regular grocery stores don't stock it. If you genuinely can't find it, Dutch-processed cocoa will still give you a dark, rich cake — just more dark brown than black.
Can I make this cake ahead of time?
Yes, and I'd actually encourage it. Bake the layers the day before, wrap them tightly in plastic wrap once cooled, and store at room temperature overnight. Make the frosting the same day and keep it covered in the fridge. Assemble the next day — the layers will be firmer and much easier to frost cleanly.
Can I freeze the baked cake layers?
Yes. Wrap each cooled layer tightly in plastic wrap, then in foil, and freeze for up to 3 months. Thaw overnight in the fridge before assembling. I'd freeze them unfrosted — the cream cheese frosting doesn't freeze and thaw as cleanly as the cake itself.
My frosting looks lumpy. What went wrong?
Almost always, this is cold cream cheese. It needs to be genuinely room temperature — soft enough that you can press your finger into it easily. If your frosting already looks lumpy, try beating it longer on medium-high speed. A minute or two of extra beating usually smooths it out. If it's still lumpy, briefly warming the bowl with your hands while beating can help.
Can I make this gluten-free?
I haven't tested it myself, but a 1:1 gluten-free flour blend (like Bob's Red Mill 1-to-1 or King Arthur Measure for Measure) should work here. Make sure the blend contains xanthan gum, which gives structure. The texture may be very slightly different but the flavor should hold up well.
This is the cake I make when I want something that looks like I worked harder than I did. The black cocoa does most of the heavy lifting visually, and the cream cheese frosting is straightforward enough that even on a busy day I can pull the whole thing together. It's become my go-to for birthdays in our house — Zainab requests it, my husband eats three slices, and I always make a double batch of frosting because I like having extra to fill between the layers generously.
If you're looking for something to serve alongside this at a dessert spread, my no-bake coconut cream balls are an easy make-ahead option that don't require turning the oven on again. And if you're planning a full holiday dessert table, Grinch fudge is another one that looks more complicated than it is.
One last thing: the cake is better on day two. I know that sounds like a strange thing to say, but the crumb settles and the flavor deepens overnight. If you can make it a day ahead and refrigerate it assembled, do that. Bring it out 30 minutes before you serve it and you'll get the best version of this cake. 🎂🖤
LUXURIOUS BLACK VELVET CAKE
Ingredients
For the Cake:
- 1¾ cups all-purpose flour
- ¾ cup black cocoa powder or Dutch-processed cocoa
- 2 cups granulated sugar
- 1½ teaspoons baking powder
- ½ teaspoon baking soda
- 1 teaspoon salt
- 2 large eggs
- 1 cup buttermilk
- ½ cup vegetable oil
- 2 teaspoons vanilla extract
- 1 cup hot water or hot coffee for depth
For the Cream Cheese Frosting:
- 8 oz cream cheese softened
- ½ cup unsalted butter softened
- 3 cups powdered sugar
- 1 teaspoon vanilla extract
- Pinch of salt
Instructions
Preheat the Oven:
- Preheat oven to 350°F (175°C). Grease and line two 9-inch round cake pans with parchment paper.
Make the Batter:
- In a large bowl, whisk together flour, cocoa powder, sugar, baking powder, baking soda, and salt. In another bowl, beat eggs, buttermilk, oil, and vanilla. Combine wet and dry ingredients. Stir in hot water or coffee last; the batter will be thin.
Bake the Cake:
- Divide batter evenly between the pans. Bake for 30–35 minutes or until a toothpick comes out clean. Cool in pans 10 minutes, then transfer to wire racks to cool completely.
Prepare Frosting:
- Beat cream cheese and butter until smooth. Gradually add powdered sugar, vanilla, and salt. Beat until light and fluffy.
Assemble the Cake:
- Frost between layers and over the top and sides of the cake. Chill before slicing for clean layers.
Notes
Frosting Flavour Twist: Add a touch of espresso powder or orange zest to the frosting for a unique flavour.
Serving Suggestions: Top with fresh berries or chocolate curls for a luxurious finish.
Allergy-Friendly Tips: Substitute dairy-free butter and cream cheese for a lactose-free version.
Storage Tips: Store frosted cake in the refrigerator for up to 5 days. Bring to room temperature before serving.
If you made this cake and loved it, here are a few more recipes from my kitchen you might want to try next:
- No-Bake Coconut Cream Balls (Melt-in-Your-Mouth Bites)
-
{"@context":"https://schema.org","@type":"Article","headline":"LUXURIOUS BLACK VELVET CAKE","description":"Rich, moist black velvet cake with deep cocoa flavour and silky cream cheese frosting for an elegant dessert experience.","datePublished":"2025-06-20T07:55:23+00:00","dateModified":"2026-05-03T21:14:18+00:00","author":{"@type":"Person","name":"Sana Umer","url":"https://forfoodiefriends.com/about/","description":"Self-taught home cook with 10+ years of kitchen experience. Mom of two who develops every recipe in her own kitchen.","jobTitle":"Recipe Developer & Food Blogger","image":"https://forfoodiefriends.com/wp-content/uploads/sana-umer-author-photo.jpg"},"publisher":{"@type":"Organization","name":"For Foodie Friends","url":"https://forfoodiefriends.com/","logo":{"@type":"ImageObject","url":"https://forfoodiefriends.com/wp-content/uploads/forfoodiefriends-logo.png"}},"mainEntityOfPage":{"@type":"WebPage","@id":"https://forfoodiefriends.com/luxurious-black-velvet-cake/"},"image":"https://forfoodiefriends.com/wp-content/uploads/2025/06/LUXURIOUS-BLACK-VELVET-CAKE.jpg"}






Comments
No Comments