
Italian nut roll cookies offer buttery dough, and delicate sweetness, creating an irresistible homemade treat perfect for holidays or everyday enjoyment. Their delicate aroma fills the kitchen as they bake, creating an inviting atmosphere.
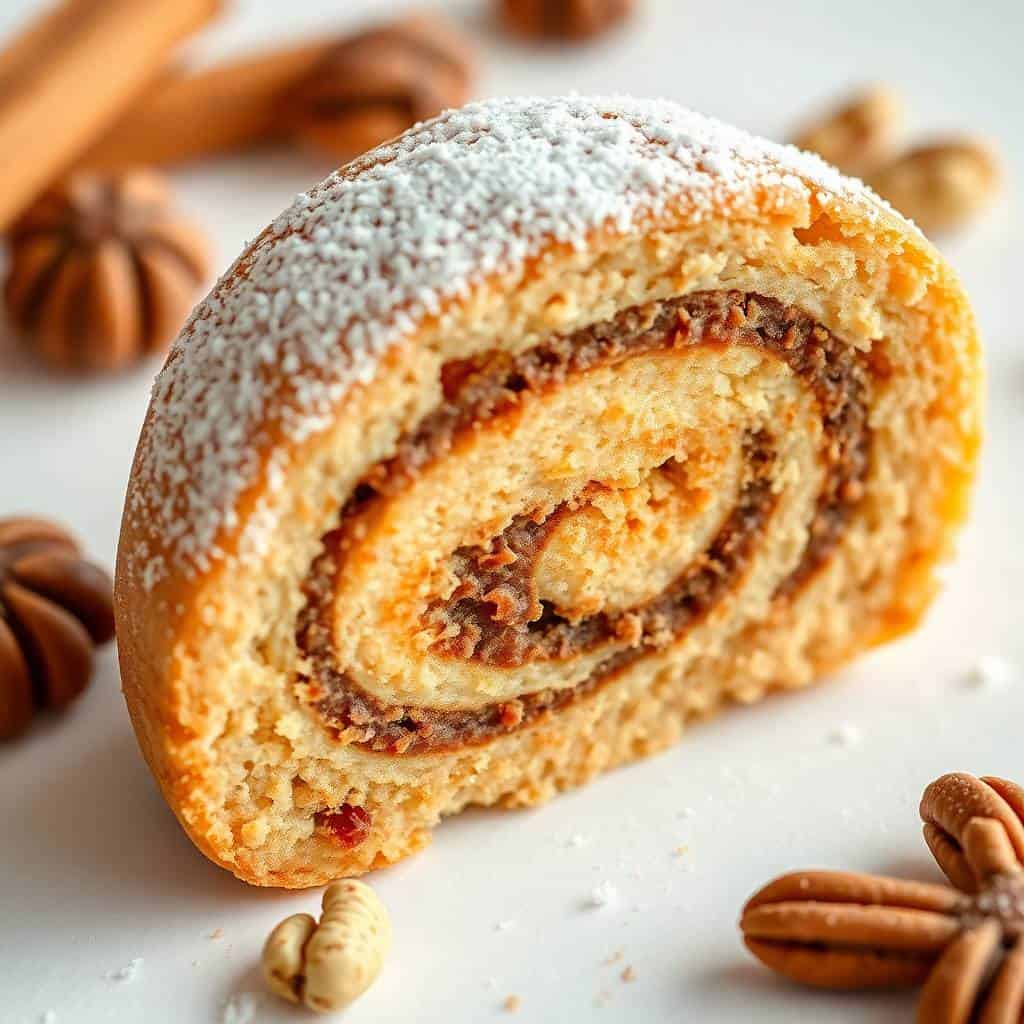
Each cookie delivers a tender, flaky bite wrapped around a sweet, aromatic nut filling that feels both nostalgic and comforting. They make an excellent addition to festive gatherings or quiet afternoons with coffee.
The subtle sweetness of the dough pairs beautifully with the rich, finely ground nuts, creating the perfect balance of texture and taste. Whether you’re experienced or just starting out, this recipe is approachable and rewarding.
These cookies also offer versatility, making them easy to customize with your favorite nuts or added flavors. Italian Nut roll cookies are perfect for cookie exchanges, festive tables, or anytime you want a classic, homemade sweet treat.
Enjoy these treats as gifts, holiday desserts, or comforting snacks. Their unique blend of tradition and flavor ensures they stand out from ordinary cookies. Once you try them, they’ll quickly become a cherished staple in your baking rotation.

WHY YOU WILL LOVE THIS RECIPE
- Traditional Charm: These cookies deliver nostalgic Italian flavors that provide a comforting, homemade experience perfect for festive gatherings and family celebrations.
- Rich Nut Filling: The sweet, aromatic nut mixture creates a flavorful center that beautifully complements the soft, buttery dough with irresistible warmth.
- Perfect Texture: Each cookie offers a tender, flaky bite that melts in your mouth while maintaining a satisfyingly structured shape.
- Customizable Flavor: You can easily adjust nuts or spices, allowing personalized variations while preserving the recipe’s authentic italian essence and appeal.
- Crowd-Pleasing Treat: Their elegant appearance and delicious flavor make them ideal for sharing at parties, gifting, or enjoying privately.
- Simple to Prepare: Straightforward steps and accessible ingredients make this recipe approachable for bakers at any skill level.
INGREDIENTS
- All-purpose flour
- Unsalted butter
- Granulated sugar
- Eggs
- Sour cream
- Baking powder
- Salt
- Walnuts or mixed nuts
- Brown sugar
- Cinnamon
- Vanilla extract
DIRECTIONS
- Step No.1: Prepare the dough
Combine flour, sugar, baking powder, and salt in a bowl. Add butter, eggs, and sour cream, mixing until a soft dough forms.
- Step No.2: Chill the dough
Wrap the dough tightly and chill it in the refrigerator to firm it, making it easier to roll and shape later.
- Step No.3: Make the filling
Process nuts, brown sugar, cinnamon, and vanilla until finely combined, creating a cohesive, aromatic mixture for spreading.
- Step No.4: Roll out the dough
Divide dough into portions and roll each into a thin rectangle. Spread an even layer of nut filling across the surface.
- Step No.5: Form the cookies
Roll dough tightly into logs, sealing edges. Slice each log into small, even pieces for consistent baking.
- Step No.6: Bake the cookies
Arrange cookies on a lined sheet and bake until golden brown, allowing their aroma to fill the kitchen beautifully.

TIPS FOR SUCCESS
- Chill the Dough: Chilling ensures easier handling and helps the cookies maintain their shape while baking for perfect results.
- Use Fresh Nuts: Fresh, high-quality nuts deliver stronger aroma and better flavor, enhancing the cookie’s warm, traditional taste.
- Roll Evenly: Keeping dough thickness consistent ensures uniform baking and creates evenly textured, beautifully shaped cookies.
- Seal the Edges: Tightly sealing rolled dough prevents the filling from leaking during baking, ensuring tidy, intact cookies every time.
- Don’t Overbake: Watch closely to avoid overbrowning, which can create dryness instead of the desired tender texture.
- Cool Completely: Allow cookies to cool fully before serving to help flavors develop and textures settle perfectly.
VARIATIONS
- Pistachio Filling: Substitute walnuts with pistachios for a vibrant, nutty flavor that adds color and sophistication to each bite.
- Chocolate Drizzle: Add a chocolate drizzle for extra sweetness, creating a dessert-style cookie with added richness and flair.
- Orange Zest: Mix zest into the dough for a bright citrus aroma that complements the nutty filling beautifully.
- Hazelnut Twist: Swap nuts with hazelnuts for a deeper, toasted flavor reminiscent of classic italian holiday treats.
- Spiced Filling: Add nutmeg or allspice to create a warm, aromatic, seasonal variation perfect for winter baking.
- Honey Sweetened: Replace some sugar with honey for a softer sweetness and subtle floral notes that elevate the filling.
SERVING AND STORAGE
Serving
Serve these Italian nut roll cookies with warm coffee or tea, offering a comforting, aromatic treat suitable for gatherings or quiet moments.
Storage
Store cookies in an airtight container to maintain freshness, preserving their tender texture and delightful nutty flavor for several days.
FAQ
Yes, the dough can be chilled overnight to simplify preparation and improve the cookie’s final texture.
Absolutely, freeze baked or unbaked rolls tightly wrapped to preserve freshness and bake or thaw as needed.
Yes, walnuts, pecans, hazelnuts, or pistachios all work well, offering unique flavors without altering the dough.
Roll tightly and seal edges well to keep the filling contained during baking.
Overbaking or using too much flour can cause dryness, so monitor closely and measure ingredients carefully.
These Italian nut roll cookies blend cherished tradition with flavor, making them a delightful addition to any dessert table.
Their rustic, homemade charm brings warmth to gatherings and adds a personal touch to celebrations or snacking.
These cookies also offer flexibility, making them easy to adjust based on personal preference or available ingredients.
With their ease, beauty, and unforgettable flavor, they’ll find a special place in your regular baking routine. Enjoy each bite as a comforting reminder of simple, homemade goodness.


ITALIAN NUT ROLL COOKIES
Ingredients
For the Dough:
- 2 ½ cups all-purpose flour
- 1 teaspoon baking powder
- ¼ teaspoon salt
- 1 cup unsalted butter softened
- ¾ cup granulated sugar
- 1 teaspoon vanilla extract
- 1 large egg
For the Filling:
- 1 cup finely chopped walnuts or pecans
- ¼ cup brown sugar
- 1 teaspoon cinnamon
- 2 tablespoons milk
For Decoration (Optional):
- Powdered sugar for dusting
Instructions
- Preheat Oven: Preheat oven to 350°F (175°C). Line a baking sheet with parchment paper.
- Mix Dry Ingredients: In a medium bowl, whisk together flour, baking powder, and salt; set aside.
- Make Dough: In a large bowl, beat butter and sugar until light and fluffy. Add egg and vanilla, mixing until combined. Gradually add dry ingredients until dough forms.
- Prepare Filling: Mix nuts, brown sugar, cinnamon, and milk in a small bowl.
- Shape Cookies: Roll dough into rectangles. Spread filling evenly, roll up tightly, and slice into ½-inch pieces.
- Bake: Place on prepared baking sheet and bake 15 minutes or until lightly golden.
- Cool & Serve: Allow to cool slightly, then dust with powdered sugar if desired.
Notes
- Make Ahead: Dough can be prepared a day in advance and refrigerated.
- Customizing the Flavor: Use a mix of nuts or add a splash of almond extract for extra flavor.
- Serving Suggestions: Perfect for holiday cookie trays, gifting, or enjoying with tea or coffee.
- Allergy-Friendly Options: Substitute nuts with seeds for a nut-free version.
- Storage Tips: Store in an airtight container at room temperature for up to 1 week.





Comments
No Comments