
I made these sticky buns for the first time on a Saturday morning when I had a can of crescent dough in the fridge and genuinely no desire to make anything that required actual effort. Twenty-five minutes later my kitchen smelled like a bakery, and Zainab was reaching for a second bun before the first batch had fully cooled. That was about six months ago. We've made them almost every other weekend since.
What makes this version work is the caramel glaze — you pour it into the pan before the buns go in, and the oven does the rest. It bubbles up around the dough while it bakes and coats everything in this sticky, glossy layer when you flip the pan. I use crescent roll dough from a can, which I know sounds like a shortcut, but it gives you a genuinely soft, layered result without having to make yeasted dough from scratch. The filling is brown sugar, butter, and cinnamon — stuff you probably already have sitting in your kitchen right now.
My husband takes his with a cup of tea and pretends he's only having one. Zainab likes the ones with pecans scattered in the glaze; Saad picks every nut out and requests chocolate chips instead. I usually do pecans on one side of the pan and leave the other half plain, and everyone ends up happy. If I'm doing a bigger Saturday brunch, I'll pair these with something savory — my homemade oatmeal cream pies sometimes make an appearance for dessert later, which tells you a lot about the kind of sugar situation we run in this house on weekends.
One thing to know before you start: the flip is non-negotiable, and the timing matters. I waited too long once and the glaze hardened into the pan like concrete — genuinely couldn't get it out cleanly. Let the pan cool for 3–5 minutes so you can handle it without burning yourself, then flip immediately. Don't wait. And go heavy on the greasing — I use real butter in every corner, every time.
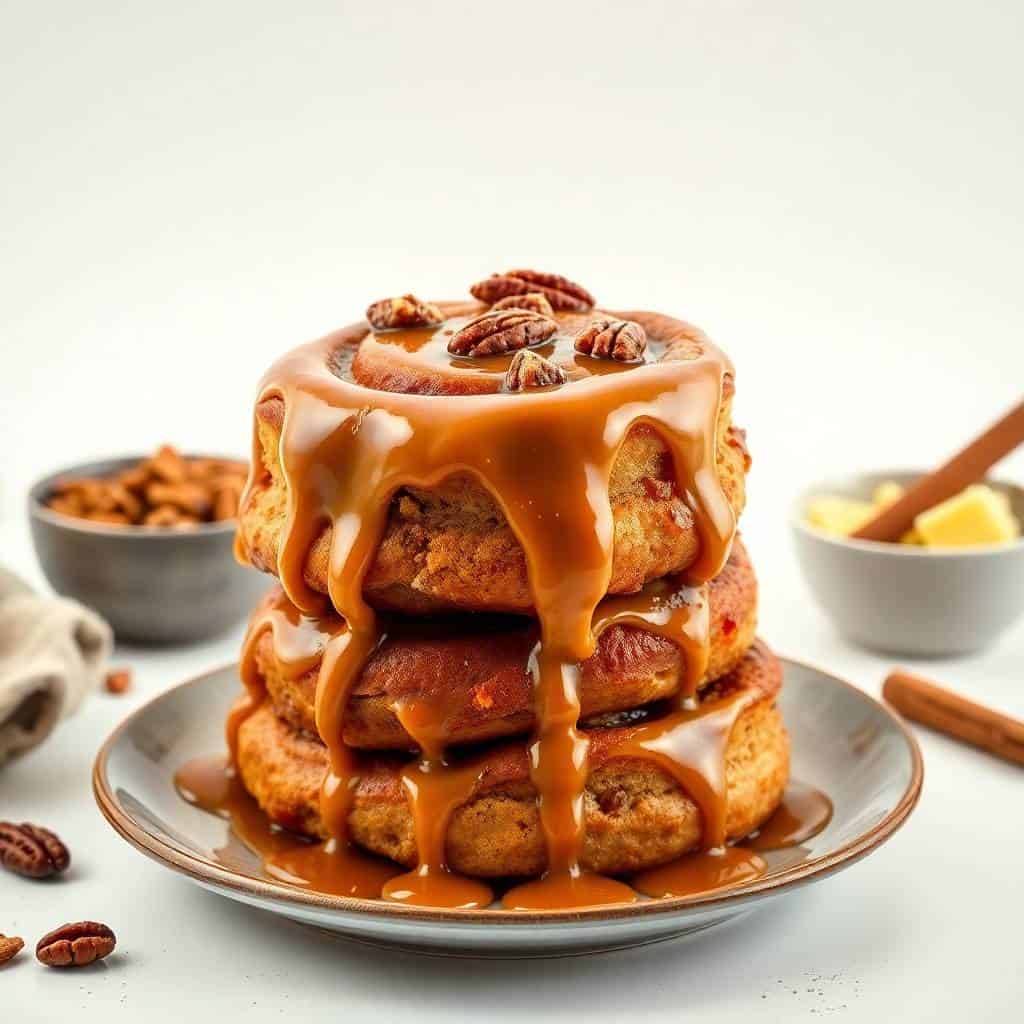
Why You'll Love This Recipe
- On the table in under 30 minutes: Start to finish, including the flip and a few minutes of cooling, these take about 25–30 minutes. I've made them on rushed school mornings when I needed something warm and real on the table fast. The crescent dough is already rolled and ready — you're just adding flavor and baking it. No proofing, no waiting, no stress about yeast not activating.
- The glaze does most of the work: You stir together butter, brown sugar, and corn syrup, pour it into the pan, and the oven turns it into a proper sticky caramel. I didn't expect it to work as well as it does — the first time I made it I thought the glaze would just burn. Instead it bubbles up around the buns and coats everything when you flip. It looks genuinely impressive for how little effort it actually takes.
- Kids will actually eat it: I've made fancier baked goods that my kids pushed around the plate and didn't finish. These disappear. Zainab will eat them cold out of the container the next morning — not something I encouraged, but I can't argue with it either. If you have picky eaters who need something sweet and familiar for breakfast, this is a reliable one to have in your back pocket.
- You can prep it the night before: Assemble everything, cover the pan with plastic wrap, refrigerate overnight, and bake in the morning. I do this when I'm having people over for brunch and don't want to be scrambling around the kitchen while guests are arriving. Pull the dish out while the oven preheats, let it sit on the counter for 10 minutes, then bake as normal. Same result as same-day.
- It's easy to customize: The base recipe is just a starting point. I've done a chocolate chip version that my kids prefer for birthdays, a maple syrup glaze I make in the fall, and a cream cheese drizzle version for when I want them to feel a bit more special. The crescent dough handles all of it without complaint — it's a very forgiving base to work with.
Ingredients
- 1 can refrigerated crescent roll dough (or biscuit dough)
- ½ cup packed brown sugar
- ¼ cup granulated sugar
- ¼ cup unsalted butter, melted
- 2 tablespoons corn syrup or honey (maple syrup also works)
- 1 teaspoon ground cinnamon
- 1 teaspoon vanilla extract
- ½ cup chopped pecans (optional — skip for nut-free)
Directions
- Preheat and prep the pan: Preheat your oven to 375°F (190°C). Grease a 9x13-inch baking dish really generously with butter or non-stick spray — don't be shy about it. The grease is the only thing standing between you and sticky buns that won't release from the pan, and I've learned that lesson the hard way.
- Make the caramel glaze: In a small bowl, stir together the melted butter, brown sugar, corn syrup (or honey), and vanilla until combined. Pour this evenly across the bottom of your baking dish. If you're using pecans, scatter them over the glaze now — they'll end up on top once you flip the pan, which is the whole point.
- Prep the dough: Unroll the crescent dough on a clean surface and press the seams together firmly with your fingers. You want one flat, sealed sheet — if the seams stay open, the filling leaks out and makes a sticky mess on the bottom of your oven. I speak from experience on this one.
- Add the filling and roll: Mix the granulated sugar and cinnamon together and sprinkle evenly over the dough. Roll the dough up tightly from the long edge, keeping it as snug as you can. Slice into 12 rounds, roughly 1 inch thick each.
- Arrange and bake: Place the rounds cut-side down over the glaze in your baking dish. Bake for 20–25 minutes until golden brown on top and you can see the glaze bubbling around the edges. Your kitchen will smell incredible at this point — this is when everyone in my house wanders into the kitchen.
- Flip while warm: Let the buns cool in the pan for 3–5 minutes — just enough so the pan is handleable. Then place a large plate or rimmed tray over the top and invert in one confident motion. If you wait too long, the caramel sets and it becomes very difficult to get them out cleanly.

Tips for Success
- Seal the dough seams properly: Crescent dough comes perforated, and if you don't press those seams flat before adding the filling, it oozes out the sides during baking. My first two attempts I kept wondering why the caramel was burning on the pan floor instead of staying under the buns. Pressing the seams takes about ten extra seconds and makes a real difference — do it.
- Don't overbake: Pull the buns when they're just golden — not deep brown. Overbaked crescent dough gets dry and a little tough, and the glaze can turn bitter if it burns at the edges. I set a timer for 20 minutes and check from there. Every oven runs differently, so the first time you make these, check early rather than waiting for the full 25 minutes.
- Flip at the right moment: The 3–5 minute rest after baking is important. Flip too soon and the glaze is still liquid and will splash when you invert. Wait too long and it hardens completely. I set a short timer specifically so I don't wander off to check my phone and forget. If the glaze does harden in the pan, you can warm it briefly on the stovetop to loosen it — but it's much easier to just flip on time.
- Roll the dough tightly: A loose roll means the rounds unravel during baking and you lose the swirl. I roll from the long edge and keep tension in the dough with my fingers as I go. It doesn't have to be perfect — the buns still taste the same — but a tight roll gives you that nice spiral cross-section when you bite in.
- Grease the pan generously: I mean it — go heavy, especially in the corners and up the sides of the dish. The caramel glaze is sticky by design, and if the pan isn't well-greased, part of that glossy topping stays behind when you flip. A properly greased pan means the whole thing comes out clean and you're not scraping caramel off the dish with a spatula.
Variations
- Chocolate chip version: Scatter a handful of mini chocolate chips over the cinnamon sugar before you roll up the dough. This is Saad's preferred version and the one I make for birthdays or when the kids have friends over. The chocolate melts into the filling and makes the whole thing taste more like dessert than breakfast. Nobody ever complains about that.
- Maple glaze swap: Replace the corn syrup with real maple syrup for a deeper, slightly woodsy sweetness. I do this version in autumn when I'm already in a warm-spice kind of mood — add a pinch of nutmeg to the cinnamon filling and it smells incredible while it bakes. If you like maple-forward baked goods, this is the version to try first.
- Cream cheese drizzle: Mix 2 oz softened cream cheese with 3 tablespoons powdered sugar and a splash of milk until smooth, then drizzle it over the warm buns after you flip them. This turns a casual Saturday breakfast into something that feels genuinely special. Make sure the cream cheese is at room temperature first — cold cream cheese lumps up and doesn't drizzle properly, it just clumps.
- Pumpkin spice filling: Swap the plain cinnamon for pumpkin pie spice — about 1 teaspoon. It adds that warm clove-ginger-nutmeg note that works really well from September through December, but honestly I don't think of this as seasonal-only. If you have pumpkin pie spice in your cupboard and you like the flavor, use it whenever you want.
- Nut-free version: Just skip the pecans entirely — the buns are completely fine without them. The glaze still caramelizes beautifully and the texture is just as good. I make the nut-free version half the time anyway because of school policies, and honestly, I don't miss the pecans when I skip them.
Serving and Storage
Serving
Serve these warm — that's when the glaze is at its best, still a little runny and sticky. They're good completely on their own, but if you're doing a fuller brunch spread, they sit nicely alongside something savory. My husband always wants a second cup of tea with his. If you want to round out the table, my beef stir fry with noodles is obviously not a brunch dish, but something like scrambled eggs or a simple savory dish balances out all the sweetness well. A strong cup of coffee or tea is really all these need.
Storage
Store leftovers in an airtight container at room temperature for up to 2 days. For longer storage, refrigerate for up to 4–5 days and reheat in the microwave for 20–30 seconds before eating. They lose a little of that fresh-baked softness after a day, but Zainab eats them cold straight from the fridge and doesn't care at all — so take that as you will. You can also freeze baked buns in an airtight container or zip-lock bag for up to a month. Thaw at room temperature and warm briefly in the microwave before serving; the glaze comes back to life with a little heat.

Frequently Asked Questions
Can I use homemade dough instead of crescent roll dough?
Yes — homemade yeasted dough will give you a slightly chewier, more bread-like result. Just know you'll need to account for proofing time, which adds a couple of hours to the process. This crescent roll version is specifically designed for speed, so if you're using homemade dough, plan ahead and treat it more like a traditional sticky bun recipe rather than a quick weekend breakfast.
What can I use instead of corn syrup?
Honey or maple syrup both work well. Honey gives a floral sweetness; maple syrup adds a deeper, slightly smoky note. I've used both and honestly prefer the maple syrup version for fall baking. The consistency of the glaze stays about the same either way, so swap freely based on what you have.
Can I make these the night before?
Yes, and I do this regularly. Assemble everything in the baking dish, cover tightly with plastic wrap, and refrigerate overnight. In the morning, pull the dish out while the oven preheats and let it sit on the counter for about 10 minutes to take the chill off. Then bake as normal. They come out just as good as same-day — I actually prefer this method when I'm having people over for brunch.
Can I bake these in a muffin tin instead of a baking dish?
You can — spoon a little of the glaze into each muffin cup, add a pecan or two, then place one round in each cup. Reduce the bake time to around 12–15 minutes and watch them closely. The individual buns are cute and easier to serve if you're feeding a crowd, but I use a 9x13-inch dish most of the time because it's faster and easier to flip all at once.
Can I freeze leftover sticky buns?
Yes. Let them cool completely first, then store in an airtight container or zip-lock bag and freeze for up to one month. Thaw at room temperature or overnight in the fridge, then warm in the microwave for 25–30 seconds. The texture is slightly softer than fresh, but the glaze comes back nicely with a little heat. I usually freeze them individually so I can just pull one out at a time.
EASY STICKY BUNS
Ingredients
- 1 can refrigerated crescent roll dough or biscuit dough
- ½ cup brown sugar packed
- ¼ cup granulated sugar
- 1 teaspoon cinnamon
- ¼ cup butter melted
- ½ cup chopped pecans optional
Instructions
- Preheat Oven: Preheat oven to 375°F (190°C). Grease a 9x13-inch baking dish.
- Prepare Filling: In a small bowl, mix brown sugar, granulated sugar, and cinnamon.
- Assemble Buns: Unroll crescent dough and brush with melted butter. Sprinkle with sugar mixture. Roll up tightly and slice into 12 pieces.
- Add Topping: Place chopped pecans in the baking dish. Arrange rolls on top. Drizzle with any extra butter and sugar mixture.
- Bake: Bake for 20–25 minutes until golden brown and bubbly.
- Serve: Cool for 5 minutes, then invert onto a serving platter so the caramelized topping is on top.
Notes
- Make Ahead: Assemble buns the night before, refrigerate, and bake fresh in the morning.
- Flavor Variations: Add raisins, dried cranberries, or drizzle with cream cheese glaze.
- Serving Suggestions: Best served warm with coffee or milk.
- Storage Tips: Store leftovers in an airtight container at room temperature for 2 days or refrigerate for up to 4 days.
I've made a lot of weekend baked goods over the years — cinnamon rolls from scratch, various cookie situations, all kinds of things — and these sticky buns have stayed in regular rotation specifically because they don't demand much. A can of crescent dough, a handful of pantry staples, and 25 minutes. That's the whole ask.
What I keep coming back to is the flip. There's something genuinely satisfying about inverting that pan and seeing the glossy caramel side come out on top with the pecans embedded in it. My husband calls it "the reveal." I've ruined it once by waiting too long and letting the glaze harden — but I've nailed it every time since. It's one of those small cooking moments that actually feels good, even when it's a simple recipe.
If you want to keep the sweet baking momentum going after these, my homemade oatmeal cream pies are another one that gets requested in this house more often than I'd like to admit. And if you're planning a full brunch spread, my cowboy queso makes a great savory counterpoint — set it out with some chips while the buns are still in the oven and everyone's happy before anything even hits the table.
Make these once and you'll know exactly what to tweak for your family — more pecans, less sugar, chocolate chips instead of cinnamon, whatever works. They're forgiving, fast, and worth making on a Saturday morning when you want something that feels a little special without actually being complicated. 🍯✨
If you liked these sticky buns, here are a few more things from my kitchen worth trying:
- Homemade Oatmeal Cream Pies — soft, chewy, and genuinely better than the store-bought version
- Reese's Cheese Ball: Peanut Butter Bliss — no-bake, kid-approved, and dangerously easy to make
-
{"@context":"https://schema.org","@type":"Article","headline":"EASY STICKY BUNS","description":"Easy sticky buns are soft, gooey, and topped with caramelized sugar and nuts—perfect for a sweet breakfast or indulgent treat.","datePublished":"2025-10-07T08:56:11+00:00","dateModified":"2026-05-13T15:22:40+00:00","author":{"@type":"Person","name":"Sana Umer","url":"https://forfoodiefriends.com/about/","description":"Self-taught home cook with 10+ years of kitchen experience. Mom of two who develops every recipe in her own kitchen.","jobTitle":"Recipe Developer & Food Blogger","image":"https://forfoodiefriends.com/wp-content/uploads/sana-umer-author-photo.jpg"},"publisher":{"@type":"Organization","name":"For Foodie Friends","url":"https://forfoodiefriends.com/","logo":{"@type":"ImageObject","url":"https://forfoodiefriends.com/wp-content/uploads/forfoodiefriends-logo.png"}},"mainEntityOfPage":{"@type":"WebPage","@id":"https://forfoodiefriends.com/easy-sticky-buns/"},"image":"https://forfoodiefriends.com/wp-content/uploads/2025/08/EASY-STICKY-BUNS.jpg"}






Comments
No Comments