
My husband doesn't really love fudge — except for this one. I made a batch of Cherry Garcia fudge on a whim last winter, mostly because I had a can of sweetened condensed milk sitting in the pantry and a bag of dried cherries I kept meaning to use. He ate four pieces before dinner and asked if we could keep some "for later," which we both knew meant he was going to find it in the fridge at 11pm.
What I like about this fudge is that it doesn't require a candy thermometer or any real technique. You melt the chocolate with the condensed milk, stir in your flavorings, fold in the cherries and nuts, and let the fridge do the rest. The almond extract is the little thing that makes people ask what's in it — it's subtle but it lifts the whole thing. Don't skip it.
I usually make this around the holidays because it cuts into neat little squares and holds up well in a tin — it's genuinely one of the easier things on my Christmas candy list. If you're already thinking about holiday treats, I have a whole roundup of 27 best Christmas candy recipes that this fudge fits right into. But honestly, I've made it in March for no reason at all and it was just as good.
One thing to know upfront: this is a semi-sweet chocolate version in the body of this post, but the recipe card at the bottom uses white chocolate chips with dark chocolate chunks folded in — which is actually closer to the real Cherry Garcia flavor. I've made both. Both are good. I'll give you tips for each below so you can pick your version.

Why You'll Love This Recipe
- No thermometer, no stress: I've ruined candy before by not having a proper thermometer and guessing wrong on the soft-ball stage. This recipe skips all of that. The sweetened condensed milk does the work of sugar syrup, so you just melt, stir, and chill. Even if you've never made fudge before, this is a reasonable place to start.
- The cherry-chocolate combination actually works: I know dried cherries sound a bit plain compared to fresh, but they're better here — they don't release extra moisture, so your fudge sets properly instead of staying soft. The tartness cuts through the richness of the chocolate in a way that keeps it from feeling too heavy. My husband, who usually skips fruity desserts, didn't even notice the cherries until I told him.
- Genuinely good for gifting: This fudge holds its shape, doesn't weep or get sticky at room temperature for short periods, and slices cleanly into squares. I layer it in a small tin between pieces of parchment and it looks like I put in far more effort than I actually did. It's one of those things that reads as thoughtful without requiring a whole day in the kitchen.
- The ingredients are all grocery store basics: Chocolate chips, sweetened condensed milk, vanilla extract, almond extract, dried cherries, and nuts. Nothing specialty, nothing you need to hunt down. I've grabbed everything at Walmart or Aldi without any trouble. The dried cherries are usually in the baking aisle near the raisins.
- It keeps well: I make a double batch because one disappears immediately and the second one is actually for saving. It keeps in the fridge for up to two weeks in an airtight container, and it freezes well too — slice it first, then freeze the squares in a single layer before storing them in a bag. You can pull out a few pieces whenever you want something sweet.
Ingredients
- 2 cups semi-sweet chocolate chips (or see the recipe card for the white chocolate version)
- 1 can (14 oz) sweetened condensed milk
- 1 teaspoon vanilla extract
- ½ teaspoon almond extract
- 1 cup dried cherries, roughly chopped
- ½ cup chopped walnuts or pecans
- ¼ teaspoon salt
Directions
- Step 1: Melt the chocolate. Combine the chocolate chips and sweetened condensed milk in a medium saucepan over low heat. Stir constantly — don't walk away, because this catches on the bottom faster than you'd expect. Keep going until fully melted and smooth, about 4–5 minutes.
- Step 2: Add the flavorings. Take the pan off the heat and stir in the vanilla extract, almond extract, and salt. The almond extract might seem like an odd addition but it's what gives this fudge its Cherry Garcia identity — don't skip it. Stir everything together until evenly combined.
- Step 3: Fold in the cherries and nuts. Add the chopped dried cherries and nuts and fold them in gently with a spatula or wooden spoon. I try to chop the cherries fairly small so they distribute evenly — big chunks can make the fudge awkward to slice later.
- Step 4: Pour into the pan. Line an 8x8-inch baking dish with parchment paper, leaving some overhang on the sides so you can lift it out later. Pour the fudge mixture in and smooth the top with a spatula. Tap the pan gently on the counter a couple of times to release any air bubbles.
- Step 5: Chill and slice. Refrigerate for at least 2 hours, or until completely firm. Use the parchment to lift the whole slab out of the pan, then cut into squares with a sharp knife. Running the knife under hot water and wiping it dry between cuts gives you much cleaner edges.
Tips for Success
- Keep the heat low and stir constantly: The first time I made this I tried to speed things up by turning the heat to medium. The chocolate seized into a grainy, clumpy mess and I had to start over. Low heat is not optional — it's what keeps the fudge smooth and creamy. If it looks like it's not melting fast enough, that's fine. Just keep stirring.
- Toast the nuts first: This is optional, but it makes a real difference. I toss the walnuts or pecans in a dry skillet over medium heat for 3–4 minutes, shaking the pan occasionally, until they smell nutty and turn a shade darker. It takes almost no time and the flavor payoff is significant. Let them cool before adding them to the warm fudge.
- Chop the cherries smaller than you think: I learned this the awkward way — I left some cherries in large halves my first batch and they created soft, chewy pockets that made slicing messy. Smaller pieces (about ¼ inch) distribute more evenly throughout the fudge and you get a little cherry in every bite instead of big chunks in some squares and none in others.
- Don't skip the parchment paper: I've tried to grease the pan instead and it doesn't work the same way. The fudge sticks at the corners and you end up crumbling the edges trying to get it out. Parchment with overhang on all four sides means you lift the whole slab out cleanly and cut it on a flat surface. A regular sheet pan lined with parchment works too if you want thinner fudge.
- Let it chill fully before cutting: Two hours is the minimum. If you cut it too early it squishes instead of slices, and the squares won't hold their shape. If I'm making this for gifts or a party, I make it the night before and let it chill overnight. It cuts beautifully cold and the texture is firmer and more satisfying.
Variations
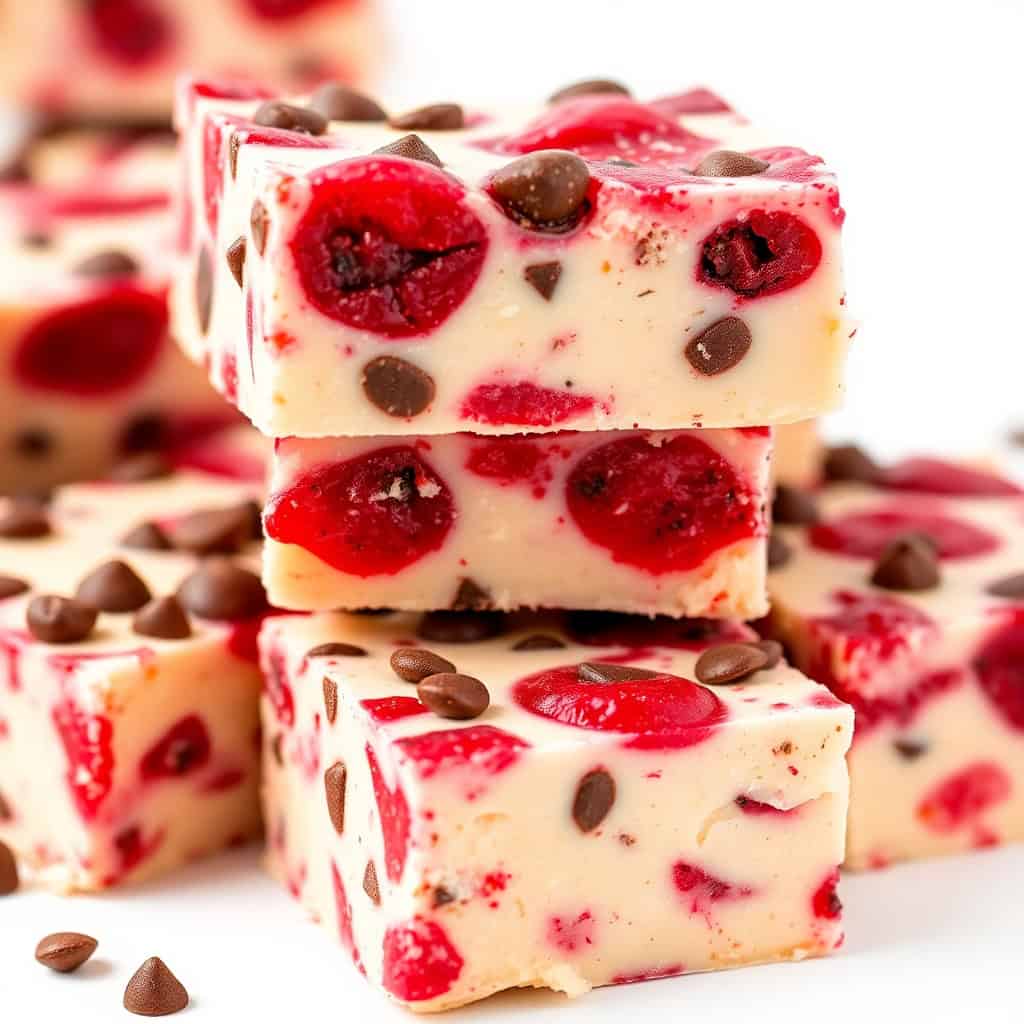
- White chocolate version (Cherry Garcia classic): This is actually what the recipe card below uses — white chocolate chips as the base with dark chocolate chunks folded in along with the cherries. It's closer to what the original ice cream looks like and the contrast between the sweet white chocolate and the bitter dark chunks is really good. My kids prefer this version because it's sweeter.
- Dark chocolate version: Swap the semi-sweet chips for 72% dark chocolate. The fudge comes out less sweet and more intense, which I personally love with a cup of tea in the evening. It also makes the cherry flavor pop more because there's less competing sweetness. If you go this route, you can reduce the salt slightly since dark chocolate often has more already.
- Nut-free version: Just leave the nuts out entirely. The fudge is still good — it's softer in texture without the crunch, but the cherry-chocolate combo carries it fine on its own. This is what I do when I'm making it for a school event where nuts are a concern. You could add more dried cherries to compensate for the missing bulk if you like.
- Boozy cherry fudge: Soak the dried cherries in cherry liqueur or brandy for 30 minutes before using them, then drain and pat dry. They plump up slightly and carry just a whisper of that boozy warmth through the fudge. This is not authentic anything — it's just my version for adult occasions. I made it for a holiday gathering once and it disappeared in about twenty minutes.
- Festive drizzle finish: Melt 2–3 tablespoons of white chocolate (or dark, depending on your base) and drizzle it over the top of the set fudge before slicing. It takes two minutes and makes the whole pan look much more finished. I do this when I'm packaging it as a gift alongside my Christmas Oreos — it gives everything a cohesive look in the tin.
Serving and Storage
Serving
Serve this fudge at room temperature — straight from the fridge it's firm but can feel a little dense. Let it sit out for 10–15 minutes before eating and the texture softens to that creamy, melt-on-your-tongue consistency you want. I serve it cut into small squares (about 1-inch is plenty, this is rich) on a plate or layered in a tin. It pairs really well with black coffee or a cup of tea. At the holidays I'll put it out alongside other sweets on a dessert tray — it holds its shape well at room temperature for a few hours.
Storage
Keep leftover fudge in an airtight container in the refrigerator for up to 2 weeks. I put a sheet of parchment between layers if I'm stacking the squares so they don't stick together. For longer storage, freeze the squares in a single layer first until solid, then transfer to a freezer-safe bag or container. They'll keep for up to 3 months. Thaw in the fridge overnight or at room temperature for about 20 minutes before eating.

Frequently Asked Questions
Can I use fresh cherries instead of dried cherries?
I wouldn't recommend it. Fresh cherries release a lot of moisture when they sit in the fudge, which can prevent it from setting properly and leave you with soft, sticky squares that fall apart. Dried cherries are the right call here — they give you that tart cherry flavor without adding any liquid. Maraschino cherries are also too wet and too sweet for this recipe.
Why did my fudge turn out grainy?
Grainy fudge almost always means the heat was too high at some point. When chocolate overheats or seizes, it loses its smooth texture and turns gritty. Keep the heat on low the entire time you're melting and stir constantly. If it does seize up, sometimes adding a tablespoon of warm condensed milk and stirring vigorously can bring it back — but honestly, it's better to just start fresh with low heat.
Can I make this fudge without nuts?
Yes, absolutely. Just leave them out and the rest of the recipe stays the same. The fudge will be slightly softer in texture without the crunch, but it still sets and tastes great. If you want to add something in their place for texture, a handful of extra dried cherries or even some crushed graham crackers folded in at the end works nicely.
What's the best way to cut fudge into clean squares?
Run a sharp knife under hot water, wipe it dry with a towel, and make your cut. Repeat between each slice. The warmth of the knife helps it glide through the fudge instead of dragging or cracking it. Lift the whole slab out using the parchment paper overhang before you start cutting — it's much easier to cut on a flat board than inside the pan.
Can I make this fudge ahead of time?
This is actually one of the best make-ahead sweets I know. I almost always make it at least a day ahead — it needs a minimum of 2 hours to set but it's noticeably better after chilling overnight. You can make it up to 2 weeks ahead and keep it refrigerated, or freeze it for up to 3 months. If I'm giving it as a gift, I make it 2–3 days early and store the squares in a tin in the fridge until I need them.

CHERRY GARCIA FUDGE
Ingredients
- 2 cups white chocolate chips
- 1 can 14 oz sweetened condensed milk
- 1 teaspoon vanilla extract
- ½ cup dried cherries chopped
- ½ cup dark chocolate chunks
- ¼ teaspoon salt
Instructions
- Step 1: Melt Chocolate – In a saucepan, melt white chocolate chips with condensed milk over low heat, stirring constantly.
- Step 2: Add Flavorings – Remove from heat and stir in vanilla extract and salt.
- Step 3: Mix in Add-Ins – Fold in chopped cherries and dark chocolate chunks.
- Step 4: Set the Fudge – Pour mixture into a lined 8x8-inch pan and smooth the top.
- Step 5: Chill and Serve – Refrigerate for at least 2 hours before cutting into squares.
Notes
- Make Ahead: Store in an airtight container in the fridge for up to a week.
- Customizing the Flavor: Add chopped almonds or swap dark chocolate for milk chocolate.
- Serving Suggestions: Perfect for holiday gifts or a sweet after-dinner treat.
- Allergy-Friendly Options: Use dairy-free chocolate and coconut condensed milk for a vegan version.
- Storage Tips: Keep refrigerated to maintain freshness and texture.
This Cherry Garcia fudge has become one of those recipes I come back to every year without thinking much about it — it just fits into the holiday season naturally. I make a big batch in December, keep half in the fridge for us, and box up the other half for gifts. It travels well, looks nice in a tin, and takes about 20 minutes of actual hands-on time. For all of that, it punches well above its weight.
If you're already in holiday baking mode, this pairs really well with a batch of Amish Friendship Bread — they're both make-ahead, both good for gifting, and both feel a little more special than they are to put together. I like having a few options that aren't all cookies when I'm building a gift tin.
Saad tried a piece of this once and said it tasted "like ice cream but solid," which is pretty much exactly right. He's not wrong. The white chocolate version in the recipe card especially has that Cherry Garcia quality — the sweet base, the dark chocolate chunks, the tart cherry — it's recognizable in the best way. I'm not claiming this is anything more than a very easy no-thermometer fudge inspired by a famous ice cream, but it's a genuinely satisfying thing to make and eat. 🍫🍒✨
If you liked this, you'll probably like these too:
- 27 Best Christmas Candy Recipes — a full roundup for your holiday sweet tin
- Christmas Oreos — fast, festive, and always a hit
- Amish Friendship Bread — a make-ahead bake worth the ten days
- Shamrock Pancakes with Minty Drizzle — for when you want something fun and a little unexpected





Heather Ziegler says
When it says "dried cherries" is it carefully dried marishino cherries from a jar, or a bag of actual dried cherries?
Sana Umer says
Great question! 😊
For this recipe, “dried cherries” means actual dried cherries from a bag, not maraschino cherries from a jar. Bagged dried cherries are chewy and slightly tart, which balances the sweetness of the fudge perfectly. Maraschino cherries are much wetter and very sweet, so they can change the texture and flavor of the fudge. If you only have maraschino cherries, make sure to drain them very well, pat them completely dry, and chop finely before using.
Arla Adams says
Love cheery & fudge!
Sana Umer says
Totally agree! Thanks for the love ❤️