
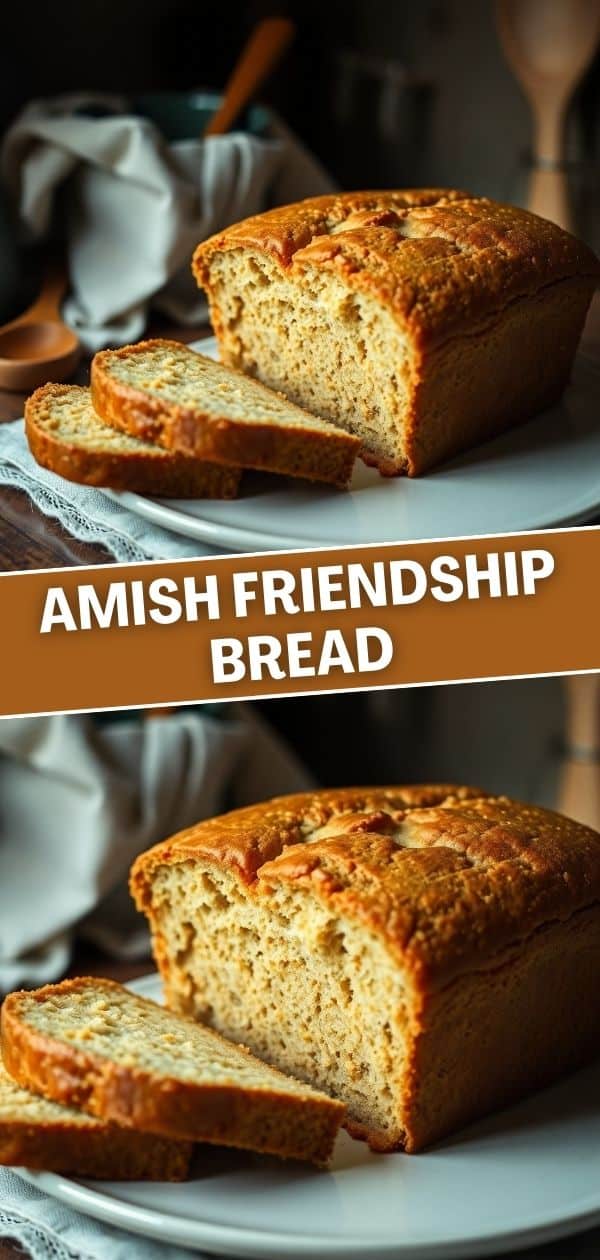
I first made Amish Friendship Bread because a neighbor knocked on my door with a zip-lock bag of bubbling starter and a handwritten note. I had no idea what I was getting into. Ten days of feeding something on my counter, watching it slowly come to life — I was skeptical at first, honestly. But by Day 10 when I pulled two golden loaves out of the oven and the kitchen smelled like a bakery, I completely understood why people have been passing this starter along for generations.
What makes this bread different from anything else I bake is the process itself. The 10-day starter acts almost like a sourdough culture — you're building flavor slowly, feeding it daily, letting the yeast do its work. The result is a slightly sweet, faintly tangy quick bread that doesn't taste like anything you'd get from a boxed mix. The oil keeps it incredibly moist, and it stays soft for days. I've baked a lot of sweet breads — including my Cranberry, Orange and Pecan Muffins — but this one has a depth of flavor that's hard to explain until you taste it yourself.
My husband was confused by the whole process the first time ("Why is there a bowl of flour sitting on the counter? Is it supposed to smell like that?"). But he changed his tune completely when he had a warm slice with butter. Zainab calls it "the bubbly bread" and asks me to make it every couple of months. The fact that you bake two loaves at once means one for us and one to give away — which is really the whole point of this tradition.
One thing to set expectations on: this is a 10-day commitment, not a Tuesday-night bake. You don't need to do much each day — mostly just stir and add ingredients — but you do need to plan ahead. If you're the kind of person who forgets things on the counter, set a phone reminder. I promise the payoff on Day 10 is worth every single one of those daily stirs.

Why You'll Love This Recipe
- The flavor is genuinely different: Because the starter ferments over 10 days, you get a complexity that instant yeast breads just don't have. It's sweet but not cloying, with a very faint tang underneath. My husband described it as "like a coffee cake but more interesting," which is honestly a pretty accurate description. Once you've tasted this, plain quick bread feels a little flat by comparison.
- It makes two loaves at once: The Day 10 recipe yields enough batter for two 9x5 loaf pans, which I appreciate because one disappears fast in my house. I usually keep one and bring the other to a friend or neighbor. It also means you can freeze a whole loaf for later — I wrap one tightly in plastic wrap and aluminum foil and it holds beautifully in the freezer for up to 3 months.
- It builds into a real tradition: After you bake, you divide the remaining starter and share it with friends, who then start their own 10-day cycle. I've given out this starter to three different people in my neighborhood and it's genuinely become a thing we talk about. It's one of the few recipes where the sharing is literally built into the process, not just an afterthought.
- The add-ins are endless: The base recipe is intentionally simple so you can take it in any direction. I've done cinnamon and walnuts, dried cranberries, a handful of chocolate chips, even a teaspoon of cardamom that my family loved. Every time I bake it, I try something slightly different depending on what's in my pantry. It never comes out badly — the starter is forgiving that way.
- No stand mixer, no special equipment: All you need is a large non-metallic bowl (glass or ceramic works great), a wooden spoon, and a couple of loaf pans. I do the whole thing with the same wooden spoon I use for everything. On Day 10, the mixing is just stirring — the batter comes together easily by hand and takes maybe 5 minutes.
Ingredients
- Starter — Day 1:
- 1 package (2¼ teaspoons) active dry yeast
- ¼ cup warm water (around 110°F — warm to the wrist, not hot)
- 1 cup all-purpose flour
- 1 cup milk (not ultra-pasteurized — regular whole or 2% from any grocery store works fine)
- Starter Feedings — Days 2 through 9 (each day):
- 1 cup all-purpose flour
- 1 cup milk (not ultra-pasteurized)
- 1 cup granulated sugar
- Bread — Day 10:
- 1 cup starter (reserve the rest for sharing)
- 1 cup granulated sugar
- 1 cup milk
- ½ cup vegetable oil (or canola oil)
- 1 teaspoon salt
- 1 teaspoon baking powder
- ½ teaspoon baking soda
- 2 cups all-purpose flour
- Optional add-ins: 1 cup chopped walnuts or pecans, 1 cup dried fruit (raisins, cranberries, or chopped dates), 1 teaspoon cinnamon, or ½ cup chocolate chips
Directions
- Day 1 — Start the Starter: Dissolve the yeast packet in ¼ cup of warm water and let it sit for about 5 minutes until it starts to foam. In a large non-metallic bowl (glass or ceramic, not metal), combine 1 cup flour and 1 cup milk. Add the yeast mixture and stir everything together with a wooden spoon. Cover the bowl loosely with a clean kitchen towel or a piece of plastic wrap with a few holes poked in it — you want air to get in. Leave it on the counter at room temperature for 24 hours.
- Days 2 through 9 — Feed the Starter: Each day, add 1 cup flour, 1 cup milk, and 1 cup sugar to the starter. Stir well with your wooden spoon, then recover loosely and leave at room temperature. The starter will get bubbly and active as the days go on — that's exactly what you want. Don't panic if it smells a little tangy or sour by Day 5 or 6; that's the fermentation happening and it's a good sign.
- Day 10 — Mix the Bread Batter: Preheat your oven to 325°F (160°C). Grease and flour two 9x5 inch loaf pans, or line them with parchment paper. In a large bowl, combine 1 cup of the starter with the sugar, milk, oil, salt, baking powder, and baking soda. Stir to combine. Gradually add the flour, stirring until the batter is smooth. Fold in any optional add-ins at this point.
- Bake the Bread: Divide the batter evenly between the two prepared loaf pans. Bake at 325°F for 50 to 60 minutes, or until a toothpick or skewer inserted into the center comes out clean. The tops should be golden brown and the edges should pull slightly from the sides of the pan. Let the loaves cool in the pans for 10 minutes before turning them out onto a wire rack.
- Divide and Share the Remaining Starter: After removing your 1 cup of starter for baking, you'll have roughly 3 cups left. Divide this into portions — keep one for yourself to start another 10-day cycle, and give the rest to friends along with these instructions. I usually split it into 3-cup portions in zip-lock bags or small glass jars so it's easy to hand off.

Tips for Success
- Never use metal bowls or utensils: Metal can react with the active yeast and actually inhibit the fermentation process. I use a large glass mixing bowl I've had for years and a plain wooden spoon. If you only have metal bowls, a large ceramic casserole dish works too. The non-metallic rule applies to every single day, not just Day 1.
- Don't refrigerate the starter — ever: I learned this the hard way the first time when I thought I'd pop it in the fridge overnight "just to be safe." It killed the yeast and I had to start over from scratch. The starter needs to stay at room temperature the entire 10 days so the yeast stays active and keeps developing. If your kitchen is very cold in winter, tuck it in a slightly warmer spot like near the stove.
- Check your yeast before you start: If your active dry yeast is old or has been sitting in a warm cupboard, it might not activate properly. I always proof mine first — dissolve it in the warm water and wait 5 minutes. If it doesn't foam or bubble, throw it out and get a fresh packet. Starting with dead yeast means 10 days of feeding something that will never bake into good bread, which is a frustrating way to spend a week and a half.
- Use regular milk, not ultra-pasteurized: Ultra-pasteurized milk (sometimes labeled UHT) has been heated so intensely that some of the proteins behave differently, and it can interfere with how the starter develops. Plain whole milk or 2% from any grocery store — Walmart, Aldi, Costco — works perfectly. Just double-check the label before you buy.
- Don't skip the cooling time in the pan: I know it's tempting to flip the loaves out the second they come out of the oven, but 10 minutes in the pan lets the structure set. I rushed it once and the bottom of the loaf tore completely — it still tasted fine but it looked a mess. Use that 10 minutes to make a cup of tea and be patient. It's worth it for a clean, intact loaf that slices properly.
Variations
- Cinnamon walnut (my go-to): Add 1 teaspoon of cinnamon and 1 cup of roughly chopped walnuts to the batter on Day 10. The cinnamon blooms in the oven and makes the whole house smell incredible. This is the version I make most often and the one Zainab always requests. It pairs really well with a smear of butter while the loaf is still slightly warm — almost like a cross between banana bread and a coffee cake.
- Chocolate chip: Fold in ½ cup of chocolate chips and reduce the sugar in the bread slightly (about ¾ cup instead of 1 cup) since the chips add sweetness. This version tends to disappear faster than any other in my house. It reminds me of a chocolate chip quick bread but with that extra layer of flavor from the fermented starter underneath.
- Dried cranberry and orange zest: Stir in 1 cup of dried cranberries and the zest of one orange. The tang from the cranberries plays really well with the sweet fermented base. If you like that kind of flavor combination, my Cranberry, Orange and Pecan Muffins use a similar pairing in a completely different format — worth bookmarking.
- Bake it as muffins: Pour the Day 10 batter into a greased 12-cup muffin tin instead of loaf pans and reduce the bake time to about 20 to 25 minutes at 325°F. The muffins are great for sharing individually — easier to hand out than sliced bread. Check doneness with a toothpick the same way. If you enjoy baking sweet muffins, my Gooey Cinnamon Cream Cheese Muffins are another one to try on a weekend morning.
- Powdered sugar glaze: After the loaves have cooled completely, mix ½ cup of powdered sugar with 1 to 2 tablespoons of milk until it's a thin drizzle consistency and pour it over the tops. It adds a pretty finish if you're gifting the bread. I sometimes add a drop of vanilla extract to the glaze — it makes a difference even in that small amount.
Serving and Storage
Serving
This bread is at its best slightly warm, about 20 to 30 minutes out of the oven, with a little butter melted into a slice. It's also great at room temperature the next day — I actually think the flavor deepens slightly overnight as everything settles. We eat it as a breakfast bread, an afternoon snack, or alongside a cup of tea. It's not a savory bread, so I wouldn't pair it with something like soup — but if you're after a cozy fall spread, it goes nicely next to a slice of Homemade Apple Pie for a dessert table.
Storage
Store the baked bread in an airtight container at room temperature for up to 5 days — it stays moist because of the oil in the batter, which I appreciate. For longer storage, wrap the cooled loaf tightly in plastic wrap and then a layer of aluminum foil and freeze for up to 3 months. Thaw at room temperature for a few hours — don't microwave it to thaw or the texture gets gummy. For the active starter: keep it in your non-metallic bowl covered loosely at room temperature, feed it daily, and never refrigerate it. As long as you feed it regularly, it will keep going indefinitely.
Frequently Asked Questions
What if I miss a day of stirring the starter?
Don't stress about it — just stir it as soon as you remember. Missing one day won't ruin everything; the yeast is more resilient than you'd think. Where it becomes a problem is if you miss several days in a row and the starter starts to smell truly off (not just sour, but genuinely bad). One skipped day is completely fine.
My starter isn't bubbling — what's wrong?
The two most common causes are old yeast and ultra-pasteurized milk. Check the expiration date on your yeast packet and make sure your milk label doesn't say "ultra-pasteurized" or "UHT." If the starter sits for 3 days with zero activity and no bubbling at all, it's safer to start fresh with a new yeast packet rather than trying to revive a dead starter.
Can I freeze the starter if I need to pause the process?
Yes, freezing is actually a good option if you're going on vacation or need a break. Transfer the starter to a freezer-safe container, leaving a little room for expansion, and freeze for up to 3 months. When you're ready to continue, thaw it in the fridge overnight and then bring it to room temperature before resuming daily feedings. Give it an extra stir on the first day back — it might take a day to get active again.
Can I use honey instead of granulated sugar?
You can experiment with it, but I'd stick with granulated sugar for the starter feedings at least, since honey behaves differently with yeast in ways that can be unpredictable. For the bread batter on Day 10, swapping in honey might make the loaf a little denser and change the flavor slightly — not necessarily bad, just different. If you try it, use about ¾ cup of honey for every 1 cup of sugar since honey is sweeter.
How do I know when the bread is fully baked?
The standard toothpick test works well here: insert it into the very center of the loaf and it should come out clean or with just a couple of dry crumbs. If it comes out with wet batter, give it another 5 to 10 minutes and test again. The top should also be a deep golden brown and the edges will have pulled slightly away from the pan sides. Every oven runs a little differently — mine tends to run hot, so I start checking at 50 minutes.
AMISH FRIENDSHIP BREAD
Ingredients
Starter (Day 1)
- 1 package active dry yeast
- ¼ cup warm water
- 1 cup all-purpose flour
- 1 cup milk
Starter Feedings (Days 2-9)
- 1 cup all-purpose flour (per day)
- 1 cup milk (per day)
- 1 cup granulated sugar (per day)
Bread (Day 10)
- 1 cup starter
- 1 cup granulated sugar
- 1 cup milk
- ½ cup vegetable oil (or canola oil)
- 1 teaspoon salt
- 1 teaspoon baking powder
- ½ teaspoon baking soda
- 2 cups all-purpose flour
- Optional additions: 1 cup chopped nuts, 1 cup dried fruit, 1 teaspoon cinnamon
Instructions
- Start the Starter (Day 1): Dissolve yeast in warm water. Combine flour and milk in a non-metallic bowl. Add yeast mixture and stir. Cover loosely and let stand at room temperature for 24 hours.
- Feed the Starter (Days 2-9): Each day, add 1 cup each of flour, milk, and sugar to the starter. Stir well and cover loosely. Let stand at room temperature.
- Bake the Bread (Day 10): Preheat oven to 325°F (160°C). Grease and flour two 9x5 inch loaf pans. Combine starter, sugar, milk, oil, salt, baking powder, and baking soda. Gradually add flour, stirring until combined. Stir in optional ingredients. Pour batter into pans and bake for 50-60 minutes, or until a skewer comes out clean. Cool in pans for 10 minutes before transferring to a rack.
Notes
- Starter Care: Store starter in a non-metallic container at room temperature. Feed daily. Divide every 10 days, keeping one portion and sharing the rest.
- Sharing: Include instructions when sharing starter.
- Flavor Customization: Experiment with additions like chocolate chips, spices, or extracts.
- Storage: Store baked bread in an airtight container at room temperature for several days.
There's something I genuinely love about this bread that goes beyond how it tastes. The 10-day process forces you to slow down and pay attention to something small every single day — it's the opposite of an





Comments
No Comments