
What makes this casserole so irresistible is the way the tater tots behave on top — they crisp up in the oven while sitting on the saucy beef mixture, getting golden and crunchy on the outside while the bottom layer absorbs just enough of that tangy sloppy joe sauce to stay slightly soft and flavorful. Meanwhile the cheddar and mozzarella melts down between the tots into every crevice. Every single bite has crispy potato, gooey cheese, and savory beef all at once. It is everything you love about a sloppy joe sandwich but in a format that feeds eight people from one dish.
I make this for family dinners, potlucks, game day gatherings, and those chaotic weeknights when I need something that everyone will eat without negotiation. It requires almost no technique — you brown beef, add sauce, top with tots and cheese, and bake. Even my older kids make this on their own now. The whole thing is on the table in under 40 minutes including prep time.
If you are looking for the most crowd-pleasing weeknight dinner in my rotation, this cheesy sloppy joe casserole is it. Let me show you exactly how I make it.
WHY YOU WILL LOVE THIS RECIPE
- Sloppy Joe Flavor Without the Mess: You get every bit of that tangy, savory, slightly sweet sloppy joe flavor you love — but served in a casserole dish that portions cleanly and does not drip down your arms. All the fun, none of the napkin situation.
- Crispy Tater Tot Topping: The frozen tater tots bake directly on top of the beef mixture and come out golden and crunchy, creating a textural contrast with the saucy filling underneath that makes every bite more interesting than a standard casserole topping. My kids specifically request the corner pieces where the tots are crispiest.
- Ready in Under 40 Minutes: From pulling out the ingredients to setting the dish on the table, this casserole takes about 35-40 minutes total — genuinely doable on the busiest weeknight without any stress or advanced planning required.
- Make-Ahead Friendly: Assemble the entire casserole the night before, cover it, and refrigerate. When you get home the next day, it goes straight from the fridge into the oven — dinner is ready in 25 minutes with zero prep. It is one of the best make-ahead dinner options I know for truly busy weeks.
- Feeds a Crowd From One Pan: A 9x13 dish comfortably feeds 6-8 people, making this the casserole I reach for every time I need to bring something to a potluck or feed a group without making multiple dishes. It travels well and reheats beautifully.
- Endlessly Customizable: Swap the tater tots for biscuit dough, use ground turkey instead of beef, add jalapeños for heat, or mix different cheeses into the casserole — the base recipe handles every variation gracefully and stays delicious no matter what you add or swap.
INGREDIENTS
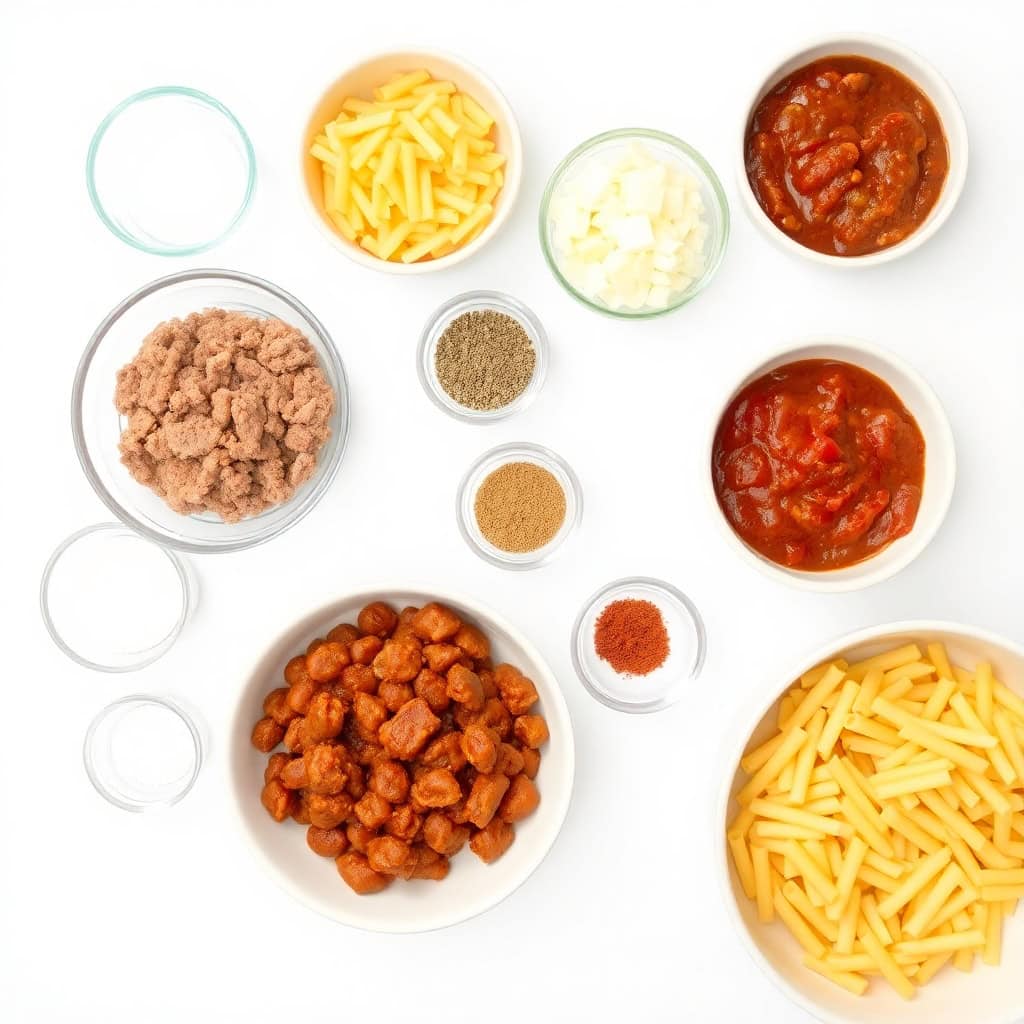
- 1 lb ground beef (80/20 for the best flavor — lean enough to drain but fatty enough to stay juicy)
- 1 small onion, finely chopped
- 1 can (15 oz) sloppy joe sauce
- 1 cup shredded cheddar cheese (shred from a block for better melt — pre-shredded bags contain anti-caking agents that affect the melt)
- 1 cup shredded mozzarella cheese
- 2 cups frozen tater tots (keep them frozen until the moment they go on top — this is how they crisp properly)
- 1 tablespoon olive oil
- ½ teaspoon garlic powder, ½ teaspoon onion powder
- Salt and pepper to taste
DIRECTIONS
- Step No.1: Preheat the Oven
Preheat your oven to 375°F (190°C). Grease a 9x13-inch casserole dish with cooking spray or butter generously — you want to make sure the edges do not stick when serving.
- Step No.2: Brown the Beef and Onion
Heat olive oil in a large skillet over medium-high heat. Add the chopped onion and cook 3-4 minutes until softened and translucent. Add the ground beef and cook, breaking it into small pieces, until fully browned — about 6-7 minutes. Drain the excess fat thoroughly — leaving too much fat will make the casserole greasy.
- Step No.3: Add the Sauce and Simmer
Stir in the sloppy joe sauce, garlic powder, onion powder, salt, and pepper. Reduce heat to medium-low and simmer 5-7 minutes, stirring occasionally. This step is important — simmering lets the flavors meld and thickens the sauce slightly so the casserole does not end up watery.
- Step No.4: Assemble the Casserole
Spread the beef mixture evenly across the bottom of your greased casserole dish in a smooth, even layer. Place the frozen tater tots in a single layer on top — pack them tightly so every bite has a tot. Combine the shredded cheddar and mozzarella and scatter evenly over the tots.
- Step No.5: Bake
Bake uncovered at 375°F for 25-30 minutes until the cheese is fully melted and bubbly and the tater tots are golden brown and crispy. Watch it from the 20-minute mark — you want crispy tots, not soft ones. If the cheese is melted but the tots need more color, turn the broiler on for 2-3 minutes at the end.
- Step No.6: Rest and Serve
Let the casserole rest 5 minutes before serving — this allows the saucy filling to set slightly so it portions cleanly. Serve with a simple side salad or garlic bread for a complete meal.
TIPS FOR SUCCESS
- Keep the Tater Tots Frozen Until the Last Second: Do not let them thaw before placing them on top. Frozen tots go into the oven and crisp up properly from the inside out — thawed tots turn soft and stay soft no matter how long you bake them. This is the single most important tip for getting that satisfying crunch.
- Drain the Beef Thoroughly: After browning, tip the skillet and spoon out any pooled fat before adding the sauce. Excess fat prevents the tots from crisping properly and makes the finished casserole greasy rather than saucy. I drain mine into a bowl lined with paper towels.
- Simmer the Sauce Before Baking: Those 5-7 minutes of simmering on the stovetop are not optional — they reduce excess moisture in the sauce so the filling bakes up thick and saucy rather than watery and thin. A watery filling is the most common complaint with this type of casserole and this step prevents it entirely.
- Shred Your Own Cheese: Pre-shredded cheese contains potato starch and cellulose as anti-caking agents that prevent it from melting smoothly — you get a slightly grainy, clumped texture instead of that gorgeous stretchy pull. A block of cheddar takes 2 minutes to grate and the difference in the final casserole is clearly visible.
- Use the Broiler at the End: If your tots are not as golden as you want after 25 minutes, switch to the broiler for 2-3 minutes while watching carefully. The broiler finishes the crunch without overcooking the beef layer underneath. This trick gives you the best possible tot texture every time.
- Add Vegetables to the Beef Mixture: Finely diced bell peppers, mushrooms, or even zucchini cook perfectly in with the beef and onion — they add nutrition and flavor without anyone noticing they are there. I add half a diced green bell pepper every time and it blends in completely with the sloppy joe sauce.
VARIATIONS
- Cornbread Topping Version: Replace the tater tots with a box of cornbread mix prepared according to package directions and poured over the beef layer before baking. The cornbread bakes into a slightly sweet, crumbly topping that turns this into a Southern-inspired casserole that is genuinely different and just as satisfying. Bake at 375°F for 25-28 minutes until the cornbread is golden.
- Ground Turkey Version: Swap the ground beef for ground turkey for a lighter casserole that saves significant calories without sacrificing the sloppy joe flavor — the sauce carries most of the taste anyway. Add an extra tablespoon of olive oil when browning since turkey is leaner and needs the fat to stay moist through baking.
- Spicy Jalapeño Version: Stir ¼ cup of pickled jalapeño slices directly into the beef mixture and top with pepper jack cheese instead of cheddar. The combination of spicy jalapeño and tangy sloppy joe sauce is genuinely addictive — this is the version I make for adults-only gatherings where I know everyone tolerates heat.
- Biscuit Topping Version: Use refrigerated biscuit dough (cut each biscuit in half) placed cut-side down over the beef mixture instead of tots. The biscuits bake fluffy and golden on top while absorbing some of the sauce from below — it is closer to a pot pie texture and works beautifully for cold weather comfort food nights.
- Vegetarian Black Bean Version: Replace the ground beef with 2 cans of drained black beans mixed with sautéed onion, bell pepper, and corn. The beans hold up beautifully in the sloppy joe sauce and create a filling, protein-rich casserole that meat-eaters genuinely enjoy. Season more generously with cumin and smoked paprika to compensate for the missing beef flavor.
- Extra Cheesy Double Layer Version: Mix ½ cup of shredded cheese directly into the beef mixture before adding it to the dish, then add the full cheese layer on top of the tots as normal. The cheese inside the beef layer creates pockets of melted, saucy cheese throughout the filling that make every bite richer and more indulgent — my kids' requested version every time.
SERVING AND STORAGE
Serving
Serve the casserole hot straight from the oven with a simple green salad, garlic bread, or roasted vegetables alongside. For a complete casual meal, a side of coleslaw works particularly well — the cool, creamy crunch against the warm, saucy casserole is a combination that works every time. Portion by scooping with a large spoon and make sure every serving gets a good mix of crispy tots, melted cheese, and saucy beef from the bottom layer.
Storage
Serve the casserole hot straight from the oven with a simple green salad, garlic bread, or roasted vegetables alongside. For a complete casual meal, a side of coleslaw works particularly well — the cool, creamy crunch against the warm, saucy casserole is a combination that works every time. Portion by scooping with a large spoon and make sure every serving gets a good mix of crispy tots, melted cheese, and saucy beef from the bottom layer.
FAQ
Yes — this is one of the best make-ahead casseroles I know. Assemble it completely including the tater tot topping and cheese, cover tightly with plastic wrap, and refrigerate for up to 24 hours. When you are ready to bake, remove it from the fridge while the oven preheats and add 5-8 extra minutes to the bake time since it is going in cold. The tots may need a few extra minutes to crisp since they were refrigerated.
Freeze it BEFORE baking for the best results. Assemble completely, wrap tightly in plastic wrap then foil, and freeze for up to 2 months. Thaw overnight in the refrigerator before baking as directed — do not bake from frozen. Do not freeze a baked casserole as the tater tots become soft and waterlogged when thawed.
Yes — refrigerated biscuit dough, cornbread batter, and mashed potatoes all work beautifully as alternatives. Biscuit dough gives a fluffy pot-pie-style topping; cornbread adds a slightly sweet Southern flair; mashed potatoes create a shepherd's pie-style casserole. Adjust bake time slightly: biscuits and cornbread take about the same time as tots, while mashed potatoes need 5-10 fewer minutes.
Yes — use spicy sloppy joe sauce, add a tablespoon of sriracha to the beef mixture, stir in pickled jalapeños, swap cheddar for pepper jack cheese, or add fresh diced jalapeños to the beef. Each addition builds the heat level progressively so you can dial it exactly where your family likes it.
The most common cause is thawed tots — always use them straight from frozen, never let them sit out first. The second cause is too much moisture in the beef layer — drain the fat thoroughly after browning and simmer the sauce long enough before assembling. If the tots still need more color after 25 minutes, switch the oven to broil for 2-3 minutes while watching closely.
This cheesy sloppy joe casserole has earned a permanent spot in my weekly dinner rotation and I genuinely cannot imagine going back to plain sloppy joe sandwiches. The casserole format makes it easier to serve, easier to portion, and honestly more satisfying to eat — every component works together in each bite in a way that the sandwich version simply cannot replicate. Once you make it the first time you will understand why my family requests it constantly.
If you are new to casserole cooking, this is the recipe to start with. It requires no special technique, uses pantry staples you likely already have, and the result is impressive enough to serve to guests without any apology. The two tips that make the biggest difference are keeping your tots frozen until the last moment and draining the beef fat completely — get those two things right and the rest takes care of itself. For more cheesy casserole recipes using ground beef, browse through our full casserole collection.
When you make this, leave a comment below and tell me which topping you used — tater tots, biscuits, or cornbread. And if you added jalapeños or tried the vegetarian version, I genuinely want to hear how it turned out. Send it to a friend who needs a new weeknight dinner idea and send them here to forfoodiefriends.com!

CHEESY SLOPPY JOE CASSEROLE
Ingredients
- 1 lb ground beef
- ½ cup diced onion
- ½ cup diced bell pepper
- 2 cloves garlic minced
- 1 can 15 oz sloppy joe sauce
- 1 can 8 oz refrigerated biscuit dough, cut into quarters
- 1 ½ cups shredded cheddar cheese
- ½ teaspoon salt
- ½ teaspoon black pepper
- ½ teaspoon smoked paprika optional
- 2 tablespoons chopped parsley for garnish
Instructions
- Step 1: Preheat Oven – Preheat oven to 375°F (190°C) and grease a 9x13-inch baking dish.
- Step 2: Cook Beef Mixture – In a large skillet, cook ground beef, onion, and bell pepper over medium heat until beef is browned. Drain excess fat.
- Step 3: Add Sauce & Seasonings – Stir in garlic, sloppy joe sauce, salt, pepper, and smoked paprika. Simmer for 5 minutes.
- Step 4: Assemble Casserole – Spread the sloppy joe mixture in the baking dish. Sprinkle half of the cheddar cheese over it. Evenly place biscuit dough pieces on top.
- Step 5: Bake – Bake uncovered for 20 minutes. Remove from oven, sprinkle with remaining cheese, and bake for another 10 minutes until bubbly and golden brown.
- Step 6: Serve – Let cool slightly, garnish with parsley, and serve warm!
Notes
- Make Ahead: Prep the sloppy joe mixture ahead and refrigerate; assemble before baking.
- Customizing the Flavor: Add jalapeños for spice or swap cheddar for pepper jack cheese.
- Serving Suggestions: Pair with a crisp side salad or roasted veggies.
- Allergy-Friendly Options: Use gluten-free biscuit dough if needed.
- Storage Tips: Store leftovers in an airtight container in the fridge for up to 3 days.





Comments
No Comments