
I made butter poached lobster tails for the first time on our anniversary a few years back, and I was genuinely nervous. Lobster felt like the kind of thing that required a culinary degree or at minimum a very expensive restaurant. But I'd been reading about butter poaching and how the low, gentle heat keeps the meat from turning rubbery, and I figured if I ruined it, we'd just order pizza. We did not have to order pizza. It turned out so well that my husband asked me to make it again the following week.
What makes butter poaching different from every other lobster method I've tried is the control. You're not dumping the tails into boiling water and hoping for the best. The butter stays at a low, steady temperature — somewhere between 160°F and 180°F — and the lobster just quietly cooks in it, staying tender all the way through. The butter itself picks up all that sweet lobster flavor while you cook, so when you spoon it over the top at the end, it's basically a sauce you made for free.
I save this for nights when I want dinner to feel like an event — anniversaries, Eid celebrations, or whenever I just want something that feels a little more special than a weeknight. It pairs beautifully with a rich, cheesy pasta if you want to turn it into a full spread, or honestly just with crusty bread and a green salad if you want to keep it simple. My husband always chooses the bread-and-salad route. He likes to mop up every last drop of the poaching butter.
One thing I want to be upfront about: the temperature management is everything here. Don't try to rush this by cranking the heat. I made that mistake the first time I attempted this on a weeknight when I was in a hurry, and the lobster came out with that slightly bouncy, overcooked texture. Keep the heat low, stay near the stove, and it takes maybe 12 minutes of actual cooking time.
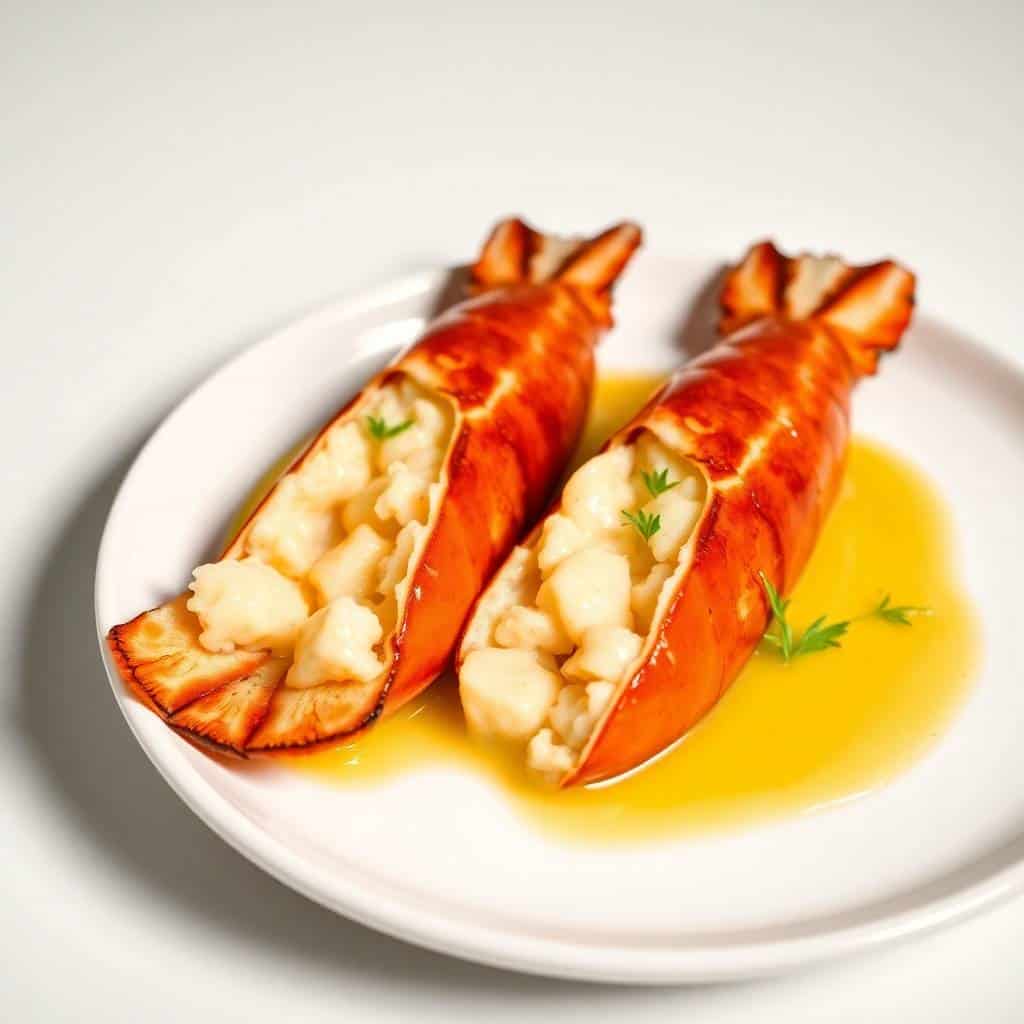
Why You'll Love This Recipe
- It's ready in under 30 minutes: From cutting the shells to plating, this whole recipe moves fast. The prep takes maybe 5 minutes if you're comfortable with kitchen scissors, and the poaching itself is just 10–12 minutes of low heat. I've made this on a Tuesday night after a long day and still had dinner on the table before anyone got too hungry.
- The butter becomes your sauce: You're not making a separate sauce or reduction. As the lobster poaches, the butter absorbs that sweet seafood flavor, and by the time you're ready to plate, you have this golden, garlicky, lemon-kissed butter just sitting there waiting to be spooned over everything. Don't waste a drop of it.
- The texture is completely different from boiled lobster: Boiled lobster can go tough in seconds if you're not paying close attention. Butter poaching gives you a much larger window — the gentle heat is more forgiving — and the result is this silky, almost custardy texture that I genuinely didn't know lobster could have the first time I made it right.
- You only need a few ingredients: Lobster tails, butter, garlic, lemon juice, salt. That's basically it. The quality of the lobster does most of the work, and the butter amplifies it. I don't add a lot because I don't want anything competing with that natural sweetness.
- No special equipment needed: A saucepan, kitchen scissors, and a spoon. That's the whole toolkit. I use a small heavy-bottomed saucepan I've had for years and a pair of kitchen scissors I bought for under $10. No thermometer is strictly required, though a cheap instant-read one helps you stay in that 160°F–180°F range without guessing.
Ingredients
- 2 lobster tails (about 6 oz each — fresh or fully thawed frozen)
- 1 cup (2 sticks) unsalted butter, cut into cubes
- 1 tablespoon water
- 1 garlic clove, minced (optional but I always add it)
- 1 teaspoon fresh lemon juice
- Salt, to taste
- Fresh parsley, chopped, for garnish
- Lemon wedges, for serving
Directions
- Step 1: Prepare the lobster tails — Use kitchen scissors to cut straight down the top of each shell, running from the open end toward the tail fin. Gently pull the meat up and out, then rest it on top of the shell so it sits in that classic presentation shape. This also helps it cook evenly since the meat is fully exposed to the butter.
- Step 2: Build the butter emulsion — In a small saucepan over low heat, add the 1 tablespoon of water first. Then whisk in the butter a few cubes at a time, letting each addition melt before adding the next. This creates a smooth, stable emulsion rather than just a pool of separated fat. Keep the heat low — you want the butter warm and liquid, not bubbling or browning.
- Step 3: Add the flavorings — Once the butter is melted and smooth, stir in the minced garlic and cook for about 1 minute until fragrant. Add the lemon juice and a pinch of salt. Taste the butter at this point — it should smell incredible. Adjust salt if needed. Keep that temperature between 160°F and 180°F (70°C–82°C).
- Step 4: Poach the lobster — Carefully lower the lobster tails into the warm butter, meat side down. Let them poach for 10–12 minutes, spooning the butter over the tops every couple of minutes. The lobster is done when the meat turns fully opaque and feels just firm to the touch. Pull one out and check the thickest part — if it's still translucent in the center, give it another minute or two.
- Step 5: Plate and serve — Transfer the lobster tails to plates. Spoon a generous amount of the remaining poaching butter over each one. Garnish with fresh parsley and serve with lemon wedges on the side. Serve immediately — this is not a dish that holds well.
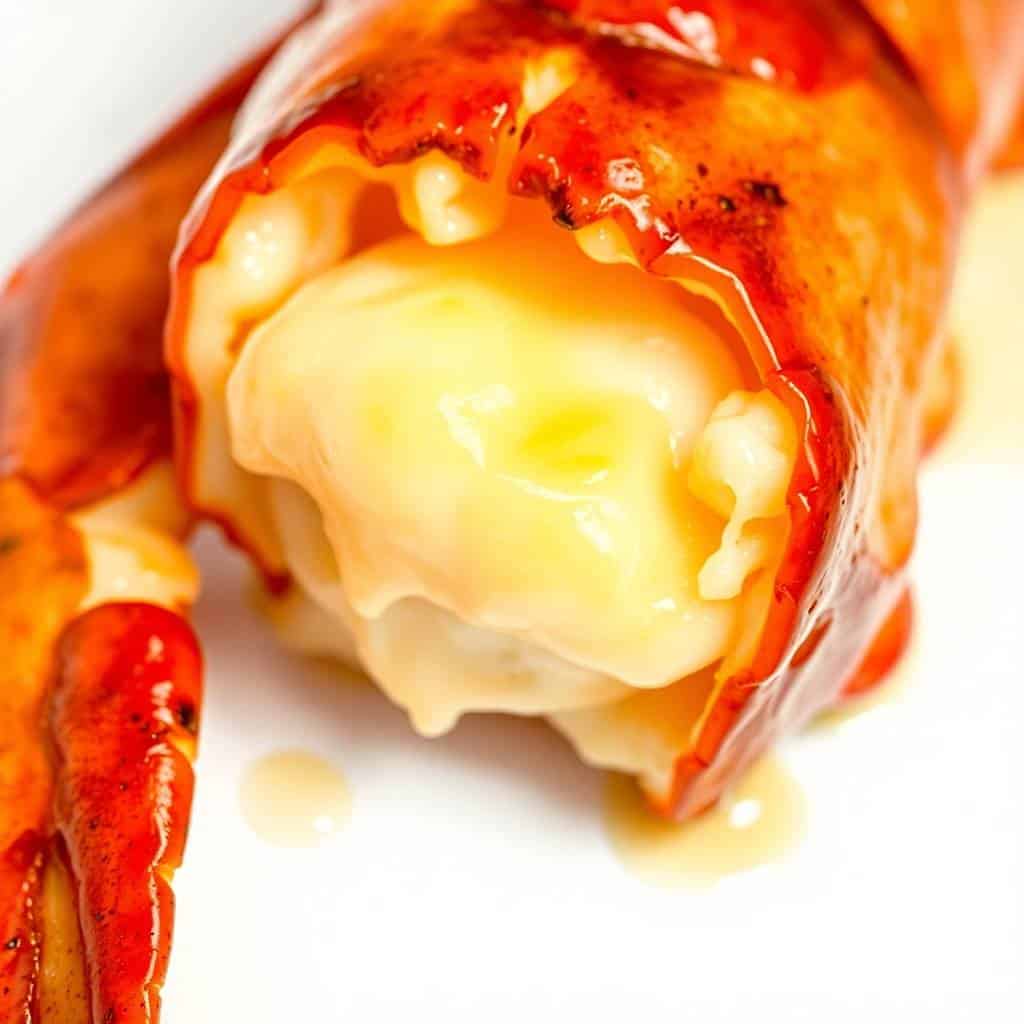
Tips for Success
- Keep that butter below a simmer: This is the single most important rule of the whole recipe. The first time I got impatient and let the heat creep up, the butter started bubbling and the lobster came out stringy and tight. You want the butter to look almost still — maybe the occasional tiny bubble at the edges, but nothing vigorous. If it starts bubbling, pull the pan off the heat for 30 seconds and let it settle.
- Thaw frozen tails completely before cooking: If you're using frozen lobster tails (which is what most of us have access to — I buy mine from Costco or Walmart when they have them), make sure they're fully thawed in the fridge overnight. Partially frozen tails cook unevenly; the outside gets overdone before the center is safe. I learned this the hard way on a night I was too impatient to wait.
- Add the water when building the emulsion: That single tablespoon of water at the start might seem strange, but it helps the butter come together as an emulsion rather than just separating into oil and milk solids. The result is a smoother, creamier poaching liquid that coats the lobster better. Skip it and the butter still works, but the texture is not quite the same.
- Baste constantly during cooking: Don't just drop the lobster in and walk away. Every 2 minutes or so, spoon the warm butter over the exposed top of the meat. The tails are resting on their shells, so only the bottom is fully submerged. Basting ensures the top gets cooked and flavored too, and it also helps you keep an eye on how the meat is changing color.
- Use a pan that fits the tails snugly: If your pan is too wide, the butter spreads out thin and shallow and the tails end up barely submerged. I use a small 2-quart saucepan for two tails — they fit side by side with just enough room, and the butter comes up around them nicely. If you only have a wide pan, double the butter quantity so there's enough depth to work with.
Variations
- Garlic herb butter: Add 2–3 sprigs of fresh thyme or a small sprig of tarragon directly to the butter along with the garlic. Pull them out before serving. The herbs perfume the butter subtly without overpowering the lobster — tarragon especially has this slightly anise-like quality that works beautifully with seafood. My husband always asks for this version.
- Spicy butter: Add a pinch of red pepper flakes to the butter along with the garlic. It adds a very subtle heat in the background — not enough to make it spicy, just enough to give it a little edge. If you want more heat, add a small split dried chili or a few drops of your favorite hot sauce right at the end.
- White wine butter poach: Before adding the butter, add 2 tablespoons of dry white wine to the pan and let it cook down for 30 seconds, then proceed with building the butter emulsion. The wine adds a slight acidity that cuts through the richness and makes the whole thing taste a little more complex. I use whatever I have open — a basic Sauvignon Blanc from Trader Joe's or Aldi works fine.
- Lemon zest and caper butter: Add the zest of half a lemon and 1 teaspoon of capers (rinsed) to the butter. This gives it a brighter, more briny character — closer to a piccata profile. If you're serving this over pasta, this variation in particular works extremely well spooned over the noodles.
- Ghee instead of butter: If you or someone you're cooking for is lactose-sensitive, swap the butter for ghee. Ghee is clarified butter with the milk solids removed, so it's much lower in lactose. I always have ghee at home — it's a staple in my kitchen — and the flavor is actually richer and slightly nuttier than regular butter. This is my go-to variation when I'm cooking for my in-laws.
Serving and Storage
Serving
Serve the lobster tails immediately, right off the stove. Spoon the poaching butter generously over the top and add a lemon wedge on the side. For a full dinner, I like serving these over creamy mashed potatoes or with a simple pasta tossed in olive oil and garlic — the extra butter drips down into whatever's underneath and makes everything better. A crisp green salad on the side keeps the plate from feeling too heavy. If you want to make it a proper special occasion spread, a glass of cold white wine and some crusty bread to soak up the remaining butter is honestly all you need. I've also served this next to a big tray of pepperoni pizza rolls when the kids were also at the table — yes, really, it worked fine because kids eat what kids eat.
Storage
Lobster is genuinely best eaten right away. If you have leftovers, store them in an airtight container in the fridge and eat within 24 hours — not 2–3 days, just one day. To reheat, put the lobster back in a small pan with a tablespoon or two of fresh butter over very low heat, and baste it gently until warmed through. Microwaving lobster is not something I'd recommend — it turns rubbery almost immediately. The poaching butter itself can be strained through a fine mesh strainer, stored in the fridge in a sealed jar, and used within 3 days to flavor pasta, sauté vegetables, or baste other seafood. It's too good to throw away.

Frequently Asked Questions
Can I use frozen lobster tails for this recipe?
Yes, frozen tails work well — they're actually what I use most of the time since fresh lobster isn't easy to find where I live. Just make sure to thaw them completely in the refrigerator overnight before cooking. Cooking them from partially frozen means the outside overcooks before the center comes up to temperature, and that's when you get that rubbery texture everyone hates.
How do I know when the lobster is fully cooked?
The meat will turn from translucent and grayish to fully opaque and white. It should also feel just firm when you press it gently with a spoon — not squishy (undercooked) and not bouncy-tight (overcooked). The 10–12 minute range at 160°F–180°F is reliable for 6 oz tails, but always check the thickest part of the meat rather than going purely by time.
Can I reuse the poaching butter after cooking?
Absolutely — and I'd encourage it because it tastes incredible. Strain it through a fine mesh strainer to remove any garlic bits or parsley, then store it in a sealed jar in the fridge for up to 3 days. Use it to toss with pasta, sauté shrimp or scallops, or spoon over steamed vegetables. It has this deep, sweet, buttery seafood flavor that makes everything it touches taste better.
What size lobster tails work best for butter poaching?
Medium tails in the 5–6 oz range are the sweet spot. They're big enough to feel substantial on the plate but small enough to cook through evenly in 10–12 minutes at low heat. Larger tails — 8 oz and up — need more time and it's harder to keep the temperature consistent throughout without overcooking the edges. If all you can find are large tails, just add a few extra minutes and check frequently.
Can I make the butter ahead of time?
Yes — you can build the emulsion with garlic and lemon in advance and keep it warm on the lowest setting on your stove while you get everything else ready. I sometimes prep the butter 20 minutes before I want to start cooking, which makes the whole process feel less rushed. Just make sure you don't let it sit over heat for too long before adding the lobster, or the garlic can go from fragrant to slightly bitter.
BUTTER POACHED LOBSTER TAILS
Ingredients
- 2 lobster tails about 6 oz each
- 1 cup unsalted butter 2 sticks
- 1 tablespoon water
- 1 garlic clove minced (optional)
- 1 teaspoon lemon juice
- Salt to taste
- Fresh parsley for garnish
- Lemon wedges for serving
Instructions
Prepare the Lobster Tails:
- Use kitchen scissors to cut down the top of each shell and gently pull the meat out, resting it on top of the shell.
Melt the Butter:
- In a saucepan over low heat, add water and slowly whisk in butter a few cubes at a time to create a smooth emulsion.
Add Flavor:
- Stir in garlic and lemon juice. Keep the butter mixture warm but not boiling — it should stay between 160°F–180°F (70°C–82°C).
Poach the Lobster:
- Add the lobster tails to the warm butter and cook for 10–12 minutes, basting occasionally, until the meat is opaque and tender.
Serve:
- Transfer to plates, drizzle with extra butter, and garnish with parsley and lemon wedges. Serve immediately.
Notes
- Make Ahead: You can prepare the clarified butter in advance and reheat it gently before poaching.
- Customizing the Flavor: Add herbs like thyme or tarragon for a fragrant twist.
- Serving Suggestions: Serve over mashed potatoes, pasta, or with steamed asparagus for a restaurant-quality meal.
- Allergy-Friendly Options: Substitute butter with ghee for a lactose-free version.
- Storage Tips: Best enjoyed fresh. If needed, refrigerate leftovers for up to 1 day and reheat gently in melted butter.
Every time I make this, I'm reminded that impressive food doesn't always require a long ingredient list or complicated technique. Butter poached lobster tails are genuinely one of those recipes where the method does all the heavy lifting. You just have to respect the low heat and pay attention, and the result takes care of itself. It's become my go-to for any dinner that needs to feel special without requiring me to spend the whole afternoon in the kitchen.
If you're planning a romantic dinner or a holiday meal, this is the kind of dish that makes people assume you spent far more time and effort than you actually did. Pair it with something indulgent on the dessert side — my eggnog cookies around the holidays, or a simple store-bought ice cream if you don't want to bake — and the whole evening feels thought-through without being exhausting.
I'm not claiming this is a classic French beurre monté or anything with a proper culinary pedigree behind it. It's just the version I figured out in my kitchen, through a few trial-and-error attempts, that consistently works. The temperature thing took me a couple tries to get right, but once it clicked, it clicked for good. Now I make this whenever I want dinner to feel like a real occasion. 🦞🧈✨
If you liked this recipe, here are a few more from the site you might want to try next:
- Million Dollar Ravioli Casserole — rich, cheesy, and deeply satisfying as a side or a standalone dinner
-
{"@context":"https://schema.org","@type":"Article","headline":"BUTTER POACHED LOBSTER TAILS","description":"Butter Poached Lobster Tails are tender, rich, and luxurious — delicately cooked in warm butter for a melt-in-your-mouth gourmet seafood experience.","datePublished":"2025-10-28T04:18:35+00:00","dateModified":"2026-05-03T20:48:11+00:00","author":{"@type":"Person","name":"Sana Umer","url":"https://forfoodiefriends.com/about/","description":"Self-taught home cook with 10+ years of kitchen experience. Mom of two who develops every recipe in her own kitchen.","jobTitle":"Recipe Developer & Food Blogger","image":"https://forfoodiefriends.com/wp-content/uploads/sana-umer-author-photo.jpg"},"publisher":{"@type":"Organization","name":"For Foodie Friends","url":"https://forfoodiefriends.com/","logo":{"@type":"ImageObject","url":"https://forfoodiefriends.com/wp-content/uploads/forfoodiefriends-logo.png"}},"mainEntityOfPage":{"@type":"WebPage","@id":"https://forfoodiefriends.com/butter-poached-lobster-tails/"},"image":"https://forfoodiefriends.com/wp-content/uploads/2025/10/BUTTER-POACHED-LOBSTER-TAILS.jpg"}



Comments
No Comments