
I made beef tenderloin for the first time on Eid a few years ago, and I was terrified the entire time. It's an expensive cut, it cooks fast, and there's basically no margin for error if you want it medium-rare. I overshot it that first time — pulled it at 145°F thinking I was being safe — and ended up with something closer to well-done. My husband was kind about it. I was not impressed with myself.
What I've learned since then is that beef tenderloin is actually one of the more forgiving roasts once you understand a few things: it needs to come to room temperature before it hits the oven, it needs a proper sear first, and it absolutely needs to rest before you slice it. Get those three things right and the rest takes care of itself. The seasoning is simple — garlic, rosemary, thyme, butter — because the beef itself is already doing most of the work.
This has become my go-to for any big occasion. Christmas Eve, Eid, when my in-laws visit, or honestly when I just want to make a Sunday feel like something. My husband asks for it with a red wine pan sauce. I usually make mashed potatoes alongside it and everyone is happy. I make a double batch of the herb rub and keep the leftovers in a little jar for the next time.
One thing I want to set expectations on: you really do need a meat thermometer for this. I know that sounds fussy, but tenderloin is not the place to guess. A basic instant-read thermometer costs around $10 at Walmart and it will save this roast. Everything else about this recipe is genuinely straightforward.
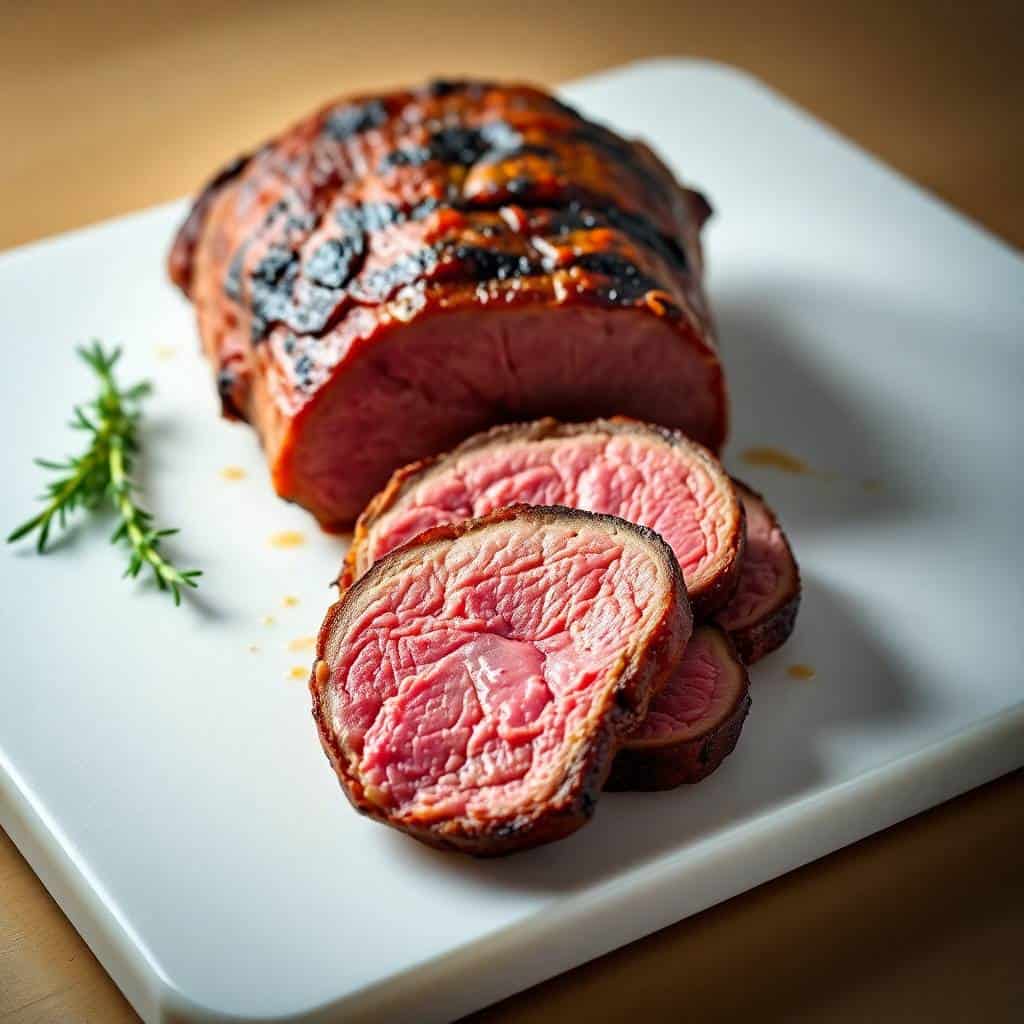
Why You'll Love This Recipe
- The tenderness is genuinely unlike anything else: Beef tenderloin is cut from a muscle that does almost no work, which means it stays incredibly soft even after roasting. I serve it to guests who say they don't usually like roast beef, and they always change their minds. There's no chewy, tough-to-cut moment at the table — it slices cleanly and melts the second it hits your mouth.
- Simple seasoning, serious flavor: You don't need a complicated spice paste or a 24-hour marinade. Garlic, fresh rosemary, thyme, salt, pepper, and a little butter are genuinely all this cut needs. The beef does the heavy lifting — the herbs just frame it. I've tried fancier rubs and always come back to this combination.
- It looks like a restaurant centerpiece: When you bring a whole seared, herb-crusted tenderloin to the table, it just looks impressive. I'm not going to pretend otherwise. My mother-in-law asked me twice if I'd ordered it from a catering company the first time I made this version. You can spend years on fancy appetizers — start them off with this and they'll be satisfied no matter what else you serve.
- It's faster than you think: The active cooking time is genuinely short — a quick sear and then 25–30 minutes in the oven. Most of the time is just waiting: 30 minutes at room temperature before it goes in, 15 minutes resting after it comes out. The oven does the real work while you set the table or finish your sides.
- The leftovers are worth protecting: Cold sliced tenderloin on a sandwich the next day is something I look forward to almost as much as the original meal. My husband slices it thin and builds something closer to a slider situation. Reheat it gently — or honestly, just eat it cold — and it stays tender and flavorful.
Ingredients
- 3 pounds beef tenderloin, trimmed
- 2 tablespoons olive oil
- 2 teaspoons kosher salt
- 1 teaspoon freshly ground black pepper
- 1 teaspoon garlic powder
- 1 teaspoon onion powder
- 4 garlic cloves, minced (in addition to garlic powder — yes, both)
- 1 tablespoon fresh rosemary, chopped (or 1 teaspoon dried)
- 1 teaspoon fresh thyme leaves (or ¼ teaspoon dried)
- 2 tablespoons butter
- 1 tablespoon Dijon mustard (optional, but it helps the rub stick)
- Kitchen twine (for tying the roast)
Directions
- Bring it to room temperature: Take the tenderloin out of the fridge 30–45 minutes before you plan to cook it. A cold roast hitting a hot oven cooks unevenly — the outside overcooks before the center is done. This step is free and makes a real difference.
- Preheat the oven: Set your oven to 475°F (245°C) and place a rack inside a roasting pan. You want the oven fully up to temperature before the meat goes in.
- Prepare and tie the roast: Pat the tenderloin completely dry with paper towels — moisture is the enemy of a good sear. If the thin tail end is flopping loose, fold it under and tie it with kitchen twine to keep the thickness even. Tie the whole roast every 1–2 inches so it holds its shape.
- Season: Mix the olive oil, salt, pepper, garlic powder, onion powder, minced garlic, rosemary, thyme, and Dijon (if using) in a small bowl. Rub the mixture all over the roast, covering every surface. Don't be shy — this is a thick piece of meat and it can handle it.
- Sear it first: Melt the butter in a large heavy skillet over medium-high heat. Sear the tenderloin on all sides until deeply browned, about 2–3 minutes per side. This step builds the crust and flavor that makes it taste restaurant-quality. Don't skip it — this is where the color and depth come from.
- Roast: Transfer the seared roast to the rack in your roasting pan. Sprinkle a little extra rosemary and thyme on top if you like. Roast for 25–30 minutes, checking with a meat thermometer starting at the 20-minute mark. Pull it at 130°F (54°C) for medium-rare or 135°F (57°C) for medium — it will rise another 5°F while it rests.
- Rest before slicing: Remove the roast from the oven and tent it loosely with foil. Let it rest for 15 minutes — this is not optional. The juices redistribute during this time and if you cut into it early you'll lose them all over your cutting board instead of keeping them in the meat.
- Slice and serve: Remove the twine, slice into thick pieces, and serve immediately with your sides and sauces.
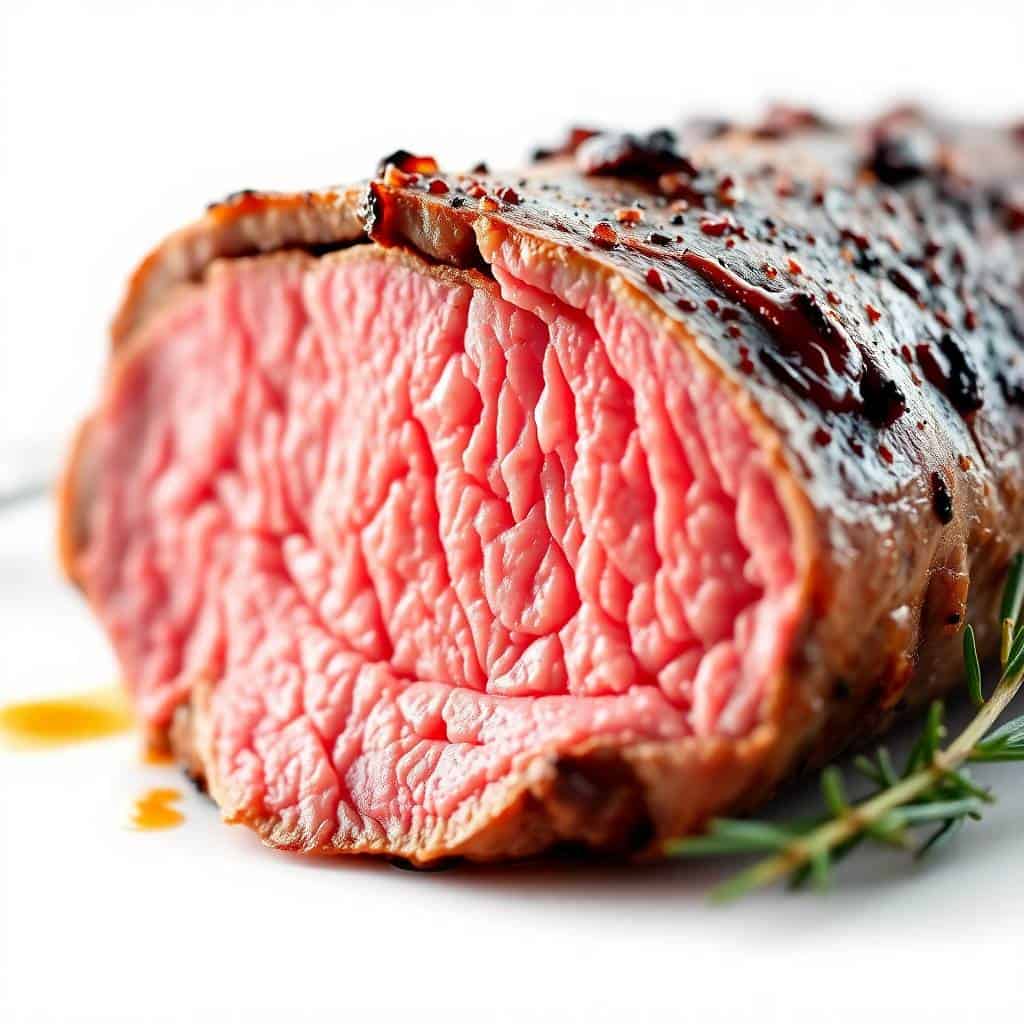
Tips for Success
- Use a meat thermometer — this is non-negotiable: I know I keep saying it, but I ruined my first tenderloin by guessing and it cost me a lot of money and disappointment. A cheap instant-read thermometer from Walmart or Amazon (around $10) is genuinely all you need. Pull at 130°F for medium-rare. The temperature will climb another 5 degrees while it rests, so don't wait for 135°F before pulling it out of the oven.
- Dry the meat before you sear it: I learned this the hard way. If the surface of the tenderloin is wet when it hits the pan, it steams instead of sears and you get a grey, sad crust instead of that deep mahogany brown. Paper towels, a good pat-down all over, then straight into the hot butter. The difference is very visible.
- Don't skip tying the roast: Beef tenderloin tapers at one end, which means if you don't tie it, the thin part overcooks long before the thick part is done. Fold the tail under, secure it with kitchen twine, and tie the whole thing at regular intervals. It takes two minutes and makes a measurable difference in even cooking throughout.
- Buy the best beef you can afford: This recipe has very few ingredients, so the quality of the meat is most of what you're tasting. USDA Choice is the minimum I'd go — Prime if it's a special occasion and your store carries it. Costco often has whole beef tenderloins at a better price per pound than the butcher counter if you're willing to trim it yourself.
- Make it the night before (the seasoning part): You can season, tie, and refrigerate the roast up to 24 hours ahead. Uncovered in the fridge actually works slightly better — the surface dries out a bit more, which helps the sear. Just take it out 30–45 minutes before cooking to come to room temperature. This is what I do when I'm hosting a dinner and I don't want to be scrambling in the kitchen while guests arrive.
Variations
- Garlic herb crust: Mix ½ cup panko breadcrumbs with 2 tablespoons softened butter, extra minced garlic, and chopped fresh parsley. After searing, press this mixture onto the top of the roast before it goes in the oven. It bakes into a crunchy, golden coating that looks stunning when you slice it. This is the version I make at Christmas — Zainab specifically requests the crispy top bits.
- Red wine pan sauce: After searing the tenderloin, don't clean that skillet. Add a diced shallot to the drippings and cook for a minute, then pour in ½ cup of red wine and ½ cup beef broth. Scrape up all the browned bits and simmer until reduced by half. Finish with a tablespoon of cold butter. This is my husband's preferred pairing and it genuinely makes the whole meal feel more complete.
- Horseradish mustard crust: Mix 2 tablespoons of prepared horseradish with 2 tablespoons of Dijon and spread it over the roast before roasting (after searing). It forms a sharp, pungent crust that cuts nicely against the rich beef. This version is for the adults at my table — I keep a plain slice aside for Saad who has strong opinions about horseradish.
- Peppercorn crusted: Before searing, press a generous amount of coarsely cracked black peppercorns all over the surface of the roast. The pepper gets slightly charred in the sear and creates a spicy, aromatic bark. Pair this version with a creamy sauce on the side to balance the heat — a simple sour cream and chive situation works well.
- Pakistani-style spiced version: This isn't traditional in any way, but I've tried it and it's genuinely good. Add ½ teaspoon of garam masala and ¼ teaspoon of smoked paprika to the spice rub. Serve the sliced roast with a yogurt-based sauce with cumin and mint on the side. My family in Pakistan would probably find this confusing, but it works. Serve it with a simple beef curry for a full spread if you're feeding a crowd.
Serving and Storage
Serving
Slice the tenderloin into pieces about ¾ to 1 inch thick and serve immediately. Mashed potatoes are my go-to side — they soak up any juices on the plate. Roasted asparagus or green beans work well for something lighter. If you made a red wine pan sauce, pour it over the slices right at the table. For a holiday spread, this pairs really well with a simple salad to start and something sweet to finish — my family usually wants the apple crisp casserole for dessert when I make this for a big dinner.
Storage
Store leftover slices in an airtight container in the fridge for up to 3–4 days. When reheating, go low and slow — a few minutes in a 250°F oven wrapped in foil keeps it from drying out. Alternatively, eat it cold on a sandwich; thinly sliced cold tenderloin on good bread with a little horseradish mayo is one of those leftover situations I actively look forward to. I don't recommend freezing it — the texture suffers and tenderloin is too good to waste that way.
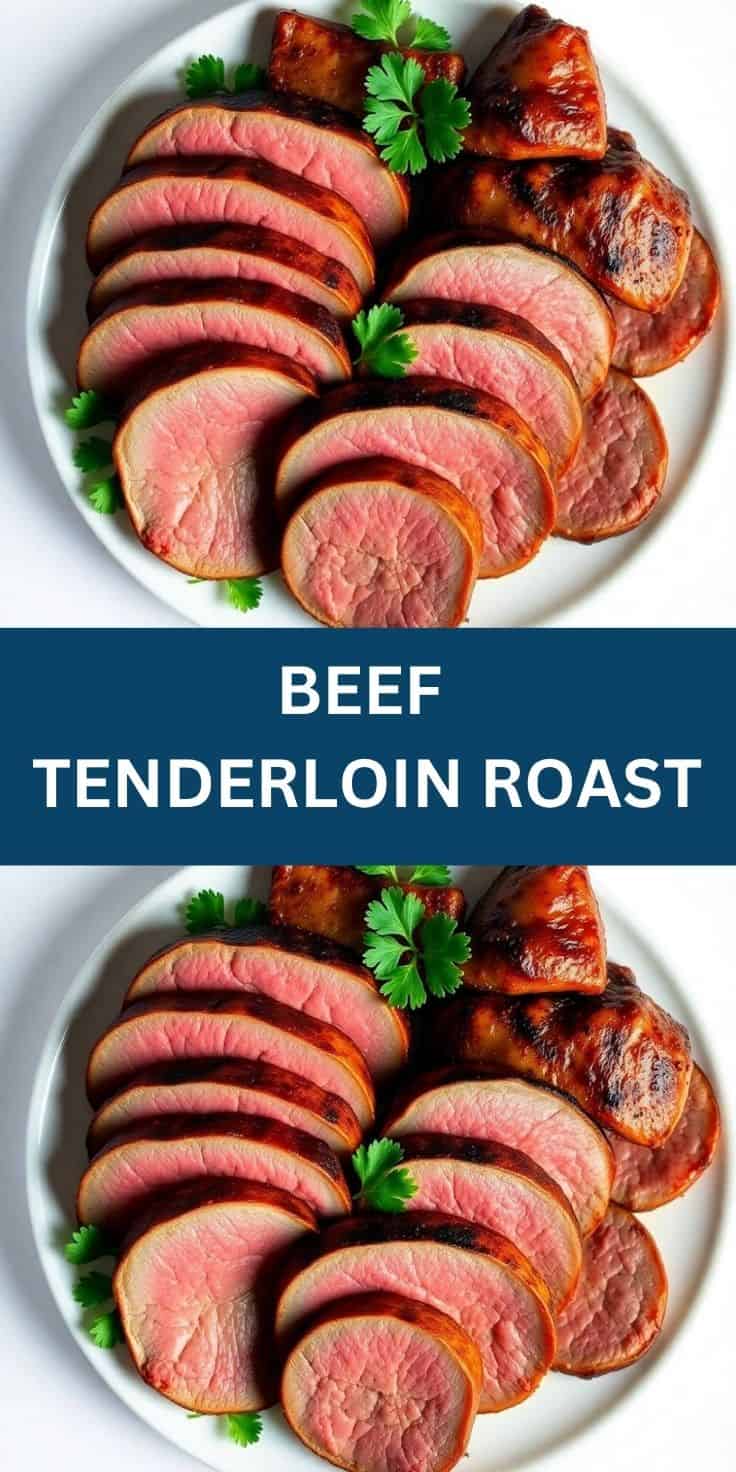
Frequently Asked Questions
What temperature should I pull the tenderloin out of the oven?
Pull it at 130°F (54°C) for medium-rare or 135°F (57°C) for medium — the internal temperature will climb another 5 degrees while it rests under foil. I made the mistake of waiting until 145°F my first time and ended up with well-done meat. Medium-rare is genuinely the sweet spot for tenderloin; anything more and you start losing the texture that makes this cut worth the price.
Can I prepare the roast the night before?
Yes, and I actually recommend it. Season the roast, tie it with kitchen twine, and leave it uncovered in the fridge overnight. The surface dries out slightly, which helps you get a better sear the next day. Just take it out of the fridge 30–45 minutes before cooking so it has time to come to room temperature.
Do I have to sear it before roasting?
You don't have to, but the sear makes a real difference. Without it, the outside of the roast stays pale and the flavor is noticeably flatter. The Maillard reaction — the browning that happens in a hot pan — builds a crust and depth that you just can't get from the oven alone at these roasting times. It adds maybe 10 minutes to the process and it's worth it every time.
Can I use dried herbs instead of fresh?
Yes. Use about one-third the amount — so if the recipe calls for 1 tablespoon of fresh rosemary, use 1 teaspoon of dried. Dried herbs are more concentrated. The flavor won't be identical, but it's still very good. I keep dried rosemary and thyme in my pantry year-round for exactly this kind of situation when I don't have fresh on hand.
Is the Dijon mustard necessary?
No, it's optional. I use it because it adds a subtle tang and helps the herb rub stick to the surface of the meat rather than falling off during searing. If you don't have it or don't like it, the roast is still completely delicious without it — the garlic and herb rub stands on its own just fine.
BEEF TENDERLOIN ROAST
Ingredients
- 3 pounds beef tenderloin trimmed
- 2 tablespoons olive oil
- 2 teaspoons salt
- 1 teaspoon black pepper
- 1 teaspoon garlic powder
- 1 teaspoon onion powder
- 1 teaspoon fresh rosemary chopped
- 1 teaspoon thyme leaves
- 2 tablespoons butter
Instructions
- Preheat the Oven: Preheat oven to 475°F (245°C). Place a rack inside a roasting pan.
- Prepare the Beef: Pat the beef tenderloin dry with paper towels. Rub it with olive oil, salt, pepper, garlic powder, and onion powder.
- Season and Sear: In a large skillet, melt butter over medium-high heat. Sear the beef on all sides until browned, about 2–3 minutes per side.
- Roast: Transfer to the prepared roasting pan. Sprinkle rosemary and thyme over the top. Roast for 25–30 minutes for medium-rare or until internal temperature reaches 135°F (57°C).
- Rest the Meat: Remove from the oven and tent loosely with foil. Let rest for 10–15 minutes before slicing.
- Serve: Slice into thick pieces and serve warm with your favourite sides or sauces.
Notes
- Make Ahead: Season and refrigerate the beef for up to 24 hours before roasting. Bring to room temperature before cooking.
- Custom Flavours: Add Dijon mustard, crushed garlic, or balsamic glaze before roasting for extra flavour.
- Serving Suggestions: Pair with mashed potatoes, roasted vegetables, or a red wine sauce for a complete meal.
- Storage Tips: Store leftovers in an airtight container in the fridge for up to 3 days. Reheat gently to maintain tenderness.
This is genuinely one of those recipes I come back to every few months and feel grateful I figured out. The first version I made was a disappointment — overcooked, dry, more expensive than anything I'd ever roasted. The version I make now is the opposite of that. It takes about an hour from start to finish including the resting time, and it consistently produces something that tastes like it came from a good steakhouse.
If you're making this for a holiday dinner, the make-ahead seasoning trick is what will keep you sane. Season and tie it the night before, leave it in the fridge uncovered, and all you need to do the next day is sear and roast. That frees you up for everything else — the sides, the table, the people. I serve it every Christmas Eve now and the prep stress is genuinely minimal compared to what the finished dish looks like.
If you want something sweet to end the meal after this, the million dollar bread pudding is what I usually make alongside it for big dinners — rich, satisfying, and it can be prepped ahead too. The combination works really well for a holiday spread where you want to do as much in advance as possible.
If you make this




Comments
No Comments