
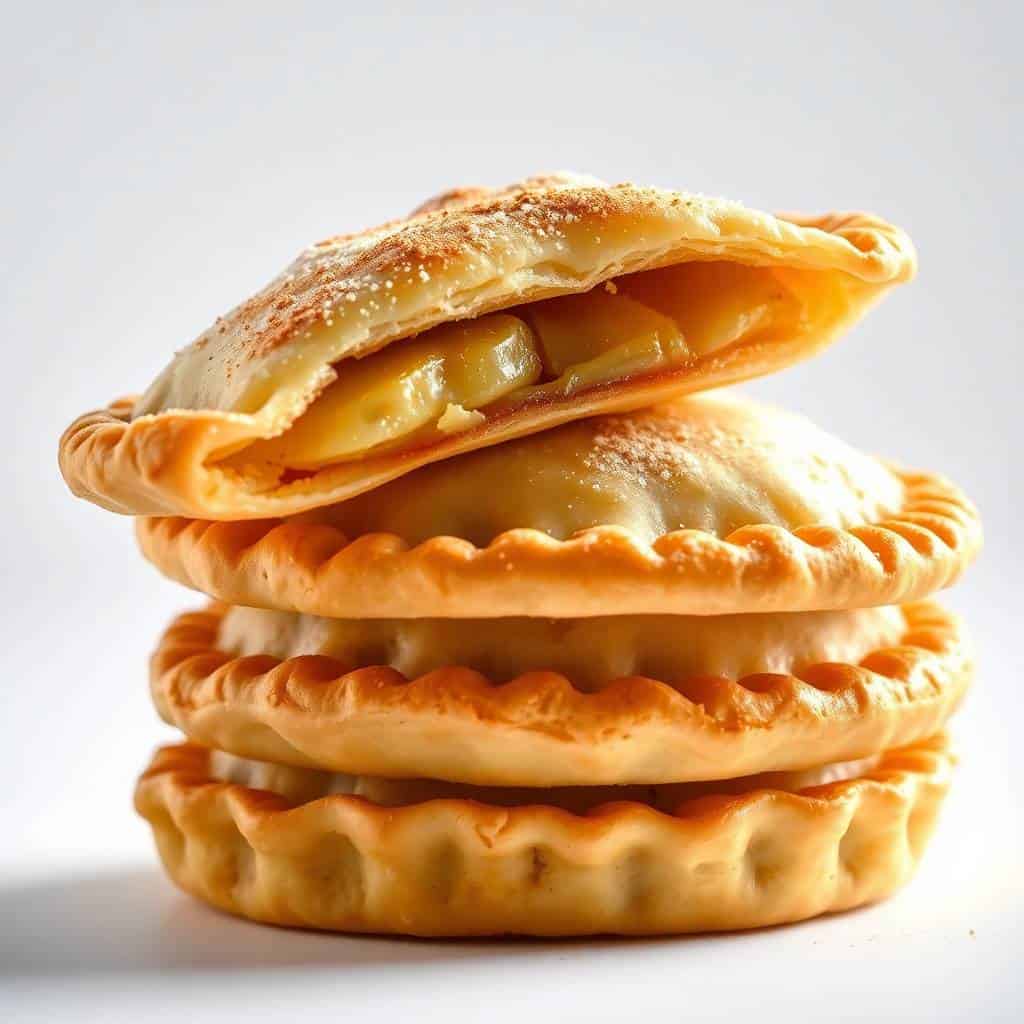
The dessert that disappears the fastest at every summer picnic, every backyard barbecue, and every 4th of July gathering I have ever brought it to is a tray of American apple hand pies: golden, buttery, flaky pastry pockets filled with cinnamon-spiced apples, sealed with crimped fork edges, brushed with egg wash, and sprinkled with coarse sugar that crackles under the teeth on the first bite. They are everything a great American dessert should be — nostalgic, handheld, perfectly portioned, and impossible to walk past without taking one.
What makes hand pies genuinely better than a full apple pie at any gathering is the portability and the crust-to-filling ratio. A slice of apple pie needs a plate, a fork, and a moment of stillness. A hand pie needs none of those things — you pick it up, you eat it, you move on with your day. And because every single hand pie is wrapped entirely in pastry, every bite delivers that golden buttery crust against the warm cinnamon apple filling, with no central slice of filling-only territory the way a regular pie has.
This post covers the classic American apple hand pie in full detail, plus seven variations including a caramel-swirl version, a puff pastry version, mini bite-sized hand pies, a nut-studded version, a mixed-fruit version, a glazed bakery-style version, and a dairy-free version. Every single one can be made ahead, frozen unbaked, and pulled straight from the freezer to the oven whenever the craving hits. Find more apple-forward ideas in our fall apple recipes roundup, our classic apple pie, and our apple pie bombs.
Let's make the best handheld apple dessert of the summer!

WHY YOU WILL LOVE THIS RECIPE
- The Most Nostalgic American Dessert in Portable Form: Apple hand pies sit at the intersection of every classic American dessert — apple pie filling, flaky butter crust, and the convenience of a handheld treat. They are the dessert that immediately reminds people of their grandmother's kitchen, of school lunchboxes, of state fairs, of every red-white-and-blue celebration. Bringing a tray of hand pies to any gathering creates an immediate emotional response that almost no other dessert can match — they are pure comfort food in the most universally beloved American form.
- Genuinely Better Crust-to-Filling Ratio Than Regular Pie: A slice of apple pie has crust on two sides and a large center of pure filling. A hand pie is wrapped entirely in pastry on every side, which means every single bite contains both the flaky buttery crust and the cinnamon apple filling in perfect proportion. The all-around pastry wrap is also what makes hand pies portable — the crust is structural, not just decorative, and it keeps the warm juicy filling contained as you eat.
- Make-Ahead and Freezer-Friendly — Bake Whenever You Need Them: Assembled unbaked hand pies freeze beautifully on a sheet pan, transfer to a freezer bag once solid, and store for up to a month. They bake directly from frozen with just an extra 5–7 minutes added to the baking time — no thawing required. Having a bag of frozen hand pies in the freezer means a homemade dessert is always 30 minutes away regardless of how busy the week is. This is genuinely one of the most practical desserts in any home baker's repertoire.
- Scales Effortlessly for Any Size Gathering: One batch of hand pies makes 8 generously sized portions or 16 mini versions, but the recipe doubles, triples, and quadruples without any technique adjustment. For a large summer party, a triple batch made ahead and frozen unbaked covers 24 guests with absolute ease — the freezer-to-oven workflow makes large-format hand pie production genuinely manageable in a way that full pies are not. Each hand pie also serves one person cleanly, eliminating the slicing-and-plating step entirely.
- The Coarse Sugar Topping Is the Best Detail: Brushing the assembled hand pies with egg wash and sprinkling coarse sanding sugar across the tops before baking is the small detail that transforms these from homemade-looking to bakery-quality. The coarse sugar crystals don't fully melt during baking — they stay visible as glittery, crystalline flecks across the golden crust, providing a textural crunch with every bite and a visual sparkle that immediately signals "this was made with care." Don't skip this step; it is what makes the finished hand pies look genuinely professional.
- The Cinnamon-Apple Filling Tastes Like Pure Fall: The combination of Granny Smith apples, brown sugar, cinnamon, nutmeg, and a small amount of lemon juice produces a filling that tastes like the platonic ideal of apple pie — slightly tart from the apples and lemon, deeply warm from the brown sugar and spices, and perfectly balanced. The flour absorbs the apple juices as they release during baking, producing a thick, glossy filling rather than a runny one. This is the filling everyone wants from an apple dessert and the one most home bakers struggle to get right — this recipe delivers it consistently every time.
- Works for Every Occasion from Lunchboxes to Holiday Tables: Hand pies belong in school lunchboxes, in road trip snack bags, on summer picnic blankets, at 4th of July barbecues, at Thanksgiving dessert tables, and at Christmas cookie swaps. There is genuinely no occasion where a tray of warm apple hand pies is not welcomed enthusiastically. Pair them with our 4th of July charcuterie board for Independence Day or our easy fall desserts for autumn celebrations.
INGREDIENTS
- For the Apple Filling:
- 2 cups peeled, diced apples (Granny Smith or Honeycrisp)
- ¼ cup granulated sugar
- ¼ cup brown sugar
- 1 teaspoon ground cinnamon
- ½ teaspoon ground nutmeg
- 1 tablespoon lemon juice
- 1 tablespoon all-purpose flour
- For Assembly:
- 1 package refrigerated pie crusts (2 crusts) or homemade pie dough
- 1 large egg, beaten (for egg wash)
- 1 tablespoon coarse sanding sugar (optional but recommended, for topping)
DIRECTIONS
- Step No.1: Prepare the apple filling
In a medium bowl, combine the diced apples, granulated sugar, brown sugar, ground cinnamon, ground nutmeg, lemon juice, and flour. Stir well until every piece of apple is evenly coated with the spiced sugar mixture. Let the filling rest for 5–10 minutes — the sugars will start to draw moisture from the apples and the flour will begin to thicken the resulting syrup, producing a glossier, more cohesive filling. For a softer, jammier filling, you can cook the apple mixture in a small saucepan over medium heat for 5–7 minutes until the apples have softened slightly and the syrup has thickened, then cool completely before filling the pies — both approaches work, with the uncooked filling producing a slightly more textured apple bite and the cooked filling producing a smoother, more pie-like consistency.
- Step No.2: Roll out the pie crust
On a lightly floured surface, unroll the refrigerated pie crusts (or roll out your homemade dough to about ⅛-inch thickness). Use a rolling pin to smooth each crust slightly into a more even circle, then cut each crust into 4 equal rectangles for a total of 8 pieces. Alternatively, use a 4-inch round cookie cutter to cut circles for half-moon hand pies — both rectangular pockets and half-moon shapes are classic. Keep the cut dough cold by placing the prepared pieces on a parchment-lined sheet pan and returning them to the refrigerator for 10 minutes if your kitchen is warm; cold dough produces the flakiest finished crust.
- Step No.3: Fill the hand pies
Place approximately 2–3 tablespoons of apple filling slightly off-center on each rectangle or circle, leaving at least a ½-inch border of bare dough around the filling on the side that will be folded over. The border is essential for creating a strong seal — overfilling is the single most common cause of pies bursting open during baking, so resist the urge to pack more filling in than the dough can comfortably enclose. Lightly brush the bare dough border with a small amount of water or beaten egg using your finger or a pastry brush — this helps the top and bottom of the pie adhere when sealed.
- Step No.4: Seal and brush the pies
Fold each rectangle in half over the filling to form a closed pocket (or fold each circle in half to form a half-moon). Press the edges firmly with your fingers first to bond the two layers of dough, then crimp the edges decoratively with the tines of a fork — the fork press both seals the pie securely and creates the classic ridged edge that signals a proper hand pie. Use a sharp knife to cut 2–3 small slits in the top of each pie to allow steam to escape during baking — without these vents, steam pressure can cause the pies to split open at random points. Brush the tops of each sealed pie generously with the beaten egg and sprinkle with coarse sanding sugar.
- Step No.5: Bake the pies
Preheat the oven to 375°F (190°C) — preheating fully before the pies go in is essential for getting the dough to start setting and lifting into flaky layers immediately on contact with the hot oven. Arrange the assembled pies on a parchment-lined baking sheet with at least 1 inch of space between them — the pies expand slightly as they bake and need room to set without sticking to each other. Bake for 20–25 minutes until the tops are deeply golden brown and you can see a small amount of filling bubbling through the steam vents. If the bottoms are not browning evenly, slide the sheet pan down to a lower rack for the final 5 minutes of baking.
- Step No.6: Cool and serve
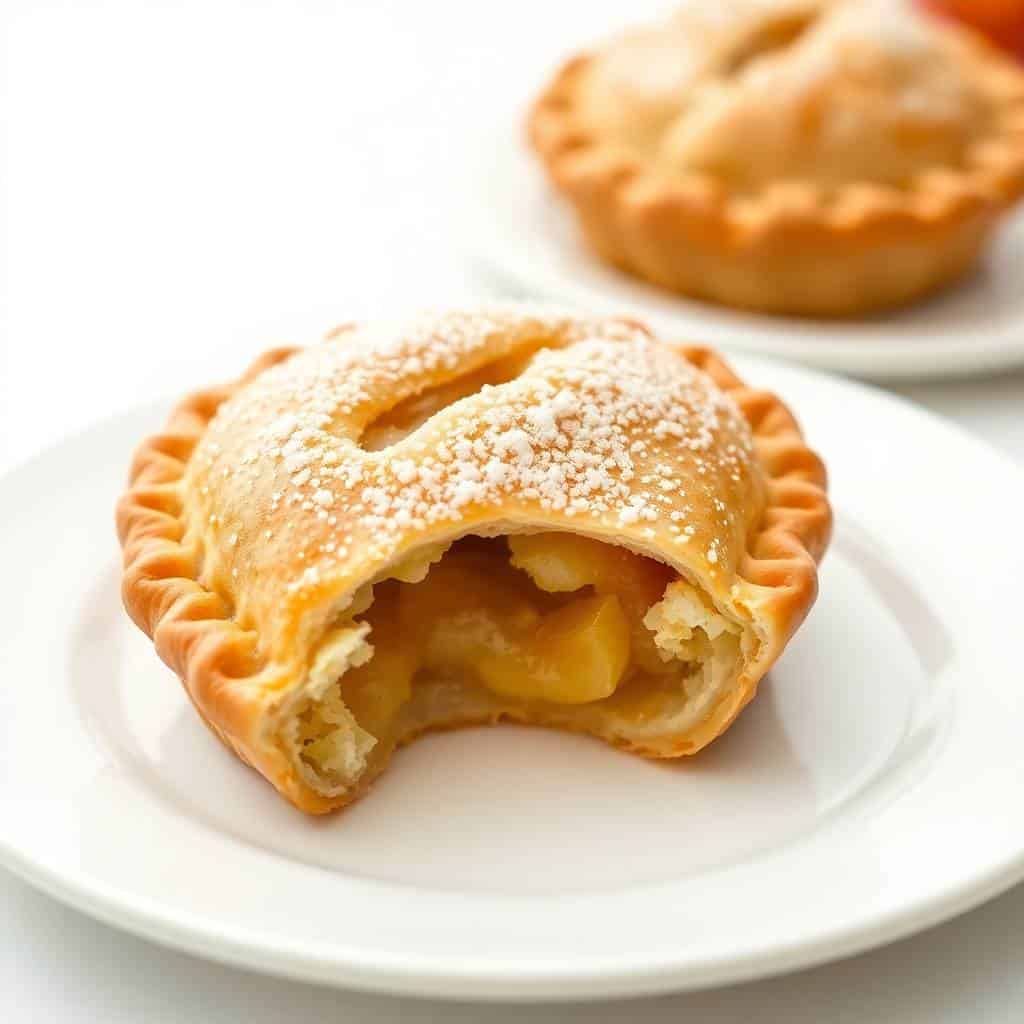
Transfer the baked hand pies to a wire rack and let them cool for at least 10 minutes before serving — the filling is genuinely scalding hot when it first comes out of the oven and the cooling time also allows the filling to thicken to its final glossy consistency. Serve warm with a scoop of vanilla ice cream for the most classic American presentation, or at room temperature for picnics and lunchboxes. The hand pies are equally good both ways, though a warm pie with cold ice cream is the experience to chase if you have the option.
TIPS FOR SUCCESS
- Use Firm, Tart Apples for the Best Filling: Granny Smith is the gold standard for hand pies — the tartness balances the sugar, the firm flesh holds its shape during baking rather than turning to mush, and the apples retain enough texture in the finished pie to give every bite a satisfying chew. Honeycrisp, Braeburn, and Pink Lady are excellent secondary choices. Avoid soft baking apples like Red Delicious, Gala, or McIntosh — they break down completely during baking and produce a sauce-like filling rather than a chunky apple one. A mix of two firm varieties produces the most complex flavor.
- Keep the Dough Cold at Every Stage: Cold butter in the dough is what creates the steam pockets that produce flaky layers during baking — warm butter melts into the flour and produces a tough, crackery crust instead. Chill the dough for at least an hour before rolling, work quickly when shaping the pies, and refrigerate the assembled pies for 10–15 minutes before they go into the oven if your kitchen has gotten warm during assembly. Cold pies going into a hot oven is the entire trick to bakery-quality flakiness.
- Seal the Edges Thoroughly to Prevent Leaks: Press the edges first with your fingers to bond the two layers of dough, then crimp securely with a fork. A poorly sealed edge will burst open during baking and release the filling onto the sheet pan, leaving you with a half-empty pie. Brushing the bottom edge with a small amount of water or egg wash before folding the top dough over creates a stronger seal — the moisture acts as glue between the two dough layers. Take the extra 10 seconds per pie to seal thoroughly; it is the difference between intact pies and leaky ones.
- Don't Overfill the Pies: The single most common hand pie failure is overfilling, which leads to pies that burst open at the seams during baking and release their filling onto the sheet pan. Two tablespoons of filling per 4-inch pie is the correct amount — it looks like less than you want to use, but it is exactly right. The filling expands and bubbles during baking, and a generously filled pie will always fail at the seal before a modestly filled pie does. Trust the recipe quantity and save the extra filling for a second batch.
- Always Cut Steam Vents in the Top: Two or three small slits in the top of each sealed pie before baking are essential — they allow steam from the cooking filling to escape gradually rather than building up internal pressure that forces the pie to crack open at random weak points. A decorative pattern of three small slits in a fan shape, or one X-shape cut, both work beautifully and provide a more polished finished appearance than randomly placed vents. This 5-second step is what separates intact, beautifully presented hand pies from cracked, burst ones.
- Bake on Parchment Paper for the Cleanest Result: Parchment paper prevents any filling that does leak from sticking to the sheet pan and burning during the remainder of the bake — burnt sugar smoke is genuinely awful to clean and can flavor the pies unpleasantly. Parchment also makes transfer of the baked pies to the cooling rack effortless. A silicone baking mat works equally well. Skip the bare sheet pan entirely — the small effort of lining the pan saves significant cleanup time and protects against any seal failures during baking.
- Cool Before Serving to Let the Filling Set: The filling is genuinely scalding hot directly from the oven and will burn your tongue immediately if you bite into a pie within the first 5 minutes. Letting the pies cool on a wire rack for at least 10 minutes allows the filling to drop to a safe eating temperature and also allows the starch in the filling to fully set, producing a thicker, glossier filling rather than a thin syrupy one. The wait is genuinely worth it; warm-but-not-hot is the optimal eating temperature.
VARIATIONS
- Caramel Apple Hand Pies: Drizzle 1 teaspoon of thick caramel sauce over the apple filling in each pie before sealing — the caramel melts into the filling during baking, creating pockets of rich buttery sweetness that intensify the apple pie flavor dramatically. You can also brush warm caramel sauce over the cooled baked pies for an even more indulgent finish. This is the variation to make for a fall dinner party dessert or for an extra-special holiday tray. Pair with our caramel apple dessert cups for a complete caramel apple celebration.
- Puff Pastry Apple Hand Pies: Swap the pie dough for store-bought puff pastry for a dramatically different texture — puff pastry produces tall, airy, shatteringly crisp layers rather than the tender flakiness of pie crust. The puff pastry version bakes slightly hotter (400°F instead of 375°F) and shorter (15–18 minutes) and produces hand pies that look genuinely bakery-made with very little additional effort. This is the variation to choose when you want maximum drama and visual impact with the least labor — store-bought puff pastry does most of the work.
- Mini Bite-Sized Hand Pies: Use a 2.5-inch round cutter to cut smaller circles from the pie dough and fill each with just 1 teaspoon of apple filling. The mini version makes 24–30 bite-sized pies from the same recipe and bakes in 12–15 minutes total. These are the perfect party version — they are eaten in two bites, they look adorable on a dessert tray, and guests can grab several without committing to a full-sized pie. Make them for our bridal shower finger foods table or any cocktail party dessert spread.
- Apple-Pecan Hand Pies: Add ¼ cup chopped pecans or walnuts to the apple filling — the nuts provide a textural contrast to the soft apples and add a warm, buttery, slightly bitter dimension that pairs beautifully with cinnamon and brown sugar. Toast the pecans in a dry skillet for 3–4 minutes before adding for maximum nutty flavor. This is the variation to make for fall and Thanksgiving — the apple-pecan combination is one of the most classic American flavor pairings and one that immediately reads as autumnal. Pair with our Thanksgiving dinner ideas for a complete holiday menu.
- Mixed Fruit Hand Pies: Substitute the apples with pears, peaches, mixed berries, or a combination — the same dough and assembly technique works for any fruit filling, with only the cinnamon and nutmeg adjusted to suit the fruit (skip the warm spices for berry fillings and add a small amount of cardamom for pear fillings). Peach hand pies are extraordinary in summer when peaches are at their peak — see our fresh peach cobbler for more peach inspiration. Berry hand pies are the perfect summer picnic dessert.
- Glazed Bakery-Style Hand Pies: Skip the coarse sugar topping on the unbaked pies and instead drizzle a simple powdered sugar glaze (1 cup powdered sugar whisked with 2 tablespoons milk and ½ teaspoon vanilla extract) over the fully cooled baked pies. The glaze sets into a glossy white finish that turns the rustic homemade hand pies into something that looks like it came from a high-end bakery. For an extra-special version, add a splash of maple syrup or apple cider to the glaze for additional flavor. Find more glazed dessert inspiration in our fluffy ricotta cookies.
- Dairy-Free and Vegan-Friendly Hand Pies: Use a plant-based butter (Earth Balance or similar) in homemade pie dough and replace the egg wash with a non-dairy milk wash (oat milk or almond milk brushed over the tops produces a similar golden finish). The filling is naturally dairy-free and vegan as written. The dairy-free version is genuinely indistinguishable in taste and texture from the classic version — this is one of the easiest classic American desserts to adapt for plant-based eaters without any compromise on quality or flavor. Pair with our vegan cake recipes for a full plant-based dessert spread.
SERVING AND STORAGE
Serving
Serve hand pies warm with a scoop of vanilla ice cream for the most classic American presentation — the cold cream melting against the warm cinnamon apple filling and flaky crust is the platonic ideal of apple pie à la mode in handheld form. Alternatively, serve at room temperature for picnics, lunchboxes, and road trips where ice cream isn't an option — the pies are genuinely excellent at room temperature and travel beautifully wrapped in parchment paper or stacked in a single layer in a sealed container. A drizzle of caramel sauce, a dusting of powdered sugar, or a dollop of fresh whipped cream are all excellent serving additions for a more dressed-up presentation.
Storage
Cooled hand pies store in an airtight container at room temperature for up to 2 days — the crust softens slightly after the first day but the pies remain delicious. For storage beyond 2 days, refrigerate for up to 5 days in a sealed container; the refrigerated pies should be warmed in a 325°F oven for 5–7 minutes before serving to restore the crust crispness. For longer storage, freeze unbaked assembled pies on a sheet pan until solid, then transfer to a freezer bag and store for up to a month — bake directly from frozen at 375°F for 25–30 minutes (about 5 extra minutes longer than fresh pies). Baked hand pies also freeze well — cool completely, wrap individually in plastic wrap and foil, freeze for up to a month, and thaw at room temperature or warm in a low oven to refresh.
FAQ
Yes, hand pies freeze beautifully both unbaked and baked. For unbaked pies, assemble fully and freeze on a sheet pan until solid, then transfer to a freezer bag for up to a month. Bake directly from frozen at 375°F for 25–30 minutes (about 5 extra minutes longer than fresh). For baked pies, cool completely, wrap individually in plastic wrap and foil, freeze for up to a month, and thaw at room temperature or warm in a 325°F oven for 5–7 minutes to refresh the crust. The unbaked-then-baked-from-frozen approach produces the freshest, flakiest results.
Firm, tart apples are essential — Granny Smith is the gold standard because the tartness balances the sugar perfectly and the firm flesh holds its shape during baking rather than turning to mush. Honeycrisp, Braeburn, and Pink Lady are excellent secondary choices that bring a touch more sweetness. Avoid soft baking apples like Red Delicious, Gala, McIntosh, or Fuji — they break down completely during baking and produce a sauce-like filling rather than the chunky textured apple filling that defines a great hand pie. A mix of two firm varieties (one tart, one sweet) produces the most complex flavor.
Absolutely — homemade pie crust produces a noticeably better-tasting and flakier hand pie and is genuinely worth the small extra effort when time allows. The classic ratio is 2½ cups all-purpose flour, 1 teaspoon salt, 1 cup (2 sticks) cold cubed unsalted butter, and 6–8 tablespoons of ice water; whisk the dry ingredients, cut in the butter until it resembles coarse crumbs, then add ice water gradually until the dough just comes together. Divide in half, shape into discs, wrap, and chill for at least 1 hour before rolling. Keep everything cold throughout — cold dough is the entire secret to flaky homemade crust.
Soggy bottom crusts come from three causes: too much liquid in the filling, an underbaked bottom, and the pies cooling on a sheet pan that traps moisture underneath. The fixes are: include the tablespoon of flour in the filling to absorb apple juices as they release during baking, don't overfill the pies (extra filling means extra liquid), and bake on a fully preheated sheet pan or pizza stone for the bottom heat that crisps the underside. Transfer the baked pies to a wire cooling rack within 5 minutes of removing from the oven — the rack allows steam to escape from underneath rather than trapping it against the crust.
Yes — substitute the pie crust with a 1:1 gluten-free pie crust (many excellent store-bought options are now available in the refrigerated section) and replace the tablespoon of all-purpose flour in the filling with the same amount of gluten-free flour blend, cornstarch, or arrowroot powder. The technique is otherwise identical and the finished hand pies are virtually indistinguishable from the wheat version when made with a high-quality gluten-free crust. Cold dough handling is even more important with gluten-free dough since it can be more fragile — work in small batches and refrigerate any dough you're not actively using.
These American apple hand pies are the dessert that brings the loudest, most enthusiastic response from every guest at every picnic, every barbecue, and every holiday table they appear at. The combination of flaky butter crust, cinnamon-spiced apple filling, and the coarse sugar crackle on top is genuinely as good as American baking gets — nostalgic, perfectly portioned, and impossible to stop at one.
Try the caramel swirl version for fall, the mini bite-sized version for parties, the glazed bakery-style version when you want maximum impressiveness, and the freezer-stash approach so you always have a fresh-baked dessert 30 minutes away. Pair with our fall apple recipes, our classic apple pie, our firecracker jello shots, and our patriotic poke cake for the complete summer celebration spread, or with our Thanksgiving dinner ideas for the full fall holiday menu. 🥧🍎✨


AMERICAN APPLE HAND PIES
Ingredients
For the Filling:
- 3 cups peeled diced apples (Granny Smith or your choice)
- ½ cup granulated sugar
- 1 teaspoon ground cinnamon
- ¼ teaspoon ground nutmeg
- 1 tablespoon lemon juice
- 1 tablespoon all-purpose flour
For the Dough:
- 2 ½ cups all-purpose flour
- 1 teaspoon salt
- 1 cup 2 sticks unsalted butter, cold and cubed
- 6 –8 tablespoons ice water
For Assembly:
- 1 large egg beaten (for egg wash)
- Sugar for sprinkling
Instructions
Make the Dough:
- In a large bowl, whisk flour and salt. Cut in cold butter until mixture resembles coarse crumbs. Gradually add ice water, 1 tablespoon at a time, until dough comes together. Divide dough in half, shape into discs, wrap, and chill for 1 hour.
Prepare Filling:
- In a saucepan, combine apples, sugar, cinnamon, nutmeg, lemon juice, and flour. Cook over medium heat, stirring until apples soften and mixture thickens. Cool completely.
Assemble Pies:
- Preheat oven to 400°F (200°C). Roll out dough on a floured surface to ¼-inch thickness. Cut into 4-inch circles. Place 2 tablespoons filling on each circle, fold dough over to form a half-moon, and seal edges with a fork.
Bake:
- Place pies on a parchment-lined baking sheet. Brush with egg wash and sprinkle sugar on top. Bake for 20–25 minutes or until golden brown.
Cool & Serve:
- Cool on a wire rack before serving.
Notes
- Make Ahead: Dough can be made and chilled up to 2 days in advance.
- Freezing: Freeze unbaked pies for up to 1 month; bake from frozen, adding a few extra minutes.
- Flavor Twist: Add chopped nuts or raisins to the filling for texture.
- Serving Suggestion: Serve warm with vanilla ice cream or whipped cream.
- Dairy-Free Option: Use plant-based butter and milk substitutes.





Comments
No Comments