
Fall in our house means the oven barely gets a break. The second the weather drops even slightly — and I mean slightly, because Pakistani winters don't hit the way they do in the US — I start reaching for apples, pumpkin, cinnamon, and pecans. Fall desserts are genuinely my favorite category of baking all year. There's something about the combination of warm spice and caramel-sweet fruit that makes everything feel worth the effort, even on a Tuesday night when I'm already tired.
What makes a fall dessert worth making at home? For me, it comes down to three things: accessible ingredients you can grab at Walmart or Trader Joe's, a reasonable amount of effort (nobody wants a five-hour project on a weeknight), and that specific cozy quality where a warm dessert actually delivers on what fall is supposed to feel like. I've made a lot of these recipes multiple times to get them right — a few of them I failed on the first try, which you'll hear about if you look at my easy pumpkin recipes section. Only the ones that actually worked stayed on this list.
This roundup covers 22 recipes across the full range of what fall baking can look like — from a no-bake pumpkin cheesecake that requires zero oven time, to soft pumpkin cookies, to a puff pastry apple galette that looks impressive but comes together in under an hour. There are vegan options, gluten-free options, air fryer recipes, and a few things that are just purely indulgent (looking at you, pecan pie bars). If you're building a full holiday dessert table, check out my fall dessert recipes collection and the easy apple dessert recipes roundup — both have more ideas to pull from.
Here are the 22 fall desserts I keep coming back to — pick whatever fits your week, your oven, and how many people you're feeding.
Top 22 Easy Fall Dessert Recipes

21. Cinnamon Apple Sticky Rolls (Vegan)
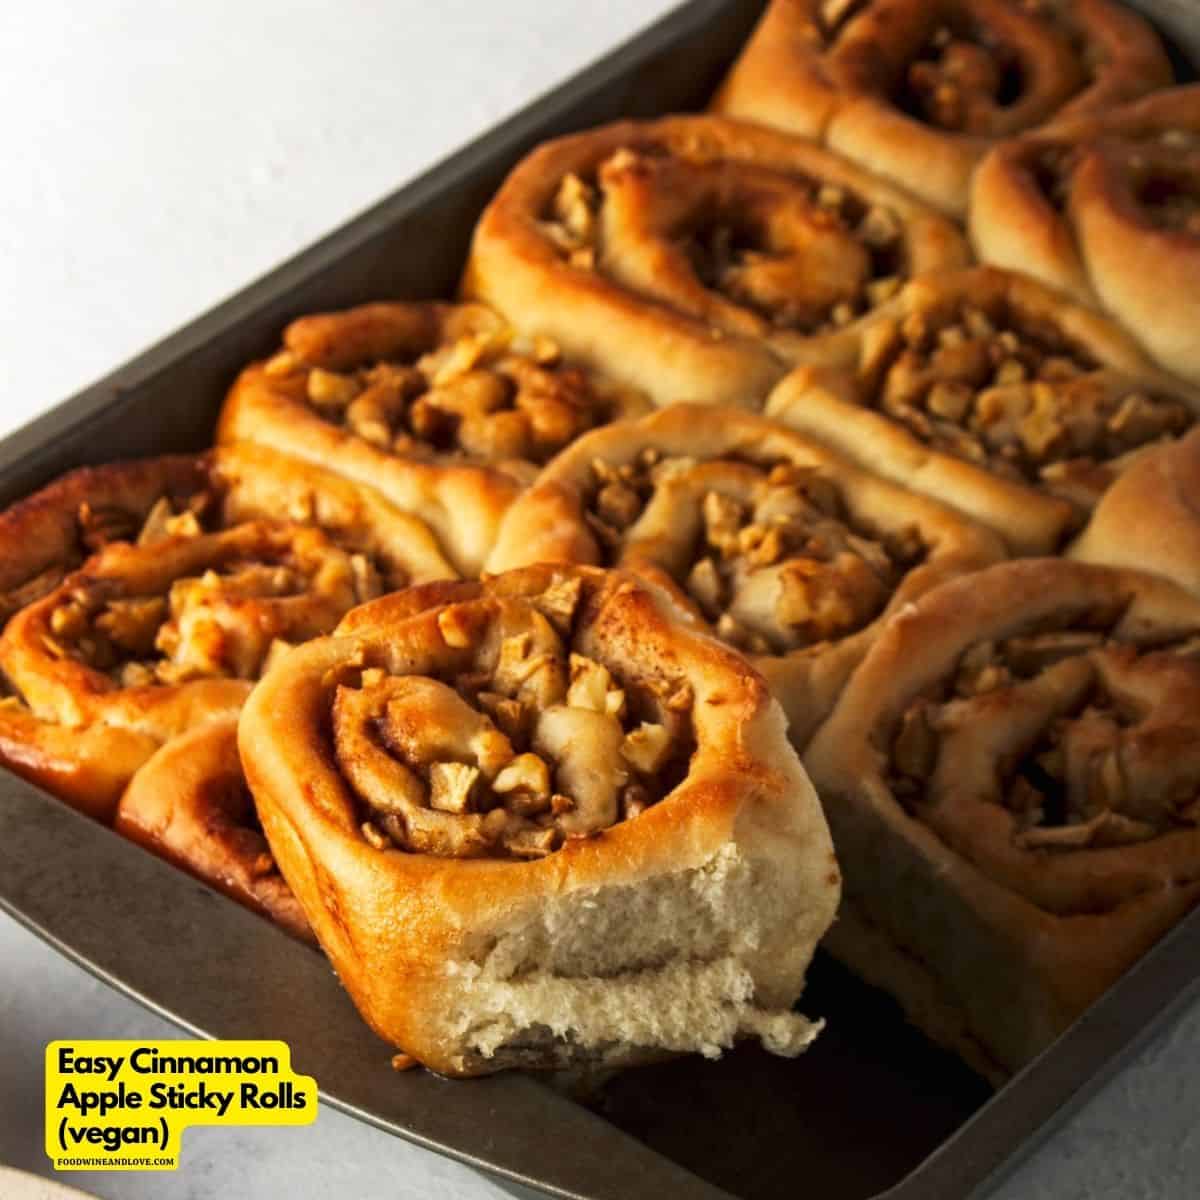
These vegan cinnamon apple sticky rolls are one of those recipes I kept putting off because I assumed vegan baking meant compromising on richness. I was wrong. The dough is soft, the apple-walnut filling is sticky in the best possible way, and the whole thing smells like fall the second it hits the oven. If you've got a free Sunday morning and apples sitting on the counter, this is where they should go.
Ingredients
- 3 cups all-purpose flour, plus more for dusting
- 2¼ teaspoons active dry yeast (1 standard packet)
- 1 cup warm oat milk (or any plant-based milk)
- 3 tablespoons maple syrup, divided
- 3 tablespoons vegan butter, melted, plus extra for the pan
- ½ teaspoon salt
- 2 medium apples, peeled and finely diced
- ½ cup chopped walnuts
- 2 teaspoons ground cinnamon
- ¼ cup brown sugar, packed
- ¼ cup powdered sugar + 1–2 tablespoons oat milk (for glaze)
Instructions
- Combine warm oat milk, 1 tablespoon maple syrup, and yeast in a large bowl. Let it sit for 5–10 minutes until foamy — if it doesn't foam, your yeast is dead and you need a fresh packet.
- Add melted vegan butter, salt, and flour to the yeast mixture. Stir until a shaggy dough forms, then knead on a floured surface for about 8 minutes until smooth. Place in a lightly oiled bowl, cover, and let rise for 1 hour.
- While the dough rises, mix diced apples, walnuts, cinnamon, brown sugar, and remaining 2 tablespoons maple syrup in a bowl. Set aside.
- Roll the risen dough out into a roughly 12x9-inch rectangle on a floured surface. Spread the apple-walnut filling evenly across it, leaving a 1-inch border. Roll tightly from the long side and cut into 9 even rolls.
- Place rolls in a greased 9x13-inch baking pan, cover, and let rise another 30 minutes. Bake at 375°F for 22–25 minutes until golden on top.
- Whisk powdered sugar with oat milk to make a thin glaze and drizzle over warm rolls before serving.
Tips
- Tip: Pat the diced apples dry with a paper towel before mixing into the filling — excess moisture makes the dough soggy at the bottom.
- Tip: Rolls can be assembled the night before, covered with plastic wrap, and refrigerated. Pull them out 30 minutes before baking to take the chill off.
- Tip: Granny Smith apples hold their shape best during baking; Honeycrisp works too and adds a bit more sweetness.
20. Healthy Oven Baked Oats (No Banana, No Eggs)
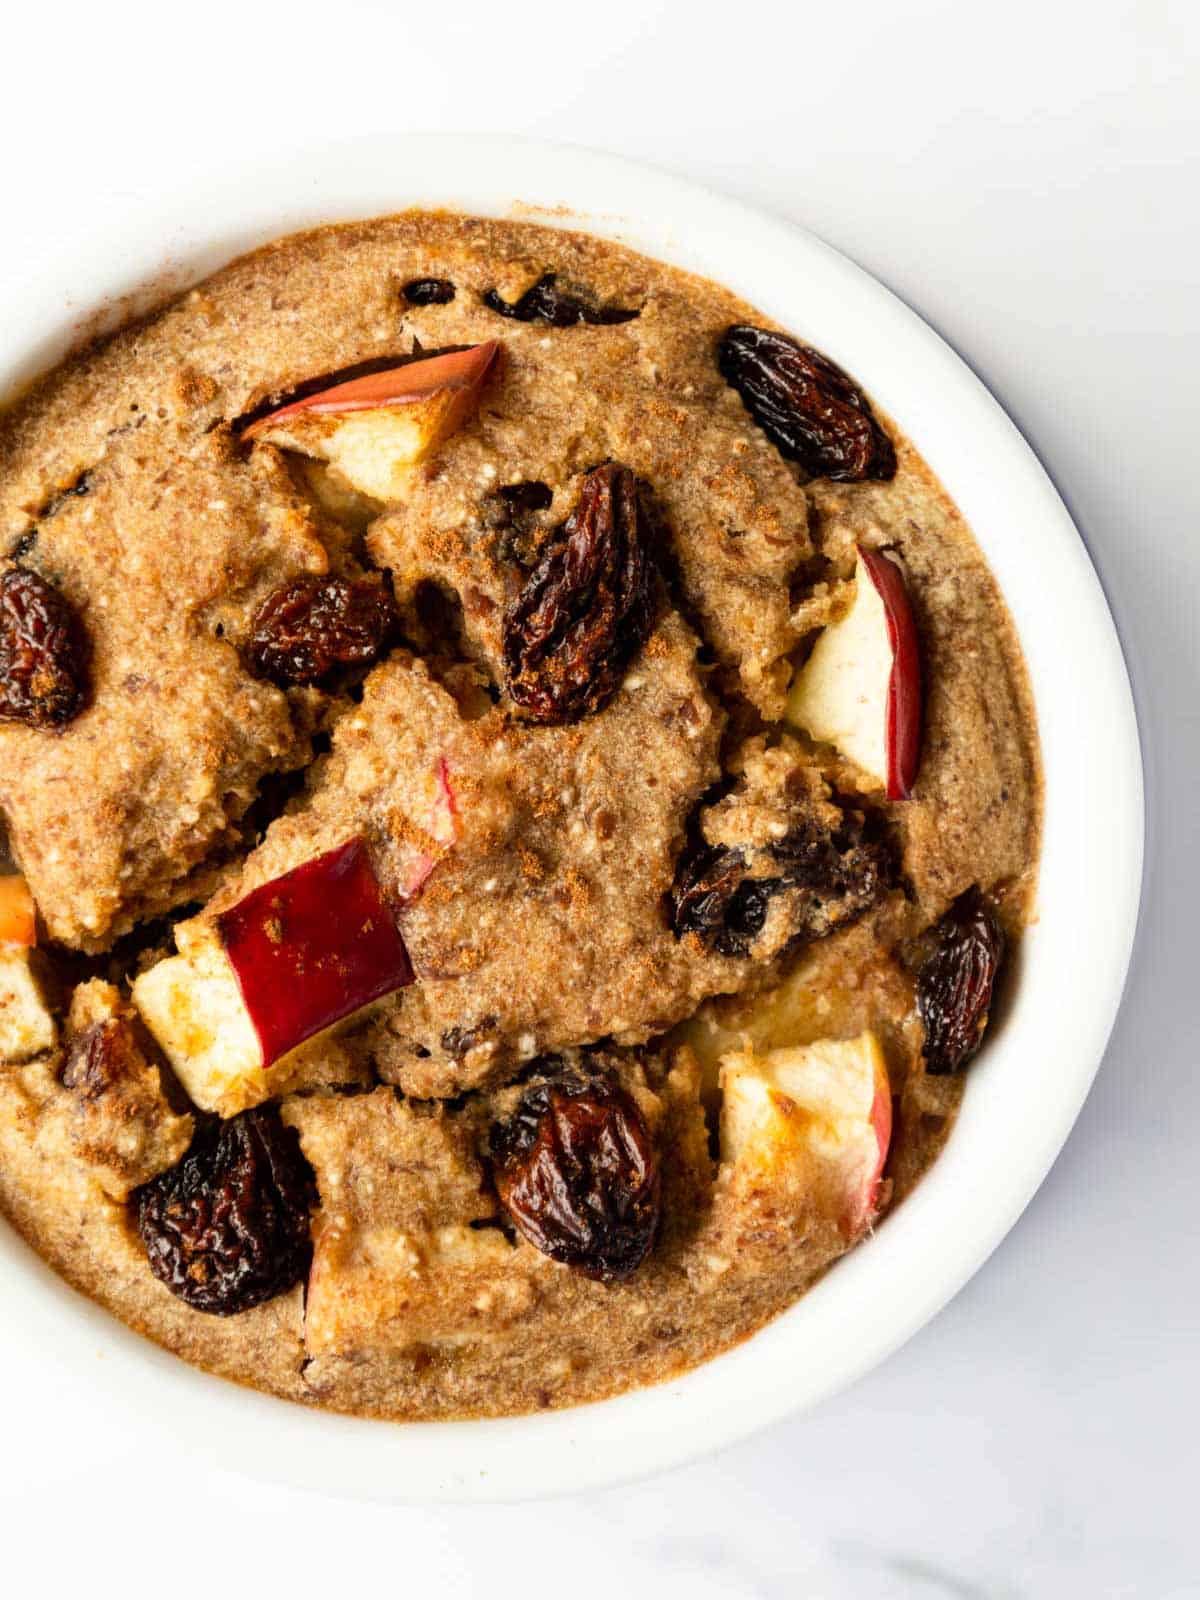
I know "baked oats" sounds more breakfast than dessert, but hear me out — serve these warm from the oven with a drizzle of maple syrup and a spoonful of peanut butter on top, and they absolutely cross the line into dessert territory. No banana, no eggs, which means they're both vegan and free from that faint banana flavor that shows up in so many baked oat recipes. The texture is almost like a soft oat cake, and the apple-cinnamon combo running through it is exactly what fall should taste like.
Ingredients
- 2 cups rolled oats (not instant)
- 1½ cups oat milk (or almond milk)
- 3 tablespoons maple syrup
- 1 tablespoon chia seeds (acts as the binder in place of eggs)
- 1 teaspoon vanilla extract
- 1 teaspoon ground cinnamon
- ½ teaspoon baking powder
- 1 medium apple, peeled and diced small
- ¼ cup raisins (optional)
- Peanut butter and mixed berries, to serve
Instructions
- Preheat your oven to 375°F. Grease a small 8x8-inch baking dish or four individual ramekins with a little oil or cooking spray.
- In a large bowl, combine oats, chia seeds, cinnamon, baking powder, and a pinch of salt. Stir in the oat milk, maple syrup, and vanilla extract until everything is evenly mixed.
- Fold in the diced apple and raisins (if using). Pour the mixture into your prepared dish and spread evenly.
- Bake for 30–35 minutes until the top is set and lightly golden at the edges. The center should feel firm, not jiggly, when you give it a gentle shake.
- Let cool for 5 minutes, then serve warm with a dollop of peanut butter and a handful of mixed berries on top.
Tips
- Tip: Let the mixture sit for 5 minutes before pouring into the dish — the chia seeds start absorbing the milk and help everything hold together better once baked.
- Tip: This keeps well in the fridge for up to 4 days. Reheat individual portions in the microwave for 60–90 seconds with a splash of milk poured over the top.
- Tip: For a dessert-forward version, scatter a handful of dark chocolate chips on top in the last 10 minutes of baking.
19. Individual Baked Apple Crumble Pots
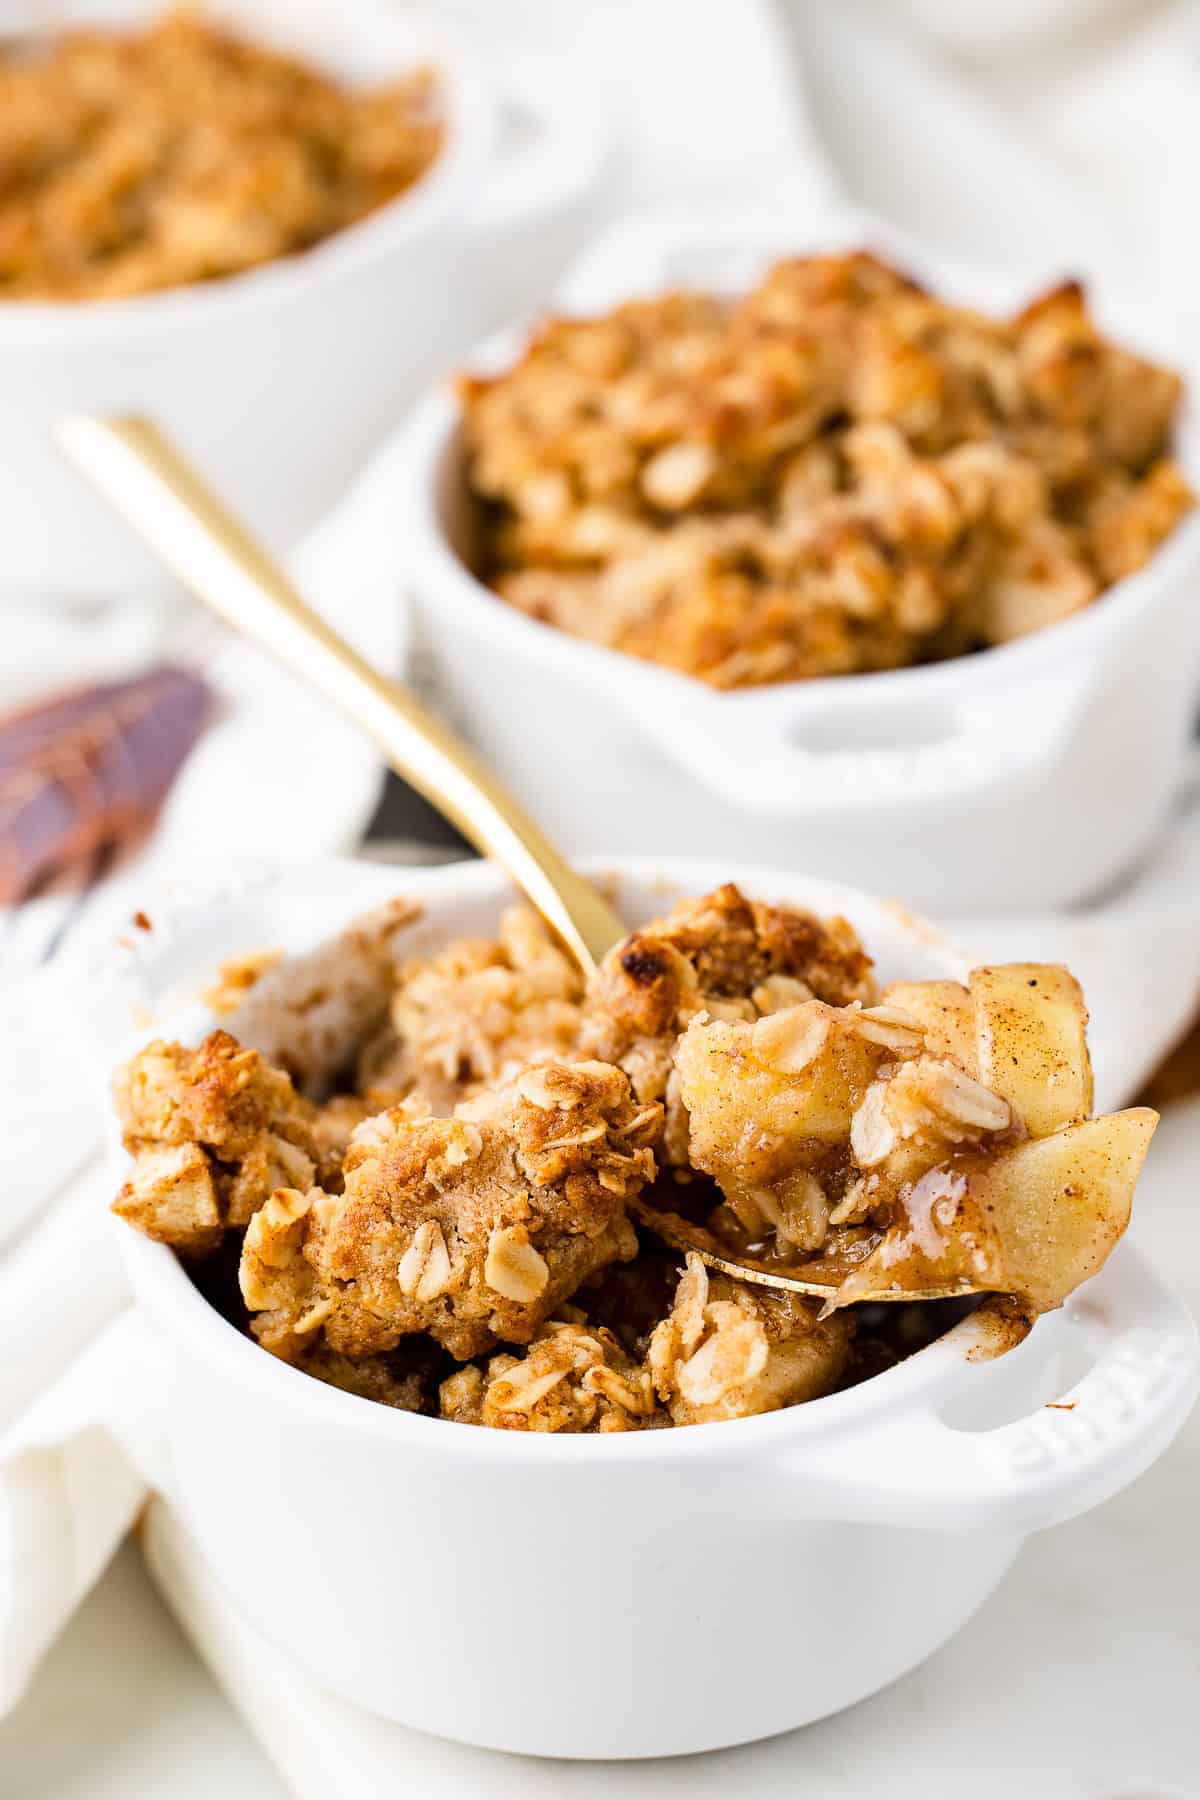
These individual apple crumble pots are genuinely one of my favorite things to make when I have people over in the fall. Everyone gets their own little pot, the crumble stays crispy because it's not fighting with a giant shared dish, and the whole thing looks far more impressive than the effort it takes. I use Granny Smith apples for the filling — they hold their shape and balance the sweetness of the crumble topping without turning to mush. Zainab always asks if she can have the crumble topping raw before I even get it into the oven.
Ingredients
- 4 medium Granny Smith apples, peeled, cored, and diced into ½-inch pieces
- 3 tablespoons granulated sugar
- 1 teaspoon ground cinnamon
- ¼ teaspoon ground nutmeg
- 1 teaspoon lemon juice
- ¾ cup rolled oats
- ½ cup all-purpose flour
- ⅓ cup brown sugar, packed
- ¼ teaspoon salt
- 4 tablespoons cold unsalted butter, cut into small cubes
Instructions
- Preheat oven to 350°F. Set four 6-ounce ramekins on a baking sheet.
- Toss diced apples with granulated sugar, cinnamon, nutmeg, and lemon juice in a bowl until evenly coated. Divide the apple mixture between the four ramekins, filling each about two-thirds full.
- In a separate bowl, combine oats, flour, brown sugar, and salt. Add the cold butter cubes and use your fingertips to rub the butter into the dry ingredients until the mixture resembles coarse, clumpy breadcrumbs — you want visible chunks, not fine sand.
- Spoon the crumble topping generously over each ramekin, pressing it down very lightly.
- Bake for 30–35 minutes until the topping is golden and you can see the apple filling bubbling around the edges. Let sit for 5 minutes before serving with vanilla ice cream or cream.
Tips
- Tip: Keep your butter cold right up until you use it — warm butter makes a greasy topping instead of a crispy one. I put mine back in the freezer for 10 minutes if the kitchen is warm.
- Tip: You can assemble the ramekins up to 4 hours ahead and refrigerate them unbaked. Add 5 extra minutes to the bake time if going straight from fridge to oven.
- Tip: To make this gluten-free, swap the all-purpose flour for almond flour — the crumble will be slightly more crumbly but still delicious.
18. Pecan Pie Bars

If you love pecan pie but dread making a whole pie from scratch, these bars are your answer. All of that buttery, caramel-nutty filling gets pressed into a shortbread base that you cut into neat squares — no pie dish, no blind baking, no fuss. The toffee bits in the filling melt down into little pockets of extra sweetness that honestly make the whole thing better than most full pies I've had. I make a double batch because they disappear at any fall gathering before I've even had a chance to grab one for myself.
Ingredients
- 1½ cups all-purpose flour
- ⅓ cup powdered sugar
- ¼ teaspoon salt
- ½ cup (1 stick) cold unsalted butter, cut into cubes
- 1 can (14 oz) sweetened condensed milk
- 2 tablespoons unsalted butter, melted
- 1 teaspoon vanilla extract
- 1½ cups chopped pecans
- ½ cup toffee bits (like Heath bits, found at most Walmart or Kroger stores)
Instructions
- Preheat oven to 350°F. Line an 8x8-inch baking pan with parchment paper, leaving an overhang on two sides so you can lift the bars out cleanly.
- Make the shortbread base: combine flour, powdered sugar, and salt. Cut in the cold butter using your fingers or a fork until the mixture looks like coarse crumbs. Press firmly and evenly into the prepared pan. Bake for 15 minutes until just barely golden.
- While the base bakes, whisk together sweetened condensed milk, melted butter, and vanilla in a bowl. Stir in the chopped pecans and toffee bits.
- Pour the pecan filling evenly over the hot shortbread base and spread to the edges.
- Bake for another 25–28 minutes until the filling is bubbling and set at the edges with a slight jiggle in the very center. It firms up as it cools — don't overbake or the filling turns hard.
- Cool completely at room temperature, then refrigerate for at least 1 hour before lifting out and cutting into bars. A sharp knife wiped clean between cuts gives you the cleanest edges.
Tips
- Tip: Don't skip the parchment paper — the filling is very sticky and you will not get clean bars out of an unlined pan. Ask me how I know.
- Tip: Bars store well in an airtight container in the fridge for up to 5 days. They're actually better on day two once the flavors settle.
- Tip: Can't find toffee bits? Substitute with ½ cup butterscotch chips — different but equally good.
17. Maple Pecan Pie

Growing up in Pakistan, pecan pie wasn't something I'd ever heard of, let alone eaten. The first time I tried it at a friend's Thanksgiving table here, I immediately wanted to figure out how to make it at home. This maple version is the one I landed on after a few attempts — swapping some of the corn syrup for real maple syrup gives the filling a deeper, less sugary-sweet flavor that I think makes it genuinely better than the classic. The filling is custardy and rich, the pecans on top toast up beautifully, and a good store-bought pie crust (I use Pillsbury refrigerated crust from Walmart when I'm short on time) works perfectly here.
Ingredients
- 1 unbaked 9-inch pie crust (homemade or store-bought refrigerated)
- 3 large eggs
- ½ cup pure maple syrup
- ½ cup light corn syrup
- ¾ cup brown sugar, packed
- 3 tablespoons unsalted butter, melted and slightly cooled
- 1 teaspoon vanilla extract
- ½ teaspoon salt
- 1½ cups pecan halves
Instructions
- Preheat oven to 350°F. Fit your pie crust into a 9-inch pie dish and crimp the edges. Place it in the fridge while you make the filling — a cold crust holds its shape better.
- In a large bowl, whisk together eggs, maple syrup, corn syrup, brown sugar, melted butter, vanilla, and salt until smooth and combined.
- Scatter the pecan halves evenly across the bottom of the chilled pie crust. Pour the filling mixture slowly over the pecans — they'll float to the top as you pour, which is exactly what you want.
- Bake for 50–60 minutes. The edges should be set and the center should have just a slight wobble — like set Jell-O, not liquid. If the crust edges are browning too fast, cover them loosely with foil after 30 minutes.
- Cool on a wire rack for at least 2 hours before slicing. The filling needs this time to fully set — cutting it early gives you a runny mess.
Tips
- Tip: Use real maple syrup here, not pancake syrup — the flavor difference is significant and worth it for a dessert this simple.
- Tip: The pie can be made a day ahead and stored at room temperature, loosely covered. It actually slices more cleanly the next day.
- Tip: If you want to skip the corn syrup entirely, use 1 full cup of maple syrup instead — the flavor will be stronger and the texture slightly softer, but it works.
12. Air Fryer Pumpkin Spice Snickerdoodle Cookies

I started making these when I wanted snickerdoodles but didn't want to heat up the whole oven for a small batch. The air fryer gets them done in about 8 minutes and they come out with that crinkly cinnamon-sugar crust on the outside and a soft, slightly chewy center. The pumpkin puree keeps them from drying out, which is the usual snickerdoodle problem. My kids eat them straight off the rack, which means I never actually get to plate them nicely.
Ingredients
- 1 ½ cups all-purpose flour
- 1 teaspoon cream of tartar
- ½ teaspoon baking soda
- ¼ teaspoon salt
- ½ cup unsalted butter, softened
- ¾ cup granulated sugar
- ¼ cup canned pumpkin puree (not pumpkin pie filling)
- 1 egg yolk
- 1 teaspoon vanilla extract
- 3 tablespoons granulated sugar + 1 teaspoon pumpkin pie spice (for rolling)
Instructions
- Whisk together flour, cream of tartar, baking soda, and salt in a bowl and set aside.
- Beat softened butter and sugar together until light, about 2 minutes by hand or with a hand mixer. Mix in pumpkin puree, egg yolk, and vanilla.
- Fold the dry ingredients into the wet until a soft dough forms. Chill in the fridge for 20 minutes — this stops the cookies from spreading too thin in the air fryer.
- Mix the rolling sugar and pumpkin pie spice in a small bowl. Scoop dough into 1½-tablespoon balls and roll each one generously in the spiced sugar.
- Line your air fryer basket with parchment paper. Air fry at 325°F for 7–9 minutes until the edges are set but the center still looks slightly underdone — they firm up as they cool.
Tips
- Tip: Don't skip chilling the dough. Pumpkin adds moisture and the dough needs that 20 minutes cold or the cookies spread into flat discs.
- Tip: Every air fryer runs a little different — check at 7 minutes the first time you make these and adjust from there.
- Tip: These store well in an airtight container for 3 days, but they're honestly best the day they're made when that sugar crust is still slightly crisp.
13. Baked Persimmons

I'll be honest — the first time I bought persimmons I had no idea what to do with them. They sat on my counter for four days before I finally looked up what to make. Baking them is one of the simplest things you can do: a little coconut oil, a pinch of cardamom, some apple juice, and the oven does everything. They come out soft and caramel-like, almost jammy, and the cardamom gives them a warmth that feels very fall. Serve them over Greek yogurt or vanilla ice cream and nobody will guess how easy it was.
Ingredients
- 4 ripe Fuyu persimmons, halved crosswise
- 2 tablespoons coconut oil, melted
- 2 tablespoons brown sugar
- ½ teaspoon ground cardamom
- ¼ teaspoon cinnamon
- ¼ cup apple juice (or apple cider)
- Pinch of salt
Instructions
- Preheat your oven to 375°F. Arrange the persimmon halves cut-side up in a baking dish that fits them snugly.
- Whisk together the melted coconut oil, brown sugar, cardamom, cinnamon, and salt. Spoon this mixture evenly over each persimmon half.
- Pour the apple juice into the bottom of the baking dish — this keeps the persimmons from drying out and creates a light syrup as it bakes.
- Bake for 25–30 minutes until the persimmons are tender when pierced with a knife and the edges have started to caramelize. Spoon the pan juices over the top before serving.
Tips
- Tip: Use Fuyu persimmons (the squat, tomato-shaped ones) — not Hachiya. Hachiya need to be fully soft before eating and aren't ideal for baking this way.
- Tip: If you can't find persimmons, this same technique works beautifully with ripe pears or peaches — just reduce the bake time by about 5 minutes.
- Tip: Leftovers keep in the fridge for 2 days and are genuinely good cold, spooned over oatmeal the next morning.
14. Southern Sweet Potato Pie with Marshmallow Fluff
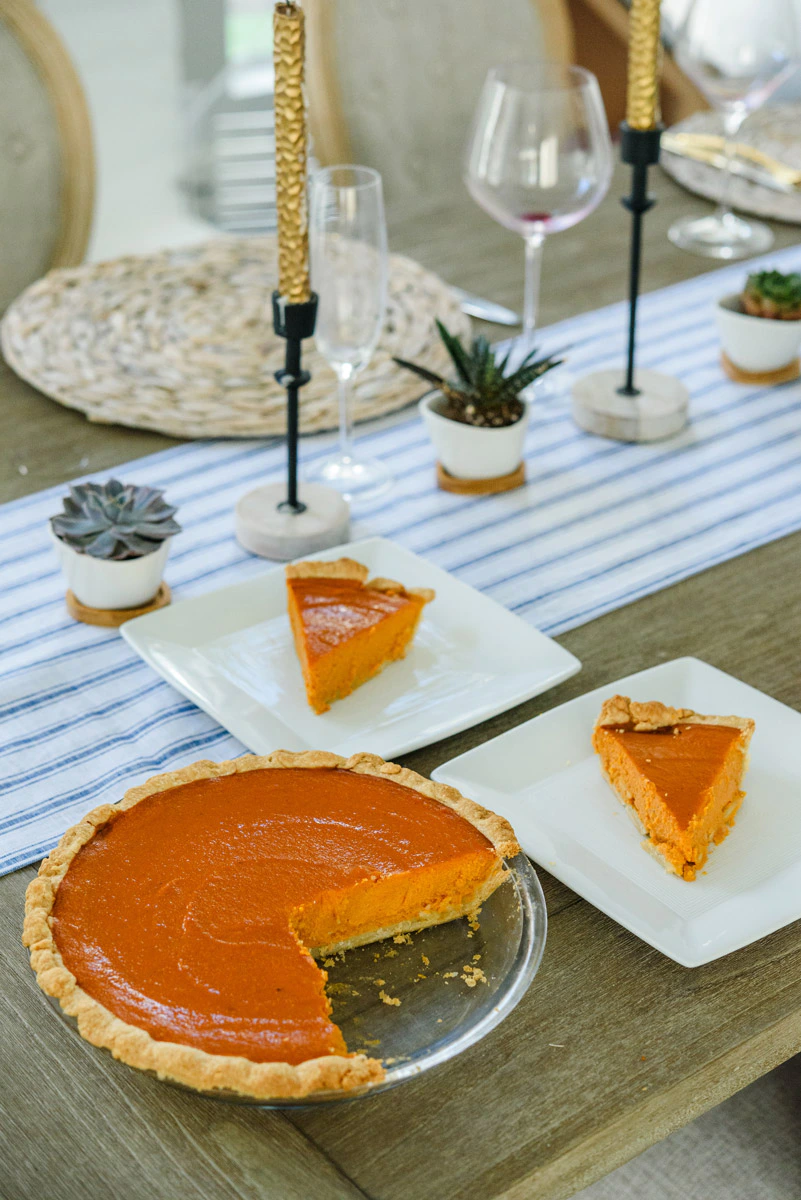
Sweet potato pie is something I came to late — we didn't grow up with this in Pakistan, it's a Southern American classic through and through. But once I tried it, I understood immediately why people make it every single fall. It's smoother and less aggressively spiced than pumpkin pie, with a natural sweetness that doesn't need much help. The marshmallow fluff on top gets lightly toasted under the broiler and turns into something between a meringue and a cloud. My husband, who is suspicious of any dessert involving vegetables, asks for this one.
Ingredients
- 1 unbaked 9-inch pie crust (store-bought is fine — Pillsbury refrigerated works perfectly)
- 2 cups mashed sweet potato (from about 2 medium sweet potatoes, roasted and peeled)
- ½ cup granulated sugar
- ¼ cup brown sugar, packed
- 2 eggs
- ½ cup evaporated milk
- 3 tablespoons unsalted butter, melted
- 1 teaspoon vanilla extract
- 1 teaspoon cinnamon, ½ teaspoon nutmeg, ¼ teaspoon ginger
- 1½ cups marshmallow fluff (Jet-Puffed is what I use)
Instructions
- Preheat oven to 350°F. Press your pie crust into a 9-inch pie dish and crimp the edges. Set aside.
- In a large bowl, beat together the mashed sweet potato, both sugars, eggs, evaporated milk, melted butter, vanilla, and spices until completely smooth. A hand mixer makes this faster but a whisk works too — just make sure there are no sweet potato lumps.
- Pour the filling into the prepared crust and bake for 50–55 minutes, until the center is just set with a slight wobble. Let it cool completely on a wire rack — at least 2 hours.
- Once cool, spread the marshmallow fluff evenly over the top of the pie. Place under the broiler on high for 1–2 minutes, watching closely, until the fluff is golden and toasted in spots. Serve immediately or refrigerate until ready.
Tips
- Tip: Roast your sweet potatoes rather than boiling them — roasting concentrates the flavor and keeps the mash drier, which gives you a better pie texture.
- Tip: The pie must be fully cooled before you add the marshmallow fluff or it will slide right off. Don't rush this step.
- Tip: If you don't want to broil, you can skip the toasted look and just serve the fluff as-is — it's still good, just softer and sweeter rather than lightly charred.
15. Gluten-Free Pumpkin Scones
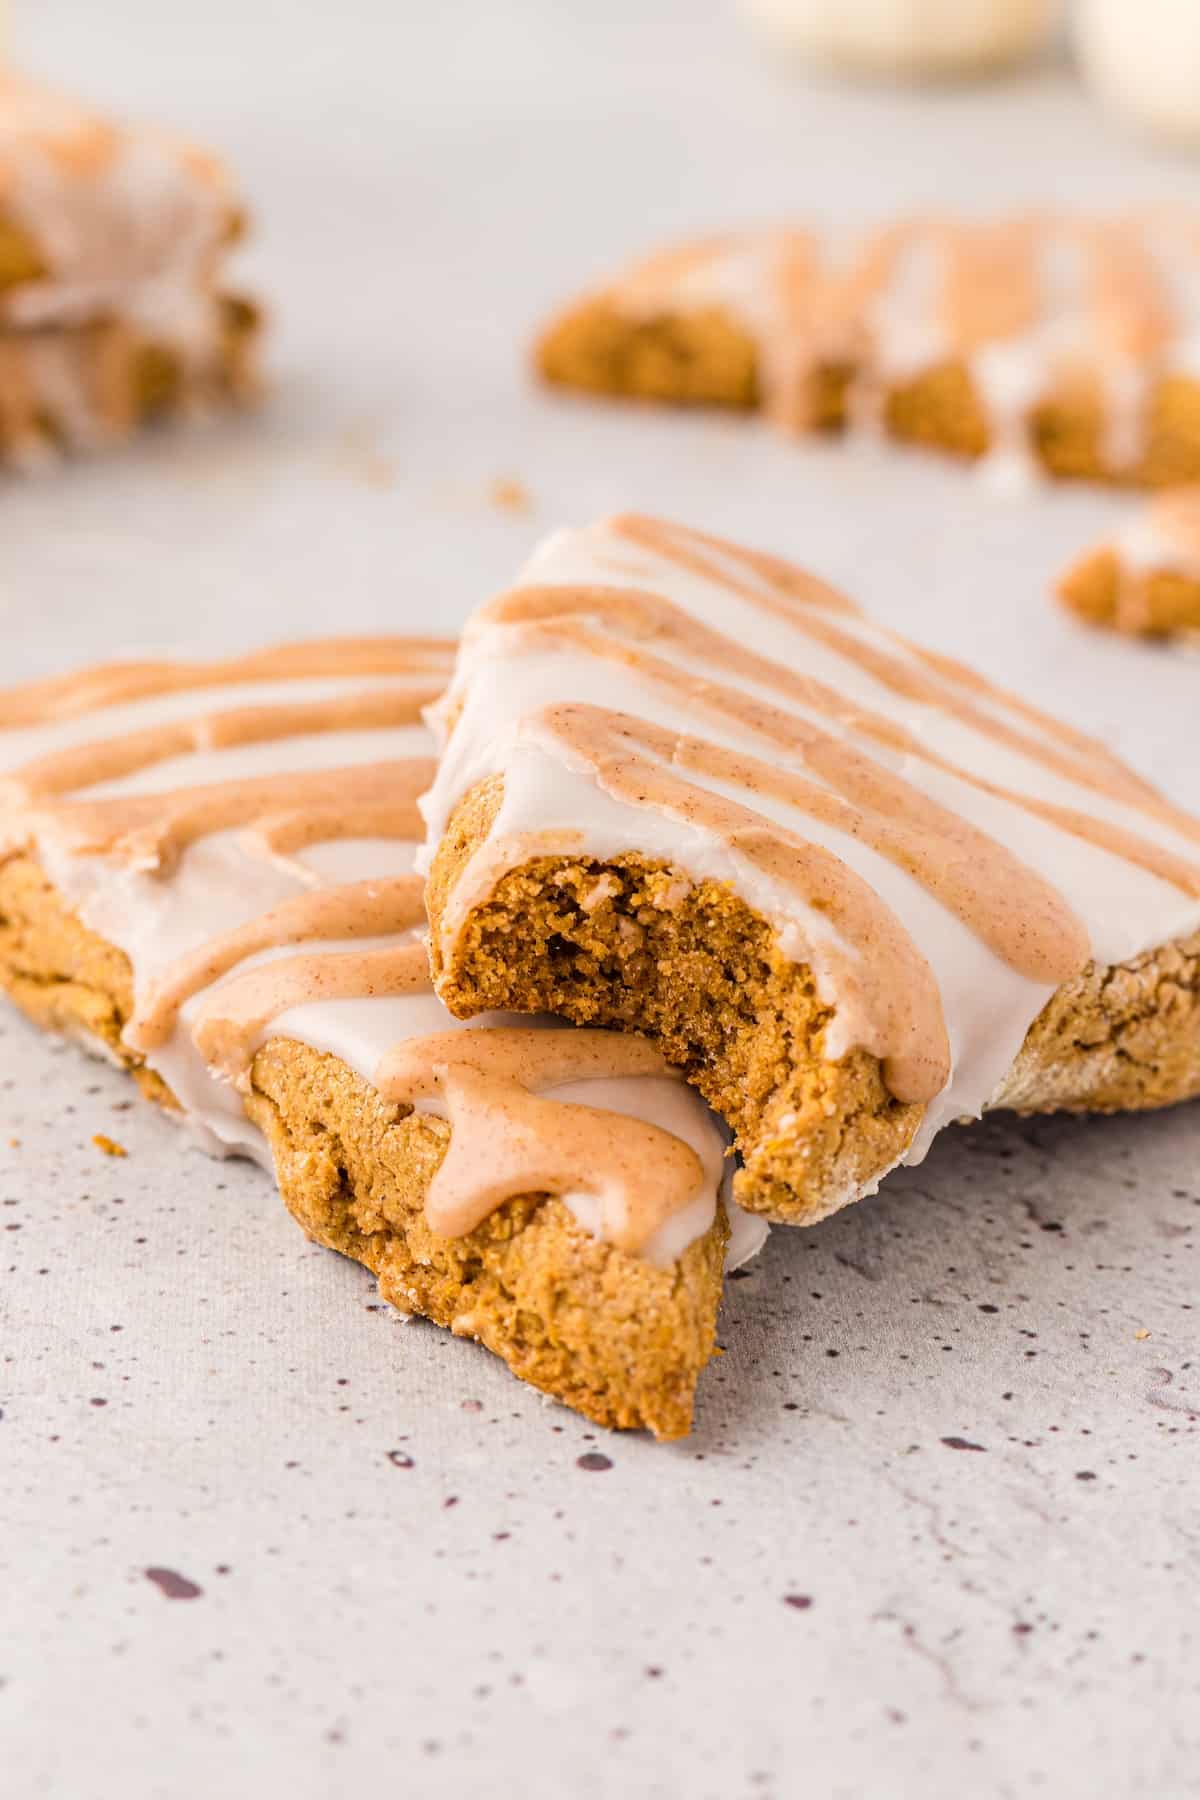
I made these for a friend who can't eat gluten and was genuinely surprised that nobody at the table could tell the difference. Gluten-free scones can go wrong in about five different ways — too crumbly, too dense, gummy in the middle — but keeping the dough cold and not overworking it solves most of those problems. The pumpkin puree adds just enough moisture to hold everything together, and a pumpkin spice glaze drizzled over the top makes them look like something from a coffee shop. These are worth making even if nobody at your table needs to eat gluten-free.
Ingredients
- 2 cups gluten-free all-purpose flour blend (Bob's Red Mill 1-to-1 works well)
- 1 tablespoon baking powder
- ¼ cup granulated sugar
- 1½ teaspoons pumpkin pie spice
- ¼ teaspoon salt
- 6 tablespoons cold unsalted butter, cubed
- ½ cup canned pumpkin puree
- ⅓ cup heavy whipping cream, plus more for brushing
- 1 egg
- 1 teaspoon vanilla extract
- For the glaze: 1 cup powdered sugar + 2 tablespoons milk + ¼ teaspoon pumpkin pie spice
Instructions
- Preheat oven to 400°F. Line a baking sheet with parchment paper. Whisk together the flour, baking powder, sugar, pumpkin pie spice, and salt in a large bowl.
- Cut the cold butter into the flour mixture using your fingertips or a pastry cutter until the mixture looks like coarse crumbs with some pea-sized butter pieces remaining. Cold butter is non-negotiable here — it creates the flaky layers.
- In a separate small bowl, whisk together pumpkin puree, heavy cream, egg, and vanilla. Pour over the flour mixture and stir gently until a shaggy dough comes together — stop as soon as it holds. Do not overwork it.
- Turn dough out onto a lightly floured surface, pat into a 1-inch thick circle, and cut into 8 wedges. Transfer to the lined baking sheet, brush tops with cream, and bake 18–20 minutes until golden.
- Let scones cool for 10 minutes, then whisk together the glaze ingredients and drizzle over the top.
Tips
- Tip: Gluten-free dough doesn't hold together as firmly as regular dough — if it feels too sticky to shape, refrigerate it for 15 minutes before cutting.
- Tip: Make sure your gluten-free flour blend contains xanthan gum — most 1-to-1 blends do, but check the label. Without it, the scones will fall apart.
- Tip: These are best the day they're made. If you want to prep ahead, cut the unbaked wedges and freeze them solid on the tray, then bake from frozen at 400°F adding 5 extra minutes.
16. Quick Cookie Butter Overnight Oats

Yes, overnight oats as a dessert — I know how that sounds. But when you layer them with Biscoff spread, crushed Biscoff biscuits, and a drizzle of almond milk sweetened with vanilla, they stop being breakfast and become something you'd serve in a glass at a dinner party. Saad spotted these in the fridge one morning and thought I'd made a special treat just for him. The caramel-spice flavor of the cookie butter soaks into the oats overnight, and the texture is thick and satisfying without being heavy. These take about 5 minutes to assemble the night before.
Ingredients
- 1 cup old-fashioned rolled oats
- 1 cup unsweetened almond milk (or regular milk)
- ¼ cup plain Greek yogurt
- 1½ tablespoons Biscoff cookie butter spread, plus extra for drizzling (Trader Joe's Speculoos butter works if you can't find Biscoff)
- 1 tablespoon maple syrup or honey
- 1 teaspoon vanilla extract
- ¼ teaspoon cinnamon
- Pinch of salt
- 4–5 Biscoff biscuits, roughly crushed (for topping)
- 2 tablespoons chopped almonds (optional, for crunch)
Instructions
- In a jar or bowl with a lid, stir together the oats, almond milk, Greek yogurt, cookie butter, maple syrup, vanilla, cinnamon, and salt until the cookie butter is fully incorporated — warm it for 10 seconds in the microwave first if it's stiff and hard to mix.
- Cover and refrigerate overnight, or for at least 6 hours. The oats will absorb the liquid and thicken up considerably.
- When ready to serve, stir the oats and add a splash more almond milk if they're thicker than you like. Drizzle with extra cookie butter, top with crushed Biscoff biscuits and chopped almonds, and serve cold.
Tips
- Tip: Add the crushed biscuits right before serving, not the night before — they'll go soggy overnight and you lose that contrasting crunch.
- Tip: For a more dessert-forward version, layer the oats in a clear glass with alternating spoonfuls of plain oat mixture and cookie butter — it looks impressive and takes about 30 extra seconds.
- Tip: This keeps in the fridge for up to 3 days without the toppings, so I make a double batch on Sunday and have dessert ready for the whole week.
7. Apple Turnovers With Phyllo Dough

Phyllo dough is one of those things I was genuinely scared of the first time I worked with it — I was convinced it would tear and fall apart on me. It did, a little. But the finished turnovers were still incredible, which tells you how forgiving this recipe actually is. You get this shatteringly crisp, paper-thin shell wrapped around a spiced apple filling with vanilla and a little cornstarch to keep everything from going soggy inside. These come together faster than any pie I've ever made, and they look like you put in way more effort than you did.
Ingredients
- 6 sheets phyllo dough, thawed
- 3 tablespoons unsalted butter, melted
- 2 medium apples, peeled and finely diced (Granny Smith or Honeycrisp both work)
- 3 tablespoons granulated sugar
- 1 teaspoon ground cinnamon
- 1 tablespoon cornstarch
- ½ teaspoon vanilla extract
- Pinch of salt
- Powdered sugar, for dusting
Instructions
- Preheat your oven to 375°F. Line a baking sheet with parchment paper.
- In a small bowl, toss the diced apples with sugar, cinnamon, cornstarch, vanilla, and salt until evenly coated.
- Lay one sheet of phyllo dough on a clean surface and brush lightly with melted butter. Stack a second sheet on top and brush again. Cut the layered sheets into 3 equal rectangles.
- Place a heaping tablespoon of apple filling near one short end of each rectangle. Fold the dough over the filling diagonally to form a triangle, continuing to fold flag-style until you reach the end. Press edges gently to seal.
- Place turnovers on the prepared baking sheet, brush tops with remaining butter, and bake for 20-22 minutes until deep golden and crisp.
- Let cool for 5 minutes, then dust with powdered sugar and a pinch of extra cinnamon before serving.
Tips
- Tip: Keep unused phyllo sheets covered with a damp towel while you work — they dry out and crack within minutes if left exposed.
- Tip: Don't overfill the turnovers. A heaping tablespoon is genuinely enough — too much filling and the dough won't seal properly.
- Tip: These are best eaten the same day. If you want to prep ahead, assemble unbaked turnovers and refrigerate them for up to 4 hours before baking.
8. Pumpkin Streusel Coffee Cake
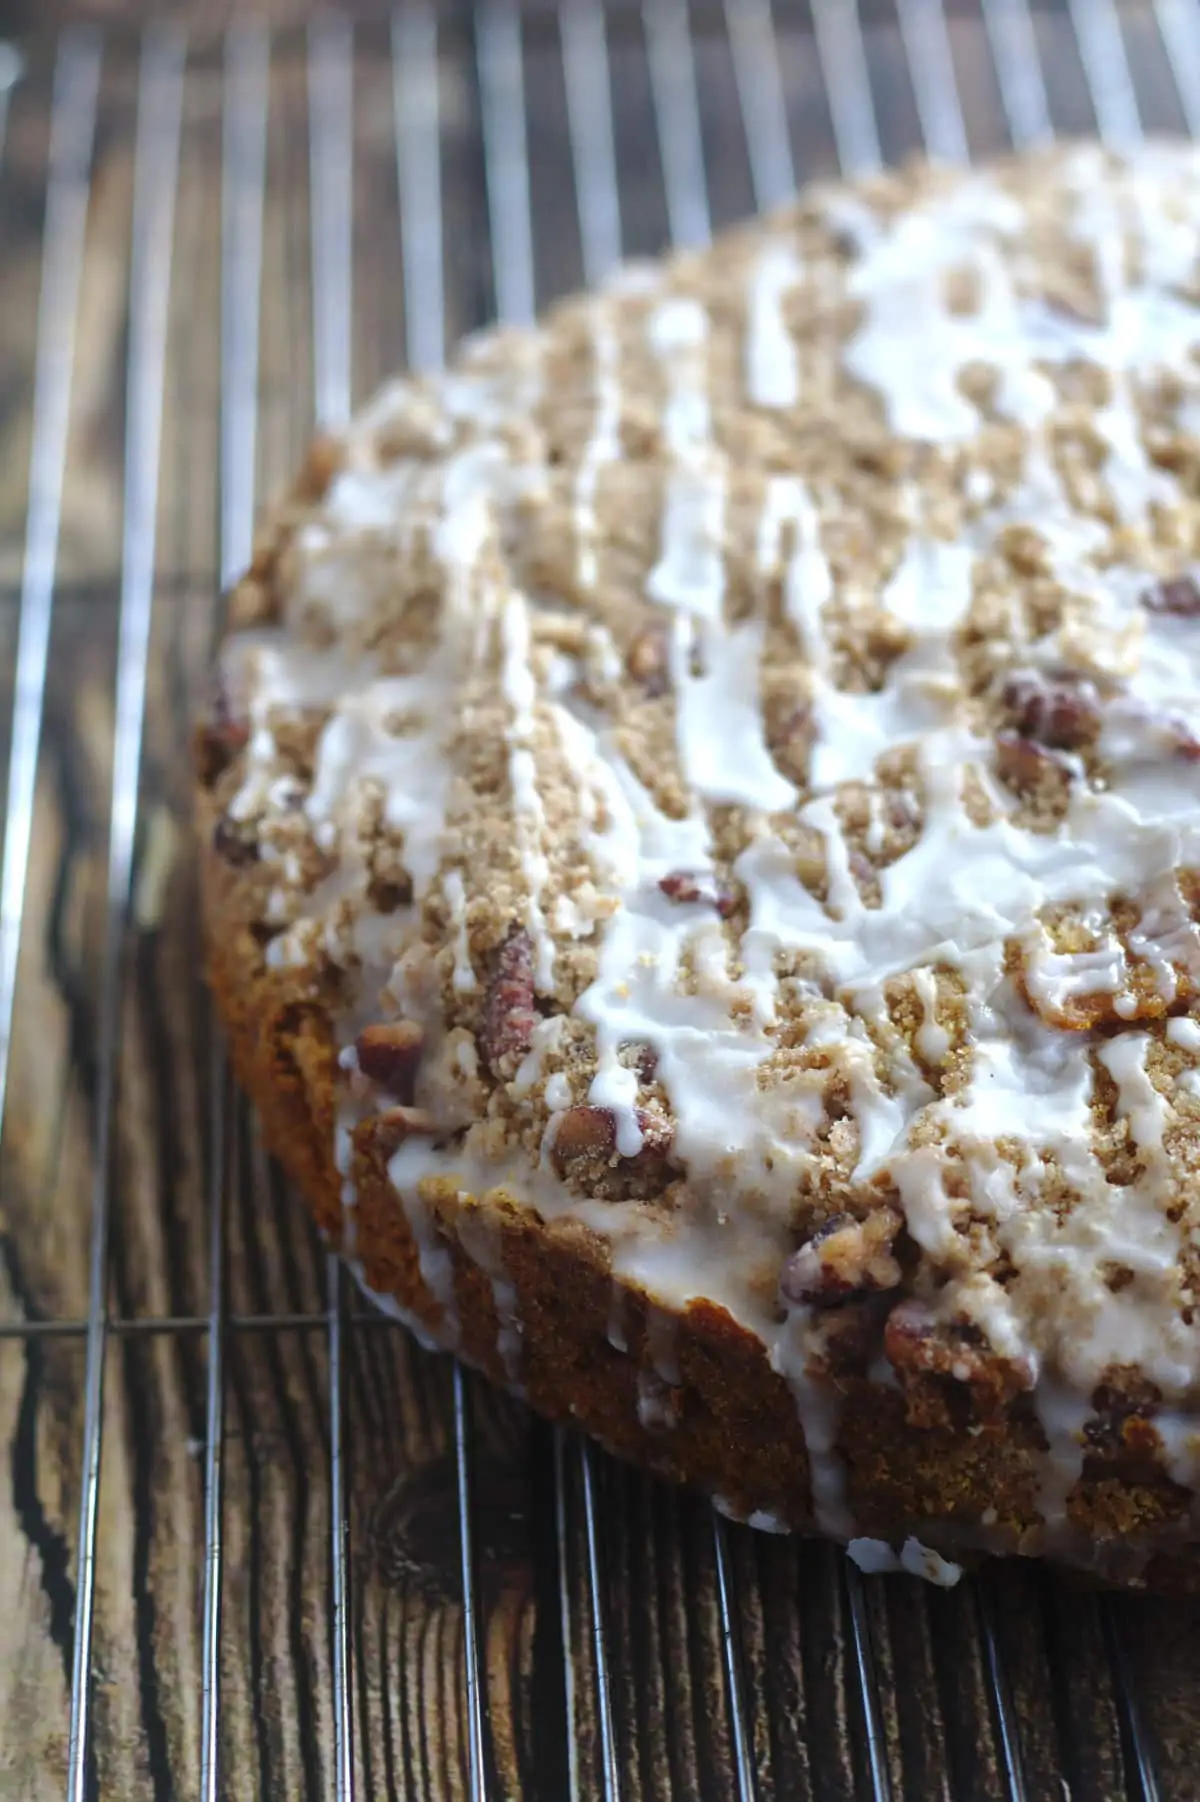
I make this every October without fail. The crumbly streusel on top is the reason — it bakes into this buttery, slightly crunchy layer that contrasts perfectly with the soft, spiced pumpkin cake underneath. Everything comes from basic pantry ingredients: flour, butter, brown sugar, canned pumpkin. No special equipment. I've made it start to finish in under an hour on weekday mornings, which is either very efficient or slightly unhinged, depending on how you look at it. Either way, it disappears fast in my house.
Ingredients
- 1½ cups all-purpose flour
- 1 teaspoon baking powder
- ½ teaspoon baking soda
- 1½ teaspoons pumpkin pie spice
- ¼ teaspoon salt
- ½ cup canned pumpkin puree (not pumpkin pie filling)
- ⅓ cup granulated sugar
- ¼ cup vegetable oil
- 1 large egg
- ¼ cup milk
- Streusel topping: ½ cup all-purpose flour, ⅓ cup brown sugar, ¼ teaspoon cinnamon, 3 tablespoons cold butter (cubed)
Instructions
- Preheat oven to 350°F. Grease an 8x8-inch baking pan.
- Make the streusel first: combine flour, brown sugar, and cinnamon in a small bowl. Cut in cold butter with your fingers or a fork until the mixture looks like coarse crumbs. Set aside.
- In a large bowl, whisk together the pumpkin puree, sugar, oil, egg, and milk until smooth.
- Add the flour, baking powder, baking soda, pumpkin pie spice, and salt. Stir until just combined — don't overmix or the cake will be dense.
- Pour batter into the prepared pan, then scatter the streusel topping evenly over the surface.
- Bake for 30-35 minutes until a toothpick inserted in the center comes out clean. Cool for at least 10 minutes before slicing.
Tips
- Tip: The butter for the streusel must be cold — room temperature butter will just absorb into the flour instead of forming crumbs.
- Tip: No pumpkin pie spice? Use ¾ teaspoon cinnamon, ¼ teaspoon ginger, and a pinch each of nutmeg and cloves — that's essentially the same thing.
- Tip: This cake keeps well covered at room temperature for 2 days, or you can refrigerate it for up to 4 days. It's honestly better the next morning.
9. Pumpkin Spice Cheesecake
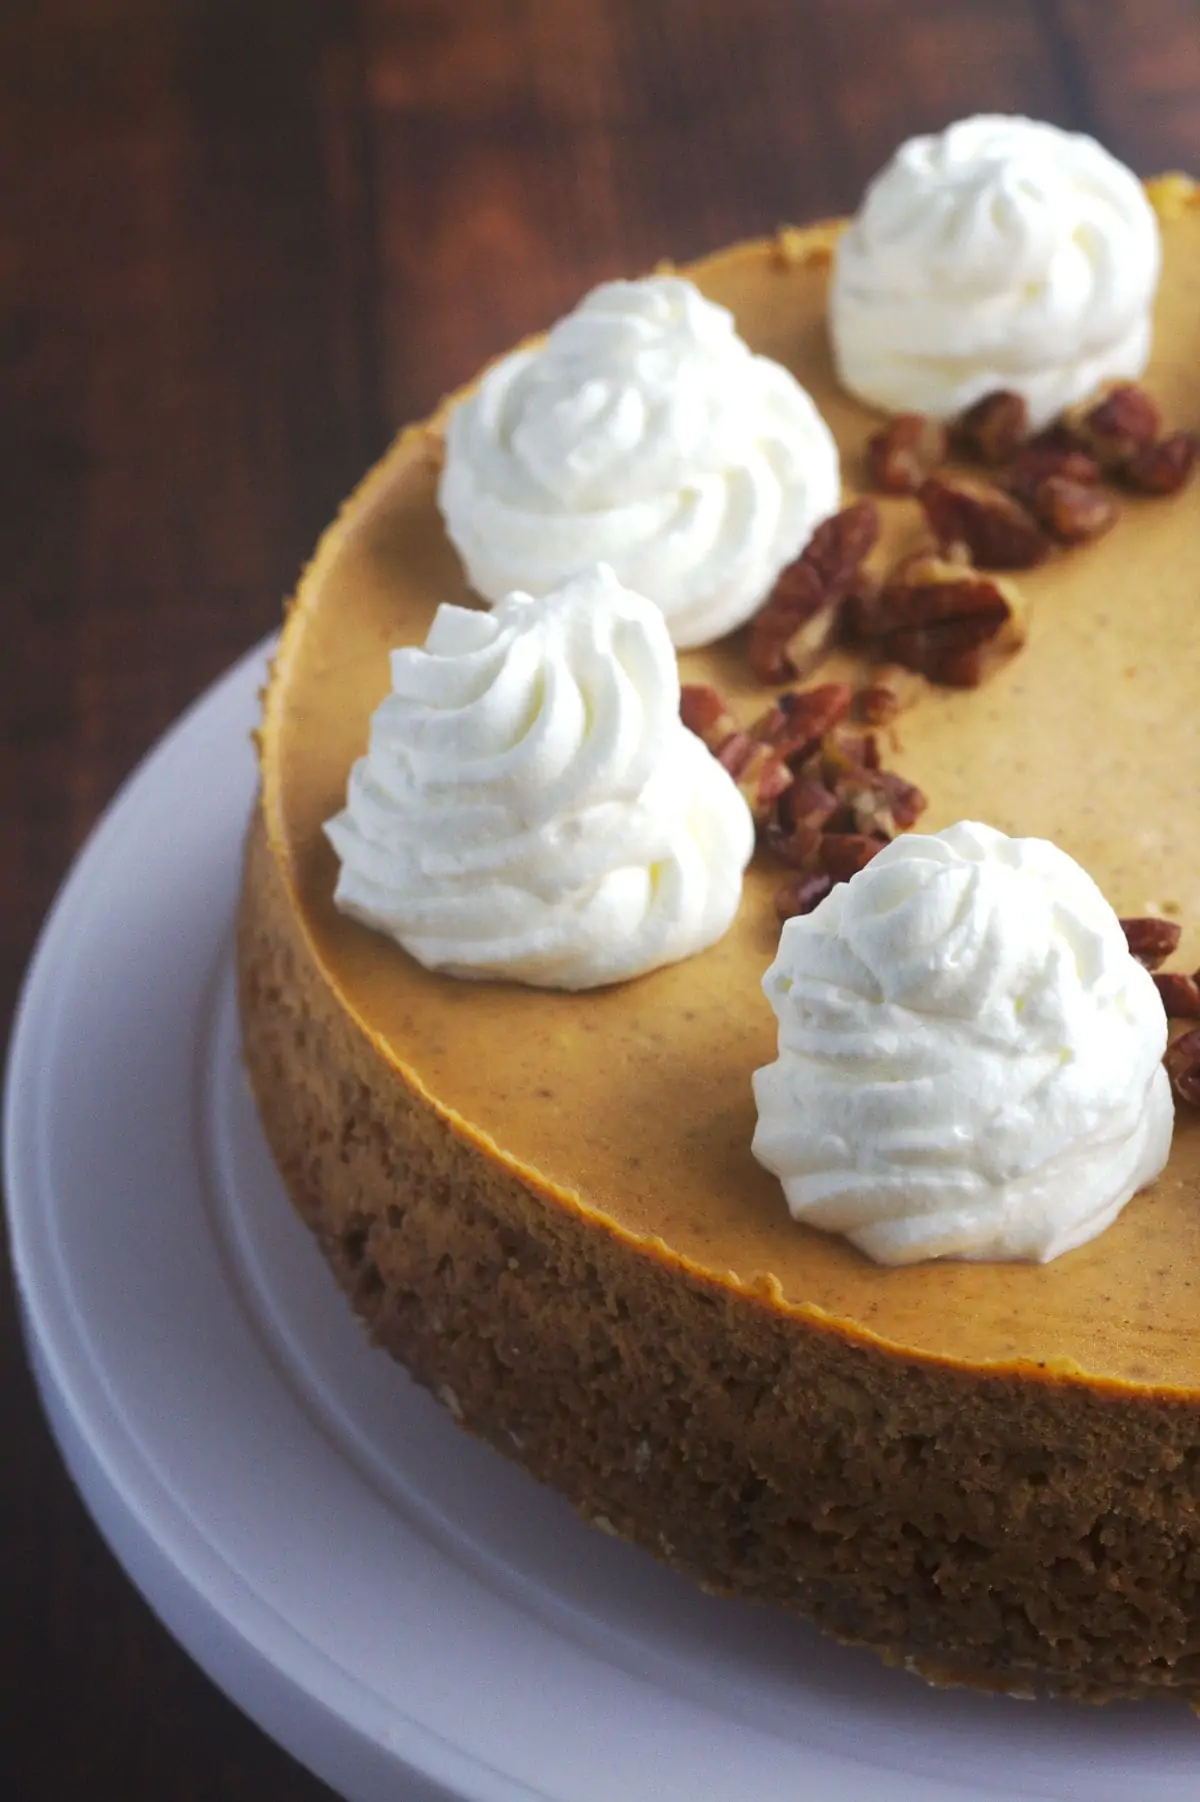
Cheesecake is the kind of dessert I used to think was only for special occasions or people with more patience than me. Then I tried making a no-fuss pumpkin spice version and realized most of the work is just waiting for it to chill. The filling is creamy and lightly spiced, the graham cracker crust is buttery and crunchy, and the whole thing gets finished with whipped cream and a scatter of chopped pecans if you're feeling generous. My husband had two slices the first time I made it, which is the highest praise I know.
Ingredients
- 1½ cups graham cracker crumbs (about 10 full sheets)
- 5 tablespoons unsalted butter, melted
- 2 tablespoons granulated sugar
- 16 oz (2 blocks) cream cheese, softened to room temperature
- ¾ cup canned pumpkin puree
- ½ cup powdered sugar
- 1½ teaspoons pumpkin pie spice
- 1 teaspoon vanilla extract
- 1 cup heavy whipping cream
- ⅓ cup chopped pecans, for topping (optional)
Instructions
- Mix graham cracker crumbs, melted butter, and granulated sugar together. Press firmly into the bottom of a 9-inch springform pan (or a regular pie dish works too). Refrigerate while you make the filling.
- Beat the softened cream cheese with a hand mixer or wooden spoon until smooth and lump-free. Add pumpkin puree, powdered sugar, pumpkin pie spice, and vanilla. Mix until fully combined.
- In a separate bowl, whip the heavy cream to stiff peaks. Gently fold the whipped cream into the pumpkin-cream cheese mixture in two additions — keep it light so the filling stays fluffy.
- Spoon the filling over the chilled crust and smooth the top. Cover and refrigerate for at least 4 hours, or overnight for best results.
- Before serving, top with extra whipped cream, a dusting of powdered sugar, and chopped pecans if using.
Tips
- Tip: Cold cream cheese will give you a lumpy filling no matter how long you beat it. Let it sit out for at least 30 minutes before you start.
- Tip: This is a no-bake cheesecake, so the overnight chill time really matters — it needs that time to firm up properly. Don't rush it.
- Tip: You can make this up to 2 days ahead and keep it covered in the fridge. Add the toppings only right before serving so they stay fresh.
10. Easy Sourdough Pumpkin Muffins

If you keep sourdough discard in your fridge — and it just sits there making you feel vaguely guilty — this recipe is what you've been waiting for. The discard adds a subtle tang that cuts through the sweetness beautifully, and it keeps the muffins tender for days longer than a regular pumpkin muffin would stay. Zainab is not usually a muffin person, but she ate two of these in one sitting and asked if there were more. I make a double batch now because one tray is genuinely not enough.
Ingredients
- 1 cup sourdough discard (unfed, straight from the fridge is fine)
- 1 cup canned pumpkin puree
- 2 large eggs
- ½ cup vegetable oil (or melted coconut oil)
- ¾ cup brown sugar, packed
- 1 teaspoon vanilla extract
- 1½ cups all-purpose flour
- 1 teaspoon baking soda
- ½ teaspoon baking powder
- 2 teaspoons pumpkin pie spice
- ½ teaspoon salt
Instructions
- Preheat oven to 375°F. Line a 12-cup muffin tin with paper liners or grease well.
- In a large bowl, whisk together the sourdough discard, pumpkin puree, eggs, oil, brown sugar, and vanilla until smooth.
- Add the flour, baking soda, baking powder, pumpkin pie spice, and salt. Fold together until just combined — a few streaks of flour are fine. Overmixing makes muffins tough.
- Divide batter evenly among the muffin cups, filling each about ¾ full. Sprinkle with a pinch of extra brown sugar or pumpkin seeds on top if you like.
- Bake for 18-22 minutes until a toothpick inserted in the center comes out clean. Cool in the pan for 5 minutes before transferring to a wire rack.
Tips
- Tip: No sourdough discard? You can substitute ½ cup plain yogurt plus ½ cup all-purpose flour — it won't be quite the same, but it'll still give you a tender, slightly tangy muffin.
- Tip: These freeze really well. Let them cool completely, bag them up, and freeze for up to 2 months. Microwave for 30-40 seconds and they taste freshly baked.
- Tip: For extra texture, fold in ½ cup chocolate chips or chopped walnuts before filling the muffin cups. Both are good. My preference is chocolate chips, obviously.
11. Puff Pastry Apple Galette

A galette sounds fancy until you realize it's basically a rustic tart where the edges are supposed to be imperfect — which means it's actually the most forgiving thing you can bake. Using store-bought puff pastry cuts the work down to almost nothing. You layer thin apple slices over the pastry, fold up the edges, add a drizzle of caramel, and the oven does the rest. I serve it straight from the pan with a scoop of vanilla ice cream, and it looks like something from a bakery window. No one needs to know it took 20 minutes of actual effort.
Ingredients
- 1 sheet frozen puff pastry, thawed (Pepperidge Farm works great)
- 2 medium apples, thinly sliced (about ⅛-inch thick)
- 2 tablespoons granulated sugar
- 1 teaspoon ground cinnamon
- 1 tablespoon unsalted butter, cut into small pieces
- 1 egg, beaten (for egg wash)
- 3 tablespoons caramel sauce (store-bought is completely fine)
- Vanilla ice cream, for serving
Instructions
- Preheat oven to 400°F. Line a baking sheet with parchment paper and lay the thawed puff pastry sheet on top. If it cracked while thawing, just press it back together — it'll bake fine.
- Toss the apple slices with sugar and cinnamon in a bowl. Arrange them in overlapping rows across the pastry, leaving about a 1½-inch border around the edges.
- Fold the pastry edges up over the apples, pressing gently so they hold their shape. Brush the folded edges with beaten egg. Dot the apple slices with the small pieces of butter.
- Bake for 25-30 minutes until the pastry is deep golden brown and puffed at the edges and the apples are soft and slightly caramelized at the edges.
- Remove from oven, drizzle caramel sauce over the top while still warm, and serve immediately with vanilla ice cream.
Tips
- Tip: Slice the apples as thin and even as you can — thick slices won't soften through before the pastry overbrowns. A mandoline makes this easy, but a sharp knife and patience works too.
- Tip: Don't skip the egg wash on the border — it's what gives you that deep, shiny golden crust instead of a pale, doughy edge.
- Tip: This galette is best eaten the day it's baked. The pastry softens overnight and won't be nearly as good reheated, so plan to finish it in one sitting. That part is easy.
16. Easy Vegan Applesauce Cake (No Flax Eggs)

I know a lot of vegan baking recipes rely on flax eggs, and honestly they work fine — but sometimes you just want to skip the extra step. This applesauce cake does exactly that. The applesauce pulls double duty as both the egg replacer and the moisture source, and the result is a genuinely soft, tender crumb that doesn't taste like a compromise. I top mine with a simple vanilla whipped frosting, and it disappears fast at our house even with the non-vegans.
Ingredients
- 1½ cups all-purpose flour
- 1 cup unsweetened applesauce
- ¾ cup granulated sugar
- ⅓ cup neutral oil (vegetable or canola)
- ¼ cup plain unsweetened oat milk (or any plant-based milk)
- 1½ teaspoons vanilla extract
- 1 teaspoon baking soda
- 1 teaspoon cinnamon
- ¼ teaspoon salt
- Vegan vanilla whipped frosting, for topping (store-bought or homemade)
Instructions
- Preheat your oven to 350°F. Grease an 8-inch round or square baking pan and set aside.
- In a large bowl, whisk together the applesauce, oil, oat milk, sugar, and vanilla until well combined.
- Add the flour, baking soda, cinnamon, and salt into the wet ingredients and fold until just combined — don't overmix or the cake will be dense.
- Pour the batter into the prepared pan and bake for 28–32 minutes, until a toothpick inserted in the center comes out clean.
- Let cool completely before spreading on the vanilla whipped frosting. Serve at room temperature.
Tips
- Tip: Use unsweetened applesauce — sweetened versions can make the cake cloying and throw off the sugar balance.
- Tip: The cake is done when the edges pull slightly from the pan and the top springs back when gently pressed — don't rely on color alone.
- Tip: You can add ½ cup of chopped walnuts or raisins to the batter if you want a little texture in each bite.
17. Easy Pumpkin Dump Cake
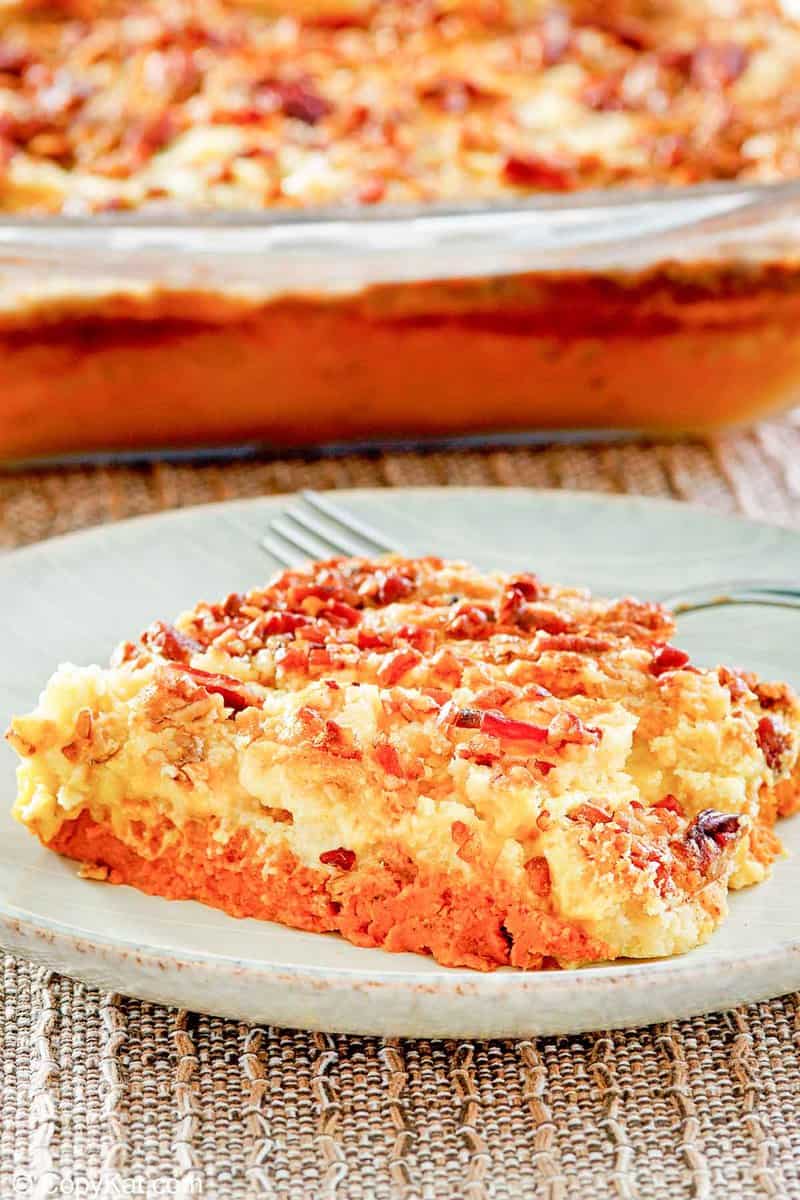
I'll be upfront: the name is terrible. But the cake? Actually really good. You basically layer pumpkin puree and spices in a baking dish, dump a box of yellow cake mix over the top, pour melted butter over everything, and let the oven do all the work. The bottom stays custardy and soft, the top gets this slightly crisp, buttery crumble going — it's the kind of fall dessert that looks like you didn't try and still gets requests for the recipe.
Ingredients
- 1 can (15 oz) pumpkin puree (not pumpkin pie filling)
- 1 can (12 oz) evaporated milk
- 3 large eggs
- 1 cup granulated sugar
- 2 teaspoons pumpkin pie spice
- ½ teaspoon salt
- 1 box (15.25 oz) yellow cake mix (Betty Crocker or Duncan Hines both work)
- ¾ cup (1½ sticks) unsalted butter, melted
- Whipped cream, for serving
Instructions
- Preheat oven to 350°F. Lightly grease a 9x13-inch baking dish.
- In a large bowl, whisk together the pumpkin puree, evaporated milk, eggs, sugar, pumpkin pie spice, and salt until smooth. Pour into the prepared dish.
- Sprinkle the dry cake mix evenly over the pumpkin layer — don't stir. Then drizzle the melted butter as evenly as you can over the top of the cake mix.
- Bake for 50–55 minutes, until the top is golden and set. The center should not jiggle when you move the pan.
- Let cool for at least 20 minutes before scooping. Serve warm with whipped cream.
Tips
- Tip: Make sure you're using plain pumpkin puree and not pumpkin pie filling — pumpkin pie filling is pre-sweetened and spiced and will throw the whole balance off.
- Tip: Pour the melted butter slowly and try to cover the cake mix as evenly as possible — any dry spots on top won't get that nice golden crust.
- Tip: This keeps well in the fridge for up to 4 days. I actually think it tastes better the next day once everything settles.
18. Orange Olive Oil Cake
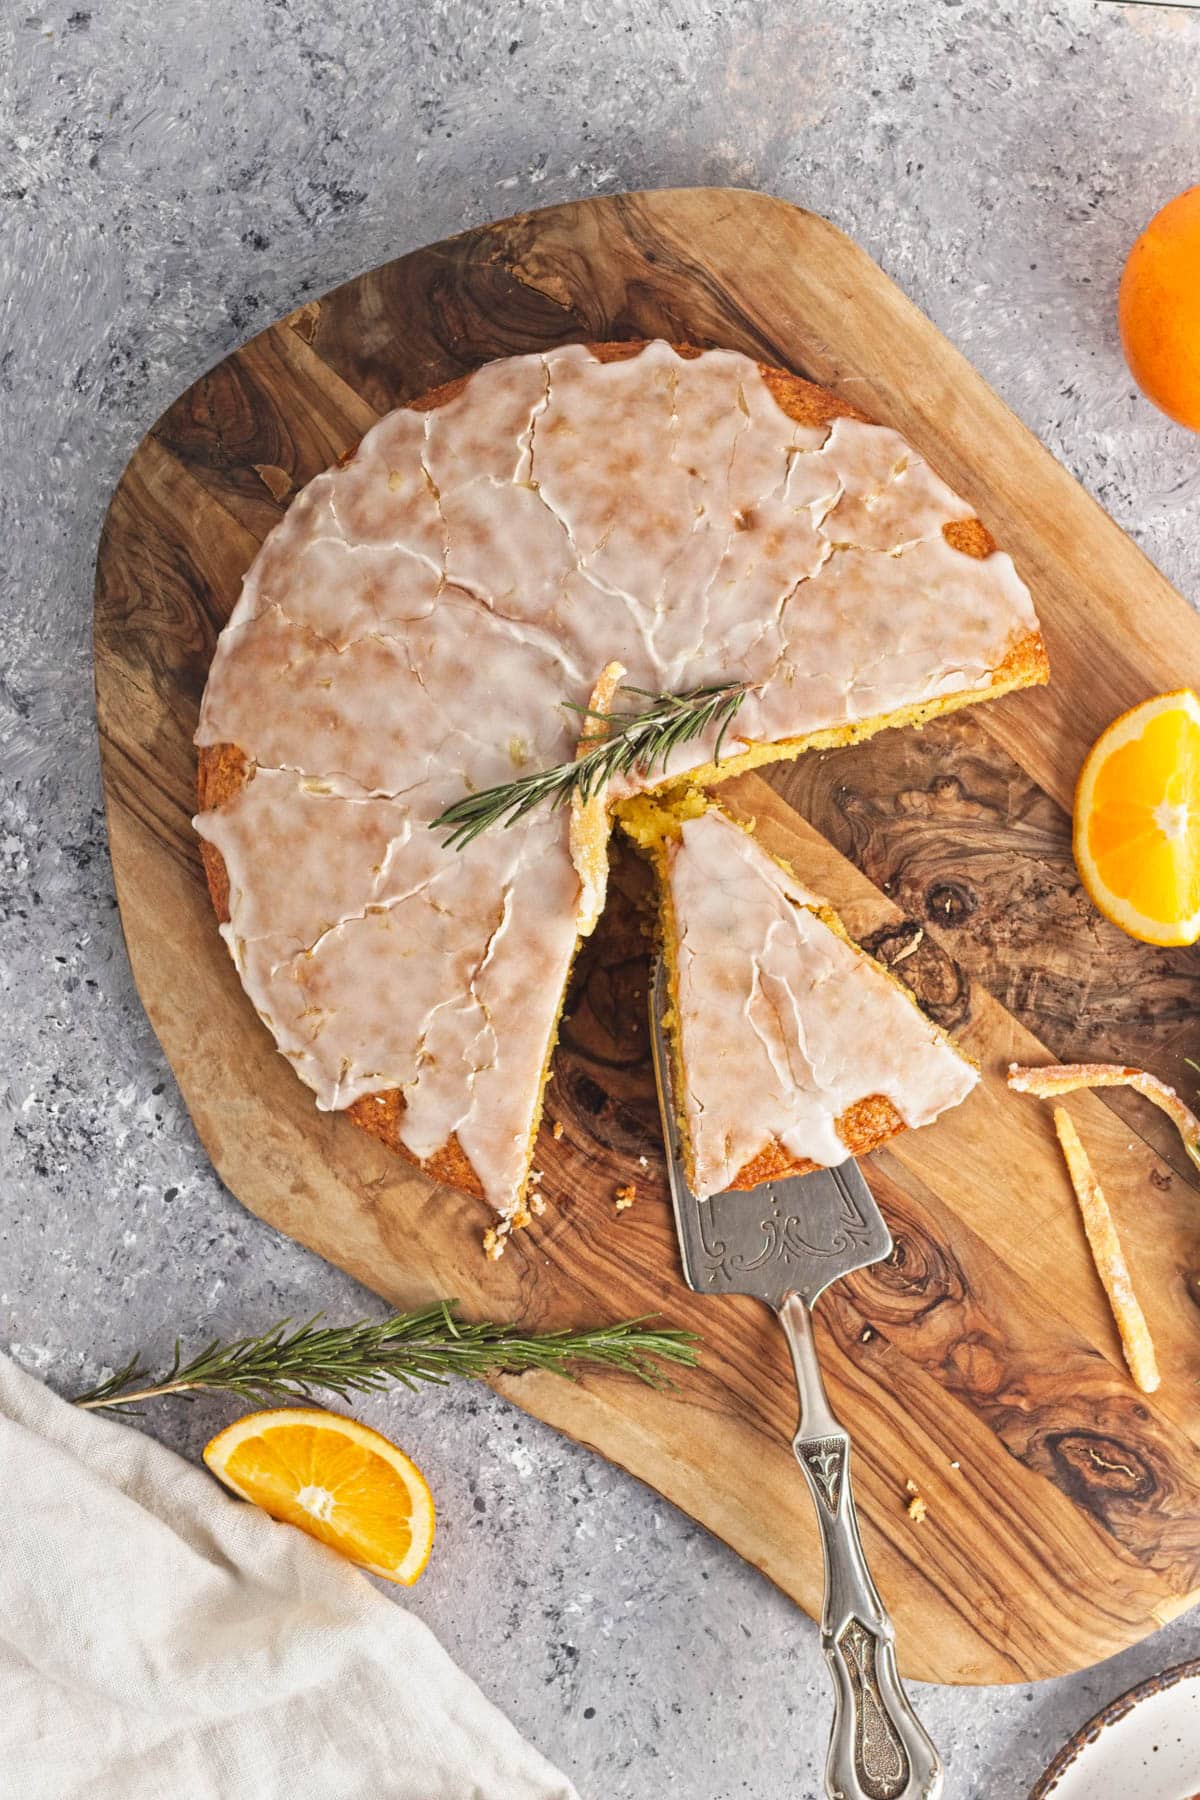
This one surprised me the first time I made it. I was skeptical about olive oil in a dessert cake — it felt like something that belonged in a bread recipe — but it produces this incredibly moist, slightly dense crumb that you just can't get with regular vegetable oil. The fresh orange zest and juice cut right through the richness, and if you add a little chopped rosemary like the recipe suggests, it gives the whole thing this subtle herby note that makes people stop and ask what's in it. My full orange cake recipe goes deeper if you want more orange-forward options.
Ingredients
- 1½ cups all-purpose flour
- 1 cup granulated sugar
- 3 large eggs
- ¾ cup good-quality olive oil (extra virgin works well here)
- ½ cup fresh orange juice (from about 2 medium oranges)
- 2 tablespoons fresh orange zest
- 1 tablespoon fresh rosemary, very finely chopped (optional but worth it)
- 1½ teaspoons baking powder
- ¼ teaspoon salt
- Powdered sugar, for dusting
Instructions
- Preheat oven to 350°F. Grease a 9-inch round cake pan and line the bottom with parchment paper.
- In a large bowl, whisk together the eggs and sugar for about 2 minutes until slightly pale. Add the olive oil, orange juice, and zest and whisk until combined.
- Fold in the flour, baking powder, salt, and rosemary (if using) until just incorporated — a few small lumps are fine.
- Pour batter into the prepared pan and bake for 35–40 minutes, until golden on top and a toothpick comes out clean.
- Cool in the pan for 10 minutes, then turn out onto a wire rack. Dust generously with powdered sugar before serving.
Tips
- Tip: Use fresh orange juice, not from a carton — the difference in flavor is noticeable in a simple cake like this where orange is the main event.
- Tip: This cake actually gets better on day two as the olive oil flavor mellows and the crumb settles — make it the night before if you're serving guests.
- Tip: If rosemary feels too unusual, swap it for a teaspoon of vanilla extract — still delicious, just more familiar.
19. Graham Cracker Crust Sweet Potato Pie
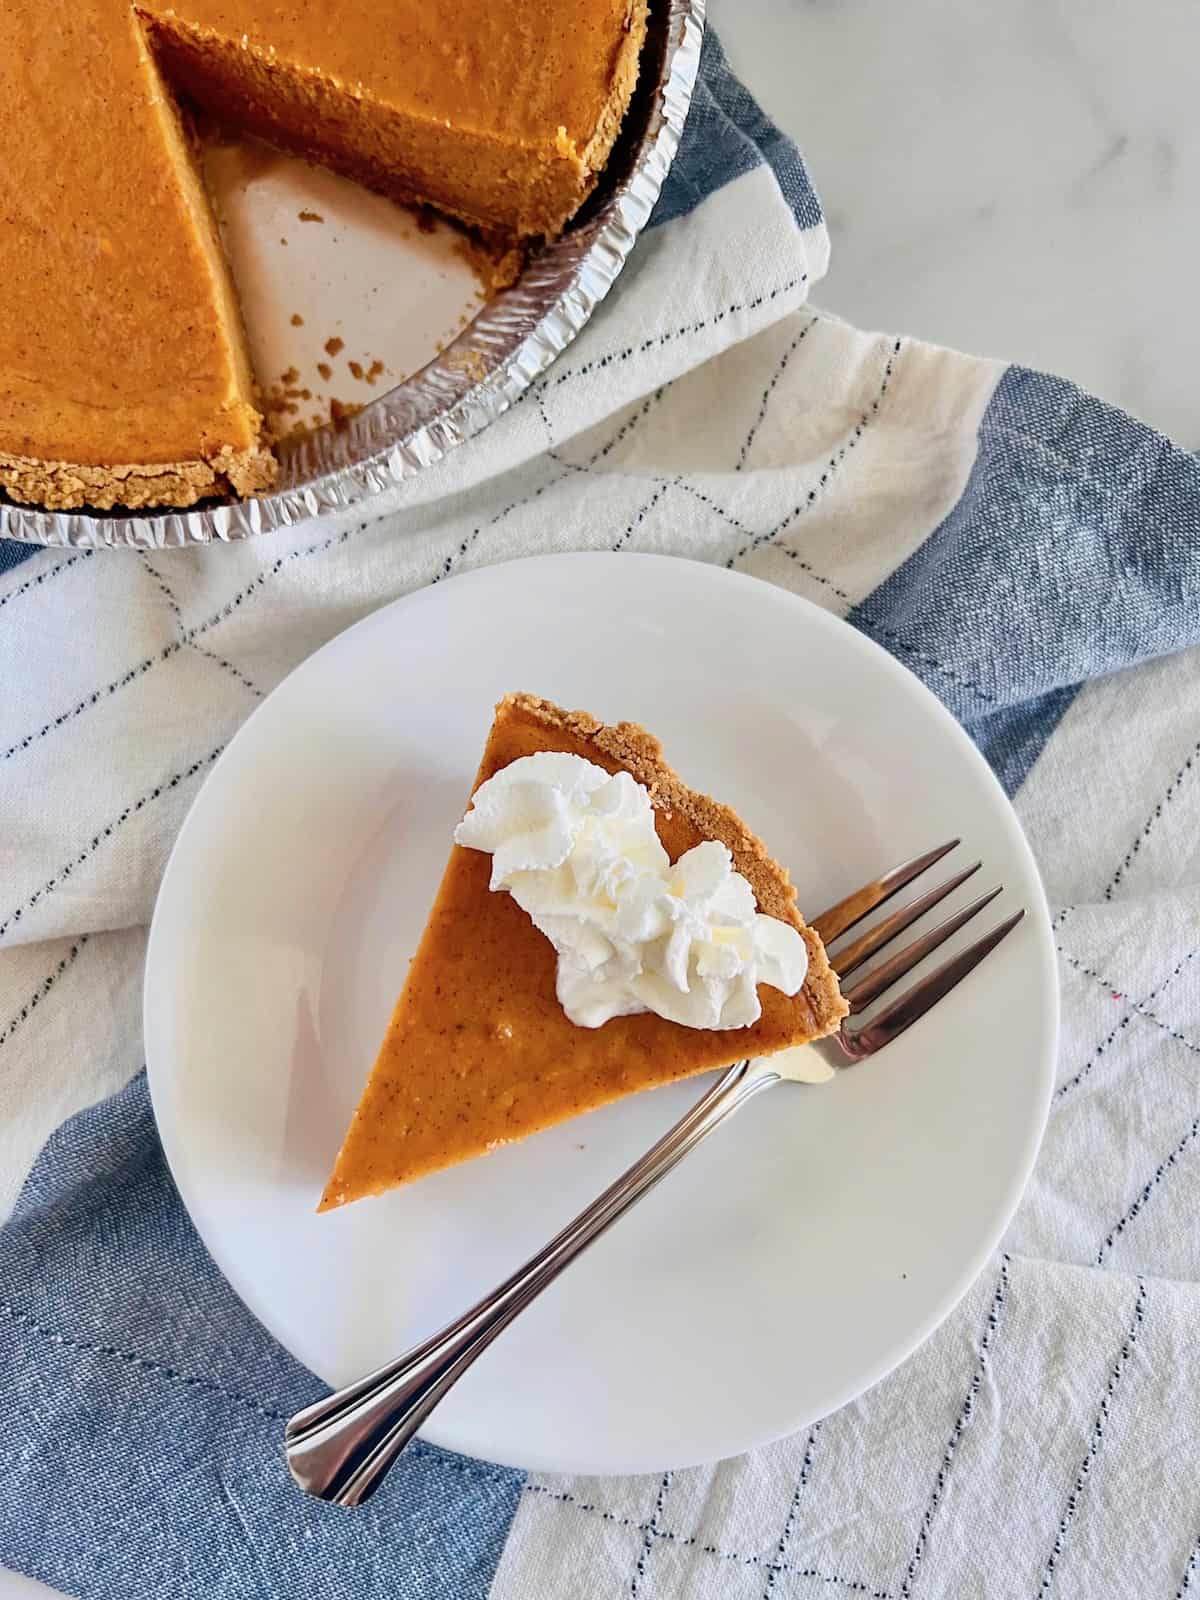
Sweet potato pie is one of those things I hadn't grown up with — in Pakistan, sweet potatoes were a savory thing, roasted with chaat masala. The first time I tasted the southern American version at a friend's Thanksgiving, I understood immediately why people make this every single year without question. The graham cracker crust version is my favorite because it skips the fuss of a pastry crust entirely and adds this faint honeyed crunch that works beautifully against the silky, spiced filling. A proper spoonful of fresh whipped cream on top is non-negotiable.
Ingredients
- 1½ cups graham cracker crumbs (about 10 full crackers)
- 6 tablespoons unsalted butter, melted
- 2 tablespoons sugar (for crust)
- 2 cups mashed sweet potato (from about 2 medium sweet potatoes, roasted and peeled)
- 1 can (14 oz) sweetened condensed milk
- 2 large eggs
- 1½ teaspoons vanilla extract
- 1 teaspoon cinnamon
- ½ teaspoon nutmeg
- ¼ teaspoon salt
- Whipped cream, for serving
Instructions
- Preheat oven to 350°F. Mix graham cracker crumbs, melted butter, and sugar together until it resembles wet sand. Press firmly into a 9-inch pie dish, going up the sides. Bake for 8 minutes, then set aside to cool slightly.
- In a large bowl, beat together the mashed sweet potato, sweetened condensed milk, eggs, vanilla, cinnamon, nutmeg, and salt until completely smooth.
- Pour the filling into the pre-baked crust and smooth the top with a spatula.
- Bake for 45–50 minutes, until the filling is just set — it should have a very slight wobble in the very center when you nudge the pan.
- Cool completely at room temperature, then refrigerate for at least 2 hours before slicing. Serve with whipped cream.
Tips
- Tip: Roasting the sweet potatoes instead of boiling them concentrates the flavor and keeps the filling from getting watery — worth the extra 45 minutes.
- Tip: Press the graham cracker crust firmly and evenly — use the bottom of a measuring cup to get it flat and compact so it doesn't crumble when you slice.
- Tip: This pie holds up well in the fridge for 3–4 days, which makes it a great make-ahead dessert for holiday gatherings.
20. Soft Pumpkin Cookies
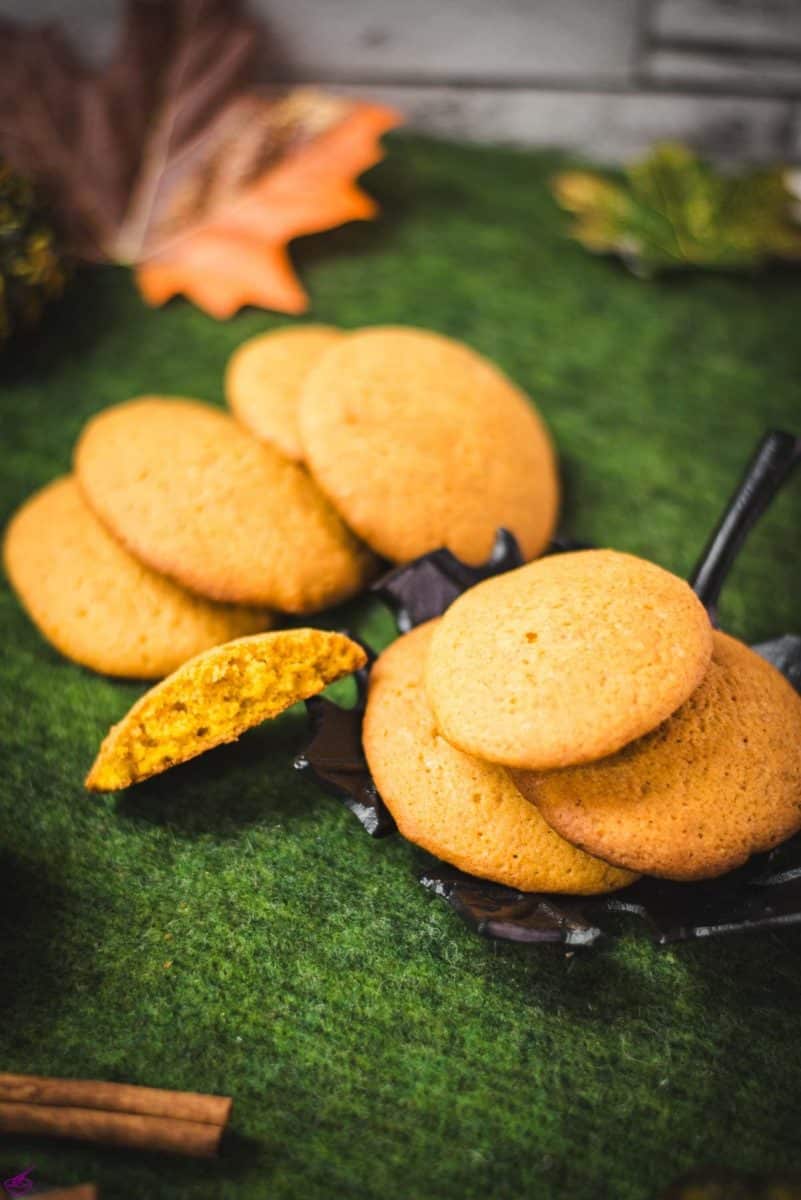
Zainab spotted these in my baking folder and asked me to make them before I'd even finished planning the week. These soft pumpkin cookies are genuinely different from the cakey, puffy kind you find everywhere in fall — they have actual structure, a slightly crisp edge, and a tender center loaded with pumpkin puree and warm spice. The key is not overloading the batter with too much pumpkin, which is what usually turns cookies into mini cakes. Top with a simple cream cheese glaze or caramelized pumpkin butter and they're done in well under an hour.
Ingredients
- 2¼ cups all-purpose flour
- ½ cup pumpkin puree (blotted dry with paper towels to remove excess moisture)
- ½ cup (1 stick) unsalted butter, softened
- ¾ cup brown sugar, packed
- ¼ cup granulated sugar
- 1 large egg yolk (just the yolk — this helps with structure)
- 1½ teaspoons vanilla extract
- 1½ teaspoons pumpkin pie spice
- ½ teaspoon baking soda
- ¼ teaspoon salt
- Cream cheese glaze or pumpkin butter, for topping
Instructions
- Preheat oven to 375°F. Line two baking sheets with parchment paper. Spread the pumpkin puree onto a few layers of paper towels and press gently to absorb excess moisture — this step matters for cookie texture, not cake texture.
- Beat the softened butter, brown sugar, and granulated sugar together until light and fluffy, about 2 minutes. Mix in the egg yolk, vanilla, and dried-out pumpkin puree.
- Add the flour, pumpkin pie spice, baking soda, and salt. Mix until a soft dough forms — it will be slightly sticky.
- Scoop 1.5-tablespoon balls of dough onto the prepared baking sheets, spacing them about 2 inches apart. Flatten each one slightly with the palm of your hand.
- Bake for 11–13 minutes until the edges are just set. They'll look underdone — that's correct. Let them cool on the pan for 5 minutes before moving them, then add your glaze or pumpkin butter topping.
Tips
- Tip: Blotting the pumpkin dry is the single most important step in this recipe — skip it and your cookies will puff up soft and cakey instead of spreading into proper cookies.
- Tip: Using just the egg yolk (no white) keeps the cookies tender and slightly chewy rather than dry — it's a small change that makes a real difference.
- Tip: Chill the dough for 30 minutes before baking if your kitchen is warm — it helps them hold their shape and keeps the edges from spreading too thin.
21. No Bake Pumpkin Cheesecake
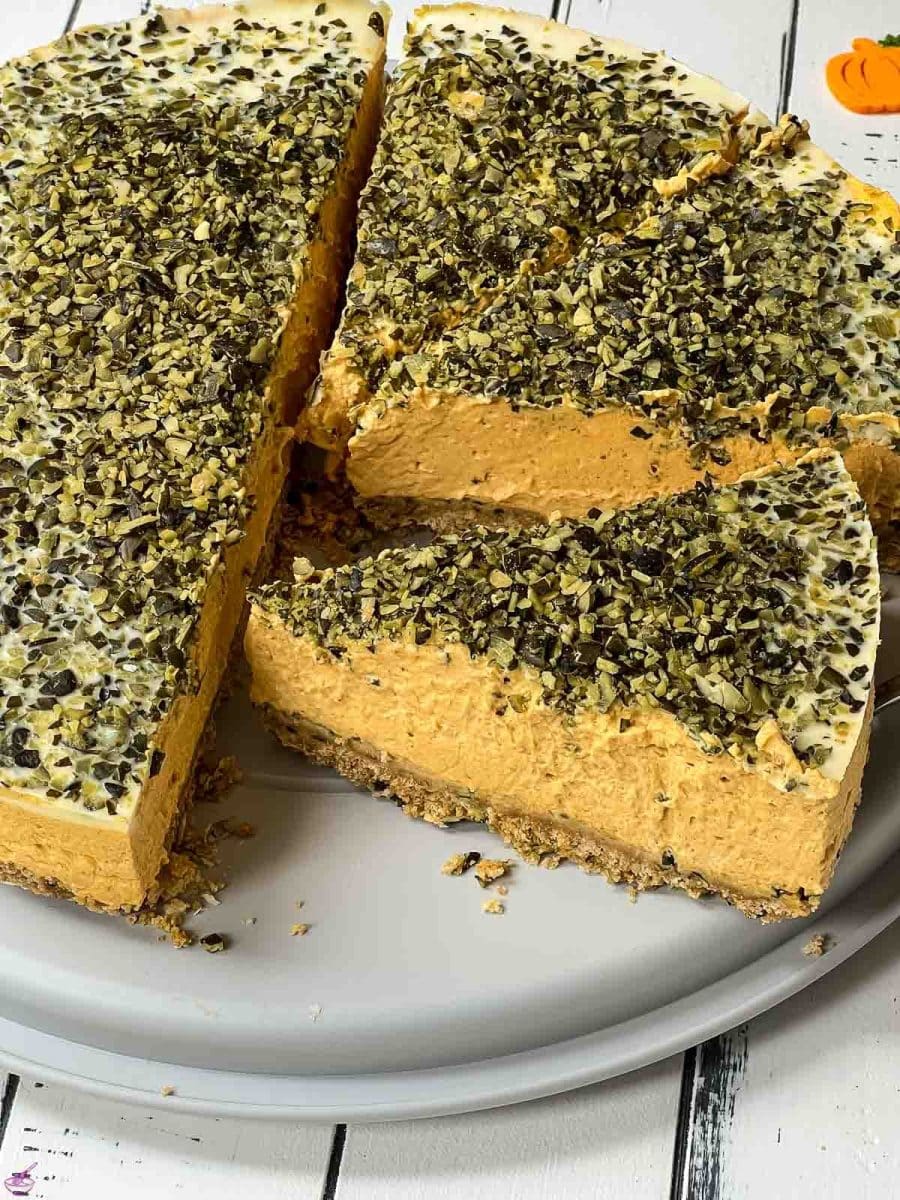
No oven, no stress — this no bake pumpkin cheesecake is the recipe I reach for when I want something impressive without heating up the whole kitchen. It's creamy, it's spiced just right, and it sets up beautifully overnight in the fridge. The first time I made this, I was nervous it wouldn't firm up enough to slice cleanly — it did, and it was stunning. Saad called it "the best pie" which, coming from a kid who usually just wants chocolate, felt like high praise.
Ingredients
- 1½ cups graham cracker crumbs (about 10 full crackers)
- ¼ cup granulated sugar
- 6 tablespoons unsalted butter, melted
- 16 oz cream cheese, softened to room temperature
- 1 cup canned pumpkin puree (not pumpkin pie filling)
- 1 cup powdered sugar, sifted
- 1½ teaspoons pumpkin pie spice
- 1 teaspoon pure vanilla extract
- 1½ cups heavy whipping cream, cold
Instructions
- Make the crust: mix graham cracker crumbs, granulated sugar, and melted butter together until the mixture looks like wet sand. Press firmly into the bottom of a 9-inch springform pan and refrigerate while you make the filling.
- Beat the softened cream cheese with a hand mixer on medium speed until completely smooth and lump-free, about 2 minutes. Cold cream cheese will leave lumps you can't get rid of later, so let it sit out at least 30 minutes first.
- Add the pumpkin puree, powdered sugar, pumpkin pie spice, and vanilla extract to the cream cheese. Mix on low until just combined, then increase to medium and beat until smooth and uniform in color.
- In a separate cold bowl, whip the heavy cream to stiff peaks. Gently fold the whipped cream into the pumpkin mixture in two or three additions — don't stir hard or you'll deflate it. You want it light and airy.
- Pour the filling over the chilled crust, smooth the top with a spatula, and refrigerate for at least 6 hours or overnight. Slice and serve with a dollop of whipped cream if you like.
Tips
- Tip: Make sure your cream cheese is fully at room temperature before beating — cold cream cheese is the number one reason for a lumpy no-bake cheesecake filling.
- Tip: For the cleanest slices, run a thin knife under hot water, wipe it dry, and slice — repeat between each cut. It makes a huge difference for presentation.
- Tip: This cheesecake keeps well in the fridge for up to 4 days, covered tightly. I actually think it tastes better on day two once everything has really settled and the spices have deepened.
Fall desserts are one of those things that don't need to be complicated to feel special. A warm apple crisp, a slice of pumpkin bread, a mug of something spiced — that's the whole point of this season. Every recipe in this list is something I've made in my own kitchen, most of them multiple times, and they all deliver that cozy feeling without asking too much of you on a Tuesday night.
Saad's personal favorites from this list are the caramel apple nachos and anything with a brown butter situation going on. My husband leans toward the classics — the pecan pie bars, the pumpkin roll. I've started doubling the apple cider donuts because they disappear before they even cool down. Whatever you make from here, just pick one that fits your week and start there. That's always how it goes with fall baking — one recipe leads to another.
If you're looking for more recipe inspiration beyond fall desserts, I've got you covered. Check out my fall dinner recipes for weeknight meals that match the season, and my easy cookie recipes if you're in full baking mode. These are the recipes I keep coming back to all season long. 🍂🍎🎃✨
More Recipes to Explore
- Fall Dinner Recipes — cozy weeknight meals to pair with your fall baking
- Easy Cookie Recipes — if you've got the oven on anyway, here's what to bake next
- Pumpkin Recipes — for when you buy a can of pumpkin and need more than one use for it
- Apple Recipes — both sweet and savory, for when you come home from the orchard with too many apples
- Recipe Roundups — all my roundup posts in one place, organized by season and category
Frequently Asked Questions
Which fall dessert on this list is the easiest to make for a beginner?
Honestly, the apple crisp is where I'd send anyone who's new to baking. There's no pastry dough, no tempering, no timing stress — you just toss apples with a few spices, make a crumble topping, and bake. It's forgiving in a way that most desserts aren't, and it tastes like you put in way more effort than you actually did.
Can I make any of these fall desserts ahead of time?
Most of them, yes. The pumpkin roll, the pecan pie bars, the pumpkin bread — all of these keep well for several days, and some actually taste better the next day once the flavors settle. I usually bake the bars and bread a day ahead when I'm making them for guests. Just wrap tightly and store at room temperature or in the fridge depending on the recipe.
What fall dessert works best for a large group or potluck?
Bar desserts are your best friend for crowds — they travel well, you can cut them into as many pieces as you need, and there's no slicing drama at the table. The pecan pie bars and the pumpkin cheesecake bars both work great for potlucks. I've brought both to gatherings and the pan comes home empty every time.
Can I substitute canned pumpkin for fresh pumpkin puree?
Yes, and honestly I prefer canned for baking. Fresh pumpkin puree has more moisture and can throw off your ratios if you're not careful. Canned pumpkin (like Libby's, which you'll find at any Walmart or Target) is consistent, smooth, and reliable. I've used both and the canned version gives better results in things like pumpkin bread and cheesecake bars.
How do I store leftover fall desserts so they don't dry out?
It depends on the dessert, but the biggest thing is airtight storage. Baked goods like apple crisp and crisps in general are best covered tightly and reheated in the oven at 325°F for about 10 minutes — it brings back the texture. Bars and breads do well in an airtight container at room temperature for 3-4 days, or in the fridge if they have a cream cheese component. Anything with fresh whipped cream should be served the same day.
Share This Post!
If you found a recipe here you want to try, save it to Pinterest or share it with someone who needs a reason to bake this fall. 🍂🎃
View More Recipes here Recipe Roundups





Comments
No Comments