
The Saturday morning treat that my children request more reliably than anything else in my baking repertoire — the one that fills the kitchen with the most irresistibly warm vanilla aroma and produces the most immediate, most joyful breakfast-table response — is a fresh batch of baked vanilla donuts: soft, cakey, buttermilk-based donuts baked in a donut pan until lightly golden and springy, then dipped in a simple vanilla glaze that sets into a glossy, slightly crackly shell. They are genuinely as satisfying as a bakery donut and they require no hot oil, no thermometer, and no special technique beyond not overmixing the batter.
What makes baked vanilla donuts genuinely great rather than just a baked-good-shaped-like-a-donut is the buttermilk in the batter. Buttermilk does three things: it activates the baking soda to produce a light, fluffy rise; it adds a very subtle tang that makes the donut taste complex rather than flat; and it creates a tender, moist crumb that stays soft for days rather than staling after a few hours the way many baked donuts do. A good-quality vanilla extract is the other non-negotiable — use pure vanilla extract, not imitation, and use it generously. The vanilla is the entire flavor of this donut and it deserves a premium ingredient.
This post covers the classic baked vanilla donut in full detail — batter, technique, glaze, and decoration — plus seven variations including chocolate glazed, cinnamon sugar, lemon vanilla, maple pecan, cream-filled, mini donuts, and a dairy-free adaptation. Every version is ready in under 30 minutes and the donuts are beautiful enough to gift. Find more baked donut inspiration in our baked chocolate chip donuts, our blueberry cake donuts, and our chocolate chip donuts.
Let's make the most delightful homemade donuts your kitchen has ever produced!
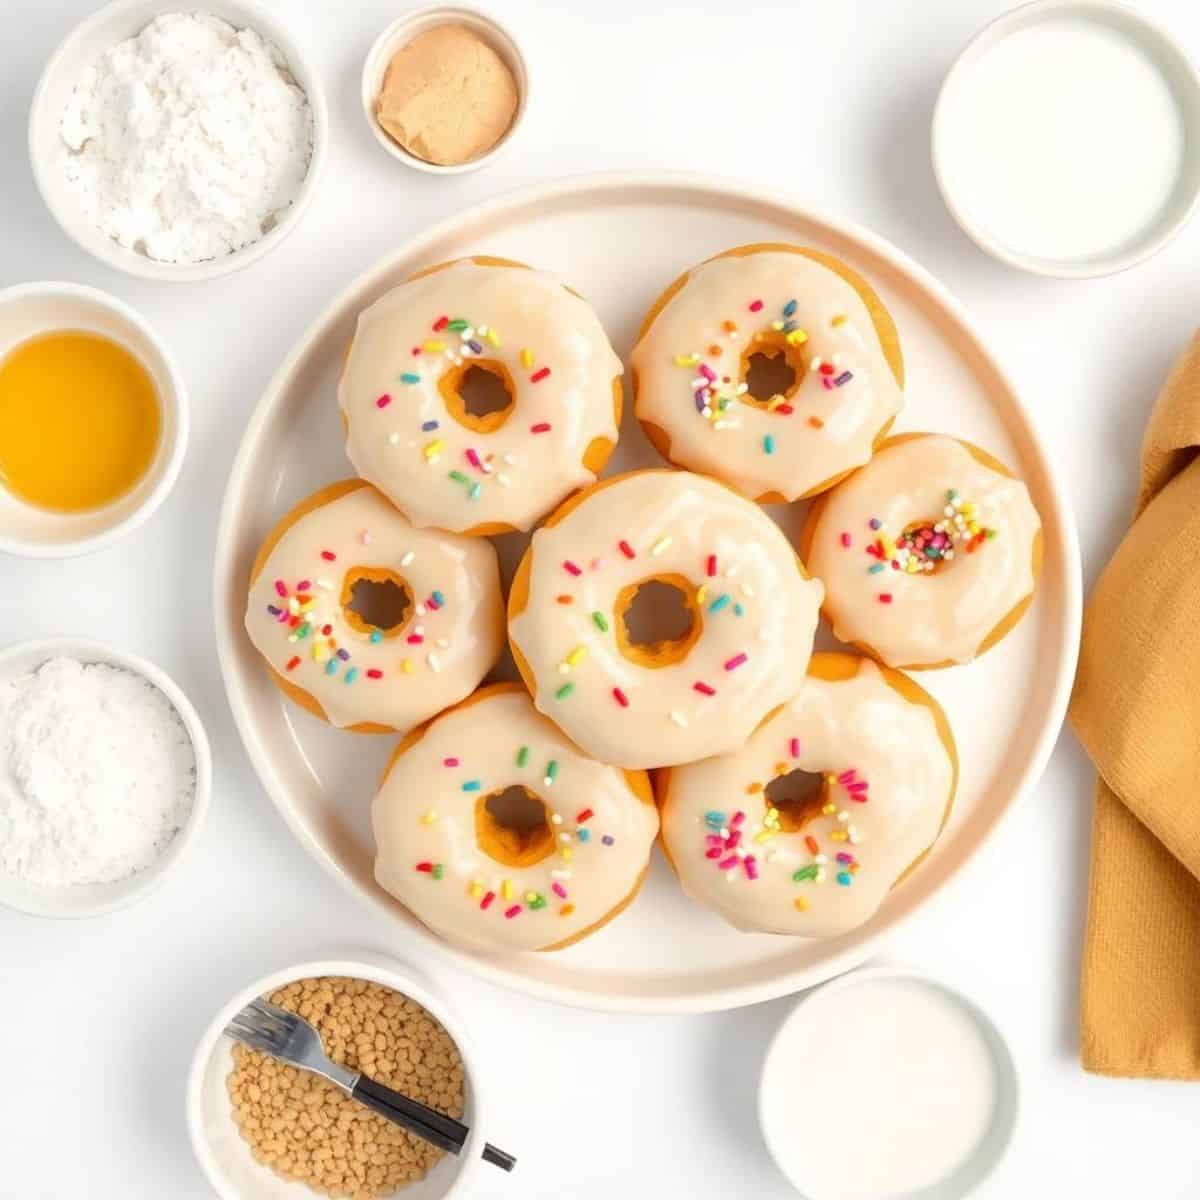
WHY YOU WILL LOVE THIS RECIPE
- No Deep Fryer — All the Donut Joy, None of the Oil: The primary barrier between most home bakers and homemade donuts is the deep-frying step — the oil management, the temperature control, the mess and smell, the disposal problem. Baked vanilla donuts eliminate every one of those barriers entirely. A donut pan, a mixing bowl, and a home oven are the only equipment required, and the baked donuts are genuinely excellent — light, tender, and satisfying in every way the fried original promises. I have served these alongside bakery donuts at brunch and had guests genuinely unable to tell which were homemade and which were bought.
- Ready in Under 30 Minutes — Faster Than a Bakery Run: From pulling the flour from the pantry to pulling a glazed donut from the cooling rack is genuinely under 30 minutes. The batter takes 5 minutes to mix, the donuts bake in 10–12 minutes, and the glaze takes 3 minutes to make and apply. The entire process from raw ingredients to a plate of glazed, sprinkle-topped donuts takes less time than driving to a bakery and standing in line. This speed makes baked vanilla donuts viable on any weekend morning, not just special occasions when you have planned ahead.
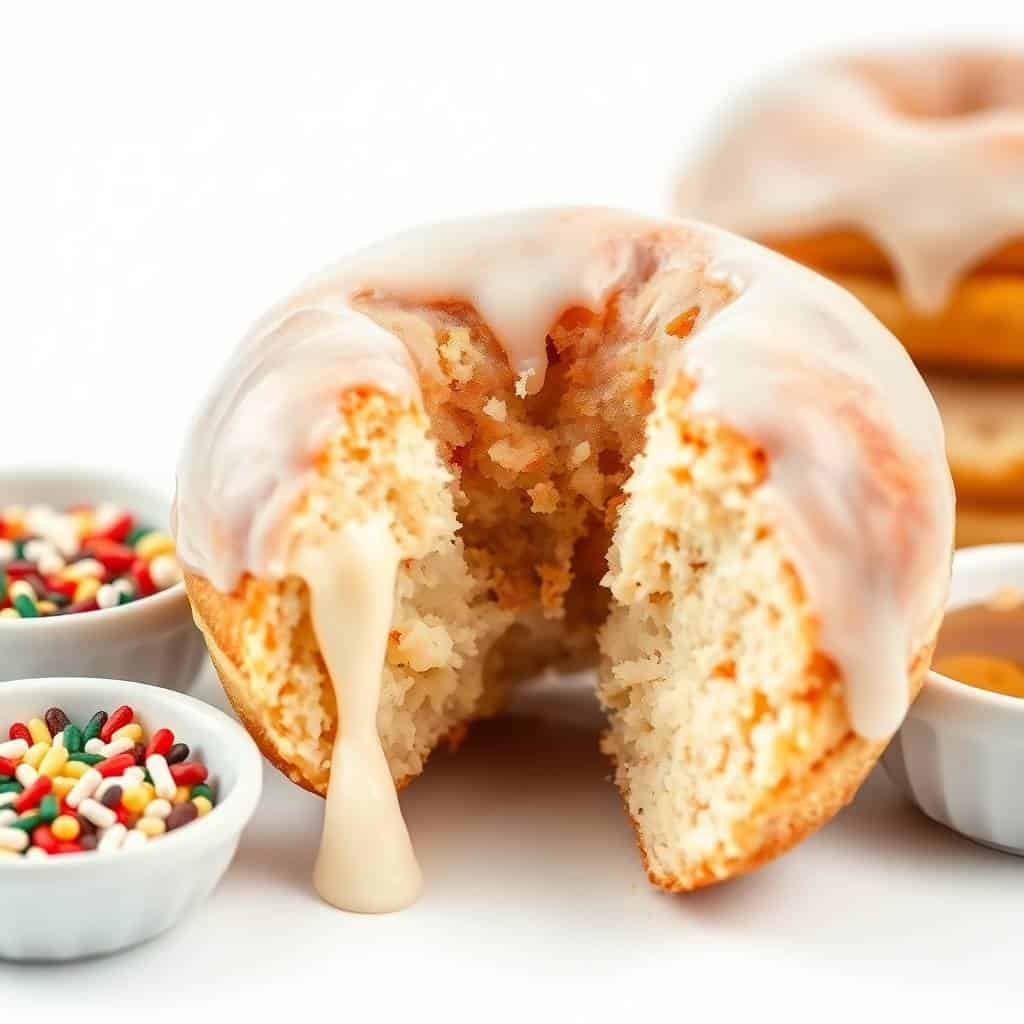
- The Buttermilk Batter Produces an Exceptionally Tender Crumb: The buttermilk in this recipe is not interchangeable with regular milk — it is the ingredient that separates a truly excellent baked donut from a mediocre one. The acidity in buttermilk reacts with the baking soda to produce a fine, even rise with a very tender crumb; it also adds a barely perceptible tang that makes the donut taste more complex and more interesting than a plain sweet batter. The buttermilk also keeps the donuts moist for significantly longer than milk-based batters — they are still excellent the second day, which is genuinely unusual for baked donuts.
- The Vanilla Glaze Is the Detail That Makes These Bakery-Quality: The three-ingredient glaze — powdered sugar, milk, and vanilla — sets into the glossy, slightly crackly translucent shell that immediately signals "bakery donut" to every guest who sees it. The glaze is what the eye reaches for first and what makes a plain baked donut look immediately impressive and intentional. Applied while the donuts are fully cooled (not warm), the glaze sets firmly within 10 minutes and holds through serving, packaging, and gifting without becoming sticky or runny.
- Completely Customizable — One Batter, Endless Variations: The classic vanilla batter and glaze is a blank canvas that accepts virtually any flavor addition, topping, or coating. Lemon zest, cinnamon, chocolate glaze, maple icing, sprinkles, chopped nuts, cinnamon sugar — all of these are 5-minute additions that transform the same base recipe into a completely different donut. I regularly make a batch of the vanilla batter and split it into three or four different glazes and toppings so the plate looks like it came from a specialty donut shop — the variety from a single batter takes under 15 extra minutes and produces a dramatically more impressive visual display.
- Make-Ahead, Freezer-Friendly, and Perfect for Gifting: Baked vanilla donuts freeze beautifully — cool completely without glazing, freeze in a single layer, then transfer to a freezer bag for up to 2 months. Thaw at room temperature and glaze fresh for a just-made result any morning. They also store at room temperature in an airtight container for up to 2–3 days, making them excellent for gifting — a box of glazed and decorated donuts tied with a ribbon is one of the most charming and thoughtful homemade gifts I know. See our easy brunch ideas for more morning celebration inspiration.
- A Genuinely Fun Activity to Make with Children: Baked donuts are one of the best family baking projects available — the batter requires no special technique (just mix until combined), the donut pan format makes filling and shaping entirely foolproof, the short bake time means children are not waiting impatiently forever, and the glazing and decorating step with sprinkles is the most universally enjoyed activity in all of baking. I have made these with children as young as four years old and the experience is genuinely joyful for everyone involved. See our easy cookie recipes for more kid-friendly baking projects.
INGREDIENTS
- For the Donuts:
- 2 cups all-purpose flour
- 1 teaspoon baking powder
- ½ teaspoon baking soda
- ¼ teaspoon salt
- ½ cup granulated sugar
- 2 large eggs, at room temperature
- ¾ cup buttermilk, at room temperature
- ¼ cup unsalted butter, melted
- 2 teaspoons pure vanilla extract
- For the Vanilla Glaze:
- 1 cup powdered sugar
- 2–3 tablespoons milk
- ½ teaspoon pure vanilla extract
- Sprinkles, optional for decoration
DIRECTIONS
- Step No.1: Preheat the oven and prepare the donut pan
Preheat the oven to 350°F (175°C). Grease a standard 12-cavity donut pan very generously with non-stick cooking spray or a brush of softened butter, making sure to coat every surface of each cavity including the center tube — any un-greased surface will cause the donuts to stick and tear when removed. Set the greased pan aside while you make the batter. Do not skip or under-grease this step — a sticky donut pan is the most common cause of broken, misshapen donuts in baked recipes.
- Step No.2: Mix the dry ingredients
In a large mixing bowl, whisk together the all-purpose flour, baking powder, baking soda, salt, and granulated sugar. Whisk for a full 30 seconds to distribute the leavening agents evenly throughout the flour — unevenly distributed baking powder or soda produces donuts that rise inconsistently, with some domed and some flat. Set the dry bowl aside.
- Step No.3: Mix the wet ingredients
In a separate bowl, whisk together the room-temperature eggs, room-temperature buttermilk, melted butter, and vanilla extract until completely smooth and uniform — about 30–45 seconds of vigorous whisking. Room-temperature dairy and eggs are important here because they incorporate more smoothly into the batter and produce a more even bake than cold ingredients. If your buttermilk and eggs are cold from the refrigerator, microwave the buttermilk for 15–20 seconds and set the eggs in warm water for 5 minutes to bring them closer to room temperature before using.
- Step No.4: Combine into batter
Pour the wet ingredient mixture into the bowl of dry ingredients and stir with a rubber spatula or wooden spoon until just combined — the most critical technique instruction in this recipe is to stop mixing the moment no dry flour streaks remain visible, even if the batter looks slightly lumpy. Overmixing develops the gluten in the flour and produces donuts that are dense and chewy rather than light and cakey. Ten to twelve strokes of the spatula is typically enough — the batter will be thick and slightly rough-looking, which is correct.
- Step No.5: Fill the donut pan
Transfer the batter to a large piping bag or a large zip-top bag with one corner snipped off — this is by far the easiest and cleanest way to fill a donut pan. Pipe the batter into each cavity, filling each one approximately ¾ full — the batter rises during baking and a ¾-full cavity produces a donut with the correct thickness without overflowing. Alternatively, use a small spoon to carefully spoon the batter into each cavity, smoothing the top gently with a wet finger to level it. Avoid filling the cavities more than ¾ full or the donut will bake over the center tube and lose its hole.
- Step No.6: Bake the donuts
Bake at 350°F for 10–12 minutes until the donuts are lightly golden on top and spring back when pressed gently with a fingertip — a toothpick inserted into the thickest part of a donut should come out clean with no wet batter attached. Do not overbake — baked donuts dry out quickly and the difference between perfectly moist and slightly dry is just 1–2 extra minutes in the oven. Remove the pan from the oven and let the donuts cool in the pan for exactly 5 minutes — this brief pan rest allows them to firm enough to release cleanly without being so fully cooled that they stick.
- Step No.7: Cool, glaze, and decorate
After 5 minutes in the pan, run a thin offset spatula or butter knife around the edge of each donut to loosen it, then invert the pan over a wire cooling rack to release the donuts. Allow them to cool completely on the rack — at least 15 minutes — before glazing. Glazing warm donuts causes the glaze to melt and run off rather than setting into the glossy shell it should. While the donuts cool, whisk together the powdered sugar, 2 tablespoons of milk, and vanilla extract until completely smooth and lump-free. Adjust the consistency with additional milk ½ teaspoon at a time until the glaze flows steadily from a spoon. Dip each cooled donut face-side-down into the glaze, let the excess drip back into the bowl, then set glazed-side-up on the rack. Add sprinkles immediately while the glaze is still wet — they will not adhere once the glaze has set. Allow the glaze to set fully before stacking or packaging, approximately 10–15 minutes.
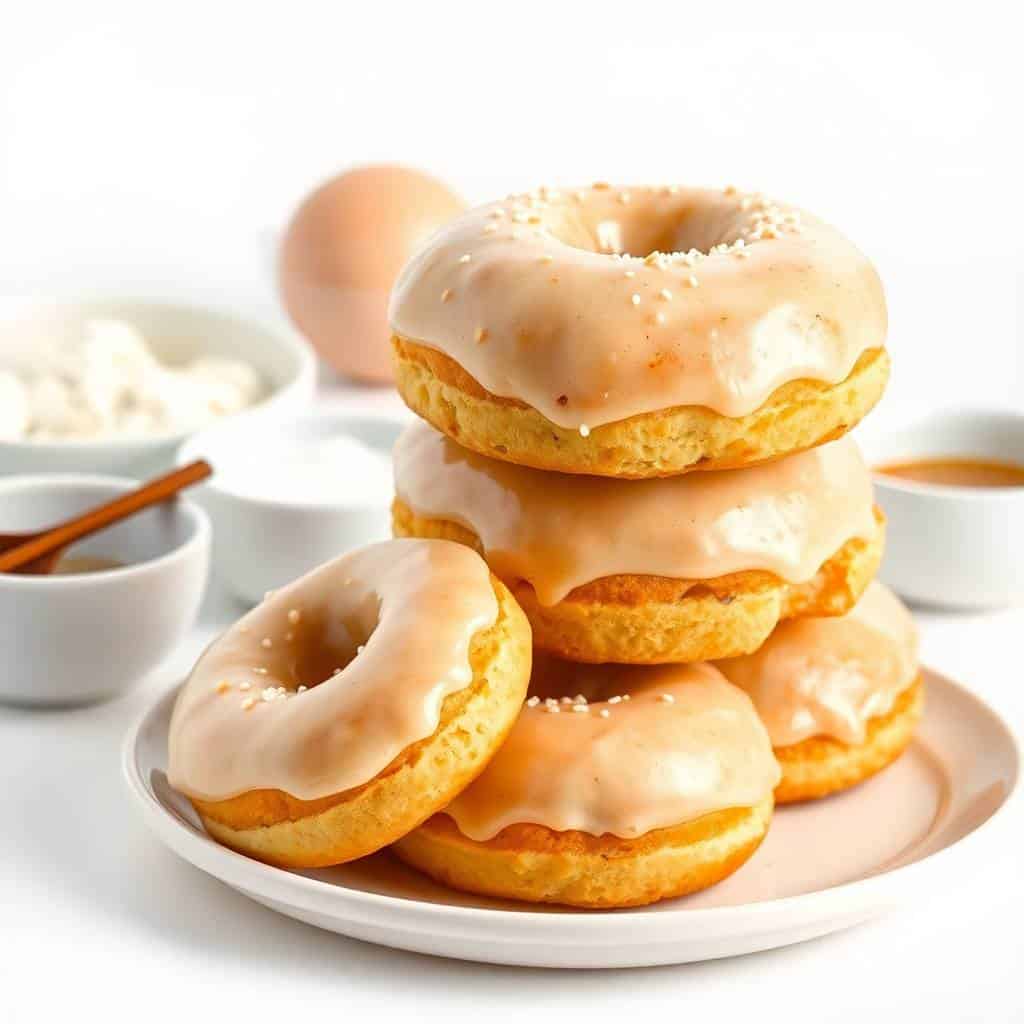
TIPS FOR SUCCESS
- Never Overmix the Batter: This is the single most important instruction in the entire recipe. Overmixed donut batter develops gluten and produces dense, chewy donuts rather than the light, cakey ones this recipe is designed to produce. Mix until the dry and wet ingredients are just combined — 10 to 12 strokes of a spatula. The batter should look slightly lumpy when properly mixed; a perfectly smooth batter has been overmixed. Accept the lumps and trust the oven to even them out.
- Use Room Temperature Eggs and Buttermilk: Cold wet ingredients don't emulsify as smoothly as room-temperature ones, which can result in a batter that is slightly separated or uneven in texture before it even hits the oven. Room-temperature dairy and eggs mix into each other more readily and produce a more uniform, more evenly baked donut. If you forget to pull ingredients from the refrigerator early, a 15-second microwave for the buttermilk and a 5-minute warm water soak for the eggs gets them close enough to room temperature to work well.
- Use a Piping Bag to Fill the Pan: Spooning batter into donut pan cavities is messy and inconsistent — some cavities end up with too much batter, some with too little, and the batter tends to land on the center tube rather than around it, obstructing the hole. A piping bag (or a zip-top bag with the corner cut) gives you precise control over where the batter goes and produces evenly filled cavities with clean holes in every donut. This 30-second setup step makes filling the entire pan faster and cleaner than any spoon approach.
- Use Pure Vanilla Extract — Not Imitation: Vanilla is the entire flavor of this donut and the quality of the extract is directly reflected in the quality of the finished donut. Pure vanilla extract contains hundreds of flavor compounds that produce the warm, complex, floral vanilla flavor everyone recognizes and loves; imitation vanilla extract contains primarily vanillin and produces a thinner, less nuanced flavor. The price difference between pure and imitation is small relative to the difference in quality it produces. Vanilla bean paste is also excellent here and adds visible flecks of vanilla bean that look beautiful in the finished donut.
- Let Donuts Cool Completely Before Glazing: Warm donuts melt the glaze on contact and it runs off entirely rather than coating the surface. The glaze needs a cool, firm surface to adhere to and set on — a donut that is just slightly warm to the touch is still too warm for glazing. Give the donuts a full 15 minutes on the cooling rack, or up to 30 minutes in a cool kitchen, before dipping. If you are in a hurry, place the donuts in the refrigerator for 5 minutes to cool them quickly before glazing.
VARIATIONS
- Chocolate Glazed Vanilla Donuts: Replace the vanilla glaze with a chocolate glaze — melt ½ cup of semi-sweet chocolate chips with 2 tablespoons of heavy cream in 30-second microwave intervals, stirring between each, until completely smooth. Dip the cooled donuts and finish with sprinkles, crushed Oreos, or a drizzle of white chocolate. The combination of the vanilla-flavored donut and the chocolate glaze is the most classic and universally beloved donut flavor combination available and the one that gets the most enthusiastic response from every age group at any table. Pair with our baked chocolate chip donuts for a full chocolate spread.
- Cinnamon Sugar Vanilla Donuts: Skip the glaze entirely. While the donuts are still warm from the oven (but not scorching), brush each one generously with melted butter and immediately toss in a mixture of ½ cup granulated sugar and 1 teaspoon ground cinnamon. The warm butter and sugar create a caramelized, fragrant coating that is the most nostalgic donut experience of all — every bite tastes like a churro and a cake donut simultaneously. This is the variation I make most often for casual weekend breakfasts because it is faster than making and applying a glaze and produces an equally spectacular result. See our cinnamon sugar french toast muffins for more cinnamon sugar inspiration.
- Lemon Vanilla Donuts: Add 1 tablespoon of fresh lemon zest to the batter when mixing the wet ingredients, and make the glaze with fresh lemon juice instead of milk (start with 1 tablespoon and add more to reach the right consistency). The lemon zest in the batter produces a bright, floral citrus note that complements the vanilla without competing with it, and the lemon glaze adds a tangy brightness that makes the finished donut taste like spring. These are the donuts I bring to Easter brunch and spring celebrations — they photograph beautifully and taste extraordinarily fresh.
- Maple Pecan Donuts: Make the glaze with 1 tablespoon of pure maple syrup replacing 1 tablespoon of the milk, and stir in ¼ teaspoon of maple extract for an intensified maple flavor. Top each glazed donut immediately with finely chopped toasted pecans before the glaze sets. The combination of the vanilla donut, the maple glaze, and the toasted pecan crunch is deeply autumnal and the most sophisticated version of this recipe — genuinely restaurant-quality in flavor and appearance. Pair with a strong cup of coffee for the best fall morning breakfast imaginable. See our easy brunch ideas for more serving inspiration.
- Mini Baked Vanilla Donuts: Use a mini donut pan (24-cavity) and reduce the baking time to 7–8 minutes. The mini donuts are bite-sized, completely adorable, and ideal for parties, brunch spreads, and children's events — a platter of 24 glazed and decorated mini donuts in different colors is one of the most visually spectacular and most crowd-pleasing party dessert presentations available from a single batter. They also make excellent party favors packaged in small boxes or cellophane bags. See our sweet treats for Mother's Day for more gifting ideas.
SERVING AND STORAGE
Serving
Serve baked vanilla donuts at room temperature or very slightly warm — they are most tender and most fragrant within the first hour of baking. Pair with a strong cup of coffee, a pot of tea, or a cold glass of milk for the most satisfying breakfast or brunch experience. Arrange on a tiered cake stand or a large flat platter with different glaze colors and topping variations for a genuinely spectacular brunch table centerpiece. For gifting, stack 2–3 donuts with the glazed sides facing up, wrap in a small cello bag, tie with ribbon, and you have a beautiful homemade gift that most recipients will remember.
Storage
Store glazed donuts in an airtight container at room temperature for up to 2 days — the buttermilk batter keeps them moist significantly longer than most baked donut batters. For storage up to 5 days, refrigerate in an airtight container and bring to room temperature before serving. To freeze, cool completely without glazing, freeze in a single layer on a sheet pan, then transfer to a freezer bag for up to 2 months. Thaw at room temperature for 30 minutes, then glaze fresh for a just-baked result. Unglazed donuts can also be warmed in a 300°F oven for 5 minutes before glazing for a fresh-from-the-oven experience any morning.
FAQ
Yes — baked vanilla donuts freeze beautifully for up to 2 months. For the best results, freeze them unglazed: cool completely on a wire rack, arrange in a single layer on a sheet pan and freeze until solid, then transfer to a freezer bag. Thaw at room temperature for 30 minutes and glaze fresh for a just-baked result. Already-glazed donuts also freeze acceptably but the glaze becomes slightly sticky when thawed — the flavor is completely unaffected. Do not microwave directly from frozen as it produces an uneven texture.
Yes — if you don't have a donut pan, a standard muffin tin works perfectly and produces vanilla donut muffins rather than ring-shaped donuts. Fill each muffin cavity approximately ⅔ full and bake at 350°F for 12–15 minutes (slightly longer than the donut format since the muffin shape is deeper). The finished muffins have the identical flavor and texture to the donuts — the only difference is the shape. Glaze them the same way, dipping the tops in the vanilla glaze. They are equally delicious in every way.
The classic vanilla glaze (powdered sugar, milk, and vanilla extract) is the most universally appealing and the best complement to the vanilla flavor of the donut. Chocolate glaze (melted chocolate chips with cream) is the most dramatic visual alternative. Maple glaze (powdered sugar, maple syrup, and a splash of milk) is the most sophisticated flavor variation. Lemon glaze (powdered sugar and fresh lemon juice) is the brightest and most refreshing. All four glazes can be made with the same base donut in under 5 minutes each, making it easy to offer multiple options from a single batch.
Generous greasing is the entire solution — use non-stick cooking spray or softened butter applied with a pastry brush to coat every surface of each cavity, including the center tube and the flat top surface between cavities. After greasing, some bakers dust the pan with a small amount of flour to further prevent sticking. After baking, always allow the donuts to cool in the pan for at least 5 minutes before removing — hot donuts are more fragile and more likely to tear than ones that have cooled slightly. A thin offset spatula or butter knife run around the edge of each donut helps loosen any that are reluctant to release.
Yes — the batter contains ½ cup of granulated sugar which produces a donut that is pleasantly and moderately sweet on its own, without any topping. The plain unglazed donut is excellent with coffee or tea and tastes more like a classic cake donut than a glazed one. The glaze adds an extra layer of sweetness and the glossy finish that makes the donuts look bakery-made, but it is genuinely optional. For a lighter option, dust unglazed donuts with a small amount of powdered sugar instead of dipping in full glaze — this adds a delicate sweetness and an attractive appearance without the full sugar load of a glaze.
Baked vanilla donuts are the recipe that makes home baking feel genuinely magical — a handful of pantry ingredients, under 30 minutes, and a donut pan produce something so soft, so fragrant, and so beautifully glazed that every person who sees them reaches for one immediately. Make the cinnamon sugar version on Saturday morning and the chocolate glazed version for Sunday — the kitchen will smell extraordinary both days.
Try the lemon version for spring, the maple pecan for fall, and always make the mini version when you have guests — a platter of tiny glazed donuts is impossible to resist at any gathering. Pair with our baked chocolate chip donuts, our blueberry cake donuts, our easy brunch ideas, and our easy breakfast recipes for the complete morning spread. 🍩🍦✨

BAKED VANILLA DONUTS RECIPE
Ingredients
For the Donuts:
- 2 cups all-purpose flour
- 1 teaspoon baking powder
- ½ teaspoon baking soda
- ¼ teaspoon salt
- ½ cup granulated sugar
- 2 large eggs
- ¾ cup buttermilk
- ¼ cup unsalted butter melted
- 2 teaspoons vanilla extract
For the Glaze:
- 1 cup powdered sugar
- 2 –3 tablespoons milk
- ½ teaspoon vanilla extract
- Sprinkles optional
Instructions
- Preheat Oven: Preheat oven to 350°F (175°C). Grease a donut pan lightly with non-stick spray.
- Mix Dry Ingredients: In a bowl, whisk together flour, baking powder, baking soda, salt, and sugar.
- Mix Wet Ingredients: In another bowl, whisk eggs, buttermilk, melted butter, and vanilla until smooth.
- Combine: Add wet ingredients into dry, stirring until just combined (do not overmix).
- Fill Pan: Spoon or pipe batter into donut pan, filling each mold about ¾ full.
- Bake: Bake 10–12 minutes until donuts are lightly golden and spring back when touched. Let cool for 5 minutes before removing from pan.
- Glaze: Mix powdered sugar, milk, and vanilla until smooth. Dip cooled donuts into glaze and top with sprinkles if desired.
Notes
- Flavour Twist: Add a pinch of cinnamon or nutmeg to the batter for extra warmth.
- Chocolate Option: Swap vanilla glaze with melted chocolate for a rich topping.
- Storage: Store in an airtight container at room temperature for up to 2 days.
- Serving Tip: Best enjoyed fresh with coffee, tea, or a cold glass of milk.





Comments
No Comments