
I made these baked chocolate chip donuts on a Saturday morning when Zainab woke up asking for "something sweet" before I'd even had my first cup of tea. I had a donut pan sitting in the cabinet that I'd used maybe twice, a bag of mini chocolate chips, and about 30 minutes before everyone else woke up. That's genuinely how this recipe got tested in my kitchen — not as some planned baking project, but as a half-asleep Saturday scramble.
What surprised me is how close these come to the real thing. I was skeptical about baked donuts for a long time — I assumed they'd taste like muffins shaped like rings, which honestly isn't the same. But this batter, with buttermilk instead of regular milk, gives you something genuinely soft and a little tangy, with a tight crumb that holds together. The mini chocolate chips are important here. Regular chips sink and clump; mini chips stay suspended in the batter and you get chocolate in every single bite.
Zainab approved immediately. My husband had three and asked if there were more. I now make a double batch because a single batch of six disappears before I've even cleaned up the bowl. If you're looking for more baked breakfast treats that come together fast, my easy blueberry muffins follow a similar formula and are just as quick.
One thing to know going in: you do need a donut pan. A standard 6-cavity donut pan costs about $10–12 at Walmart or any kitchen store, and it's worth having. If you absolutely don't have one, you can use a muffin pan — the result will be a domed chocolate chip muffin, not a donut, but the flavor is identical. Just add a couple of minutes to the baking time and check with a toothpick.
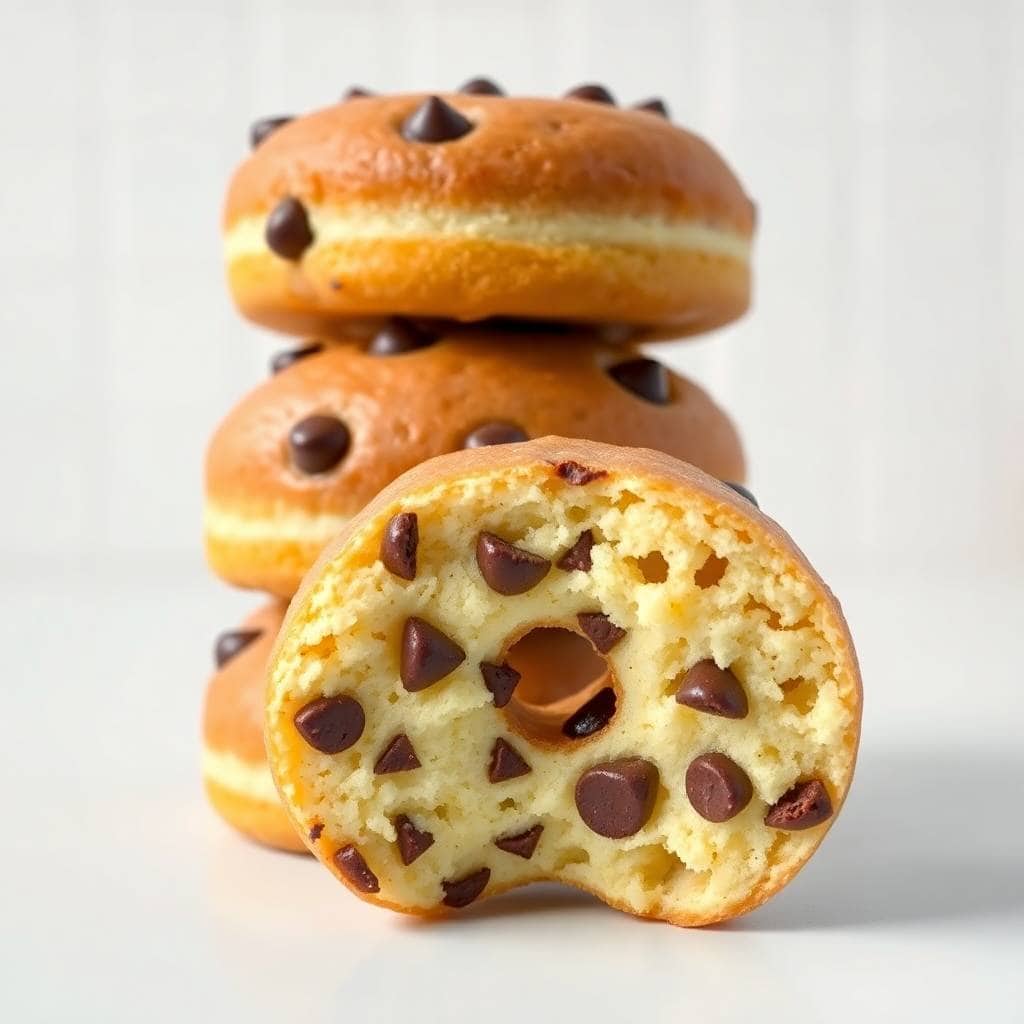
Why You'll Love This Recipe
- Ready in under 30 minutes: From the moment I start measuring flour to the moment the donuts hit the wire rack, this is a 25–28 minute operation. The batter takes maybe 8 minutes to mix, and the donuts bake in 10–12. On mornings when I don't have time for anything elaborate, this is the recipe I reach for.
- No frying, no hot oil: I've made fried donuts exactly once. The cleanup took longer than the baking, the oil smelled up the kitchen for hours, and two of them were undercooked in the middle. Baked donuts skip all of that. The oven does the work and the result is a softer, lighter texture that I actually prefer.
- Basic pantry ingredients: There's nothing in this recipe that requires a special trip to the store. Flour, sugar, egg, butter, buttermilk, vanilla, baking powder, baking soda — I have all of this in my kitchen at almost all times. The mini chocolate chips are the only thing you might need to grab, and they're at every grocery store.
- Kids can help: The mixing is simple enough that even young kids can do it. Zainab likes to fold in the chocolate chips herself, which she takes very seriously. It's become a Saturday morning thing in our house — she measures, I supervise, and we both eat warm donuts about 25 minutes later.
- Completely customizable: The base batter is mild enough to take a glaze, a dusting of powdered sugar, a drizzle of melted chocolate, or nothing at all. I've made these plain, I've dipped them in a quick powdered sugar glaze, and once I rolled them in cinnamon sugar while still warm. All three versions went fast.
Ingredients
- 1 cup all-purpose flour
- ⅓ cup granulated sugar
- 1 teaspoon baking powder
- ¼ teaspoon baking soda
- ¼ teaspoon salt
- ½ cup buttermilk (see note below if you don't have it)
- 1 large egg
- 2 tablespoons melted butter
- 1 teaspoon vanilla extract
- ½ cup mini chocolate chips
- Optional: powdered sugar, glaze, or cinnamon sugar for topping
No buttermilk? Mix ½ cup regular milk with ½ teaspoon white vinegar or lemon juice, stir, and let it sit for 5 minutes. It works exactly the same way and I've done this plenty of times.
Directions
- Preheat and prep the pan: Preheat your oven to 350°F (175°C). Grease a 6-cavity donut pan thoroughly with cooking spray or softened butter, making sure to get into the center tube. A well-greased pan is the difference between donuts that pop out cleanly and ones that stick and tear.
- Mix the dry ingredients: In a large bowl, whisk together the flour, sugar, baking powder, baking soda, and salt. Whisking the dry ingredients together first means the leavening distributes evenly so all six donuts rise the same way.
- Mix the wet ingredients: In a separate bowl, whisk the buttermilk, egg, melted butter, and vanilla extract until smooth and combined. Make sure your melted butter has cooled slightly — if it's too hot it can start to cook the egg when they meet.
- Combine and fold: Pour the wet ingredients into the dry ingredients and stir until just combined. The batter will look a little lumpy and that's fine — stop mixing the moment you don't see dry streaks. Overmixing is the main reason baked donuts turn out dense. Fold in the mini chocolate chips with a spatula using two or three gentle turns.
- Fill the donut pan: Spoon the batter into a zip-top bag or piping bag, snip off a small corner, and pipe it into the donut cavities filling each about ¾ full. You can also use a spoon, but the bag gives you more control and less mess. I've done both — the bag is faster.
- Bake: Bake for 10–12 minutes until the tops are lightly golden and a toothpick inserted into the thickest part comes out clean. Don't open the oven before the 10-minute mark. Let the donuts cool in the pan for 5 minutes before turning them out onto a wire rack — they firm up during those 5 minutes and release cleanly.
Tips for Success
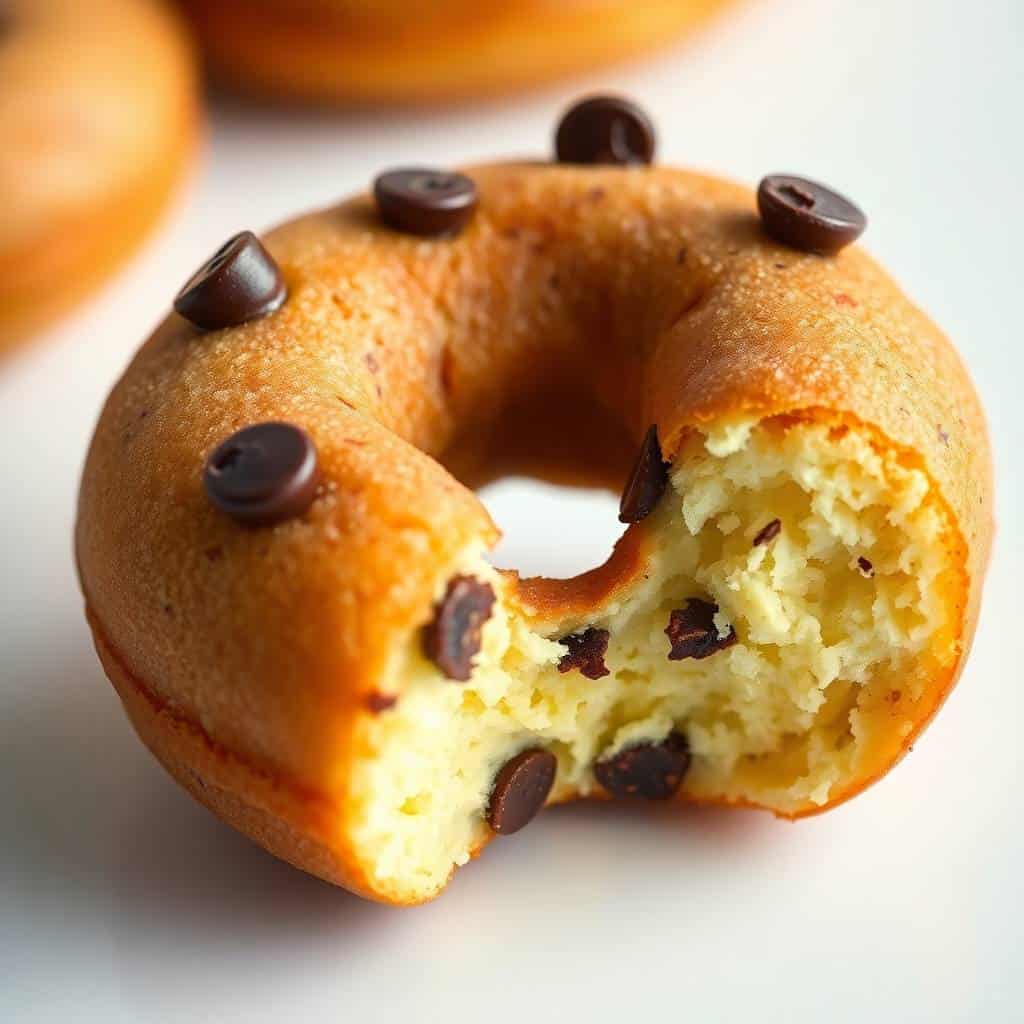
- Don't overmix the batter: I ruined my first batch by stirring until the batter was perfectly smooth because that's what I do with most batters. These donuts came out rubbery and flat. With quick breads and donut batters, lumps are your friend — they mean you haven't overdeveloped the gluten. Stir until the flour just disappears and then stop.
- Use mini chocolate chips, not regular ones: I tried this with regular-sized chocolate chips once and most of them sank to the bottom of the cavities during baking. Mini chips are light enough to stay distributed through the batter. You get chocolate in every bite instead of a clump at the base.
- Let your butter cool before adding it: Melted butter poured directly from the pan into your wet ingredients while it's still very hot can scramble the egg slightly, which affects the texture. I melt mine first and let it sit for about 5 minutes while I measure out the dry ingredients. That's usually enough time for it to cool down.
- Grease the pan generously: Donut pans have more surface area than muffin cups because of the center tube, and if any spot is under-greased the donut will stick right there. I use cooking spray and go over the whole pan twice, including the center posts. Takes ten seconds and saves a lot of frustration.
- Cool before glazing: If you want to add a powdered sugar glaze or dip these in chocolate, wait until the donuts are fully cool — not just warm, actually cool. I've tried glazing warm donuts and the glaze slides right off and pools on the rack. Give them at least 15 minutes on the wire rack first.
Variations
- Simple powdered sugar glaze: Mix 1 cup powdered sugar with 2–3 tablespoons of milk and a drop of vanilla extract until you get a thick but pourable glaze. Dip the top of each cooled donut and let it set on the wire rack for a few minutes. This is the version I make most often — it takes about 3 minutes and makes the donuts look like they came from a bakery.
- Cinnamon sugar coating: Mix ¼ cup granulated sugar with 1 teaspoon cinnamon. While the donuts are still slightly warm (not hot), brush them lightly with melted butter and roll them in the cinnamon sugar. This is what I do when I want something that tastes like a churro-donut hybrid. Saad went through four of these in one sitting.
- White chocolate or butterscotch chips: Swap the mini chocolate chips for white chocolate chips or butterscotch chips. The batter is mild enough that both work really well. If you like the combination of chocolate flavors, try my peanut butter chocolate chip scones — same kind of mix-in flexibility with a different texture entirely.
- Banana chocolate chip: Replace 3 tablespoons of the buttermilk with 3 tablespoons of mashed ripe banana. It adds a subtle banana flavor and a little extra moisture. This is not an authentic recipe variation — it's just something I tried when I had a very ripe banana on the counter and it worked out well.
- Dairy-free version: Use any plant-based milk (oat milk works well here) with a teaspoon of vinegar in place of buttermilk, and swap the butter for melted coconut oil. The texture is slightly different — a little less rich — but the donuts still bake up soft and the chocolate chips carry the flavor. I've made this for a friend who can't do dairy and she kept the recipe.
Serving and Storage
Serving
These donuts are best eaten the same day, still slightly warm or at room temperature. In our house they get eaten with a glass of cold milk for the kids and a cup of strong tea for me. If you're serving them for a morning gathering, dust them with powdered sugar right before putting them out — it looks nice and takes five seconds. They pair well with coffee too, which is why I sometimes make them when we have people over for a weekend brunch alongside something savory.
Storage
Store in an airtight container at room temperature for up to 3 days. After day one they lose a little of their softness, but 10 seconds in the microwave brings them back almost perfectly. To freeze, wrap each donut individually in plastic wrap and put them in a zip-top freezer bag — they'll keep for up to a month. Reheat from frozen in the microwave for 20–25 seconds. Don't add glaze before freezing; add it fresh after reheating.

Frequently Asked Questions
Do I really need a donut pan, or can I use something else?
You need a donut pan to get the ring shape. If you don't have one, a standard muffin pan works — you'll get domed chocolate chip muffins instead, which taste identical. Bake them at the same temperature but add 2–3 minutes to the baking time and check with a toothpick. A basic 6-cavity donut pan runs about $10–12 at Walmart and is worth having if you plan to make these more than once.
Can I make these ahead of time?
Yes. I often bake them the night before and store them in an airtight container at room temperature. The next morning I microwave them for about 10 seconds and they're soft again. If you're adding a glaze, do that fresh on the day you're serving them — glaze made the night before can get sticky and weird by morning.
Can I use regular chocolate chips instead of mini?
You can, but mini chips really do work better here. Regular chips are heavier and tend to sink to the bottom of the donut cavities while baking. Mini chips stay suspended through the batter, so you get chocolate throughout instead of a concentrated clump at the base. I've tested both and the mini chip version is noticeably better.
How do I make a simple glaze for these?
Mix 1 cup of powdered sugar with 2–3 tablespoons of milk and a drop of vanilla extract. Stir until smooth — it should be thick enough to coat a spoon but thin enough to drip slowly. Dip the top of each fully cooled donut into the glaze and set on a wire rack. If you want a chocolate glaze, melt a handful of chocolate chips with a teaspoon of butter and dip the same way.
Can I freeze baked chocolate chip donuts?
Yes, and they freeze well. Wrap each cooled donut individually in plastic wrap, then put them all in a zip-top freezer bag. They'll keep for up to a month. To reheat, microwave one unwrapped donut for 20–25 seconds from frozen. Freeze them plain without any glaze or topping — add that after reheating.

BAKED CHOCOLATE CHIP DONUTS
Ingredients
- 1 cup all-purpose flour
- ⅓ cup granulated sugar
- 1 teaspoon baking powder
- ¼ teaspoon baking soda
- ¼ teaspoon salt
- ½ cup buttermilk
- 1 large egg
- 2 tablespoons melted butter
- 1 teaspoon vanilla extract
- ½ cup mini chocolate chips
Instructions
Preheat the Oven:
- Preheat oven to 350°F (175°C). Lightly grease a donut pan with cooking spray or butter.
Mix the Dry Ingredients:
- In a large bowl, whisk together flour, sugar, baking powder, baking soda, and salt.
Combine Wet Ingredients:
- In another bowl, whisk together buttermilk, egg, melted butter, and vanilla extract until well combined.
Make the Batter:
- Pour the wet ingredients into the dry ingredients. Stir until just combined. Fold in the mini chocolate chips gently.
Fill the Donut Pan:
- Spoon the batter into a piping bag or zip-top bag. Snip off the tip and pipe the batter into the prepared donut pan, filling each cavity about ¾ full.
Bake:
- Bake for 10–12 minutes or until a toothpick inserted into a donut comes out clean. Allow to cool in the pan for 5 minutes before transferring to a wire rack.
Notes
- Storage: Store in an airtight container at room temperature for up to 3 days.
- Make Ahead: Donuts can be frozen and reheated in the microwave for a quick treat.
- Gluten-Free Option: Use a 1:1 gluten-free flour substitute.
- Add-ins: Try adding chopped nuts or replacing chocolate chips with white or dark chocolate.
I've made a lot of baked goods on this site and these donuts have become one of the recipes I come back to most consistently. They're not complicated, they don't require anything special, and they're done before the morning really gets going. The buttermilk gives them a slight tang that keeps them from being one-dimensionally sweet, and the chocolate chips do the rest of the work.
If you're in a chocolate mood and want something a little more indulgent after these, my German chocolate cupcakes are worth the extra effort — they're a weekend project rather than a weekday scramble, but the payoff is real. And if you want another quick chocolate fix that goes in a totally different direction, my chocolate fudge dessert pizza is exactly as over-the-top as it sounds.
These baked chocolate chip donuts are the kind of recipe that earns a permanent spot in your rotation not because it's flashy, but because it works every time and takes almost no effort. Make a double batch. Trust me on that one. 🍩✨
If you liked these, here are a few more recipes you might want to try next:
- Easy Blueberry Muffins — same quick-batter formula, ready in about the same time
- Peanut Butter Chocolate Chip Scones — for when you want something a little more substantial with your morning coffee
- German Chocolate Cupcakes — a proper weekend baking project when you want something impressive
- Chocolate Fudge Dessert Pizza — wildly fun and genuinely delicious





Comments
No Comments