
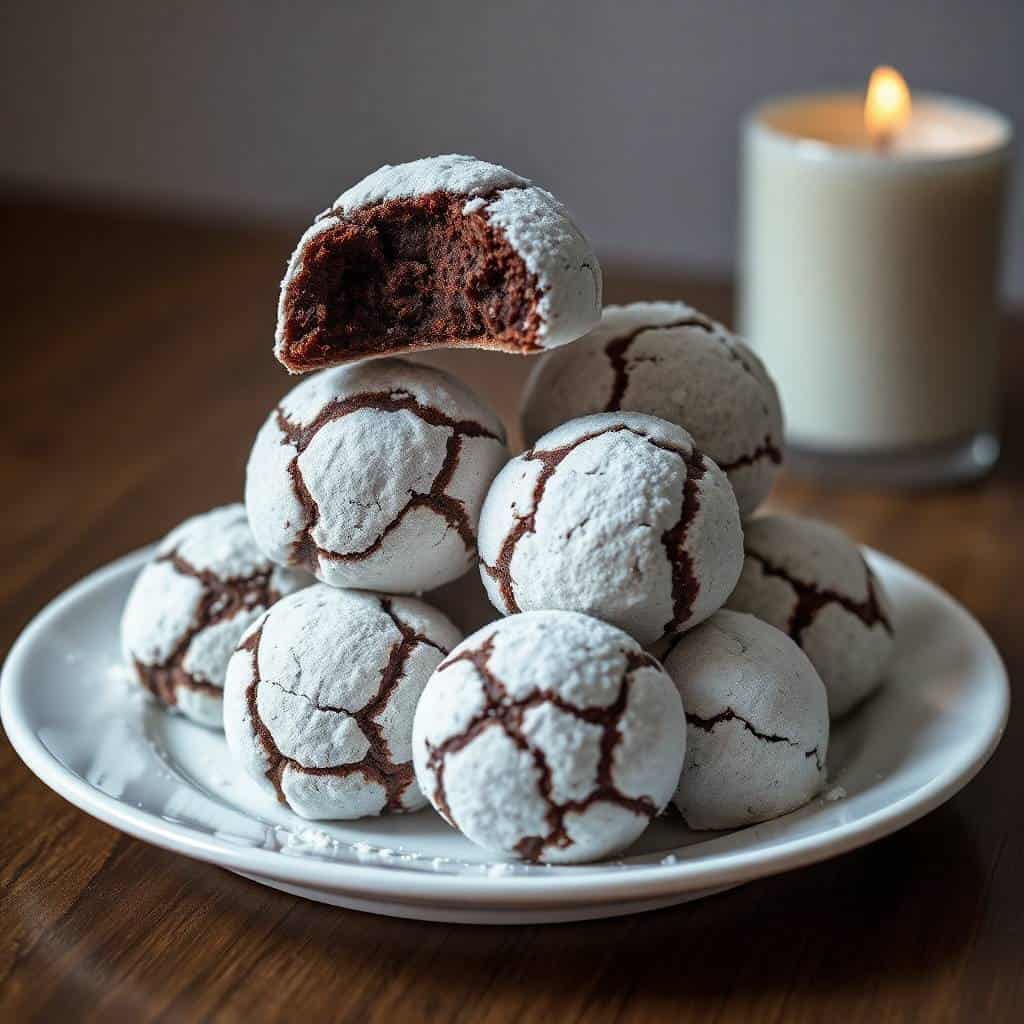
Every December, I make at least three or four different cookies for the holidays, and these chocolate snowball cookies are always the first to disappear off the tray. I started making them a few years back when I wanted something that looked snowy and festive without requiring me to do any piping or decorating — because honestly, my royal icing skills are a disaster. These little powdered sugar-rolled cocoa balls looked impressive with zero effort, and that was enough to make me fall for them completely.
What makes this recipe work is the double roll in powdered sugar — once while they're slightly warm, and once after they've cooled completely. The first coat sort of melts into the surface and gives a thin base layer. The second coat is what gives you that proper snowy look. I figured this out after my first batch came out looking pale and streaky instead of properly white. Skip the double roll and they just don't look right.
Zainab is the one who requests these every year without fail. She loves anything with chocolate and powdered sugar together, and these tick both boxes for her. I usually make a double batch because a single batch of about 30 cookies sounds like a lot until my husband finds the container and starts eating them with his evening chai. They also make a genuinely nice gift — a little box of these tied with ribbon is one of my go-to holiday presents for neighbors and teachers.
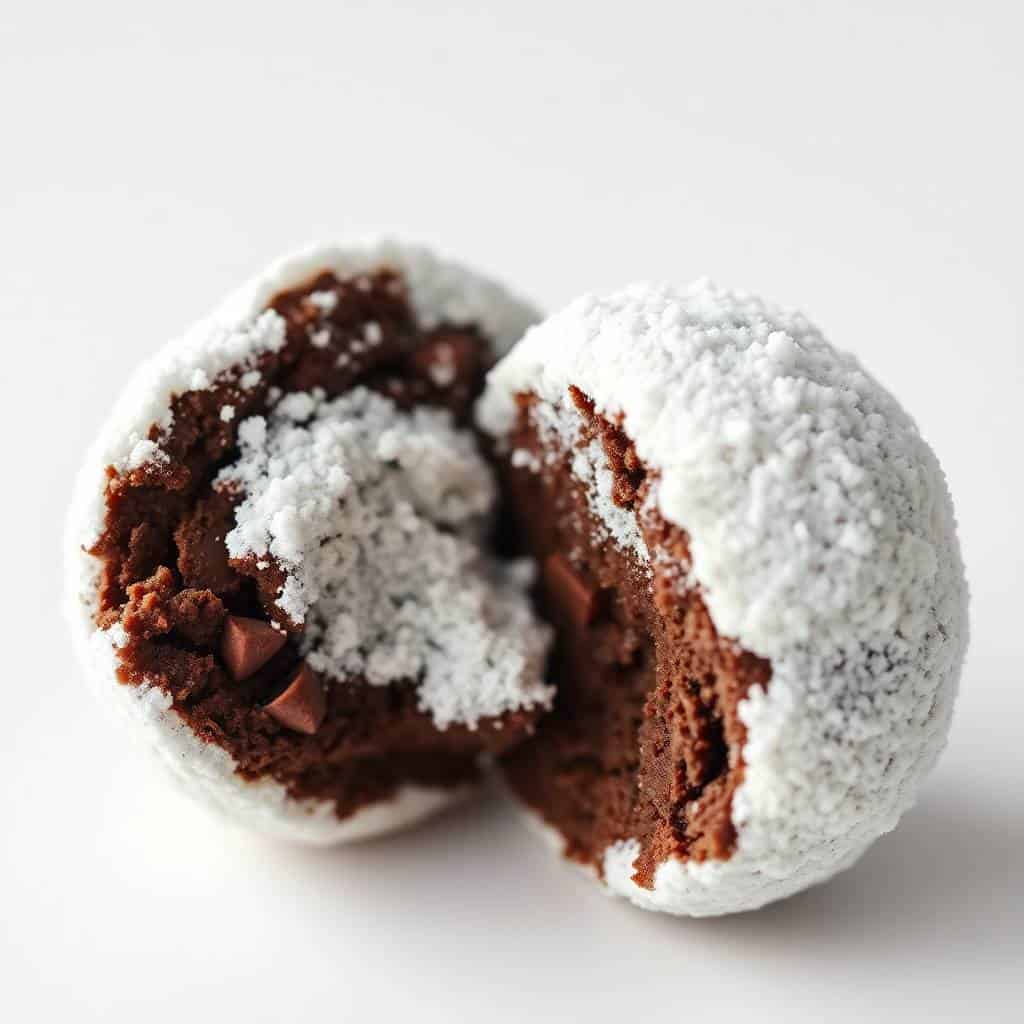
One thing to set expectations on: these are not your typical crisp, snappy cookies. They're tender and crumbly, almost shortbread-like, and they melt when you bite into them. If you're looking for something chewy, this isn't it. But if you want a rich, buttery, chocolate cookie that practically dissolves on your tongue — that's exactly what these are. If you enjoy holiday baking, you might also love my Easter Candy Fudge once the season shifts — it uses the same simple pantry-staple approach.
Why You'll Love This Recipe
- No decorating required: The powdered sugar coating does all the work visually. You don't need any piping bags, food coloring, or decorating skills — just roll them in sugar and they look like little snowballs straight out of a winter scene. I've brought these to holiday parties and gotten more compliments on them than cookies I spent twice as long decorating.
- They hold up well over several days: Unlike some cookies that go stale or lose their texture by day two, these actually taste better on day two and three once the flavors have settled. I bake them two days before I need them and they're genuinely at their best by then. That makes holiday planning so much easier.
- Pantry-friendly ingredients: Everything in this recipe — butter, cocoa powder, flour, powdered sugar, vanilla — is something I almost always have on hand. No special trip to a specialty store, no unusual ingredients. I've made these on a whim on Christmas Eve when I realized I hadn't baked enough, and everything I needed was already in my kitchen.
- A chocolate version of a classic: The original Mexican wedding cookie or Russian tea cake is already delicious, but adding cocoa powder takes it somewhere deeper and more interesting. The chocolate flavor isn't loud or intense — it's subtle and rich, which works perfectly with the sweet powdered sugar coating.
- Great for gifting: These stack and travel well, which not all cookies do. Layer them in a tin with wax paper between layers and they arrive looking exactly as they did when you packed them. I've mailed these to family during the holidays and they survived the trip beautifully.
Ingredients
- 1 cup unsalted butter, softened to room temperature
- ½ cup powdered sugar, plus more for rolling (you'll use about 1½ cups total for rolling)
- 1 teaspoon vanilla extract
- 1¾ cups all-purpose flour
- ¼ cup unsweetened cocoa powder
- ¼ teaspoon salt
- ¾ cup finely chopped nuts — walnuts or pecans work best (see nut-free note in variations)
Directions
- Make the dough: Preheat your oven to 350°F (175°C). In a large bowl, cream together the softened butter and powdered sugar until smooth and combined — this only takes about a minute by hand with a wooden spoon. Mix in the vanilla extract.
- Add the dry ingredients: In a separate bowl, whisk together the flour, cocoa powder, and salt. Gradually add this dry mixture to the butter mixture, stirring until a soft dough forms. Fold in the chopped nuts. The dough will feel slightly crumbly but should hold together when you press it.
- Chill the dough: Cover the bowl with plastic wrap and refrigerate for at least 30 minutes. This step isn't optional — cold dough holds its round shape in the oven, whereas warm dough tends to spread and flatten.
- Shape the cookies: Roll the dough into 1-inch balls using your palms. Place them about 1 inch apart on a baking sheet lined with parchment paper. They won't spread much, but give them a little room anyway.
- Bake: Bake for 10–12 minutes, until the cookies are set but still look slightly underdone on top. They should not brown. They'll look a little underbaked when you pull them — that's right. They firm up as they cool.
- First sugar coat: Let the cookies cool on the pan for 5 minutes, then roll them in powdered sugar while still slightly warm. Set them on a wire rack to finish cooling completely.
- Second sugar coat: Once fully cooled, roll each cookie in powdered sugar a second time. This is what gives them that properly white, snowy look. Don't skip this step.
Tips for Success
- Your butter must be properly softened: Cold butter won't cream smoothly and you'll end up with a lumpy dough that's hard to roll into neat balls. Leave it out for at least an hour before you start, or set it near a warm oven for 20–30 minutes. It should feel like soft clay — if you press a finger in, it leaves an indent easily but doesn't feel greasy or melted.
- Don't skip chilling the dough: The first time I made these, I was impatient and skipped the chill. The cookies spread and flattened in the oven and came out looking more like chocolate discs than snowballs. Thirty minutes in the fridge makes all the difference — the dough becomes easier to roll and the cookies hold their shape during baking.
- Pull them out before they look done: These cookies don't brown the way other cookies do — the cocoa makes it impossible to tell by color. Go by time and by feel: 10–12 minutes, and when you tap the top lightly, they should feel just set but not hard. Overbaking dries them out and you lose that melt-in-your-mouth texture that makes them special.
- Chop your nuts finely: Big chunks of nut can make it hard to roll the dough into smooth balls and can poke through the surface awkwardly. I run mine through a quick round in a food processor, or chop them very finely by hand on a cutting board. The smaller the pieces, the more evenly they distribute through the dough and the smoother your cookies come out.
- Use fresh powdered sugar for rolling: If your powdered sugar has been sitting in the back of the pantry for a while and has clumps, sift it before rolling. Clumpy sugar doesn't coat evenly and you'll end up with patchy cookies. I keep a small fine-mesh sieve just for this — nothing fancy, any cheap one from the dollar store works.
Variations
- Nut-free version: Leave the nuts out completely and swap in mini chocolate chips instead — about ½ cup works well. This is what I do when I'm bringing these somewhere and I'm not sure about nut allergies. The mini chips distribute evenly and add little pockets of melted chocolate inside each cookie. Shredded coconut is another option if you want texture without nuts.
- Mocha version: Add 1 teaspoon of instant espresso powder to the dry ingredients before mixing. It doesn't make these taste like coffee — it deepens the chocolate flavor significantly, the same way a small amount of coffee enhances chocolate cake. My husband prefers this version and I honestly think it's the best one.
- Peppermint chocolate: Add ½ teaspoon of peppermint extract to the dough in place of part of the vanilla. Once you roll them in powdered sugar the second time, press a tiny bit of crushed candy cane on top. These are genuinely festive and taste like a peppermint patty in cookie form — Zainab goes absolutely wild for this version around Christmas.
- Spiced chocolate: Mix in ½ teaspoon of cinnamon and a tiny pinch of cayenne pepper with the dry ingredients. This is a Mexican chocolate-style variation — warm, slightly spicy, with the chocolate coming through underneath. It's not sweet-spicy, more like a gentle warmth at the back of your throat. I serve these alongside something rich like Buttermilk Pecan Pralines for a dessert spread that covers a lot of different flavor notes.
- Orange zest: Add 1 teaspoon of fresh orange zest to the dough. Chocolate and orange is a combination that doesn't get enough credit — the citrus cuts through the richness of the cocoa in a way that makes these feel a little more grown-up. I've brought these to dinner parties and they always prompt questions about what's different about them.
Serving and Storage
Serving
These are best served at room temperature — straight from the fridge they can feel a little dense and the flavors are muted. Set them out 15–20 minutes before serving. They go beautifully alongside hot cocoa, a strong cup of chai, or black coffee. For holiday presentations, I line a small tray or tin with parchment, arrange the cookies in a single layer, and add a light extra dusting of powdered sugar right before serving so they look fresh and snowy. For gifting, I layer them in a box with wax paper between layers — they travel well and the powdered sugar stays mostly intact.
Storage
Store in an airtight container at room temperature for up to 1 week. Separate layers with wax paper so the powdered sugar coating doesn't stick or clump. They actually taste better on day two and three, so don't feel like you need to rush through them. To freeze, lay them flat on a baking sheet first until solid, then transfer to a zip-lock freezer bag — they'll keep for up to 2 months. Thaw at room temperature for about 30 minutes and give them a light re-roll in powdered sugar if the coating has absorbed during freezing.

Frequently Asked Questions
Can I make these ahead of time?
Yes, and I actually recommend it. These cookies keep well for up to a week at room temperature in an airtight container, and the flavor improves after the first day. You can also freeze the baked cookies for up to 2 months — thaw them at room temperature and do a quick second roll in powdered sugar before serving to freshen them up.
Why do you roll them in sugar twice?
The first roll happens while the cookies are still slightly warm, which means the powdered sugar partially melts into the surface and creates a thin base layer that sticks well. The second roll after they've fully cooled is what gives them the thick, white, snowy appearance. I learned the hard way that one roll alone always looks sparse and uneven.
What if I don't want to use nuts?
Skip them entirely or swap in ½ cup of mini chocolate chips or shredded coconut. The cookies work fine without nuts — the texture is slightly softer but still good. Mini chocolate chips are my go-to substitute because they keep the chocolate theme going and add little melty pockets inside each cookie.
Are these cookies supposed to be soft inside?
Yes. The inside should be tender and almost crumbly — that melt-in-your-mouth quality is exactly what you're going for. If yours come out hard or dry, they were likely overbaked. Pull them at 10–12 minutes even if they look slightly underdone on top. They firm up as they cool on the pan.
Can I chill the dough overnight?
Absolutely. I often make the dough the night before and bake in the morning. If the dough has chilled overnight it will be quite firm straight from the fridge — let it sit at room temperature for 10–15 minutes before rolling so it's pliable enough to work with without cracking.

CLASSIC CHOCOLATE SNOWBALL COOKIES
Ingredients
- 1 cup unsalted butter softened
- ½ cup powdered sugar plus more for coating
- 1 teaspoon vanilla extract
- 1 ¾ cups all-purpose flour
- ¼ cup unsweetened cocoa powder
- ¼ teaspoon salt
- ¾ cup finely chopped nuts walnuts or pecans work best
Instructions
Make the Dough:
- Preheat your oven to 350°F (175°C). In a large bowl, cream together the softened butter and powdered sugar until smooth. Mix in vanilla.
Add the Dry Ingredients:
- In a separate bowl, whisk together flour, cocoa powder, and salt. Gradually add the dry mixture to the butter mixture until fully combined. Fold in the chopped nuts.
Shape the Cookies:
- Roll the dough into 1-inch balls and place them about 1 inch apart on a baking sheet lined with parchment paper.
Bake:
- Bake for 10–12 minutes or until set but not browned. Let cool for 5 minutes on the baking sheet.
Coat with Sugar:
- While still slightly warm, roll the cookies in powdered sugar. Let cool completely and roll in sugar a second time for a snowy finish.
Notes
Store in an airtight container at room temperature for up to 1 week. These cookies also freeze well for up to 2 months. Nut-Free Option:
Skip the nuts or substitute with mini chocolate chips or shredded coconut for a different flavor. Holiday Tip:
Use festive mini paper cups and serve on a holiday tray for gifting or parties.
These chocolate snowball cookies have quietly become one of my most-made holiday recipes over the past few years. I love that they look like they took effort — people always comment on how pretty and festive they are — but the actual process is genuinely straightforward. Cream the butter, add the dry ingredients, chill, roll, bake, sugar. That's really it. No special equipment, no complicated technique. I make them on a regular sheet pan with parchment and a wooden spoon and they come out exactly right every time.
What I keep coming back to is how versatile the base recipe is. Once you've made it once, you can take it in so many directions depending on what you feel like — the mocha version with espresso powder, the peppermint version for Christmas, the spiced version with cinnamon and cayenne. The foundation is solid enough that it handles variations well. If you're putting together a full holiday dessert spread, these pair really nicely alongside something like Strawberry Shortcake Trifles for something lighter and fruity, or next to my Copycat Little Debbie Valentine Cakes if you're going full indulgent.
If you make these, the one thing I'd ask you to do is not skip the double sugar roll. I know it sounds like an extra step, but that second coat after cooling is what takes them from looking homemade-rustic to looking genuinely snowy and beautiful. It's thirty extra seconds of work and it matters. Make a batch, set them out, and watch them vanish. 🍪❄️
If you enjoyed baking these, here are a few more recipes from my kitchen you might want to try next:
- Easter Candy Fudge — simple, colorful, and uses just a few pantry ingredients
- Buttermilk Pecan Pralines — rich, caramel-y, and made for nut lovers
- Copycat Little Debbie Valentine Cakes — a fun nostalgic bake that my kids go crazy for
- Strawberry Shortcake Trifles — easy layered dessert that looks beautiful on a table
- Cheesy Thumbprint Appetizers with Hot Pepper Jelly — if you want something savory to balance out all this sweetness





Comments
No Comments