
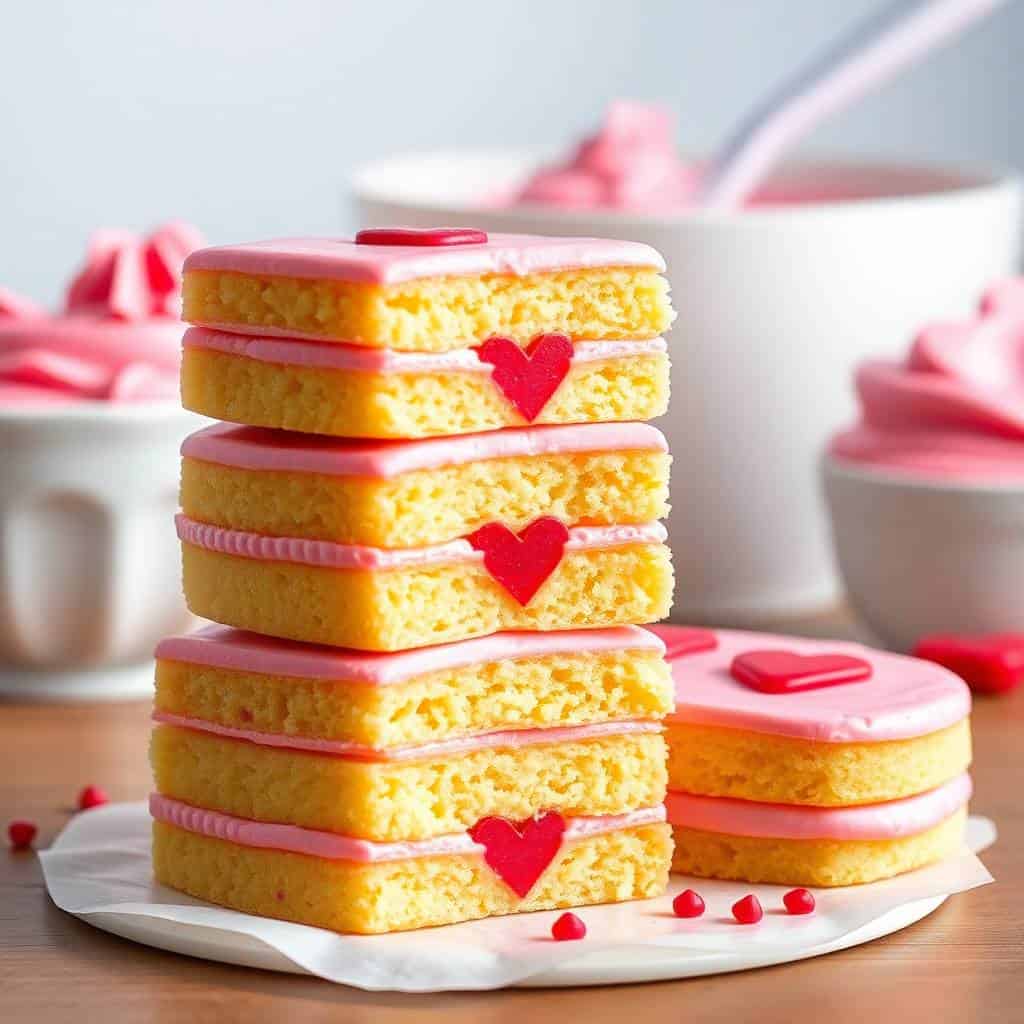
Every February, Little Debbie Valentine Cakes start showing up at checkout lines and I watch my kids lose their minds over that pink icing. Saad will spot them from across the store. I finally decided to figure out how to make them at home — and after a few test batches, I landed on a version that's actually better than the box.
What makes these work is the red velvet base — real cocoa powder, a touch of vinegar, a good hit of red food coloring. It gives you that soft, slightly fudgy crumb that holds together when you sandwich it with the vanilla buttercream filling. The pink icing on top sets up glossy and firm, just like the original. I'm not claiming this is some fancy patisserie creation — it's a copycat snack cake, and that's exactly what it should be.
I make a double batch every Valentine's week because one batch disappears before I've even finished icing the second half. Saad takes some to school, Zainab saves hers in the fridge and eats them cold the next morning, and my husband somehow always finds the ones I set aside for photos. If you're looking for something sweet to make around the holidays, I also love this Classic Creamy Chocolate Mousse — it's a nice contrast if you want something lighter alongside these cakes.
One thing I'll tell you upfront: let the cakes cool completely before you touch them. I got impatient the first time and the buttercream slid right off the warm cake and pooled on the plate. Not a disaster, but not the look we're going for. Give them at least 45 minutes on a wire rack — an hour is better.
Why You'll Love This Recipe
- Real red velvet flavor: This isn't just vanilla cake dyed pink — it has cocoa powder, buttermilk, and white vinegar, which is what actually gives red velvet its signature tang and tenderness. I was surprised how much the cocoa and vinegar combination changes the texture. It's subtler than chocolate cake but richer than plain white, and it makes these taste noticeably closer to the real thing than plain vanilla batter would.
- Vanilla buttercream that actually holds: The filling uses softened butter, powdered sugar, a splash of heavy cream, and vanilla — and it whips up thick enough to stay put inside the sandwich without squishing out the sides. I've made fillings with cream cheese before (and you can here too), but the pure butter version sets firmer and slices cleaner.
- That glossy pink icing: Powdered sugar, a little milk, vanilla, and a few drops of red or pink food coloring. It goes on smooth and sets up with a slight shell, just like the store-bought version. You can adjust the shade however you like — I usually do a soft pink, but Zainab once convinced me to go full hot pink and honestly it looked great.
- Approachable for any skill level: You don't need a stand mixer, a piping bag, or any special equipment. I use a hand mixer, a regular 8x8 pan or a mini muffin tin, and a butter knife for spreading. The steps are simple and sequential — bake, cool, fill, ice, decorate.
- Festive without being fussy: Heart-shaped sprinkles on top, pink icing, little rectangle sandwiches — they look like you put in a lot of effort even though the actual active time is maybe 30 minutes. I've sent these in Saad's lunchbox and brought them to a Valentines Day gathering, and both times people asked for the recipe.
Ingredients
- For the Cake:
- 1 ¼ cups all-purpose flour
- ¼ cup unsweetened cocoa powder
- ½ teaspoon baking soda
- ½ teaspoon baking powder
- ¼ teaspoon salt
- ½ cup buttermilk (see FAQ for a quick substitute if you don't have any)
- 1 large egg
- ½ cup granulated sugar
- ¼ cup brown sugar
- ½ cup vegetable oil
- 1 tablespoon red food coloring (gel food coloring works better than liquid here)
- 1 teaspoon vanilla extract
- 1 teaspoon white vinegar
- For the Filling and Frosting:
- ½ cup unsalted butter, softened (leave it out 20 minutes before you start)
- 1 ½ cups powdered sugar
- 1 teaspoon vanilla extract
- 2 tablespoons heavy cream or milk
- For the Pink Icing:
- 1 cup powdered sugar
- 2 tablespoons milk
- 1 teaspoon vanilla extract
- Red or pink food coloring, a few drops at a time until you reach your shade
- Heart-shaped sprinkles for decoration
Directions
- Preheat the oven: Set your oven to 350°F (175°C). Line a mini muffin tin or small individual cake pans with liners, or grease an 8x8-inch baking pan if you're going the rectangle route. Both work — the mini muffin tin gives you rounder little cakes, the 8x8 lets you cut clean rectangles closer to the original shape.
- Make the cake batter: In a large bowl, whisk together the flour, cocoa powder, baking soda, baking powder, and salt. In a separate bowl, beat together the egg, granulated sugar, brown sugar, oil, buttermilk, red food coloring, vanilla, and white vinegar until everything is well combined. Gradually add the dry ingredients to the wet, stirring until just smooth — stop as soon as you don't see dry streaks.
- Bake: Fill your prepared pans about ¾ full with batter. Bake for 20–25 minutes, or until a toothpick inserted in the center comes out clean. Let the cakes cool completely in the pan before moving them — I usually wait about 10 minutes in the pan, then transfer to a wire rack for at least another 30–40 minutes.
- Prepare the filling and frosting: Beat the softened butter with a hand mixer until creamy and pale, about 2 minutes. Gradually add powdered sugar and beat it in, then add the vanilla and heavy cream. Keep beating until you get a fluffy, smooth frosting. If it's too stiff, add a tiny splash more cream. If it's too soft, add a bit more powdered sugar.
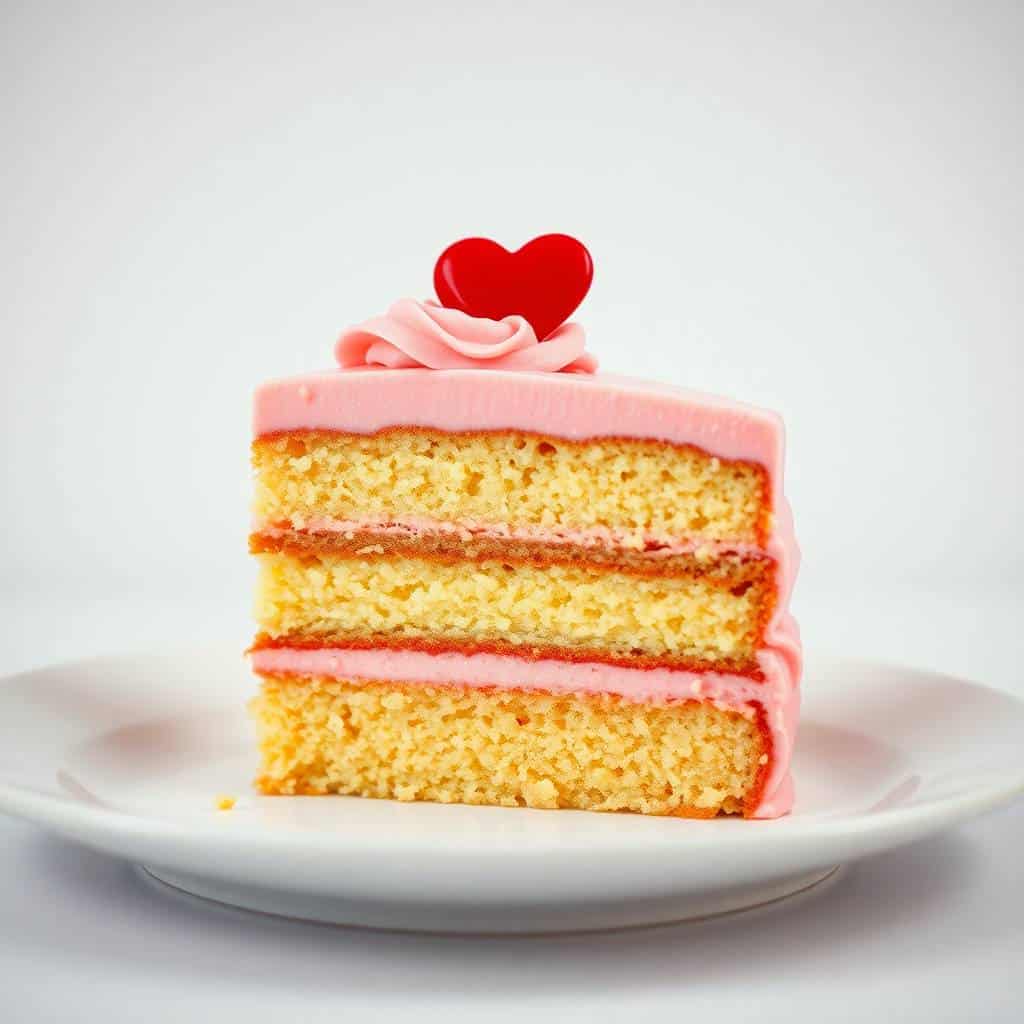
- Assemble the cakes: If your cakes domed on top, use a serrated knife to level them — a flat surface makes the sandwich stack much cleaner. Spread a generous layer of filling on one piece, then press another piece on top. If you're using an 8x8 pan, cut the cooled cake into rectangles first, then slice each rectangle horizontally to create the sandwich layers.
- Make the pink icing: Whisk together powdered sugar, milk, vanilla, and a few drops of red or pink food coloring in a small bowl. Add milk or powdered sugar a tiny bit at a time until it's smooth and spreadable — you want it thick enough to sit on top without running off, but thin enough to spread easily.
- Ice and decorate: Spread the pink icing over the top of each assembled cake. Add heart-shaped sprinkles before the icing sets. Let everything sit for about 15–20 minutes until the icing firms up before stacking or serving.
Tips for Success
- Use gel food coloring, not liquid: I tried this with regular liquid red food coloring my first batch and needed nearly three times as much to get a deep color — which messed with the batter consistency. Gel coloring (the kind that comes in little pots, available at Walmart or any grocery store near the baking supplies) gives you a vivid red with just one tablespoon and doesn't thin out the batter.
- Don't skip the vinegar: I know it sounds weird to add vinegar to cake batter, but it's a key part of what makes red velvet taste like red velvet. It reacts with the cocoa and the baking soda to give you a lighter crumb and that subtle tang. It's only a teaspoon — you won't taste it directly, but you'll notice if you skip it.
- Cool completely before filling: This is the tip I wish someone had told me on batch one. Even slightly warm cakes will melt your buttercream on contact — it goes greasy and slides around instead of staying put. I set a timer for 45 minutes and don't touch them until it goes off. If you're impatient (I usually am), pop them in the fridge for 20 minutes after they've reached room temperature.
- Level the tops before sandwiching: If your mini cakes domed up during baking, a flat slice with a serrated knife makes the whole thing stack properly. Domed tops mean wobbly sandwiches and uneven icing. Takes 30 seconds and makes a real difference in the final look.
- Add espresso powder to the batter: This is optional, but one teaspoon of instant espresso powder stirred into the dry ingredients deepens the cocoa flavor noticeably. You won't taste coffee — it just makes the chocolate come forward more. My husband started requesting it and now I always do it.
Variations
- Strawberry cream filling: Swap the vanilla buttercream for strawberry cream cheese frosting — just beat 4 oz of cream cheese with ½ cup powdered sugar, a tablespoon of strawberry jam, and a splash of vanilla. It's tangier than the original but my kids love this version. The fruity filling against the red velvet cake is genuinely really good.
- Heart-shaped cutouts: If you're baking in an 8x8 pan, you can use a heart-shaped cookie cutter on the cooled cake slab instead of cutting rectangles. You'll have more scraps, but the shape is adorable for a Valentine's Day table. Saad thought the scraps were the best part — they went straight into a bowl with some leftover frosting.
- White chocolate drizzle: Instead of (or in addition to) the pink icing, melt about ⅓ cup of white chocolate chips with a teaspoon of coconut oil in the microwave in 30-second bursts, stir until smooth, and drizzle it over the assembled cakes. Let it set at room temperature. It adds a creamy sweetness and looks really elegant for a gift box.
- Cream cheese filling: Replace the butter in the filling with 4 oz of softened cream cheese and reduce the powdered sugar to 1 cup. Beat until smooth, then add vanilla and a tablespoon of cream if needed. It's richer and tangier — a bit closer to actual red velvet cake frosting. If you like a less sweet filling, this is the way to go.
- Gluten-free version: I haven't personally tested this extensively, but a 1:1 gluten-free flour blend (like the one from Bob's Red Mill or the King Arthur measure-for-measure version available at most grocery stores) works reasonably well as a straight substitute. The texture is slightly denser but the flavor is still good. Worth trying if you're baking for someone with a gluten sensitivity.
Serving and Storage
Serving
These are good at room temperature or slightly chilled — I actually prefer them cold from the fridge because the filling firms up and the whole cake feels more structured. Serve them on a plate with a glass of cold milk or alongside a cup of tea. They work as a dessert, a lunchbox treat, or a Valentine's Day gift packed in a little box with tissue paper. In Pakistan we'd never have these as kids, but they're exactly the kind of sweet my kids grew up seeing at American birthday parties — and now they expect them every February.
Storage
Store assembled cakes in an airtight container at room temperature for up to 3 days. In the fridge, they'll keep for up to a week — the icing stays set and the cake stays moist. You can also freeze the unfrosted cake layers (wrapped individually in plastic wrap) for up to one month. Thaw overnight in the fridge, then fill, ice, and decorate the next day. Don't freeze the fully assembled cakes with icing — the icing doesn't hold up well to freezing and thawing.

Frequently Asked Questions
Can I make these cakes a day ahead?
Yes, and honestly they're better the next day once the filling has had time to set. Bake the cakes, let them cool, fill and assemble them, then cover and refrigerate overnight. Add the pink icing and sprinkles the morning you plan to serve them so the icing stays fresh and glossy.
I don't have buttermilk — what can I use instead?
Mix 1 tablespoon of white vinegar or lemon juice into ½ cup of regular milk, stir, and let it sit for 5 minutes. It curdles slightly and that's exactly what you want — it works as a direct substitute for buttermilk in this recipe. I've done this dozens of times when I've run out of buttermilk mid-recipe.
Can I freeze these cakes?
Freeze the unfrosted cake layers only, wrapped tightly in plastic wrap and then in foil. They'll keep for up to a month. Thaw in the fridge overnight, then bring to room temperature before filling and icing. I wouldn't freeze the fully assembled, iced cakes — the icing gets sticky and weepy after thawing.
My icing is too runny — how do I fix it?
Add powdered sugar a tablespoon at a time and whisk it in. Runny icing usually means there's too much milk relative to sugar. Go slowly — it thickens up fast and you can always add more milk if you overcorrect. The icing should be thick enough that it coats the back of a spoon and doesn't slide off immediately.
Can I use cream cheese in the filling instead of butter?
Absolutely. Use 4 oz of softened cream cheese in place of the butter, drop the powdered sugar to about 1 cup, and add vanilla and a splash of cream to loosen it up. It makes a tangier, slightly denser filling — closer to actual red velvet frosting. My husband prefers this version, while Saad likes the plain buttercream.

COPYCAT LITTLE DEBBIE VALENTINE CAKES
Ingredients
For the Cake:
- 1 ¼ cups all-purpose flour
- ¼ cup unsweetened cocoa powder
- ½ teaspoon baking soda
- ½ teaspoon baking powder
- ¼ teaspoon salt
- ½ cup buttermilk
- 1 large egg
- ½ cup granulated sugar
- ¼ cup brown sugar
- ½ cup vegetable oil
- 1 tablespoon red food coloring gel preferred
- 1 teaspoon vanilla extract
- 1 teaspoon white vinegar
For the Filling and Frosting:
- ½ cup unsalted butter softened
- 1 ½ cups powdered sugar
- 1 teaspoon vanilla extract
- 2 tablespoons heavy cream or milk
- Heart-shaped sprinkles for decoration
Instructions
Preheat the Oven:
- Preheat oven to 350°F (175°C). Line a mini muffin tin or small cake pans with liners.
Make the Cake Batter:
- In a bowl, whisk together flour, cocoa powder, baking soda, baking powder, and salt. In another bowl, beat egg, sugars, oil, buttermilk, food coloring, vanilla, and vinegar until combined. Gradually add dry ingredients and mix until smooth.
Bake:
- Fill prepared pans about ¾ full with batter. Bake for 20–25 minutes or until a toothpick inserted comes out clean. Let cool completely.
Prepare the Filling and Frosting:
- Beat butter until creamy. Gradually add powdered sugar, vanilla, and heavy cream. Beat until smooth and fluffy.
Assemble the Cakes:
- If cakes are domed on top, level them with a knife. Spread frosting on one cake layer, then sandwich with another. Frost the outside lightly.
Decorate:
- Top with heart-shaped sprinkles for a festive look.
Notes
- Make Ahead: Cakes can be baked and frosted a day ahead. Store covered at room temperature.
- Flavor Tips: Add a teaspoon of espresso powder to the cake batter for deeper chocolate flavor.
- Serving Ideas: Perfect for Valentine’s parties, school snacks, or cozy dessert nights.
- Storage Tips: Keep in an airtight container at room temperature for up to 3 days or refrigerate for up to 1 week.
I make these every February now without fail. What I like most is that they're genuinely close to the original — soft, a little fudgy, with that creamy center and the set pink icing on top — but they're made with real ingredients and they taste fresher. The cocoa and buttermilk combination in the cake does real work here. This isn't a recipe where you're compensating for something missing; it's actually a solid cake in its own right.
If you're in the mood for more chocolate, my Classic Creamy Chocolate Mousse is a good follow-up recipe to have in your back pocket — it comes together fast and feels impressive without a lot of fuss. And if you're cooking for a crowd that needs both sweet and savory on the table, we've got plenty of dinner options too — the Cheesy Sausage Potato Soup





Comments
No Comments