
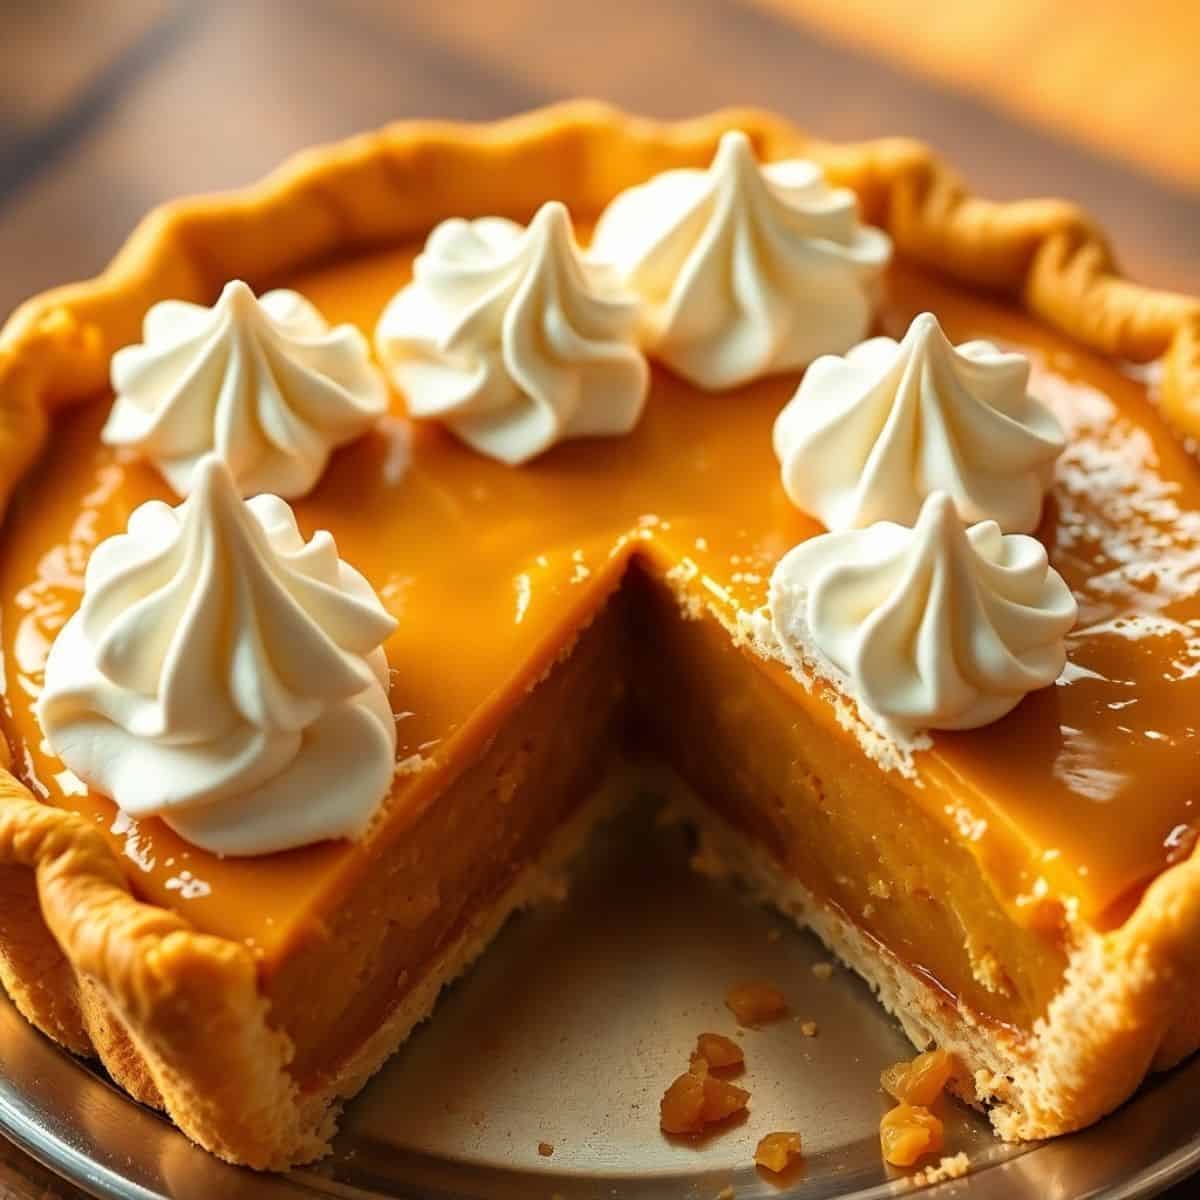
I have a thing for old-fashioned custard pies — the kind that take a little patience but pay off completely when you slice into them and the filling holds its shape, smooth and glossy. Butterscotch pie is one of those desserts I came to late, but now I make it more than almost anything else in the cool months. The filling is brown sugar cooked down with butter until it smells like caramel, then thickened with egg yolks into something that's genuinely a little magical.
What makes this version work is keeping the method simple. The filling comes together on the stovetop — no baking the custard, no water bath, no fuss. The hardest part is the tempering step, where you slowly whisk hot filling into your egg yolks before adding them back to the pan. I'll explain exactly why that matters in the tips section, because the first time I skipped it I ended up with scrambled egg in my butterscotch. That was a learning experience.
My husband is the one who originally asked me to figure out a butterscotch pie — he'd had one at a diner somewhere and kept talking about it. I made it three times before I got the filling texture right. Now it's what I bring when I need to bring something to a gathering, and it disappears faster than anything else on the table. If you enjoy this kind of old-fashioned dessert, my Mini Lemon Meringue Cheesecakes use a similar custard logic and are just as satisfying.
One thing to set expectations: this pie needs at least 4 hours in the refrigerator to set properly, so plan ahead. I usually make it the night before I need it. The whipped cream goes on right before serving — if you put it on too early it weeps a little. Small detail, but worth knowing.
Why You'll Love This Recipe
- Stovetop filling, no oven drama: The butterscotch custard is cooked entirely on the stovetop, which means you're not juggling oven temperatures or worrying about a water bath. Once your crust is pre-baked and cooled, the filling takes maybe 20 minutes of active stirring. It's straightforward work, and you can see exactly what's happening the whole time.
- Real butterscotch flavor: This isn't butterscotch flavoring from a packet — it's brown sugar and butter cooked together until they turn into something deeply caramel-like. The difference is noticeable. Dark brown sugar gives you a more intense flavor; light brown sugar is milder. I use dark and I'm glad I do.
- Make-ahead friendly: I make this pie the evening before I need it and it only gets better overnight. The filling firms up beautifully and the flavors deepen. When you're hosting dinner, having the dessert completely done the day before is genuinely stress-reducing.
- Works with store-bought or homemade crust: I'll be honest — on a weeknight I use a refrigerated store-bought pie crust from Walmart or Trader Joe's and it works completely fine. If you have time and want to make the crust from scratch, I've included that too. Either way the filling is the star.
- The whipped cream topping is dead simple: Three ingredients — heavy cream, powdered sugar, vanilla — beaten to stiff peaks. Zainab helped me with this part the last time I made it, and she was very proud of the result. No special equipment needed; a hand mixer or even a whisk and some effort works fine.
Ingredients
- For the Crust:
- 1 9-inch pie crust, pre-baked (store-bought refrigerated crust works great, or homemade — see note below)
- For the Butterscotch Filling:
- 1 cup packed brown sugar (dark brown for deeper flavor, light brown for milder)
- ⅓ cup cornstarch
- ½ teaspoon salt
- 3 cups whole milk
- 4 large egg yolks
- 1 teaspoon vanilla extract
- 3 tablespoons unsalted butter
- For the Whipped Cream Topping:
- 1 cup heavy whipping cream
- 2 tablespoons powdered sugar
- 1 teaspoon vanilla extract
Homemade Crust (if you want to make your own): Mix 1 ½ cups all-purpose flour with ½ teaspoon salt, cut in ½ cup chilled cubed butter until crumbly, add 4-5 tablespoons ice water one tablespoon at a time until dough forms. Refrigerate 30 minutes, roll out, fit into pie dish, pre-bake at 375°F (190°C) with pie weights for 15 minutes, then remove weights and bake another 10 minutes until golden.
Directions
- Start with a fully pre-baked, completely cooled crust. This is non-negotiable — if the crust is even slightly warm when you pour in the filling, it can make the bottom soggy. I usually bake my crust in the morning if I'm making the pie for that evening.
- Make the butterscotch base. In a medium saucepan, whisk together the brown sugar, cornstarch, and salt. Gradually whisk in the 3 cups of whole milk until the mixture is smooth with no dry lumps. Take your time here — if the cornstarch isn't fully mixed in before you turn on the heat, you can get clumps later.
- Cook until thickened. Place the saucepan over medium heat and stir constantly with a wooden spoon or silicone spatula, scraping the bottom of the pan as you go. The mixture will start to thicken slowly, then more quickly as it nears a boil. When it comes to a full boil, keep stirring and let it boil for exactly 1 minute, then pull it off the heat.
- Temper the egg yolks. In a small bowl, whisk your 4 egg yolks until smooth. Now slowly — and I mean slowly — ladle about ½ cup of the hot butterscotch mixture into the egg yolks while whisking constantly. This raises the temperature of the yolks gradually so they don't scramble. Once you've added about half a cup, whisk the tempered yolk mixture back into the saucepan.
- Return to heat and finish the filling. Put the saucepan back over medium heat and cook, stirring constantly, for another 2-3 minutes until the filling thickens again and just starts to bubble. Remove from heat and stir in the 3 tablespoons of butter and the vanilla extract until everything is completely smooth.
- Fill the crust and chill. Pour the butterscotch filling into your cooled pre-baked crust, smoothing the top with a spatula. Let it cool on the counter for about 20 minutes, then cover loosely with plastic wrap (don't press the wrap against the filling or you'll get a skin) and refrigerate for at least 4 hours, or overnight.
- Make the whipped cream right before serving. Beat the heavy cream, powdered sugar, and vanilla together with a hand mixer on medium-high speed until stiff peaks form — this takes about 3-4 minutes. Spread or pipe over the chilled butterscotch filling and serve immediately, or refrigerate for up to an hour before serving.
Tips for Success
- Don't skip the tempering step: The first time I made this, I poured the hot filling straight into the egg yolks without tempering — I figured it would be fine because I was stirring quickly. I ended up with yellow specks throughout my filling that were definitely cooked egg. It still tasted okay but looked wrong. Tempering takes an extra 90 seconds. Do it.
- Stir constantly and scrape the bottom: Cornstarch-thickened fillings want to stick and scorch on the bottom of the pan, especially once they start thickening. I use a silicone spatula rather than a whisk for the cooking stage because it does a better job of cleaning the pan's bottom edges. If you smell anything burning, get it off the heat immediately.
- Use whole milk, not low-fat: I tried this once with 2% milk when I ran out of whole milk and the filling was noticeably thinner and less rich. The fat in whole milk is doing real work here. If anything, you could swap in half of the milk for half-and-half if you want an even richer result — but don't go in the other direction.
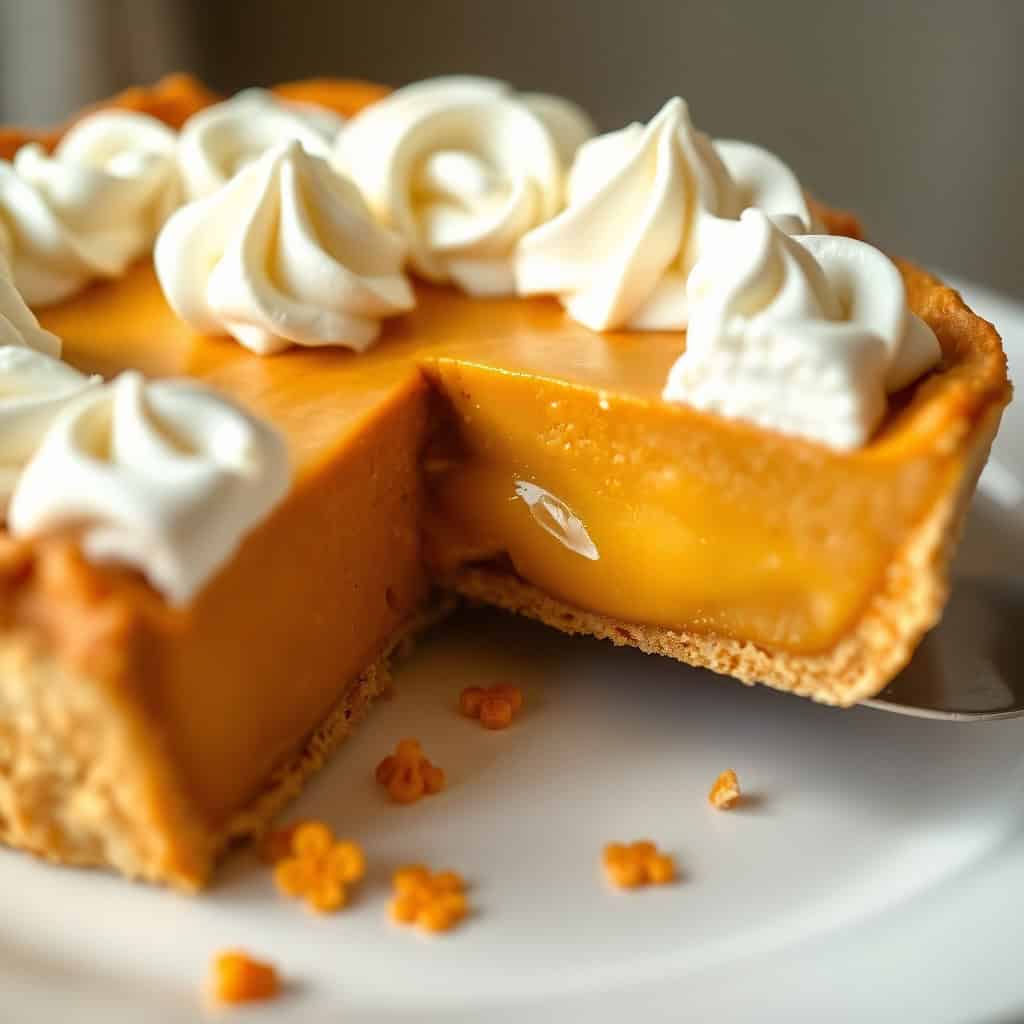
- Give it the full 4 hours to set: I know it's tempting to slice into it earlier, but a filling that hasn't fully set will slump when you cut it. The full 4 hours — or overnight — gives you clean slices. I've started making this pie exclusively as a next-day dessert, and honestly it's better for it.
- Whip the cream cold: Cold cream whips faster and holds its peaks better. I put my mixing bowl in the freezer for 10 minutes before I start. If your heavy cream has been sitting on the counter for any reason, pop it back in the fridge for 30 minutes first. Warm cream will whip to soft peaks at best and can turn grainy if you overwork it.
Variations
- Butterscotch meringue pie: Instead of whipped cream, top the pie with a classic meringue — 3 egg whites beaten with 6 tablespoons sugar until stiff and glossy, then spread over the warm filling and baked at 350°F (175°C) for about 12 minutes until lightly golden. This is the more traditional American diner version, and my husband actually prefers it this way. The meringue goes on while the filling is still warm so it seals to the surface properly.
- Pecan butterscotch pie: Scatter ½ cup of roughly chopped toasted pecans over the bottom of the pre-baked crust before pouring in the filling. They stay crunchy at the bottom and add a nutty contrast to the sweet custard. I use pecans I buy in bulk from Costco — toasting them in a dry pan for 3 minutes first makes a real difference to the flavor.
- Chocolate drizzle: Melt 2 ounces of semisweet chocolate with a teaspoon of neutral oil and drizzle it over the whipped cream just before serving. The slight bitterness of the chocolate cuts through the sweetness of the butterscotch in a way that works well. This is the version I make when I want it to look a little more impressive at the table.
- Gluten-free version: Use a gluten-free pre-made pie crust (Bob's Red Mill makes a good mix, or Pillsbury now has a refrigerated gluten-free crust). The filling itself is naturally gluten-free since the thickener is cornstarch. I've made it this way for a friend who can't have gluten and she said she couldn't tell the difference in the filling at all.
- Butterscotch trifle version: If your crust cracks or you just don't want to deal with a pie dish, layer the butterscotch filling with crushed shortbread cookies and whipped cream in glasses or a trifle dish. It's not traditional but it's very good. My Red, White & Blueberry Trifle uses a similar layered approach if you want inspiration for how to build it.
Serving and Storage
Serving
Serve this pie cold, straight from the refrigerator. Add the whipped cream within an hour of serving — if it sits for too long with the cream on top it starts to weep slightly at the edges. I slice it with a sharp knife that I've run under hot water and dried, which gives you clean cuts through the custard. A small drizzle of caramel sauce on each slice, if you have it, is a nice touch. A cup of strong tea or coffee alongside makes this feel like a proper dessert course.
Storage
Refrigerator: Store leftover pie covered in the refrigerator for up to 4 days. I press a sheet of plastic wrap against the cut surface of the filling to keep it from drying out. The whipped cream will soften after a day but the filling stays good.
Freezer: You can freeze this pie without the whipped cream topping. Wrap the cooled, set pie tightly in plastic wrap, then a layer of foil, and freeze for up to 2 months. Thaw overnight in the refrigerator and add fresh whipped cream before serving. The texture of the filling is slightly less silky after freezing, but it's still very good.

Frequently Asked Questions
Can I use a store-bought pie crust?
Yes, and I do it all the time. Refrigerated pie crusts from Pillsbury or Trader Joe's work well — just blind bake them according to the package directions before adding the filling. Make sure the crust is completely cooled before you pour in the butterscotch filling or the bottom will go soft.
How do I know when the filling is thick enough?
It should coat the back of a spoon thickly and hold a line when you drag your finger through it. In the pan it will look almost like a thick pudding — it moves slowly when you tilt the pan. Keep in mind it will firm up considerably more once it cools and chills, so don't overcook it trying to get it to hold its shape at room temperature.
Can I make this pie a day ahead?
Yes, this is actually my preferred method. Make the pie completely (without the whipped cream), cover it, and refrigerate overnight. The filling sets more firmly and the flavor deepens slightly. Add the whipped cream within an hour or two of serving. I've made this up to two days ahead and it held up perfectly.
My filling has lumps — what went wrong?
Usually this means the cornstarch wasn't fully whisked into the milk before heating, or the heat was too high and it cooked unevenly. If you catch it early, you can strain the filling through a fine mesh sieve before pouring it into the crust — this actually works really well and saves the pie. I've done this more than once.
Can I use a different topping instead of whipped cream?
Meringue is the traditional alternative and works beautifully — it goes on while the filling is still warm and gets baked briefly in the oven. A store-bought whipped topping like Cool Whip also works if you're short on time, though it's sweeter than homemade whipped cream. My husband always asks for meringue; I usually make whipped cream because it's faster.

BUTTERSCOTCH PIE
Ingredients
For the Crust:
- 1 9-inch pie crust, pre-baked
For the Filling:
- 1 cup packed brown sugar
- ⅓ cup cornstarch
- ½ teaspoon salt
- 3 cups whole milk
- 4 large egg yolks
- 1 teaspoon vanilla extract
- 3 tablespoons butter
For the Topping:
- 1 cup heavy cream
- 2 tablespoons powdered sugar
- 1 teaspoon vanilla extract
Instructions
Prepare the Filling:
- In a medium saucepan, combine the brown sugar, cornstarch, and salt. Gradually whisk in the milk until smooth.
- Cook over medium heat, stirring constantly, until the mixture thickens and comes to a boil. Boil for 1 minute, then remove from heat.
- In a small bowl, whisk the egg yolks. Gradually whisk in a small amount of the hot mixture to temper the yolks. Slowly pour the egg mixture back into the saucepan, whisking constantly.
- Return the saucepan to medium heat and cook, stirring constantly, until the mixture thickens again and just starts to boil. Remove from heat and stir in the butter and vanilla extract until smooth.
- Pour the butterscotch filling into the pre-baked pie crust. Allow to cool slightly, then refrigerate for at least 4 hours, or until set.
Prepare the Topping:
- In a large mixing bowl, beat the heavy cream, powdered sugar, and vanilla extract together until stiff peaks form.
- Spread the whipped cream over the chilled butterscotch filling.
Serve:
- Slice and serve the butterscotch pie chilled. Enjoy!
Notes
- Pie Crust: For convenience, you can use a store-bought pie crust or make your own from scratch. Ensure it's fully baked before adding the filling.
- Sugar Variations: You can use dark brown sugar for a deeper flavor or light brown sugar for a milder taste.
- Toppings: For extra indulgence, sprinkle some butterscotch chips or shaved chocolate on top of the whipped cream.
- Make-Ahead: This pie can be made a day in advance and stored in the refrigerator until ready to serve.
- Leftovers: Store any leftover pie in an airtight container in the refrigerator. It should keep well for up to 4 days.
This butterscotch pie has become one of my most-requested desserts, which I honestly did not expect when I first started figuring it out. There's something about the combination of the caramel-deep filling and the cold, lightly sweetened whipped cream that people really respond to. It feels old-fashioned in the best way — like something from a proper diner counter, not a fancy patisserie.
I make it most often in autumn and winter, when I want something that feels warm and comforting even though it's served cold. It's also genuinely one of the easier showstopper desserts I know — the filling has a few careful steps but it's not technically difficult. If you've made pudding on a stovetop before, you can make this. If you like custard-based desserts, my Tiramisu Cupcakes use a similar rich, egg-thickened approach and are just as good for entertaining.
The next time you need a dessert that slices cleanly, travels well to a gathering, and can be made completely the day before — this is the one to reach for. It never fails me, and after three failed attempts at the beginning,





Comments
No Comments