
Valentine's Day in our house is less about fancy dinners and more about small, sweet things that make everyone feel special — a little tray of something pretty on the counter, something pink in a bowl, Zainab asking if she can help dip strawberries in chocolate. That's the part I actually love. I don't need a reservation at a restaurant. I need a good snack spread and some red napkins from the dollar section at Target.
What makes a Valentine's snack actually worth making? For me it comes down to three things: it has to look like you put in effort even when you didn't, it has to come together in under 30 minutes most of the time, and it has to work for both kids and adults. I've tried the overly elaborate stuff — the ones with sixteen steps and specialty candy molds — and by the time I'm done I'm too tired to enjoy the day. These are the easy, no-drama snacks that actually make it to the table. If you're also thinking ahead to treat season, my Valentine's Day dessert recipes roundup covers the sweeter side of things too.
This list has 26 recipes covering a real mix — chocolate covered strawberries, deviled strawberries, pink buttercream cupcakes, smoothie bowls, savory bites like mini salmon cakes, and even a berry galette for when you want something that looks impressive but isn't. There are vegan options, keto options, and snacks that are just plain fun to make with kids. If you're planning a whole Valentine's spread, my Valentine's Day recipes page has even more ideas to round out the table, and my easy strawberry desserts post is worth bookmarking for berry season too.
Here are the 26 snacks I keep coming back to — pick whatever fits your Valentine's Day, whether that's a quiet afternoon with the kids or a full-on party spread.
Top 26 Easy Valentine's Day Snack Recipes
25. Mini Salmon Cakes
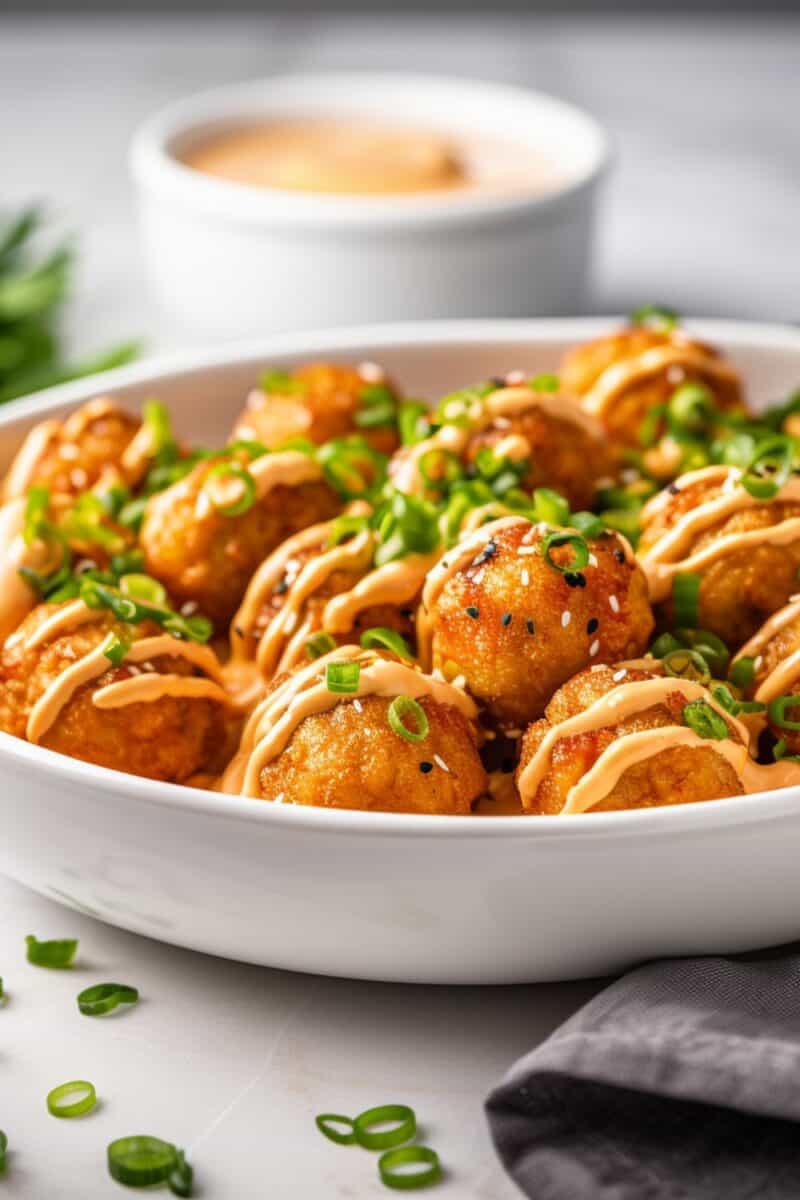
Valentine's Day doesn't have to be all sugar and chocolate — sometimes the most impressive thing you can put out is something savory that nobody expected. These mini salmon cakes are exactly that. They're bite-sized, crispy on the outside, tender inside, and they feel genuinely fancy without requiring much work. I've made a version of salmon patties my whole life — my mother used to make them with canned salmon on weeknights — but shaping them small and serving them as party snacks is a move I wish I'd figured out sooner.
Ingredients
- 2 cans (14.75 oz each) pink salmon, drained and flaked
- ½ cup plain breadcrumbs (panko works great here)
- 2 large eggs, beaten
- 3 tablespoons mayonnaise
- 2 tablespoons Dijon mustard
- 2 green onions, finely chopped
- 1 teaspoon garlic powder
- ½ teaspoon smoked paprika
- Salt and black pepper to taste
- 2 tablespoons olive oil or neutral oil, for pan-frying
Instructions
- In a large bowl, combine the drained salmon, breadcrumbs, eggs, mayonnaise, Dijon mustard, green onions, garlic powder, and smoked paprika. Mix until everything comes together — the mixture should hold its shape when pressed.
- Scoop about 1½ tablespoons of the mixture and shape into small round patties, roughly 2 inches wide. Press firmly so they hold together. You should get about 20–24 mini cakes.
- Refrigerate the shaped patties for at least 20 minutes — this step really helps them stay together in the pan and is worth the wait.
- Heat oil in a skillet over medium heat. Cook the salmon cakes in batches, about 3 minutes per side, until golden and crispy. Don't overcrowd the pan or they'll steam instead of sear.
- Transfer to a paper towel-lined plate. Serve warm with a dollop of sour cream or a quick sriracha mayo on the side.
Tips
- Tip: Drain the canned salmon really well — press it with the back of a spoon against the can lid. Too much liquid and your patties will fall apart in the pan.
- Tip: You can shape these the night before and keep them covered in the fridge. Just cook them right before serving so they stay crispy.
- Tip: Canned salmon from Costco or Walmart works perfectly here — no need for anything fancy.
24. Strawberry Cake Pops
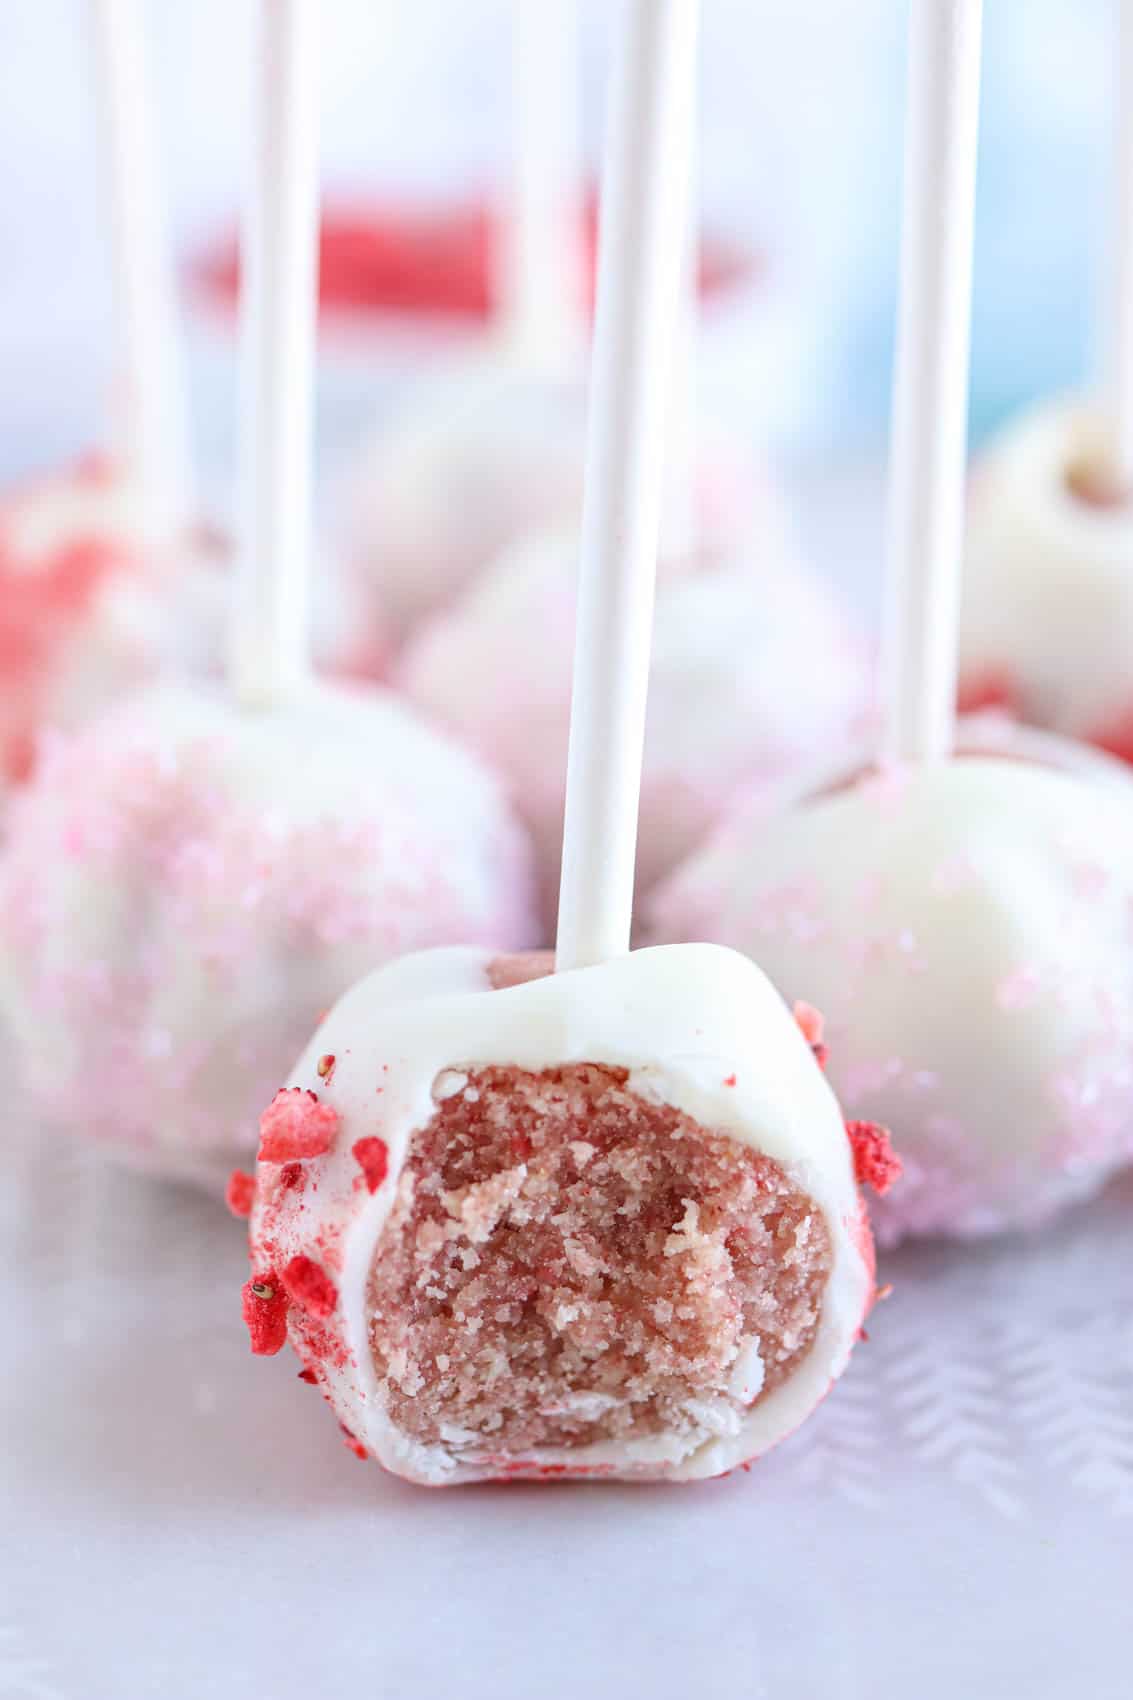
Zainab spotted cake pops at a bakery once and decided they were the most magical food she'd ever seen. I told her we could make them at home and she looked at me like I was lying. We made them together that weekend — strawberry flavored, dipped in pink and white chocolate — and they turned out better than the ones from the shop. These are genuinely fun to make with kids, and they look absolutely adorable on a Valentine's Day spread. The strawberry flavor comes through in both the cake and the coating, which makes every bite taste like the holiday itself.
Ingredients
- 1 box strawberry cake mix (plus eggs, oil, and water per box directions)
- ½ cup strawberry frosting (store-bought is fine)
- 12 oz pink candy melts or white chocolate chips + pink food coloring
- 20–24 lollipop sticks
- 1 tablespoon coconut oil or vegetable shortening (to thin the chocolate coating)
- Sprinkles, for decorating
Instructions
- Bake the strawberry cake according to the box directions in a 9x13 pan. Let it cool completely — at least 1 hour. Don't rush this or the pops will be greasy.
- Crumble the cooled cake into a large bowl until it looks like fine crumbs. Add the strawberry frosting a little at a time and mix with your hands until the mixture holds together when squeezed — you may not need all the frosting.
- Roll the mixture into balls about 1¼ inches wide. Place on a parchment-lined baking sheet and freeze for 20–30 minutes until firm.
- Melt the candy melts or chocolate with coconut oil in a microwave-safe bowl in 30-second intervals, stirring between each. Dip the tip of each lollipop stick into the melted chocolate, then insert it about halfway into each cake ball. Return to the freezer for 5 minutes.
- Dip each cake pop fully into the melted chocolate, letting the excess drip off. Add sprinkles immediately before the coating sets. Stand upright in a styrofoam block or tall glass to dry completely.
Tips
- Tip: If your chocolate coating is too thick, add coconut oil a teaspoon at a time until it's thin enough to dip smoothly — thick coating causes cracking as it dries.
- Tip: Don't skip freezing the balls before dipping. Warm cake pops fall off the stick in the chocolate — learned that the hard way.
- Tip: Pink candy melts are easy to find at Walmart or Michael's around Valentine's season — grab them early because they sell out fast.
23. Pink Chocolate Covered Strawberries
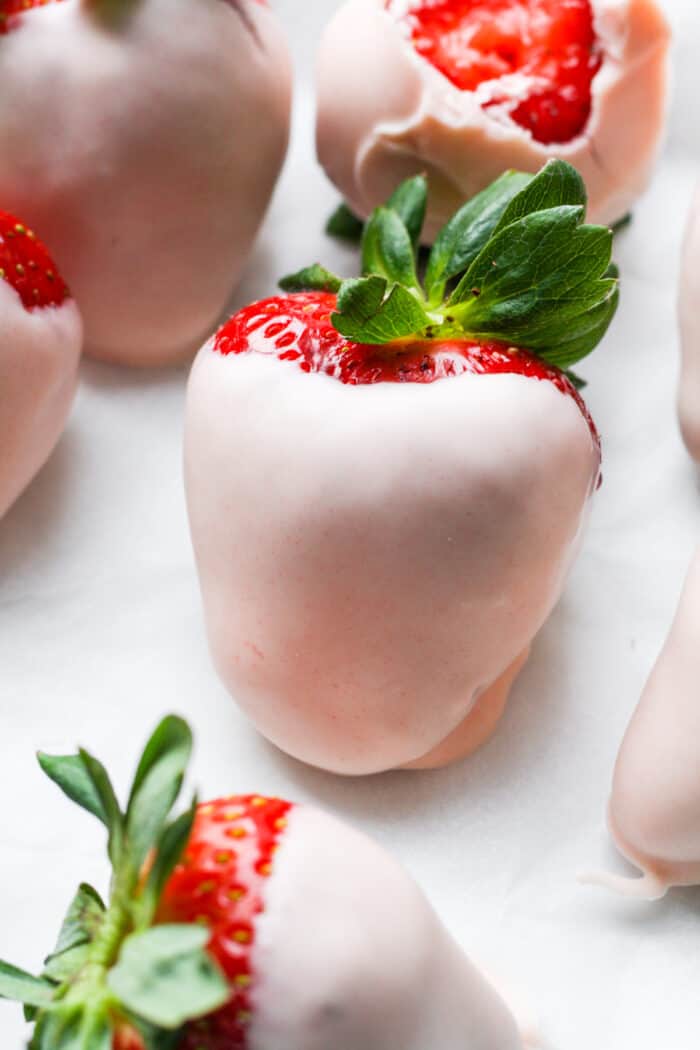
If there's one Valentine's Day snack that never needs an explanation, it's chocolate covered strawberries. But the pink version? That's where it gets fun. You get all the same satisfaction of a classic — that snap of chocolate giving way to a cold, juicy strawberry — but the pink coating makes them look specifically made for the holiday. I make a double batch every February because they disappear before I even get the platter properly arranged. This is also one of those recipes where the result looks far more impressive than the actual effort involved.
Ingredients
- 1 lb fresh strawberries (about 20–24), washed and completely dried
- 10 oz white chocolate chips or white chocolate bark
- 1–2 teaspoons pink or red gel food coloring
- 1 teaspoon coconut oil (optional, helps thin the chocolate)
- White sprinkles or sanding sugar, for decorating
Instructions
- Wash the strawberries and dry them very thoroughly — lay them on paper towels and pat each one dry. Any moisture will cause the chocolate to seize or streak, so this step matters more than it seems.
- Melt the white chocolate chips with coconut oil in a microwave-safe bowl in 30-second intervals, stirring after each round, until fully smooth. Add gel food coloring a little at a time until you reach your desired shade of pink.
- Hold each strawberry by the stem and dip into the pink chocolate, letting excess drip off. Set on a parchment-lined baking sheet. Add sprinkles immediately before the coating sets.
- Let the strawberries set at room temperature for 15–20 minutes, or refrigerate for 10 minutes if you're in a hurry. Serve the same day for the best texture.
Tips
- Tip: Use gel food coloring, not liquid — liquid food coloring can make white chocolate seize up and turn grainy.
- Tip: Don't refrigerate longer than necessary. Cold strawberries release condensation as they come back to room temperature, which makes the chocolate look sweaty and dull.
- Tip: If you want a deeper red-pink, use red gel coloring and add just a tiny touch of white to soften the color — makes a beautiful hot pink without going too dark.
22. Vegan Chocolate Covered Strawberries
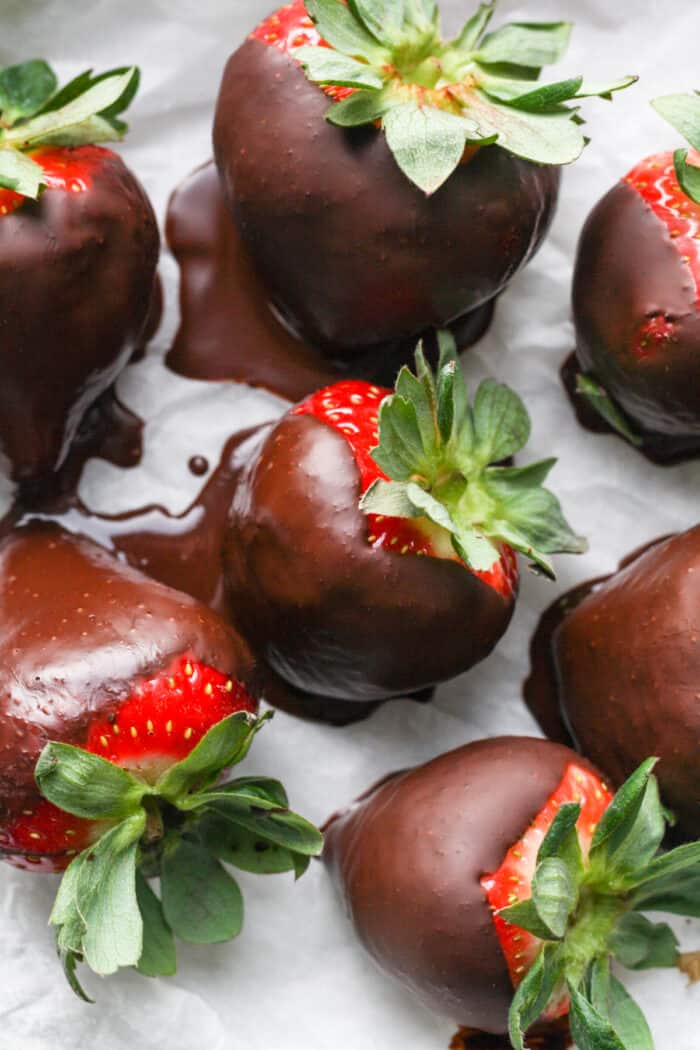
I didn't grow up thinking about dairy-free chocolate — that wasn't a thing in our kitchen in Pakistan. But I have friends who eat vegan, and I refuse to put out a snack table where someone is stuck staring at what they can't have. These vegan chocolate covered strawberries look identical to the regular version and honestly taste just as good. The key is using good quality dairy-free dark chocolate — the 70% cocoa bars you'll find at Trader Joe's or even Aldi work beautifully here. No one at the table will know the difference unless you tell them.
Ingredients
- 1 lb fresh strawberries, washed and fully dried
- 10 oz dairy-free dark chocolate chips or a vegan chocolate bar, chopped
- 1 teaspoon coconut oil (adds shine and helps with dipping)
- Flaky sea salt or vegan sprinkles, for topping (optional)
Instructions
- Wash the strawberries and dry them completely — spread on a clean kitchen towel and leave for at least 20 minutes. Wet strawberries and melted chocolate do not get along.
- Melt the dairy-free chocolate and coconut oil together using a double boiler or microwave. If using the microwave, go in 30-second bursts and stir each time — vegan chocolate can scorch faster than regular chocolate if you rush it.
- Dip each strawberry into the melted chocolate by the stem, letting the excess drip off cleanly. Place on a parchment-lined tray. Sprinkle with flaky sea salt or vegan sprinkles if using.
- Allow to set at room temperature for about 20 minutes, or refrigerate for 10 minutes. Serve within a few hours for best texture and appearance.
Tips
- Tip: Check the label on your chocolate — many dark chocolates at regular grocery stores are accidentally vegan, so you don't necessarily need to hunt down a specialty store.
- Tip: A pinch of flaky salt on top of dark chocolate covered strawberries is genuinely one of the best flavor combinations — don't skip it if you have it.
- Tip: If you want to make them look extra festive, drizzle a contrasting dairy-free white chocolate (Enjoy Life brand works well) over the set dark chocolate coating.
17. Pink Buttercream Cupcakes
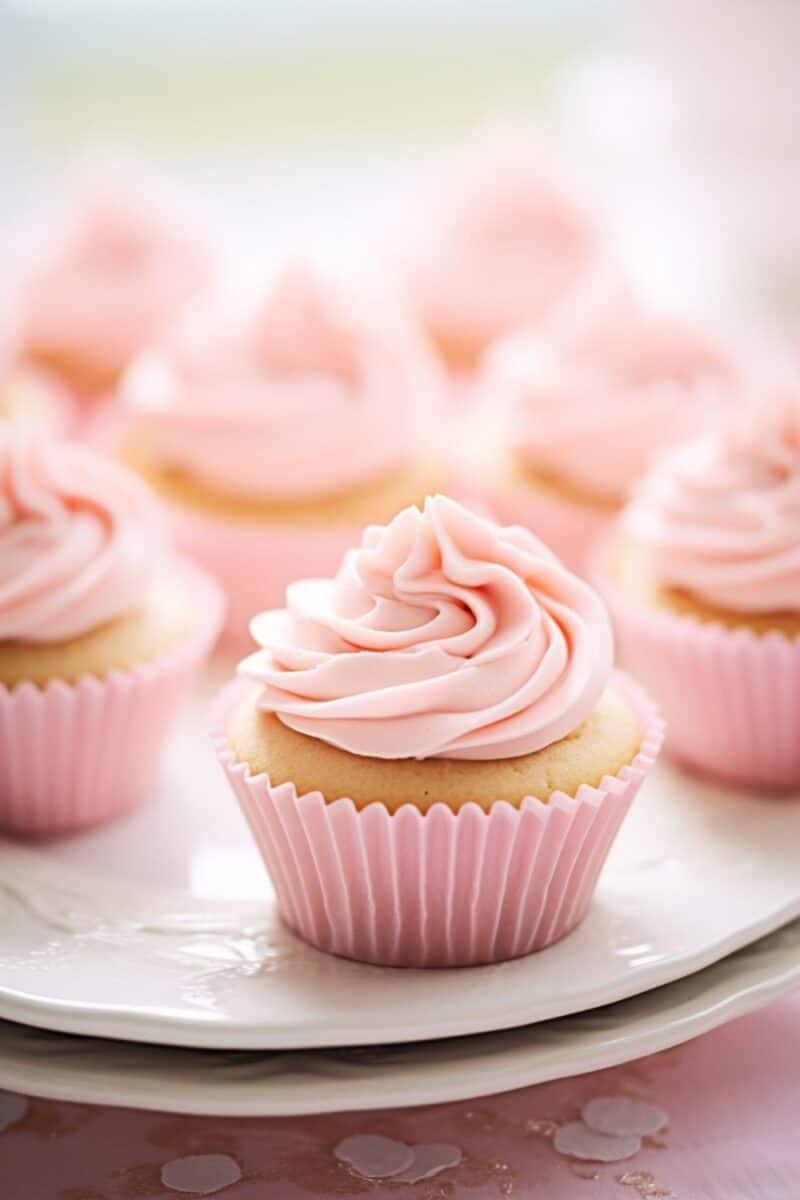
These are the cupcakes Zainab specifically requested the last time Valentine's Day came around — and honestly, I get it. Fluffy vanilla cupcakes piled high with pink buttercream frosting are hard to argue with. The crumb is soft and tender, and that pink swirl on top looks like it took effort even when it didn't. If you want something that looks impressive on a plate without requiring a pastry degree, this is it. They also pair beautifully with our pink champagne cupcakes if you're putting together a full dessert spread.
Ingredients
- 1 ½ cups all-purpose flour
- 1 ½ teaspoons baking powder
- ¼ teaspoon salt
- ½ cup (1 stick) unsalted butter, softened
- ¾ cup granulated sugar
- 2 large eggs, room temperature
- 1 teaspoon vanilla extract
- ½ cup whole milk
- 1 cup (2 sticks) unsalted butter, softened (for frosting)
- 3 cups powdered sugar, sifted
- 2 tablespoons heavy cream
- Pink gel food coloring (a little goes a long way)
Instructions
- Preheat oven to 350°F. Line a 12-cup muffin tin with cupcake liners.
- Whisk together flour, baking powder, and salt in a bowl and set aside.
- Beat the softened butter and sugar together until pale and fluffy, about 3 minutes. Add eggs one at a time, then stir in vanilla.
- Alternate adding the flour mixture and milk to the butter mixture, starting and ending with flour. Mix just until combined — don't overwork it or the cupcakes get dense.
- Fill liners two-thirds full and bake 18–20 minutes, until a toothpick comes out clean. Cool completely before frosting.
- For the frosting, beat the butter until smooth, then gradually add powdered sugar and cream. Add a small drop of pink gel coloring and mix until you reach your desired shade. Pipe onto cooled cupcakes.
Tips
- Tip: Gel food coloring gives a more vivid pink than liquid — you'll find it at Walmart or any craft store near the baking supplies.
- Tip: Don't skip cooling the cupcakes fully before frosting. I've rushed this step before and ended up with a melted pink puddle instead of a swirl.
- Tip: No piping bag? Use a zip-lock bag with a small corner snipped off — works just as well for a simple swirl.
18. Strawberry Flip Fruit Dip

A fruit dip might sound simple, but this strawberry flip fruit dip is one of those things people reach for repeatedly at a party without really knowing why it's so good. It's creamy, slightly tangy, and has a natural strawberry flavor that doesn't taste artificial. Serve it in a bowl surrounded by sliced strawberries, apple wedges, and grapes and it looks like you put in way more effort than you did. I also love that it comes together in minutes — no baking, no waiting.
Ingredients
- 8 oz cream cheese, softened
- ½ cup strawberry jam or preserves
- ¼ cup sour cream
- 1 tablespoon powdered sugar
- ½ teaspoon vanilla extract
- Fresh fruit for dipping (strawberries, apple slices, grapes, banana)
Instructions
- Let the cream cheese sit out for about 15 minutes to soften — cold cream cheese clumps and won't blend smoothly.
- Beat the cream cheese with a hand mixer or wooden spoon until smooth and lump-free.
- Add the strawberry jam, sour cream, powdered sugar, and vanilla. Mix until everything is combined and the dip is creamy and pink.
- Taste and adjust — add a bit more jam for sweetness or a touch more sour cream for tang.
- Transfer to a serving bowl and refrigerate for at least 30 minutes before serving. Arrange fruit around the bowl and serve chilled.
Tips
- Tip: Use a good-quality strawberry jam for the best flavor — the cheap jellies taste a bit artificial here. Trader Joe's strawberry preserves work really well.
- Tip: This dip can be made the night before and kept covered in the fridge — the flavor actually deepens a little overnight.
- Tip: To keep apple slices from browning on your platter, toss them in a little lemon juice before arranging.
19. Keto Blueberry Muffins with Almond Flour
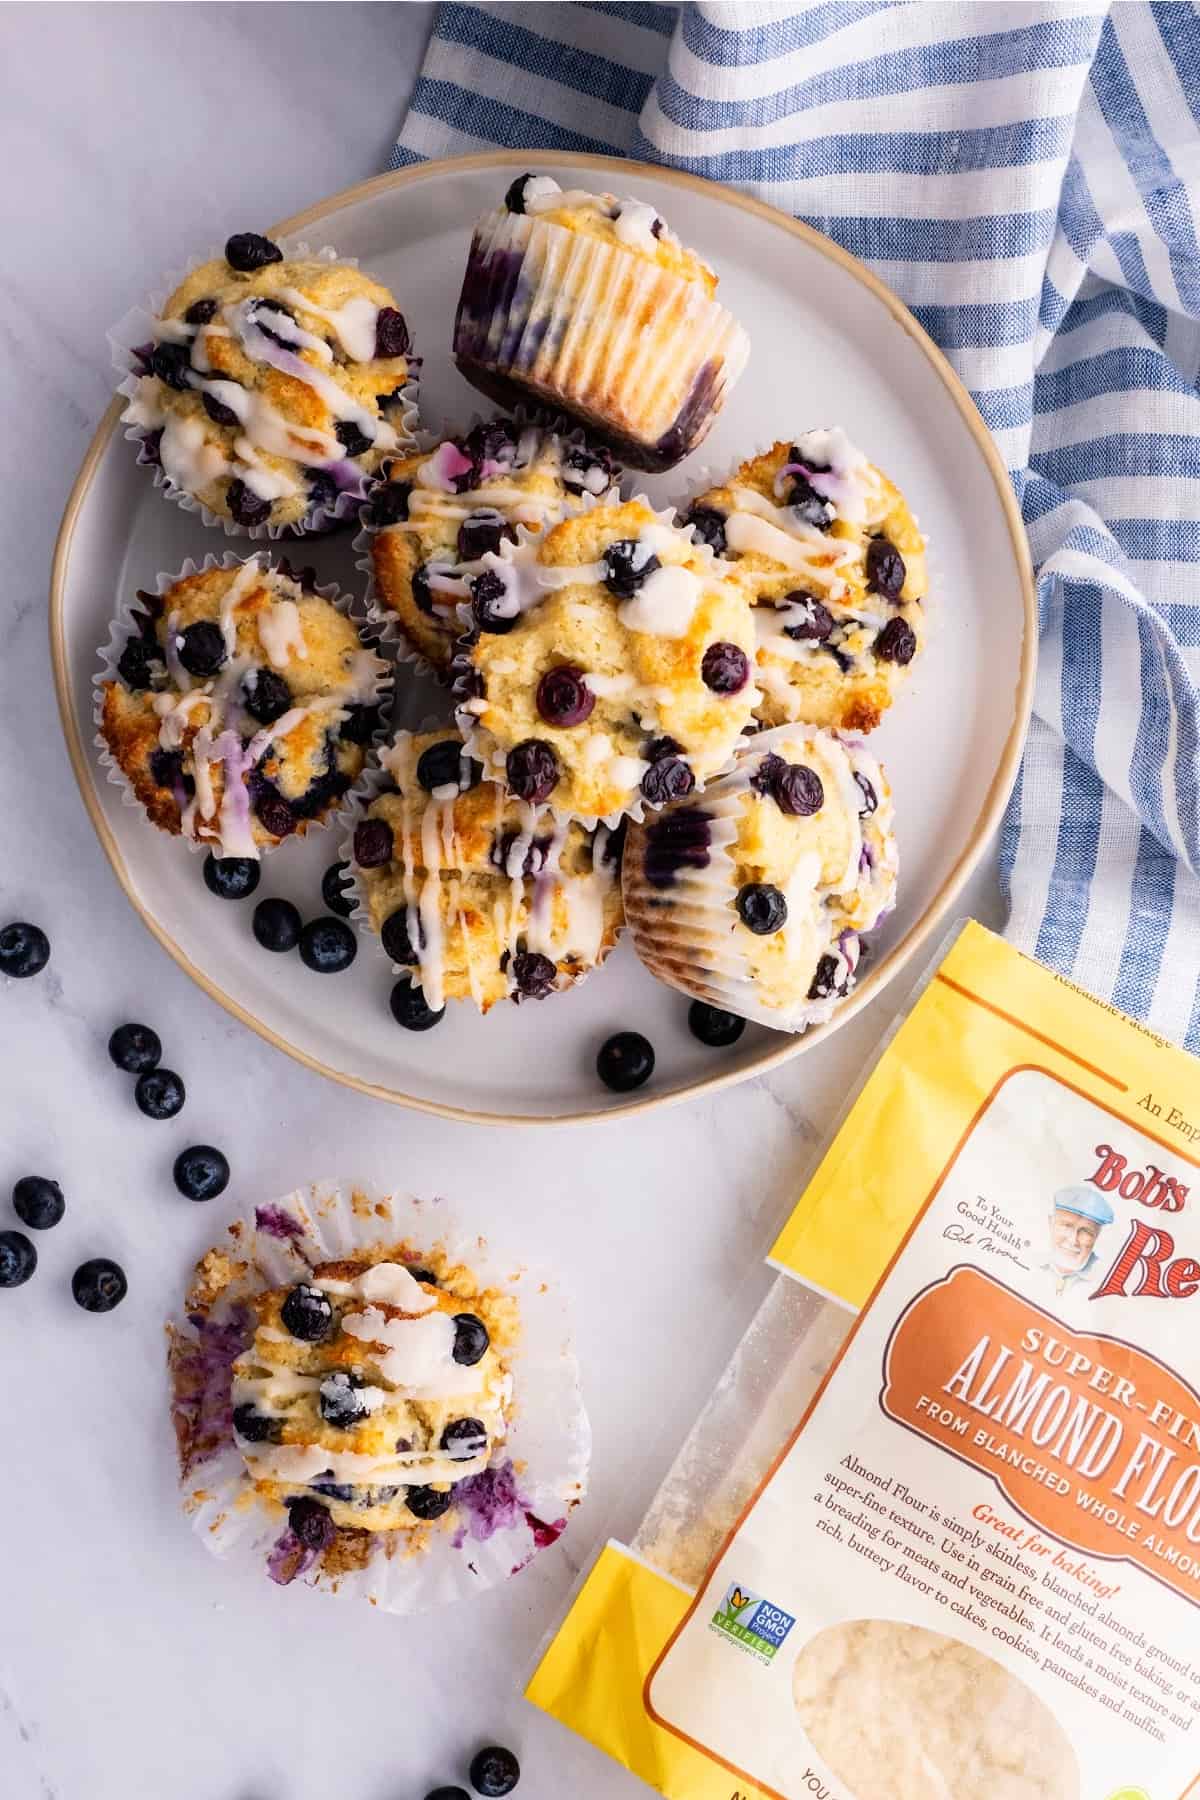
I'll be honest — I was skeptical about almond flour muffins for a long time. My first attempt came out dense and eggy, and I nearly gave up. But when you get the ratio right, they're genuinely good: moist in the middle, slightly golden on top, and packed with blueberries in every bite. These are a solid option if you're watching carbs or have someone coming over who follows a keto or gluten-free diet — they won't feel like they're eating a compromise. The blueberries make them feel festive enough for a Valentine's snack spread too.
Ingredients
- 2 cups almond flour (fine-ground, like Bob's Red Mill — available at most Walmarts and Costco)
- ¼ cup granulated erythritol or monk fruit sweetener
- 1 ½ teaspoons baking powder
- ¼ teaspoon salt
- 3 large eggs
- ¼ cup melted coconut oil or unsalted butter
- ¼ cup unsweetened almond milk
- 1 teaspoon vanilla extract
- 1 cup fresh or frozen blueberries
Instructions
- Preheat oven to 350°F. Line a muffin tin with 10–12 paper liners and set aside.
- In a large bowl, whisk together almond flour, sweetener, baking powder, and salt.
- In a separate bowl, whisk eggs, melted coconut oil, almond milk, and vanilla until combined.
- Pour the wet ingredients into the dry and stir until a thick batter forms. Gently fold in the blueberries — if using frozen, don't thaw them first or the batter turns purple.
- Divide batter evenly among the liners, filling each about three-quarters full. Bake 22–25 minutes until the tops are golden and a toothpick comes out clean.
- Let cool in the pan for 10 minutes before transferring to a rack. They firm up as they cool, so don't panic if they seem soft right out of the oven.
Tips
- Tip: Fine-ground almond flour gives a much better texture than almond meal — they're not the same thing, even though the bags look similar on the shelf.
- Tip: These store well in an airtight container for up to 4 days at room temperature, or freeze them for up to a month.
- Tip: If you're not doing keto, regular granulated sugar works as a 1:1 swap for the erythritol.
20. Apple Banana Smoothie with Peanut Butter Powder
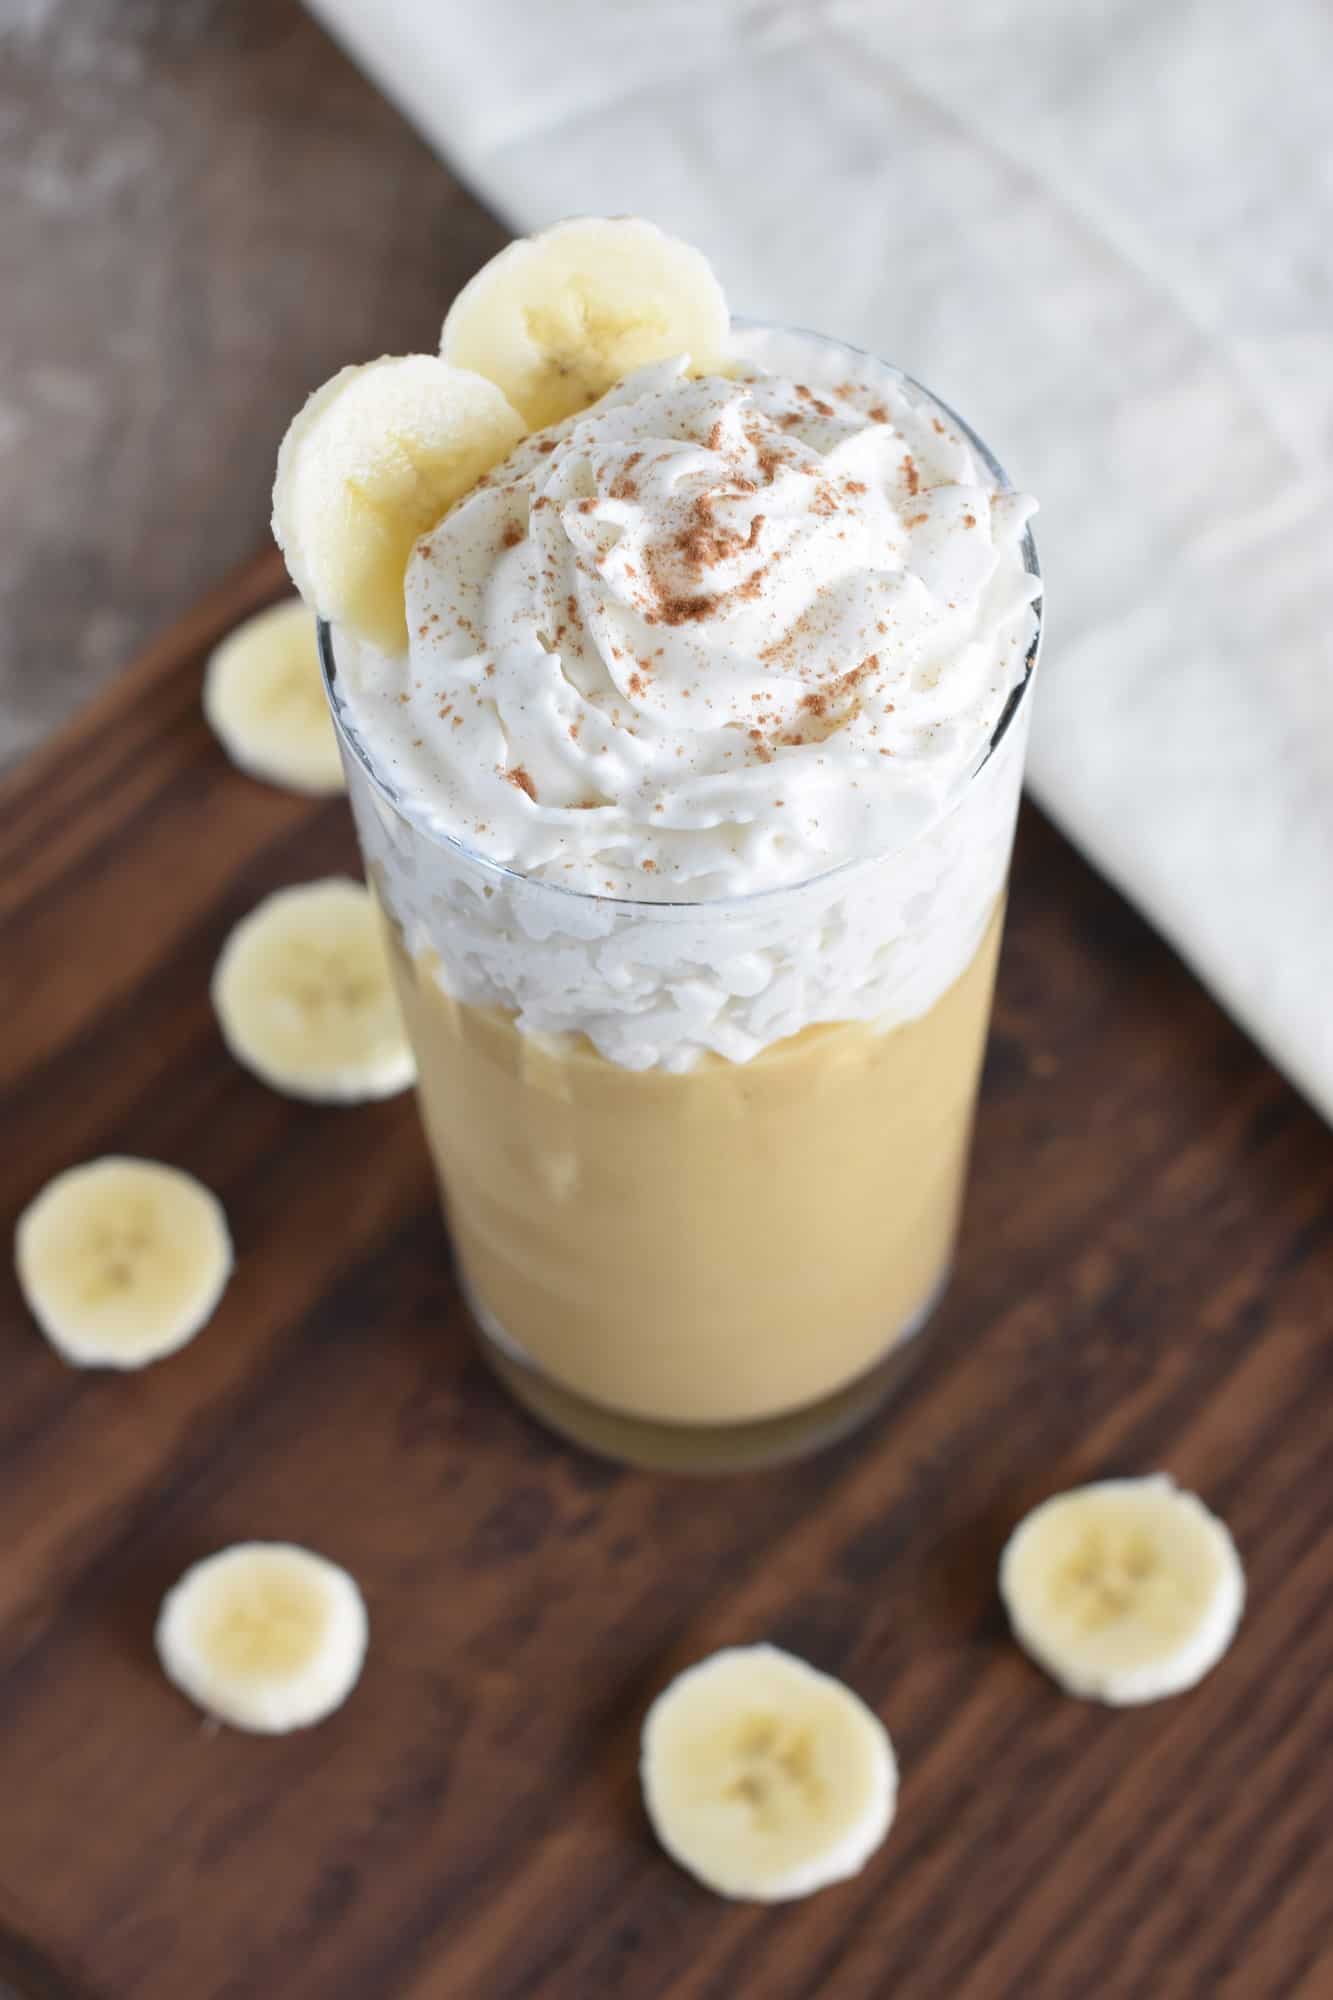
Sometimes a Valentine's snack doesn't need to be a cookie or a cake — a thick, creamy smoothie hits differently when you want something filling but not heavy. This one uses peanut butter powder instead of regular peanut butter, which keeps it light while still delivering that nutty flavor. Apple and banana together make it naturally sweet enough that you barely need anything else. If you have kids who are hit-or-miss on smoothies, this one tends to win them over — the banana makes it creamy and the apple adds a fresh note that keeps it from being cloying. It's a solid healthy snack option that still feels like a treat.
Ingredients
- 1 medium ripe banana, frozen
- 1 medium apple, peeled, cored, and chopped (any variety — Fuji or Gala work well)
- 2 tablespoons peanut butter powder (PB2 or similar, available at most grocery stores)
- 1 cup unsweetened almond milk (or regular milk)
- ½ cup plain Greek yogurt
- 1 teaspoon honey (optional, taste first)
- Pinch of cinnamon
Instructions
- Add the almond milk and Greek yogurt to the blender first — this helps everything blend more smoothly without air pockets.
- Add the frozen banana, chopped apple, peanut butter powder, and cinnamon.
- Blend on high for about 60 seconds until completely smooth. Taste — if you want it sweeter, add the honey and blend for another 10 seconds.
- Pour into glasses and serve immediately. This doesn't keep well — the apple oxidizes and the texture changes, so drink it fresh.
Tips
- Tip: Freeze your banana ahead of time — a frozen banana makes the smoothie thick and cold without needing ice, which would water it down.
- Tip: If you don't have peanut butter powder, a tablespoon of regular peanut butter works fine — it just makes the smoothie slightly richer and a little higher in fat.
- Tip: For a Valentine's twist, swap the apple for half a cup of frozen strawberries — it turns the whole thing pink and tastes great.
21. Vegan Oatmeal Cookies
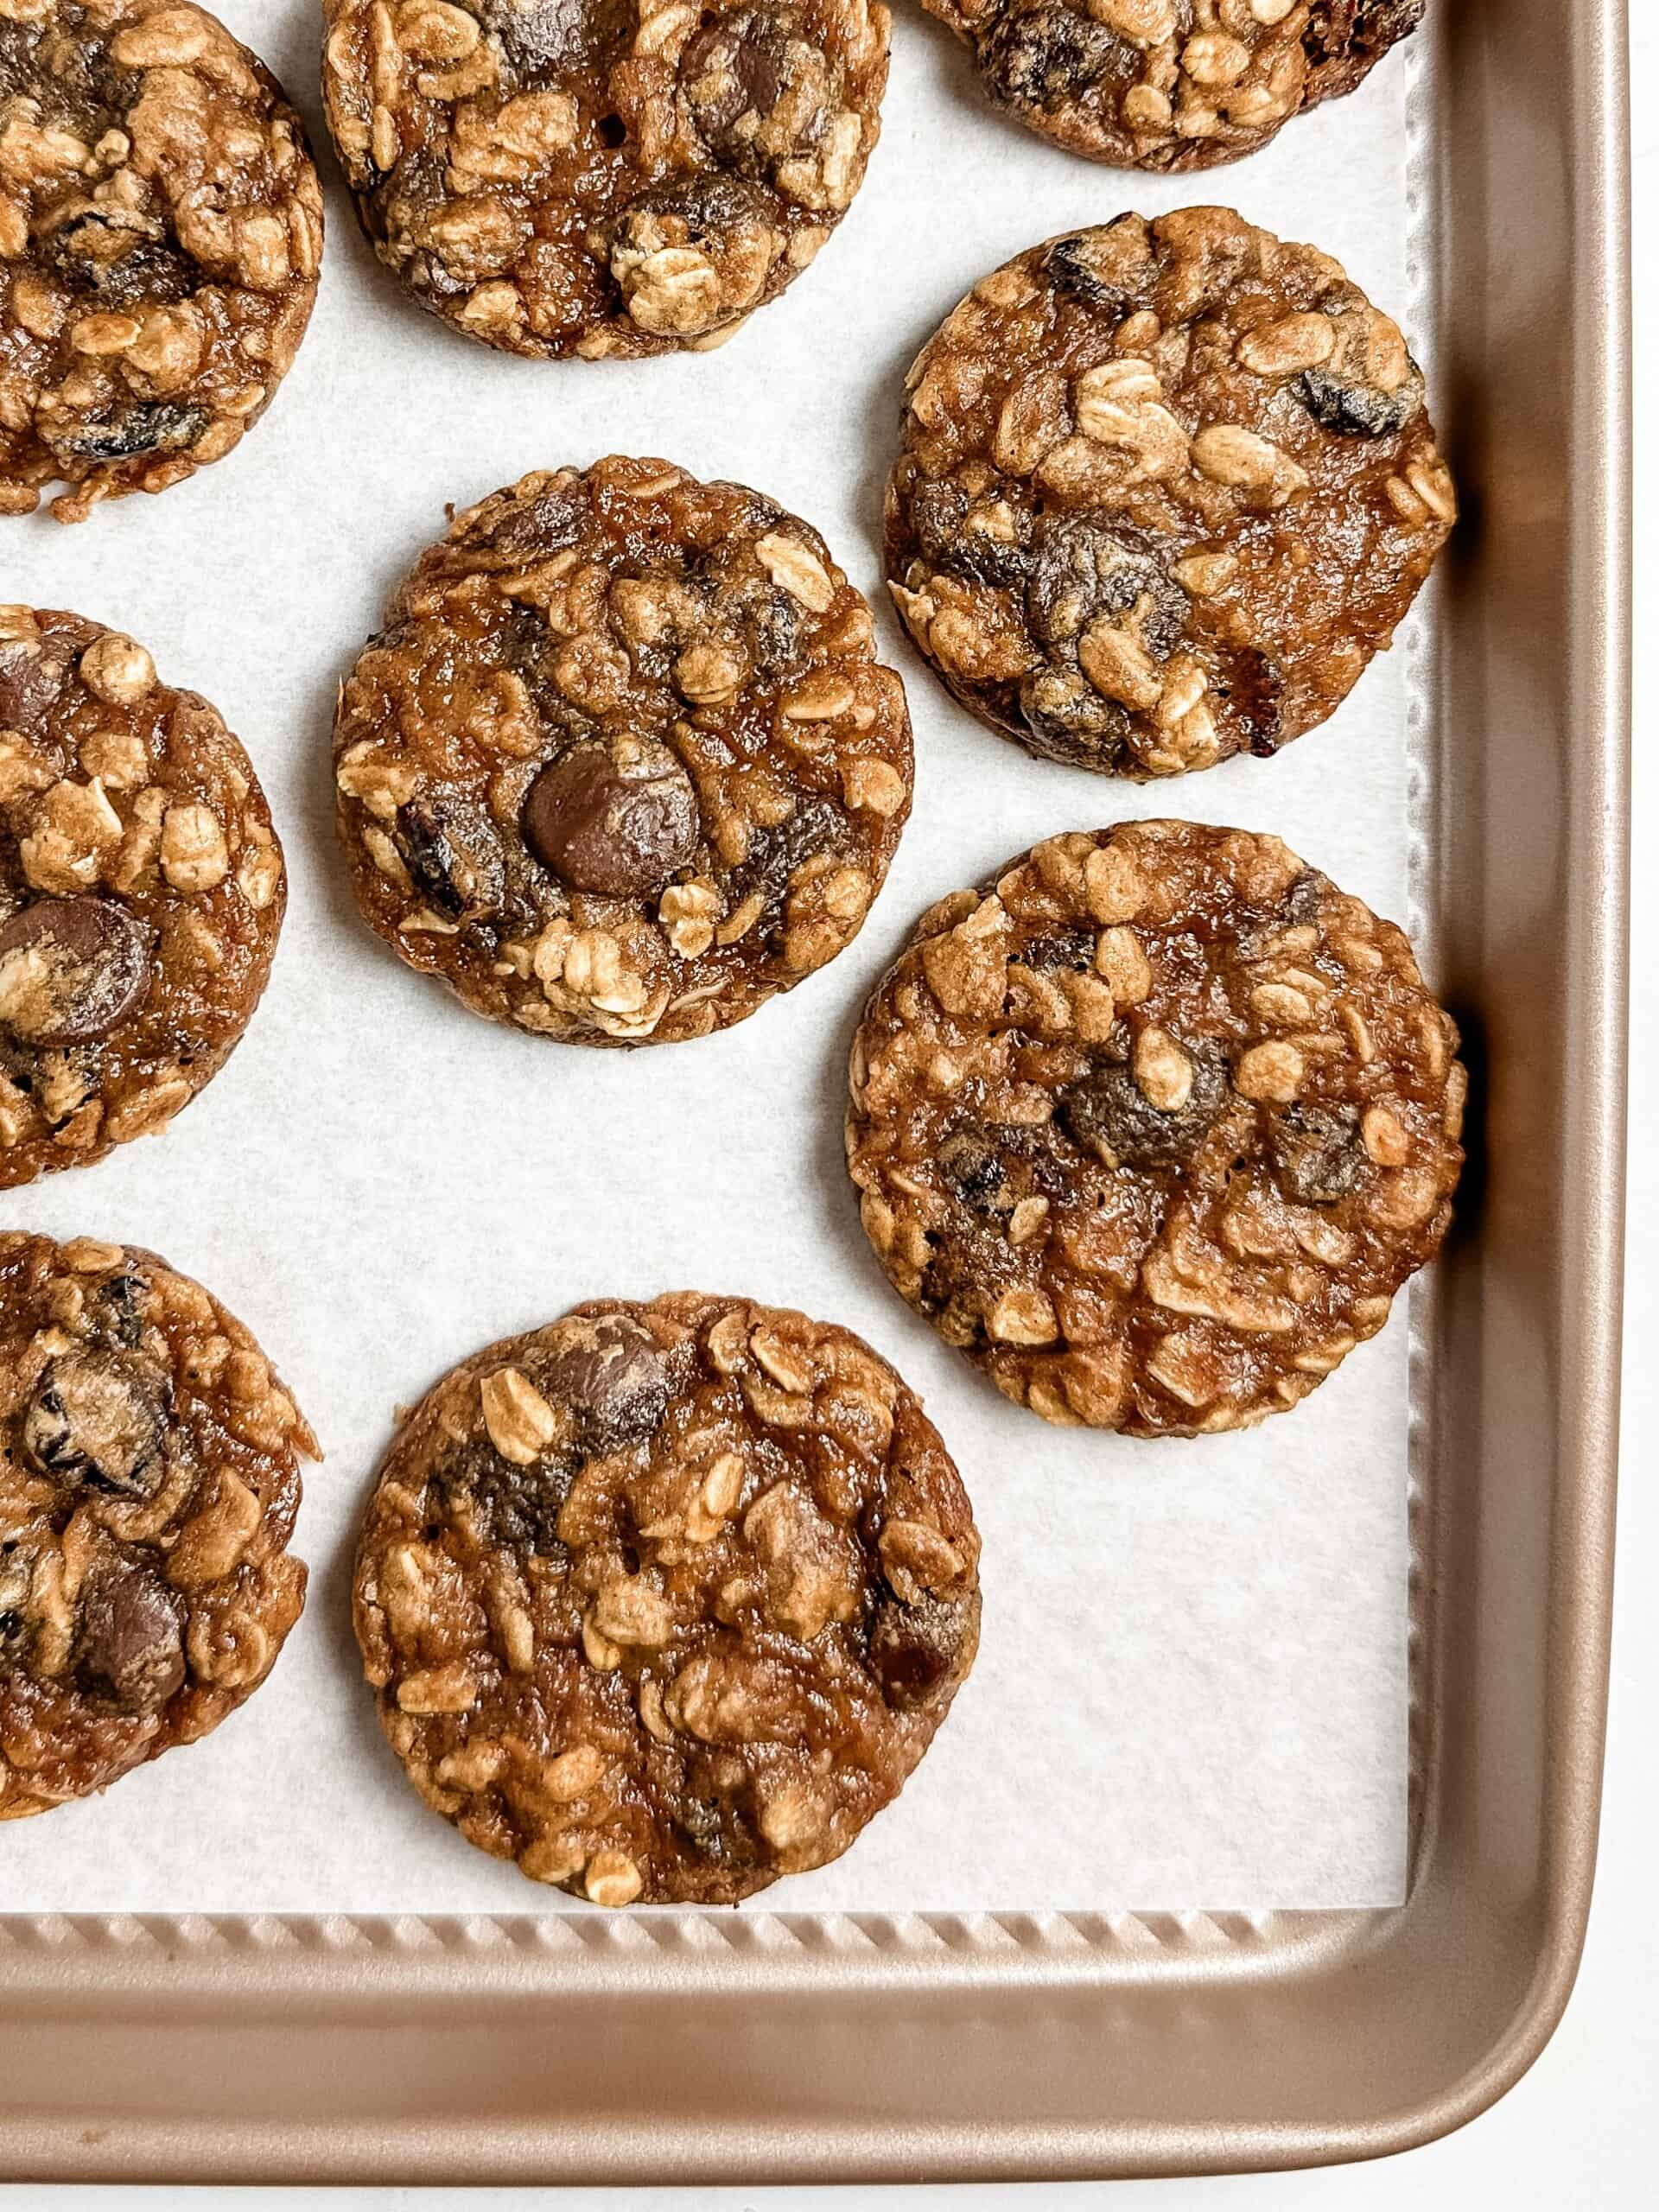
These vegan oatmeal cookies are one of those recipes where the absence of butter and eggs genuinely doesn't hurt the final result. They come out chewy in the center with slightly crisp edges, and the oats give them a heartiness that makes one or two feel satisfying rather than leaving you reaching for another handful. I've made these for guests who follow a vegan diet, and they've also disappeared just as fast at a regular snack table where nobody was looking at the ingredients. If you're putting together a Valentine's spread that works for multiple dietary needs, these earn their spot.
Ingredients
- 1 ½ cups rolled oats (old-fashioned, not quick oats)
- ¾ cup all-purpose flour
- ½ teaspoon baking soda
- ½ teaspoon cinnamon
- ¼ teaspoon salt
- ⅓ cup coconut oil, melted (or vegetable oil)
- ½ cup brown sugar, packed
- ¼ cup maple syrup
- 1 flax egg (1 tablespoon ground flaxseed + 3 tablespoons water, mixed and rested 5 minutes)
- 1 teaspoon vanilla extract
- ½ cup dairy-free chocolate chips or raisins (optional)
Instructions
- Make the flax egg first — stir together ground flaxseed and water and let it sit for 5 minutes until it thickens to a gel-like consistency.
- Preheat oven to 350°F. Line a baking sheet with parchment paper.
- In a large bowl, whisk together oats, flour, baking soda, cinnamon, and salt.
- In a separate bowl, stir together melted coconut oil, brown sugar, maple syrup, flax egg, and vanilla until smooth.
- Pour the wet ingredients into the dry and stir until a thick dough forms. Fold in chocolate chips or raisins if using. The dough will be soft — that's fine.
- Scoop rounded tablespoons onto the baking sheet, spacing about 2 inches apart. Flatten slightly with your palm. Bake 10–12 minutes until the edges are set and golden. Let cool on the pan for 5 minutes before moving — they firm up as they cool.
Tips
- Tip: Don't overbake these — they look underdone when you pull them out, but they set up perfectly as they cool on the pan.
- Tip: To make these gluten-free as well as vegan, swap the all-purpose flour for a 1:1 gluten-free flour blend and use certified gluten-free oats.
- Tip: I make a double batch because these keep well in an airtight container for 5 days — and they're gone well before that at my house anyway.
12. Valentine Heart Shaped Cookies

These heart-shaped butter cookies with a simple icing are one of those things I make every February without fail. The dough is a classic shortbread-style base — buttery, a little crumbly, not too sweet on its own — and once you cut them into hearts and add colored icing, they look genuinely impressive for about 30 minutes of effort. Zainab claims decorating them is her job now, so I mostly stay out of the way and just make sure there's enough pink food coloring in the house.
Ingredients
- 2 ¼ cups all-purpose flour
- ½ teaspoon baking powder
- ¼ teaspoon salt
- ¾ cup (1½ sticks) unsalted butter, softened to room temperature
- ¾ cup granulated sugar
- 1 large egg
- 1½ teaspoons pure vanilla extract
- 1 cup powdered sugar (for icing)
- 2–3 tablespoons milk (for icing)
- Pink or red food coloring
Instructions
- Whisk together flour, baking powder, and salt in a bowl and set aside. In a separate large bowl, beat butter and sugar together until light and fluffy, about 2–3 minutes by hand.
- Add the egg and vanilla to the butter mixture and mix until combined. Gradually stir in the flour mixture until a soft dough forms. Divide into two discs, wrap in plastic wrap, and refrigerate for at least 1 hour.
- Preheat oven to 350°F. Roll dough out on a lightly floured surface to about ¼-inch thickness. Cut with a heart-shaped cookie cutter and place on a parchment-lined baking sheet.
- Bake for 9–11 minutes until the edges are just barely turning golden. Don't overbake — they firm up as they cool. Let cool completely on a wire rack before icing.
- Mix powdered sugar with milk one tablespoon at a time until you get a thick but spreadable icing. Add food coloring and decorate as you like.
Tips
- Tip: Don't skip the chilling step — cold dough holds its heart shape much better in the oven. Room-temperature dough spreads and you lose those clean edges.
- Tip: If your icing is too runny, add a little more powdered sugar. If it's too stiff to spread, add milk half a teaspoon at a time.
- Tip: These keep well in an airtight container at room temperature for up to 4 days, so you can bake them a day ahead of Valentine's Day without stress.
13. Chocolate Covered Pineapple

Chocolate covered pineapple sounds almost too simple to bother writing down, but I keep coming back to it because the combination genuinely works. The tartness of fresh pineapple cuts right through the richness of dark chocolate in a way that feels almost fancy, even though you're just melting chocolate and dipping fruit. I made a big tray of these one year when I didn't have time for anything more involved, and honestly the plate cleared faster than the cookies did.
Ingredients
- 1 fresh pineapple, peeled, cored, and cut into 1-inch chunks (or use pre-cut from Costco or Walmart)
- 1½ cups dark chocolate chips or chopped dark chocolate (semi-sweet works too)
- 1 tablespoon coconut oil (helps the chocolate melt smoothly)
- Optional: flaky sea salt, sprinkles, or crushed freeze-dried strawberries for topping
- Toothpicks or short skewers for dipping
Instructions
- Pat the pineapple chunks completely dry with paper towels. This step matters — any moisture will cause the chocolate to seize up and clump instead of coating smoothly.
- Melt chocolate chips and coconut oil together in a microwave-safe bowl in 30-second intervals, stirring between each, until fully smooth. Alternatively, use a double boiler on the stovetop.
- Spear each pineapple chunk with a toothpick and dip into the melted chocolate, letting any excess drip back into the bowl. Place on a parchment-lined baking sheet.
- While the chocolate is still wet, add any toppings like flaky salt or sprinkles. Refrigerate for 20–30 minutes until the chocolate is fully set.
Tips
- Tip: Drying the pineapple thoroughly is the single most important step here. I learned the hard way that wet fruit and melted chocolate do not get along.
- Tip: White chocolate works beautifully here too — drizzle it over the dark chocolate coating once it's set for a two-tone look that feels very Valentine's Day.
- Tip: These are best eaten the same day. The pineapple releases juice over time and softens the chocolate shell, so don't make them too far ahead.
14. Strawberry Breakfast Parfaits
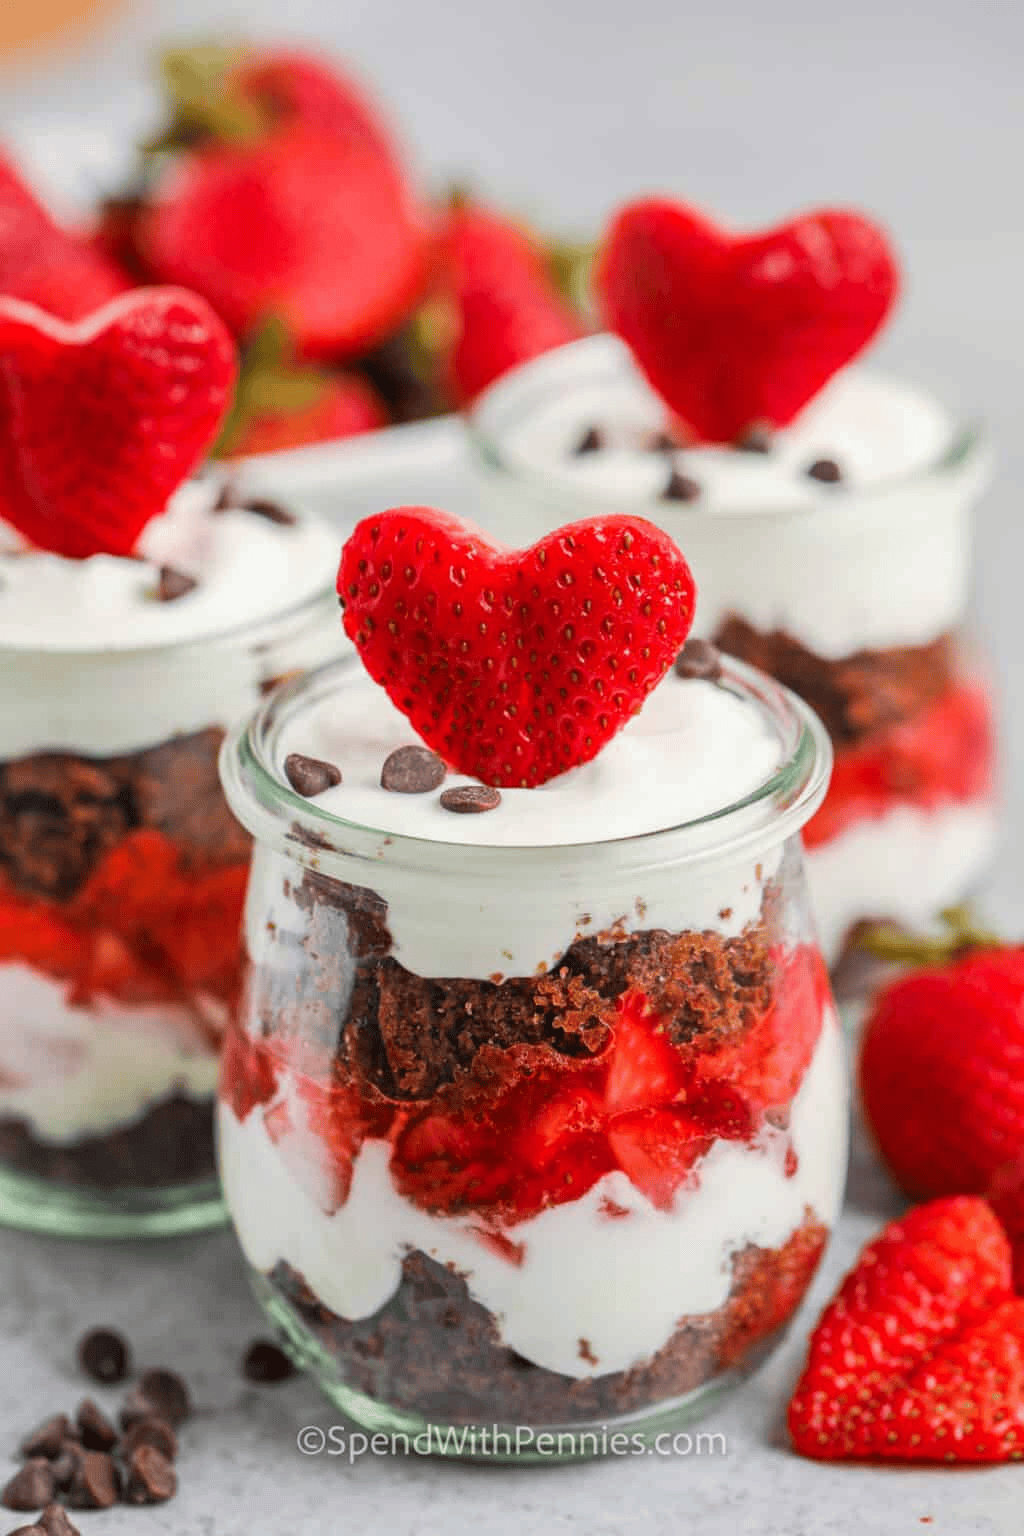
If you want something that feels special on Valentine's morning without actually cooking anything, this is the answer. Layered strawberry parfaits with Greek yogurt, crunchy granola, and fresh berries come together in about five minutes per glass and look genuinely beautiful on the table. I make these whenever I want a breakfast that feels like a treat but still has enough substance to actually carry us through the morning.
Ingredients
- 2 cups plain Greek yogurt (full-fat for the best texture)
- 2 tablespoons honey or maple syrup, plus more to taste
- 1 teaspoon vanilla extract
- 1½ cups fresh strawberries, hulled and sliced
- 1 cup granola (store-bought is perfectly fine — I use the Trader Joe's vanilla clusters)
- Optional: 2 tablespoons mini chocolate chips or a drizzle of chocolate sauce
Instructions
- Stir the honey and vanilla extract into the Greek yogurt until combined. Taste and adjust sweetness — some yogurts are tangier than others so you might want a little more honey.
- In a clear glass or jar, add a layer of granola first, then a layer of sweetened yogurt, then a layer of sliced strawberries. Repeat the layers until the glass is full, finishing with strawberries on top.
- Drizzle with a little extra honey and add mini chocolate chips if using. Serve immediately so the granola stays crunchy, or assemble just before serving.
Tips
- Tip: If you want to prep these the night before, keep the granola separate and add it right before serving. Otherwise it goes soggy overnight and loses all its crunch.
- Tip: Use clear glasses or mason jars so the layers are visible — it genuinely makes them look more impressive and feels more like an occasion breakfast.
- Tip: Frozen strawberries thawed overnight work fine here if fresh ones aren't looking great at the store — just drain off excess liquid before layering.
15. Crescent Dogs

I know crescent dogs might seem out of place on a Valentine's Day snack list, but hear me out — they are the easiest savory item you can put on a party spread, kids go absolutely wild for them, and they disappear within minutes. Flaky crescent roll dough wrapped around a hot dog and baked until golden is one of those snacks that requires almost no effort and somehow still feels like you did something. If you're hosting kids or just want something that isn't all chocolate and sugar, throw a batch of these in the oven.
Ingredients
- 1 can (8 oz) refrigerated crescent roll dough (Pillsbury is the standard)
- 8 hot dogs (beef or chicken, whichever you prefer)
- 1 tablespoon melted butter (optional, for brushing)
- Ketchup and mustard for serving
Instructions
- Preheat oven to 375°F. Line a baking sheet with parchment paper. Unroll the crescent dough and separate it into 8 triangles along the perforated lines.
- Place a hot dog at the wide end of each dough triangle and roll it up toward the narrow point, stretching the dough slightly to wrap snugly around the hot dog. Place on the prepared baking sheet with the dough point tucked underneath.
- Brush the tops lightly with melted butter if using — it gives them a beautiful golden color. Bake for 12–14 minutes until the dough is puffed and golden brown.
- Let cool for a couple of minutes before serving. Serve with ketchup and mustard on the side.
Tips
- Tip: For a Valentine's twist, cut each hot dog in half and wrap smaller pieces of dough around them to make mini crescent dogs — easier for little hands and more bite-sized for a snack spread.
- Tip: Keep the dough cold until you're ready to use it. Warm crescent dough gets sticky and harder to handle, so work quickly once you open the can.
- Tip: You can add a thin strip of cheese inside the dough before rolling — a little cheddar melted inside makes these even better and kids love the surprise.
16. Simple Homemade Membrillo (Quince Paste)

Membrillo is one of those things I'd eaten at Spanish restaurants and always assumed was impossible to make at home. It's not. Quince paste is basically quince fruit cooked down with sugar until it turns into this deep amber, sliceable block that tastes floral and sweet with a slight tartness — it pairs beautifully with sharp cheese and crackers, which makes it one of the most sophisticated things you can put on a Valentine's charcuterie board. Quince is available at most grocery stores in fall and winter, or check the international aisle if your store is smaller.
Ingredients
- 2 lbs quince (about 3–4 medium fruits)
- 1½ cups granulated sugar (approximately — you'll measure based on the cooked fruit weight)
- Juice of 1 lemon
- ½ cup water
- Pinch of salt
Instructions
- Peel, core, and roughly chop the quince. Place in a saucepan with the water and lemon juice. Cover and simmer over medium-low heat for about 30–40 minutes until completely soft and easily pierced with a fork.
- Drain any excess liquid and blend or mash the cooked quince until completely smooth. Weigh the puree — you'll need an equal weight of sugar (so if you have 1 lb of puree, use 1 lb of sugar).
- Return the puree to the saucepan, add the measured sugar and pinch of salt. Cook over medium-low heat, stirring frequently, for 45–60 minutes. The mixture will thicken dramatically and turn from pale yellow to a deep reddish-amber. It's done when it pulls away from the sides of the pan cleanly.
- Pour into a parchment-lined loaf pan or shallow dish and smooth the top. Let cool completely at room temperature, then refrigerate uncovered overnight until fully set and sliceable.
- Slice into thin pieces and serve alongside sharp cheddar, manchego, or brie with crackers.
Tips
- Tip: The long cooking time in step 3 is not optional — this is what develops the deep color and jammy, sliceable texture. Don't rush it by turning up the heat or it will scorch on the bottom.
- Tip: Membrillo keeps wrapped in the fridge for up to 3 weeks, so you can absolutely make this several days before Valentine's Day and have it ready to go.
- Tip: If you can't find quince, this technique works similarly with firm pears — the result won't be identical but it'll still be a lovely fruit paste for a cheese board.
11. S'more Cookie Dough Truffles
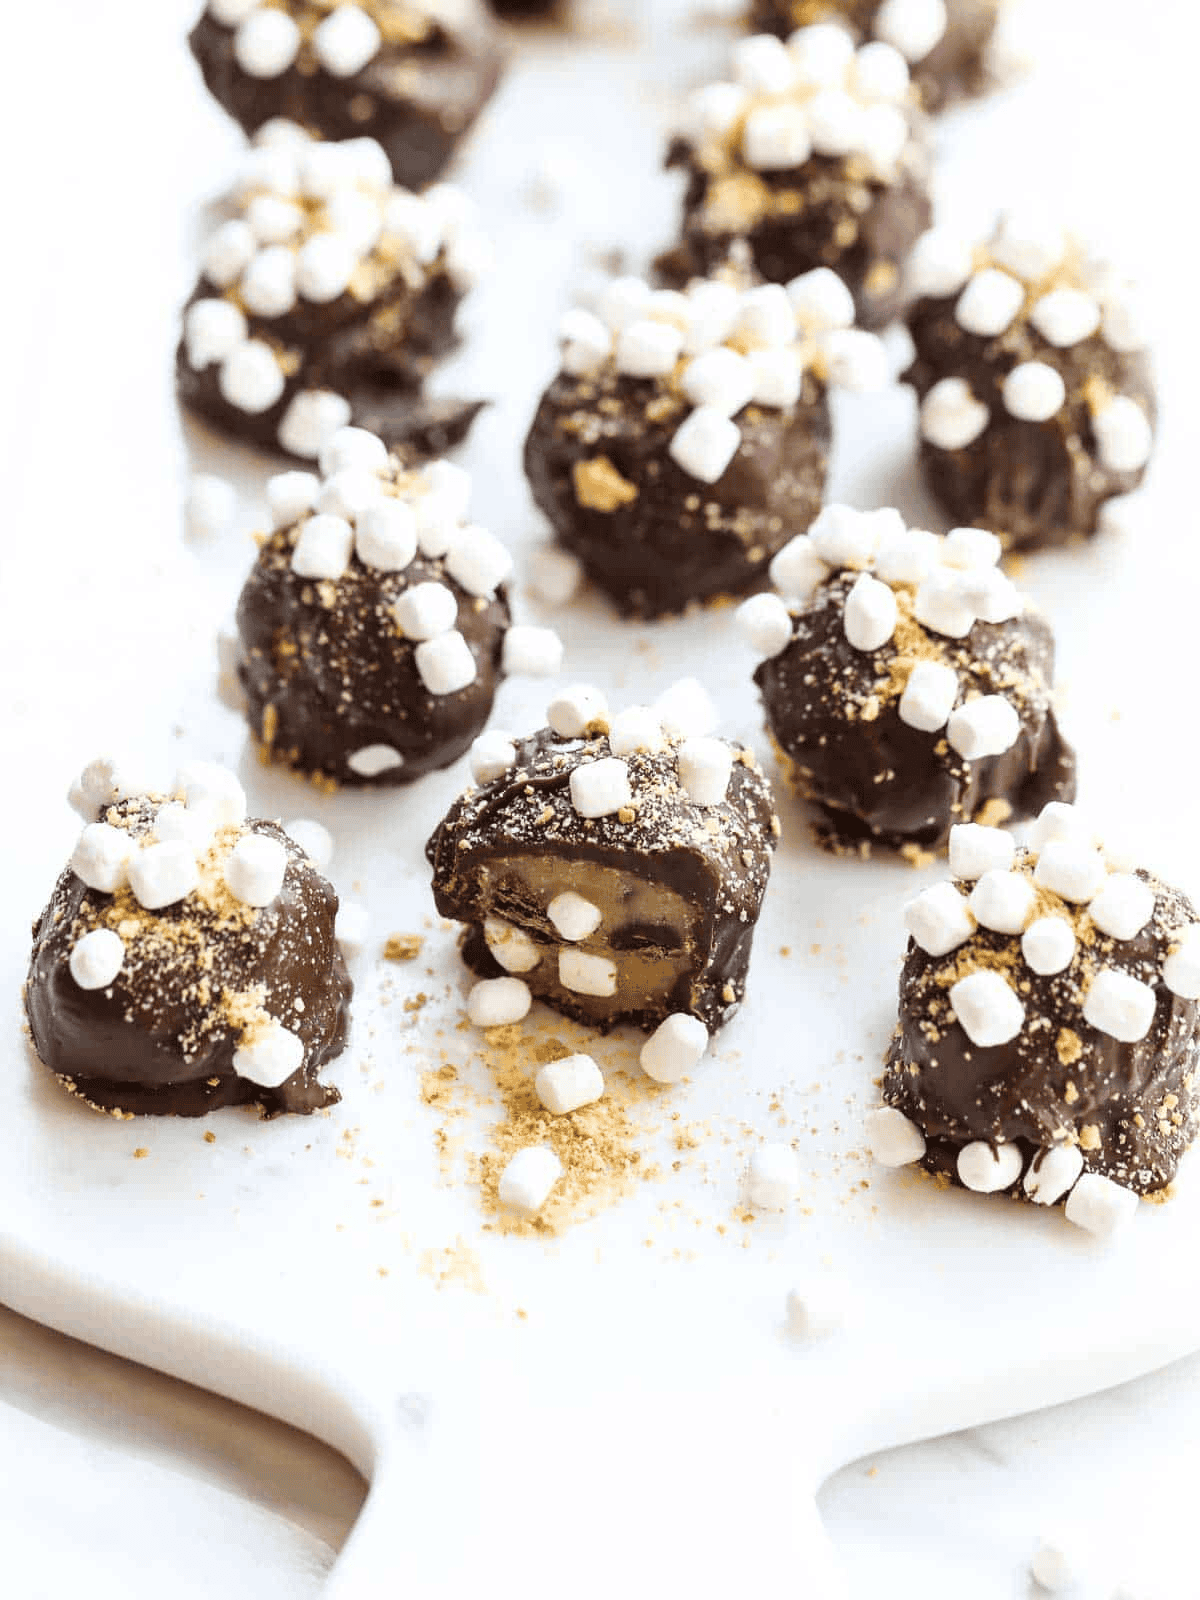
Cookie dough truffles are already dangerous to have in the house — but when you add a s'mores twist, they become completely unreasonable. These are no-bake, no eggs, and they come together with graham cracker crumbs, mini chocolate chips, and a chocolate coating that sets up firm. I made a batch of these on a whim one evening and Zainab ate four before I could pack them into the fridge. They look fancy enough to gift in a little box, but they're genuinely easy to pull off.
Ingredients
- 1 cup all-purpose flour (heat-treated — microwave 1 min, let cool)
- ½ cup unsalted butter, softened
- ½ cup packed brown sugar
- 2 tablespoons milk
- 1 teaspoon vanilla extract
- ½ cup graham cracker crumbs (about 4 full crackers crushed fine)
- ½ cup mini chocolate chips
- ¼ cup mini marshmallows, roughly chopped
- 8 oz semi-sweet chocolate chips or melting wafers, for coating
- Extra graham cracker crumbs for topping
Instructions
- Beat butter and brown sugar together until fluffy. Add milk and vanilla and mix well.
- Stir in the heat-treated flour and graham cracker crumbs until a soft dough forms. Fold in the mini chocolate chips and chopped marshmallows.
- Roll the dough into 1-inch balls and place on a parchment-lined baking sheet. Freeze for 20 minutes until firm.
- Melt the chocolate coating in a microwave-safe bowl in 30-second intervals, stirring between each, until smooth.
- Dip each truffle into the melted chocolate using a fork, let the excess drip off, and place back on the parchment. Sprinkle with extra graham cracker crumbs immediately before the chocolate sets.
- Refrigerate for at least 15 minutes until the coating is fully set. Store in an airtight container in the fridge for up to 5 days.
Tips
- Tip: Don't skip the heat-treating step on the flour — raw flour can carry bacteria, and since these aren't baked, it matters.
- Tip: Melting wafers (like Ghirardelli or Wilton brand from Walmart) give a cleaner, firmer coating than regular chocolate chips, which can seize if overheated.
- Tip: If the dough feels too sticky to roll, refrigerate it for 10 minutes before shaping — it firms up quickly.
10. Cinnamon Berry & Beetroot Smoothie Bowl (Raw, Vegan)
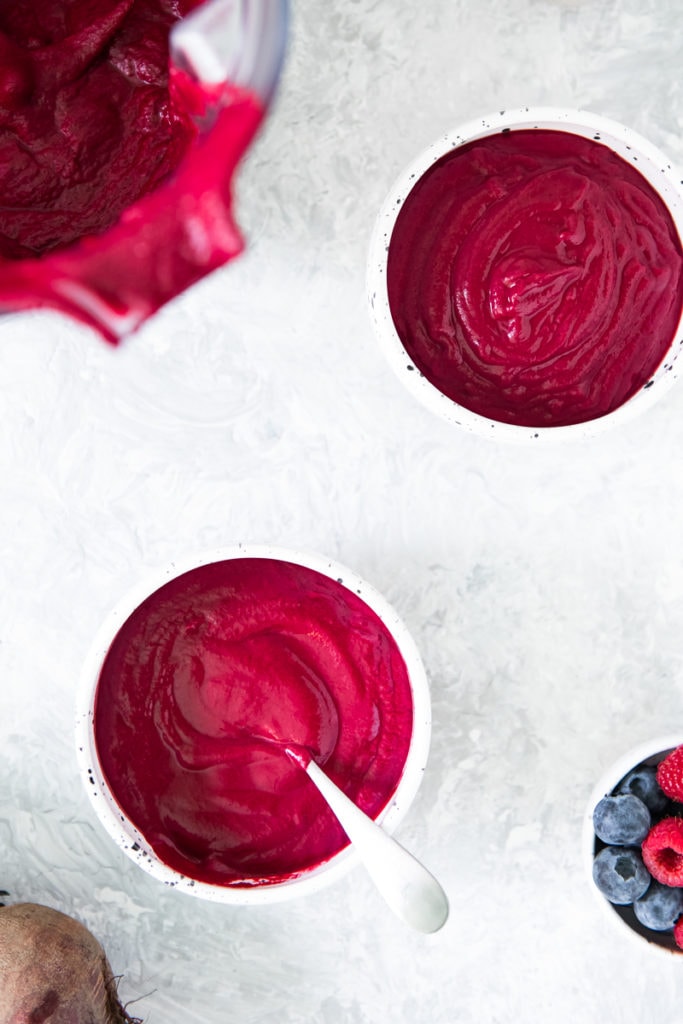
This smoothie bowl is genuinely one of the prettiest things you can put on a table for Valentine's Day — that deep magenta color from the beetroot and berries looks like it was designed for the occasion. It's raw, vegan, and actually filling because of the frozen banana base. I was skeptical about beetroot in a sweet bowl the first time I made it, but you don't taste the earthiness at all once the berries and cinnamon come in. It's a great option if you're doing a healthy snack spread alongside the more indulgent treats on this list.
Ingredients
- 1 small raw beet, peeled and roughly chopped (or ½ cup pre-cooked beet)
- 1 cup frozen mixed berries (strawberries, raspberries, or blueberries)
- 1 medium frozen banana, broken into chunks
- ½ teaspoon ground cinnamon
- ¼ cup unsweetened almond milk (or any plant-based milk), plus more if needed
- 1 tablespoon almond butter (optional, for extra creaminess)
- Toppings: fresh berries, granola, coconut flakes, sliced banana, chia seeds
Instructions
- Add the beet, frozen berries, frozen banana, cinnamon, almond milk, and almond butter (if using) to a high-powered blender.
- Blend on high until completely smooth, scraping down the sides as needed. Add milk one tablespoon at a time only if the blender is struggling — you want a thick, spoonable consistency, not drinkable.
- Pour into a wide bowl and smooth the top. Arrange your toppings in rows or sections for that classic smoothie bowl look — fresh berries, a sprinkle of granola, coconut flakes, and chia seeds all work beautifully here.
- Serve immediately — smoothie bowls don't hold well once assembled, so have your toppings prepped and ready before you blend.
Tips
- Tip: If using raw beet, it blends best when the pieces are small. Pre-cooked beet (the vacuum-sealed kind from Trader Joe's or Aldi) is a great shortcut and blends even smoother.
- Tip: Freeze your banana ahead of time — a ripe, spotted banana frozen overnight gives the base its thick, creamy texture without any dairy.
- Tip: To make it more Valentine's-themed, use heart-shaped strawberry slices and red sprinkles as part of your topping arrangement.
9. Easy Chocolate Covered Figs – Refined Sugar Free!

Figs dipped in dark chocolate sound like something you'd find at a specialty shop for twelve dollars, but they take about fifteen minutes at home and the result is genuinely stunning. The natural sweetness of the fig means you don't need any added sugar in the chocolate coating — just use good quality dark chocolate (70% or above) and it handles itself. These are naturally refined sugar-free, which makes them a nice option if you're making a snack spread that includes something for everyone. I use dried Mission figs from Costco for this, and they work perfectly.
Ingredients
- 12 dried figs (Mission or Calimyrna), stems trimmed
- 4 oz dark chocolate (70% cacao or higher), roughly chopped
- 1 teaspoon coconut oil (helps the chocolate stay smooth and glossy)
- Flaky sea salt, for topping
- Optional: crushed pistachios or freeze-dried raspberry powder for decoration
Instructions
- Line a baking sheet with parchment paper. If your figs feel very dry, soak them in warm water for 5 minutes and pat completely dry before dipping.
- Melt the dark chocolate and coconut oil together in a microwave-safe bowl in 30-second bursts, stirring between each, until fully smooth.
- Hold each fig by the top and dip it about three-quarters of the way into the chocolate, letting the excess drip off. Place on the prepared sheet.
- Immediately sprinkle with flaky sea salt and any other toppings you're using. Work quickly before the chocolate starts to set.
- Refrigerate for 15-20 minutes until the chocolate is fully set. Store in a single layer in an airtight container at room temperature for up to 3 days, or refrigerate for up to a week.
Tips
- Tip: The coconut oil is worth adding — it keeps the chocolate coating from cracking when you bite in and gives it a beautiful shine.
- Tip: These look impressive on a small dessert board alongside some cheese and nuts — very little effort, very good presentation for Valentine's.
- Tip: If you can't find dried figs at your regular grocery store, check the dried fruit aisle at Walmart or Trader Joe's — they're more widely available than people think.
8. Pomegranate Smoothie With Strawberries and Banana
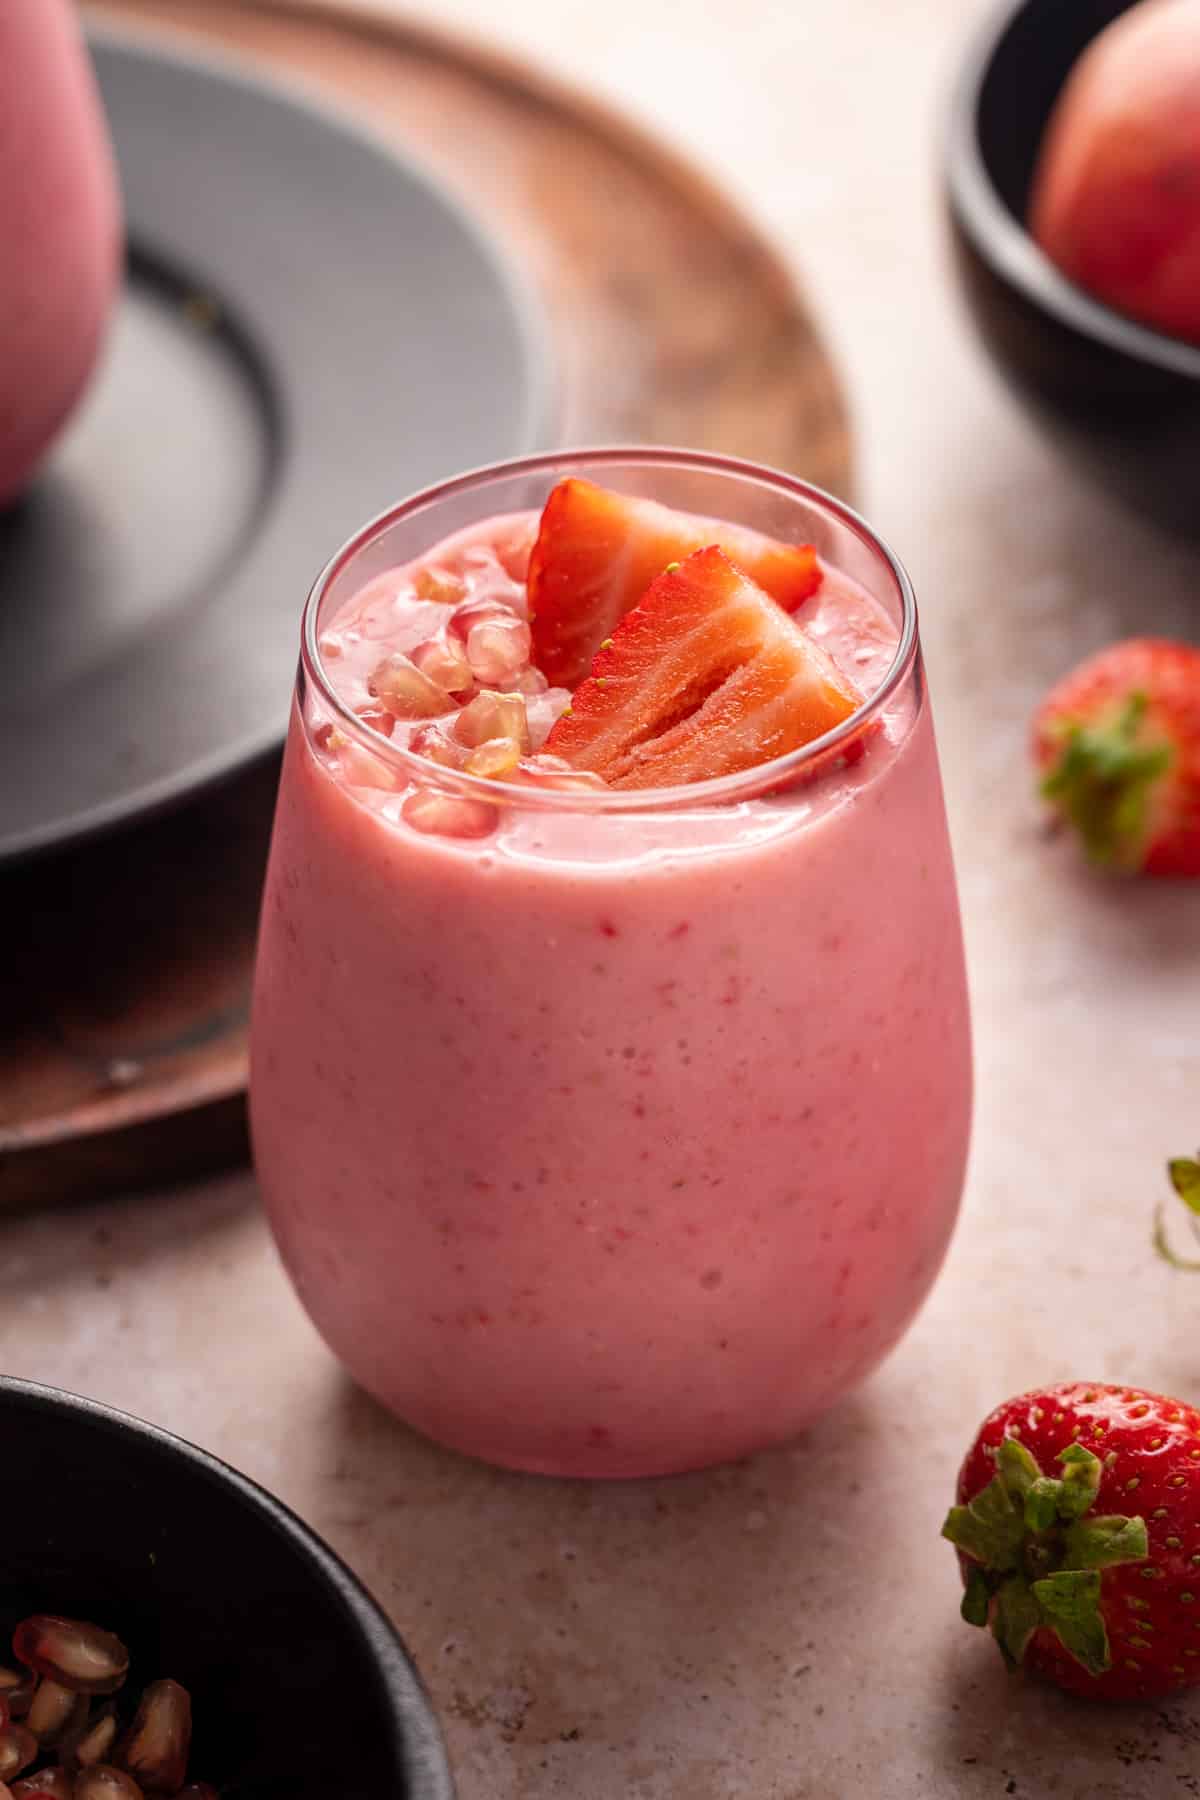
This smoothie is a deep, jewel-toned red that honestly looks like it was made for Valentine's Day — and you don't have to do anything special to achieve that color, it just comes from the pomegranate and strawberries doing their thing. The banana rounds out the tartness and makes it creamy enough to feel like a treat. I make a version of this at home using POM Wonderful pomegranate juice when fresh pomegranate isn't in season, and it works just as well. If you want something lighter alongside all the chocolate on this list, this is your answer — check out my strawberry watermelon smoothie for another fruity option along these lines.
Ingredients
- ½ cup pomegranate juice (or seeds from 1 pomegranate)
- 1 cup frozen strawberries
- 1 medium ripe banana (fresh or frozen)
- ½ cup plain Greek yogurt (or coconut yogurt to keep it dairy-free)
- ¼ cup milk of choice
- 1 tablespoon honey or maple syrup (optional, taste first)
- A few ice cubes if using fresh (not frozen) fruit
Instructions
- Add all ingredients to a blender — pomegranate juice first (this helps the blades get going), then the frozen fruit, yogurt, milk, and sweetener if using.
- Blend on high for about 60 seconds until completely smooth. Taste and adjust sweetness — pomegranate can be quite tart depending on the brand, so you might want a touch more honey.
- Pour into glasses and serve immediately. Garnish with a few fresh pomegranate arils or a sliced strawberry on the rim if you want to make it look a little extra for Valentine's.
Tips
- Tip: Using frozen strawberries instead of fresh gives you a thicker, colder smoothie without needing ice — and it's cheaper than buying fresh berries in February.
- Tip: POM Wonderful pomegranate juice (available at most Walmart and Costco stores) works perfectly here and saves you the work of seeding a pomegranate.
- Tip: Double the batch and pour into small glasses for a Valentine's brunch — it makes a beautiful first course before you bring out the food.
7. Deviled Strawberries
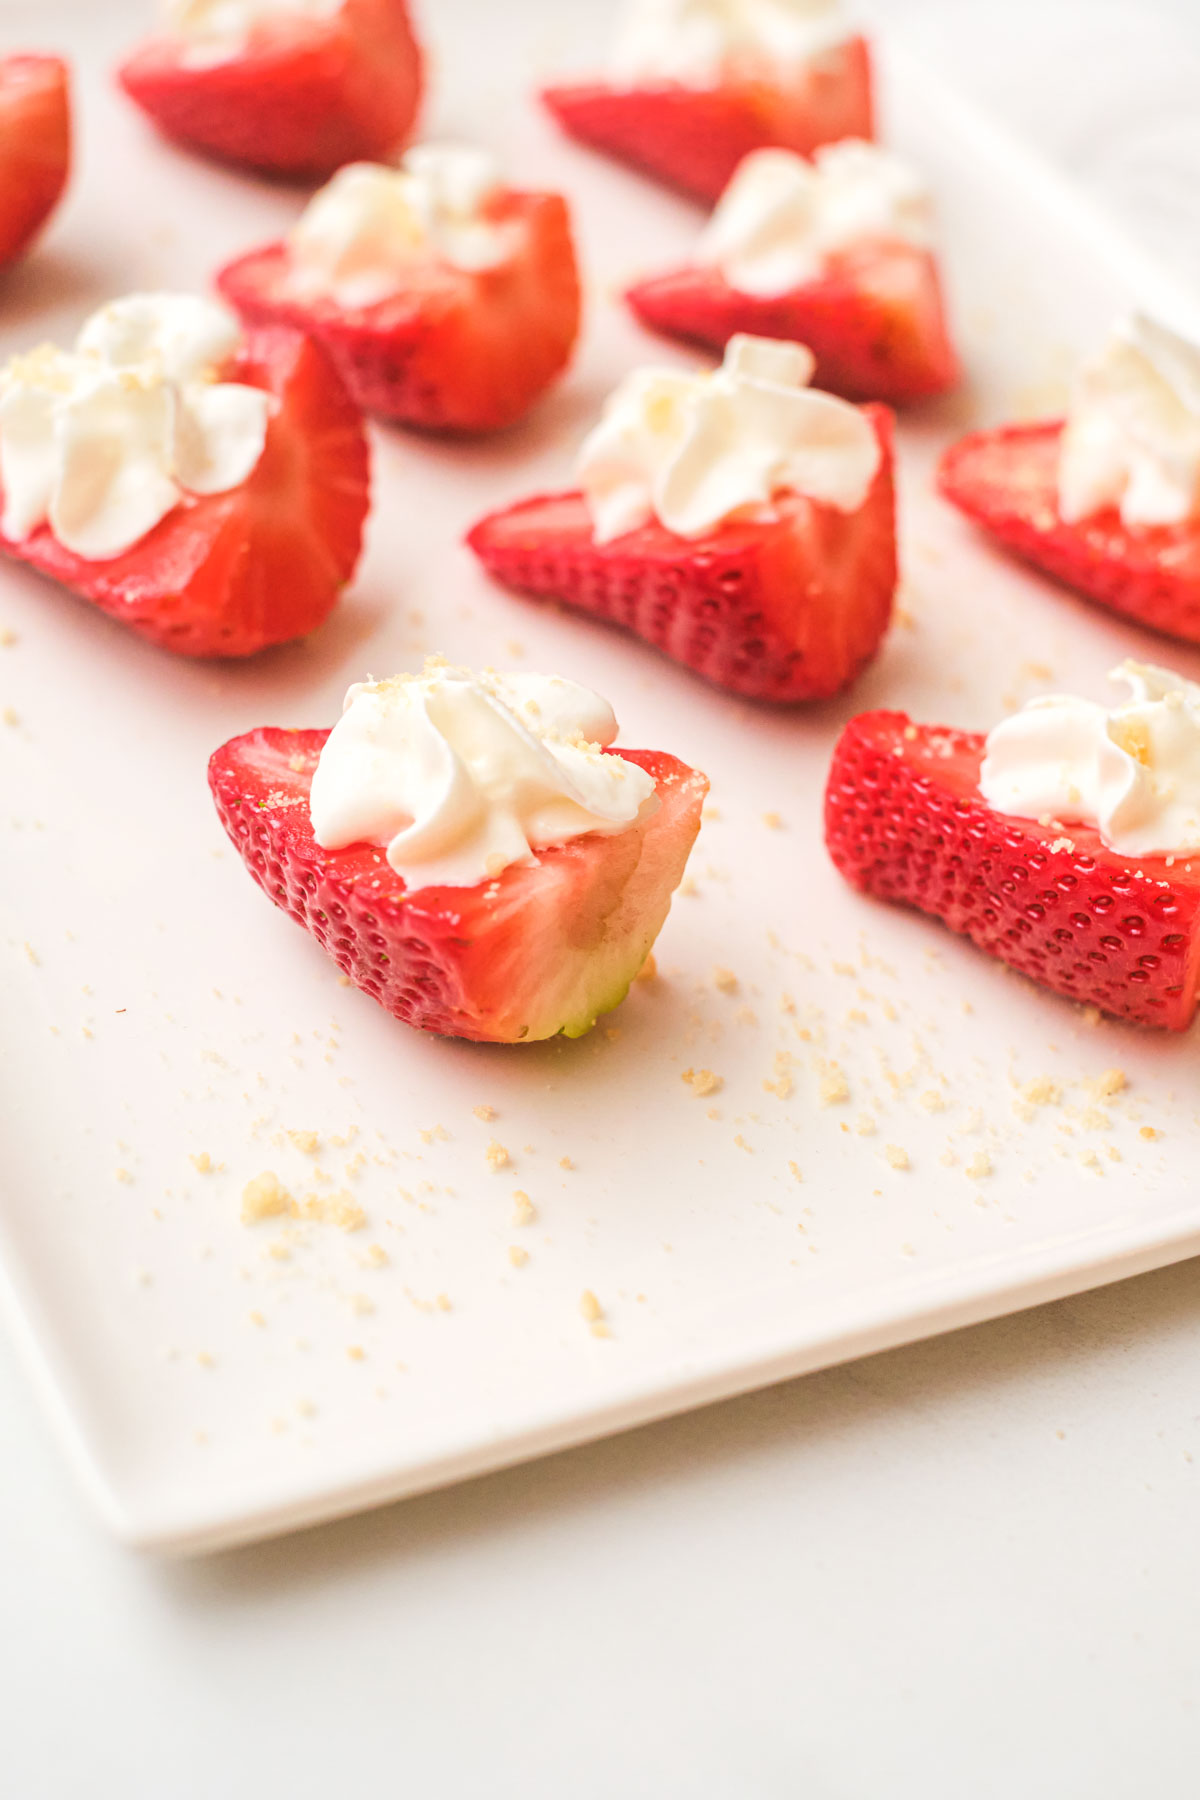
Deviled strawberries are basically the dessert version of deviled eggs — you hollow out the strawberry, pipe in a sweet cream cheese filling, and suddenly you have something that looks like it came from a catering table. They're a staple for Valentine's Day snack spreads because they're naturally heart-shaped, bite-sized, and you can make them an hour ahead without anything getting soggy. The filling is just cream cheese, powdered sugar, and vanilla — three ingredients that most people already have. I make these whenever I need a crowd-pleasing dessert snack that looks impressive but takes almost no effort.
Ingredients
- 1 lb fresh strawberries (large ones work best — look for uniform size)
- 8 oz cream cheese, softened to room temperature
- ¾ cup powdered sugar, sifted
- 1 teaspoon vanilla extract
- 1-2 tablespoons heavy cream (to loosen the filling if needed)
- Red or pink sprinkles, for topping (optional)
- Graham cracker crumbs, for topping (optional but really good)
Instructions
- Wash and dry the strawberries thoroughly — any moisture will make the filling slide around. Cut off the green tops so each berry sits flat, then use a small paring knife or melon baller to hollow out a cavity in the center of each one. Don't go too deep or the walls get too thin.
- Beat the softened cream cheese until smooth. Add the powdered sugar and vanilla extract and beat again until fluffy and well combined. If the filling is too thick to pipe, add heavy cream one tablespoon at a time until it's a smooth, pipeable consistency.
- Transfer the filling to a piping bag fitted with a star tip (or use a zip-lock bag with the corner snipped off — works just fine). Pipe the filling generously into each hollowed strawberry.
- Top each one with sprinkles, graham cracker crumbs, or a tiny pinch of flaky salt if you want a more grown-up flavor. Refrigerate until ready to serve — they hold well for up to 2 hours assembled.
Tips
- Tip: Cold cream cheese will not beat smooth — it'll stay lumpy and the filling will have a grainy texture. Let it sit out for at least 20 minutes before you start.
- Tip: Pick strawberries that are similar in size so they sit evenly on a platter — it makes the whole presentation look much more intentional.
- Tip: You can prep the hollowed strawberries and the filling separately up to a day ahead, then pipe and assemble an hour before serving — keeps everything fresh.
21. Vegan Date Brownies
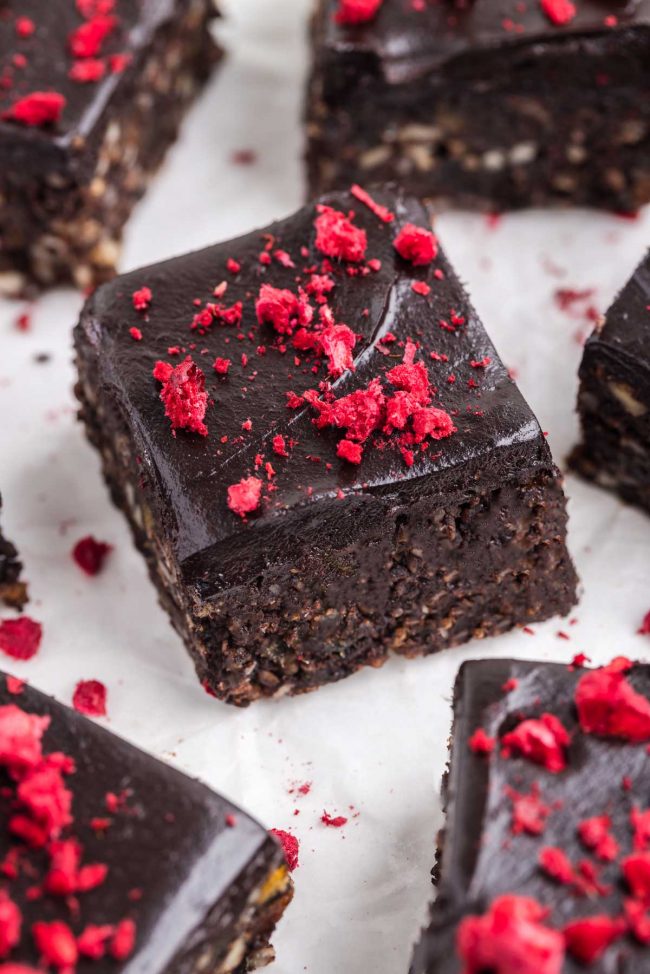
I was skeptical the first time someone told me brownies made with dates could actually satisfy a chocolate craving. I was wrong — these are genuinely fudgy, rich, and deeply chocolatey without any baking required. They hold together well, slice cleanly, and nobody at my house guessed they were vegan until I told them. If you're making a Valentine's spread that includes people with dietary restrictions, these earn their place on the table alongside everything else.
Ingredients
- 2 cups Medjool dates, pitted (about 20-22 dates)
- 1 cup raw walnuts or pecans
- ½ cup unsweetened cocoa powder
- 2 tablespoons almond butter (or any nut butter)
- 1 teaspoon vanilla extract
- ¼ teaspoon fine sea salt
- 2–3 tablespoons dairy-free chocolate chips, for topping (optional)
Instructions
- If your dates feel dry or firm, soak them in warm water for 10 minutes, then drain and pat dry before using.
- Add the walnuts to a food processor and pulse until roughly broken down — not flour, just small crumbles. Transfer to a bowl and set aside.
- Add the pitted dates to the food processor and process until a sticky paste forms, about 1 minute. Add the cocoa powder, almond butter, vanilla, and salt. Process again until fully combined and the mixture pulls away from the sides.
- Add the walnut crumbles back in and pulse just 3–4 times to mix them through — you want some texture remaining.
- Press the mixture firmly into a parchment-lined 8×8 inch pan. Scatter chocolate chips on top and press them lightly in. Refrigerate for at least 1 hour before slicing into squares.
Tips
- Tip: Medjool dates work best here — they're naturally softer and stickier than regular pitted dates. Find them at Costco or Trader Joe's in large bags for a good price.
- Tip: Use a sharp knife warmed under hot water for the cleanest slices — these are sticky and a cold blade will drag.
- Tip: These keep in the fridge for up to a week, or freeze well for up to a month — make them a few days ahead to save yourself stress on Valentine's Day.
22. Chocolate Sourdough Bread
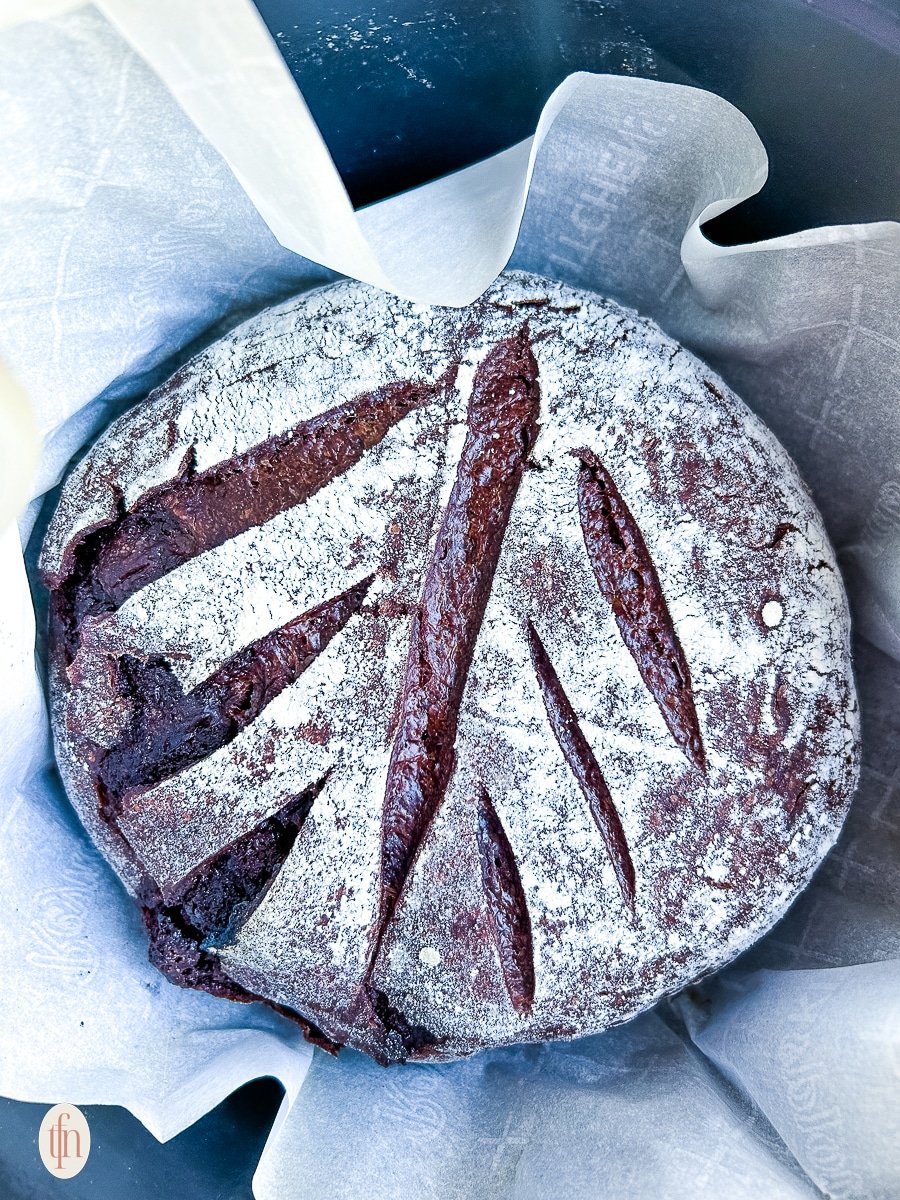
This one is for the bread bakers in the group — and honestly, it might be the most impressive thing on this entire list. A naturally leavened sourdough loaf studded with chocolate, it walks the line between breakfast bread and dessert in the best possible way. Slice it thick, toast it lightly, and serve it with butter on Valentine's morning. If you already have an active sourdough starter going, this is a beautiful way to use it. If you've been wanting a unique Valentine's breakfast idea, this is it.
Ingredients
- 100g active sourdough starter (fed and bubbly)
- 375g bread flour (about 3 cups)
- 30g unsweetened cocoa powder (about ¼ cup)
- 280g warm water (about 1⅛ cups)
- 8g fine sea salt (about 1½ teaspoons)
- 50g granulated sugar (about ¼ cup)
- 1 cup semi-sweet chocolate chips or chopped dark chocolate
Instructions
- In a large bowl, whisk together the starter and warm water. Add the flour, cocoa powder, sugar, and salt and mix until no dry flour remains. Cover and rest for 30 minutes (this is the autolyse).
- Perform 4 sets of stretch-and-folds over 2 hours, spaced 30 minutes apart. After the second set, add the chocolate chips and fold them in evenly.
- After bulk fermentation (4–6 hours at room temperature, until dough has grown about 50%), shape the dough into a round or oval loaf and place it in a floured banneton or a bowl lined with a floured kitchen towel.
- Cover and cold-proof in the refrigerator overnight (8–12 hours). This makes the bread easier to score and develops the flavor.
- Preheat your oven to 500°F with a Dutch oven inside for at least 45 minutes. Turn the cold dough out onto parchment, score the top with a sharp knife or bread lame, and bake covered for 20 minutes. Remove the lid and bake another 20–25 minutes until the crust is deep and set.
- Cool on a wire rack for at least 1 hour before slicing — cutting too early makes the crumb gummy.
Tips
- Tip: Start this bread the day before Valentine's Day — the overnight cold proof is what gives it that incredible depth of flavor and makes the morning bake stress-free.
- Tip: No Dutch oven? Use a large oven-safe pot with a lid that fits — the steam trapped inside is what creates the crispy crust, so any covered vessel works.
- Tip: Dark chocolate chips hold their shape better than milk chocolate during baking — go for 60% cacao or higher if you can find them at Trader Joe's or Whole Foods.
23. Creamy Beet Feta Dip
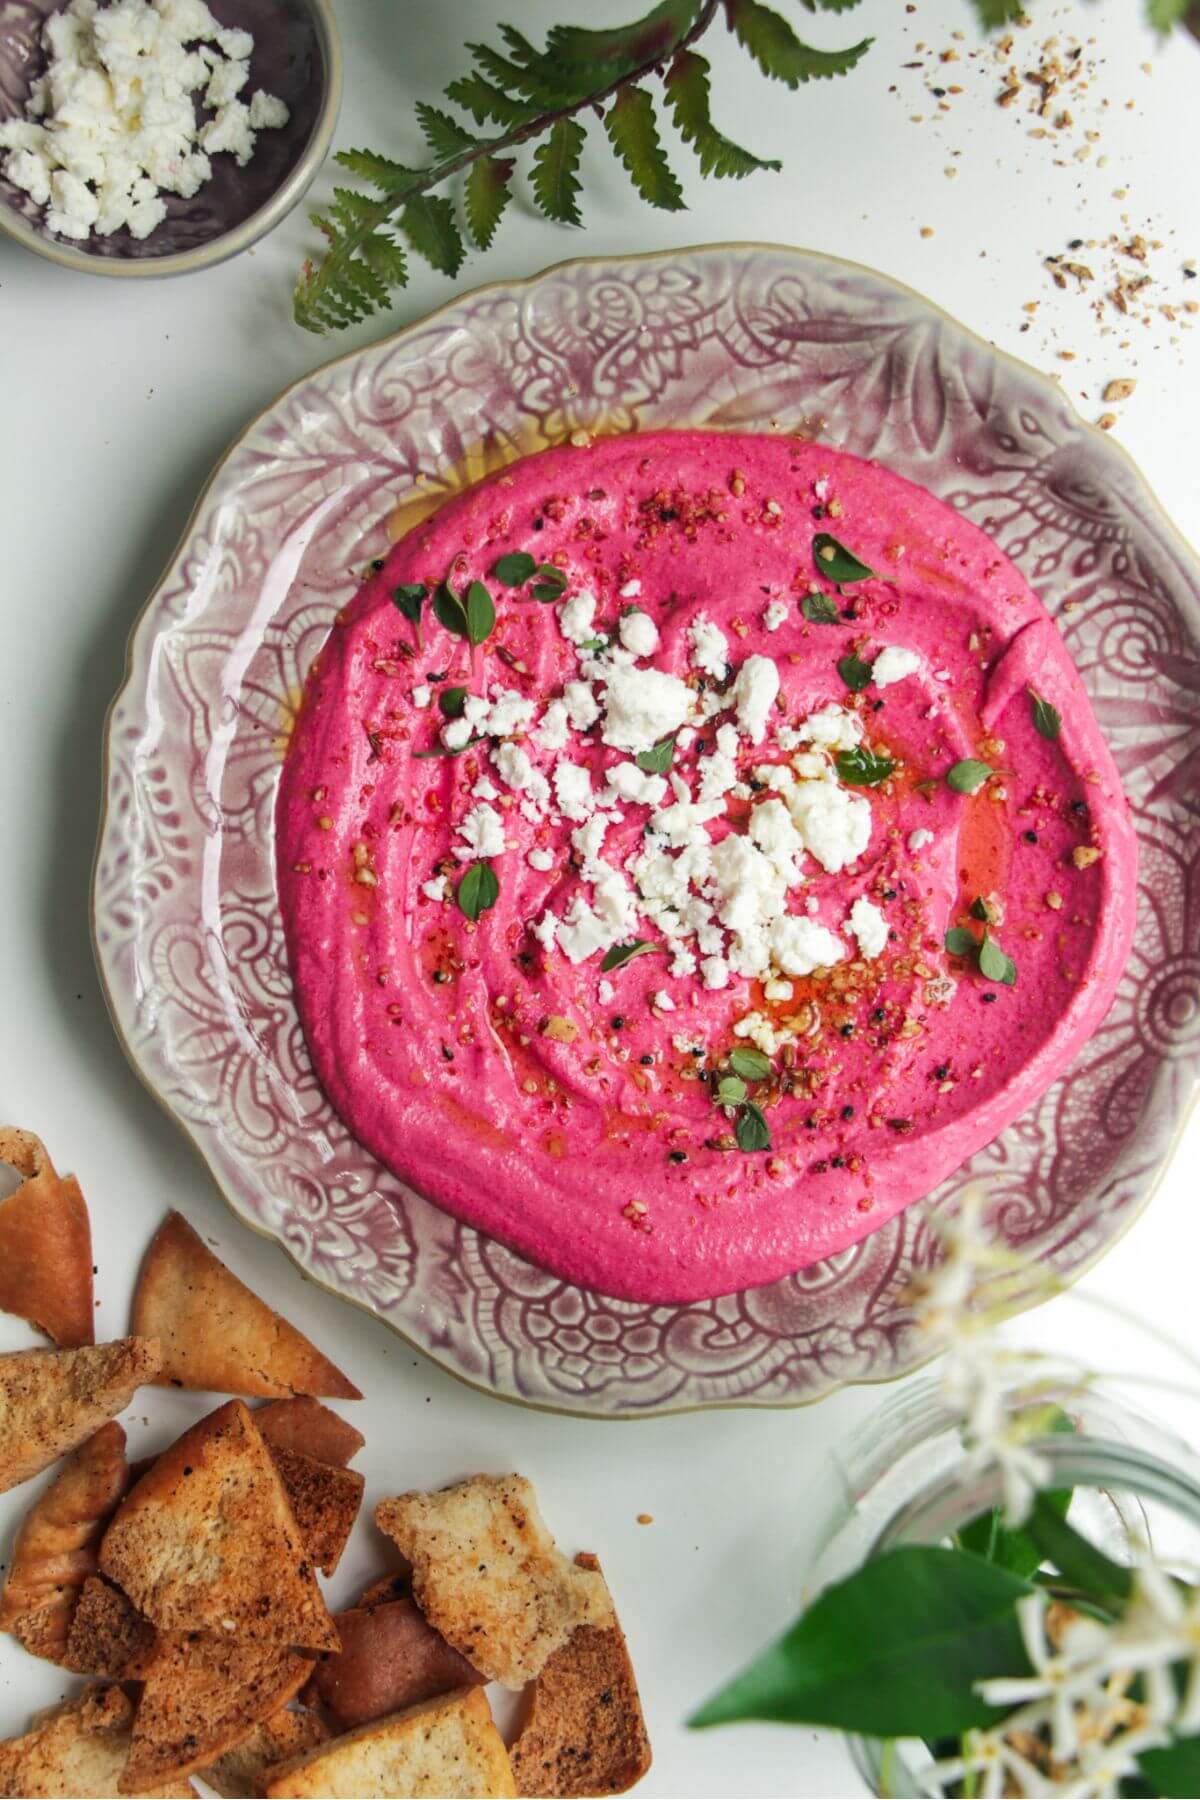
If you want something on your Valentine's table that looks stunning without a lot of effort, this is it. The color alone — that deep magenta pink — is practically made for February 14th. The roasted beets blended with salty feta create a dip that's earthy, creamy, and just tangy enough to keep you going back for more. Set it out with pita chips, sliced cucumbers, and some crackers and it disappears faster than the chocolate. I served this at a little gathering last year and three people asked me for the recipe before they'd even finished their first scoop.
Ingredients
- 3 medium beets, roasted and peeled (or one 15 oz can of whole beets, drained)
- 4 oz feta cheese, crumbled (plus a little extra for topping)
- 3 tablespoons olive oil, divided
- 2 tablespoons plain Greek yogurt
- 1 small garlic clove
- 1 tablespoon lemon juice
- ¼ teaspoon cumin
- Salt and black pepper to taste
Instructions
- To roast fresh beets: wrap them in foil and roast at 400°F for 45–55 minutes until a knife slides in easily. Let them cool, then rub the skins off with a paper towel. Skip this step if using canned beets.
- Roughly chop the roasted beets and add them to a food processor with the feta, 2 tablespoons of olive oil, Greek yogurt, garlic, lemon juice, and cumin.
- Process until very smooth, scraping down the sides as needed — about 2 minutes of running. Taste and adjust salt, pepper, and lemon juice.
- Transfer to a serving bowl. Drizzle with the remaining tablespoon of olive oil, scatter a little extra crumbled feta on top, and add a pinch of flaky salt if you have it.
Tips
- Tip: Canned beets work perfectly here and save you nearly an hour — grab them at any Walmart or Aldi and nobody will know the difference in a dip this heavily seasoned.
- Tip: Beet juice stains everything — use an old cutting board and don't wear white while you're making this.
- Tip: Make this up to 2 days ahead and store it covered in the fridge — the flavor actually improves overnight as the garlic mellows into the beets.
24. Chocolate-Covered Cherries

Chocolate-covered cherries feel like something you'd find in a fancy candy shop box, but they're genuinely easy to make at home with just a few ingredients. The classic version has a sweet fondant center that liquefies slightly around the cherry as it sits — that syrupy, jammy interior under a crisp chocolate shell is one of those combinations that just works. Saad spotted these on the counter once and ate four before I could arrange them properly. They look beautiful on a little plate for Valentine's Day and take maybe 30 minutes of actual hands-on time.
Ingredients
- 1 jar (10 oz) maraschino cherries with stems, drained and patted very dry
- 1½ cups powdered sugar, sifted
- 1 tablespoon unsalted butter, softened
- 1 tablespoon heavy cream
- ½ teaspoon vanilla extract
- 2 cups semi-sweet chocolate chips or chopped chocolate
- 1 tablespoon coconut oil or vegetable shortening (helps the chocolate coat smoothly)
Instructions
- Drain the cherries and spread them on paper towels. Pat them thoroughly dry — any moisture will cause your chocolate to seize, so take your time here.
- Mix the softened butter, heavy cream, and vanilla together, then stir in the sifted powdered sugar until a firm, pliable fondant dough forms. If it's too sticky, add a little more powdered sugar a tablespoon at a time.
- Take about 1 teaspoon of fondant, flatten it in your palm, and wrap it around each cherry, leaving the stem exposed. Set on a parchment-lined baking sheet and refrigerate for 20 minutes to firm up.
- Melt the chocolate chips and coconut oil together in 30-second microwave bursts, stirring between each, until smooth. Let it cool slightly so it doesn't melt the fondant.
- Hold each cherry by the stem and dip it into the chocolate, letting the excess drip off. Place back on the parchment sheet and let set at room temperature, or refrigerate for 15 minutes to speed it up.
Tips
- Tip: If you want that classic liqueur-center effect, let the finished chocolates sit at room temperature for 1–2 days before eating — the fondant slowly dissolves around the cherry to create a syrupy center.
- Tip: Drying the cherries completely is the most important step — I've rushed this and ended up with chocolate that cracked and slid off. Give them a full 30 minutes on paper towels.
- Tip: Store finished cherries in a cool spot or the fridge for up to 2 weeks — they actually taste better after a few days once the center softens.
25. Dehydrated Strawberry Chips
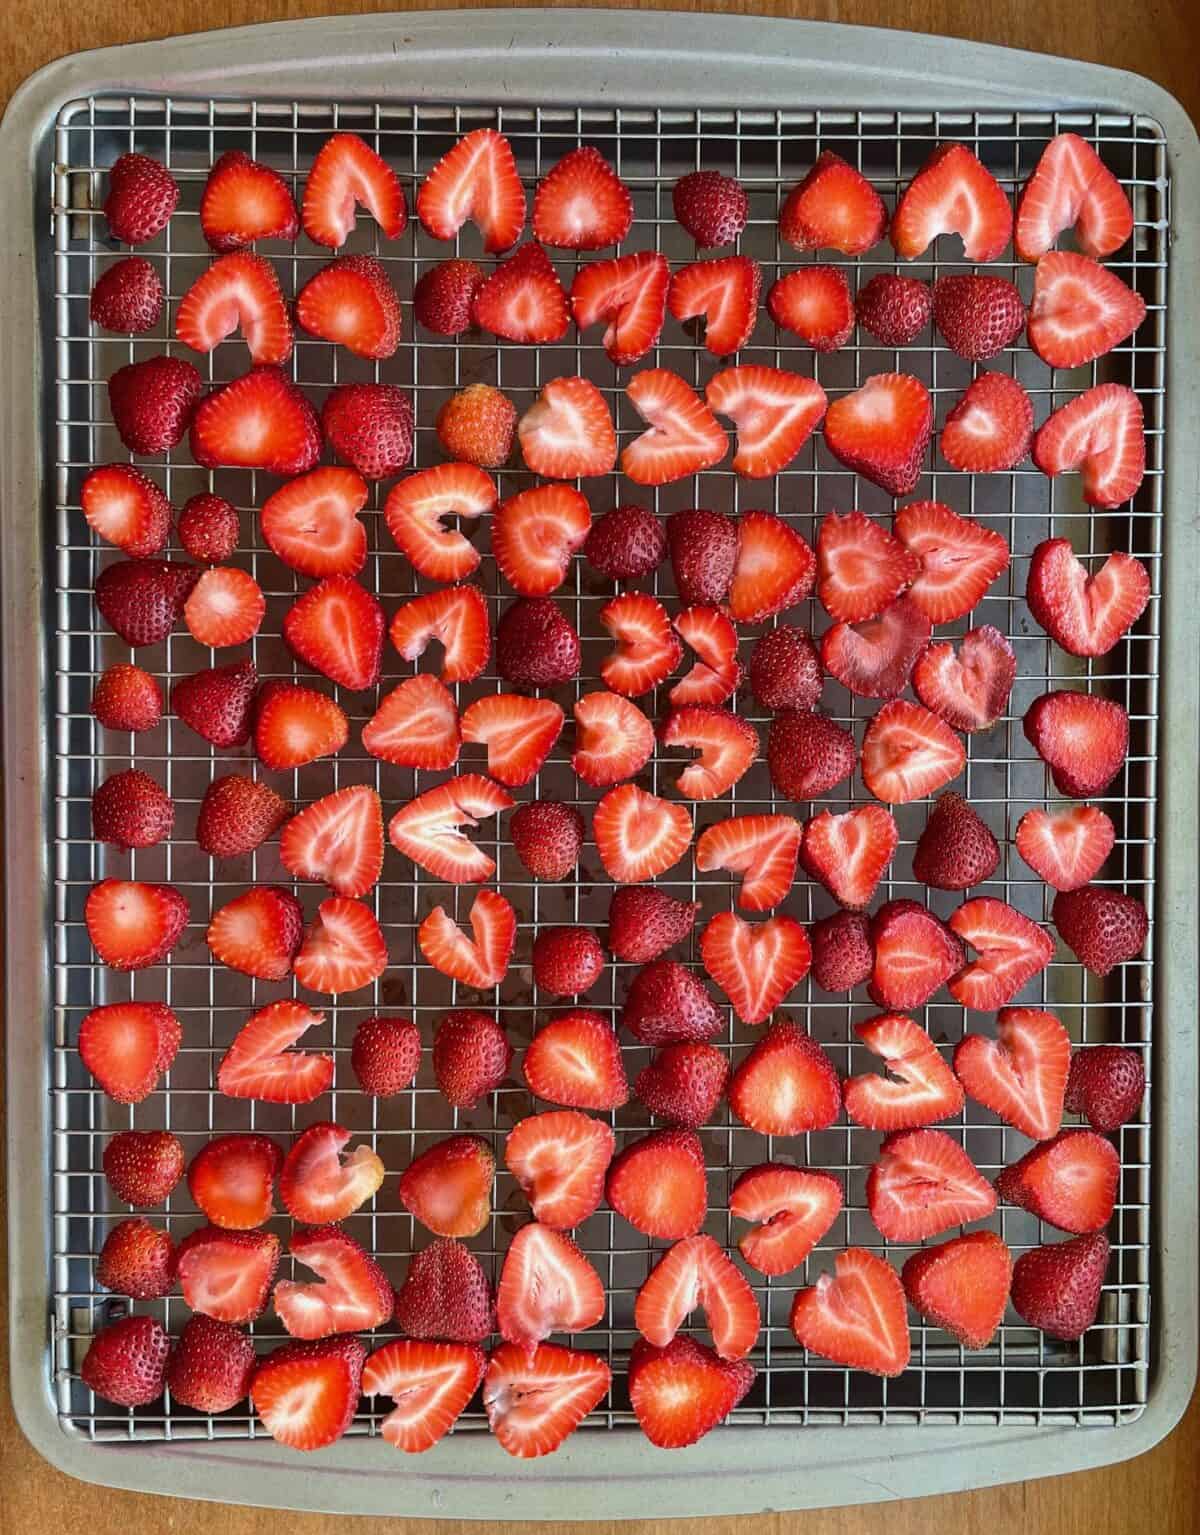
These are the recipe I reach for when I want something that feels special but has essentially zero effort involved — just strawberries, an oven, and patience. Thin-sliced strawberries dried low and slow until they're crisp, concentrated, and almost candy-like in their sweetness. They make a genuinely lovely healthy Valentine's snack on their own, or you can crumble them over yogurt, mix them into granola, or tuck them into a gift bag as a homemade treat. No dehydrator needed — your oven handles this just fine.
Ingredients
- 1 lb fresh strawberries, washed and hulled
- 1–2 teaspoons granulated sugar (optional, for extra sweetness)
- Pinch of fine sea salt (optional, brings out the flavor)
Instructions
- Preheat your oven to 200°F. Line two baking sheets with parchment paper or silicone baking mats.
- Slice strawberries as evenly as possible, about ¼ inch thick — a mandoline gives the most consistent slices, but a sharp knife works fine if you go slowly. Uniform thickness matters because thin spots will burn before thick ones dry out.
- Arrange the slices in a single layer on the prepared baking sheets with no overlapping. If using sugar and salt, sprinkle very lightly over the tops.
- Bake at 200°F for 3–4 hours, flipping the slices over once at the halfway point. The chips are done when they feel dry to the touch and have a slight crisp to them — they'll crisp up a little more as they cool.
- Remove from the oven and let cool completely on the pans before storing. They go soft if you store them warm — this step matters.
Tips
- Tip: Store completely cooled chips in an airtight container at room temperature for up to a week — if they soften, pop them back in a 200°F oven for 20 minutes to re-crisp.
- Tip: Smaller, less watery strawberries dehydrate better than the huge ones — the giant Costco strawberries take much longer and can stay chewy in the middle.
- Tip: I make a double batch every time because a single pound of fresh strawberries turns into surprisingly few chips once the water cooks out — plan for that before you start.
25. Berry Galette
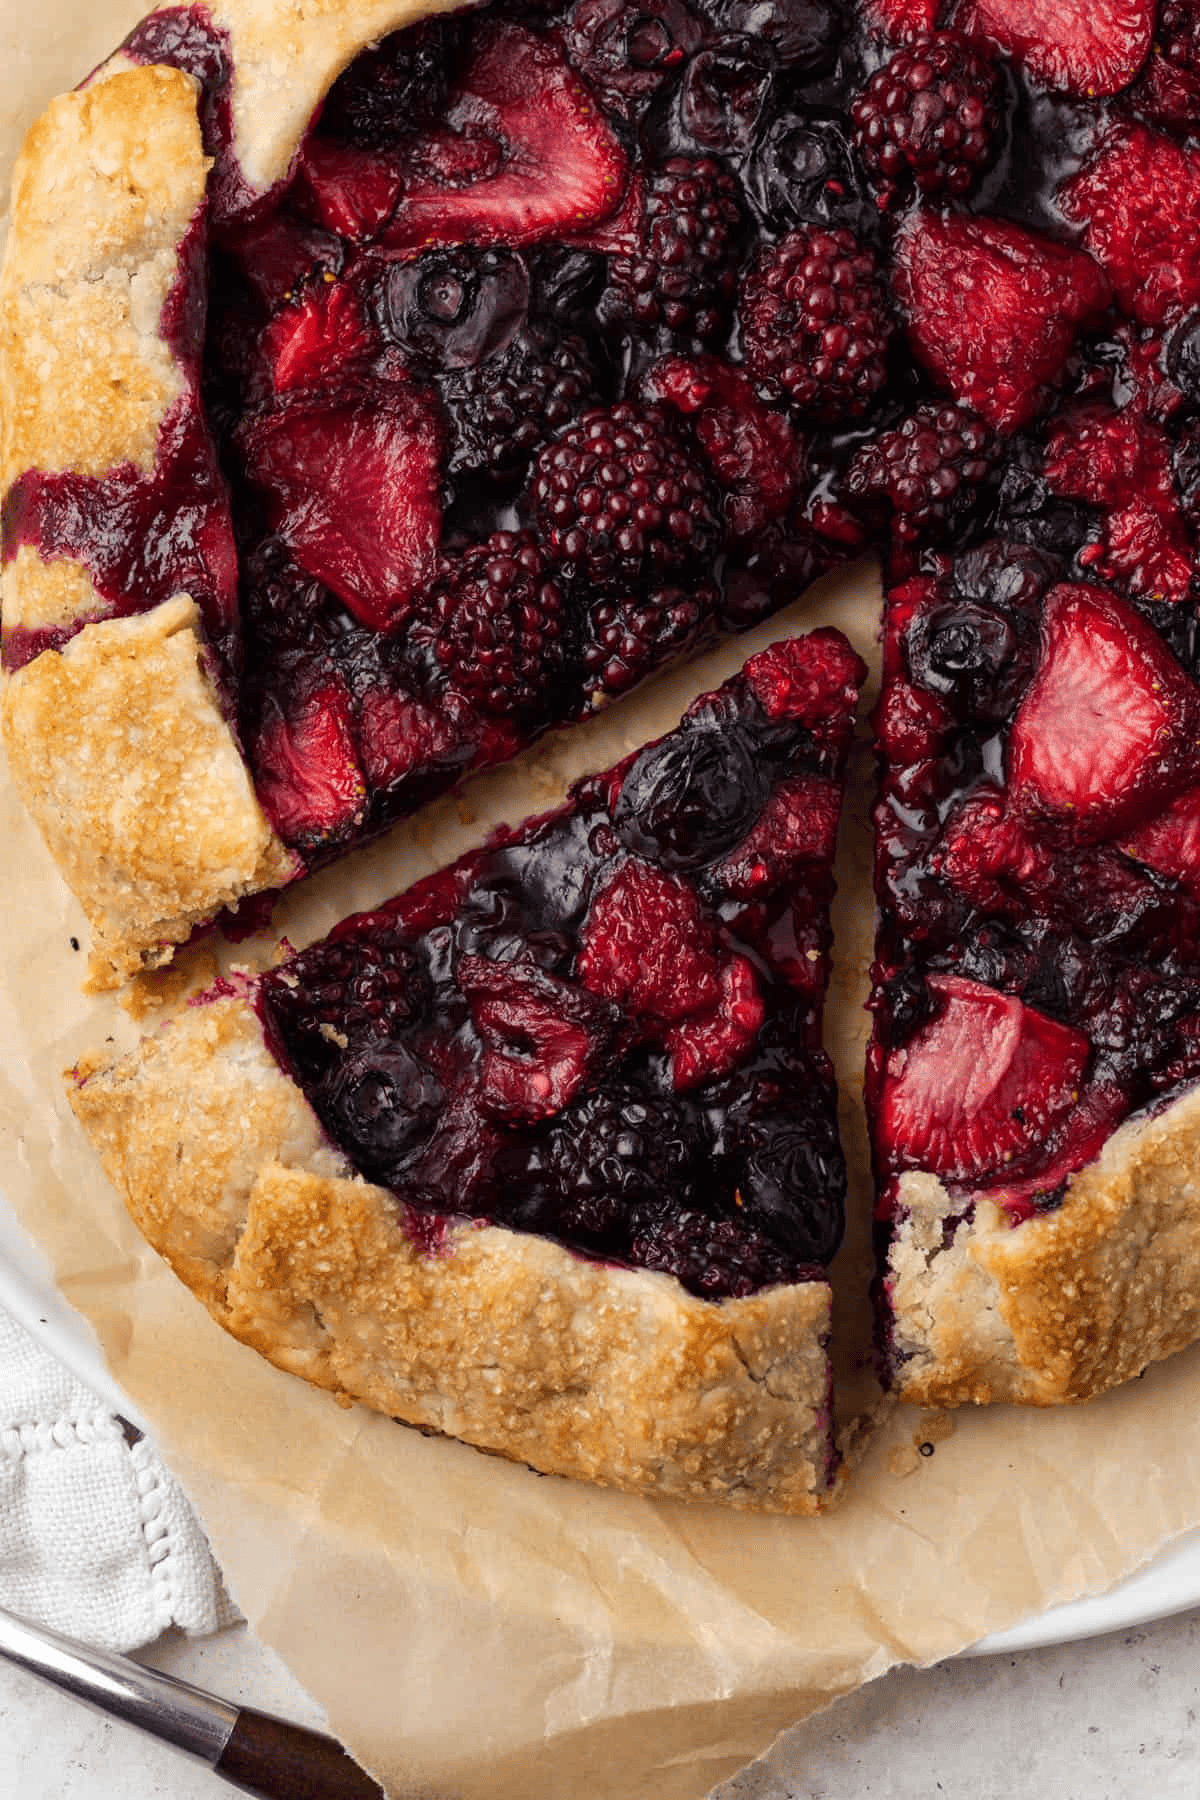
A galette sounds fancy but it's genuinely one of the most forgiving things you can bake — there's no pie dish to worry about, no crimping, and honestly the more rustic it looks, the better. You just fold the edges of the dough over the fruit and call it intentional. For Valentine's Day, the deep reds and purples of mixed berries look absolutely stunning without any extra effort. I make a double batch of this when berries are on sale at Costco because it disappears the same day.
Ingredients
- 1 sheet store-bought pie crust (or homemade if you have time)
- 2 cups mixed fresh berries (strawberries, raspberries, blueberries — any combo works)
- 3 tablespoons granulated sugar, divided
- 1 tablespoon cornstarch
- 1 teaspoon lemon juice
- ½ teaspoon vanilla extract
- 1 egg, beaten (for egg wash)
- 1 tablespoon coarse or turbinado sugar (for sprinkling on crust)
Instructions
- Preheat your oven to 400°F. Line a baking sheet with parchment paper and unroll your pie crust onto it.
- In a bowl, toss the berries with 2 tablespoons of the sugar, the cornstarch, lemon juice, and vanilla. Let it sit for about 5 minutes — the berries will release a little juice and the cornstarch will help thicken it as it bakes.
- Pile the berry mixture into the center of the crust, leaving about a 2-inch border all the way around. Fold the edges up and over the fruit, pleating as you go. It doesn't need to look perfect — that's the whole point of a galette.
- Brush the folded crust edges with the beaten egg and sprinkle the coarse sugar over the crust. This gives it that gorgeous golden, slightly crunchy finish.
- Bake for 30–35 minutes until the crust is deeply golden and the berry filling is bubbling. Let it cool for at least 15 minutes before slicing — the filling needs time to set up a little or it'll run everywhere.
Tips
- Tip: If you're using frozen berries, thaw them completely and pat them dry first — extra moisture will make the bottom of your crust soggy and the filling watery.
- Tip: Slide the parchment and galette directly onto a preheated sheet pan if you have one — the hot surface helps the bottom crust crisp up instead of going soft.
- Tip: Serve with a scoop of vanilla ice cream or a spoonful of whipped cream — Zainab insists on the ice cream every single time, and honestly I'm not going to argue with her on that one.
That's 26 snacks — I figured one extra couldn't hurt when it comes to Valentine's Day. Whether you're making a little something for the kids to take to school, putting together a spread for a couple's night in, or honestly just treating yourself because it's February and you deserve it, there's something in this list for every version of the day. I've made probably half of these in my own kitchen at this point, and the ones I keep coming back to are the ones that look impressive but don't actually require a lot of time or technique.
The most important thing I've learned about Valentine's snacks is that presentation does half the work. A strawberry dipped in chocolate on a plain plate looks nice. The same strawberry on a small board with some pink M&Ms and a few heart-shaped crackers looks like you planned for a week. It's the same 10 minutes of effort, just arranged differently. I make a double batch of anything chocolate because in this house it disappears before I've even set it down properly.
If you try any of these, I hope they make your Valentine's Day feel a little more fun and a little less stressful. Pick one or pick five — either way you're doing great. 💕🍓🍫
More Recipes You Might Like
- Valentine's Day Desserts — if the snack board leads to wanting a full dessert spread, this is the next stop.
- Valentine's Day Cookies — heart-shaped, frosted, dipped — cookies are always a good call for February 14th.
- Valentine's Day Cakes — when snacks aren't enough and someone in your house has requested a full cake (Saad, every year).
- Chocolate Covered Strawberries — a deep dive into getting the chocolate coating right, because the technique actually matters.
- Easy Party Appetizers — Valentine's snacks work for any gathering, and this list gives you options beyond the holiday.
Frequently Asked Questions
How far in advance can I make Valentine's Day snacks?
Most of these can be prepped a day ahead without any issue. Chocolate-dipped items, truffles, and anything bark-based actually set better overnight. I'd hold off on assembling anything with fruit or fresh whipped cream until the day of — those don't sit well and will look sad by the next morning.
Which of these snacks are good for kids to make?
Anything that involves dipping, decorating, or assembling is great for kids. Chocolate bark, pretzel rods dipped in melted chocolate, and fruit skewers are all low-mess and forgiving. I'd skip anything that requires precise melting or a candy thermometer if you've got little ones helping — keep it simple and fun.
What's the easiest snack on this list if I'm short on time?
Anything using store-bought base ingredients — chocolate bark with toppings, a Valentine's charcuterie board, or dipped Oreos — takes under 20 minutes and looks like you put in real effort. The trick is good presentation: use a wooden board or a pretty plate and scatter the colors intentionally.
Can I make these snacks without a lot of special equipment?
Yes, and I wouldn't have included them if you couldn't. I don't own a candy mold collection or a tempering machine — I use a microwave, a sheet pan lined with parchment, and a fork for dipping. Heart-shaped cookie cutters are the one tool worth having, and you can find a set for under $5 at Walmart or Daiso.
How do I melt chocolate without it seizing up?
The number one rule: keep water away from melted chocolate. Even a drop will cause it to seize and turn grainy. Melt in 30-second intervals in the microwave, stirring between each one — don't rush it. If you're melting a lot, a double boiler over barely simmering water works well too, but the microwave method is fast and easy once you know the intervals.
Share This Post!
If this list helped you figure out what to make this Valentine's Day, save it to Pinterest or share it with someone who's still deciding. 💕📌
View More Recipes here Recipe Roundups





Comments
No Comments