
The after-school hour at my house used to be a daily disaster. Saad would drop his backpack, walk straight to the pantry, and emerge with a fistful of crackers or whatever sugary cereal I'd accidentally bought. Twenty minutes later he'd announce he was hungry again. Zainab would do the same on a different schedule. By dinner neither of them was hungry for the food I'd actually cooked, but somehow they'd both eaten 800 calories of nothing.
What fixed it was getting honest about what a "healthy snack" actually needs to do. It has to be filling enough to count — meaning some protein or fat in there, not just refined carbs that spike and crash. It has to be fast enough for an actual after-school window, because my kids will not wait 40 minutes. And it has to be something they'll genuinely eat, not just something I wish they'd eat. A salad of raw kale and cauliflower is not a kid snack no matter how nutritious it is.
This list is 21 snacks that pass all three tests in my house. Some are sweet, some are savory, some are make-ahead, some are 5-minute throw-togethers. Most involve real ingredients my kids can recognize. A few are sneaky — the cocoa puffs made from chickpeas, for example, do exist and they do fool a 6-year-old. I've tested all of these on Saad and Zainab over the past couple years. The ones that didn't make the list got rejected hard.
A practical note before the list: keep snacks visible and accessible. We have a low drawer in our fridge that holds pre-portioned snacks — cucumber sticks in a container, hard-boiled eggs, fruit kabobs — and a similar shelf in the pantry with roasted chickpeas, granola bars, and dried fruit. The kids serve themselves from these. The "snack drawer" system changed my afternoons more than any individual recipe on this list.
21 Healthy Snacks for Kids (Easy Recipes Mine Actually Eat)

What Makes a Real Kid Snack Work
Before the recipes, three things I've learned about feeding my kids snacks that actually keep them full until dinner.
Pair a carb with a protein or fat. An apple alone is a 20-minute snack — they'll eat it, feel hungry again, and be back. An apple with a tablespoon of peanut butter or a handful of nuts is a real snack that holds them for two hours. Same for crackers with cheese, fruit with yogurt, or pretzels with hummus. The protein-fat combo slows down the sugar release and stops the crash-and-graze cycle.
Let them help when they can. Saad will eat almost any vegetable if he assembled it himself. The salad kabobs further down this list are basically a craft project disguised as food, and that's the trick. When kids build their own snack, they own it. They feel proud of it, they describe it to me with weirdly long sentences, and they actually eat it. I lean into this whenever I can.
Make ahead, portion ahead. A snack that requires me to cook something at 4pm on a Tuesday is a snack that's not happening. I make egg muffins on Sunday for the whole week, batch-roast chickpeas every other Saturday, and keep washed fruit in clear glass containers at kid-eye-level in the fridge. The work happens once, on a weekend, and the rest of the week is just opening containers.
21. Vegan BLT Tempeh Sandwich
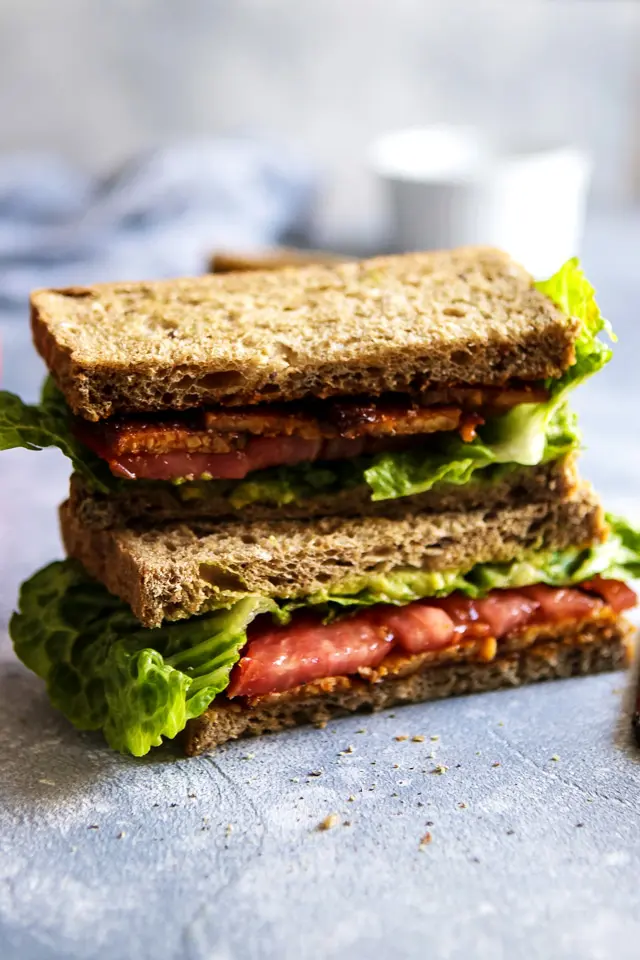
A vegetarian take on the classic BLT, using marinated tempeh strips in place of bacon. Smoky, salty, and surprisingly satisfying — even my husband, who is firmly a bacon-bacon person, will eat this when I make it. Tempeh is at most US grocery stores in the refrigerated section near the tofu. It's high in protein (about 16g per serving) and holds up to marinating better than tofu does. This makes a real lunch-sized snack for older kids; for smaller appetites, cut it into half-sandwiches.
Slice the tempeh thin — about ¼-inch — so it gets crispy in the pan. Thick tempeh stays dense and chewy in the middle, which is the texture that turns kids off. Marinate it for at least 20 minutes; overnight is even better. The marinade is what transforms it from "what is this brown thing" into something that genuinely scratches the BLT itch.
Ingredients (makes 2 sandwiches):
- 8 oz tempeh, sliced thin into strips
- 2 tablespoon soy sauce
- 1 tablespoon maple syrup
- 1 teaspoon smoked paprika
- 1 tablespoon olive oil
- 4 slices whole grain bread
- 2 tablespoon mayo or vegan mayo
- 1 ripe tomato, sliced
- 4 leaves butter lettuce
- ½ avocado, sliced
Instructions:
- Whisk soy sauce, maple syrup, smoked paprika, and a splash of water in a shallow dish. Add tempeh strips, turn to coat, and marinate at least 20 minutes (or refrigerate overnight).
- Heat olive oil in a skillet over medium heat. Cook tempeh strips 3 minutes per side until crispy on the edges. Drain briefly on paper towels.
- Toast the bread. Spread mayo on each slice.
- Build sandwiches: lettuce, tomato slices, avocado, then crispy tempeh. Top with the second slice and cut in half. Serve immediately while the tempeh is still warm.
20. Crispy Parmesan Garlic Edamame

Frozen edamame roasted with olive oil, garlic powder, and grated Parmesan until the cheese crisps onto the pods. This is one of Zainab's favorite snacks — she calls them "pop pods" because you squeeze the beans out of the pods with your teeth. Loaded with plant protein (about 10g per serving), made in 15 minutes, and the kids treat it like a fun snack instead of a "vegetable." Pair this with my best healthy snacks roundup for more ideas if you want to build a whole snack rotation.
Use edamame in the pods, not shelled. The pods are what make this a fun finger-food snack — the eating mechanic of squeezing the beans out is half the appeal. Pat them very dry before roasting; wet edamame will steam and never get crispy. Spread them in a single layer on the sheet pan, not piled up, so each pod gets direct heat and the cheese crisps.
Ingredients (serves 4):
- 1 lb frozen edamame in pods, thawed
- 2 tablespoon olive oil
- ½ cup grated Parmesan
- 1 teaspoon garlic powder
- ½ teaspoon salt
- ¼ teaspoon black pepper
- Pinch of red pepper flakes (optional)
Instructions:
- Heat oven to 400°F. Thaw edamame and pat very dry with paper towels.
- Toss edamame with olive oil, garlic powder, salt, pepper, and red pepper flakes (if using) on a sheet pan. Spread in a single layer.
- Roast 10 minutes. Pull the pan out, sprinkle the Parmesan evenly over the pods, and roast another 5 minutes until the cheese is golden and crispy.
- Let cool 5 minutes before serving — they crisp up more as they cool. Eat by squeezing the beans out of the pods.
19. Vegan Wraps with Hummus
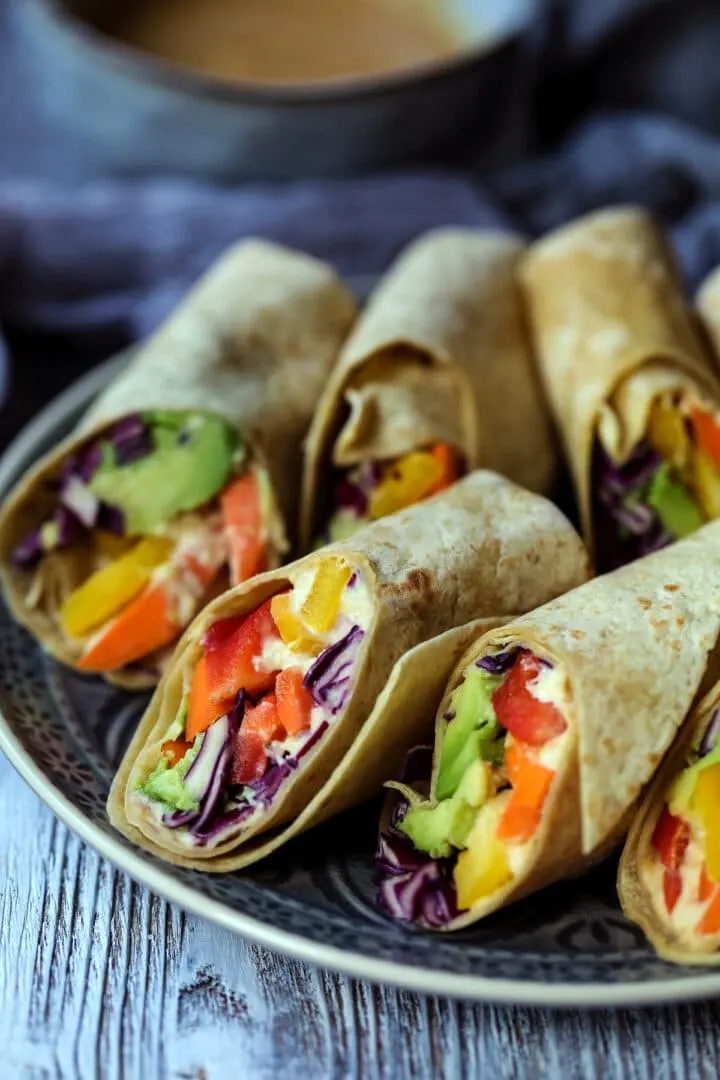
A whole grain wrap loaded with hummus, shredded purple cabbage, carrots, bell peppers, and avocado. This is one of my go-to "we're going somewhere" snacks — a soccer game, the park, a road trip. Wrap them in parchment paper, secure with tape, and they hold up in a bag for 3-4 hours without getting soggy. The hummus does double duty here: it adds protein and acts as a barrier between the wrap and the vegetables so things don't get wet.
Spread the hummus all the way to the edges of the wrap before adding vegetables. This is the seal that keeps everything from sliding around when you bite. Roll tight, then wrap in parchment before slicing in half on a diagonal — the parchment holds the rolled shape together. Cut diagonally so the colorful cross-section shows; the visual makes the wrap look 10x more appetizing to kids.
Ingredients (makes 2 wraps):
- 2 large whole grain or spinach wraps
- ½ cup hummus (plain, roasted red pepper, or garlic)
- 1 cup shredded purple cabbage
- 1 medium carrot, shredded
- ½ red bell pepper, julienned
- ½ avocado, sliced
- 2 tablespoon tahini (optional, drizzled inside)
- Pinch of salt
Instructions:
- Lay each wrap flat on a cutting board. Spread hummus all the way to the edges in an even layer.
- Layer the shredded cabbage, carrots, bell pepper, and avocado in a line down the center of each wrap. Drizzle with tahini and a pinch of salt.
- Roll tightly from the side closest to you, tucking the filling in as you go.
- Wrap in parchment paper, then slice in half on a diagonal. Serve immediately or pack for travel.
18. Easy Salad Kabobs
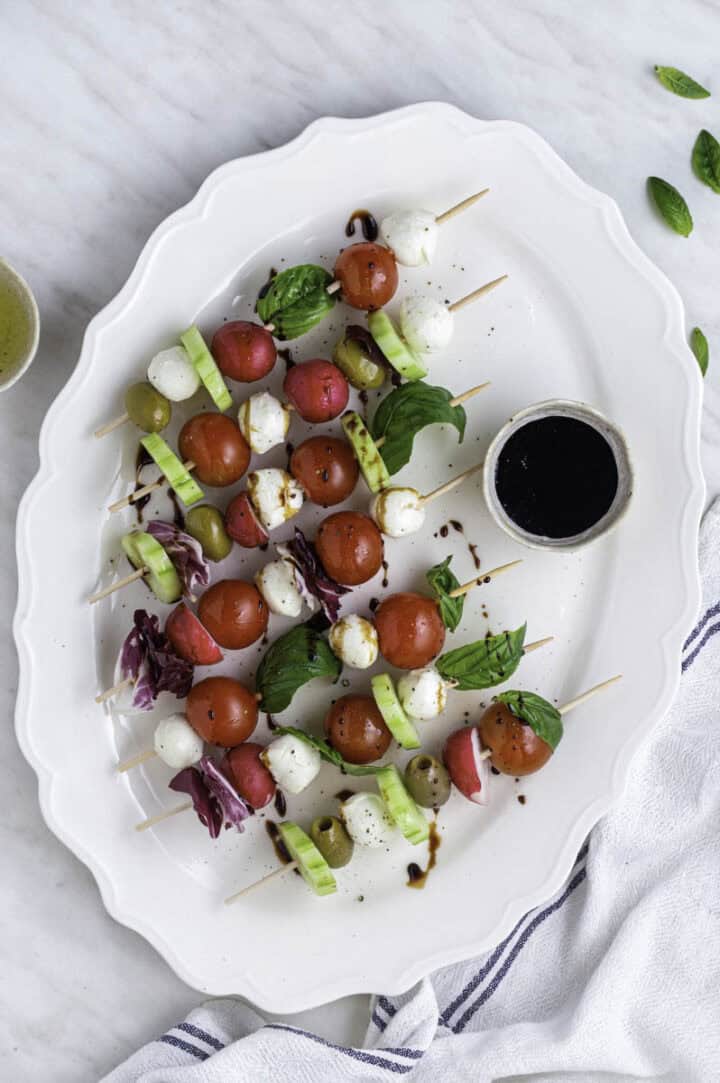
Cherry tomatoes, cucumber chunks, fresh mozzarella balls, and basil leaves threaded onto small skewers. The kids assemble them; I just lay out the ingredients in little bowls and let them go. Saad makes patterns (red-white-red-white-green), Zainab makes hers exclusively cheese-and-tomato because she doesn't trust cucumber yet. Either way, they end up eating a full plate of vegetables because they built it themselves.
Use small wooden skewers (4-6 inches) — the long BBQ skewers are too big for kid hands and a poking hazard. The mini "ciliegine" mozzarella balls (about the size of cherry tomatoes) work perfectly here. If you can't find them, cut a regular mozzarella ball into small cubes. A drizzle of balsamic glaze on top right before serving turns these from a snack into an actual mini-Caprese situation that adults will fight kids for.
Ingredients (makes 8-10 kabobs):
- 1 pint cherry tomatoes
- 1 small cucumber, cut in ½-inch chunks
- 8 oz mini fresh mozzarella balls (ciliegine), or cubed regular mozzarella
- Small fresh basil leaves
- Black olives, pitted (optional)
- Balsamic glaze for drizzling
- Salt and pepper
- 4-6 inch wooden skewers
Instructions:
- Set up an assembly station: ingredients in small bowls, skewers in a cup, plate to lay finished kabobs on.
- Thread ingredients onto each skewer alternating colors — tomato, cucumber, mozzarella, basil leaf, repeat. Leave ½-inch at the bottom for holding.
- Lay kabobs on a serving platter. Drizzle with balsamic glaze and a pinch of salt and pepper.
- Serve immediately, or refrigerate up to 4 hours covered with plastic wrap.
17. Homemade Fruit Roll-Ups
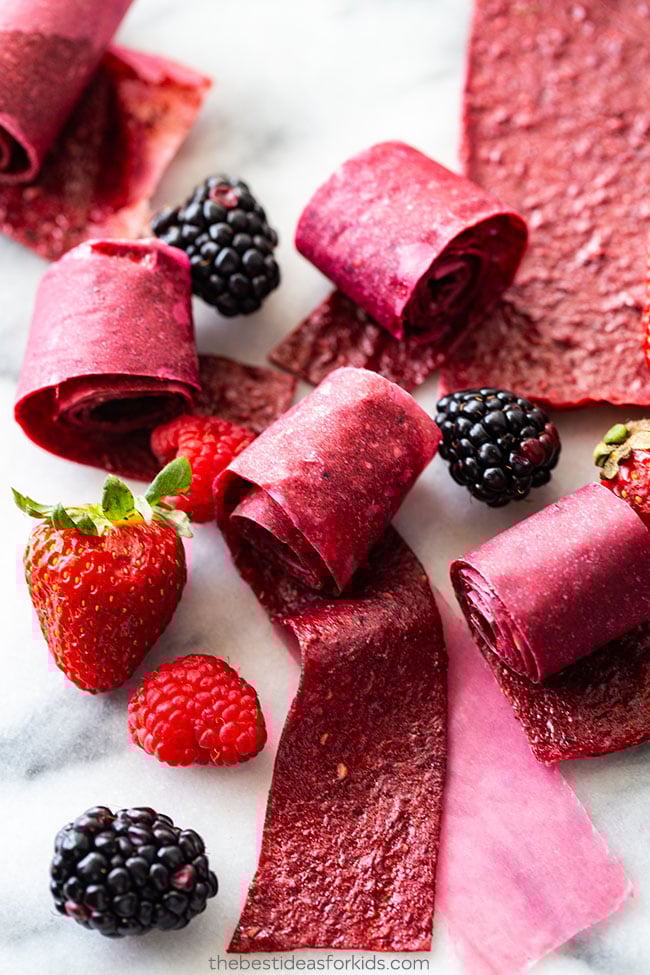
Fresh fruit puréed with a squeeze of lemon and a little honey, then dried in a low oven into a chewy fruit leather. These taste like the fruit roll-ups from the grocery store but with zero processed sugar, no corn syrup, and no preservatives. Strawberry is the classic and the easiest; mango, raspberry, and apricot also work beautifully. A batch makes about 8-10 strips and they last 2 weeks in an airtight container.
Low and slow is the entire game. The oven needs to be at 170°F (the lowest setting on most ovens, often called "warm") for 4-6 hours. Don't try to rush it at higher heat — you'll caramelize the sugars and end up with something more like fruit candy than fruit leather. A silicone baking mat works much better than parchment for peeling the finished sheets off in one piece. Cut into strips with kitchen scissors, roll up in parchment paper.
Ingredients (makes about 10 strips):
- 4 cups fresh fruit (strawberries, mango, raspberries, or apricots)
- 1-2 tablespoon honey (adjust based on fruit sweetness)
- 1 tablespoon fresh lemon juice
- Pinch of salt
- Silicone baking mat or parchment paper
- Parchment paper for rolling finished strips
Instructions:
- Heat oven to 170°F (or the lowest setting your oven allows).
- Purée fruit, honey, lemon juice, and salt in a blender until completely smooth. Taste and add more honey if the fruit is tart.
- Line a large sheet pan with a silicone baking mat or parchment. Pour the purée onto the mat and spread evenly into a very thin layer, about ⅛-inch thick. Edges can be slightly thicker.
- Bake 4-6 hours, checking after hour 4. The fruit leather is done when it's no longer sticky to the touch but still pliable. Cool completely on the mat. Cut into strips with scissors and roll each strip in a strip of parchment paper. Store in an airtight container 2 weeks.
16. Mini Raspberry Yogurt Muffins

Tiny muffins made with Greek yogurt, oat flour, and fresh raspberries — sweetened only with maple syrup, no refined sugar. The Greek yogurt is the genius move here; it adds moisture and protein, which means these stay tender for 3 days on the counter and actually keep kids full instead of just sugar-spiking them. A batch makes 24 mini muffins, which sounds like a lot until you've watched two kids eat six each in one afternoon. For more easy bakes I rely on for the kids, my easy breakfast recipes roundup has the muffin and pancake variations I rotate through.
Toss the raspberries in a teaspoon of oat flour before folding them into the batter. This is the trick that keeps berries suspended throughout the muffin instead of sinking to the bottom in a sad pink puddle. Use a mini muffin tin (24-cup), not standard size — the cook time is 12 minutes instead of 22, and the smaller size is perfect for little hands and lunchboxes.
Ingredients (makes 24 mini muffins):
- 1¼ cups oat flour (plus 1 teaspoon for the berries)
- ¼ cup almond flour
- 1 teaspoon baking powder
- ½ teaspoon baking soda
- ¼ teaspoon salt
- ½ teaspoon cinnamon
- ½ cup plain Greek yogurt
- ⅓ cup maple syrup
- 2 large eggs
- ¼ cup milk (any kind)
- ¼ cup neutral oil or melted butter
- 1 teaspoon vanilla extract
- 1 cup fresh raspberries
Instructions:
- Heat oven to 350°F. Line a 24-cup mini muffin tin with paper liners or grease well.
- Whisk oat flour, almond flour, baking powder, baking soda, salt, and cinnamon in a large bowl.
- In a separate bowl, whisk yogurt, maple syrup, eggs, milk, oil, and vanilla until smooth. Pour wet into dry and stir just until combined — don't overmix.
- Toss raspberries with 1 teaspoon oat flour, then gently fold into the batter. Scoop into the mini muffin cups, filling each ¾ full. Bake 12-14 minutes until a toothpick comes out clean. Cool in the pan 5 minutes, then transfer to a rack.
15. Vegetable Train (Birthday Party Snack)

A vegetable platter shaped like a train, made for Saad's 5th birthday party — bell pepper halves as train cars, baby carrots as wheels, cherry tomatoes for windows, celery stalks linking it together, with hummus or ranch in the bell pepper "engines" for dipping. Every kid at the party ate vegetables that day. I have never repeated that miracle with a flat plate of crudités.
Hollow out the bell peppers fully and use the trimmings somewhere else — sliced into salad, sautéed for fajitas, whatever. The hollowed peppers are sturdy enough to hold dip without leaking. Use toothpicks (carefully, with older kids supervising younger ones) to attach the baby carrot "wheels" to the bell pepper bottoms. Build the train on a long rectangular cutting board or platter — round plates don't work for the shape.
Ingredients (serves 6-8 kids):
- 4 bell peppers in different colors (red, yellow, orange, green)
- 1 lb baby carrots
- 1 pint cherry tomatoes
- 4-5 celery stalks, cut into long sticks
- 1 cucumber, sliced into thick rounds
- 1 cup hummus
- 1 cup ranch dressing
- Toothpicks
- Black olives (for the "wheels" or engine smokestack)
Instructions:
- Slice each bell pepper in half lengthwise and hollow out. These are the train "cars."
- On a long platter, arrange the bell pepper halves in a row, each one a different color. Use the celery stalks as connectors between cars.
- Attach 2-3 baby carrots under each pepper half as wheels (use toothpicks). Stick a black olive at one end as a smokestack.
- Fill the bell peppers with hummus and ranch in alternating cars. Pile cherry tomatoes, cucumber rounds, and extra baby carrots around the train for serving. Serve immediately so it looks impressive before the kids destroy it.
14. Healthy Vegan Cocoa Puffs (Roasted Chickpea Snack)
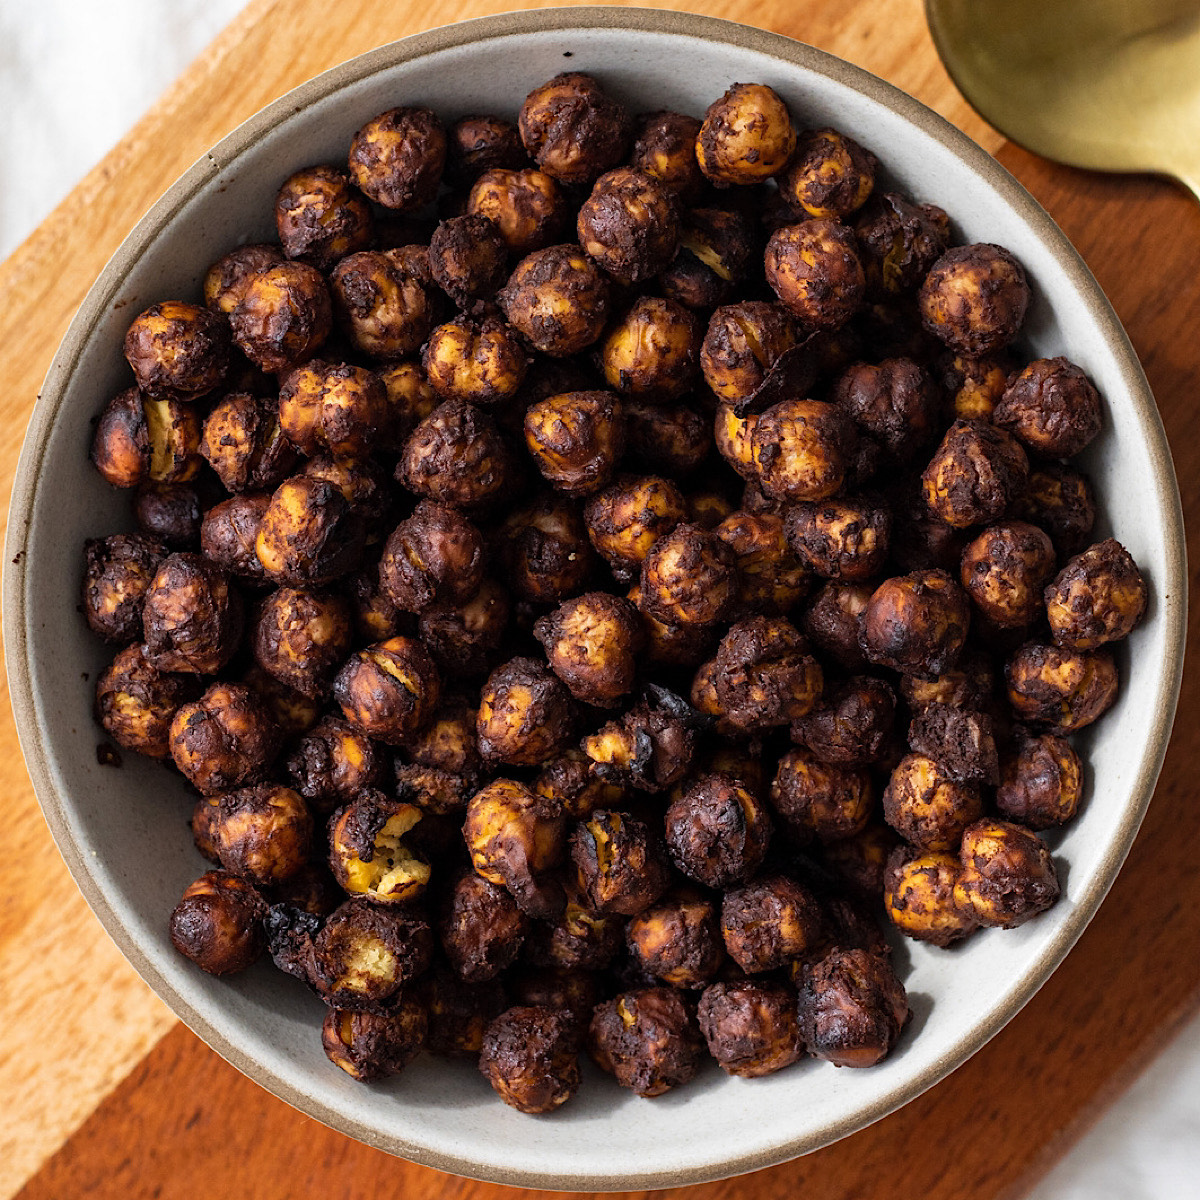
Chickpeas roasted with cocoa powder, vanilla, and a little coconut sugar until they're crunchy and taste suspiciously like Cocoa Puffs cereal. This recipe felt impossible until I made it the first time. The chickpeas crisp up, the cocoa coats the outside, and what you get is a high-protein, fiber-loaded snack that tastes like dessert. About 8g of protein per serving and roughly 6g of sugar, compared to actual Cocoa Puffs which have 9-10g sugar with almost no protein. Saad has not figured out the swap yet.
Dry the chickpeas aggressively before roasting. Drain, rinse, then spread on a clean kitchen towel and rub them around to remove as much skin as possible (the skins are what stop them from getting crispy). Pat dry again. Then roast plain for 25 minutes BEFORE adding the cocoa coating — this gets the crunch established. The cocoa mixture goes on at the end, in the last 5 minutes, so it doesn't burn.
Ingredients (serves 4):
- 2 cans (15 oz each) chickpeas, drained and rinsed
- 1 tablespoon olive oil or melted coconut oil
- 2 tablespoon unsweetened cocoa powder
- 2 tablespoon coconut sugar (or brown sugar)
- ½ teaspoon vanilla extract
- ¼ teaspoon salt
- Pinch of cinnamon
Instructions:
- Heat oven to 400°F. Drain and rinse chickpeas, then spread on a clean kitchen towel. Rub them around to remove as many skins as possible (don't worry about every single one). Pat very dry.
- Toss chickpeas with olive oil and salt on a sheet pan. Spread in a single layer. Roast 25 minutes, shaking the pan halfway through.
- Meanwhile, whisk cocoa powder, coconut sugar, vanilla, and cinnamon in a small bowl with 1 teaspoon water to make a thick paste.
- Pull chickpeas out, toss with the cocoa mixture until coated. Return to the oven for 5 more minutes. Cool completely on the pan — they crisp up more as they cool. Store in an airtight container 3-4 days.
13. Simple Roasted Chickpea Snack

The savory version of the chickpeas above — same technique, different seasoning. Smoked paprika, cumin, garlic powder, and a little coriander, roasted until shatteringly crispy. These are my pantry staple. I make a big batch every other Saturday and keep them in a glass jar on the counter. The kids eat them by the handful and they keep me out of the actual chip aisle when I'm grocery shopping. Crunchy, salty, plant protein, fiber — checks every box.
The skin-removal step matters more than any other step. Lay the rinsed chickpeas on a clean towel and roll them around vigorously — most of the skins come off in 30 seconds of friction. The naked chickpeas crisp up properly; the ones with skins stay slightly soft. Don't season heavily before roasting; do most of the seasoning after they come out of the oven so the spices don't burn on the pan.
Ingredients (serves 4):
- 2 cans (15 oz each) chickpeas, drained and rinsed
- 1 tablespoon olive oil
- 1 teaspoon salt (for roasting)
- 1 teaspoon smoked paprika
- ½ teaspoon ground cumin
- ½ teaspoon garlic powder
- ¼ teaspoon ground coriander
- Pinch of cayenne (optional)
Instructions:
- Heat oven to 400°F. Drain and rinse chickpeas. Spread on a clean kitchen towel and rub vigorously to remove the skins. Pat very dry.
- Toss chickpeas with olive oil and ½ teaspoon salt on a sheet pan. Spread in a single layer.
- Roast 30-35 minutes, shaking the pan every 10 minutes, until the chickpeas are deeply golden and crackly. They should sound like marbles when you shake the pan.
- Combine remaining salt with smoked paprika, cumin, garlic powder, coriander, and cayenne in a small bowl. Pull chickpeas from the oven, immediately toss with the spice blend while still hot. Cool completely on the pan — they crisp up more as they cool. Store in a glass jar 4-5 days.
12. Easy Egg Muffins

Eggs beaten with milk, cheese, vegetables, and whatever leftover ham or sausage is in the fridge, baked in a muffin tin until set. Make a tray of 12 on Sunday and you have breakfast or snacks for the whole week. Around 7g of protein per muffin, real food, almost zero work after the initial 15 minutes. This is the recipe that broke me out of the "I need to cook breakfast from scratch every morning" cycle.
Grease the muffin tin aggressively, even non-stick. Eggs stick to everything. I use butter on a paper towel and rub it into every cup, including the top rim. Silicone muffin liners are even better if you have them. Don't fill the cups all the way — ⅔ full is right, because the eggs puff up dramatically while baking. They'll deflate as they cool, which is fine; that's just air escaping.
Ingredients (makes 12 muffins):
- 10 large eggs
- ¼ cup milk
- 1 cup shredded cheddar
- ½ cup diced cooked ham or crumbled sausage
- ½ red bell pepper, finely diced
- 3 green onions, sliced
- 1 cup baby spinach, chopped
- ½ teaspoon salt
- ¼ teaspoon black pepper
- ¼ teaspoon garlic powder
Instructions:
- Heat oven to 375°F. Grease a 12-cup muffin tin generously with butter, including the top rim, or use silicone liners.
- Whisk eggs, milk, salt, pepper, and garlic powder in a large bowl until smooth and pale.
- Distribute the cheese, ham, bell pepper, green onions, and spinach evenly among the muffin cups. Pour egg mixture over the top, filling each cup ⅔ full.
- Bake 18-22 minutes until the centers are just set and the tops have puffed. They'll deflate as they cool — that's normal. Let cool 5 minutes in the pan before removing. Store in the fridge 5 days or freeze 2 months. Reheat 20 seconds in the microwave.
11. 3-Ingredient Guacamole
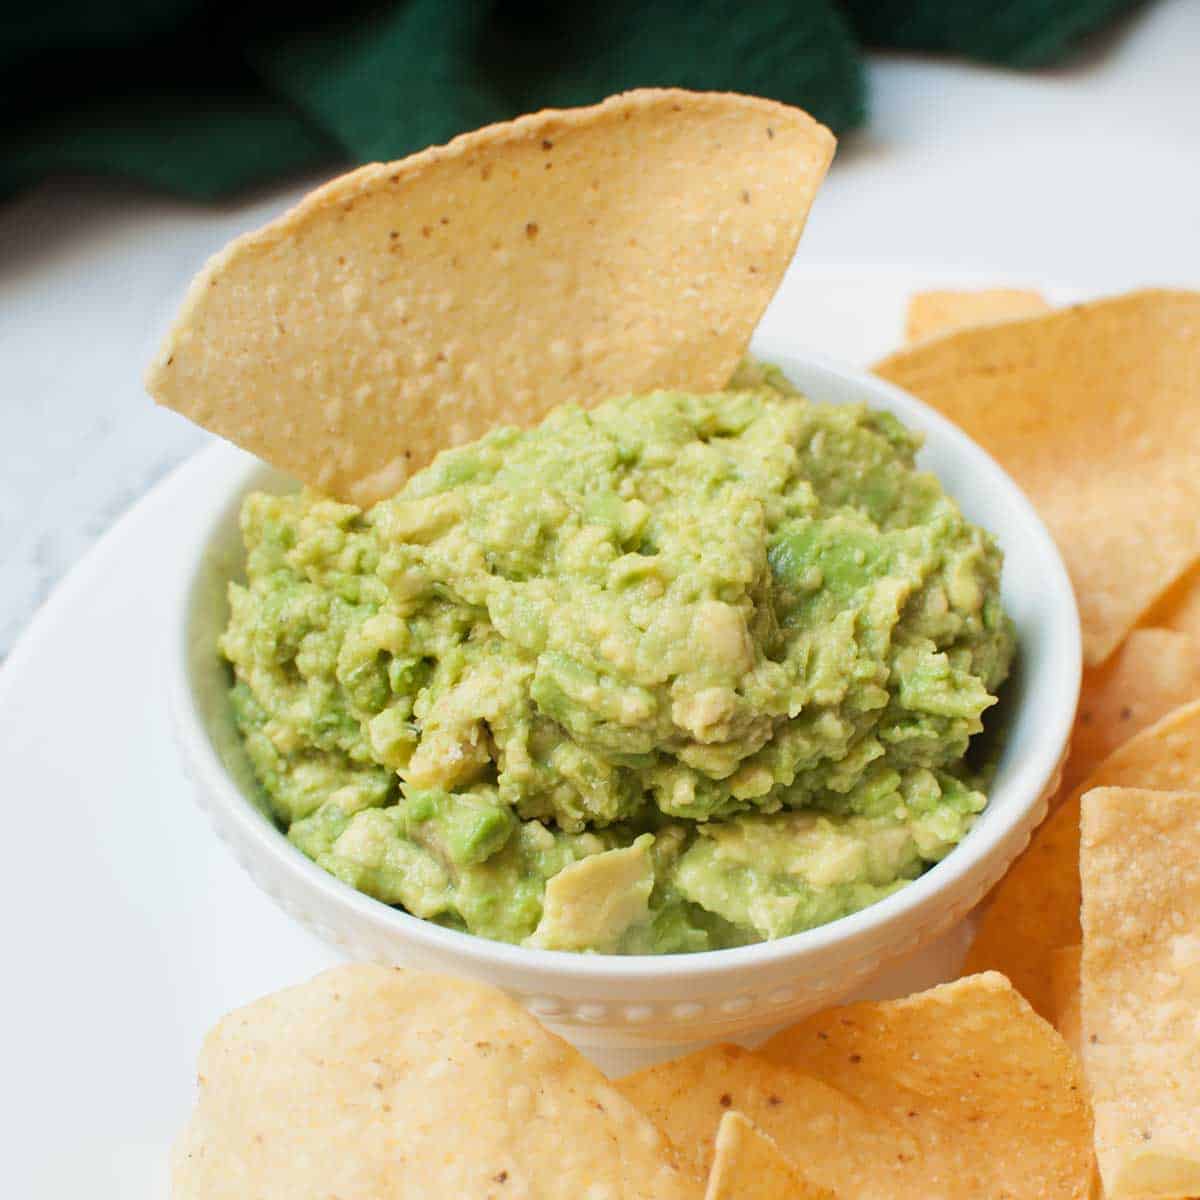
The simplest guacamole there is: ripe avocado, fresh lime juice, and garlic salt. That's it. No tomato, no onion, no cilantro to fight kids about. Just creamy, bright, garlicky avocado that you can scoop with tortilla chips, spread on toast, or dollop on top of egg muffins (recipe #12). The kids will eat this when they refuse the fancier party guacamole. Healthy fats, no added sugar, comes together in 3 minutes.
Use a fork to mash, not a food processor. Processor-made guac turns into baby food paste — the texture has to have some chunk to it to taste right. Press a piece of plastic wrap directly onto the surface of the guacamole if you're making it ahead. Air is what turns guacamole brown; the plastic wrap touching the surface keeps oxygen out and keeps it green for 24 hours in the fridge.
Ingredients (serves 4):
- 2 large ripe avocados
- 1 tablespoon fresh lime juice
- ½ teaspoon garlic salt (or to taste)
- Tortilla chips for serving
Instructions:
- Halve the avocados, remove the pits, and scoop the flesh into a bowl.
- Add lime juice and garlic salt. Mash with a fork to your desired consistency — leave some chunks for texture.
- Taste and adjust salt and lime. If serving immediately, transfer to a serving bowl with tortilla chips.
- If making ahead, press plastic wrap directly onto the surface of the guacamole (not over the bowl rim — flush against the guac itself) to prevent browning. Refrigerate up to 24 hours.
10. Easy Vegan Panko-Crusted Baked Zucchini Fries
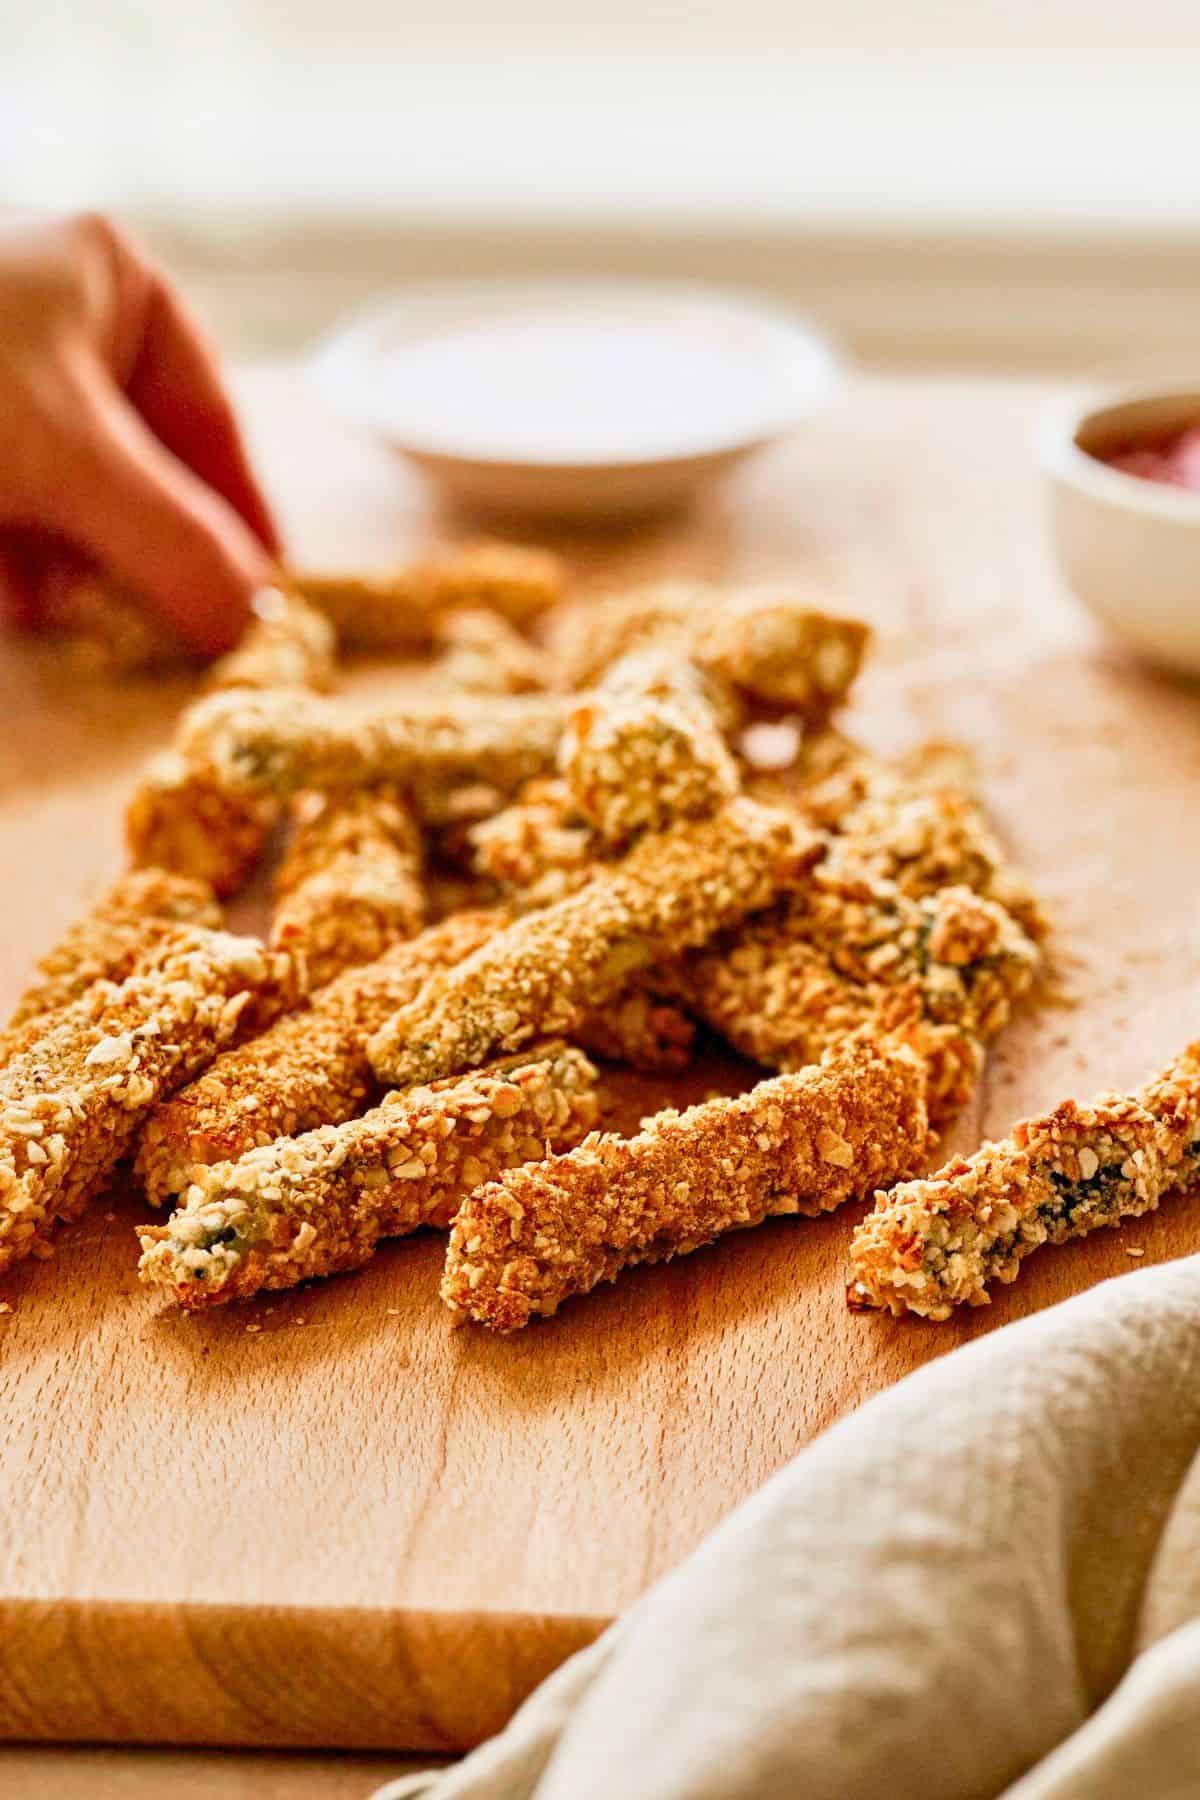
Zucchini cut into french-fry shapes, breaded with panko and nutritional yeast, baked until crispy. The breading is what sells these — without it, you're serving kids a wet vegetable they will not eat. With it, you're serving kids "fries." Saad ate three servings the first time I made them before he asked what they were made of. Zainab still calls them "green fries" and asks for them weekly.
Two non-negotiable steps. First, salt the cut zucchini sticks and let them sit for 15 minutes on paper towels — zucchini is 95% water and you have to draw some of that out or your fries will steam instead of crisp. Pat them very dry afterward. Second, bake them on a wire rack set inside a sheet pan, not directly on the pan. Air circulation is what gives you crispy on all sides; a sheet pan alone leaves the bottoms soggy.
Ingredients (serves 4):
- 2 medium zucchini, cut into ½-inch sticks
- 1 teaspoon salt (for drawing out moisture)
- ½ cup flour (any kind)
- ½ cup unsweetened almond milk or oat milk
- 1½ cups panko breadcrumbs
- 2 tablespoon nutritional yeast
- 1 teaspoon garlic powder
- 1 teaspoon Italian seasoning
- ½ teaspoon salt
- ¼ teaspoon black pepper
- Olive oil spray
Instructions:
- Cut zucchini into ½-inch fry-shaped sticks. Sprinkle with 1 teaspoon salt, toss, and lay on paper towels for 15 minutes. Pat very dry afterward.
- Heat oven to 425°F. Set a wire rack inside a sheet pan.
- Set up three shallow dishes: flour in one, almond milk in another, panko mixed with nutritional yeast, garlic powder, Italian seasoning, salt, and pepper in the third.
- Dredge each zucchini stick in flour, dip in almond milk, then roll in panko mixture pressing firmly. Arrange on the wire rack with space between sticks. Spray generously with olive oil. Bake 22-25 minutes, flipping halfway, until golden and crispy. Serve hot with ketchup or ranch.
9. Air Fryer Parsnip Chips
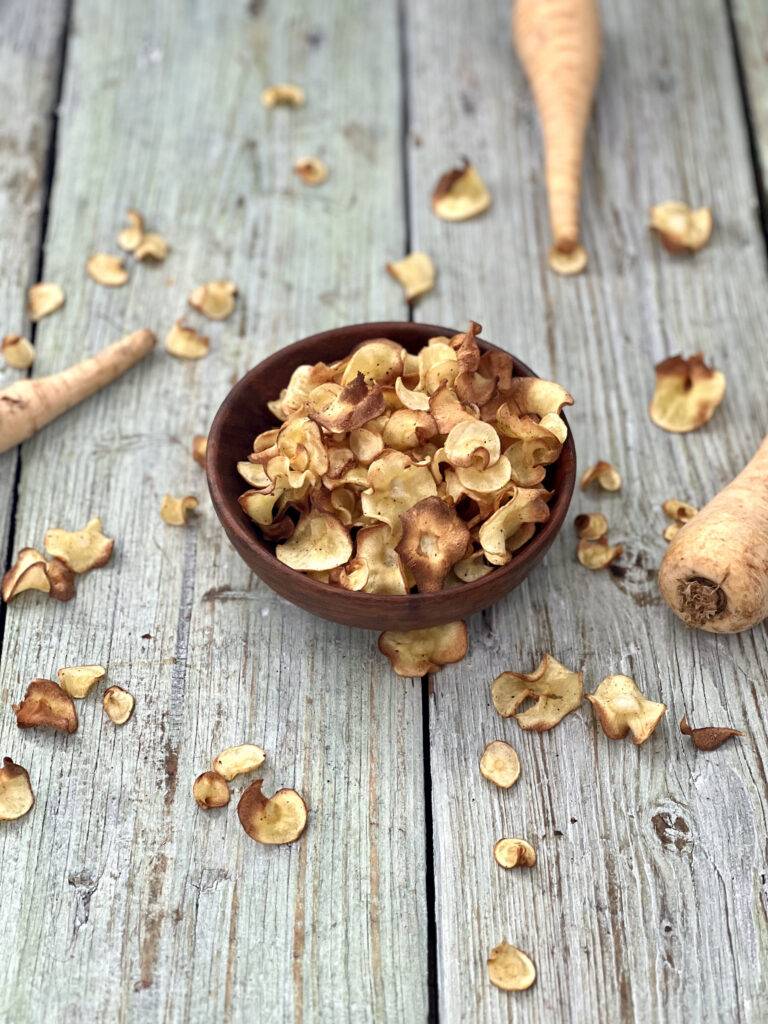
Thin parsnip slices air-fried until crispy and lightly sweet — like a fancy version of potato chips, with way more flavor. Parsnips have a natural sweetness that intensifies when roasted, so you don't need much seasoning. Just olive oil, salt, and maybe a little pepper. This is one of those snacks I made once on a whim because I had extra parsnips from a soup, and now the kids ask for them by name. For more healthy air fryer recipes, my roundup has tons of options for kid-friendly air fryer snacks.
A mandoline slicer is genuinely the only way to do this right. Hand-cut slices will be uneven thickness, which means some burn while others stay soft. A cheap plastic mandoline ($15-20 on Amazon) gets you paper-thin uniform slices in 60 seconds. Use the cut-resistant glove that comes with it — I learned that lesson the hard way. Soak the sliced parsnips in cold water for 10 minutes before drying to remove some of the starch; this is what makes them crispy.
Ingredients (serves 2-3):
- 2 large parsnips, peeled
- 1 tablespoon olive oil
- ½ teaspoon salt
- ¼ teaspoon black pepper
- Optional: pinch of rosemary or thyme
Instructions:
- Slice the peeled parsnips paper-thin with a mandoline (about 1/16 inch).
- Soak slices in cold water for 10 minutes. Drain, then pat very dry with paper towels.
- Toss in a bowl with olive oil, salt, pepper, and optional herbs.
- Preheat air fryer to 350°F. Arrange parsnip slices in a single layer in the basket (work in batches if needed). Cook 8-10 minutes, shaking every 3 minutes, until golden and crispy. Cool on a wire rack 2 minutes before serving.
8. Classic Vegan Granola Bars
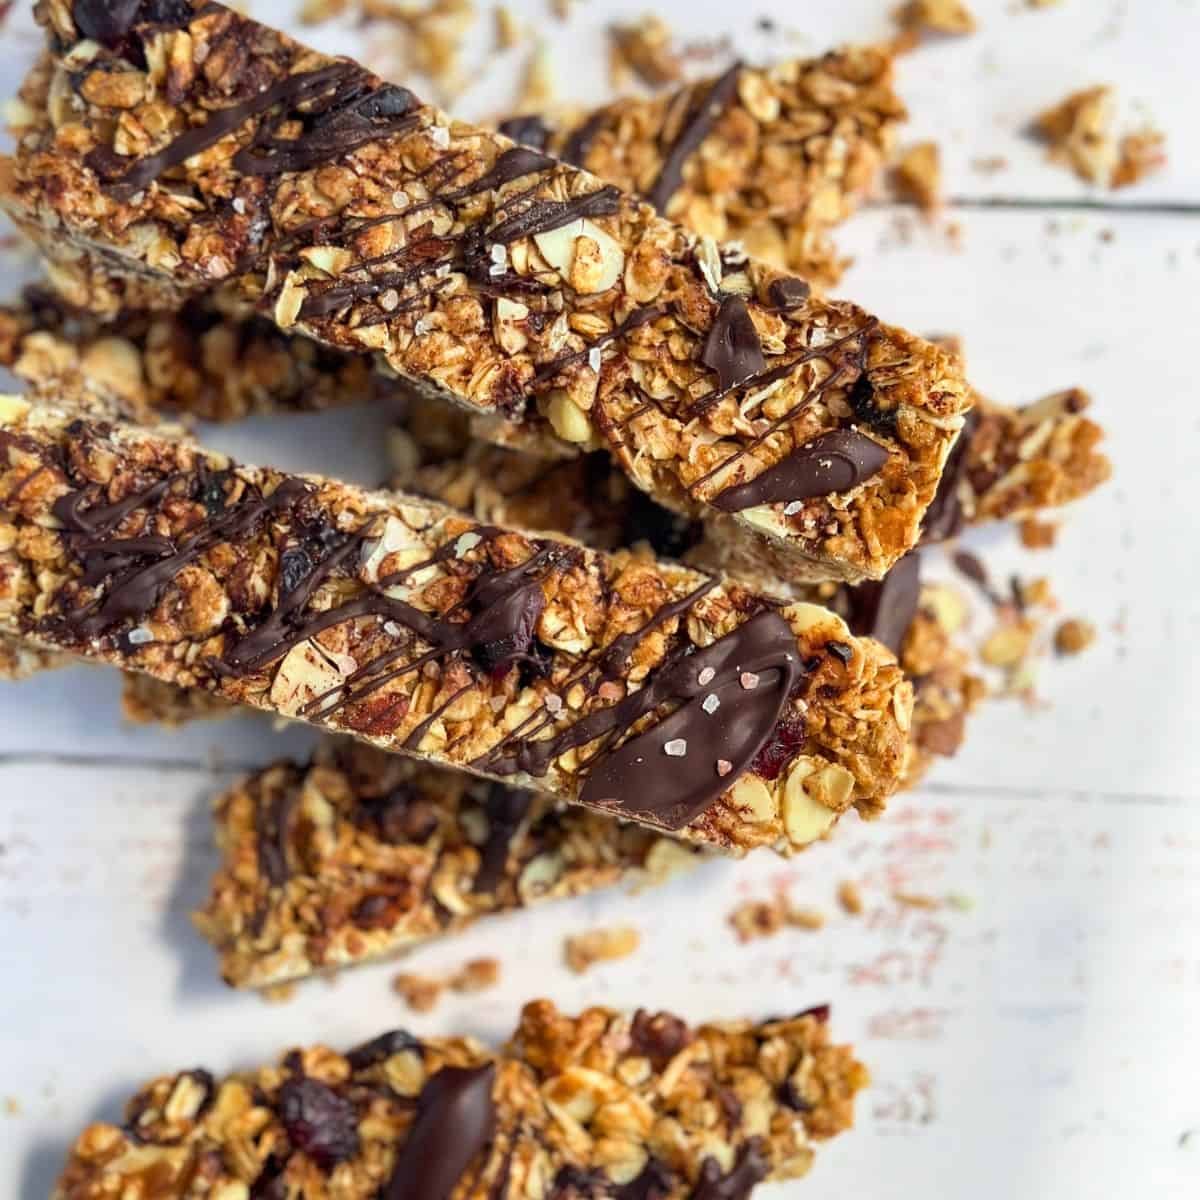
Oats, almonds, walnuts, shredded coconut, peanut butter, and brown rice syrup, pressed into a pan and chilled until firm. No baking, no refined sugar, no preservatives. I make these on Sunday and they're our lunchbox snack for the entire week. The brown rice syrup is the trick that makes them stick together without baking — honey works too but it's stickier and harder to portion.
Press the mixture into the pan really hard. Like, lean on it with the back of a spatula or a flat-bottomed glass for 30 seconds. Loosely-pressed granola bars crumble the moment you pick them up; firmly-pressed bars hold their shape and travel well. Refrigerate for at least 2 hours before slicing — they need to fully set or you'll get crumbly mess. Slice with a sharp knife in firm downward strokes, not sawing.
Ingredients (makes 12 bars):
- 2 cups rolled oats
- ½ cup chopped almonds
- ½ cup chopped walnuts
- ¼ cup shredded unsweetened coconut
- 2 tablespoon chia seeds or flaxseeds
- ½ cup creamy peanut butter
- ½ cup brown rice syrup (or honey)
- ¼ cup coconut oil, melted
- 1 teaspoon vanilla extract
- ½ teaspoon cinnamon
- Pinch of salt
- Optional: ¼ cup mini chocolate chips or dried cranberries
Instructions:
- Line an 8×8 baking pan with parchment paper, leaving overhang on two sides for easy removal.
- Combine oats, almonds, walnuts, coconut, chia seeds, cinnamon, and salt in a large bowl.
- Whisk peanut butter, brown rice syrup, melted coconut oil, and vanilla in a small bowl until smooth. Pour over the dry ingredients and stir until everything is evenly coated. Fold in chocolate chips or cranberries if using.
- Press the mixture firmly into the lined pan — really lean on it. Refrigerate at least 2 hours until set. Lift out using parchment overhang and slice into 12 bars with a sharp knife. Store in an airtight container in the fridge for 2 weeks.
7. Fresh Apple Ginger Muffins

Apple chunks and fresh grated ginger baked into oat flour muffins, lightly sweetened with maple syrup and applesauce. The ginger sounds like a kid no-go but it actually works — fresh ginger has a brightness that pairs with apple the way cinnamon usually does, but without being predictable. These are the muffins I make when the apples in the fridge are starting to wilt. Saad eats them. Zainab pulls the apple pieces out first and eats the muffin around them, then eats the apples last. Either way.
Use sweeter apples like Honeycrisp or Fuji — Granny Smith is too tart for the kids. Cut the apple chunks small (¼-inch) so they distribute evenly through the muffin instead of forming big wet pockets. Don't overmix once you add the wet ingredients — overmixed muffin batter develops gluten and makes tough, dense muffins. Stir just until you don't see dry flour, then stop.
Ingredients (makes 12 muffins):
- 2 cups oat flour
- 1½ teaspoon baking powder
- ½ teaspoon baking soda
- ½ teaspoon salt
- 1 teaspoon cinnamon
- 1 tablespoon fresh ginger, finely grated
- ½ cup applesauce
- ⅓ cup maple syrup
- 2 large eggs (or flax eggs for vegan)
- ¼ cup neutral oil
- 1 teaspoon vanilla extract
- 1 large apple (Honeycrisp or Fuji), peeled and diced small
Instructions:
- Heat oven to 350°F. Line a 12-cup muffin tin with paper liners.
- Whisk oat flour, baking powder, baking soda, salt, and cinnamon in a large bowl.
- In a separate bowl, whisk applesauce, maple syrup, eggs, oil, vanilla, and grated ginger.
- Pour wet into dry and stir just until combined. Fold in diced apple. Divide batter among muffin cups, filling each ¾ full. Bake 22-25 minutes until a toothpick comes out clean. Cool 5 minutes in pan, then transfer to a rack.
6. Vegan Bacon-Flavored Roasted Chickpeas
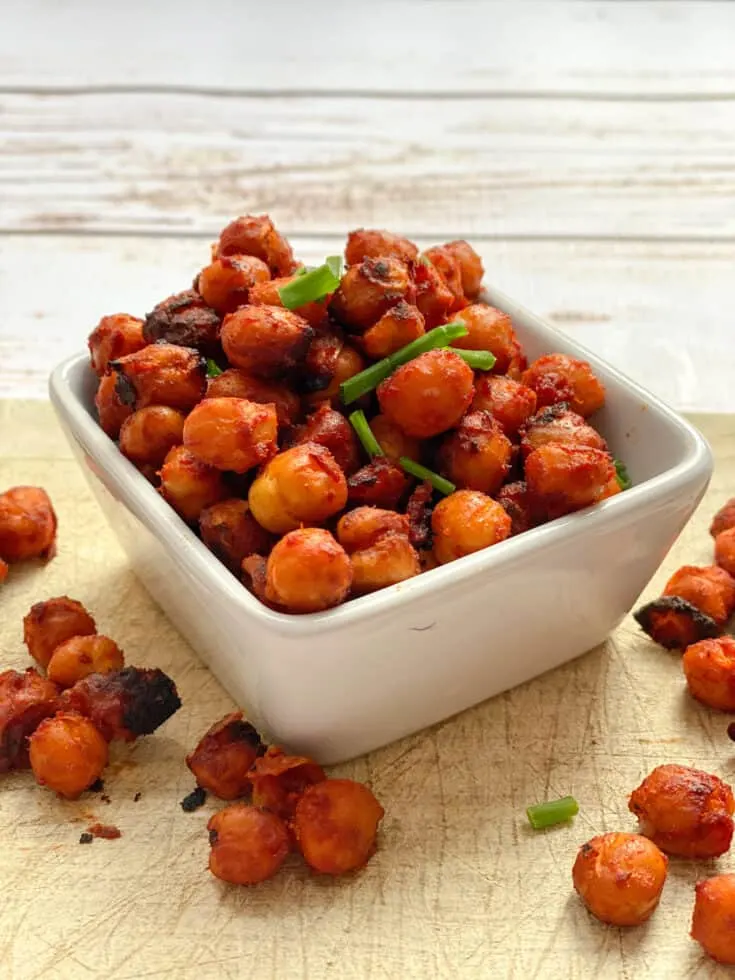
Roasted chickpeas with a smoky-savory glaze that tastes shockingly close to bacon. The magic is liquid smoke — a tiny bottle from the grocery store that gives food a smoked flavor without actually smoking it. Combined with maple syrup, soy sauce, onion powder, and a little Worcestershire (use vegan Worcestershire if you want this fully plant-based), the chickpeas come out smoky, salty, sweet, and dangerously snackable.
Liquid smoke is potent — half a teaspoon is plenty for two cans of chickpeas. Add more and you'll get a chemical-tasting result. It's in the spice aisle at most US grocery stores in a small brown bottle, lasts forever in the pantry, and works in vegan recipes that need a meaty depth. The cooled chickpeas crisp up dramatically as they sit; they're chewy when warm and crunchy when room temp.
Ingredients (serves 4):
- 2 cans (15 oz each) chickpeas, drained and rinsed
- 1 tablespoon olive oil
- 1 tablespoon soy sauce or tamari
- 1 tablespoon maple syrup
- 1 tablespoon tomato paste
- 1 teaspoon Worcestershire sauce (vegan if needed)
- ½ teaspoon liquid smoke
- 1 teaspoon smoked paprika
- ½ teaspoon onion powder
- ½ teaspoon garlic powder
- ¼ teaspoon black pepper
Instructions:
- Heat oven to 400°F. Drain and rinse chickpeas, dry on a kitchen towel.
- Toss chickpeas with olive oil on a sheet pan, spread in a single layer. Roast 20 minutes, shaking once.
- While chickpeas roast, whisk soy sauce, maple syrup, tomato paste, Worcestershire, liquid smoke, smoked paprika, onion powder, garlic powder, and pepper in a small bowl.
- Pull chickpeas from the oven, toss with the bacon glaze on the pan, return to the oven for 10 more minutes. Cool completely on the pan — they crisp up as they cool. Store in an airtight jar 3-4 days.
5. No-Bake Peanut Butter Honey Cereal Bars
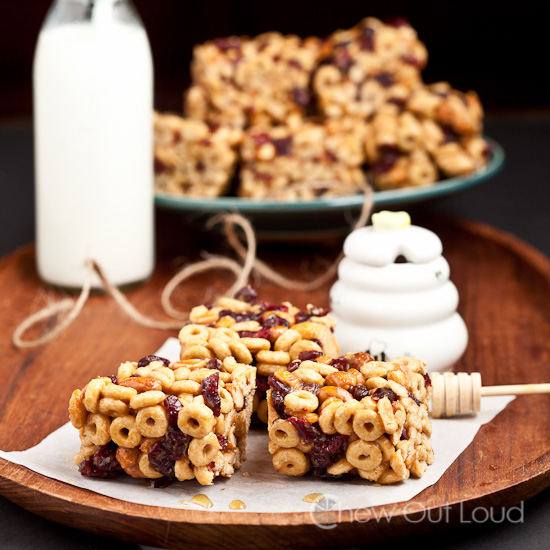
No-bake bars made with whole grain oat cereal, peanut butter, honey, dried cranberries, blueberries, and peanuts. Press it all into a pan, chill, slice into bars, done. These are my lunchbox standard for Saad's school week. They travel well, don't melt in a lunchbox, and check off carb + protein + a bit of fruit all in one bar. For more easy lunch ideas for kids, my roundup has plenty more lunchbox-friendly options that pair well with these.
Heat the peanut butter and honey together gently before mixing with the dry ingredients. Cold peanut butter is too stiff to mix evenly through cereal and dried fruit; warm liquefies it and coats everything. Heat in the microwave for 30 seconds or in a small saucepan over low heat until pourable. The bars set firm in the fridge in about an hour, but firmer if you can leave them overnight.
Ingredients (makes 12 bars):
- 4 cups whole grain oat cereal (like Cheerios)
- ½ cup chopped peanuts
- ¼ cup dried cranberries
- ¼ cup dried blueberries (or raisins)
- ¾ cup creamy peanut butter
- ½ cup honey
- 1 teaspoon vanilla extract
- Pinch of salt
Instructions:
- Line an 8×8 baking pan with parchment paper, leaving overhang for easy removal.
- Combine oat cereal, chopped peanuts, dried cranberries, and blueberries in a large bowl.
- Heat peanut butter and honey in the microwave for 30 seconds (or in a small saucepan over low heat) until pourable and smooth. Stir in vanilla and a pinch of salt.
- Pour the peanut butter mixture over the cereal mixture and stir quickly until everything is coated. Transfer to the lined pan and press down firmly — really lean on it. Refrigerate at least 1 hour until set. Lift out and slice into 12 bars. Store in an airtight container at room temp 5 days, or in the fridge 2 weeks.
4. Samoa Snack Mix
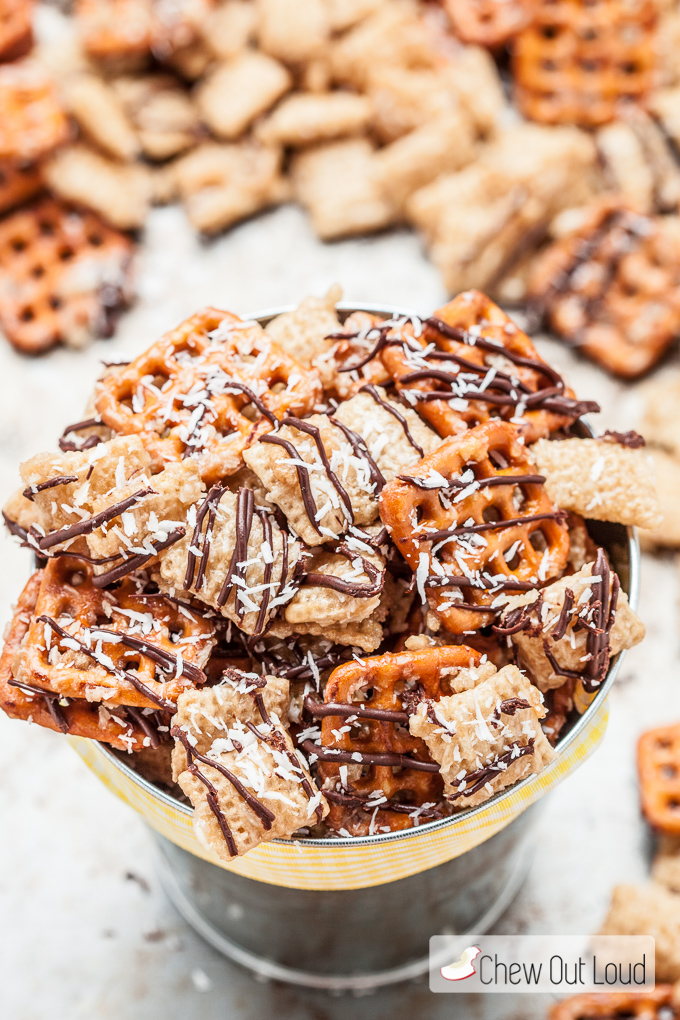
An obvious copycat of the Girl Scout Samoa cookies, made as a snack mix instead of a baked cookie. Pretzels, toasted coconut, and chocolate chips coated in a caramel made from butter, brown sugar, and corn syrup. Sweet, salty, crunchy, chewy — every texture and flavor in one bite. This is the "treat" snack on this list, not the everyday one. I make it for special occasions or as a holiday gift, and the kids ration it carefully because they know it's not coming back next week.
Toast the coconut on a dry sheet pan in a 325°F oven for 5-8 minutes until golden, shaking the pan every 2 minutes — it goes from white to gold to burnt fast. Untoasted coconut tastes raw and a little soapy; toasted coconut tastes like a cookie. Cool the snack mix on parchment paper, not foil — the caramel sticks to foil and you'll spend 20 minutes peeling it off. Once fully cooled and set, break into rough clusters with your hands.
Ingredients (serves 8-10):
- 4 cups mini pretzels (twisted or sticks)
- 1 cup unsweetened shredded coconut, toasted
- 1 cup semi-sweet chocolate chips
- ½ cup salted butter
- ½ cup light brown sugar, packed
- ¼ cup corn syrup
- ½ teaspoon vanilla extract
- Pinch of salt
Instructions:
- Toast the coconut: spread on a dry sheet pan and bake at 325°F for 5-8 minutes, shaking every 2 minutes, until golden. Watch closely.
- Line a large sheet pan with parchment paper. Spread pretzels evenly across.
- In a saucepan over medium heat, combine butter, brown sugar, and corn syrup. Bring to a boil, then cook 3 minutes without stirring. Remove from heat and stir in vanilla and salt.
- Pour the caramel evenly over the pretzels and quickly toss to coat. Sprinkle toasted coconut and chocolate chips over the top while warm — some chocolate will melt, which is fine. Let cool completely on the parchment until set (about 30 minutes). Break into clusters and store in an airtight container 5 days.
3. Cinnamon Sugar Candied Pecans
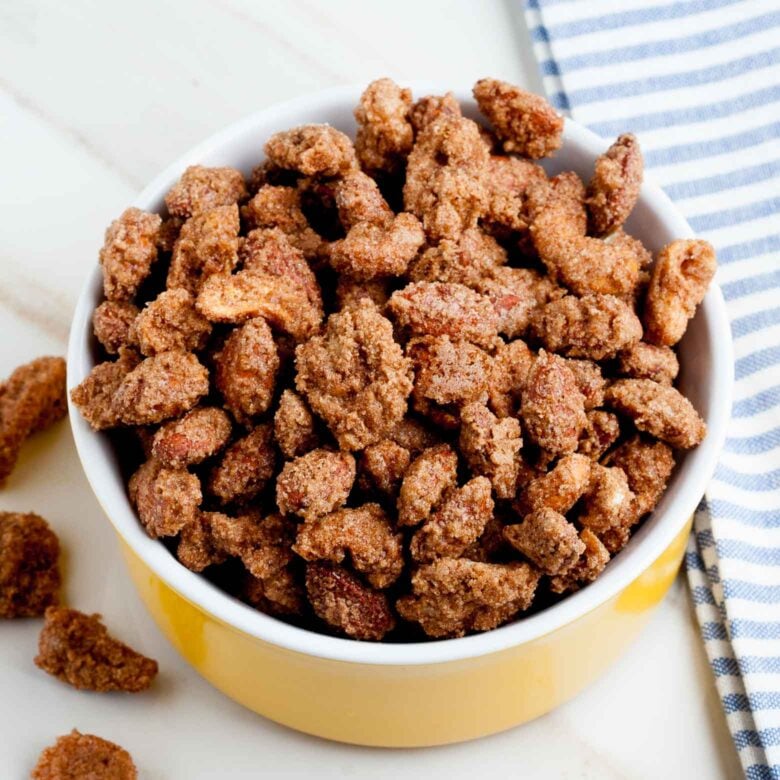
Pecans coated in an egg-white-and-sugar mixture and baked low and slow until crunchy and candied — like the ones from a holiday market that smell so good you have to buy a bag. These last for weeks in a jar on the counter, work as a snack on their own, and are also incredible on top of yogurt, salads, oatmeal, or my Thanksgiving charcuterie board recipes during the holidays. A good batch-make-once recipe for the holiday season.
Whip the egg white until it's foamy, not stiff peaks. You want enough air to coat each nut, not a meringue. About 60 seconds with a fork or whisk gets you there. Roast on a parchment-lined pan at 250°F for 1 hour, stirring every 15 minutes — the low temperature is what gives you the crunchy candied coating instead of melted sugar that turns sticky. Cool completely on the pan before breaking apart; warm candied nuts are soft and clump together.
Ingredients (makes about 4 cups):
- 4 cups raw pecan halves
- 1 large egg white
- 1 teaspoon vanilla extract
- 1 tablespoon water
- ¾ cup granulated sugar
- 2 teaspoon ground cinnamon
- ½ teaspoon salt
- Pinch of nutmeg (optional)
Instructions:
- Heat oven to 250°F. Line a large sheet pan with parchment paper.
- In a large bowl, whisk egg white, vanilla, and water until foamy (about 60 seconds). Add pecans and toss until evenly coated.
- In a small bowl, combine sugar, cinnamon, salt, and nutmeg. Sprinkle over the wet pecans and toss until every nut is coated.
- Spread pecans in a single layer on the parchment-lined pan. Bake 1 hour, stirring every 15 minutes. Cool completely on the pan — they crisp up as they cool. Break apart and store in an airtight container 2-3 weeks.
2. Air Fryer Peanut Butter Banana Dessert Bites
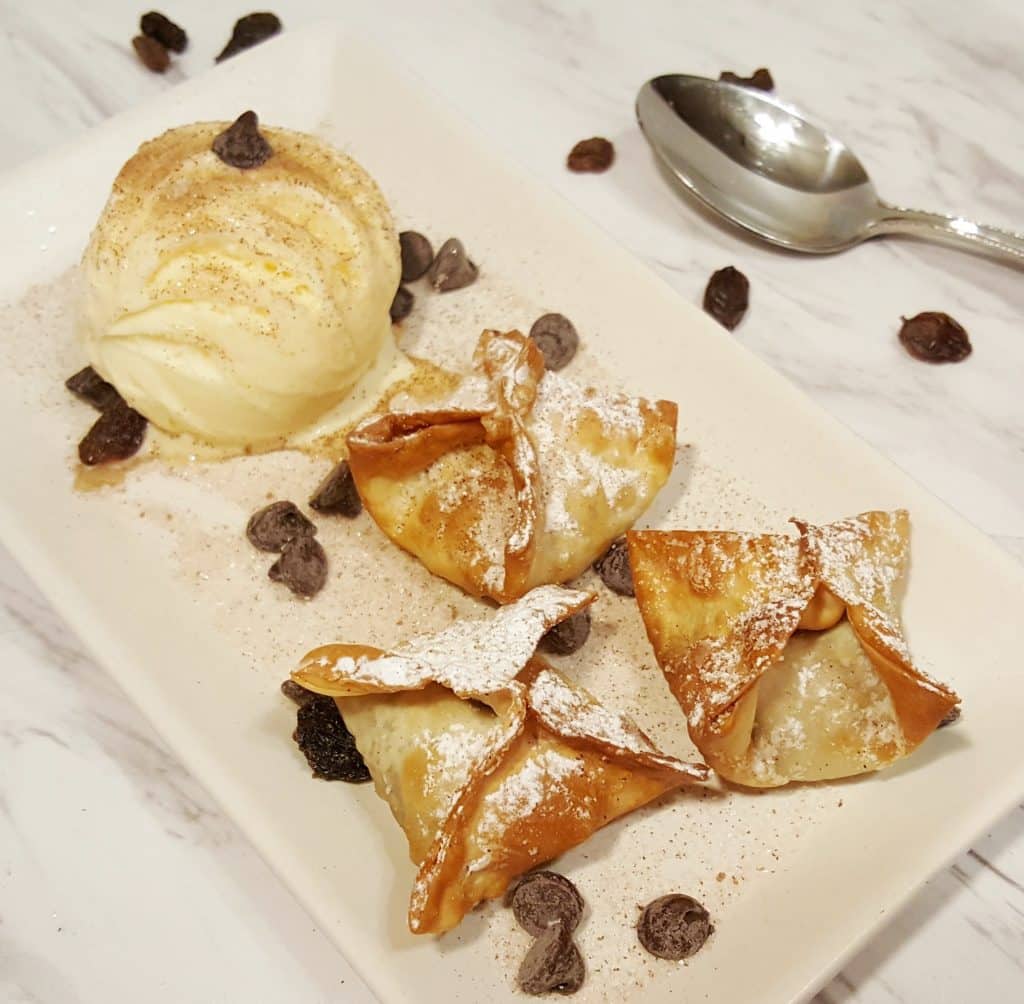
Won-ton wrappers filled with peanut butter and banana slices, then air-fried until crispy and golden. Like little crispy dumplings that taste like dessert. Eight minutes in the air fryer and you have a snack that feels like a treat but is mostly fruit and peanut butter. Saad calls these "banana puffs" and asks for them constantly. I add a sprinkle of mini M&Ms or raisins inside occasionally for variety.
Wet the edges of the won-ton wrapper with water before sealing — this is the glue. Press the edges firmly with the tines of a fork to crimp them shut so the filling doesn't leak out during cooking. Don't overfill; one teaspoon of peanut butter and 2 banana slices is the maximum. Spray the bites with olive oil before air frying — without it, the won-ton wrappers stay pale and chewy instead of crispy.
Ingredients (makes 12 bites):
- 12 won-ton wrappers (refrigerated section of most US grocery stores)
- 1 large ripe banana, sliced into 24 thin rounds
- 4 tablespoon creamy peanut butter
- Small bowl of water (for sealing)
- Olive oil spray
- Optional: mini chocolate chips, raisins, or mini M&Ms
- Optional dusting: powdered sugar or honey for serving
Instructions:
- Lay a won-ton wrapper on a flat surface. Place 1 teaspoon peanut butter in the center, top with 2 banana slices and any optional add-ins.
- Dip your finger in water and trace the four edges of the wrapper. Fold corner to corner into a triangle, pressing out air. Press edges firmly with a fork to seal.
- Repeat with remaining wrappers. Preheat air fryer to 375°F.
- Spray bites with olive oil. Arrange in a single layer in the air fryer basket. Cook 7-8 minutes, flipping halfway, until golden and crispy. Cool 2 minutes (filling is hot). Dust with powdered sugar or drizzle with honey before serving.
1. Frozen Banana Snacks

My number one because it's the snack the kids ask for more than any other. Banana slices dipped in peanut butter and dark chocolate, frozen on a tray until firm. They taste like little ice cream bites but they're literally just banana, peanut butter, and chocolate. Naturally sweet, no added sugar (if you use unsweetened peanut butter and dark chocolate), gluten-free, dairy-free, and somehow always vanish from the freezer faster than I can replace them.
Slice the bananas ½-inch thick — thinner pieces freeze too hard and feel like rocks; thicker pieces won't freeze through. Use a small dollop of peanut butter between two banana slices to make sandwiches before dipping in chocolate, or just dip individual slices. Melt the chocolate with a teaspoon of coconut oil — the oil thins it just enough to coat evenly without becoming a sticky shell. Freeze on parchment-lined trays, then transfer to a freezer bag for storage.
Ingredients (makes about 24 bites):
- 3 large ripe bananas, sliced ½-inch thick
- ½ cup creamy peanut butter
- 1 cup dark chocolate chips (60-70% cacao)
- 1 teaspoon coconut oil
- Optional toppings: chopped peanuts, shredded coconut, flaky salt
Instructions:
- Slice bananas into ½-inch rounds. Line a sheet pan with parchment paper.
- Make banana sandwiches: spread a small dollop of peanut butter on one slice, top with another slice. Or skip this step and just use individual slices.
- Melt chocolate chips and coconut oil together in a microwave-safe bowl in 30-second bursts, stirring between, until smooth.
- Dip each banana sandwich (or slice) halfway into the melted chocolate, letting excess drip off. Place on the parchment. Sprinkle with optional toppings while chocolate is still wet. Freeze 2 hours until firm. Transfer to a freezer bag for storage; keeps 2 months in the freezer.
Final Thoughts
Twenty-one snacks is more than anyone needs in regular rotation. The point of a list like this isn't to make every one — it's to flip through when you're stuck staring at a hungry kid and a fridge full of nothing. Bookmark the five or six that match your kids' actual eating habits and let the rest live on the page until you need them.
If you only take one thing away from this list: the snack drawer system is the real fix. Pick three of these to batch-make on a Sunday, portion them into clear containers, put them at kid-eye-level in the fridge and pantry, and the after-school chaos solves itself. Less arguing about what to eat, less grazing on junk, more kids who come to dinner actually hungry.
My family's most-requested from this list are the frozen banana bites (#1), the cocoa puffs chickpeas (#14), the salad kabobs (#18), and the egg muffins (#12) for meal prep. Yours will be different. Test a few, see what sticks, ignore the rest. 🍌🥕✨
If you liked this roundup, here are a few more from the site you might want next:
- 21 Best Easter Snacks Ideas — themed kid snacks for spring 🐰
- 35 Easy Breakfast Recipes — fast school-morning ideas 🥞
- 23 Best Summer Cake Ideas — for birthdays and warm-weather parties 🎂
- 19 Healthy Egg Recipes for Breakfast — more protein-packed morning options 🍳
- 45 Easy Kabob Recipes — way more than just salad kabobs 🍢
Frequently Asked Questions
What makes a snack actually healthy for kids?
A truly healthy kid snack pairs a carb with some protein or fat so it actually keeps them full. An apple alone is a 20-minute snack; an apple with peanut butter is a 2-hour snack. Look for real whole ingredients, minimal added sugar, and avoid snacks that are mostly refined carbs that spike and crash. Most of the snacks on this list include some combination of protein, fiber, and healthy fats.
Which of these snacks are best for meal prep?
The egg muffins (#12), granola bars (#8), cereal bars (#5), roasted chickpeas (#13 and #6), candied pecans (#3), and frozen banana bites (#1) are all excellent for batch-making. Most keep at least 3-5 days in the fridge or 1-2 weeks in an airtight container at room temperature. Make a batch of two or three of these on Sunday and snacks are sorted for the whole week.
How do I get picky eaters to actually eat healthy snacks?
Three tricks that work for me. First, let them help build the snack (salad kabobs, fruit roll-ups, the vegetable train) — kids eat what they assembled themselves. Second, present food as fun and visual — colorful platters, kabob shapes, hidden ingredients like the chickpea cocoa puffs. Third, make snacks visible and accessible at kid-eye-level. The snack drawer system trains them to choose the right things on their own.
Can these snacks be packed for school lunches?
Yes, many of these travel well. The granola bars (#8), cereal bars (#5), homemade fruit roll-ups (#17), apple ginger muffins (#7), raspberry yogurt muffins (#16), and roasted chickpeas (#13) all hold up in a lunchbox without refrigeration for 4-6 hours. The hummus wraps (#19) and egg muffins (#12) need an ice pack but are perfect lunchbox additions.
Are these snacks expensive to make?
Most of them are cheaper than packaged equivalents. Roasted chickpeas cost about a dollar to make a big batch that equals 3-4 bags of crackers. Homemade granola bars cost less than half what store brands charge. Egg muffins are cheaper than yogurt cups. The savings add up especially if you're feeding multiple kids. The only "expensive" snack on this list is the candied pecans, and even those work out cheaper than buying them from a market.
How long do homemade kid snacks usually keep?
It varies. Granola bars and cereal bars: 2 weeks in the fridge. Egg muffins: 5 days in the fridge or 2 months frozen. Roasted chickpeas: 3-5 days in an airtight container at room temp. Muffins: 3 days on the counter or 1 week refrigerated. Fruit roll-ups: 2 weeks airtight. Frozen banana bites: 2 months in the freezer. As a general rule, anything with fresh fruit or eggs needs refrigeration; anything dried or candied keeps longer at room temperature.





Comments
No Comments