
Summer baking in our house has its own rhythm. The markets fill up with strawberries, mangoes show up at every corner store, and Zainab starts pointing at every berry she sees and saying "cake?" She's not wrong — summer fruit basically begs to be baked into something. These months are when I do some of my most relaxed, joy-driven baking, because the ingredients are doing most of the heavy lifting for you.
What makes a summer cake worth making, in my opinion, is brightness. The flavor should feel light and seasonal — not heavy, not overly sweet, not something you'd confuse with a December holiday cake. The best ones use fruit as the hero, have a tender crumb that doesn't require fancy technique, and come together without heating up your kitchen for three hours. I also look for variety: this list has no-bake options, vegan options, gluten-free options, and everything in between. If you've been baking a lot of layer cakes lately, you might also want to check out my easy cake recipes for everyday options beyond summer.
In this roundup I've pulled together 23 summer cake ideas that cover a lot of ground. There's the Fresh Strawberry Cake for when the strawberries are peak perfect, a Mango Mousse Cake that feels almost too pretty to eat, a S'mores Icebox Cake that requires zero oven time, and a Margarita Cake that I genuinely made for a weekend dinner party and people would not stop asking about it. You'll also find loaves, buckles, upside-down cakes, and cheesecakes, because "summer cake" can mean a lot of things. If you're planning a full summer spread, my summer dessert recipes and recipe roundups have even more ideas to browse.
Here are the 23 summer cakes I keep coming back to — pick whichever fruit is sitting on your counter right now and start there.
Top 23 Summer Cake Ideas

23. Fresh Strawberry Cake
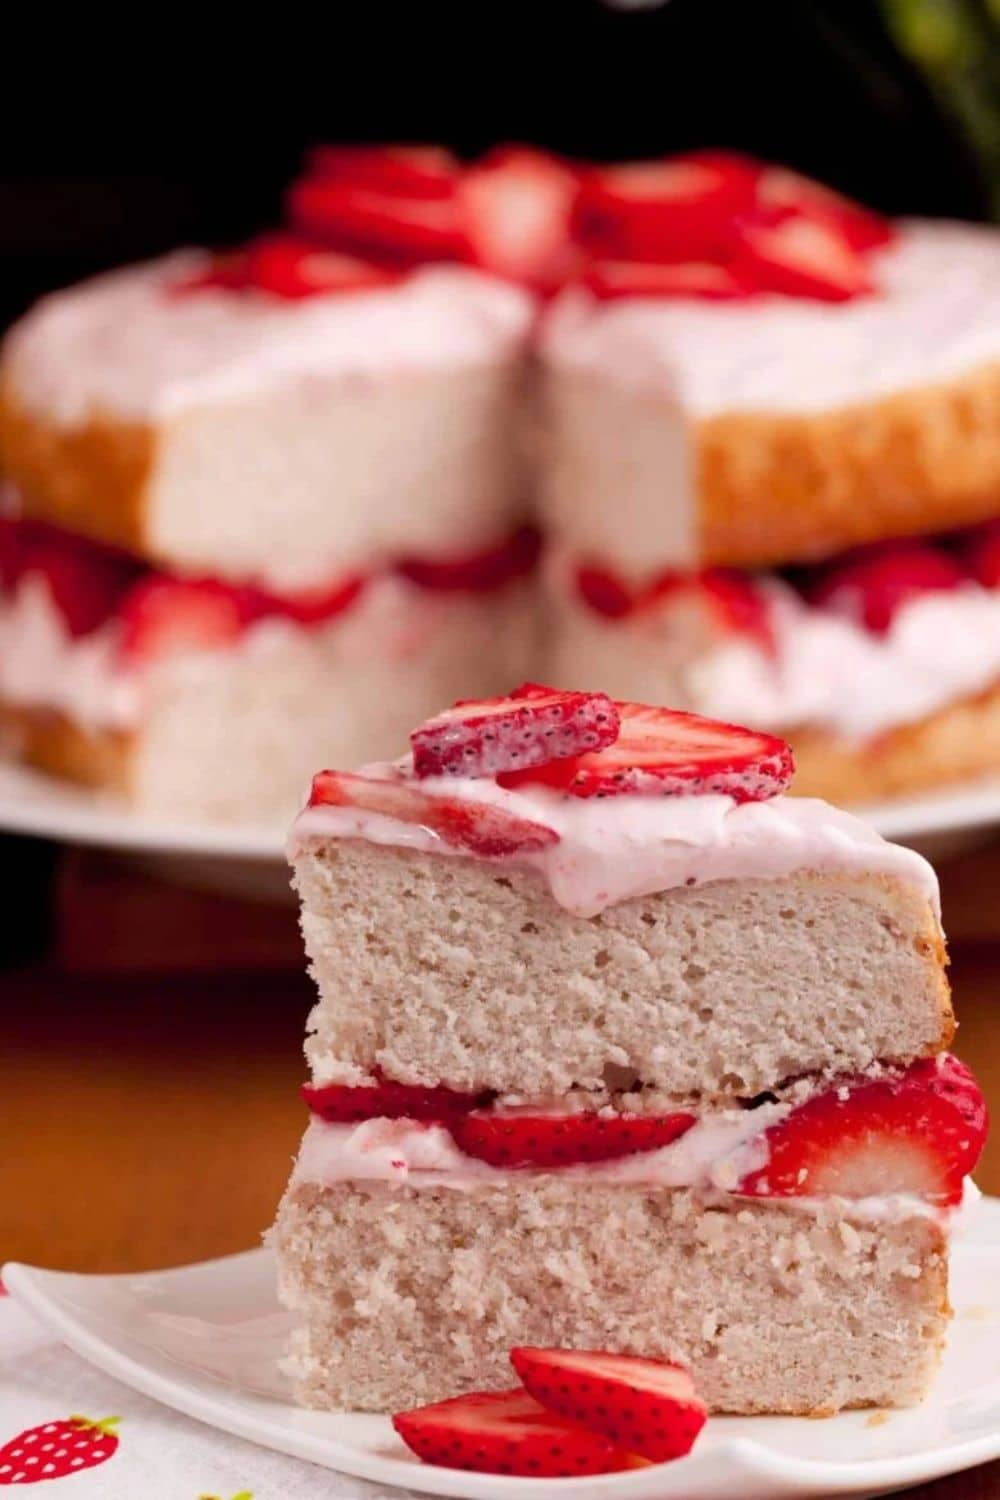
This is the cake I bake every Mother's Day without fail — and it's earned that spot because it's the real thing. No strawberry extract, no food coloring. You reduce a full pound of fresh strawberries down to ⅔ cup of deeply concentrated purée, fold that into the batter along with diced fresh berries, and the natural pink color that comes out of the oven is genuinely beautiful. The first time I made this I didn't bother reducing the strawberries — I just blended them fresh and dumped them in. The cake came out gummy in the middle and barely pink. That reduction step is not optional. Finished with a tangy cream cheese frosting, this is a summer cake that actually tastes like summer.
Ingredients
- 2½ cups cake flour
- 2 teaspoons baking powder
- ½ teaspoon salt
- 1 cup unsalted butter, softened
- 1¾ cups granulated sugar
- 4 large egg whites
- ⅔ cup reduced strawberry purée (from 1 lb fresh strawberries, simmered down)
- ½ cup whole milk
- 1 teaspoon vanilla extract
- 1 cup fresh strawberries, diced
- 8 oz cream cheese, softened
- ½ cup unsalted butter, softened (for frosting)
- 4 cups powdered sugar
- 1 teaspoon vanilla extract (for frosting) + pinch of salt
- Fresh strawberries for decorating
Instructions
- Make the strawberry reduction: Purée 1 lb fresh strawberries and simmer over medium heat for about 20 minutes, stirring occasionally, until reduced to ⅔ cup. It should look thick and jammy. Cool completely before using.
- Preheat oven to 350°F. Grease two 8-inch round cake pans and line the bottoms with parchment. Whisk the cake flour, baking powder, and salt in a bowl and set aside.
- Beat butter and granulated sugar for 4 minutes until light and fluffy. Add egg whites one at a time, beating after each. Mix in the vanilla. Alternate adding the dry ingredients and the milk combined with the cooled strawberry purée, beginning and ending with the dry. Fold in the diced strawberries.
- Divide the batter evenly between the prepared pans. Bake 28–32 minutes until a toothpick inserted in the center comes out with just a few moist crumbs. Cool in the pans for 10 minutes, then transfer to a wire rack and cool completely.
- Beat the cream cheese and butter together until smooth. Add powdered sugar gradually, then vanilla and salt, beating until the frosting is fluffy and spreadable. Frost the cooled cake generously between the layers and on top. Decorate with fresh strawberries right before serving.
Tips
- Tip: Don't skip cooling the purée — adding it warm will melt the butter in your batter and flatten the cake.
- Tip: Pat the diced strawberries dry with paper towels before folding in — excess moisture from the fruit can make the crumb wet in spots.
- Tip: The frosted cake keeps well in the fridge for up to 3 days — just bring it to room temperature for 20 minutes before slicing so the crumb softens back up.
22. Mini Iced Bakewell Tarts
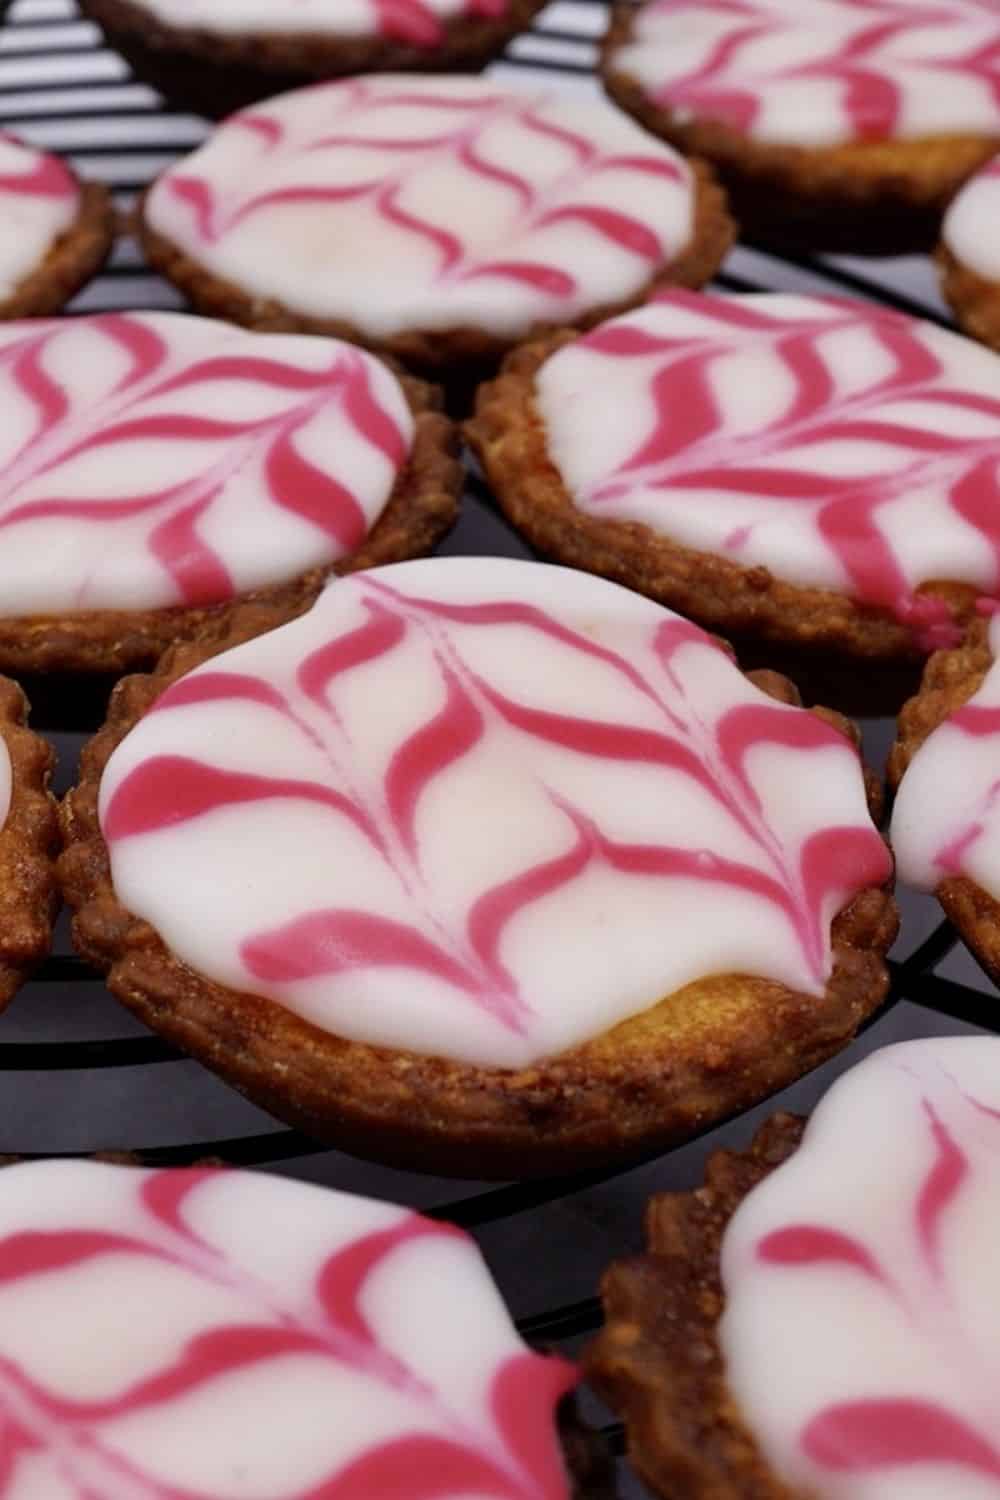
I grew up in Pakistan with no concept of a Bakewell tart — the first time I tried one was at a friend's place in the UK and I immediately understood why the British are so attached to them. Buttery shortcrust pastry, a layer of raspberry jam, almond frangipane baked until just set, and that thick white icing with the glacé cherry on top. The mini version is what I bring to summer picnics because they travel well, need no cutlery, and nobody can eat just one. The non-negotiable step here is blind-baking the pastry shells for 10 minutes before the filling goes in — skipping it means a raw, doughy base, and no amount of good frangipane rescues that.
Ingredients
- 1½ cups all-purpose flour
- ½ cup cold unsalted butter, cubed
- 2 tablespoons granulated sugar
- 1 egg yolk
- 2–3 tablespoons cold water
- ⅓ cup raspberry jam
- ½ cup unsalted butter, softened (for frangipane)
- ½ cup granulated sugar (for frangipane)
- 1 large egg
- 1 cup ground almonds (almond flour works too)
- 1 teaspoon almond extract (use real, not imitation)
- 2 tablespoons all-purpose flour (for frangipane)
- 1 cup powdered sugar + 2 tablespoons milk (for icing)
- 12 glacé cherries
Instructions
- Make the pastry: Rub the cold butter into the flour and sugar with your fingertips until the mixture looks like coarse breadcrumbs. Add the egg yolk and cold water one tablespoon at a time, mixing until the dough just comes together. Flatten into a disc, wrap, and chill for 30 minutes.
- Preheat oven to 350°F. Roll the pastry out on a lightly floured surface and cut into 12 rounds slightly larger than your muffin tin cups. Press each round into the cups, prick the bases with a fork, and blind-bake for 10 minutes until just set. Let cool slightly.
- Spoon 1 teaspoon of raspberry jam into each pastry shell. Make the frangipane: beat the softened butter and sugar until fluffy, beat in the egg, then fold in the ground almonds, almond extract, and flour. Spoon frangipane over the jam layer, filling each shell about ¾ full.
- Bake for 18–22 minutes until the frangipane is golden and set. Cool completely in the tin before removing. Whisk powdered sugar and milk until smooth, drizzle over each tart, and top with a glacé cherry. Allow the icing to set for 15 minutes before serving.
Tips
- Tip: If you can't find glacé cherries, maraschino cherries (patted very dry) work fine as a substitute.
- Tip: These keep at room temperature in an airtight container for up to 2 days — the pastry stays crisp and the icing holds well, which makes them ideal for making the day before a picnic.
- Tip: Strawberry jam works just as well as raspberry if that's what you have — the almond frangipane is forgiving with most berry jams.
21. Lemon Dump Cake
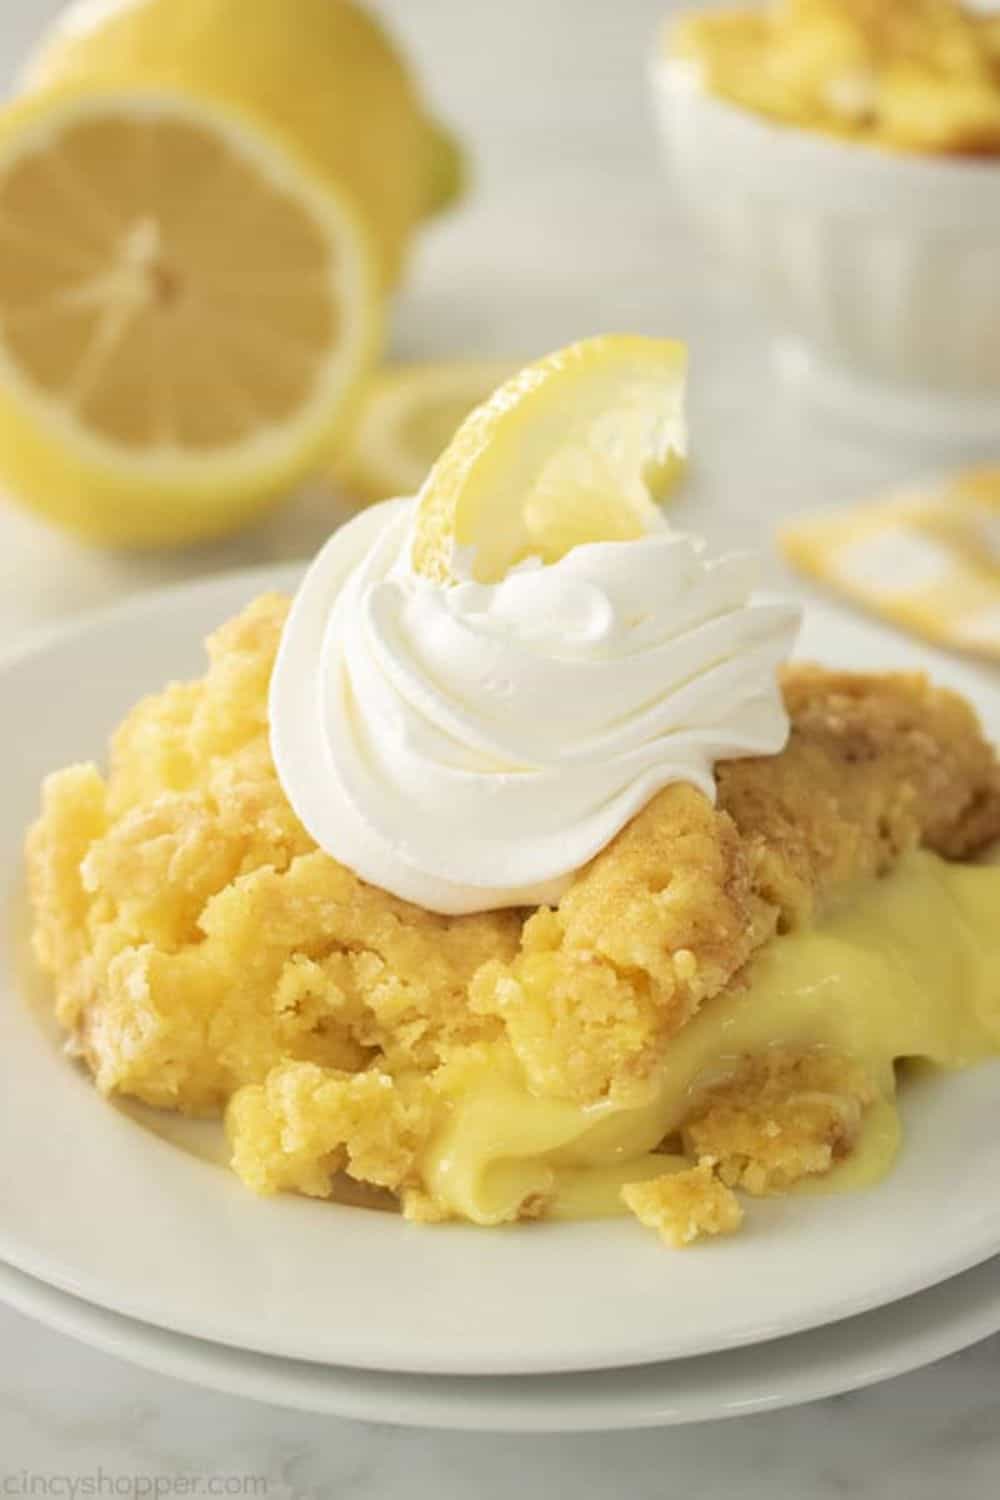
The name is terrible but the cake is genuinely good. Five minutes of prep, one pan, and you end up with this bright, citrusy, self-saucing pudding cake that tastes like it took real effort. I keep a box of lemon cake mix and a box of lemon pudding in my pantry specifically for the days when someone shows up unexpectedly and I need dessert fast. The technique is simple — you're layering rather than mixing, and the butter melts down through the dry cake mix during baking to create that crumbly, golden top over the creamy lemon pudding underneath. The fresh lemon juice and zest stirred into the pudding layer is what keeps it from tasting like straight box mix.
Ingredients
- 1 box (15.25 oz) lemon cake mix
- 1 box (3.4 oz) instant lemon pudding mix
- 2 cups whole milk
- ¾ cup unsalted butter, very cold, sliced into thin pats
- 2 tablespoons fresh lemon juice
- Zest of 1 lemon
- Whipped cream or vanilla ice cream, for serving
Instructions
- Preheat oven to 350°F. Lightly grease a 9×13-inch baking dish.
- Whisk the pudding mix with the milk for about 2 minutes until it starts to thicken. Stir in the lemon juice and lemon zest. Pour the pudding mixture evenly into the prepared baking dish.
- Sprinkle the dry lemon cake mix evenly over the pudding layer in an even layer. Do not stir — the layers need to stay separate going into the oven.
- Arrange the cold butter pats across the entire surface, covering as much area as possible. Bake for 40–45 minutes until the top is golden and crackly and the edges are bubbling. Let cool for 10 minutes, then serve warm with whipped cream or vanilla ice cream.
Tips
- Tip: The butter must be very cold when it goes on top — room-temperature butter absorbs too quickly and you lose the crumbly topping texture.
- Tip: Serve this the day it's made — it's best warm from the oven. Leftovers reheat well in the microwave in 30-second bursts.
- Tip: Can't find lemon cake mix? Use white or vanilla cake mix and add an extra tablespoon of lemon zest to the pudding layer — it gets you most of the way there.
20. Rhubarb and Ginger Cake
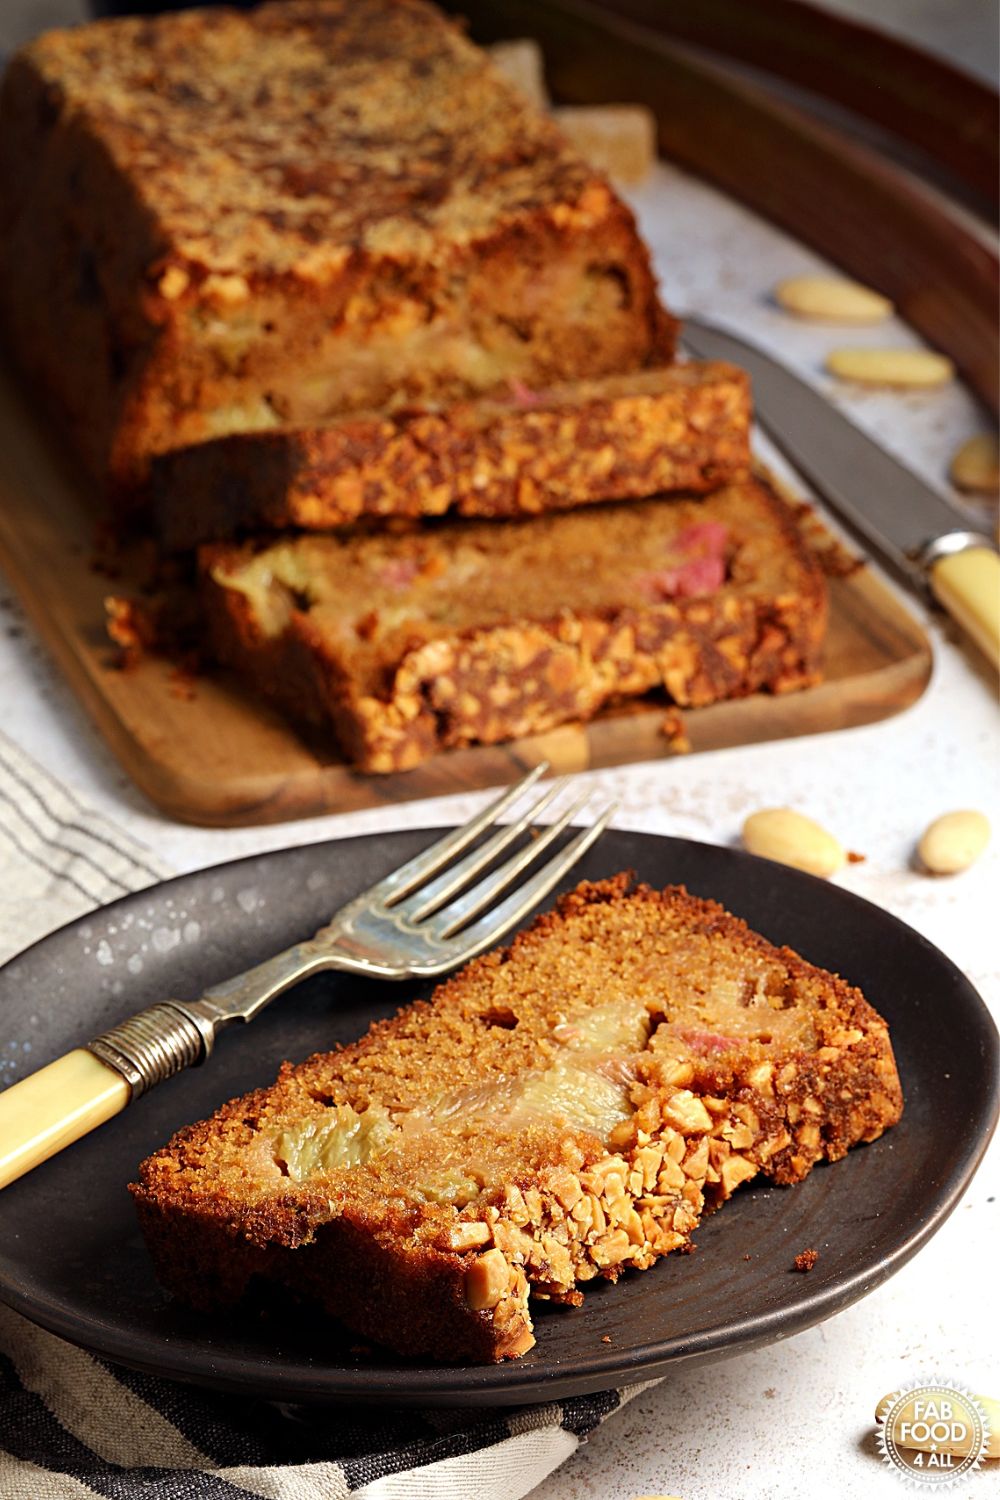
Rhubarb is one of those ingredients I never grew up with — in Pakistan it wasn't a thing — but once I started baking with it I understood why it has such a devoted following. This British-style loaf cake uses dark muscovado sugar (not regular brown sugar — the molasses content is genuinely different) and two kinds of ginger: ground and stem ginger in syrup, which adds pockets of warm, sticky heat through the crumb. The tart rhubarb cuts through the deep caramel sweetness in a way that keeps every bite interesting. The crunchy flaked almond and demerara topping is what makes it look like something from a proper bakery, even when it took about 15 minutes of hands-on work.
Ingredients
- 2 cups all-purpose flour
- 2 teaspoons baking powder
- 2 teaspoons ground ginger
- ¼ teaspoon salt
- ⅔ cup unsalted butter, softened
- 1 cup dark muscovado sugar (available at Walmart or online — don't substitute regular brown sugar)
- 3 large eggs
- ⅓ cup whole milk
- 2 cups fresh rhubarb, cut into ½-inch pieces, tossed in 1 tablespoon flour
- 2 tablespoons stem ginger in syrup, finely chopped (find it in the baking aisle or international section)
- ⅓ cup flaked almonds
- 2 tablespoons demerara sugar (or raw turbinado sugar)
Instructions
- Preheat oven to 350°F. Line a 9×5-inch loaf pan with parchment paper, leaving overhang on the sides for easy lifting.
- Whisk together the flour, baking powder, ground ginger, and salt in a bowl. In a separate large bowl, beat the softened butter and muscovado sugar for 4 minutes until as fluffy as you can get it — muscovado is dense, so it won't go as light as regular sugar. Add the eggs one at a time, beating after each.
- Alternate folding the dry ingredients and milk into the butter mixture in two or three additions. Fold in the flour-coated rhubarb pieces and the chopped stem ginger. Transfer the batter to the prepared pan and level the surface.
- Scatter the flaked almonds and demerara sugar evenly over the top. Bake for 55–60 minutes until a skewer inserted in the center comes out clean — check at 50 minutes and tent loosely with foil if the top is browning too fast. Cool in the pan for 10 minutes, then lift out and cool on a rack. Best sliced and eaten the same day, ideally with a strong cup of tea.
Tips
- Tip: Tossing the rhubarb in flour before folding it in is what stops it from sinking to the bottom — don't skip this step.
- Tip: If you can't find stem ginger in syrup, substitute 1 teaspoon of finely grated fresh ginger — the heat will be slightly sharper but it still works well.
- Tip: Frozen rhubarb works in this recipe — thaw it first and pat it very dry, then toss in flour as directed. Expect the bake time to be on the longer end.
19. Easy Strawberry Snacking Cake
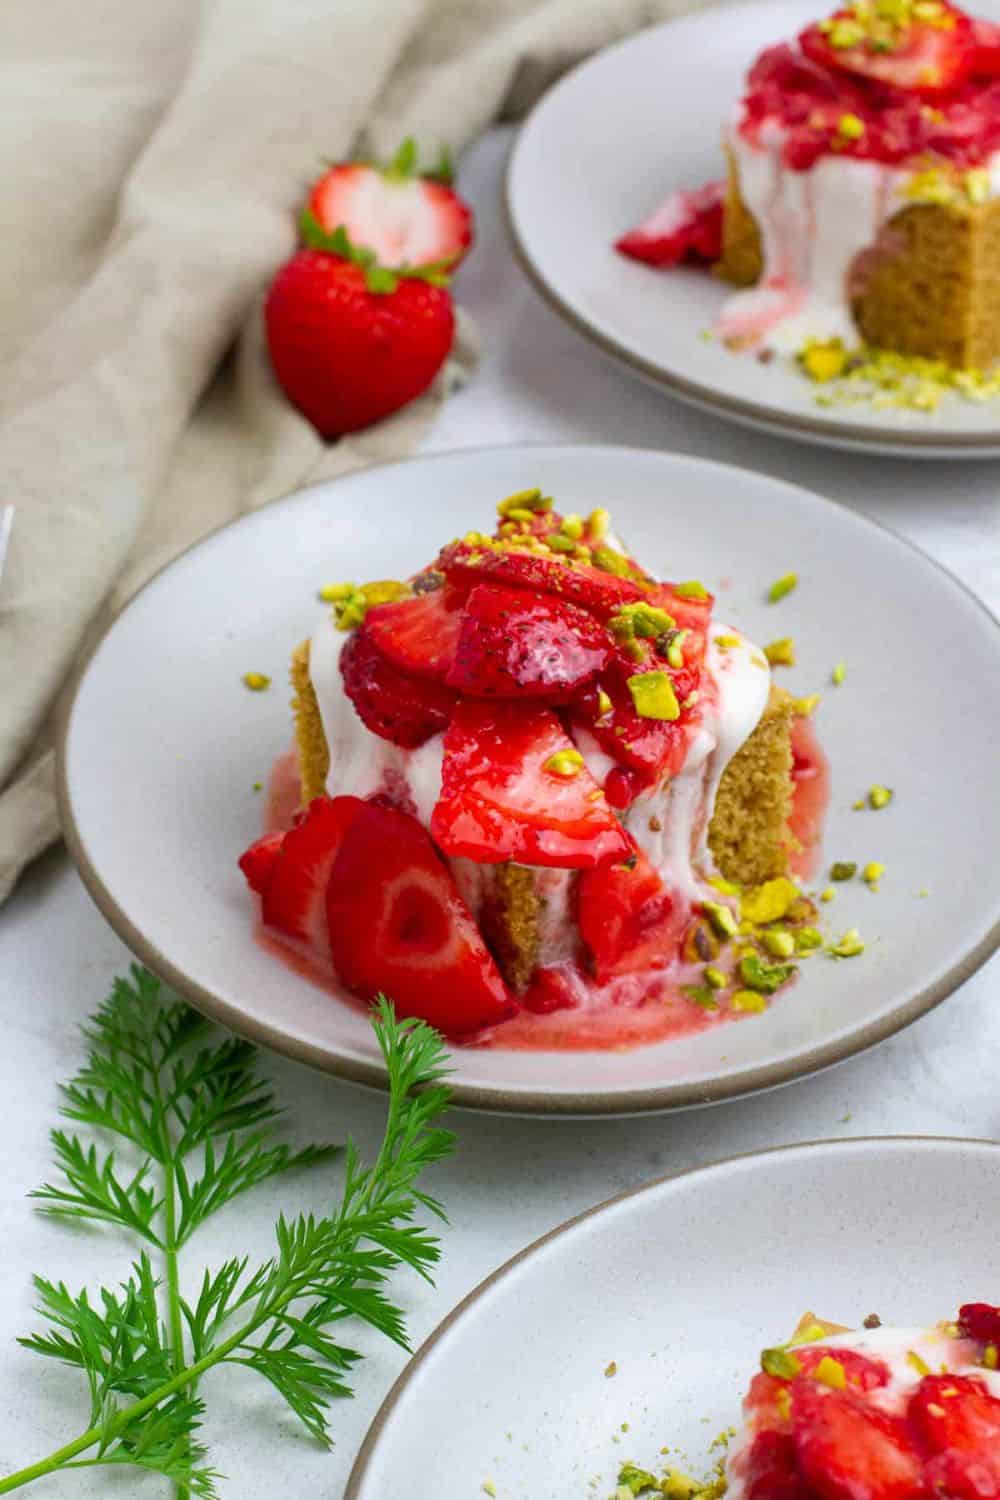
I was skeptical of this one the first time I made it — gluten-free, dairy-free, no refined sugar sounded like a lot of compromises in one cake. But the almond flour base produces a crumb that's tender and slightly nutty in a way that's actually better than most standard gluten-free flour blends I've tried. Coconut sugar keeps it naturally sweet without that hollow sweetness of refined sugar, and the lemon zest in the batter lifts everything. Zainab ate three squares the first time I made it and didn't notice anything was different. I make a double batch because it disappears in one afternoon — it's the kind of cake that's just as good as a breakfast square as it is a dessert.
Ingredients
- 2 cups almond flour (not almond meal — the finer grind matters here)
- ¼ cup oat flour (or certified gluten-free oat flour)
- 1 teaspoon baking powder
- ½ teaspoon baking soda
- ½ teaspoon salt
- 3 large eggs
- ⅓ cup coconut sugar
- ⅓ cup avocado oil (or melted coconut oil)
- ⅓ cup oat milk (or any non-dairy milk)
- 2 tablespoons fresh lemon juice
- Zest of 1 lemon
- 1 teaspoon vanilla extract
- 1½ cups fresh strawberries, hulled and quartered, tossed in 1 tablespoon almond flour
Instructions
- Preheat oven to 350°F. Line an 8-inch square baking pan with parchment paper.
- In a large bowl, whisk together the almond flour, oat flour, baking powder, baking soda, and salt. In a separate bowl, whisk the eggs, coconut sugar, avocado oil, oat milk, lemon juice, lemon zest, and vanilla until well combined.
- Pour the wet ingredients into the dry and stir until just combined — don't overmix. Gently fold in the flour-coated strawberries, distributing them evenly through the batter.
- Spread the batter evenly into the prepared pan. Bake for 35–40 minutes until the top is set and a toothpick inserted in the center comes out clean. Cool completely in the pan before slicing into squares — this cake firms up as it cools, so don't rush it.
Tips
- Tip: This cake works equally well with blueberries or raspberries if you don't have strawberries on hand — same quantity, same method.
- Tip: Store at room temperature for 1 day or refrigerate for up to 4 days — the almond flour keeps it moist longer than regular flour cakes.
- Tip: Coconut sugar can be swapped for regular granulated sugar if that's what you have — the texture will be the same, just slightly less caramel-y in flavor.
18. Vegan Apricot Almond Cake
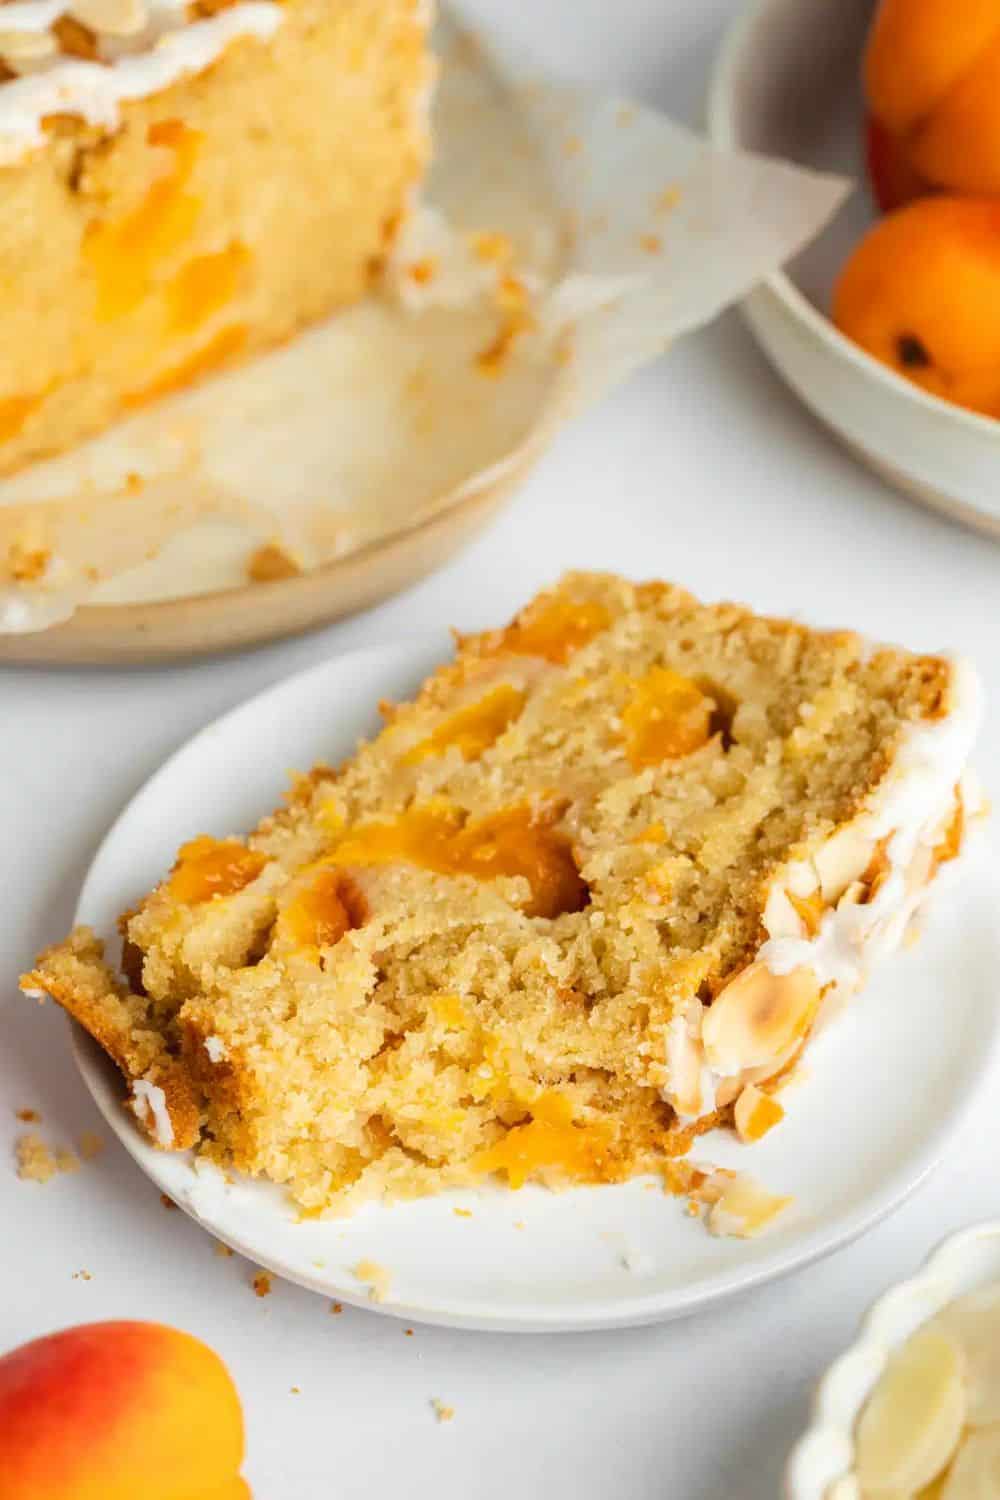
Stone fruit season in my kitchen means I'm buying apricots by the bagful, and this cake is one of my favourite things to do with them. The combination of almond flour and extra virgin olive oil gives the crumb a richness that honestly surprised me the first time I made it — I wasn't expecting a dairy-free cake to feel this luxurious. One thing I learned the hard way: use ripe-but-firm apricots, not soft ones. Overripe apricots release too much liquid into the batter and you end up with a soggy middle. Press the halves cut-side up for a pretty finish, and don't skip the flaked almonds and demerara sugar on top — that crunch is everything.
Ingredients
- 1½ cups all-purpose flour
- ¾ cup almond flour
- ¾ cup granulated sugar
- 1½ teaspoons baking powder, ½ teaspoon baking soda, ½ teaspoon salt
- ¾ cup non-dairy milk (almond or oat milk both work)
- ⅓ cup vegan yogurt (coconut yogurt works well)
- ⅓ cup extra virgin olive oil
- 1 tablespoon apple cider vinegar, 1 teaspoon vanilla extract, ½ teaspoon almond extract
- 6 ripe-but-firm apricots, halved and pitted
- ¼ cup flaked almonds + 2 tablespoons demerara sugar (for topping)
Instructions
- Preheat oven to 350°F. Grease and line a 9-inch round springform pan with parchment.
- Whisk together the all-purpose flour, almond flour, sugar, baking powder, baking soda, and salt in a large bowl. In a separate bowl, whisk the non-dairy milk, vegan yogurt, olive oil, apple cider vinegar, vanilla, and almond extract until combined.
- Pour the wet ingredients into the dry and mix until just combined — don't overmix. Pour the batter into the prepared pan and smooth the top with a spatula.
- Press the apricot halves cut-side up into the batter, spacing them evenly. Scatter flaked almonds over the top and sprinkle with demerara sugar.
- Bake for 45–50 minutes until deeply golden and a skewer inserted in the centre (between apricots) comes out clean. Cool completely in the pan before releasing and slicing.
Tips
- Tip: The apple cider vinegar reacts with the baking soda to help the cake rise — don't leave it out, even if it seems like an odd ingredient in a cake.
- Tip: If you can't find fresh apricots, canned apricot halves (drained and patted dry) work in a pinch — just reduce the bake time by about 5 minutes and check early.
- Tip: This cake keeps well at room temperature, covered, for up to 2 days — the crumb actually improves slightly by day two as the almond flavour deepens.
17. Lemon Courgette Cake
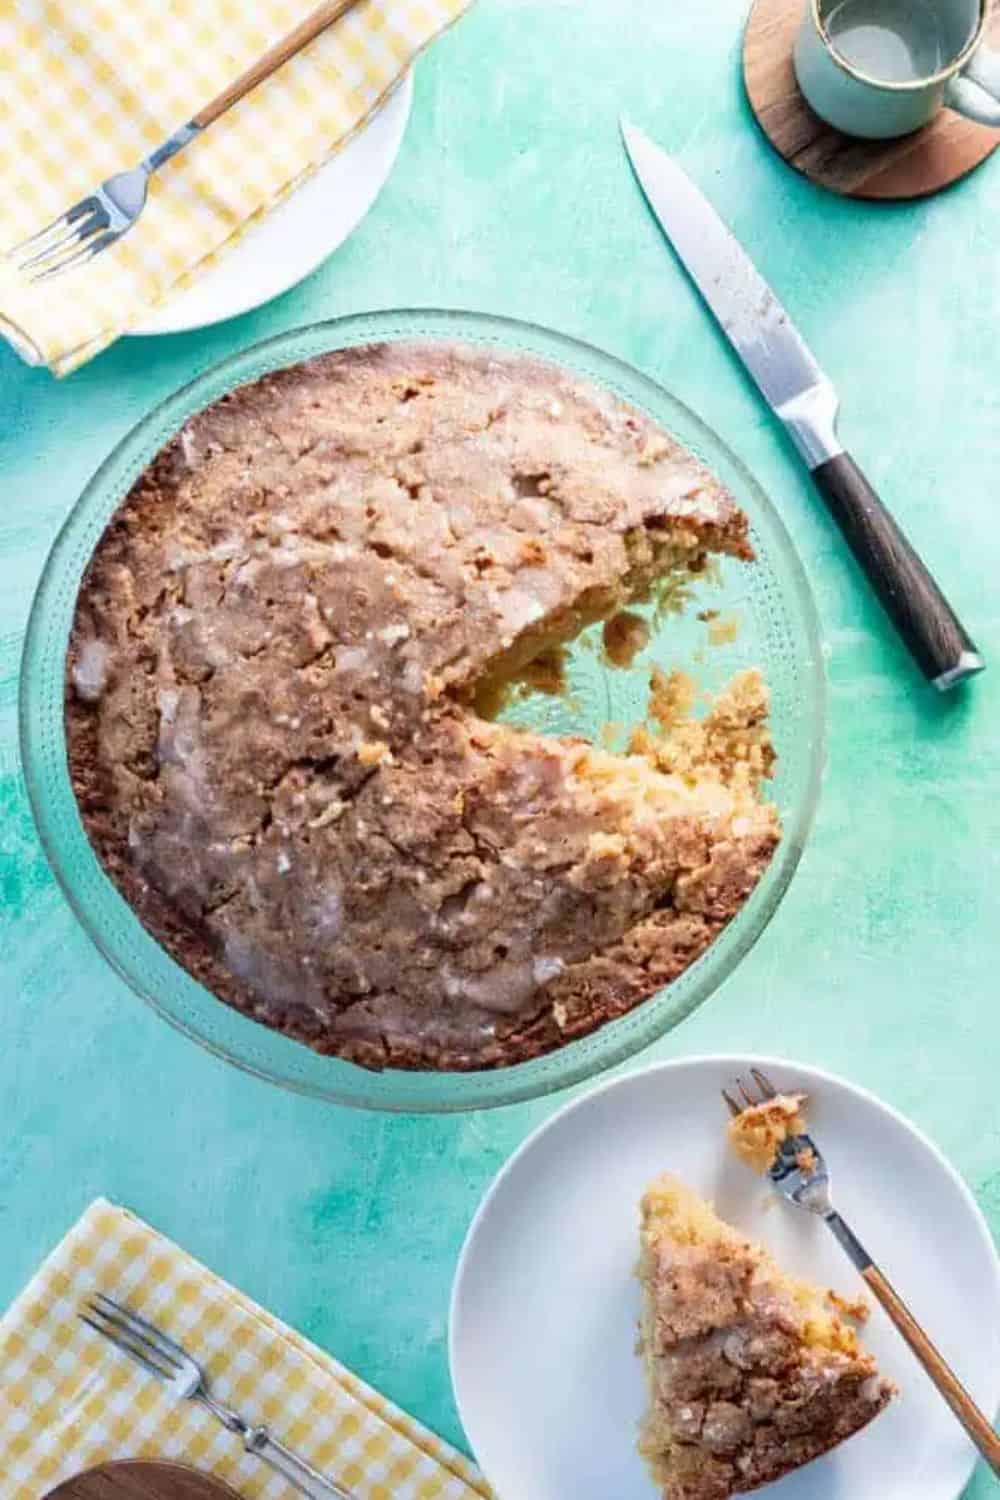
Every August, zucchini takes over. If you grow it, you know — you go from zero to twenty in about four days. This lemon courgette loaf cake is genuinely one of the best things to do with a surplus, and the people eating it have absolutely no idea there's a vegetable involved. The grated courgette works like carrots in carrot cake: it adds moisture and a tender crumb without contributing any detectable flavour. The lemon glaze at the end ties everything together and gives the top that glossy, bakery-style finish. The most important step in this whole recipe? Squeezing the grated courgette dry. Skip that and your loaf will be dense in the middle.
Ingredients
- 2 cups all-purpose flour
- 2 teaspoons baking powder, ½ teaspoon baking soda, ½ teaspoon salt
- 1 cup granulated sugar
- ⅔ cup sunflower or vegetable oil
- 3 large eggs
- 1½ cups grated courgette/zucchini, firmly squeezed dry
- Zest of 2 lemons + ¼ cup fresh lemon juice
- 1 teaspoon vanilla extract
- Lemon glaze: 1 cup powdered sugar + 2 tablespoons fresh lemon juice
Instructions
- Preheat oven to 325°F. Line a 9×5 inch loaf pan with parchment paper. Grate the courgette, then wrap it in a clean kitchen towel and squeeze firmly over the sink until no more water comes out.
- Whisk together flour, baking powder, baking soda, and salt in a large bowl. In a separate bowl, whisk the sugar, oil, eggs, lemon zest, lemon juice, and vanilla until smooth and combined.
- Pour the wet ingredients into the dry and stir until just combined. Fold in the squeezed-dry courgette. Pour batter into the prepared loaf pan.
- Bake for 55–60 minutes until a skewer inserted in the centre comes out clean. If the top starts browning too fast, tent loosely with foil for the last 15 minutes. Cool completely in the pan before glazing.
- Whisk the powdered sugar and lemon juice together until smooth and pourable. Drizzle evenly over the cooled loaf and let it set for 10 minutes before slicing.
Tips
- Tip: A box grater on the medium holes gives you the right texture for the courgette — fine grater makes it too watery, large holes leave visible chunks.
- Tip: The glaze needs the cake to be fully cool — if the cake is even slightly warm, the glaze will melt right off instead of setting on top.
- Tip: This loaf freezes really well — wrap individual slices in cling wrap and freeze for up to 2 months. Thaw at room temperature for about an hour.
16. Blueberry Buckle
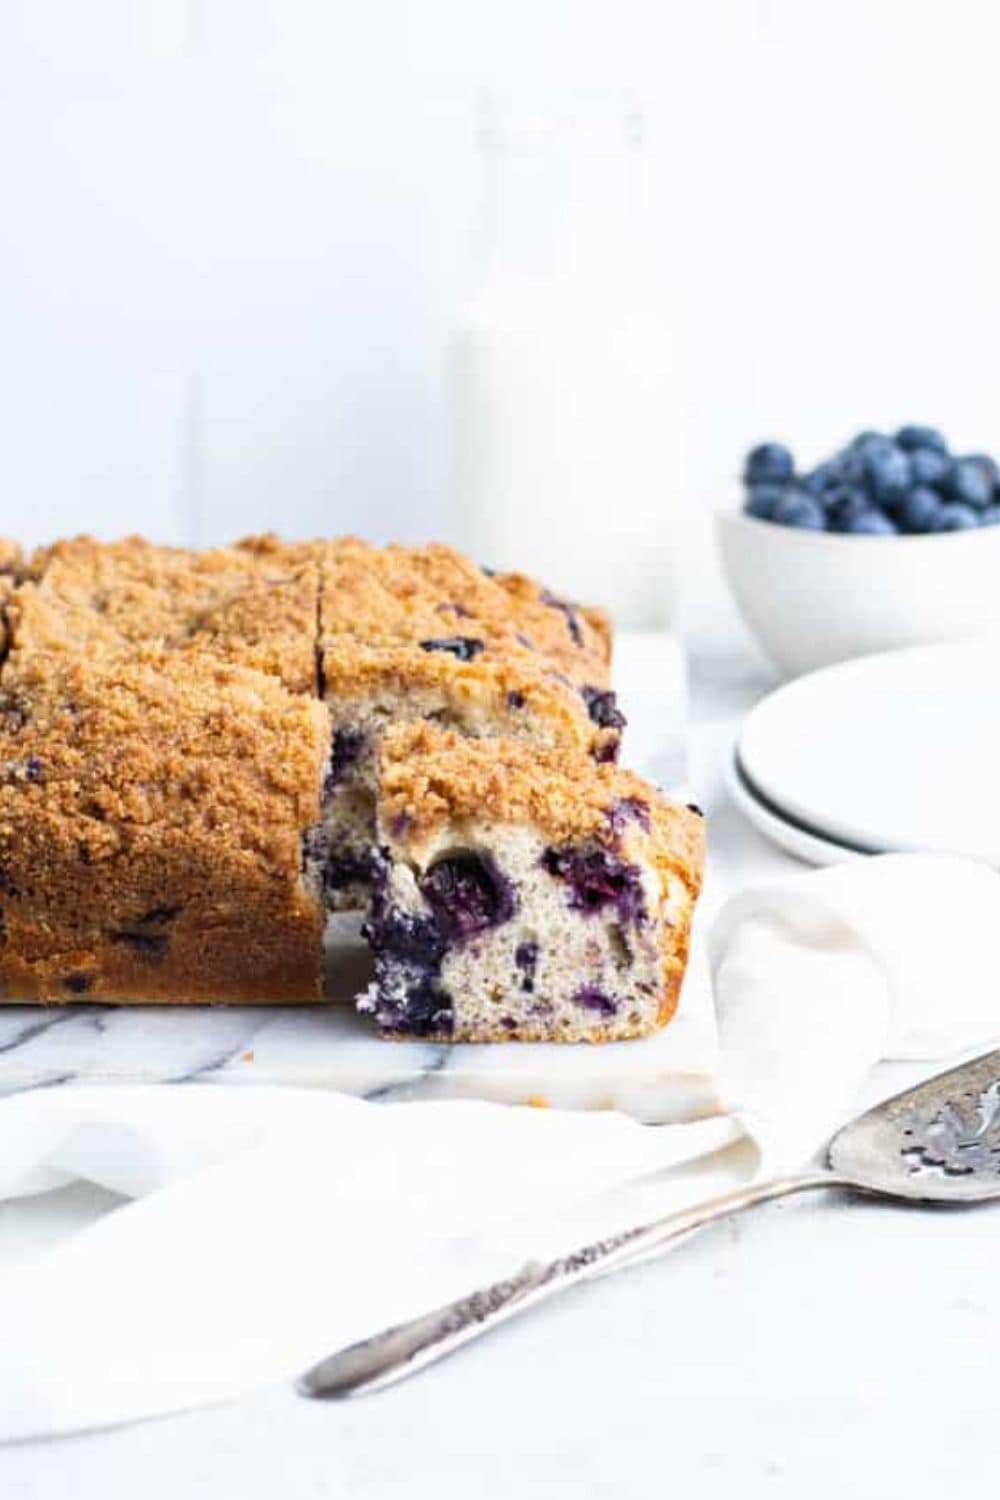
I didn't grow up with buckle — it's not a thing in Pakistan — but the first time I made one I understood immediately why it's been an American kitchen staple for generations. It's a butter cake loaded with fresh blueberries and blanketed in a cinnamon streusel that sinks slightly into the surface as it bakes, which is how it gets the name. Saad calls it "the blueberry crumble cake" and asks for it specifically during blueberry season. The trick that makes this version reliable every time: toss the blueberries in 2 tablespoons of flour before folding them into the batter. It keeps them suspended throughout the cake instead of sinking to the bottom and burning.
Ingredients
- Cake: 2 cups all-purpose flour + 2 teaspoons baking powder + ½ teaspoon salt
- ½ cup softened unsalted butter + ¾ cup granulated sugar
- 1 large egg + 1 teaspoon vanilla extract
- ½ cup whole milk
- 2 cups fresh blueberries, tossed in 2 tablespoons flour
- Streusel: ½ cup all-purpose flour + ½ cup packed brown sugar + ½ teaspoon ground cinnamon + ¼ cup cold unsalted butter, cut into small cubes
Instructions
- Preheat oven to 350°F. Grease a 9-inch square baking pan. Make the streusel first: combine flour, brown sugar, and cinnamon, then rub in the cold butter with your fingers until you have clumpy crumbs. Refrigerate while you make the cake batter.
- Whisk together flour, baking powder, and salt. In a separate large bowl, beat the softened butter and sugar together for about 4 minutes until pale and fluffy. Beat in the egg and vanilla.
- Add the dry ingredients and milk to the butter mixture in alternating additions, starting and ending with the dry ingredients. Mix until just combined — the batter will be thick.
- Gently fold in the flour-coated blueberries. Spread the batter evenly into the prepared pan, then scatter the cold streusel evenly over the top.
- Bake for 45–50 minutes until the top is deeply golden and a toothpick inserted in the centre comes out clean. Cool in the pan for at least 15 minutes before cutting. Serve warm with vanilla ice cream.
Tips
- Tip: Frozen blueberries work here — don't thaw them first. Add them straight from frozen and they hold their shape better during baking.
- Tip: Keep the streusel in the fridge until the moment you scatter it on the batter — cold fat in streusel means it stays clumpy and crisp rather than melting into the top.
- Tip: Leftovers reheat well — a quick 20 seconds in the microwave brings back that just-baked warmth, and the streusel stays surprisingly crisp.
15. No Bake Raspberry and Pistachio Cheesecake
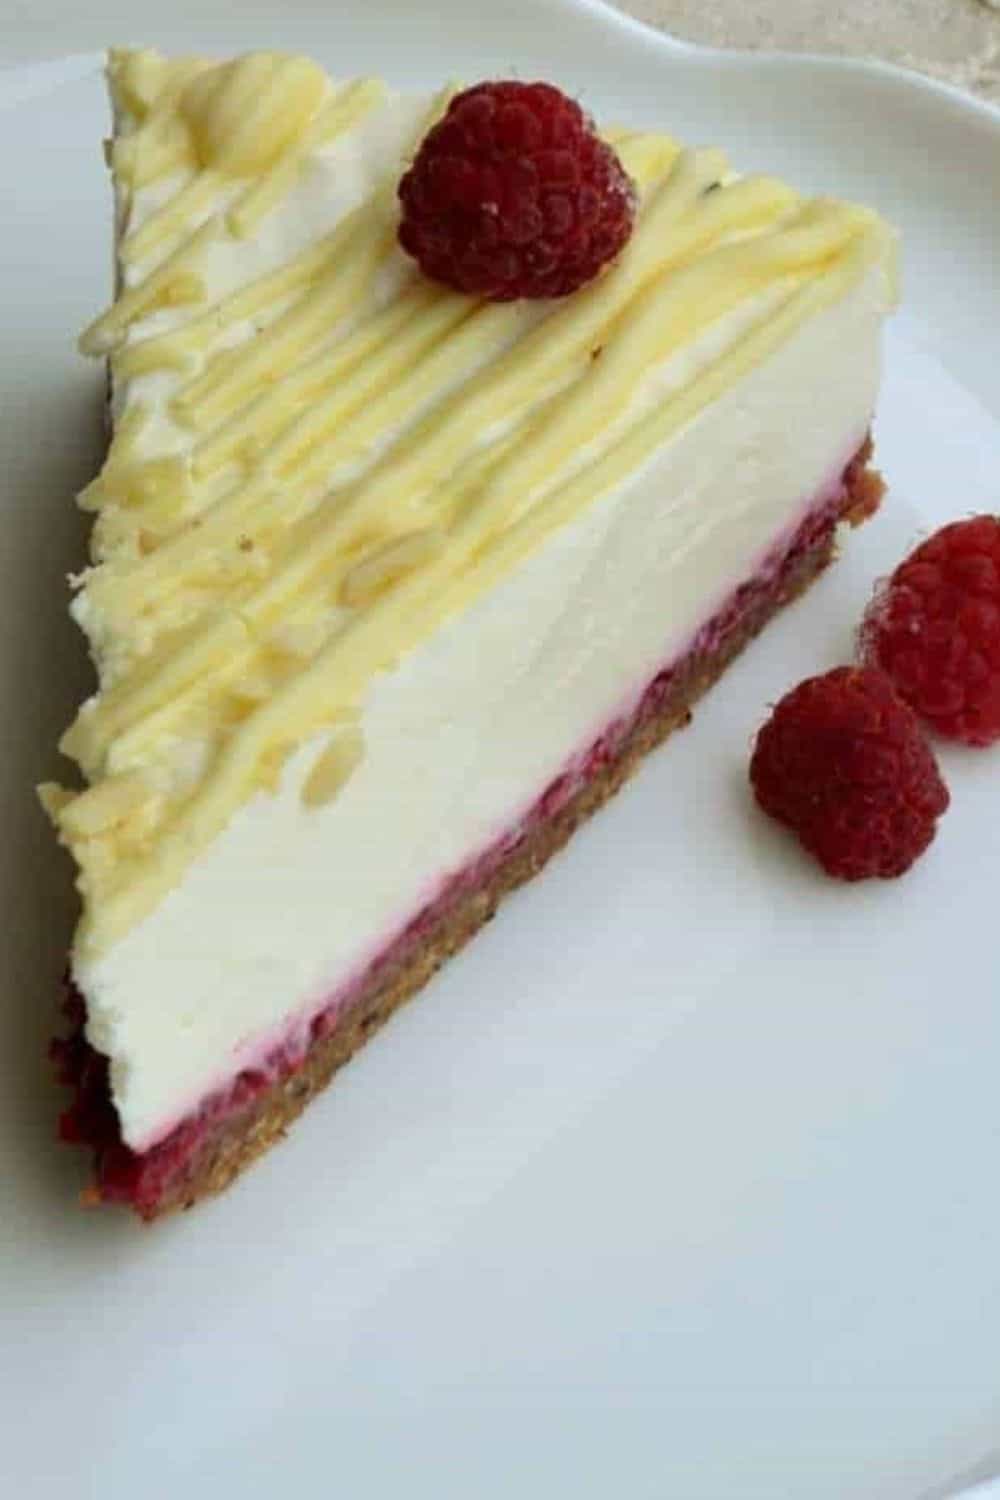
This is my go-to when I need something that looks like I spent all day on it but actually came together in about 40 minutes of active work the evening before. The pistachio-and-biscuit base is nutty and sturdy, the filling is mousse-light with a natural pink colour from real raspberry purée, and the white chocolate folded through adds just enough sweetness without making it cloying. No oven involved — which in July is a genuine blessing. The one thing I want to flag: bloom your gelatin properly. Five full minutes in cold water before you melt it. Under-bloom it and you'll end up with stringy bits in an otherwise beautiful cheesecake. Don't rush that step.
Ingredients
- Base: 1½ cups digestive biscuit or graham cracker crumbs + ½ cup finely ground pistachios + ½ cup melted unsalted butter
- 16 oz full-fat cream cheese, softened to room temperature
- ¾ cup powdered sugar + 1 teaspoon vanilla extract
- 1½ cups raspberry purée (blend about 2 cups fresh or thawed frozen raspberries, then strain through a fine sieve)
- 2 teaspoons unflavored gelatin powder, bloomed in 3 tablespoons cold water
- 4 oz good-quality white chocolate, melted and cooled slightly
- 1¼ cups heavy cream, whipped to soft peaks
- Fresh raspberries and roughly chopped pistachios to decorate
Instructions
- Combine biscuit crumbs, ground pistachios, and melted butter. Mix until the crumbs hold together when pressed. Press firmly and evenly into the base of a 9-inch springform pan. Refrigerate for at least 20 minutes while you make the filling.
- Sprinkle gelatin powder over the cold water in a small bowl and let it sit undisturbed for 5 full minutes. Then set the bowl over a small pot of simmering water and stir until the gelatin is completely liquid and clear. Set aside to cool slightly.
- Beat the cream cheese until completely smooth. Add powdered sugar and vanilla and beat again. Stir in the raspberry purée until combined. While beating on low, slowly stream in the melted gelatin, then fold in the melted white chocolate.
- Gently fold the whipped cream into the raspberry mixture in two additions, keeping as much volume as possible. Pour the filling over the chilled base and smooth the top with an offset spatula.
- Refrigerate for at least 6 hours, or overnight. To serve, run a thin knife around the edge before releasing the springform. Decorate with fresh raspberries and chopped pistachios. Slice with a hot, dry knife for clean edges.
Tips
- Tip: Make this the night before you need it — a full overnight set gives you a much cleaner slice than the minimum 6 hours, and you won't be stressed the day of.
- Tip: If you can't find digestive biscuits, graham crackers from any US grocery store are a direct substitute for the base — same texture, very similar flavour.
- Tip: The cream cheese must be fully softened before you start — cold cream cheese won't beat smooth and you'll end up with lumps in the filling that no amount of mixing will fix.
14. Margarita Cake
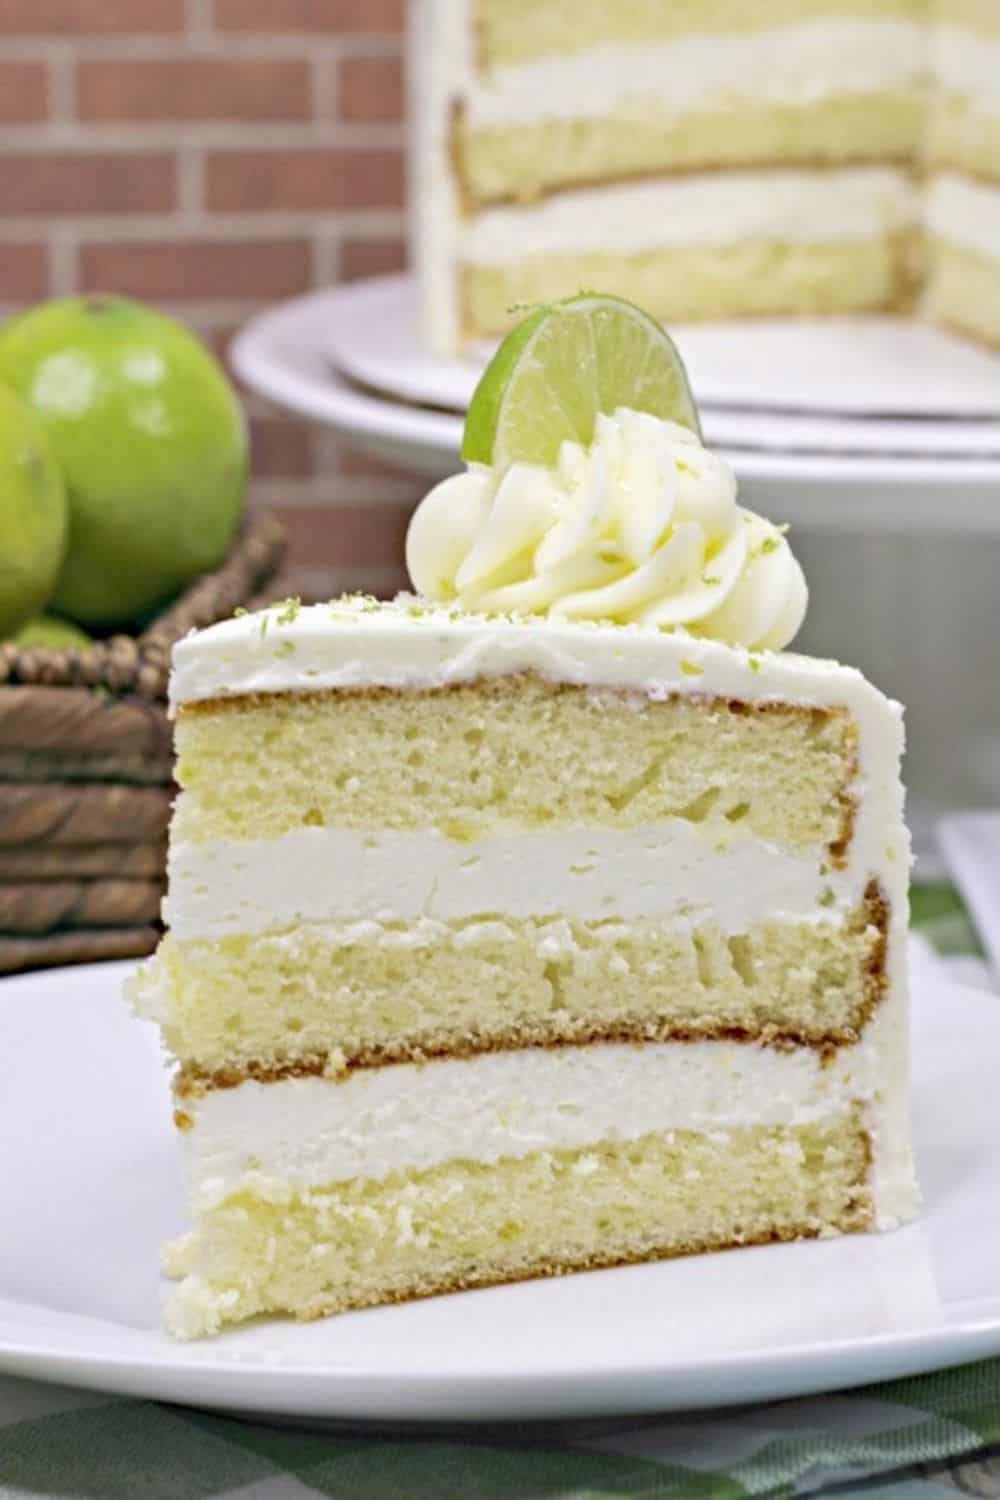
I'm not a big drinker, but I love what cocktail flavours do to a cake — and this one consistently gets the loudest reaction at adult gatherings. The tequila, fresh lime, and triple sec give it that unmistakable margarita character without tasting boozy in a heavy way. It's baked in a bundt pan so it looks dramatic without requiring any decorating skills, and the salted lime glaze drizzled over the top is exactly what a good margarita rim tastes like. Use silver tequila here — I tried it once with gold tequila and the oak flavour came through in a way that didn't work in the cake. Silver keeps it clean and bright.
Ingredients
- 1 box (15.25 oz) white cake mix (Betty Crocker or Duncan Hines both work)
- 3 large egg whites
- ⅓ cup softened unsalted butter
- ¾ cup whole milk
- 3 tablespoons silver tequila + 2 tablespoons triple sec
- 3 tablespoons fresh lime juice + zest of 2 limes
- Margarita glaze: 2 cups powdered sugar + 3 tablespoons fresh lime juice + 1 tablespoon silver tequila + 1 tablespoon triple sec + ¼ teaspoon fine salt
- Extra lime zest and a pinch of flaky salt for finishing
Instructions
- Preheat oven to 350°F. Grease a standard bundt pan very thoroughly — get into every groove — then dust lightly with flour and tap out the excess. This step matters more than almost anything else for getting a clean release.
- Combine the cake mix, egg whites, softened butter, milk, tequila, triple sec, lime juice, and lime zest in a large bowl. Beat with a hand mixer (or vigorous whisking) for about 2 minutes until the batter is smooth and well combined.
- Pour the batter into the prepared bundt pan. Bake for 35–40 minutes until a toothpick inserted in the thickest part comes out clean. Cool in the pan for exactly 15 minutes — not longer, or it starts to stick — then invert onto a wire rack.
- Once the cake is completely cool, whisk together all the glaze ingredients until smooth and pourable. Drizzle generously over the top of the cake, letting it run down the sides naturally. Finish with lime zest and a pinch of flaky salt.
Tips
- Tip: For a non-alcoholic version, replace the tequila and triple sec with equal amounts of fresh lime juice and a splash of orange juice — the citrus flavour still shines.
- Tip: The glaze sets fairly quickly once it hits the cake, so have your lime zest and flaky salt ready to sprinkle on immediately after glazing.
- Tip: If you don't have a bundt pan, bake this in a greased 9×13 inch pan instead — reduce bake time to about 28–32 minutes and check with a toothpick.
13. Mango Cake
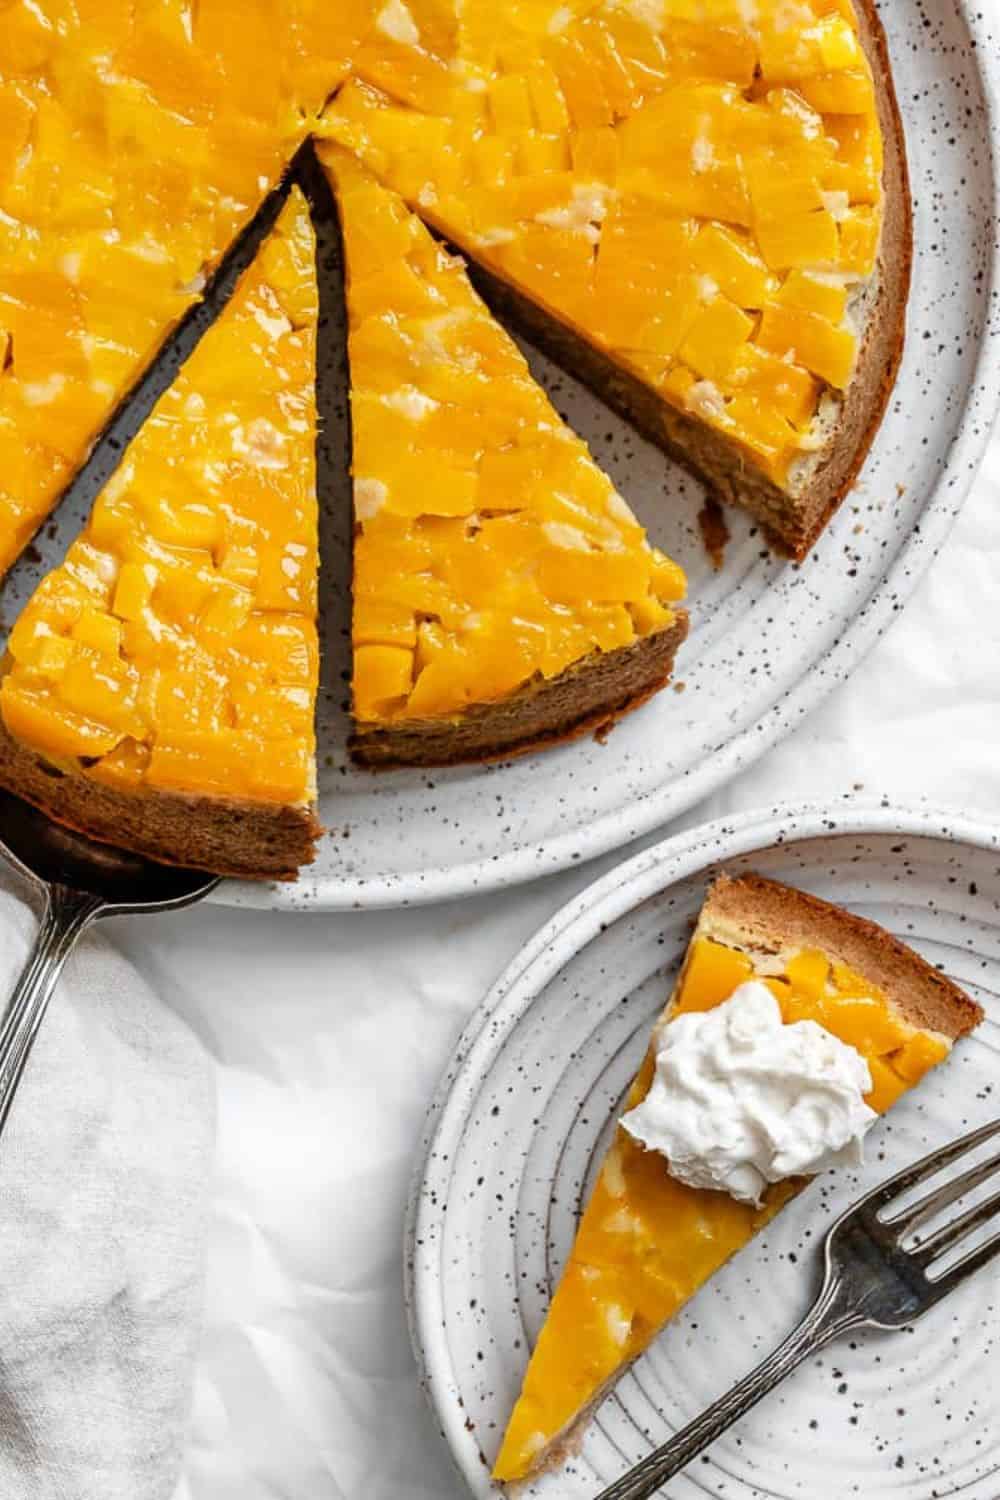
When mangoes hit peak season, this is the first thing I make. The whole cake is built around fresh ripe mango purée — no eggs, no butter, fully plant-based — and somehow it produces one of the most flavourful, tender crumbs in this entire list. I've made this with Tommy Atkins mangoes from the regular grocery store and it's fine, but the first time I used Ataulfo mangoes from a local market, the difference was genuinely startling. Sweeter, more aromatic, more depth. If you can find Alphonso, Ataulfo, or honey mangoes, use them. Frozen mango works in a pinch — just thaw completely and drain off all the liquid before puréeing or you'll throw off the batter balance.
Ingredients
- 2 cups all-purpose flour
- ¾ cup granulated sugar
- 2 teaspoons baking powder
- ½ teaspoon baking soda
- ½ teaspoon salt
- 1 cup ripe mango purée (from about 2 large ripe mangoes)
- ¾ cup plant-based milk (oat or almond work well)
- ¼ cup unsweetened apple sauce
- ⅓ cup neutral oil (vegetable or canola)
- 1 tablespoon apple cider vinegar
- 1 teaspoon vanilla extract
- Diced fresh mango and vegan whipped cream for serving
Instructions
- Preheat oven to 350°F. Grease a 9-inch round cake pan and line the bottom with parchment paper.
- In a large bowl, whisk together flour, sugar, baking powder, baking soda, and salt. In a separate bowl, whisk the mango purée, plant-based milk, apple sauce, oil, apple cider vinegar, and vanilla until smooth.
- Pour the wet ingredients into the dry and mix until just combined — a few small lumps are fine. Don't overmix or the crumb will tighten up. Pour batter into the prepared pan.
- Bake for 35–40 minutes until a toothpick inserted in the centre comes out clean. Let the cake cool in the pan for 10 minutes, then transfer to a wire rack to cool completely. Top with diced fresh mango and serve with vegan whipped cream.
Tips
- Tip: The apple cider vinegar reacts with the baking soda to help the cake rise — don't skip it even though the amount seems small.
- Tip: If using frozen mango, spread the thawed chunks on a clean kitchen towel and pat them dry before blending — excess water makes the batter too loose.
- Tip: This cake is best served the same day it's baked, but will keep at room temperature covered for up to 2 days — hold the fresh mango topping until just before serving.
12. Zucchini Strawberry Bread
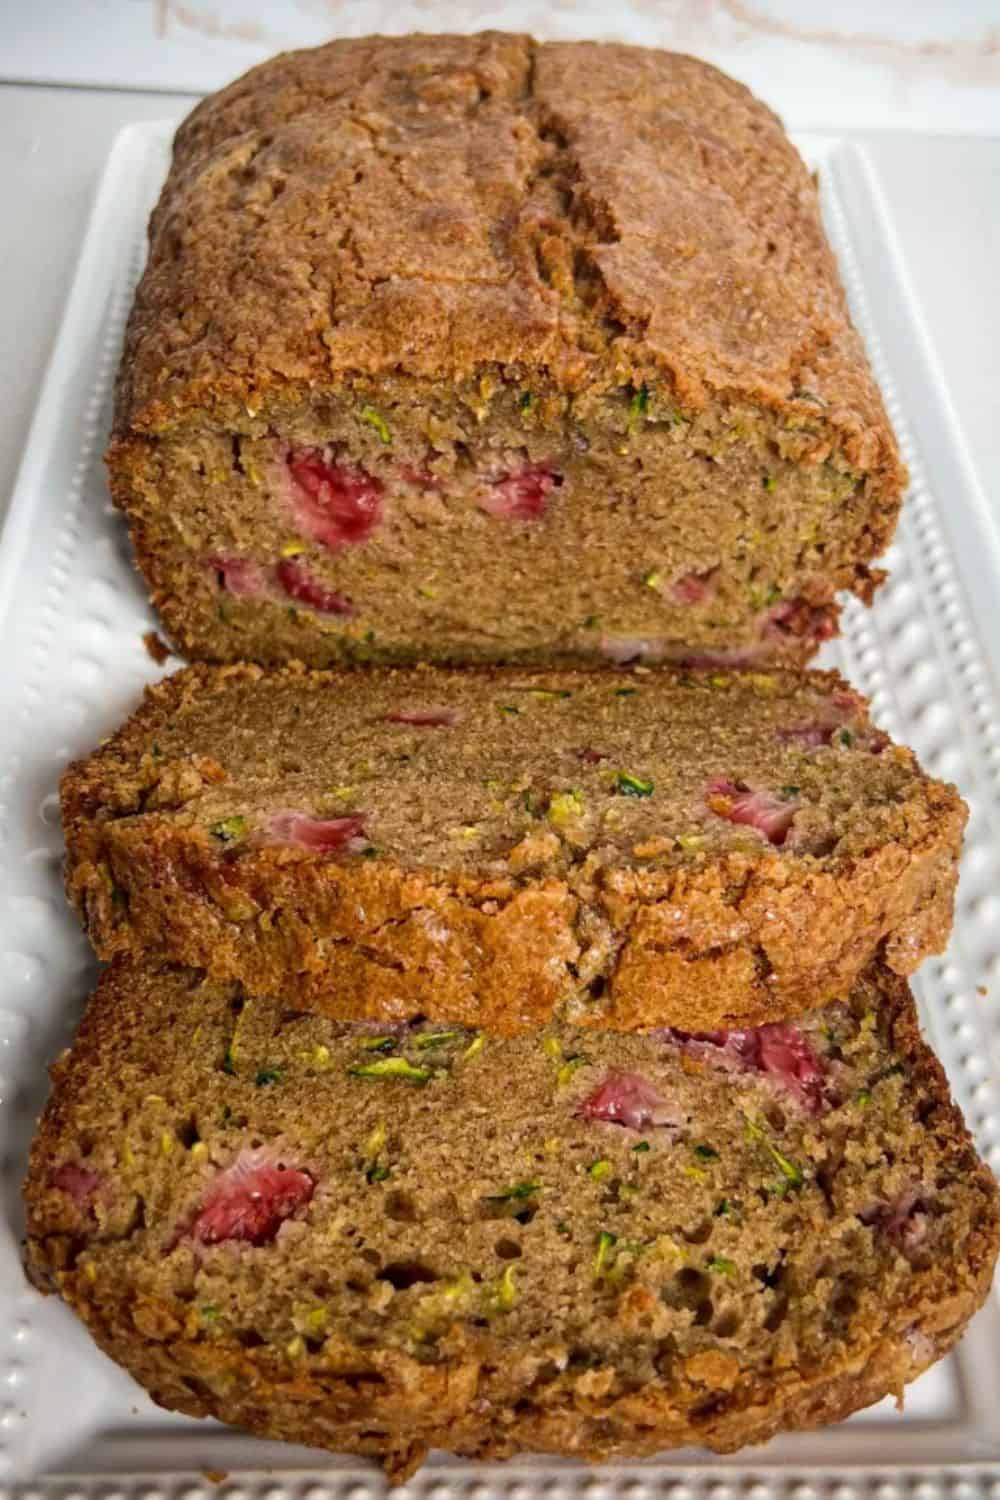
I know — zucchini and strawberries in the same loaf sounds like it shouldn't work. But this is one of those combinations where the end result is better than either ingredient alone. The grated zucchini melts into the crumb and keeps it incredibly moist without tasting like vegetables at all, while the macerated strawberries bake into jammy little pockets throughout. The cardamom is the detail that makes people ask what's in it — warm, slightly floral, different from the usual cinnamon-only loaf. Don't skip the step of macerating and draining the strawberries first, and definitely squeeze the zucchini dry in a clean kitchen towel. I skipped both steps once to save time. The loaf was wet in the middle and took an extra 20 minutes to bake through.
Ingredients
- 2 cups all-purpose flour
- 1 teaspoon baking soda
- ½ teaspoon baking powder
- 1 teaspoon salt
- 1 teaspoon ground cinnamon
- ½ teaspoon ground cardamom
- ⅔ cup white granulated sugar + ⅓ cup packed brown sugar
- 2 large eggs
- ⅔ cup neutral oil
- 1 teaspoon vanilla extract
- 1½ cups grated zucchini, squeezed thoroughly dry
- 1 cup diced fresh strawberries, macerated with 2 tablespoons sugar for 15 minutes then drained
Instructions
- Preheat oven to 350°F. Line a 9×5-inch loaf pan with parchment paper. Toss diced strawberries with 2 tablespoons sugar and let sit for 15 minutes, then drain off the collected juice. Meanwhile, squeeze the grated zucchini in a clean kitchen towel until very dry.
- In a large bowl, whisk together flour, baking soda, baking powder, salt, cinnamon, and cardamom. In another bowl, whisk both sugars, eggs, oil, and vanilla until smooth.
- Pour the wet mixture into the dry and stir until just combined. Fold in the squeezed zucchini and drained strawberries gently — don't overmix.
- Pour batter into the prepared loaf pan and bake for 60–65 minutes until a skewer inserted in the centre comes out clean. If the top browns too quickly, tent loosely with foil after 45 minutes. Cool in the pan for 15 minutes before transferring to a wire rack. Cool completely before slicing.
Tips
- Tip: Squeezing the zucchini dry is non-negotiable — use a clean kitchen towel and wring out as much moisture as you can, otherwise your loaf will be dense and underbaked in the centre.
- Tip: The loaf slices more cleanly once fully cooled — cutting it warm will compress the crumb and the berry pockets will smear.
- Tip: Wrap leftovers tightly and store at room temperature for up to 3 days, or freeze individual slices for up to 2 months.
11. Blackberry Lemon Bread
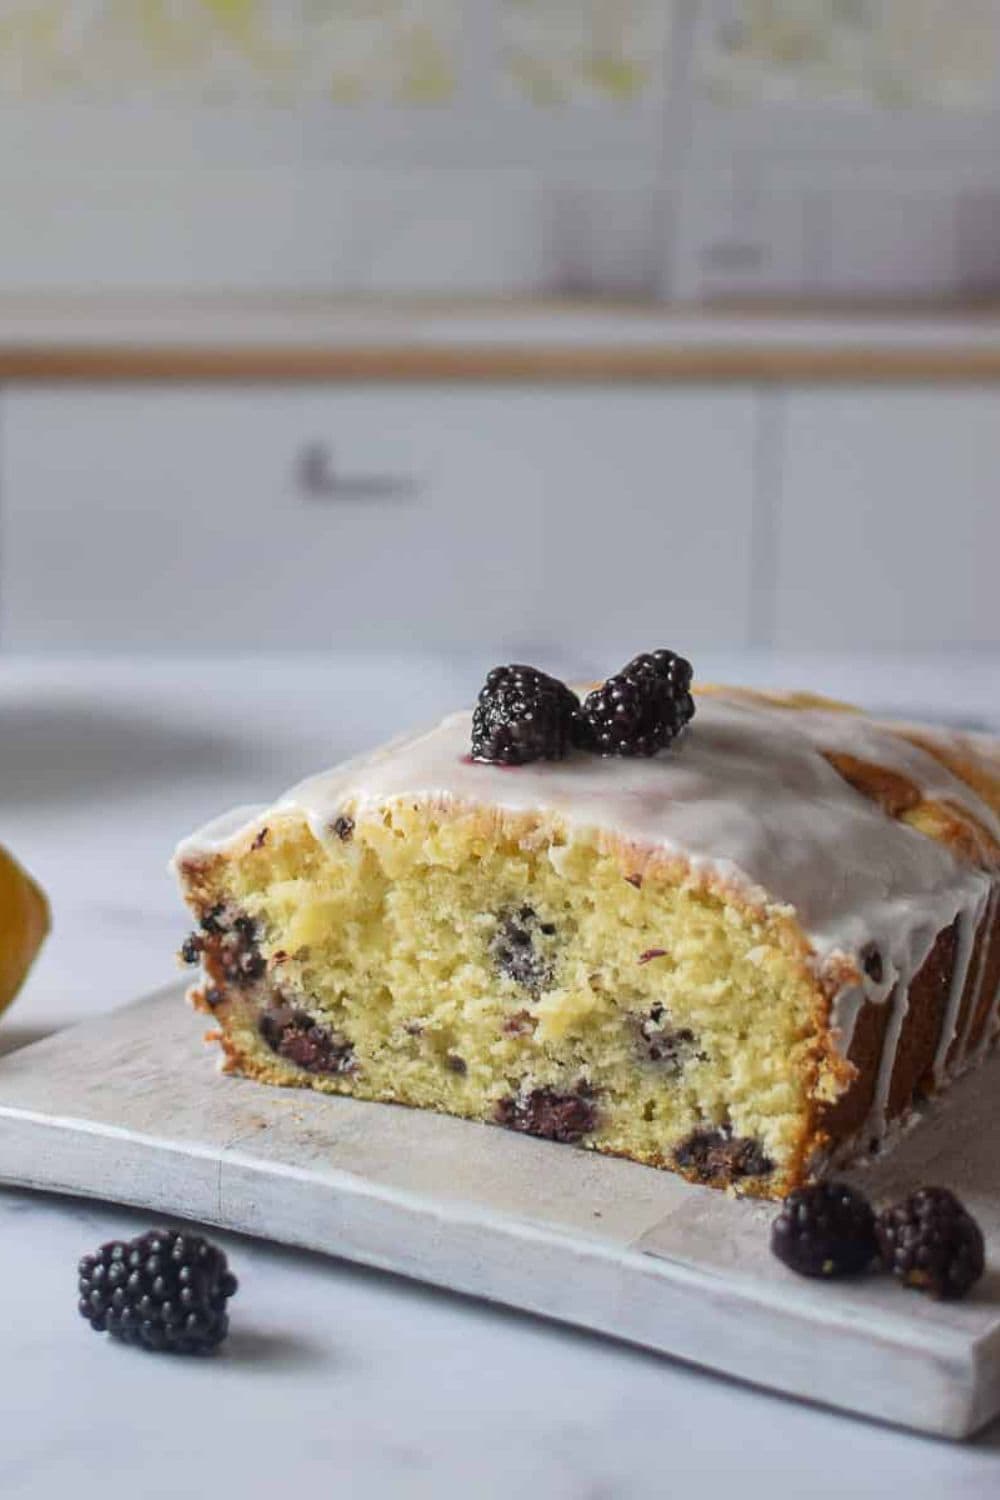
Late summer blackberries are something I look forward to every year, and this loaf is where most of them end up. It's a buttermilk quick bread with real lemon zest and juice worked into the batter, and a simple lemon glaze drizzled over the top once it cools. The buttermilk and lemon together give the crumb a tenderness that plain milk just won't produce. The one technique that actually matters here: toss the blackberries in a tablespoon of flour before folding them in. I skipped this the first time I made it and every single berry sank straight to the bottom and burst, leaving the bottom of the loaf wet and purple. The flour coating keeps them suspended throughout the crumb where they belong.
Ingredients
- 2 cups all-purpose flour, plus 1 tablespoon reserved for berries
- 1½ teaspoons baking powder
- ½ teaspoon salt
- ¾ cup granulated sugar
- ½ cup unsalted butter, softened to room temperature
- 2 large eggs
- ¾ cup buttermilk (or ¾ cup whole milk + 1 tablespoon white vinegar, left to sit 5 minutes)
- Zest of 2 lemons + 3 tablespoons fresh lemon juice
- 1 teaspoon vanilla extract
- 1½ cups fresh blackberries, tossed in 1 tablespoon flour
- Lemon glaze: 1 cup powdered sugar + 2 tablespoons fresh lemon juice, whisked smooth
Instructions
- Preheat oven to 350°F. Line a 9×5-inch loaf pan with parchment. Toss the blackberries in 1 tablespoon of flour and set aside.
- Whisk the 2 cups flour, baking powder, and salt in a bowl. In a separate large bowl, beat the softened butter and sugar together for about 3 minutes until fluffy and pale. Beat in the eggs one at a time, then mix in the lemon zest, lemon juice, and vanilla.
- Add the dry ingredients and buttermilk to the butter mixture in three alternating additions, beginning and ending with the dry ingredients. Mix until just combined after each addition — don't overwork it. Fold the flour-coated blackberries in gently with a spatula.
- Pour batter into the prepared pan and bake for 55–60 minutes until a skewer comes out clean. Cool completely in the pan on a wire rack. Once fully cool, whisk the glaze ingredients until smooth and drizzle generously over the top. Let the glaze set for 10 minutes before slicing.
Tips
- Tip: If you can't find fresh blackberries, frozen ones work — use them straight from frozen (don't thaw) and toss in flour just before folding in, or they'll bleed colour into the batter.
- Tip: No buttermilk? Stir 1 tablespoon of white vinegar or lemon juice into ¾ cup of whole milk and let it sit for 5 minutes — it curdles slightly and works exactly the same way.
- Tip: The glaze firms up as it dries, so drizzle it in generous zigzags rather than spreading — it looks better and the texture contrast against the soft loaf is worth it.
10. Clementine Olive Oil Cake
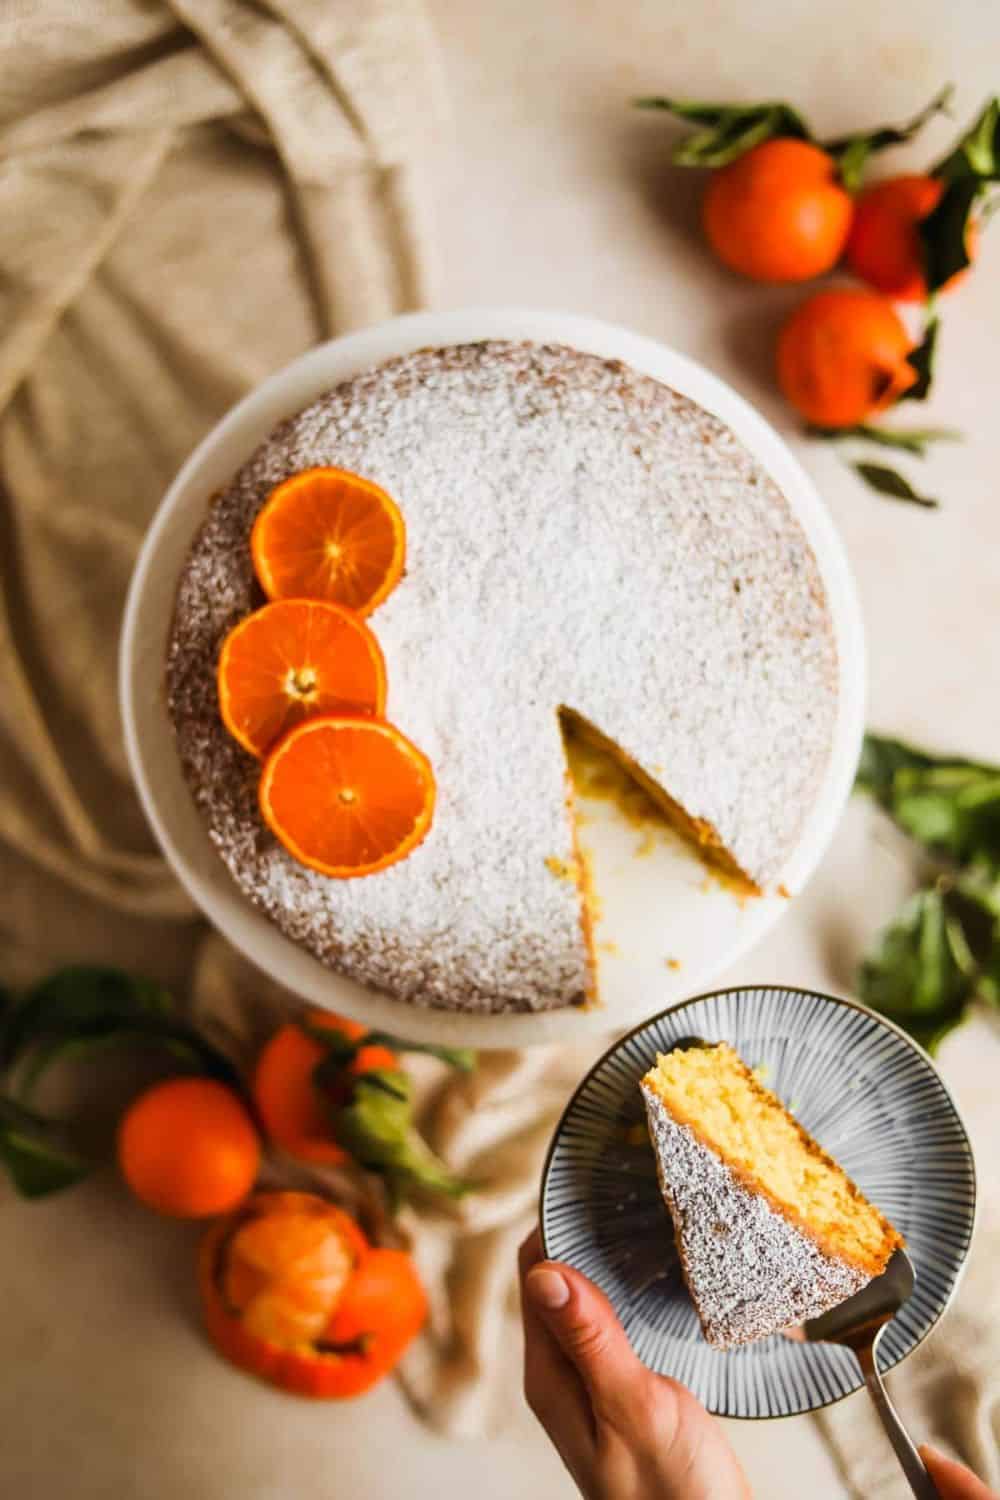
This is the cake I make when I want something that feels a little more grown-up — no frosting, no fuss, just a rustic single-layer olive oil cake with clementine zest and juice worked through the whole batter. It's Italian-inspired, though I won't claim it's strictly authentic to any one region. What I love about it is that it genuinely gets better on day two. The olive oil and citrus settle into each other overnight and the flavour deepens in a way that butter-based cakes just don't. One thing worth knowing: use a mild, fruity extra virgin olive oil here, not a robust peppery one. I tried it with a stronger oil once and there was a slightly bitter aftertaste that competed with the clementine. A bottle from Trader Joe's or Costco labelled "mild" or "light in flavour" works perfectly.
Ingredients
- 2 cups all-purpose flour
- 1 teaspoon baking powder
- ½ teaspoon baking soda
- ½ teaspoon salt
- 1¼ cups granulated sugar
- 3 large eggs
- ¾ cup mild fruity extra virgin olive oil
- ⅔ cup fresh clementine juice (about 4–5 clementines)
- Zest of 4 clementines
- 1 teaspoon vanilla extract
- Confectioner's sugar for dusting before serving
Instructions
- Preheat oven to 350°F. Grease a 9-inch round springform pan and line the bottom with parchment paper.
- Whisk flour, baking powder, baking soda, and salt together in a bowl and set aside. In a large bowl, whisk the eggs and sugar together vigorously for about 3 minutes until the mixture is pale and slightly thickened — this builds structure in the absence of creamed butter.
- Whisk the olive oil, clementine juice, clementine zest, and vanilla into the egg mixture until fully incorporated. Fold in the dry ingredients until just combined — stop as soon as no streaks of flour remain.
- Pour batter into the prepared pan and bake for 45–50 minutes until a skewer comes out clean and the top is deeply golden. Cool completely in the pan before releasing the springform. Dust generously with confectioner's sugar just before serving. Keeps well covered at room temperature for up to 3 days.
Tips
- Tip: Can't find clementines? Navel oranges work well — use the same quantity of juice and zest. The flavour will be slightly less sweet but equally good.
- Tip: Don't rush the whisking of eggs and sugar in step 2 — that 3 minutes of work is what gives this cake its lift without butter.
- Tip: Dust with confectioner's sugar right before serving rather than ahead of time — it absorbs into the surface if it sits too long and the clean white finish disappears.
9. S'mores Icebox Cake
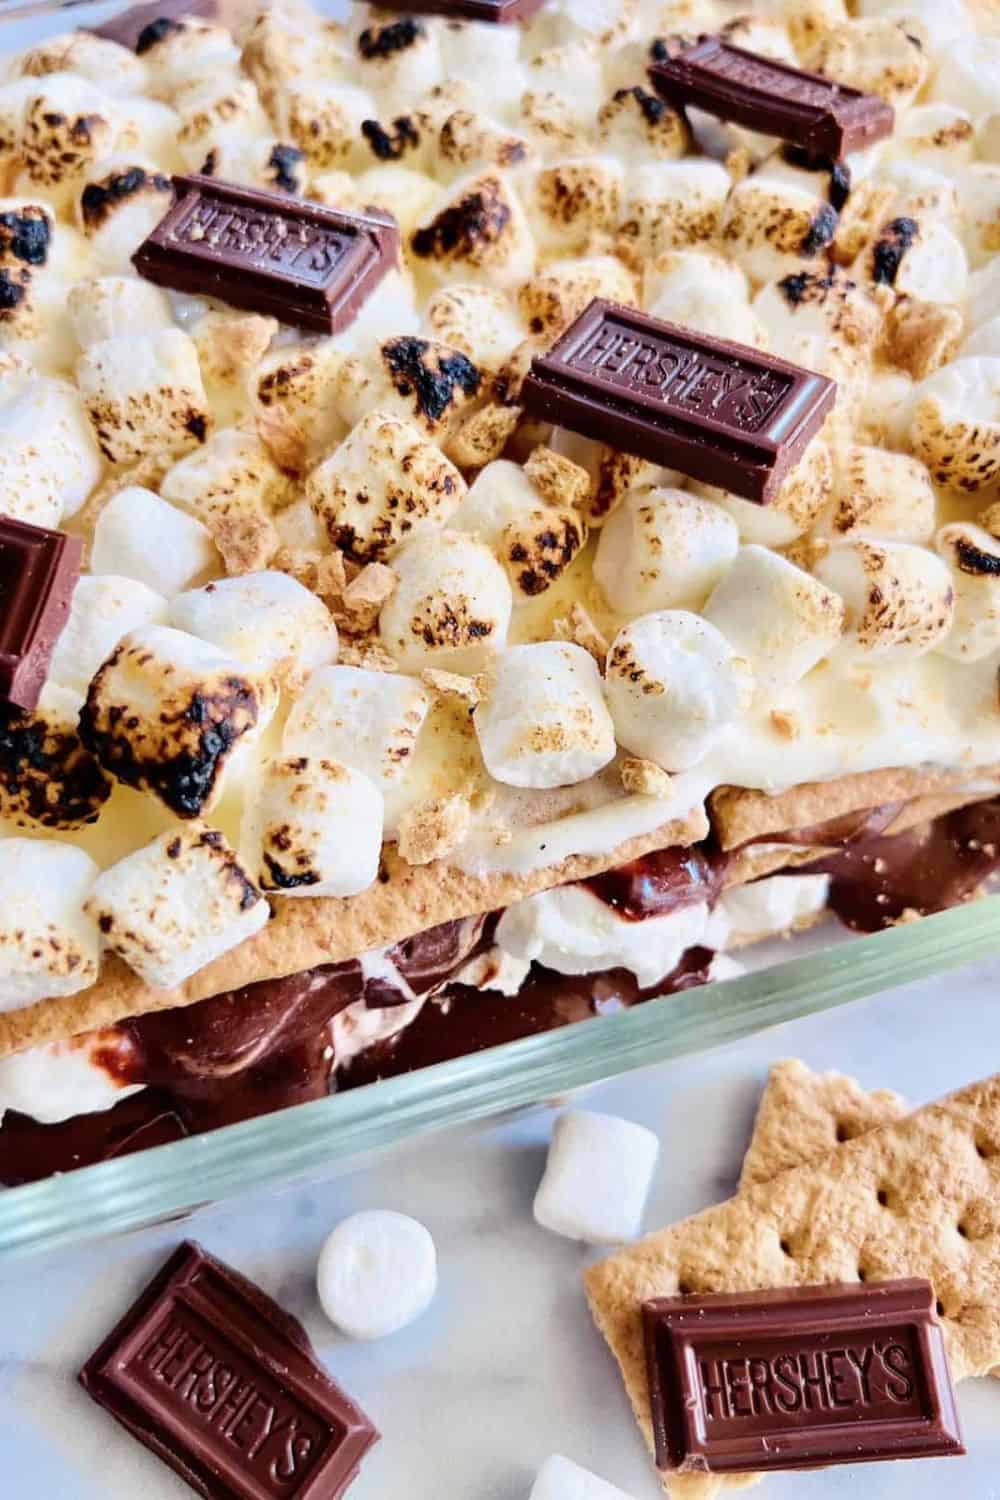
Saad and Zainab have both put this on their birthday shortlists at different points. It's a completely no-bake icebox cake — layers of graham crackers, chocolate pudding, and marshmallow cream that go into the fridge and come out the next day transformed into something that slices like a proper cake. The graham crackers soften completely overnight and take on a texture almost like sponge cake. The whole thing tastes like a deconstructed s'more, which is exactly the point. The only rule with this one is patience — you genuinely need to refrigerate it for at least 6 hours, and overnight is better. I've tried to rush it at the 3-hour mark and the crackers were still firm in the middle. It's not worth it. Just make it the night before.
Ingredients
- 1 box (5.9 oz) instant chocolate pudding mix
- 3 cups cold whole milk
- 1 container (8 oz) Cool Whip, thawed
- 1 jar (7 oz) marshmallow fluff
- 1 box graham crackers (about 14 full sheets)
- 1½ cups mini marshmallows
- ⅓ cup chocolate sauce or hot fudge
- 2 standard chocolate bars (Hershey's works well), roughly chopped
Instructions
- Whisk the pudding mix and cold milk together for 2 minutes until thickened. Refrigerate for 5 minutes to set slightly. Divide the Cool Whip in half. Fold one half into the pudding mixture until smooth — this is your chocolate layer. Set aside.
- Microwave the marshmallow fluff for 15 seconds to loosen it slightly, then fold it into the remaining Cool Whip until uniform — this is your marshmallow layer. Set aside.
- In a 9×13-inch baking dish, build the layers: a single layer of graham crackers (break pieces to fit the edges), then half the chocolate pudding mixture spread evenly, then another layer of crackers, then half the marshmallow mixture, then another cracker layer, then the remaining chocolate pudding mixture, then a final layer of graham crackers.
- Spread the remaining marshmallow mixture over the top layer of crackers. Scatter the mini marshmallows and chopped chocolate over the surface, then drizzle generously with chocolate sauce. Cover with plastic wrap and refrigerate for at least 6 hours, ideally overnight. Slice into squares to serve.
Tips
- Tip: For a toasted marshmallow finish, scatter the mini marshmallows on top just before serving and use a kitchen torch to lightly brown them — it takes 30 seconds and makes it look impressive.
- Tip: The cake keeps covered in the refrigerator for up to 3 days — the crackers just get softer over time, which most people actually prefer.
- Tip: If you can't find marshmallow fluff at your regular store, check the baking aisle near the peanut butter — Walmart and most major grocery stores carry it. In the UK, Fluff brand is available at Sainsbury's.
8. Gluten Free Lemon Cake
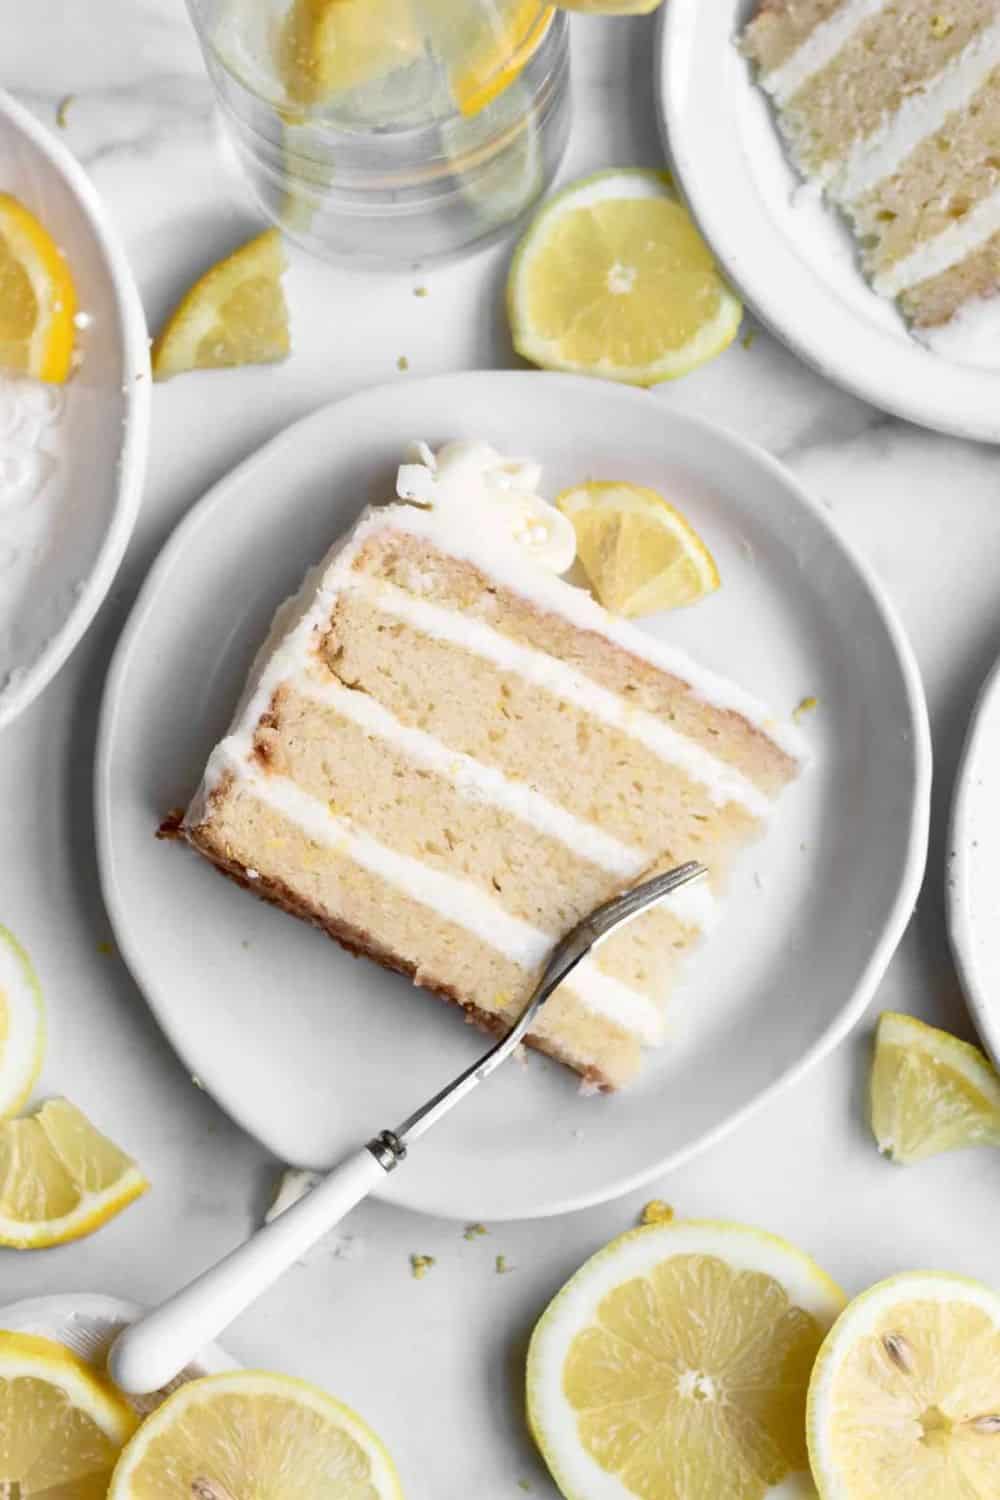
I bring this cake to every mixed-dietary gathering and people genuinely cannot tell it's gluten-free — which, honestly, is the only review that matters for a gluten-free bake. It's a two-layer cake with a soft, fluffy crumb and a tangy lemon buttercream that holds its own against any traditional flour-based version. The one thing I cannot stress enough: use a quality 1-to-1 gluten-free flour blend like Bob's Red Mill or Cup4Cup — the kind that already contains xanthan gum. I tried a cheaper generic blend once and ended up with something crumbly and sad. The right blend makes all the difference here.
Ingredients
- 2½ cups gluten-free 1-to-1 flour blend (with xanthan gum)
- 2 teaspoons baking powder
- ½ teaspoon baking soda
- ½ teaspoon salt
- ½ cup softened butter
- ¼ cup vegetable oil
- 1½ cups granulated sugar
- 4 large eggs
- 1 cup milk of choice
- ¼ cup fresh lemon juice + zest of 3 lemons
- 2 teaspoons vanilla extract
- Lemon buttercream: 1 cup softened butter, 4 cups powdered sugar, 3 tablespoons fresh lemon juice, zest of 1 lemon, pinch of salt
Instructions
- Preheat oven to 350°F. Grease two 8-inch round cake pans and line the bottoms with parchment paper.
- Whisk together the flour blend, baking powder, baking soda, and salt in a bowl and set aside. In a separate large bowl, beat the butter, oil, and sugar together for about 4 minutes until the mixture is light and fluffy.
- Add the eggs one at a time, beating well after each. Mix in the lemon zest, lemon juice, and vanilla. Alternate adding the dry ingredients and the milk, beginning and ending with dry, mixing just until combined.
- Divide the batter evenly between the pans. Bake for 28–32 minutes until a toothpick inserted in the center comes out clean. Let the layers cool completely before frosting — rushing this step means the buttercream will slide right off.
- For the buttercream, beat the softened butter until very smooth, then gradually add the powdered sugar. Mix in the lemon juice, zest, and salt. Beat on medium-high for 2 minutes until light. Frost between the layers and over the top and sides.
Tips
- Tip: Don't use a gluten-free flour blend that lacks xanthan gum — it won't provide enough structure and the cake will crumble when you try to layer it.
- Tip: Zest your lemons before juicing them — it's nearly impossible the other way around and you'll lose a lot of zest.
- Tip: If your buttercream is too thick to spread, add lemon juice a teaspoon at a time. If it's too soft, chill the frosted cake for 15 minutes before the final layer.
7. Easy Summer Plum Cake
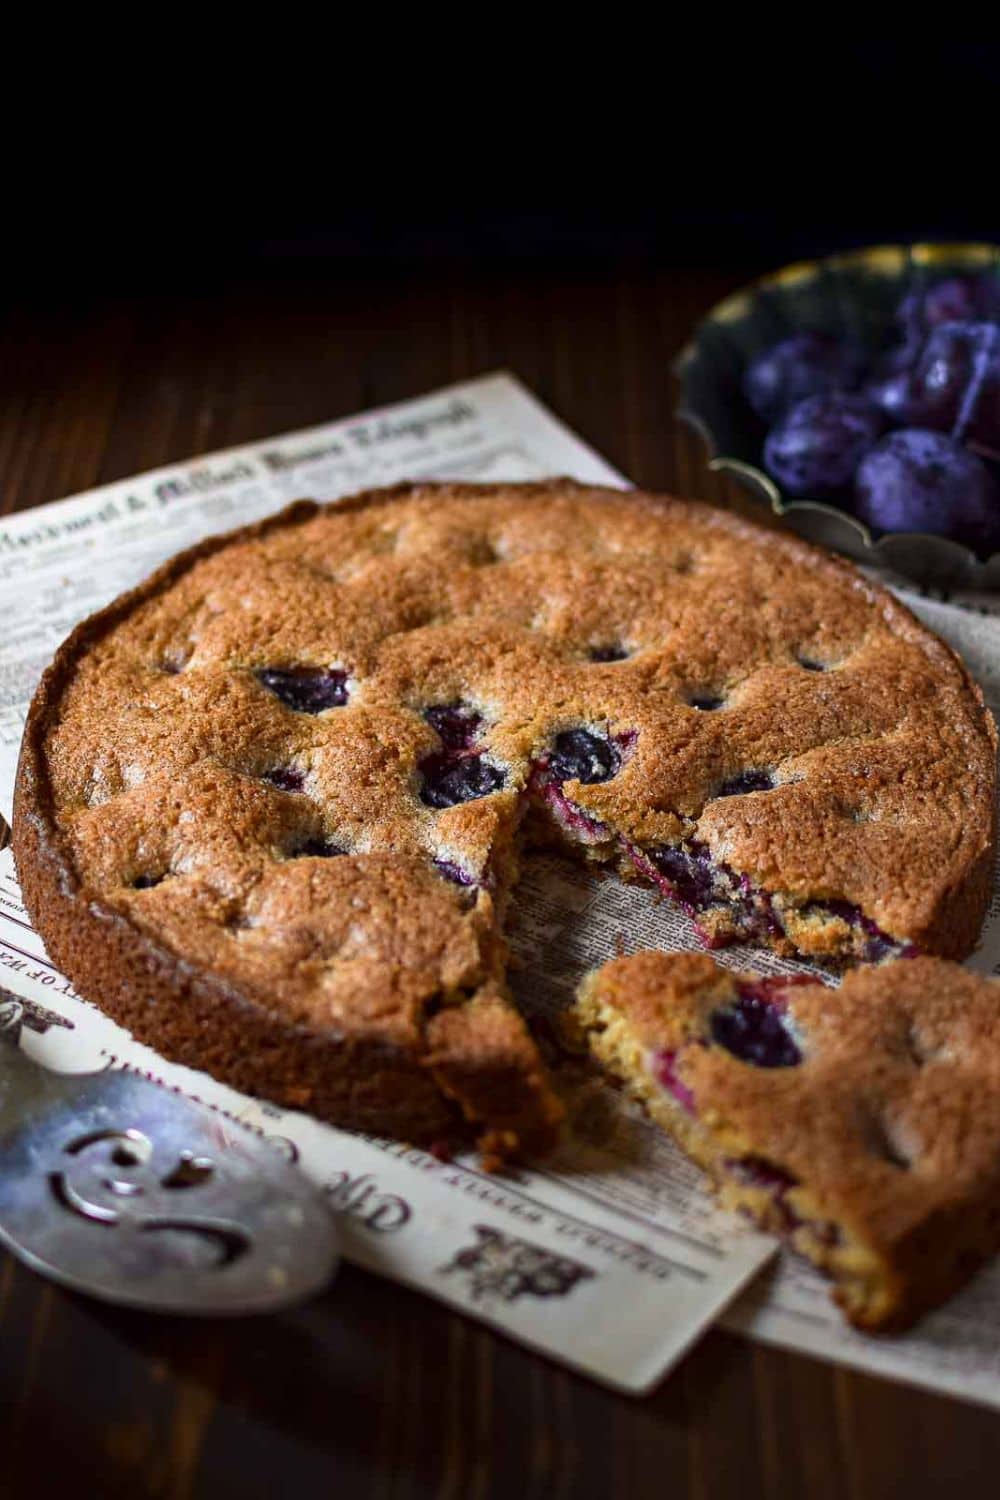
Plum cake is genuinely the most underrated stone fruit cake of summer, and I will not stop saying it. This one is a rustic single-layer with fresh plum halves pressed into the batter cut-side up, so they sink slightly and caramelise as they bake — and brown sugar in the batter gives the whole thing a warm, caramel-edged depth. The secret ingredient is Fiore di Sicilia, a citrus-vanilla extract used by professional bakers that gives the cake that distinctive high-end bakery aroma. You can find it online; if you can't track it down, substitute 1 teaspoon vanilla plus a pinch of orange zest and you'll be close enough.
Ingredients
- 2 cups all-purpose flour
- 1½ teaspoons baking powder
- ½ teaspoon salt
- 1 teaspoon ground cinnamon
- ⅔ cup softened butter
- ¾ cup brown sugar, plus 2 tablespoons for sprinkling on top
- 2 large eggs
- ⅔ cup milk
- Zest of 1 lemon
- ½ teaspoon Fiore di Sicilia (or 1 teaspoon vanilla extract + ¼ teaspoon orange zest)
- 5–6 ripe plums, halved and pitted
Instructions
- Preheat oven to 350°F. Grease and line a 9-inch round springform pan with parchment on the bottom.
- Whisk together flour, baking powder, salt, and cinnamon. In a separate bowl, beat butter and brown sugar for about 4 minutes until noticeably lighter. Beat in the eggs one at a time, then add the lemon zest and Fiore di Sicilia.
- Alternate adding the dry mixture and the milk into the butter mixture, stirring gently between each addition. Spread the batter evenly in the prepared pan.
- Press the plum halves cut-side up into the batter in a decorative pattern — they'll sink a little as they bake, which is exactly what you want. Sprinkle the extra 2 tablespoons of brown sugar over the top.
- Bake for 50–55 minutes until a skewer inserted in the center comes out clean. Let the cake cool in the pan for 20 minutes before releasing the springform. Serve warm with whipped cream.
Tips
- Tip: Use ripe but still firm plums — overripe ones release too much juice and can make the center of the cake wet and underbaked.
- Tip: The springform pan is important here — trying to turn this cake out of a regular pan risks breaking the fruit layer on top.
- Tip: This cake is even better the next day once the flavors have settled. Cover loosely and leave at room temperature overnight.
6. Keto Strawberry Shortcake
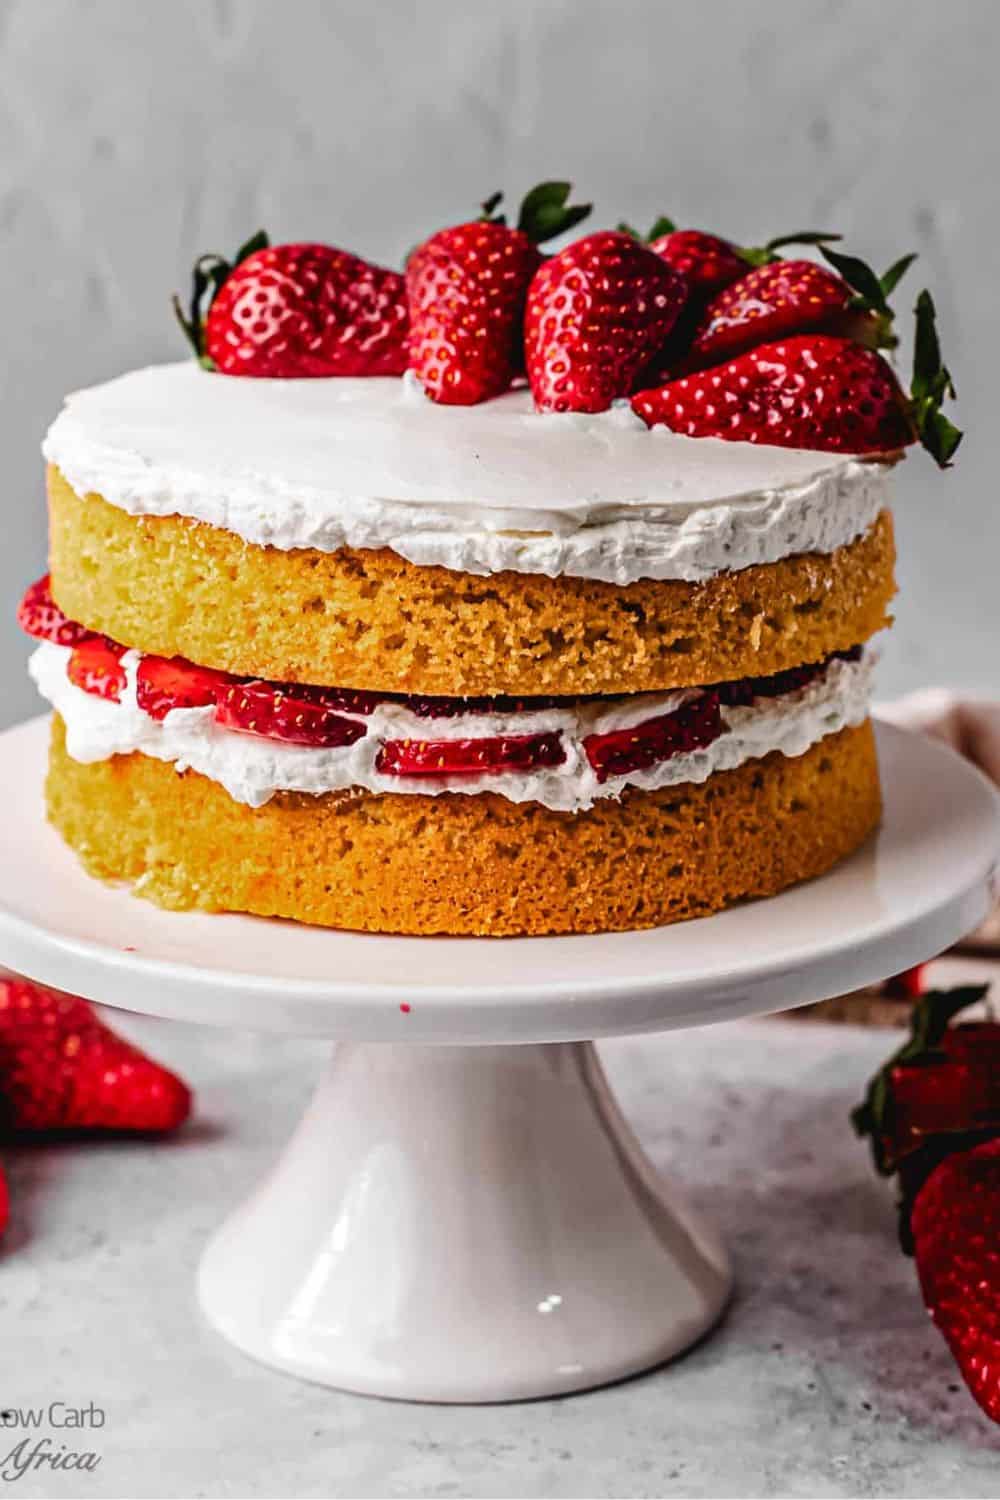
Every time I have someone keto-following coming to dinner, this is what I make — and every single time they're genuinely surprised it's low-carb. The almond flour shortcakes bake up tender with a slightly nutty quality that actually works beautifully under fresh strawberries and cold whipped cream. One thing I learned the hard way: use a powdered keto sweetener for the whipped cream, not granulated. Granulated monk fruit doesn't dissolve properly in cold cream and you end up with a gritty texture that ruins the whole thing. Powdered is worth tracking down — Lakanto makes a good one at most Walmart and Whole Foods locations.
Ingredients
- Shortcakes: 2 cups almond flour, ⅓ cup granulated monk fruit sweetener, 2 teaspoons baking powder, ½ teaspoon salt, ⅓ cup melted butter, 1 large egg, 2 tablespoons heavy cream, 1 teaspoon vanilla extract
- Macerated strawberries: 2 cups fresh strawberries, sliced, 2 tablespoons granulated monk fruit sweetener
- Whipped cream: 1½ cups heavy whipping cream, ¼ cup powdered monk fruit sweetener, 1 teaspoon vanilla extract
Instructions
- Preheat oven to 350°F. Toss sliced strawberries with 2 tablespoons sweetener in a bowl and set aside to macerate for at least 15 minutes — they'll release their juices and become almost syrupy.
- Whisk almond flour, sweetener, baking powder, and salt in a bowl. Add the melted butter, egg, heavy cream, and vanilla. Mix until a thick, slightly sticky dough forms.
- Scoop the dough into 6 equal portions on a parchment-lined baking sheet. Shape each into a rough biscuit about ¾-inch thick. Bake for 14–16 minutes until the tops and edges are golden. Let them cool completely before assembling.
- Whip the heavy cream, powdered sweetener, and vanilla together until stiff peaks form. Slice each shortcake in half horizontally. Spoon the macerated strawberries with their juices onto the bottom half, add a generous dollop of whipped cream, then place the top half on. Serve immediately.
Tips
- Tip: Don't skip the macerating step — it draws out the strawberry juices that soak into the shortcake and make the whole thing taste cohesive rather than assembled.
- Tip: The shortcakes can be baked a day ahead and stored in an airtight container at room temperature — just assemble right before serving so they don't go soggy.
- Tip: Almond flour browns faster than regular flour, so start checking at 13 minutes — ovens vary and these can go from golden to too dark quickly.
5. Plum Upside Down Cake
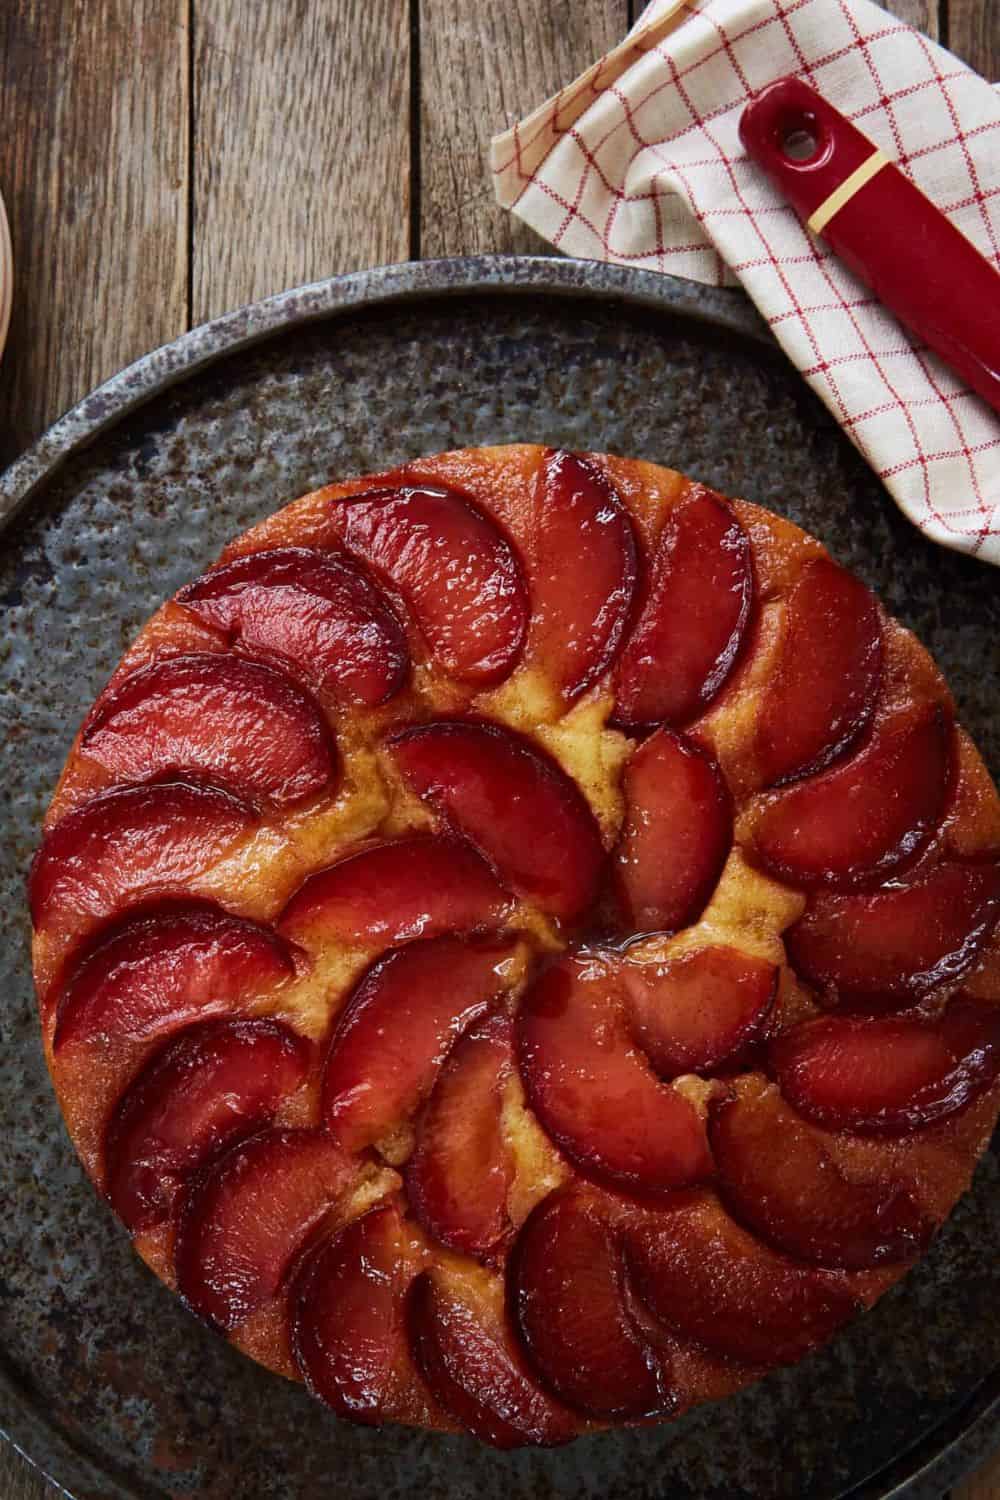
This is the cake that looks like you spent all afternoon on it when really the technique is completely straightforward. Fresh plum halves sit in a bubbling layer of butter and brown sugar at the bottom of the pan, the cake batter goes on top, and when you flip it out after baking the caramelised fruit is right there on top — glossy, jammy, and deeply colored. The one thing that absolutely matters: invert the cake while it's still piping hot. I waited too long once and the caramel had already set, taking half the plums with it when I lifted the pan. Five minutes cooling, then flip — don't hesitate.
Ingredients
- Caramel layer: ⅓ cup salted butter, ⅔ cup brown sugar, 5–6 black or red plums, halved and pitted
- 1½ cups all-purpose flour
- 1½ teaspoons baking powder
- ½ teaspoon ground cinnamon
- ¼ teaspoon salt
- ½ cup softened butter
- ¾ cup granulated white sugar
- 2 large eggs
- ¼ cup mayonnaise (Duke's or Hellmann's)
- ½ cup whole milk
- 1 teaspoon vanilla extract
Instructions
- Preheat oven to 350°F. In a 9-inch cast iron skillet or heavy oven-safe pan, melt the butter and brown sugar together over medium heat, stirring until smooth and just bubbling. Remove from heat.
- Arrange the plum halves cut-side down in the caramel in a single tight layer — pack them in, they'll shrink slightly as they bake.
- Whisk flour, baking powder, cinnamon, and salt together. In a separate bowl, beat the butter and granulated sugar for 3 minutes. Beat in the eggs, mayonnaise, and vanilla until smooth. Alternate adding the dry ingredients and milk, ending with dry.
- Carefully spread the batter over the plums in an even layer — use a spoon and be gentle so you don't disturb the fruit arrangement.
- Bake for 40–45 minutes until a skewer inserted in the center of the cake (not through a plum) comes out clean. Cool for exactly 5 minutes. Run a knife around the edge, place a large serving plate face-down over the pan, and invert quickly and decisively. Lift the pan away. Serve warm.
Tips
- Tip: The mayonnaise in the batter isn't a typo — it adds moisture and tenderness and you won't taste it at all. Don't skip it.
- Tip: If you don't have a cast iron skillet, melt the caramel in a saucepan and pour it into a greased 9-inch round cake pan before adding the plums and batter.
- Tip: Use the most colorful plums you can find — black plums turn a gorgeous deep burgundy against the caramel and make the presentation much more striking.
4. Strawberry Icebox Cake
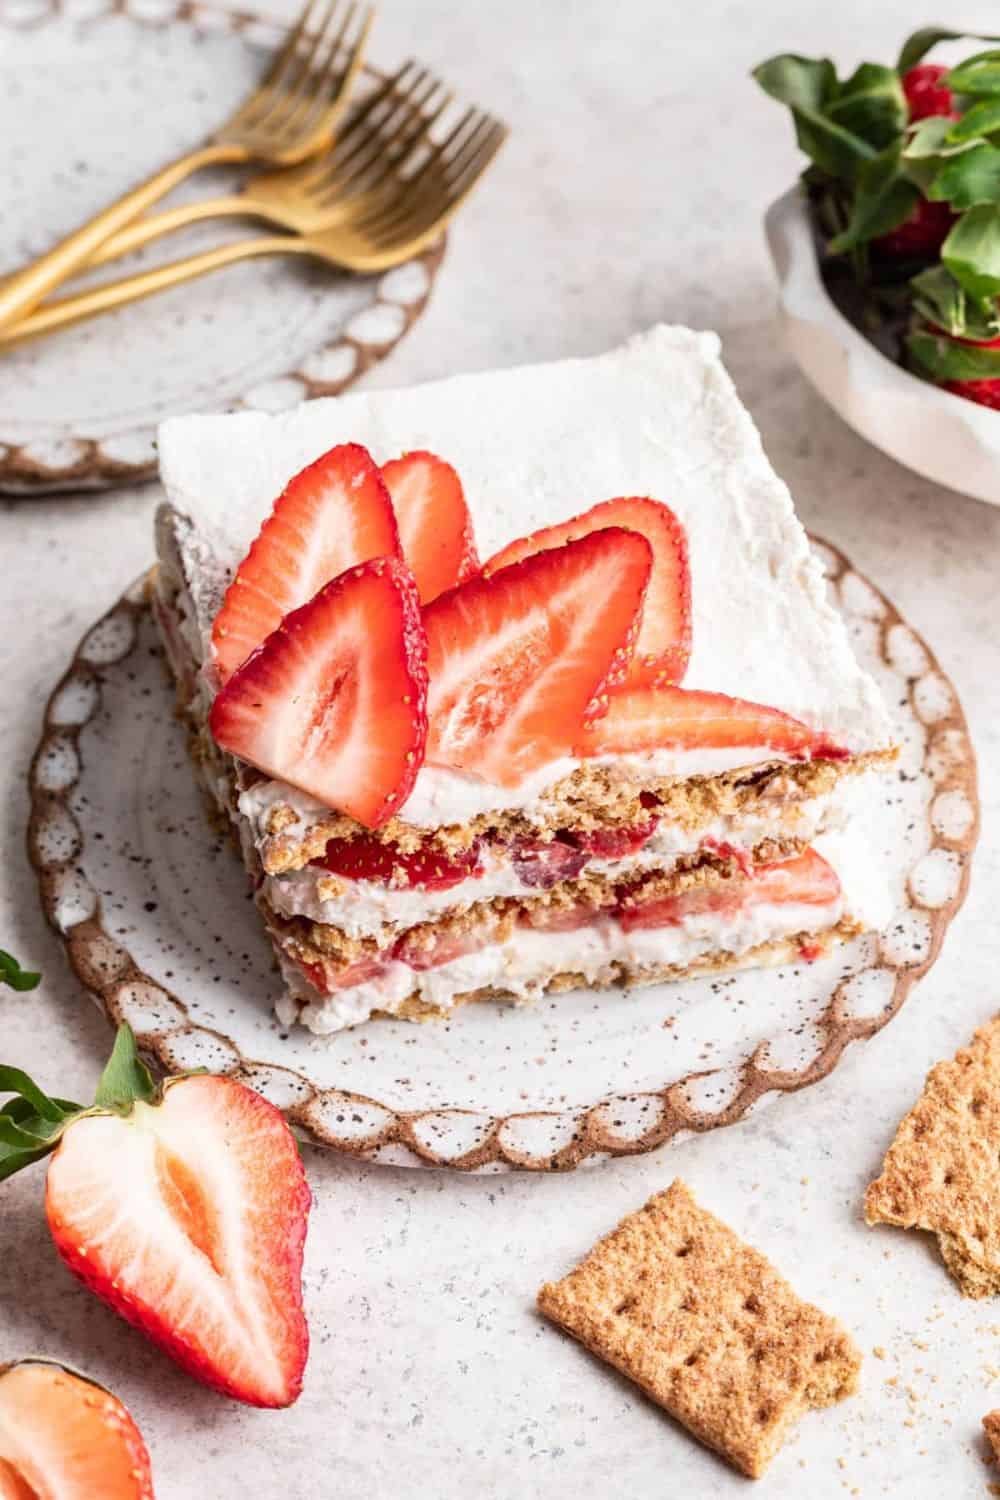
This is the recipe I reach for whenever I need a party dessert and absolutely no oven time. Six ingredients, a 9×13 dish, no baking — and it comes out looking like something from a bakery display. The layers are graham crackers (the Honey Maid box from any grocery store works perfectly), a sweetened cream cheese and whipped cream mixture, and fresh sliced strawberries repeated three times over. The make-ahead requirement is actually a feature: you have to make it the night before, which means zero day-of stress. Zainab asked me to make this one for her last birthday instead of a regular cake — that tells you everything you need to know.
Ingredients
- 8 oz cream cheese, softened to room temperature
- 1 cup powdered sugar
- 1 teaspoon vanilla extract
- 2 cups heavy whipping cream
- 1 box graham crackers, about 14 full sheets (Honey Maid or store brand both work)
- 3 cups fresh strawberries, sliced, plus a handful of whole berries for the top
Instructions
- Beat the softened cream cheese, powdered sugar, and vanilla together until completely smooth with no lumps — cold cream cheese will leave lumps, so make sure it's fully at room temperature before you start.
- In a separate cold bowl, whip the heavy cream to stiff peaks. Fold it into the cream cheese mixture in three additions, working gently to keep the mixture light and airy.
- In a 9×13 dish, lay down a single layer of graham crackers, breaking them as needed to cover the base. Spread one-third of the cream mixture evenly over the crackers, then layer on one-third of the sliced strawberries. Repeat this sequence two more times.
- Finish the top with the remaining cream and arrange whole strawberries decoratively across the surface. Cover tightly with plastic wrap and refrigerate for at least 6 hours — overnight is better. The graham crackers need that time to soften fully into a cake-like texture; slice too early and they'll still be crunchy.
Tips
- Tip: Pat the sliced strawberries dry with a paper towel before layering — excess moisture can make the cream layer slightly watery after a full overnight rest.
- Tip: This keeps well covered in the fridge for up to 3 days, though the top strawberries look freshest on day one and two.
- Tip: For cleaner slices, use a sharp knife wiped clean between cuts — the cream layer is soft and a dirty knife drags it out of shape.
21. Mango Mousse Cake
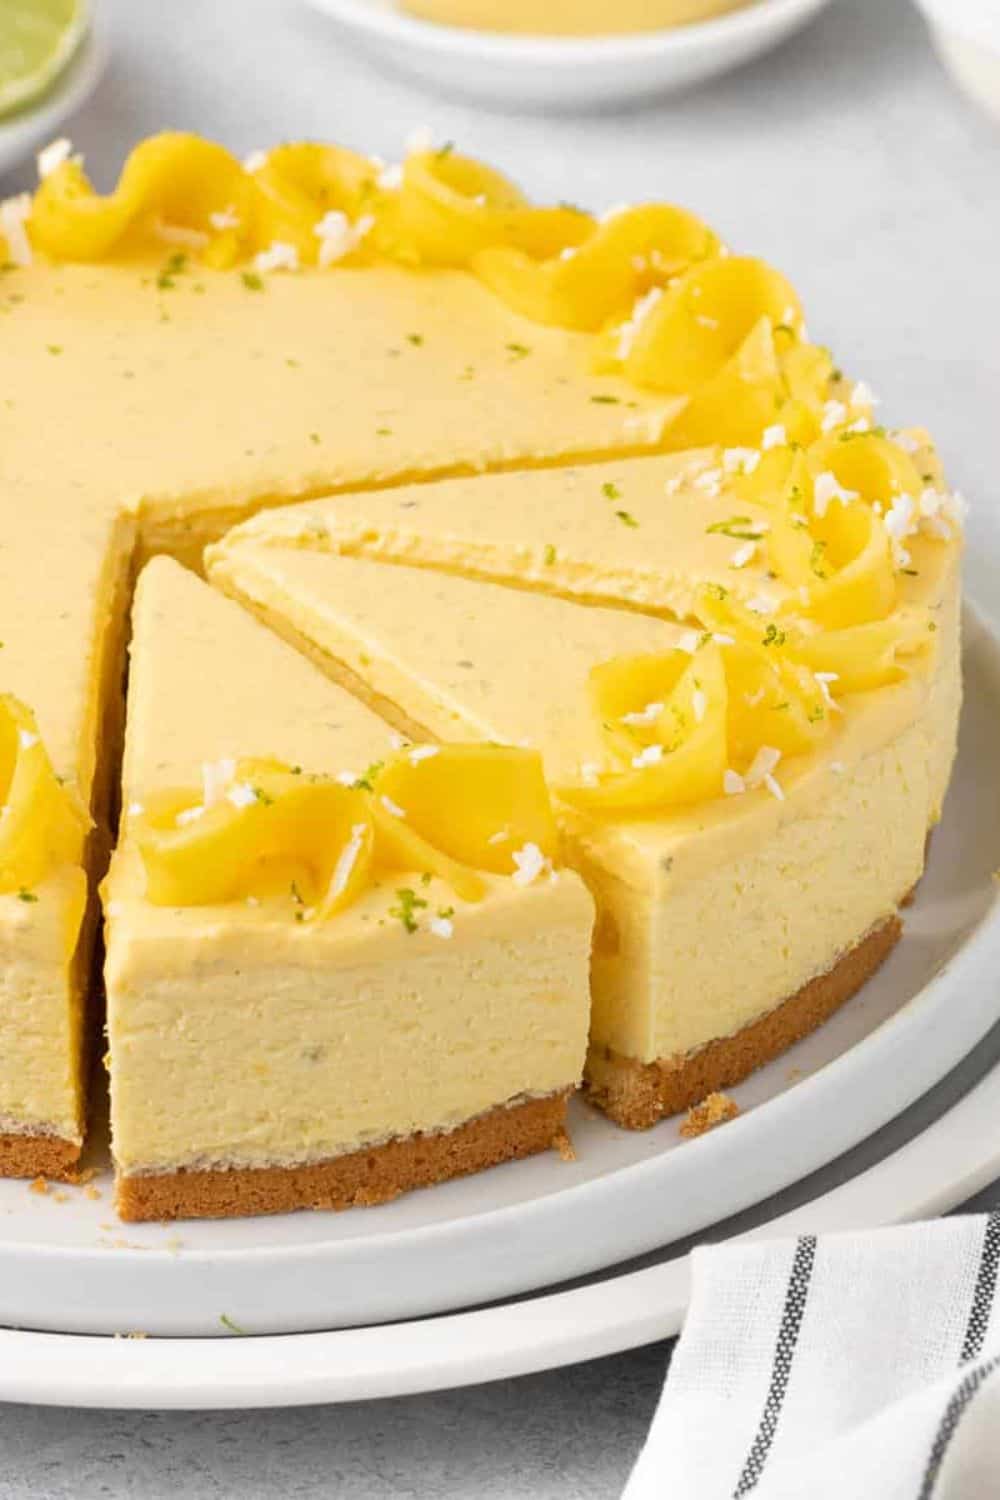
This is the cake I pull out when I actually want to impress someone — not just feed them. A buttery sablé base, a cloud-light mango mousse set with gelatin, and that glossy mirror-like glaze on top. The first time I made it, I used frozen mango from a grocery bag and the mousse was grainy and dull. Lesson learned: use ripe Ataulfo or Alphonso mangoes (Costco carries Ataulfos in season, and they're perfect for this). The flavour is concentrated, fibre is low, and the mousse comes out silky smooth. This cake looks like it came from a patisserie window but it's completely doable at home — it just needs patience and fridge time.
Ingredients
- Sablé base: 1¼ cups all-purpose flour
- ⅓ cup powdered sugar + ⅛ teaspoon salt
- ½ cup cold butter + 1 egg yolk
- Mango mousse: 2 cups mango purée (from 3 large ripe Ataulfo or Alphonso mangoes)
- ½ cup powdered sugar + 2 tablespoons fresh lime juice
- 1½ cups heavy cream, whipped to soft peaks
- 2½ teaspoons gelatin powder bloomed in 3 tablespoons cold water
- Mango glaze: ½ cup mango purée + 2 tablespoons sugar + 1 teaspoon gelatin bloomed in 1 tablespoon cold water
Instructions
- Preheat oven to 325°F. Rub cold butter into the flour, sugar, and salt until the mixture resembles breadcrumbs. Add the egg yolk and press the dough into the base of a 9-inch springform pan. Bake for 18 minutes until pale golden. Cool completely before adding the mousse.
- Bloom gelatin in cold water for 5 minutes, then melt gently over a double boiler. Whisk together the mango purée, powdered sugar, and lime juice, then stream in the melted gelatin while whisking constantly. Fold in the whipped cream gently until the mixture is smooth and uniform.
- Pour the mousse over the cooled sablé base and refrigerate for at least 4 hours until fully set.
- Make the glaze: bloom gelatin in cold water for 5 minutes. Gently heat mango purée and sugar together, stir in the melted gelatin until dissolved, and let it cool slightly. Pour over the set mousse and tilt the pan to coat evenly. Refrigerate for 1 more hour before unmoulding and serving.
Tips
- Tip: Don't pour the glaze while it's still warm — let it cool until it just coats the back of a spoon, otherwise it will melt the mousse layer underneath.
- Tip: Run a thin knife around the edge of the springform ring before unmoulding to get clean sides on the finished cake.
- Tip: No Alphonso or Ataulfo mangoes available? Canned Kesar mango pulp (found at Indian grocery stores or on Amazon) works as a very good substitute for the purée.
22. White Chocolate Berry Dessert
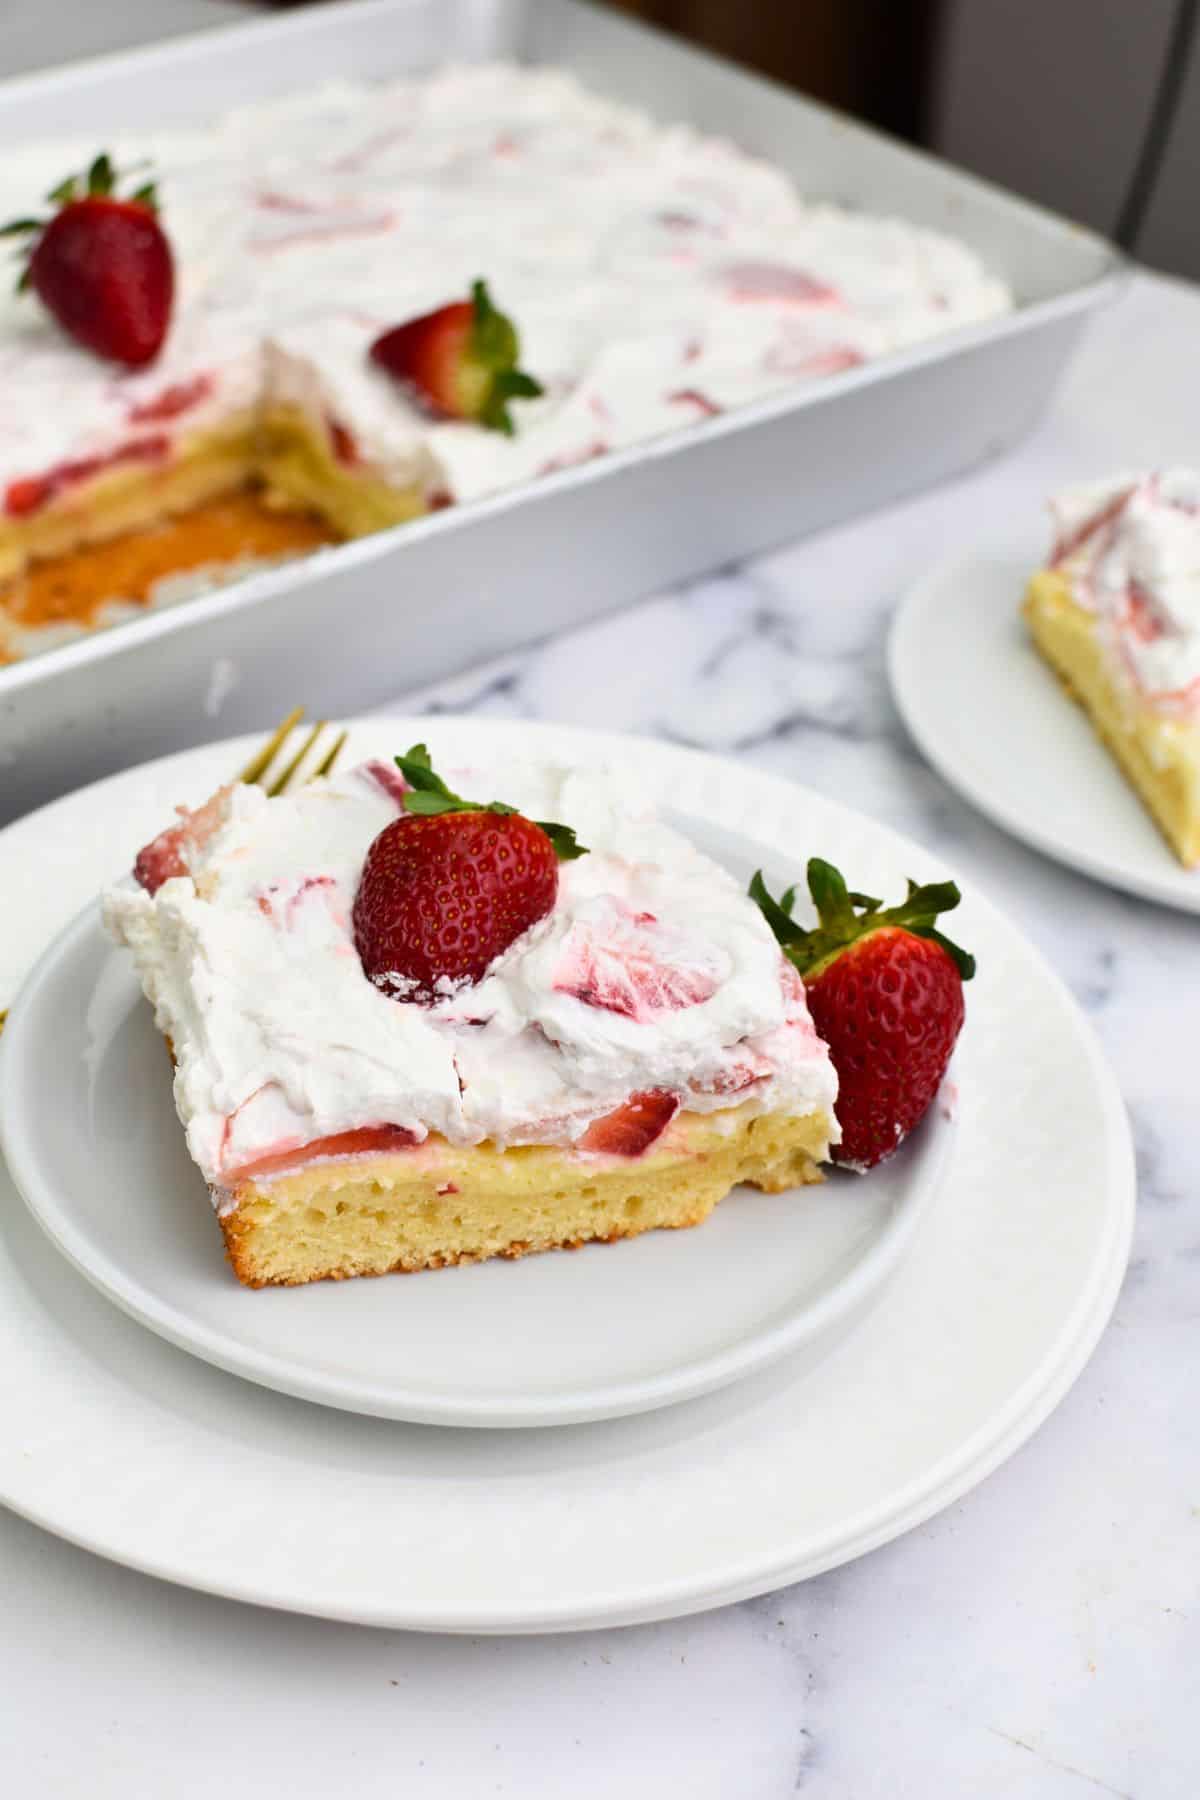
Every summer I make this at least once for a gathering, and it's the one dessert that gets finished completely — no leftovers, no polite corner piece left behind. The layering is what makes it: a crumbly baked crust, a tangy white chocolate cream cheese filling, fresh strawberries and blueberries piled on top, then whipped topping and white chocolate shavings to finish. That red, white, and blue colour palette makes it look intentional for July 4th or Memorial Day, but honestly the flavours are good enough that I make it in August for no reason at all. The one rule: give it a full 4 hours in the fridge before you cut it — the layers need to firm up or the whole thing slides apart.
Ingredients
- Crust: 1 cup all-purpose flour + ½ cup cold butter, cubed + ¼ cup brown sugar + ½ cup chopped pecans (optional)
- White chocolate layer: 8 oz cream cheese, softened
- ½ cup Greek yogurt + ½ cup powdered sugar
- 4 oz white chocolate, melted and slightly cooled
- 1 teaspoon vanilla extract
- Fruit layer: 1½ cups fresh strawberries, sliced + 1 cup fresh blueberries
- Topping: 8 oz frozen whipped topping, thawed + 2 oz white chocolate shavings + extra fresh berries for garnish
Instructions
- Preheat oven to 350°F. Rub the crust ingredients together with your fingers until the mixture looks crumbly and sandy. Press evenly into a 9×13 baking dish and bake for 15 minutes until lightly golden. Set aside to cool completely before building the layers.
- Beat the softened cream cheese until completely smooth — no lumps. Add the Greek yogurt, powdered sugar, melted white chocolate, and vanilla and beat until the mixture is uniform and creamy. Spread this evenly over the cooled crust.
- Arrange the sliced strawberries and blueberries across the white chocolate layer in an even, generous layer.
- Spread the thawed whipped topping evenly over the fruit. Finish with white chocolate shavings and a handful of extra fresh berries. Refrigerate for at least 4 hours, then slice into squares and serve cold.
Tips
- Tip: Let the cream cheese sit at room temperature for at least 20 minutes before beating — cold cream cheese leaves lumps that don't beat out no matter how long you go at it.
- Tip: Pat the strawberries dry with a paper towel after slicing — excess moisture from the berries can make the whipped topping layer weep if the dessert sits too long.
- Tip: No pecans in the crust? Skip them entirely or swap in chopped walnuts — the crust is good either way, the nuts just add a little extra texture.
23. Summer Raspberry Cake
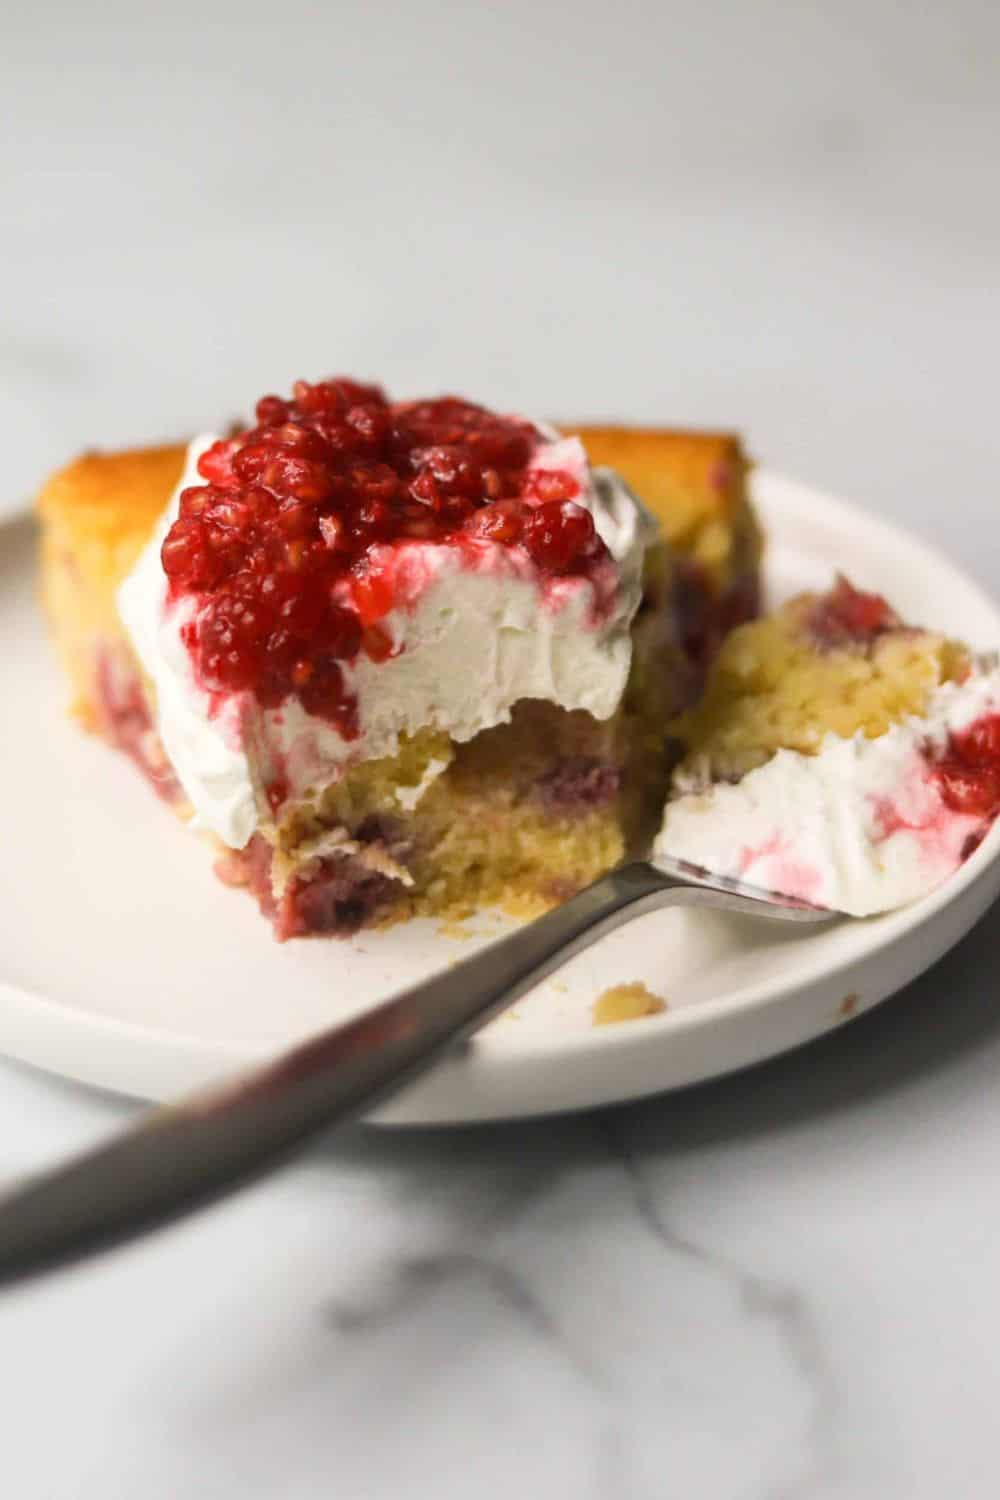
This one closes out the list at number 23 because it's the cake I'd bake if I could only make one thing all summer. Ricotta and almond flour together produce a crumb that is genuinely, almost unreasonably moist — the kind of cake that stays soft for three days without going dry or dense. Fresh raspberries folded through, lemon zest in the batter, and it comes together in one bowl without a mixer. Zainab asked me once why this one tastes "different" from other cakes — I think it's the ricotta, which adds richness without heaviness. Toss your raspberries in cornstarch before folding them in — it stops them from bleeding pink streaks through the whole batter, which is a small thing that makes a big visual difference when you slice it.
Ingredients
- 1½ cups all-purpose flour (or gluten-free 1-to-1 blend)
- ¾ cup almond flour
- 2 teaspoons baking powder + ½ teaspoon salt
- ¾ cup granulated sugar
- 3 large eggs (or 3 flax eggs for vegan: 1 tablespoon ground flax + 3 tablespoons water each, rested 5 minutes)
- ¾ cup whole-milk ricotta cheese, well-drained
- ⅓ cup neutral oil (such as vegetable or light olive oil)
- Zest of 1 lemon + 2 tablespoons fresh lemon juice
- 1 teaspoon vanilla extract
- 1½ cups fresh raspberries, tossed in 1 tablespoon cornstarch
- Whipped cream and extra fresh raspberries for serving
Instructions
- Preheat oven to 350°F. Grease and line a 9-inch round springform pan with parchment.
- In a large bowl, whisk together both flours, baking powder, and salt. In a separate bowl, whisk together the eggs, sugar, ricotta, oil, lemon zest, lemon juice, and vanilla until smooth and well combined.
- Pour the wet ingredients into the dry and stir until just smooth — don't overmix. Gently fold in the cornstarch-coated raspberries, trying to keep them mostly whole.
- Pour the batter into the prepared pan and bake for 45–50 minutes, until the top is golden and a skewer inserted in the centre comes out clean. Cool completely in the pan before removing. Serve with whipped cream and extra fresh raspberries alongside.
Tips
- Tip: Drain your ricotta in a fine mesh strainer for 30 minutes before using — watery ricotta makes the batter too loose and the bake time unpredictable.
- Tip: Don't open the oven before 40 minutes — this cake needs uninterrupted heat in the early stages or it sinks in the middle. I learned that one the hard way.
- Tip: Frozen raspberries work in a pinch — don't thaw them first, just toss them straight from frozen with the cornstarch and fold in immediately so they don't bleed into the batter before baking.
Twenty-three cakes is a lot to sort through, but honestly, I could have kept going. Summer gives you so much to work with — stone fruits at their peak, berries at every farmers market, citrus that's bright and sharp, and the kind of heat that makes you want something cold and creamy between layers of something soft. Every cake on this list earns its spot because it fits that mood. Some are quick and unfussy, some take a bit more patience, but none of them require anything you can't find at a regular grocery store.
The first summer I tried baking seriously — I mean actually paying attention instead of just following a recipe on autopilot — I burned two strawberry shortcakes and under-baked a peach upside-down cake all in the same week. That was my crash course. Now I know to check doneness by touch, not just by the timer, and to pull a cake two minutes early rather than two minutes late. If you're newer to baking, start with the icebox cakes or the no-bake options on this list. They're forgiving, they taste great, and you'll build confidence fast. If you've been at this a while, go straight for the layered ones — summer deserves the effort.
Pick whichever one matches what you've got in your kitchen right now. Ripe peaches? Lemon zest sitting on the counter? A box of graham crackers in the pantry? There's something here for all of it. I hope one of these becomes a summer regular in your house the way a few of them have become regulars in mine. 🍓🍋☀️🎂✨
More Recipes You Might Like
- Summer Dessert Recipes — if you want more warm-weather sweets beyond cake, this list covers everything from popsicles to cobblers
- Lemon Dessert Recipes — for when you're in that bright, citrusy mood and want a full lineup of options
- Strawberry Dessert Recipes — strawberry season is short, so this roundup helps you make the most of it
- Easy No-Bake Desserts — when it's too hot to turn the oven on, this is the list I go to first
- Birthday Cake Ideas — if you need one of these cakes to pull double duty as a celebration cake, this roundup has the showstoppers
Frequently Asked Questions
Which summer cake on this list is the easiest to make for a beginner?
The no-bake and icebox-style cakes are your best starting point. They don't require you to worry about oven temperature, baking time, or whether your layers rose evenly. You layer, you chill, you serve. The results look impressive even when the process was straightforward. Once you've got a couple of those under your belt, the baked ones feel a lot less intimidating.
Can I make these summer cakes ahead of time?
Most of them, yes. Chilled and icebox cakes actually need to be made ahead — they get better after a few hours in the fridge. For baked layer cakes, you can bake the layers a day in advance, wrap them tightly in plastic, and store them at room temperature, then frost the next day. Fully assembled frosted cakes keep well in the fridge for 2-3 days. Just let refrigerated cakes sit out for 20-30 minutes before serving so the crumb softens back up.
What's the best way to keep a summer cake from getting soggy when using fresh fruit?
Two things help here. First, pat your fruit dry before adding it to layers or toppings — excess moisture is the main culprit. Second, if you're folding fruit into a filling or batter, toss it lightly in a tablespoon of flour or cornstarch first. It absorbs the juice and keeps things from getting wet. For fruit on top of a finished cake, add it as close to serving time as you can manage.
Which cakes on this list hold up best for outdoor gatherings or picnics?
Sheet cakes and bundt cakes are your best outdoor options — they travel easily, slice without drama, and don't require refrigeration for a couple of hours. Avoid anything with whipped cream frosting in direct sun; it melts fast. Cream cheese frosting holds up better in heat than buttercream. If you know the cake is sitting out for a while, go with a sturdier glaze or a frosting that's been stabilized with a little cornstarch.
Can I substitute frozen fruit for fresh in these summer cake recipes?
Yes, with one adjustment — thaw frozen fruit completely and drain off as much liquid as you can before using it. Frozen fruit releases a lot more moisture than fresh when it thaws, so if you skip the draining step, your batter or filling can end up too wet. For toppings, fresh is worth it if it's in season. For baked-in fruit or fillings, frozen works just fine and is often cheaper, especially outside of peak summer months.
Share This Post!





Comments
No Comments