
Saad asked me to make sugar cookies three weeks in a row before I finally sat down and worked out a recipe I was actually happy with. The first two batches were fine — edible, sure — but they spread too thin and came out more crispy than chewy. That wasn't what he wanted, and honestly it wasn't what I wanted either.
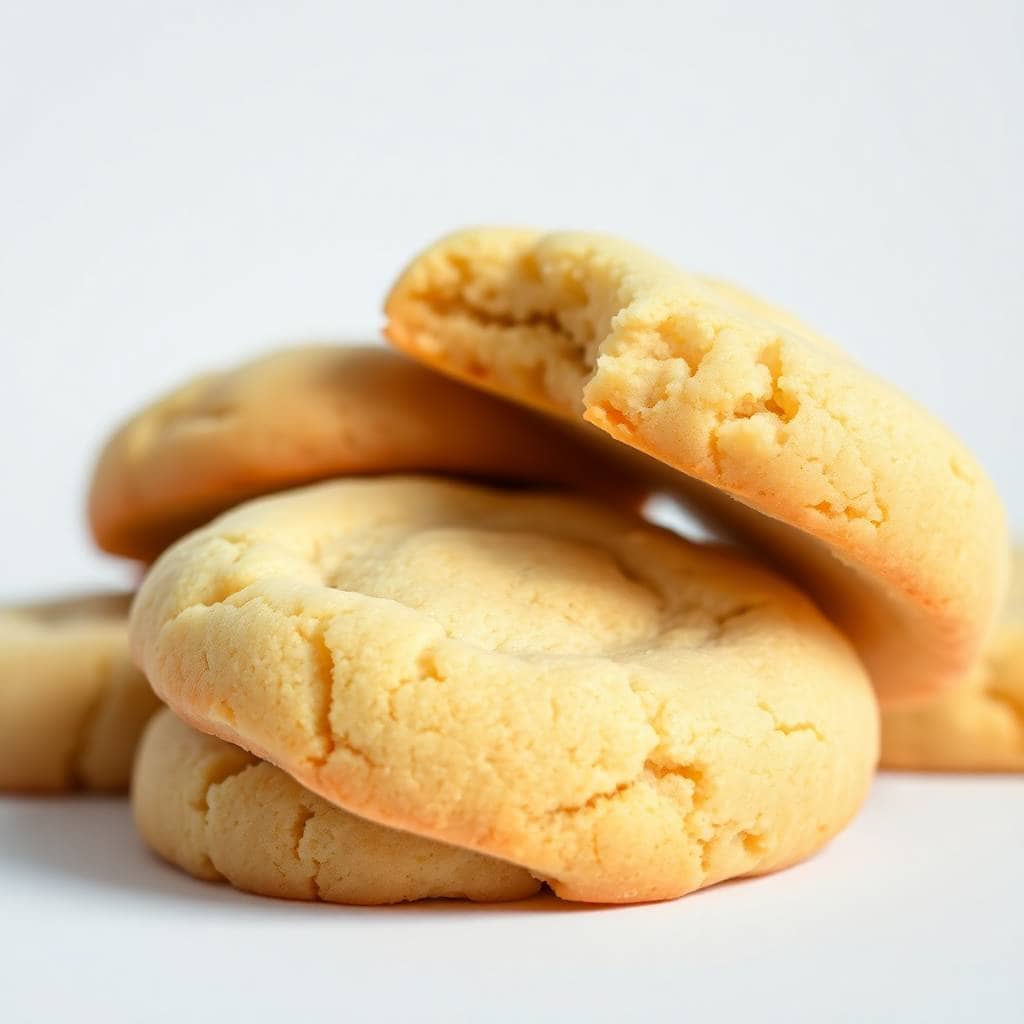
What finally worked was pulling the cookies out of the oven before they looked done. The centers will still look soft and a little underset at 10 minutes — that's exactly right. They firm up as they cool on the pan, and that's what gives you that soft, pillowy middle with the slightly crisp edge. I also stopped adding extra flour out of habit. The dough is meant to be a little sticky, and that stickiness is what keeps the texture right.
I make these most often around the holidays, but honestly they show up on a random Tuesday too. Zainab loves rolling the dough balls in the sugar — it's the one baking task she'll reliably do without getting distracted. My husband eats them warm, still a little soft from the pan. If you're looking for a dessert that's a bit less involved than my classic cheesecake, this is exactly that.
One more thing before you start: the butter needs to be properly softened, not melted. I've rushed this step before and the cookies spread into flat discs. Leave it on the counter for 30 minutes minimum. If you're in a cold kitchen like mine in winter, it might need longer. You should be able to press a finger into it easily without it being greasy or liquid.
Why You'll Love This Recipe
- That texture is real: Soft center, slightly crisp edge — it's not a marketing line, it's what actually happens when you pull these at the right time. I spent three batches figuring out the exact timing, so you don't have to. The sugar coating on the outside also helps crisp the edges without drying out the center.
- Minimal equipment needed: I make these with a hand mixer and a wooden spoon. You don't need a stand mixer, a sifter, or anything fancy. Two bowls, two baking sheets, and a cookie scoop (or just a tablespoon) is all you need. I've been using the same $12 hand mixer from Walmart for five years.
- The ingredients are always in the pantry: Flour, butter, sugar, one egg, vanilla. That's basically it. No specialty items, nothing you need to hunt down. I usually have everything on hand already, which is part of why this recipe gets made so often.
- Kids can actually help: The rolling step is genuinely fun for small hands. Zainab has been doing it since she was four. The dough isn't sticky enough to be frustrating but it holds together well, so it doesn't fall apart mid-roll. If you're looking for a kid-friendly baking project, this is a solid one.
- It makes a big enough batch to matter: This recipe makes about 36 cookies, which sounds like a lot until you see how fast they disappear. I usually make a double batch around Eid and Christmas because a single batch barely lasts two days in my house.
Ingredients
- 2 ¾ cups all-purpose flour
- 1 teaspoon baking soda
- ½ teaspoon baking powder
- 1 cup unsalted butter, softened (see note above about temperature)
- 1 ½ cups granulated sugar
- 1 large egg
- 1 teaspoon vanilla extract
- ¼ cup granulated sugar, for rolling
Directions
- Preheat the oven: Set your oven to 350°F (175°C) and line two baking sheets with parchment paper. I use regular parchment from Walmart — silicone mats work too if you have them.
- Mix the dry ingredients: In a medium bowl, whisk together the flour, baking soda, and baking powder. Set it aside. I skip salting this dough because the butter carries enough richness on its own.
- Cream the butter and sugar: In a large bowl, beat the softened butter with 1 ½ cups of sugar until the mixture looks pale and a little fluffy — about 2 to 3 minutes with a hand mixer. Don't rush this step; it's what gives the cookies their lift.
- Add the egg and vanilla: Beat in the egg and vanilla extract until everything is smooth and fully combined. At this point the mixture should look glossy and slightly thick.
- Add the dry ingredients: Gradually mix in the flour mixture until a dough forms. It will be soft but shouldn't stick to your hands excessively. If it feels too wet, refrigerate for 20 minutes before scooping.
- Shape the dough balls: Scoop tablespoon-sized portions and roll them between your palms into smooth balls. Roll each ball in the ¼ cup of sugar until evenly coated. This sugar coating is what creates those slightly crisp edges.
- Bake: Place dough balls about 2 inches apart on the prepared baking sheets. Bake for 10 to 12 minutes, until the edges are just golden. The centers will still look soft — that's exactly right. Don't wait for them to look fully done in the oven.
- Cool on the pan: Let the cookies sit on the baking sheet for 5 minutes before moving them to a wire rack. They'll finish setting during this time, and moving them too early will cause them to fall apart.

Tips for Success
- Butter temperature matters more than you think: If the butter is too cold, it won't cream properly and you'll end up with a dense cookie. If it's too warm or melted, the cookies spread into thin crispy discs. I learned this the hard way — proper room-temperature butter should leave a slight indent when you press it, but shouldn't feel greasy or slick.
- Pull them out before they look done: This is the single most important thing. The centers should still look underbaked and slightly glossy when you open the oven door. If they look completely set in the oven, they'll be overdone by the time they cool. I set a timer for 10 minutes and check at that point every single time.
- Chill the dough if it feels too soft: On a warm day or if my kitchen is hot, the dough gets a little sticky and the cookies spread more than I'd like. Thirty minutes in the fridge firms everything up and the cookies hold their shape much better. I usually do this in summer or when I've been standing near a hot stove for a while.
- Use a cookie scoop for even sizing: When cookies are different sizes, the small ones burn while the big ones are still raw. A basic cookie scoop (I have one from a dollar store) solves this completely. If you don't have one, a heaping tablespoon works — just try to keep them consistent.
- Don't skip the resting time on the pan: Five minutes on the hot baking sheet after they come out of the oven is not optional. The cookies are still finishing cooking during this time. I've tried to skip it when I was in a rush, and they fell apart when I picked them up. Just set the whole pan on a rack and wait.
Variations
- Cinnamon sugar version: Mix 1 teaspoon of ground cinnamon into the ¼ cup of rolling sugar before coating the dough balls. This is the version my husband prefers — it gives the cookies a warm, spiced edge that makes them taste almost like snickerdoodles. I make these specifically around the holidays when I want something a little cozier.
- Lemon sugar cookies: Add 1 tablespoon of fresh lemon zest to the dough when you add the vanilla. The lemon cuts through the sweetness and makes these feel lighter. I sometimes pair a batch of these with a slice of coconut ricotta cloud cake when I'm putting together a dessert spread.
- Frosted for holidays: These are a solid base for decorating. Once completely cooled, top them with simple royal icing or a basic buttercream. Saad likes to drag a toothpick through two colors of icing to make swirls. This isn't authentic bakery-style decorated cookie work, but it's fun and the kids love it.
- Chocolate chip add-in: Fold in ½ cup of mini chocolate chips after the dough comes together. The mini chips distribute more evenly than regular-sized ones, so you get a little chocolate in every bite. This version disappears faster than any other variation I've tried.
- Dairy-free swap: Replace the butter with a plant-based butter (I've used the Country Crock Plant Butter sticks and they work well here). The texture is very close to the original — maybe slightly less rich, but still a good cookie. This isn't something I make regularly, but it works when I need to bake for someone with dairy restrictions.
Serving and Storage
Serving
These are best warm, within an hour of coming out of the oven, when the center is still soft and the edges have a little snap. My kids have them with cold milk. My husband has them with tea. I usually eat one standing at the counter while I'm still cleaning up. They're also good at room temperature the next day — the texture firms up a little but they stay soft for a couple of days if sealed properly. If you're serving these at a gathering, arrange them on a plate and keep them covered until you're ready — they dry out faster when left open to the air.
Storage
Store completely cooled cookies in an airtight container at room temperature for up to 1 week. I put a piece of bread in the container with them — it sounds strange, but the bread keeps the cookies from drying out. For the dough, you can roll the balls, coat them in sugar, and freeze them on a baking sheet. Once solid, transfer to a zip-lock bag and freeze for up to 2 months. Bake straight from frozen at 350°F — just add 2 to 3 minutes to the bake time. Baked cookies can also be frozen for up to 2 months; thaw at room temperature before serving.

Frequently Asked Questions
Can I freeze the sugar cookie dough?
Yes, and I actually recommend it. Roll the dough into balls, coat in sugar, and freeze them on a baking sheet until solid. Then transfer to a freezer bag. When you're ready to bake, pull them straight out of the freezer and add 2 to 3 minutes to the bake time. No thawing needed.
Why did my sugar cookies come out flat?
Almost always it's the butter. If it was too warm or slightly melted, the cookies spread before they can set. The other common cause is a hot kitchen — if your dough felt very soft when you were rolling it, chill it for 30 minutes next time. Also make sure you're measuring flour correctly: spoon it into the cup and level it off rather than scooping directly from the bag, which packs too much in.
Can I use salted butter instead of unsalted?
You can, but leave out any additional salt if the recipe calls for it. The cookies will be slightly saltier, which some people actually prefer — it balances the sweetness. I use unsalted because it gives me more control, but I've made this with salted butter in a pinch and it still worked fine.
How do I know when the cookies are actually done?
The edges should look just set and lightly golden, and the centers should still look soft and slightly underdone. If the center looks fully baked and matte in the oven, you've gone too far. Pull them at 10 minutes and let them finish on the hot pan — they carry-cook for another few minutes outside the oven.
Can I make the dough ahead of time?
Yes. You can make the dough, cover it, and refrigerate it for up to 2 days before baking. The chilled dough actually bakes slightly thicker and holds its shape better than freshly made dough. Just let it sit at room temperature for about 10 minutes before scooping if it's too firm to roll into balls.

SOFT AND CHEWY SUGAR COOKIES
Ingredients
- 2 ¾ cups all-purpose flour
- 1 teaspoon baking soda
- ½ teaspoon baking powder
- 1 cup unsalted butter softened
- 1 ½ cups granulated sugar
- 1 large egg
- 1 teaspoon vanilla extract
- ¼ cup granulated sugar for rolling
Instructions
Preheat the Oven:
- Preheat the oven to 350°F (175°C). Line two baking sheets with parchment paper or silicone baking mats.
Mix the Dry Ingredients:
- In a medium bowl, whisk together the flour, baking soda, and baking powder. Set aside.
Make the Dough:
- In a large bowl, beat together the softened butter and 1 ½ cups granulated sugar until light and fluffy. Add the egg and vanilla extract, beating until smooth. Gradually add the dry ingredients and mix until combined.
Shape the Cookies:
- Scoop tablespoon-sized portions of dough and roll them into balls. Roll each ball in the ¼ cup of sugar to coat evenly.
Bake the Cookies:
- Place the dough balls about 2 inches apart on the prepared baking sheets. Bake for 10–12 minutes, or until the edges are golden and the centers are set.
Cool and Serve:
- Allow the cookies to cool on the baking sheets for 5 minutes before transferring them to wire racks to cool completely.
Notes
These sugar cookies have become the most-requested thing I bake, which I didn't expect when I first started working on them. I figured they'd be a once-in-a-while thing, but Saad asks for them constantly and honestly I don't mind — the whole recipe takes about 25 minutes from start to oven, and the cleanup is minimal. That's a win on a busy weeknight.
What I keep coming back to is how forgiving this recipe is once you know the two things that matter: butter temperature and bake time. Get those right and everything else falls into place. The dough is simple, the steps are straightforward, and the result is consistently good. I've made this recipe probably thirty times now and it hasn't failed me since I stopped overbaking.
If you're in the mood for other desserts, my Dr. Pepper cake with cream cheese frosting is another one the family loves — it sounds unusual but it's genuinely one of the moist





Comments
No Comments