
I first made these Santa hat brownie bites on a whim the December before last, when I needed something to bring to Zainab's school Christmas party and I was completely out of ideas. I had strawberries in the fridge, a box of cocoa powder in the pantry, and exactly one hour before the party started. What came out of the oven that afternoon was so cute that three other moms asked me for the recipe before the kids had even finished eating them.
What makes these work is the combination of a proper fudgy brownie base — not the cakey kind — with a juicy strawberry on top. The whipped cream does double duty: it acts as the "glue" that holds the strawberry in place, and it gives you that little pom-pom dot at the very tip of the hat. I make the brownies from scratch because it's honestly not much harder than a box mix and the texture is so much better. But I'll also tell you exactly how to use a box mix in the variations section, because sometimes life is busy and shortcuts are smart.
These are the kind of treats I make when I need something that looks like I spent a lot more time on it than I did. They go on the dessert table next to my edible cookie dough cups every Christmas now — the two together disappear faster than anything else on the table. I double the batch every single time because the first time I made just 12, they were gone in about four minutes flat.
One thing I want to flag upfront: don't try to assemble these warm. I made that mistake the very first time — the whipped cream slid right off and the strawberry toppled over. Let the brownie bites cool completely, at least 30 minutes out of the pan, before you start building the hats. If you're making these for a party, bake the brownie bites the night before and assemble them the morning of. Everything holds together much better that way.
Why You'll Love This Recipe
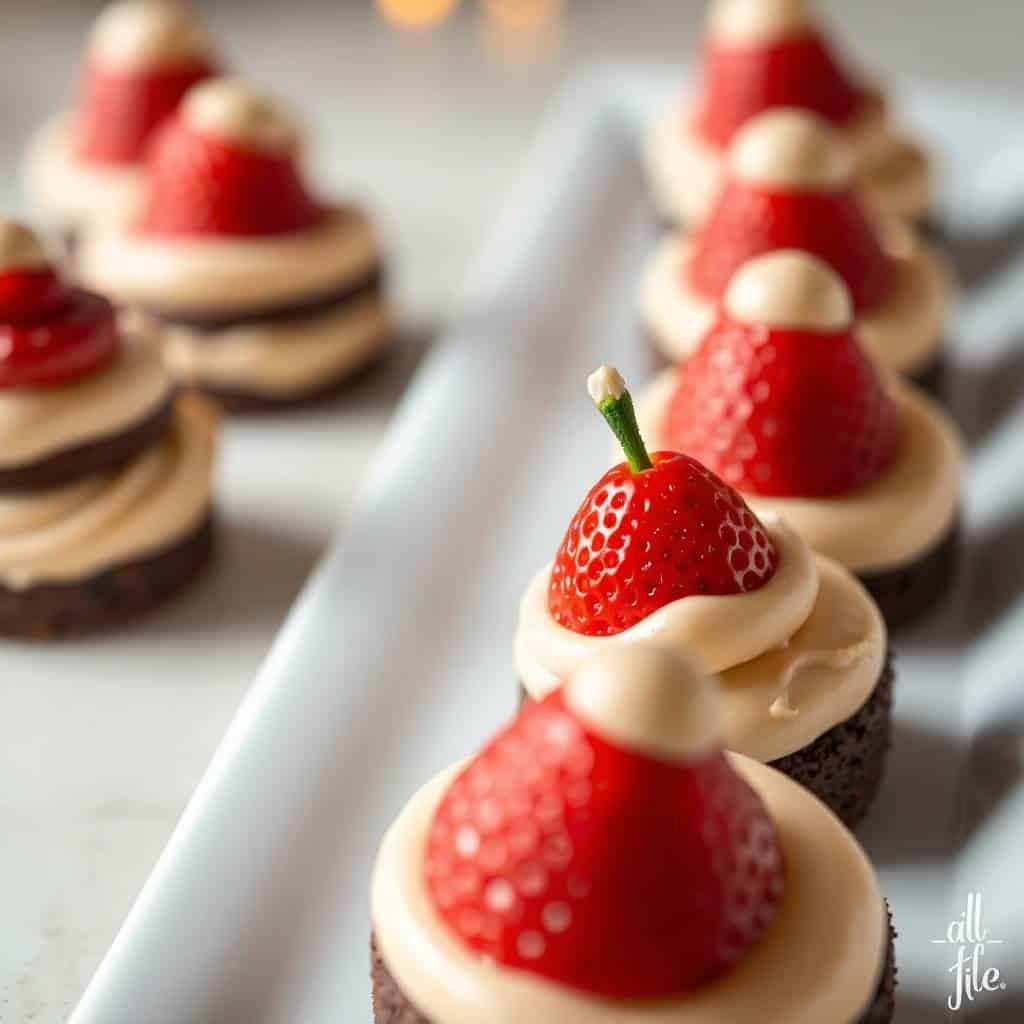
- They look impressive but the effort is low: I've brought these to three holiday parties now and every single time, people think I spent hours on them. The assembly is actually just: brownie, dab of cream, strawberry, tiny dot of cream on top. That's it. You don't need piping skills, you don't need a pastry bag — a regular zip-lock bag with the corner snipped off works perfectly fine.
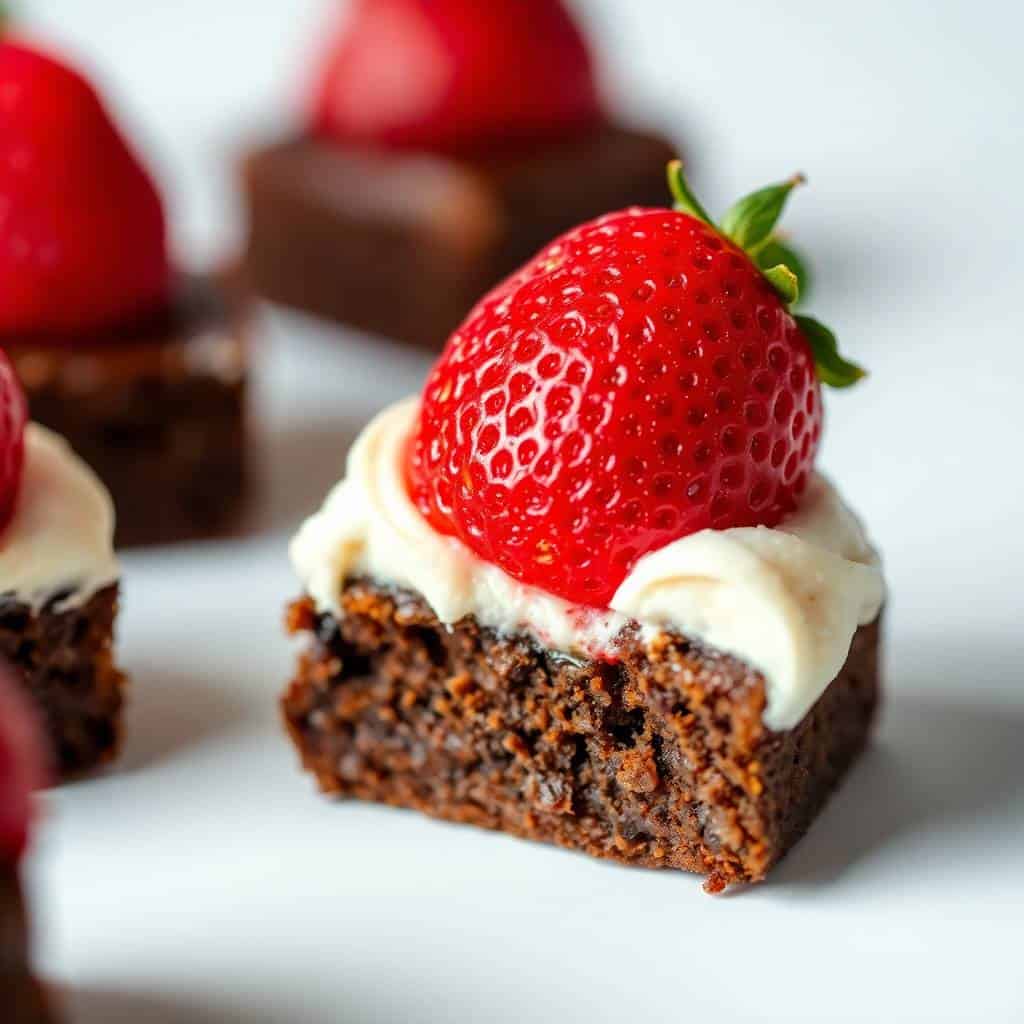
- The fudgy brownie base is genuinely good on its own: These aren't just a vehicle for the decoration — the brownie itself is rich and dense and chocolatey. I've made this batter on its own in an 8x8 pan plenty of times, just as a regular brownie. The mini muffin format gives you that slightly crispier edge with a soft centre, which is the best part of any brownie.
- Kids can help assemble: Once the brownies are cooled and laid out, even young kids can press a strawberry on top and squeeze a little cream dot. Zainab helped me make a batch when she was six. Yes, some of the hats were a little lopsided. They still tasted exactly the same. This is one of those recipes where imperfect looks charming rather than sloppy.
- You can make them ahead: The brownie bites keep well in an airtight container for up to two days. I bake them the night before, store them on the counter, and then do the strawberry-and-cream assembly the morning of the event. This way I'm not scrambling at the last minute, and the whipped cream is fresh when it matters.
- Strawberry and chocolate is a combination that genuinely works: I know people sometimes raise an eyebrow at fruit on brownies, but the slight tartness of a fresh strawberry cuts through the richness of the chocolate in a way that makes you want another one immediately. It's not a heavy dessert — each bite is small and balanced. That's why they disappear so fast.
Ingredients
- For the Brownies:
- ½ cup unsalted butter
- 1 cup granulated sugar
- 2 large eggs
- 1 teaspoon vanilla extract
- ⅓ cup unsweetened cocoa powder
- ½ cup all-purpose flour
- ¼ teaspoon salt
- ¼ teaspoon baking powder
- For the Topping:
- 1 cup whipped cream or whipped topping (store-bought like Cool Whip works well here)
- 12 fresh strawberries, hulled (look for ones that are roughly the same size so the hats look uniform)
Directions
- Preheat and prep your pan: Preheat your oven to 350°F (175°C). Grease a mini muffin tin well — I use butter and a paper towel to get into every corner. You can also use mini paper liners if you have them, which makes removal much easier.
- Melt the butter: Melt your butter in a medium saucepan over low heat, or in a microwave-safe bowl in 30-second bursts. Let it cool for a couple of minutes before you add the eggs — if it's too hot, the eggs will scramble.
- Mix the wet ingredients: Stir in the sugar, eggs, and vanilla into the melted butter until everything is combined. The batter will look glossy and that's exactly right.
- Add the dry ingredients: Add the cocoa powder, flour, salt, and baking powder. Stir until just combined — stop as soon as you don't see dry flour anymore. Overmixing is what makes brownies cakey instead of fudgy.
- Fill and bake: Spoon the batter into your mini muffin cups, filling each about ¾ full. Bake for 15–18 minutes, until a toothpick inserted in the centre comes out with just a few moist crumbs (not wet batter). These are small so they bake fast — start checking at 14 minutes.
- Cool completely: Let the brownies cool in the pan for 5 minutes, then pop them out onto a wire rack. This is the step you cannot rush. I repeat: do not try to add cream to warm brownies. Give them at least 30 minutes.
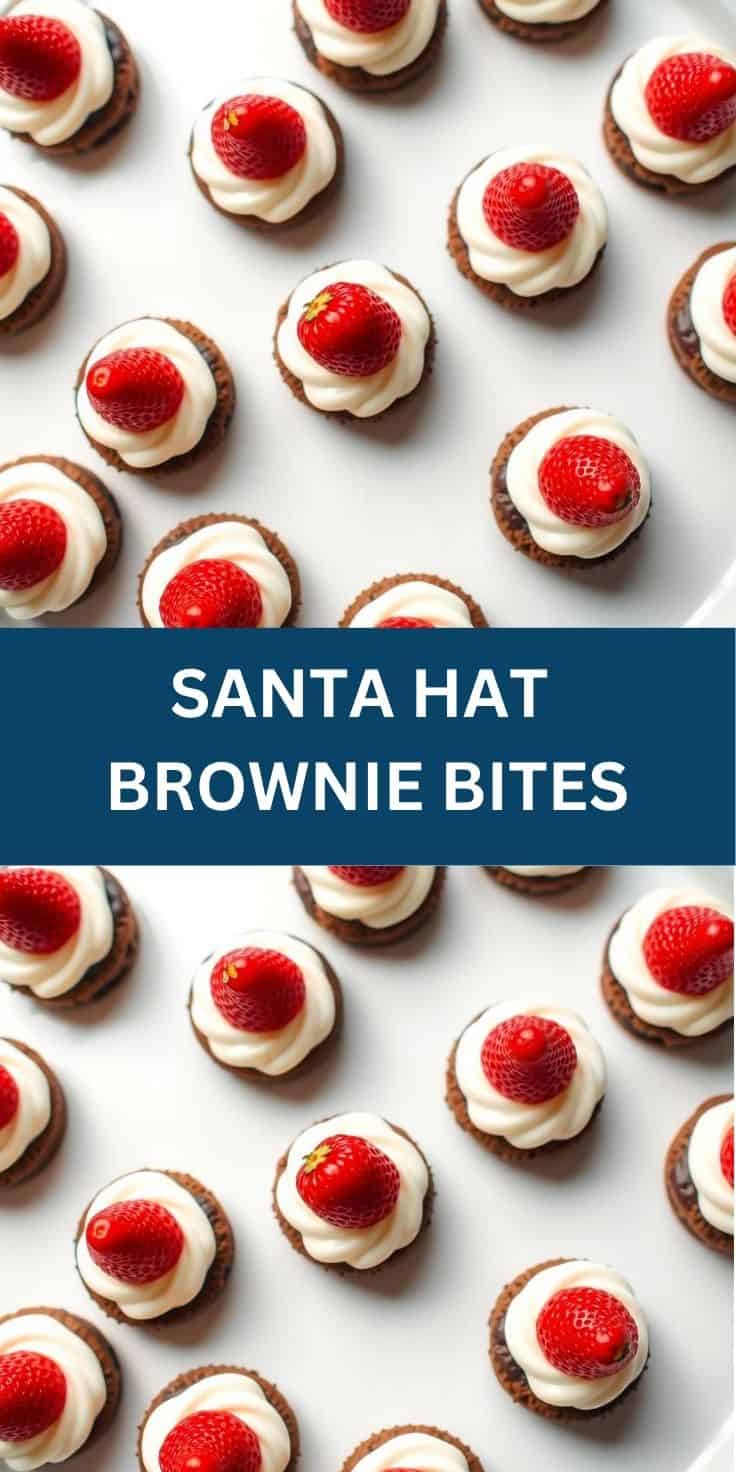
- Build the Santa hats: Pipe or spoon a small ring or dollop of whipped cream on top of each brownie bite. Press one hulled strawberry, pointed side up, down into the cream — the cream acts as the brim of the hat and holds the strawberry in place.
- Finish the hats: Add a tiny dot of whipped cream right at the tip of each strawberry to make the pom-pom. A small spoon works fine for this, or snip the tiniest corner off a piping bag for more control. Refrigerate until you're ready to serve.
Tips for Success
- Pick firm, similar-sized strawberries: Soft or overripe strawberries will droop and the hat won't hold its shape. When I'm at the grocery store, I pick through the container and pull out the ones that are roughly the same size and still quite firm. Uniform strawberries also make the finished tray look much more polished — it's a small thing that makes a visual difference.
- Use stabilised whipped cream if they need to sit out: Regular fresh whipped cream is delicious but it starts to deflate after about an hour at room temperature. If these are going on a party table and sitting out for a while, use Cool Whip or a stabilised whipped topping instead — it holds its shape for hours without weeping. I learned this the hard way at a potluck where the hats looked a bit sad by the time people got to them.
- Trim the bottom of the strawberry flat: If your strawberry has a very pointed or uneven bottom, take a tiny slice off to create a flat surface. This makes the strawberry sit stable on the brownie without wobbling. It takes about ten extra seconds per berry and makes a real difference in how they look on the plate.
- Don't overfill the muffin cups: Fill each cup about ¾ full — no more. The first time I made these I filled them too high and they puffed up over the edges and lost the nice round domed top that makes them look like a proper hat base. Slightly underfilled is better than overfilled for this recipe.
- Assemble close to serving time: The brownies themselves keep for two days in an airtight container, but once you add the whipped cream and strawberries, the clock starts ticking. Assemble a few hours before your party at most, and keep them refrigerated right up until you're ready to set them out. Cold brownies with cold cream and cold strawberries are actually really good — the chocolate firms up nicely.
Variations
- Use a boxed brownie mix: This is not cheating — it's practical. Pick up a box of Ghirardelli or Betty Crocker brownie mix, prepare it according to the package directions, and bake it in your mini muffin tin. The texture will be slightly different from scratch brownies but still fudgy and good. This cuts your active time in half, which matters when you're also making three other things for a holiday party. I've done this version and nobody knew the difference.
- Cream cheese frosting instead of whipped cream: If you want something that holds up better and has a little more richness, pipe on cream cheese frosting instead. Beat 4 oz of softened cream cheese with ½ cup powdered sugar and a splash of vanilla until smooth. It's thicker than whipped cream, which means it actually grips the strawberry better and doesn't deflate. My husband prefers this version — he says the tang of the cream cheese balances the sweetness of the brownie.
- Peppermint brownie base: Add ¼ teaspoon of peppermint extract to the batter along with the vanilla. It gives the brownies a subtle candy-cane flavour that's very Christmas-y without being overwhelming. I'd pair this version with a plain whipped cream topping so the peppermint flavour isn't competing with anything too rich. Crush a few candy canes and scatter them on the platter around the brownies for a festive look.
- Gluten-free version: Swap the all-purpose flour for a 1:1 gluten-free baking flour (Bob's Red Mill or King Arthur both work well). The texture stays very similar since there's so little flour in the recipe to begin with. Use dairy-free whipped topping if you also need these to be dairy-free. I make this version whenever I know there are guests with dietary restrictions — it's honestly barely noticeable.
- Snowy powdered sugar finish: Right before serving, dust the whole platter lightly with powdered sugar using a small sieve. It looks like a little dusting of snow over the hats and takes about thirty seconds. If you're building a full holiday dessert table — alongside something like these strawberry cheesecake nachos — this little detail makes the whole spread look more intentional and festive.
Serving and Storage
Serving
Serve these straight from the fridge or at cool room temperature — not warm. Arrange them on a flat platter so the Santa hats stay upright and don't tip. They look great on a tiered dessert stand too. If you're building a full holiday spread, these sit nicely alongside other finger desserts. I usually put them out right before guests arrive so the whipped cream looks fresh and the strawberries are still glossy.
Storage
Plain brownie bites (without the cream and strawberries) keep in an airtight container at room temperature for up to 2 days, or in the fridge for up to 4 days. Once assembled, store them in the fridge in a single layer — don't stack them or the hats will get crushed. Assembled bites are best eaten within 24 hours; after that the strawberries start to release juice and the cream gets a bit soft. I don't recommend freezing the assembled version, but you can absolutely freeze the plain brownie bites for up to 1 month and thaw them overnight before assembling.
Frequently Asked Questions
Can I use a boxed brownie mix instead of making them from scratch?
Yes, absolutely. Prepare the mix according to the package instructions and bake in a greased mini muffin tin at 350°F for about 15–18 minutes, checking with a toothpick. The scratch version has a slightly denser, fudgier texture, but a good boxed mix like Ghirardelli gets you very close with half the effort.
Can I use whipped cream from a can?
You can, but it deflates pretty quickly — usually within an hour. For a party where these will sit out for a while, I'd use Cool Whip or another stabilised whipped topping instead. If you're assembling right before serving and eating within 30 minutes, canned cream works fine.
How far ahead can I make these?
The brownie bites themselves can be baked 1–2 days ahead and stored in an airtight container. Assemble with the strawberries and whipped cream no more than a few hours before serving. I usually bake the brownies the night before and do the assembly the morning of the event — that's the schedule that's worked best for me.
What if I don't have a mini muffin tin?
Bake the brownie batter in a greased 8x8 inch pan at 350°F for about 20–25 minutes. Once fully cooled, use a round cookie cutter (about 1½ to 2 inches) to cut out circles. The edges won't be quite as neat but the taste is identical, and the Santa hat decoration covers most of the top anyway.
Can I freeze these?
Freeze the plain brownie bites only — wrap them individually or layer them between sheets of parchment in a freezer bag. They keep for up to 1 month. Thaw overnight in the fridge or about an hour at room temperature, then assemble with fresh strawberries and whipped cream before serving. Don't freeze them once they're assembled.
I've made a lot of Christmas desserts over the years — this one is the one I keep coming back to. Not because it's the most complicated or the most impressive technically, but because it reliably makes people genuinely happy when they see it. There's something about a tiny chocolate brownie wearing a strawberry hat that just works. It's the kind of thing that makes a dessert table feel like someone actually put thought into it.
If you're planning a holiday gathering and figuring out the food side of things, check out these 35 easy dinner party menu ideas — it's a good starting point when you need a full spread and don't want to lose your mind in the kitchen. These brownie bites slot in perfectly as a no-fuss dessert at the end of any of those menus.
Make the brownies the night before. Buy firm strawberries. Keep a can of Cool Whip in the fridge. That's genuinely all the prep you need to have these ready for a party without any last-minute stress. And if a few of the hats end up slightly lopsided — honestly, that's fine. Lopsided Santa hats are still Santa hats. 🍓🎅✨
SANTA HAT BROWNIE BITES
Ingredients
For the Brownies:
- ½ cup unsalted butter
- 1 cup granulated sugar
- 2 large eggs
- 1 teaspoon vanilla extract
- ⅓ cup unsweetened cocoa powder
- ½ cup all-purpose flour
- ¼ teaspoon salt
- ¼ teaspoon baking powder
For the Topping:
- 1 cup whipped cream or frosting
- 12 fresh strawberries hulled and halved
Instructions
Make the Brownies:
- Preheat oven to 350°F (175°C). Grease a mini muffin tin. In a bowl, melt butter. Stir in sugar, eggs, and vanilla. Add cocoa powder, flour, salt, and baking powder. Mix until smooth.
Bake:
- Spoon batter into mini muffin cups, filling ¾ full. Bake for 15–18 minutes or until a toothpick comes out clean. Let cool completely in pan.
Add the Santa Hats:
- Pipe a ring of whipped cream on top of each brownie bite. Place a strawberry (cut side down) on top to form the hat. Pipe a small dot of cream on the tip of each strawberry.
Serve:
- Keep chilled until ready to serve.
Notes
- Make Ahead: Brownie bases can be made a day ahead. Assemble with whipped cream and strawberries just before serving.
- Customizing the Flavor: Add peppermint extract to the brownie batter for a holiday twist, or use cream cheese frosting instead of whipped cream.
- Serving Suggestions: Serve on a platter with crushed candy canes or holiday sprinkles for extra cheer.
- Allergy-Friendly Options: Use gluten-free flour and dairy-free whipped topping if needed.
- Storage Tips: Store in the fridge in an airtight container for up to 2 days. Best enjoyed the same day they’re assembled.
If you're looking for more ideas to round out your holiday table or just your everyday kitchen rotation, here are a few other things I've been making lately:
- Edible Cookie Dough Cups — another no-fuss dessert that disappears fast at parties
- Strawberry Cheesecake Nachos Box — great for when you want something showstopper-looking without a lot of work
-
{"@context":"https://schema.org","@type":"Article","headline":"SANTA HAT BROWNIE BITES","description":"Santa Hat Brownie Bites are festive, fudgy treats topped with strawberries and whipped cream—perfect for holiday parties and gifting.","datePublished":"2025-05-31T05:54:18+00:00","dateModified":"2026-05-03T21:23:33+00:00","author":{"@type":"Person","name":"Sana Umer","url":"https://forfoodiefriends.com/about/","description":"Self-taught home cook with 10+ years of kitchen experience. Mom of two who develops every recipe in her own kitchen.","jobTitle":"Recipe Developer & Food Blogger","image":"https://forfoodiefriends.com/wp-content/uploads/sana-umer-author-photo.jpg"},"publisher":{"@type":"Organization","name":"For Foodie Friends","url":"https://forfoodiefriends.com/","logo":{"@type":"ImageObject","url":"https://forfoodiefriends.com/wp-content/uploads/forfoodiefriends-logo.png"}},"mainEntityOfPage":{"@type":"WebPage","@id":"https://forfoodiefriends.com/santa-hat-brownie-bites/"},"image":"https://forfoodiefriends.com/wp-content/uploads/2025/05/SANTA-HAT-BROWNIE-BITES.jpg"}






Comments
No Comments