
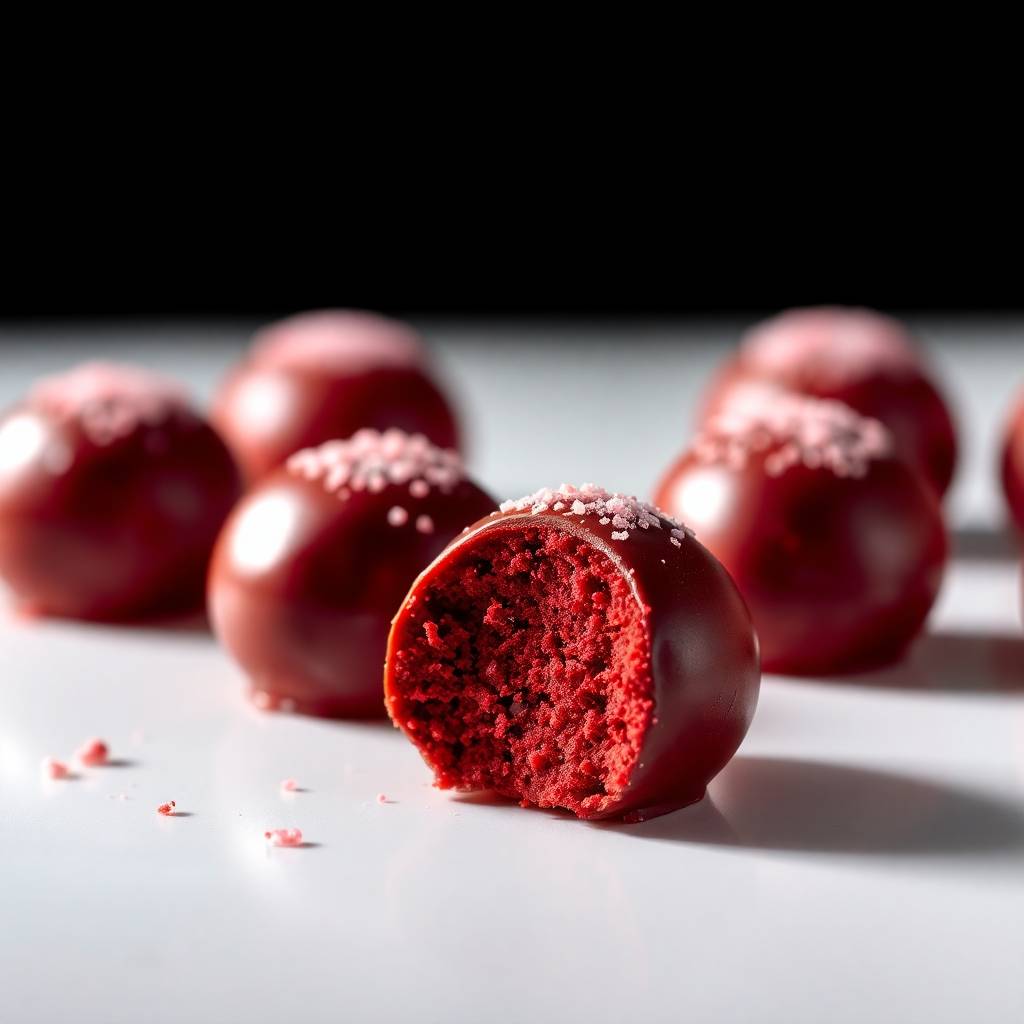
I made these red velvet cake balls for the first time on a whim, right after Christmas, when I had a leftover half a red velvet cake sitting on the counter and no idea what to do with it. I crumbled it up, mixed in some cream cheese frosting, rolled the whole thing into balls, and dipped them in chocolate — and honestly, they disappeared faster than any cake I've actually made from scratch.
What I love about this recipe is how forgiving it is. There's no batter to overmix, no layers to level, no crumb coat to wrestle with. You're basically just combining two things you probably already have — cake and frosting — rolling them into balls, and covering them in chocolate. The whole process takes maybe 30 minutes of active work, plus chilling time. If you've ever been intimidated by fancy desserts, this is a good place to start.
Zainab went absolutely wild for these. She decorated her batch with pink sprinkles and then immediately ate four of them before I could even get them properly set. My husband prefers the ones dipped in dark chocolate — he says the bitterness balances the sweetness of the cake. I usually make a double batch around Valentine's Day and the holidays because one batch never makes it through the evening. If you're looking for something festive to bring to a party, these pack up beautifully alongside my birthday cookie bars for a dessert spread that looks like you spent way more time than you actually did.
One thing I'll warn you: the chilling step is not optional. The first time I skimped on it, my cake balls started falling apart in the chocolate and the whole tray turned into a disaster. Give them a full hour in the fridge — two hours is even better — and the dipping step becomes genuinely stress-free.
Why You'll Love This Recipe
- No special equipment needed: I don't own a cake pop maker or a fancy dipping rack. I use a fork, a sheet pan lined with parchment paper, and my hands. That's genuinely all you need here. The whole setup takes about five minutes to pull together, and cleanup is easier than baking a full cake by a long shot.
- A great use for leftover cake: This recipe exists in my kitchen mostly because I kept having half-eaten red velvet cakes after birthdays. Instead of watching them go stale, I crumble them up and turn them into something people genuinely get excited about. If you don't have leftover cake, a box mix works perfectly — I've done it both ways and both taste great.
- Freezer-friendly for real: I make a double batch, freeze half of them in a zip-lock bag, and pull them out whenever I need a last-minute dessert. They thaw in about 20 minutes at room temperature. I've pulled these out for unexpected guests more times than I can count — they never look like freezer food.
- Kids can actually help: The rolling step is perfect for little hands. Zainab loves doing that part. Yes, the balls are slightly uneven when she's involved, but honestly they taste the same. Getting kids into the kitchen for the fun parts of a recipe — the decorating, the sprinkles, the rolling — makes the whole thing more enjoyable for everyone.
- Works for almost any occasion: Red and green sprinkles for Christmas. Pink drizzle for Valentine's Day. White chocolate coating for a winter look. The base recipe stays the same and you just change the decorations depending on what you're making them for. I've brought these to Eid gatherings, school bake sales, and birthday parties and they always go first.
Ingredients
- 1 box red velvet cake mix (plus eggs, oil, and water as called for on the box)
- ½ cup cream cheese frosting (store-bought works great — I use the one from Walmart; homemade is fine too)
- 8 oz melting chocolate or candy melts — dark, milk, or white chocolate (I get Ghirardelli melting wafers from Walmart or Costco)
- Optional toppings: sprinkles, crushed nuts, cocoa powder, or a contrasting chocolate drizzle
Directions
- Step 1: Bake the cake — Prepare and bake the red velvet cake according to the box instructions. Let it cool completely on a wire rack before you do anything else. I usually bake mine the night before and leave it covered on the counter — trying to rush the cooling is how you end up with soggy cake balls.
- Step 2: Crumble the cake — Break the cooled cake into a large bowl and crumble it with your hands until you have fine, even crumbs. You can use a food processor if you have one — it takes about 30 seconds — but hands work just as well and it's actually kind of satisfying.
- Step 3: Add the frosting — Add the cream cheese frosting a little at a time and mix until the crumbs come together into a soft, moldable dough. You might not need all of it. Stop when the mixture holds its shape when you press it — it should feel like stiff cookie dough, not wet or sticky.
- Step 4: Roll into balls — Scoop the mixture using a tablespoon or a small cookie scoop and roll into 1-inch balls between your palms. Place them on a parchment-lined baking sheet. Try to keep them uniform in size so they chill and set evenly.
- Step 5: Chill — Put the tray in the fridge for at least 1 hour, or 2 hours if you can wait. This step is not optional — I skipped it once and the balls fell apart in the chocolate. Cold cake balls hold their shape during dipping.
- Step 6: Melt the chocolate — Place your chocolate or candy melts in a microwave-safe bowl and melt in 30-second bursts, stirring between each one, until fully smooth. Don't overheat it — if the chocolate seizes up and goes grainy, it's too hot and you'll need to start over.
- Step 7: Dip the cake balls — Working one at a time, use a fork or skewer to lower each ball into the melted chocolate. Lift it out, let the excess drip back into the bowl, and set it on the parchment-lined tray. If the chocolate is too thick, microwave it for another 15 seconds and stir.
- Step 8: Decorate and set — Add your sprinkles, crushed nuts, or drizzle immediately after dipping — before the chocolate starts to set. Then let the tray sit at room temperature for 20 minutes, or pop it in the fridge for 10 minutes if you're in a hurry.
Tips for Success
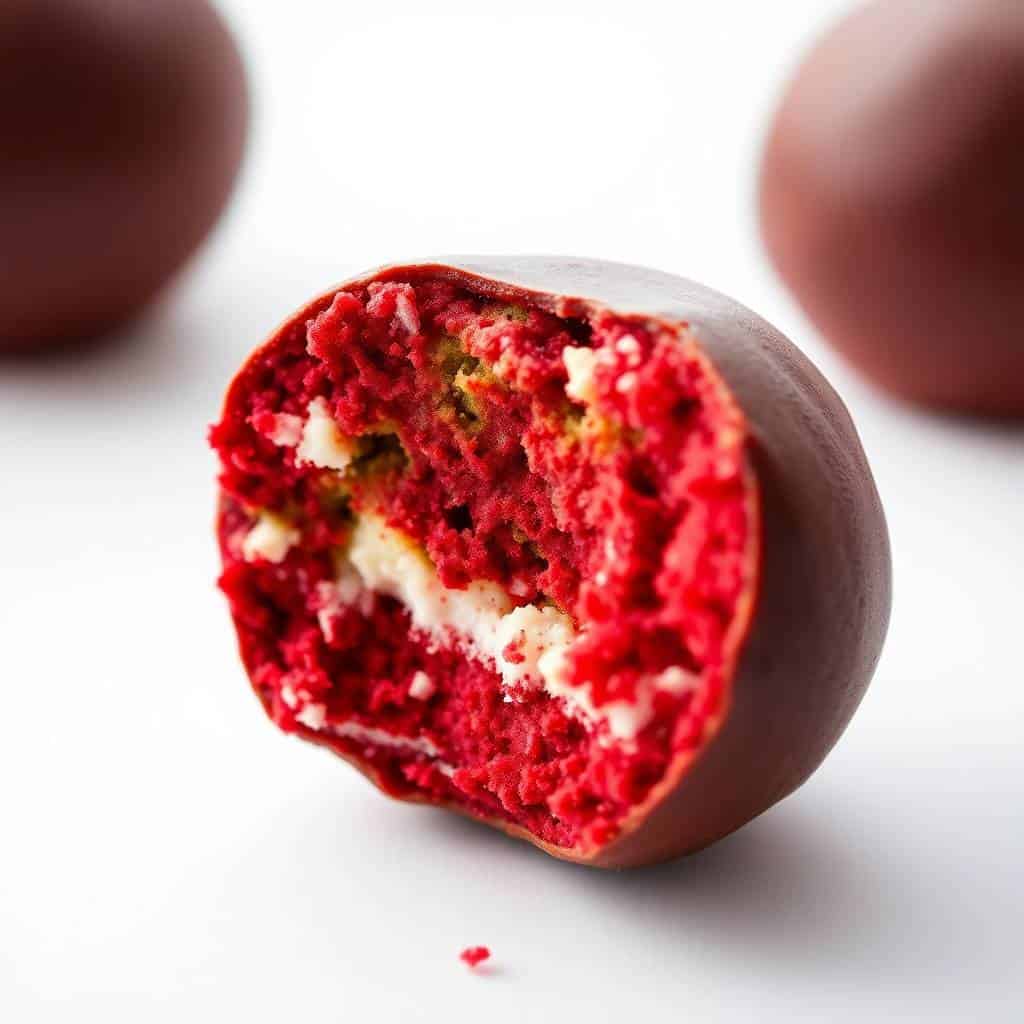
- Don't add too much frosting: This is the most common mistake I see and I made it myself the first couple of times. If the mixture gets too wet, it won't hold its shape and you'll end up with flat discs instead of balls. Add the frosting gradually — two tablespoons at a time — and stop the moment the mixture comes together. It should feel like Play-Doh, not cake batter.
- Chill longer than you think you need to: I know 1-2 hours feels like a long wait, but it genuinely matters. The cold firms up the fat in the frosting and holds everything together during the dipping step. If your kitchen runs warm (mine does in summer), put the tray in the freezer for 30 minutes instead of the fridge for an hour — same result, faster.
- Keep your chocolate warm while you work: Melted chocolate thickens as it cools, which makes dipping harder and the coating thicker than you want. I set my bowl of chocolate over a larger bowl of just-boiled water (like a DIY double boiler) to keep it fluid while I dip. It makes the whole process much smoother and the coating comes out thinner and glossier.
- Work in small batches from the fridge: Don't pull all your chilled cake balls out at once. Take out 6-8 at a time and leave the rest in the fridge. The moment they start warming up, they get soft and difficult to dip. Keeping most of them cold while you work through the batch makes the whole thing much less stressful.
- Add decorations immediately after dipping: Chocolate sets faster than you expect, especially if your kitchen is cool. Have your sprinkles and toppings right next to your dipping station so you can add them within 10-15 seconds of dipping each ball. If you wait too long, the decorations won't stick and will just slide off when the chocolate hardens.
Variations
- White chocolate coating: Swap the dark or milk chocolate for white chocolate melting wafers. The white coating against the deep red interior looks really striking when you bite into one. White chocolate is a bit sweeter than dark, so I'd hold back slightly on the frosting to balance it. Zainab always votes for this version.
- Mocha twist: Mix a teaspoon of espresso powder into the cake crumbs before adding the frosting. It doesn't make these taste like coffee — it just deepens the chocolate flavor in a way that tastes really intentional. My husband prefers this version. Serve these alongside a cup of tea and they're genuinely special.
- Gluten-free version: Use a gluten-free red velvet cake mix — brands like King Arthur and Bob's Red Mill make good ones you can find at most grocery stores. Check that your frosting and chocolate are also gluten-free (most are, but it's worth reading the label). The texture is virtually identical to the original.
- Peanut butter drizzle: After the chocolate coating sets, melt 2 tablespoons of peanut butter (the smooth kind) in the microwave for 20 seconds and drizzle it over the top with a spoon. It adds a salty-sweet contrast that works really well with the cream cheese and chocolate. This is my personal favorite variation — I make it for myself when the kids aren't looking.
- Holiday themed: This is less a flavor change and more a decorating approach. Red and green sprinkles for Christmas. Pink candy melts with white drizzle for Valentine's Day. Orange and black for Halloween. The base recipe is the same every time — you just swap the toppings. I pack these in small boxes with tissue paper for a homemade gift that takes about 10 minutes to put together.
Serving and Storage
Serving
I serve these at room temperature when I remember to pull them out of the fridge 15-20 minutes before serving. Cold cake balls taste fine, but at room temperature the inside softens up slightly and the flavor comes through better. Set them out in mini cupcake liners on a plate — they look much more put-together that way without any extra effort. If you're putting together a party spread, these go really well next to something tropical to drink, like my tropical pineapple lemonade punch, which balances the richness of the chocolate coating nicely.
Storage
Store finished cake balls in an airtight container in the fridge for up to 5 days. I layer them with parchment paper so they don't stick together. For longer storage, freeze them in a single layer on a baking sheet until solid, then transfer to a zip-lock freezer bag — they keep well for up to 3 months. Thaw in the fridge overnight or at room temperature for 20 minutes before serving. Don't refreeze after thawing.

Frequently Asked Questions
Can I use homemade red velvet cake instead of a box mix?
Yes, absolutely. I've done it both ways and the result is very similar. If you're using homemade cake, just make sure it's completely cooled before crumbling — even slightly warm cake will make the mixture too wet and sticky to roll. A dense, moist red velvet crumbles better than a very airy one, so if you have a go-to recipe that's on the denser side, use that one.
Why are my cake balls falling apart when I dip them?
Almost always this comes down to two things: not enough chilling time, or too much frosting in the mixture. The balls need to be very firm and cold going into the chocolate — if they're even slightly soft they'll crack or crumble under the weight of the coating. Chill for at least 1 full hour, and if your kitchen is warm, try the freezer for 30 minutes instead.
Can I make these ahead of time?
These are genuinely one of the best make-ahead desserts I know. You can bake the cake a day or two ahead, then roll and chill the balls the night before, and dip them the day you need them. Or do the whole thing — dipping included — up to 5 days in advance and keep them refrigerated. They actually taste better after a day in the fridge once the chocolate has fully set and the flavors have settled.
What type of chocolate works best for dipping?
Melting wafers (like Ghirardelli or Wilton Candy Melts) are the easiest to work with because they're designed to melt smoothly and set with a nice finish. Regular chocolate chips work too, but they can be temperamental — they sometimes seize up or don't set properly. If you're using regular chocolate bars or chips, add about a teaspoon of coconut oil to help it melt more evenly and give it a glossier coating.
Can I freeze red velvet cake balls?
Yes, and they freeze really well. I freeze them after dipping and decorating — lay them on a parchment-lined tray in a single layer until solid (about 2 hours), then transfer to a zip-lock bag. They'll keep for up to 3 months. To serve, thaw in the fridge overnight or leave them at room temperature for 20 minutes. The chocolate coating stays intact and the texture is just as good as fresh.
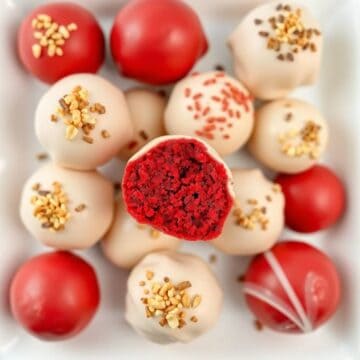
RED VELVET CAKE BALLS
Ingredients
- 1 box red velvet cake mix plus ingredients called for on box
- ½ cup cream cheese frosting
- 8 oz white or dark chocolate melted
- Optional toppings: sprinkles crushed nuts, or cocoa powder
Instructions
- Bake the Cake: Prepare and bake the red velvet cake according to package instructions. Allow to cool completely.
- Crumble the Cake: Crumble cooled cake into a large bowl. Mix in cream cheese frosting until fully combined.
- Form Cake Balls: Roll mixture into 1-inch balls and place on a parchment-lined baking sheet. Chill in the refrigerator for 30 minutes.
- Dip in Chocolate: Using a fork or skewer, dip each cake ball into melted chocolate, allowing excess to drip off. Place back on parchment paper.
- Decorate: Add sprinkles, crushed nuts, or cocoa powder before chocolate sets, if desired.
- Serve: Allow chocolate to fully set before serving. Store chilled.
Notes
- Make Ahead: Cake balls can be made a day in advance and stored in the refrigerator.
- Customizing the Flavor: Add a pinch of espresso powder for a mocha twist or drizzle contrasting chocolate for extra flair.
- Serving Suggestions: Serve at parties, holiday gatherings, or as a sweet gift in decorative boxes.
- Allergy-Friendly Options: Use dairy-free chocolate and frosting to make them vegan-friendly.
- Storage Tips: Store in an airtight container in the refrigerator for up to 5 days. Bring to room temperature before serving for best texture.
These red velvet cake balls have become one of those recipes I come back to repeatedly because they solve a real problem: what do I do when I want to bring something impressive to a gathering but I don't have three hours to spend baking? The answer is this. Bake the cake the night before, do the rolling and dipping in under an hour the next day, and show up with something that looks like it came from a bakery.
I also appreciate that this recipe is genuinely flexible. I've made it with box mix when I'm tired, with homemade cake when I have the time, with dark chocolate when my husband is around, and with white chocolate and pink sprinkles when Zainab gets to choose. The base stays the same and it works every time. If you like making no-bake or minimal-fuss desserts, my s'mores sushi recipe has a similar energy — fun, simple, and always a hit at the table.
If you make these, I really hope you let the chilling step do its thing. I know it's tempting to rush, but the difference between a properly chilled ball and an under-chilled one is the difference between clean dipping and a chocolatey mess. Give yourself the time and the whole process is genuinely enjoyable. Now go make a double batch — you'll be glad you did. 🍫❤️
If you liked these, here are a few more recipes from my kitchen you might want to try next:
- Birthday Cookie Bars — colorful, easy, and great for any celebration
- S'mores Sushi Recipe — a fun no-bake dessert the whole family can make together
- Pumpkin Cinnamon Rolls — for when you want something warm and cozy from the oven
- Tropical Pineapple Lemonade Punch — the drink I always make when I'm serving these at a party
- Butter Biscuits — a simple baked treat when you want something on the savory side