
These Heart-Shaped Brownies are a delightful and festive twist on the classic brownie, guaranteed to add a touch of love to any occasion.
Imagine rich, fudgy, chocolatey brownies baked to perfection and then lovingly transformed into charming heart shapes.
Whether you're celebrating Valentine's Day, an anniversary, a birthday, or simply want to show someone you care, these brownies are a sweet and heartfelt gesture.
They're perfect for sharing with loved ones, gifting to friends, or enjoying a special treat for yourself.
This recipe is designed to be easy to follow, even for beginner bakers, and offers plenty of room for creativity with decorations.

Why You'll Love This Recipe
- Perfect for Valentine's Day: The heart shape makes these brownies the quintessential Valentine's Day treat, deliciously expressing love and affection.
- Fudgy and Chewy Goodness: This recipe is specifically crafted to deliver perfectly fudgy and chewy brownies, the texture everyone craves.
- Easy to Make (and Fun!): This recipe is simple and straightforward, making it a fun and accessible baking project for all skill levels, even involving kids.
- Versatile and Customizable: Decorate them with frosting, sprinkles, and chocolate drizzles, or leave them elegantly plain – the choice is yours, allowing for personal touches and creativity.
- Homemade with Love: These brownies are a thoughtful and heartfelt gift, showing that you put time and effort into creating something special.
Ingredients
For the Brownies:
- ½ cup (1 stick) unsalted butter, melted
- 1 cup granulated sugar
- ¾ cup unsweetened cocoa powder (high-quality, Dutch-processed recommended)
- ¼ teaspoon salt
- 2 large eggs
- 1 teaspoon pure vanilla extract
- ½ cup all-purpose flour
For the Decoration (Optional):
- Your favorite frosting (store-bought or homemade, in Valentine's Day colors)
- Sprinkles (heart-shaped or Valentine's Day-themed)
- Melted chocolate (white, milk, or dark, for drizzling)
- Fresh berries (strawberries or raspberries, for a touch of freshness)
Directions
- Step 1: Prepare the Pan
Preheat oven to 350°F (175°C). Grease and line an 8x8-inch baking pan with parchment paper, leaving an overhang for easy removal.
- Using parchment paper is crucial for clean cuts and easy removal of the brownies.
- Step 2: Combine Wet Ingredients
In a large bowl, whisk together the melted butter, granulated sugar, high-quality cocoa powder, and salt until well combined.
- Using Dutch-processed cocoa will give a richer, deeper chocolate flavor.
- Step 3: Add Eggs and Vanilla
Beat in the eggs one at a time, then stir in the pure vanilla extract. Use pure vanilla for the best flavor.
- Step 4: Add Flour
Gradually add the all-purpose flour to the wet ingredients, mixing until just combined. Be careful not to overmix, as this can lead to tough brownies.
- Step 5: Bake
Pour the batter into the prepared baking pan and spread evenly.
- Bake for 25-30 minutes, or until a toothpick inserted into the center comes out with a few moist crumbs attached.
- The key to fudgy brownies is to slightly underbake them.
- Step 6: Cool
Let the brownies cool completely in the pan before cutting. This is important for clean cuts and prevents the brownies from crumbling.
- Step 7: Cut into Hearts
Once the brownies are completely cooled, use a heart-shaped cookie cutter to cut out heart shapes.
- Choose a cookie cutter size that maximizes the number of hearts you can get from the pan.
- You may need to gently press the cookie cutter through the brownie. You can also use a sharp knife to cut heart shapes freehand if you are feeling artistic.
- Step 8: Decorate (Optional)
Decorate the heart-shaped brownies with frosting (in Valentine's Day colors like pink, red, or white), sprinkles, melted chocolate drizzles, or fresh berries for a touch of elegance.
- Get creative and have fun with the decorations!

Serving and Storage
Serving Suggestions
These Heart-Shaped Brownies are delicious served warm or at room temperature.
They are perfect for sharing with loved ones on Valentine's Day, packaging as gifts, or enjoying as a sweet treat any time of year.
Storage
- Storing at Room Temperature: Store cooled brownies in an airtight container at room temperature for up to 3 days.
- Refrigerating: For longer storage, store the brownies in an airtight container in the refrigerator for up to 1 week. Bring to room temperature before serving for the best texture.
Tips for Success
- Use High-Quality Cocoa Powder: High-quality, Dutch-processed cocoa powder will significantly enhance the chocolate flavor of the brownies.
- Don't Overmix: Overmixing the batter can result in tough brownies. Mix until just combined.
- Don't Overbake: Overbaking will result in dry brownies. The brownies should be slightly fudgy in the center.
- Cool Completely: Allowing the brownies to cool completely before cutting is crucial for preventing them from crumbling and ensuring clean heart shapes.
- Use a Sharp Cookie Cutter: A sharp heart-shaped cookie cutter will make it easier to cut clean shapes.
Variations
- Chocolate Covered Strawberry Heart Brownies: Drizzle melted chocolate over the cooled heart-shaped brownies and top with sliced strawberries for a romantic touch.
- Cream Cheese Swirl Heart Brownies: Swirl a cream cheese mixture (tinted pink or red) into the brownie batter before baking for added flavor and visual appeal.
- Nutty Heart Brownies: Add chopped nuts, such as walnuts or pecans, to the batter for added texture and flavor.
- Salted Caramel Heart Brownies: Drizzle the baked and cooled heart brownies with caramel sauce and sprinkle with sea salt for a sweet and salty treat.
- Different Frosting Flavors: Use different frosting flavors, such as vanilla, cream cheese, strawberry, or raspberry, to complement the chocolate.
FAQs
Yes, you can use a different size pan, but you will need to adjust the baking time accordingly. Thinner brownies will bake faster.
Frozen strawberries are not recommended for this recipe as they will add excess moisture. Fresh strawberries are best.
Yes, these brownies are best made ahead of time to allow the flavors to meld together.
This can be caused by overbaking or using too much flour. Proper baking time and accurate measurements are key.
Yes, you can add other decorations such as sprinkles, chocolate chips, edible glitter, or even small candies.
These Heart-Shaped Brownies are a delightful and easy treat, perfect for expressing your love and celebrating special occasions.
The combination of fudgy chocolate, the charming heart shape, and the potential for creative decorations makes them a truly special dessert.
Whether you're baking them for a romantic gesture, a gift for friends, or just a sweet treat for yourself, these brownies are sure to be a hit.
Enjoy the rich chocolate flavor, the festive heart shape, and the satisfyingly chewy texture of these delicious brownies.
They're a perfect blend of classic brownie goodness and a touch of love, making them a memorable and delicious way to share your heart.

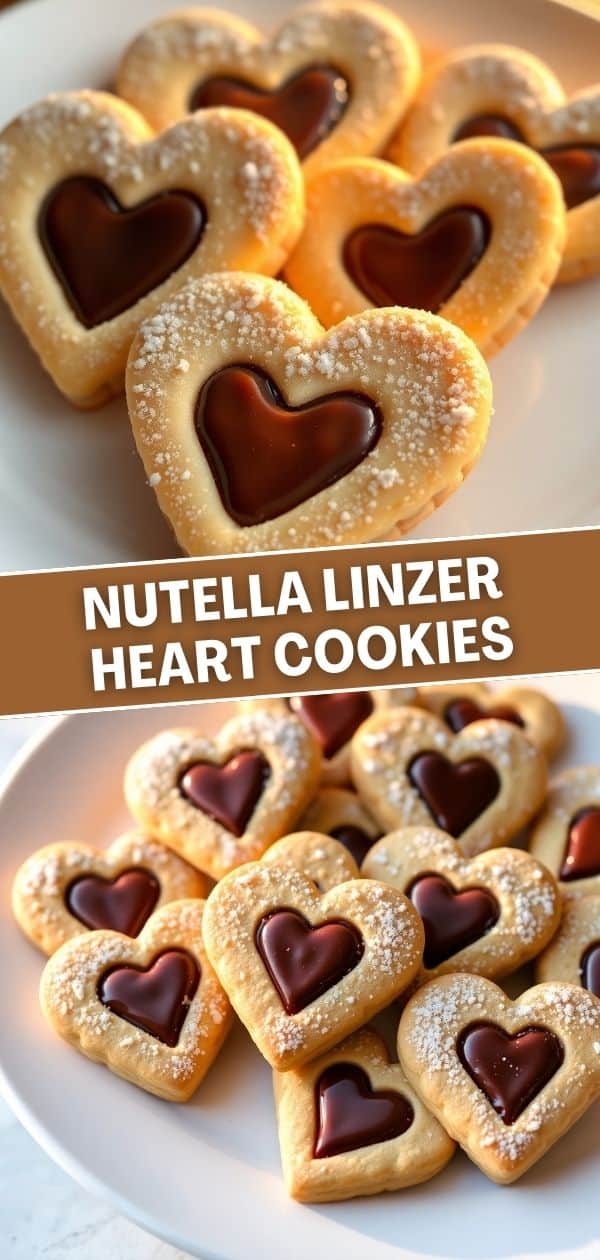
NUTELLA LINZER HEART COOKIES
Ingredients
Dough
- 1 cup (2 sticks) unsalted butter, softened
- ½ cup granulated sugar
- ¼ cup almond flour (or finely ground almonds)
- 1 teaspoon vanilla extract
- 2 ¼ cups all-purpose flour
- ¼ teaspoon salt
Filling
- 1 jar (13 ounces) Nutella
Garnish (optional)
- Powdered sugar
Instructions
- Cream butter and sugar: In a large bowl, cream together the softened butter and granulated sugar until light and fluffy, about 2-3 minutes using an electric mixer.
- Add almond flour and vanilla: Stir in the almond flour and vanilla extract.
- Combine dry ingredients: In a separate bowl, whisk together the all-purpose flour and salt.
- Combine wet and dry ingredients: Gradually add the dry ingredients to the wet ingredients, mixing on low speed until just combined. Do not overmix.
- Chill the dough: Cover the dough and refrigerate for at least 2 hours, or preferably overnight. This chilling period is crucial for preventing spreading and making the dough easier to handle.
- Preheat and prepare: Preheat oven to 350°F (175°C). Line baking sheets with parchment paper.
- Roll and cut: On a lightly floured surface, roll out the chilled dough to about ¼ inch thickness. Use heart-shaped cookie cutters (you'll need two sizes – one larger for the bottom and one smaller for the cutout in the top) to cut out the cookies. For half of the cookies, use the smaller cutter to cut out a heart shape in the center.
- Bake: Place the cookies on the prepared baking sheets, leaving about 1 inch between cookies. Bake for 10-12 minutes, or until the edges are lightly golden brown. Be careful not to overbake.
- Cool: Let the cookies cool on the baking sheets for a few minutes before transferring them to a wire rack to cool completely.
- Assemble the cookies: Once the cookies are completely cooled, spread about 1 teaspoon of Nutella on the flat side of each bottom cookie (the ones without the cutout). Top with a cut-out cookie.
- Dust with powdered sugar (optional): Dust the assembled cookies with powdered sugar, if desired.
Notes
- Almond Flour: Almond flour adds a delicate nutty flavor and texture to the cookies. If you don't have almond flour, you can finely grind whole almonds yourself.
- Chilling: Chilling the dough is essential for preventing the cookies from spreading too much and for making the dough easier to handle. Don't skip this step!
- Cookie Cutters: Using different sized heart-shaped cookie cutters is key for creating the classic Linzer cookie look.
- Nutella Filling: Nutella is the traditional filling for Linzer cookies, but you can use other fillings, such as jam, preserves, or even peanut butter.
- Storage: Store cooled cookies in an airtight container at room temperature for up to 5 days.





Comments
No Comments