
I made these cheesecake jars for the first time when I needed something for a last-minute gathering and genuinely couldn't face turning the oven on. It was the middle of summer, the kitchen was already warm, and I'd promised dessert. Thirty minutes later I had eight little jars in the fridge, and when I pulled them out an hour before serving they looked like something out of a café display. That never happens to me on a rushed day.
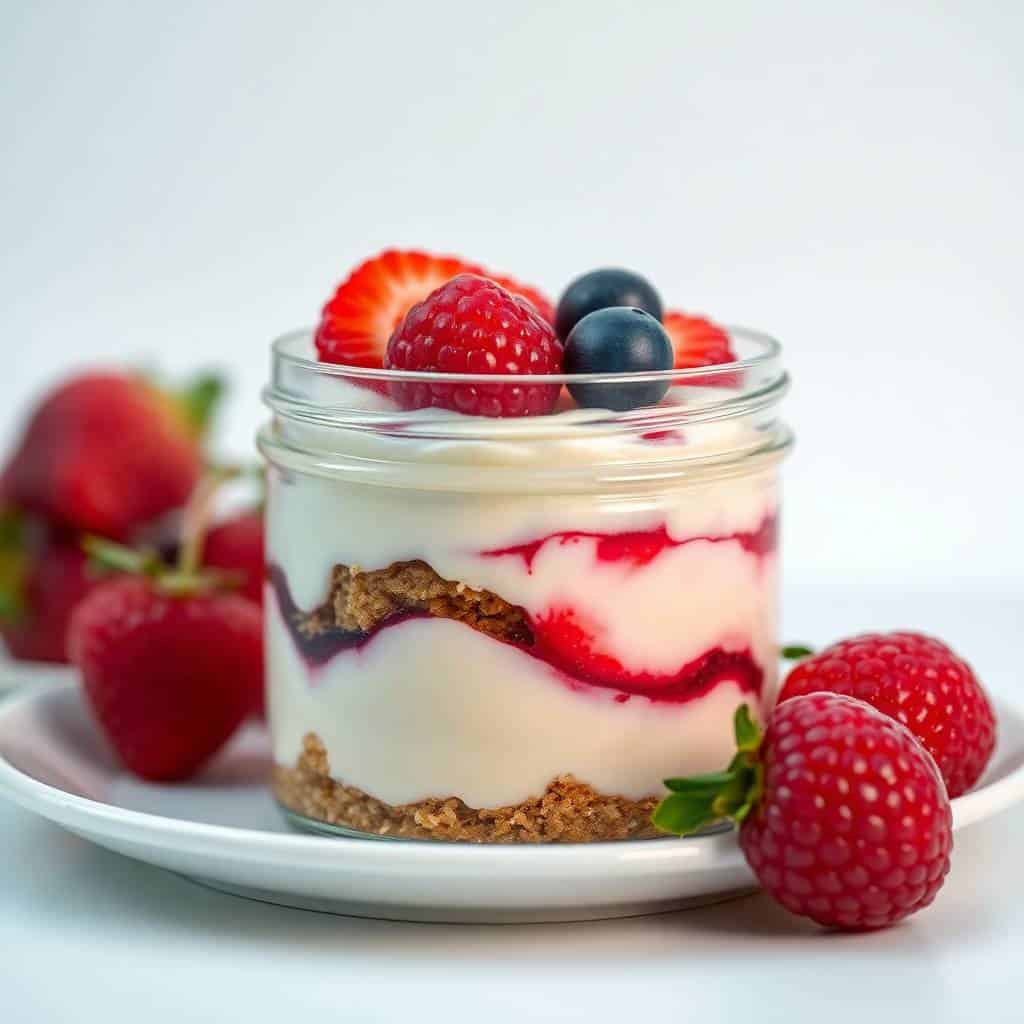
What makes these work is the filling — real cream cheese beaten smooth, folded together with whipped cream that you whip cold and stiff. The first time I tried making something like this I used whipped topping from a tub and it was fine but a bit flat. Switching to actual heavy whipping cream made the texture noticeably lighter and richer at the same time, which sounds contradictory but just try it and you'll see. The graham cracker crust pressed into the bottom of each jar is buttery and holds its shape well when you scoop through it with a spoon.
Zainab immediately claimed these as her favorite dessert, which is saying something because she usually only cares about chocolate. She likes hers with blueberries on top; my husband piles on strawberries. I usually do a mix of both because it looks pretty and I don't have to choose. If you have a party coming up and want something you can prep the night before without any stress on the day, this is the one. If you like make-ahead desserts like this, my Mini Pineapple Upside-Down Cheesecakes follow the same stress-free approach.
One thing to set expectations on: these need at least two hours in the fridge to properly set, so you can't rush them at the very end. I usually make them the night before and they come out perfectly firm and sliceable with a spoon by the next day. Make sure your cream cheese is fully at room temperature before you start or you'll have lumps in the filling that no amount of beating will fix — I learned that the hard way.

Why You'll Love This Recipe
- No oven, no stress: I've made this in July when turning on the oven wasn't happening, and I've made it in December when the oven was already full of other things. You don't need any heat at all — just a bowl, a hand mixer, and a fridge. It's genuinely one of the easiest desserts I make.
- Pre-portioned and easy to serve: No slicing, no plating, no serving spoon drama. Each jar is its own individual dessert, which means you hand them out and everyone gets an equal, neat portion. At picnics and potlucks this is a game changer — just pack the jars in a cooler bag and go.
- Make it the night before: The jars actually taste better after sitting in the fridge overnight, because the crust softens just slightly and the filling firms up fully. I make a double batch the evening before any gathering because one batch disappears before I even get a jar for myself.
- Works with whatever fruit you have: Strawberries and blueberries are my go-to, but I've used raspberries, canned cherry pie filling, and even a spoonful of mango pulp. The creamy base pairs well with almost any fruit, so you're not locked into one combination.
- Kids eat it without complaint: That is honestly a high bar in my house. These are sweet, creamy, easy to eat with a little spoon, and don't require any weird ingredients that kids pick around. Zainab has asked for these at her last two birthday dinners.
Ingredients
- For the Crust:
- 1 cup graham cracker crumbs (about 8 full sheets, crushed — a zip-lock bag and a rolling pin works fine)
- 3 tablespoons unsalted butter, melted
- 1 tablespoon granulated sugar
- For the Cheesecake Filling:
- 8 oz cream cheese, softened to room temperature (full-fat, like Philadelphia)
- ½ cup powdered sugar
- 1 teaspoon vanilla extract
- 1 cup heavy whipping cream, cold
- For the Topping:
- 1 cup fresh strawberries, chopped
- 1 cup fresh blueberries
- Optional: a spoonful of strawberry jam swirled on top, or fresh mint leaves for garnish
Directions
- Make the crust: In a bowl, mix the graham cracker crumbs, melted butter, and sugar together until the crumbs look like wet sand and hold together when you press a pinch between your fingers. Spoon 2 to 3 tablespoons into the bottom of each jar and press down firmly with the back of a spoon or the bottom of a small glass. A firm crust means it won't crumble apart when you dig in.
- Beat the cream cheese: In a large bowl, beat the softened cream cheese with a hand mixer on medium speed until it's completely smooth — no lumps at all. This step is where most people rush and regret it later. Take two full minutes here and add the powdered sugar and vanilla only once the cream cheese is genuinely smooth.
- Whip the cream: In a separate cold bowl, beat the cold heavy whipping cream on high speed until stiff peaks form. This takes about 3 to 4 minutes with a hand mixer. Cold cream whips much faster and holds its peaks better — I pop my bowl in the freezer for 10 minutes before I start.
- Fold the filling together: Add the whipped cream to the cream cheese mixture in two or three additions, folding gently with a rubber spatula. Don't stir or beat — folding keeps the air in and the texture stays light. Stop as soon as it's just combined and looks smooth and fluffy.
- Fill the jars: Spoon or pipe the cheesecake filling over the crust in each jar. A piping bag gives you cleaner layers, but a spoon works perfectly well — just smooth the tops with the back of the spoon.
- Add the fruit topping: Pile on the chopped strawberries and blueberries. If you're using jam, swirl a small spoonful on top with a toothpick for a marbled look. Add mint leaves if you want them to look extra put-together.
- Chill before serving: Cover each jar with a lid or a piece of plastic wrap and refrigerate for at least 2 hours. Overnight is even better. Serve cold, straight from the jar.
Tips for Success
- Room temperature cream cheese is non-negotiable: I've tried to rush this by using cold cream cheese and it ends up with little white lumps scattered through the filling that won't smooth out no matter how long you beat it. Take the cream cheese out of the fridge at least 45 minutes before you start. If you forgot, cut it into small cubes and let it sit for 20 minutes — it softens faster that way.
- Keep the cream cold until the moment you whip it: Warm cream doesn't whip — it just sloshes around in the bowl and never reaches stiff peaks. Keep it in the fridge until you're ready, and if your kitchen is very warm, set the bowl over a larger bowl of ice while you work. I usually pop both my bowl and the beaters in the freezer for about 10 minutes before whipping.
- Press the crust down firmly: A loosely packed crust will crumble and mix into the filling the moment you put a spoon in. Use the flat bottom of a small glass or a spice jar to really compact it. It should look solid and hold its shape when you tap the side of the jar.
- Fold, don't stir: I overworked the filling on my second attempt by stirring too vigorously and it came out denser than I wanted — still good, but not that light, mousse-like texture that makes these so satisfying. Use a rubber spatula and fold in big, slow, circular scoops from the bottom of the bowl up and over the top.
- Add fresh fruit right before serving, not before chilling: If you put cut strawberries on top and then refrigerate overnight, they release juice that can make the top of the filling look watery and a bit grey. I put the filling in and chill, then add the fresh fruit within an hour of serving. The jars look much fresher this way.
Variations
- Lemon cheesecake jars: Add 1 tablespoon of fresh lemon juice and 1 teaspoon of lemon zest to the cream cheese mixture before folding in the whipped cream. It makes the filling taste noticeably brighter and lighter. Top with raspberries instead of strawberries and it looks beautiful. This is my personal favorite version — I've made it more times than the original.
- Chocolate peanut butter jars: Swap the graham cracker crust for crushed Oreos, and mix 3 tablespoons of smooth peanut butter into the cream cheese before adding the sugar. Top with mini peanut butter cups or chocolate shavings instead of fruit. My husband thinks this version is better than the original. I'm not sure he's wrong.
- Berry jam swirl: Skip the fresh fruit and spoon 1 teaspoon of strawberry or blueberry jam onto the top of each filled jar. Use a toothpick to swirl it into the filling for a marbled look. This works really well when fresh berries are out of season or expensive — a $3 jar of jam goes a long way across eight servings.
- Salted caramel topping: Drizzle a tablespoon of store-bought salted caramel sauce over the top of each jar right before serving and add a small pinch of flaky salt. The contrast against the tangy cream cheese filling is genuinely good. This is the version I make when I want something that feels a bit more special without much extra work.
- Tropical topping: Spoon mango pulp or passion fruit over the top instead of berries. This is not a combination I would have thought to try but someone suggested it in the comments of a similar recipe I shared, and I tried it on a whim. It works. The tropical fruit cuts through the richness of the cream cheese in a way that feels genuinely refreshing.
Serving and Storage
Serving
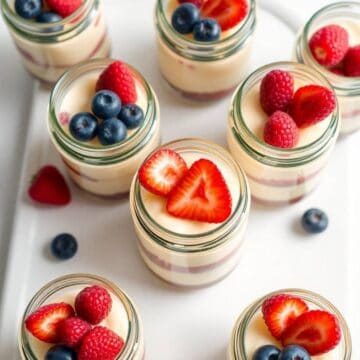
Serve the jars cold, straight from the fridge. They don't need any plating — that's the whole point. I set them out on a tray with small spoons tucked in and people help themselves. If you're packing them for a picnic or potluck, screw the lids on and pack them in a cooler bag. Add the fresh fruit topping within an hour of serving so it stays bright and fresh-looking. These pair nicely alongside something more chocolatey if you're doing a dessert spread — I sometimes set them out next to my Chocolate Lava Cakes for a mix of light and rich.
Storage
Cover each jar with a lid or plastic wrap and keep in the refrigerator for up to 3 days. The filling holds up well; the only thing that changes is the crust softens a little more each day, which some people actually prefer. I don't recommend freezing these — the cream cheese filling gets grainy and the texture after thawing is unpleasant. If you want to prep ahead for a party, make the jars up to 2 days in advance and add the fresh fruit the day you serve.

Frequently Asked Questions
Can I make these cheesecake jars the night before?
Yes, and I'd actually encourage it. The filling sets more firmly overnight and the flavors settle together nicely. Just hold off on adding the fresh fruit topping until the day you serve — add it within an hour of serving so it looks fresh rather than watery.
What size jars work best for this recipe?
I use 4 oz or 6 oz mason jars — the small Ball jars you find at Walmart or Target work perfectly. Clear plastic cups work too if you're serving at a party and don't want to worry about glass. Avoid anything too wide or too tall; you want the crust-to-filling ratio to work out with each spoonful.
Can I use whipped topping instead of heavy cream?
You can. I've done it when I was out of heavy cream and it's a perfectly fine shortcut. The filling won't be quite as light and airy as when you whip real cream yourself, but it still tastes good and sets well. Use the same amount — 1 cup — and fold it in gently the same way.
Can I freeze these cheesecake jars?
I wouldn't. I tried freezing two leftover jars once out of curiosity, and after thawing in the fridge overnight the texture of the filling was grainy and a bit separated. These keep well in the fridge for 3 days, so just make only what you'll eat within that window.
My filling has lumps — what went wrong?
Almost always it's the cream cheese. If it wasn't fully at room temperature before you started beating it, it doesn't smooth out completely and leaves little white lumps that won't disappear no matter how long you mix. Unfortunately there's not a great fix once it happens — you can push the mixture through a fine sieve, but it's easier to just start again with properly softened cream cheese. Leave it out for at least 45 minutes next time.
NO-BAKE CHEESECAKE JARS
Ingredients
For the Crust:
- 1 cup graham cracker crumbs
- 3 tablespoons unsalted butter melted
- 1 tablespoon granulated sugar
For the Cheesecake Filling:
- 8 oz cream cheese softened
- ½ cup powdered sugar
- 1 teaspoon vanilla extract
- 1 cup heavy whipping cream cold
For Topping:
- 1 cup fruit topping strawberries, blueberries, cherry pie filling, etc.
- Optional: fresh berries or mint for garnish
Instructions
Make the Crust:
- In a bowl, mix graham cracker crumbs, melted butter, and sugar until combined. Spoon 2–3 tablespoons into the bottom of each jar and press down gently.
Prepare Cheesecake Filling:
- In a large bowl, beat cream cheese until smooth. Add powdered sugar and vanilla, then mix until creamy. In a separate bowl, beat cold heavy cream until stiff peaks form. Fold whipped cream into the cream cheese mixture.
Assemble Jars:
- Spoon or pipe cheesecake filling over crust in each jar. Smooth the tops.
Add Toppings:
- Top each jar with fruit topping or fresh berries. Garnish with mint if desired.
Chill:
- Cover and refrigerate for at least 1–2 hours before serving.
Notes
- Make Ahead: Can be made up to 2 days ahead and stored in the fridge.
- Jar Size Tip: Use 4–6 oz mason jars or small clear cups.
- Flavour Variations: Add lemon zest, chocolate chips, or swap fruit toppings.
- No Cream Option: Use whipped topping instead of whipped cream for convenience.
- Serving Tip: Serve chilled straight from the jar—no mess, no slicing.
These cheesecake jars have quietly become one of my most-made desserts, which surprised me because I didn't expect something this simple to stick around the rotation. I make them whenever I need a dessert I can actually prepare the day before without worrying about it falling apart or going wrong. There's real comfort in opening the fridge on the day of a gathering and seeing a tray of finished, already-perfect desserts just sitting there waiting.
I love that the recipe is forgiving once you get the cream cheese right. After that one lumpy-filling disaster, I've never had a batch go wrong. The lemon variation is my personal favorite, but the original berry version is what gets the most requests from anyone who's tried them. If you're looking for something else no-bake and individual-portioned to round out a dessert table, my Mini Pineapple Upside-Down Cheesecakes are worth a look — different flavor entirely, same stress-free approach.
If you make these, I'd love to know what topping you went with. The salted caramel version especially — I feel like not enough people try it. These are the kind of dessert that looks like you put in a lot more effort than you actually did, and I appreciate that more than I can say. 🍓🫐✨
If you liked this recipe, here are a few more you might want to try:
- Mini Pineapple Upside-Down Cheesecakes — individual, no-fuss, and a fun flavor twist
- Chocolate Lava Cakes — for when you want something warm and deeply chocolatey
-
{"@context":"https://schema.org","@type":"Article","headline":"NO-BAKE CHEESECAKE JARS","description":"No-bake cheesecake jars are creamy, portable, and festive—perfect for parties, BBQs, and July 4th celebrations with red, white, and blue flair.","datePublished":"2025-07-03T07:16:18+00:00","dateModified":"2026-05-03T21:07:20+00:00","author":{"@type":"Person","name":"Sana Umer","url":"https://forfoodiefriends.com/about/","description":"Self-taught home cook with 10+ years of kitchen experience. Mom of two who develops every recipe in her own kitchen.","jobTitle":"Recipe Developer & Food Blogger","image":"https://forfoodiefriends.com/wp-content/uploads/sana-umer-author-photo.jpg"},"publisher":{"@type":"Organization","name":"For Foodie Friends","url":"https://forfoodiefriends.com/","logo":{"@type":"ImageObject","url":"https://forfoodiefriends.com/wp-content/uploads/forfoodiefriends-logo.png"}},"mainEntityOfPage":{"@type":"WebPage","@id":"https://forfoodiefriends.com/no-bake-cheesecake-jars/"},"image":"https://forfoodiefriends.com/wp-content/uploads/2025/07/NO-BAKE-CHEESECAKE-JARS.jpg"}






Comments
No Comments