
My mother never measured anything when she made cream puffs. She'd just look at the dough and say "that's enough" — and somehow it always was. I spent years trying to recreate what she made from memory, and I'm not going to pretend it went smoothly the first time. Or the second. The third batch was when something finally clicked, and I wrote every step down before I could forget it.
What makes this version work is the custard filling — rich, set, and not too sweet. The WPRM card below uses whipped cream as the filling (which is also lovely and lighter), but the custard version I detail in the directions section is what my family knows as the real one. You can use either depending on the occasion and how much time you have. If you're new to choux pastry, don't be intimidated — the dough comes together in one pot and the oven does most of the work. I've also got some great no-bake options on the site if baking isn't your thing right now, like these Strawberry Cheesecake Bites that require zero oven time.
Zainab goes absolutely quiet when I put these on the table, which in my house means she loves something. My husband prefers them dusted with powdered sugar and chilled. Saad wants chocolate drizzled on top — always. I usually make a batch and a half because a single batch disappears before I've even finished washing the saucepan.
One thing I'll say upfront: the custard filling needs at least an hour in the fridge to set properly. Don't rush it. I've tried to shortcut that step and ended up with warm, runny custard squirting out of the sides. Plan ahead — make the filling first, let it chill while you bake the shells, and everything comes together cleanly.
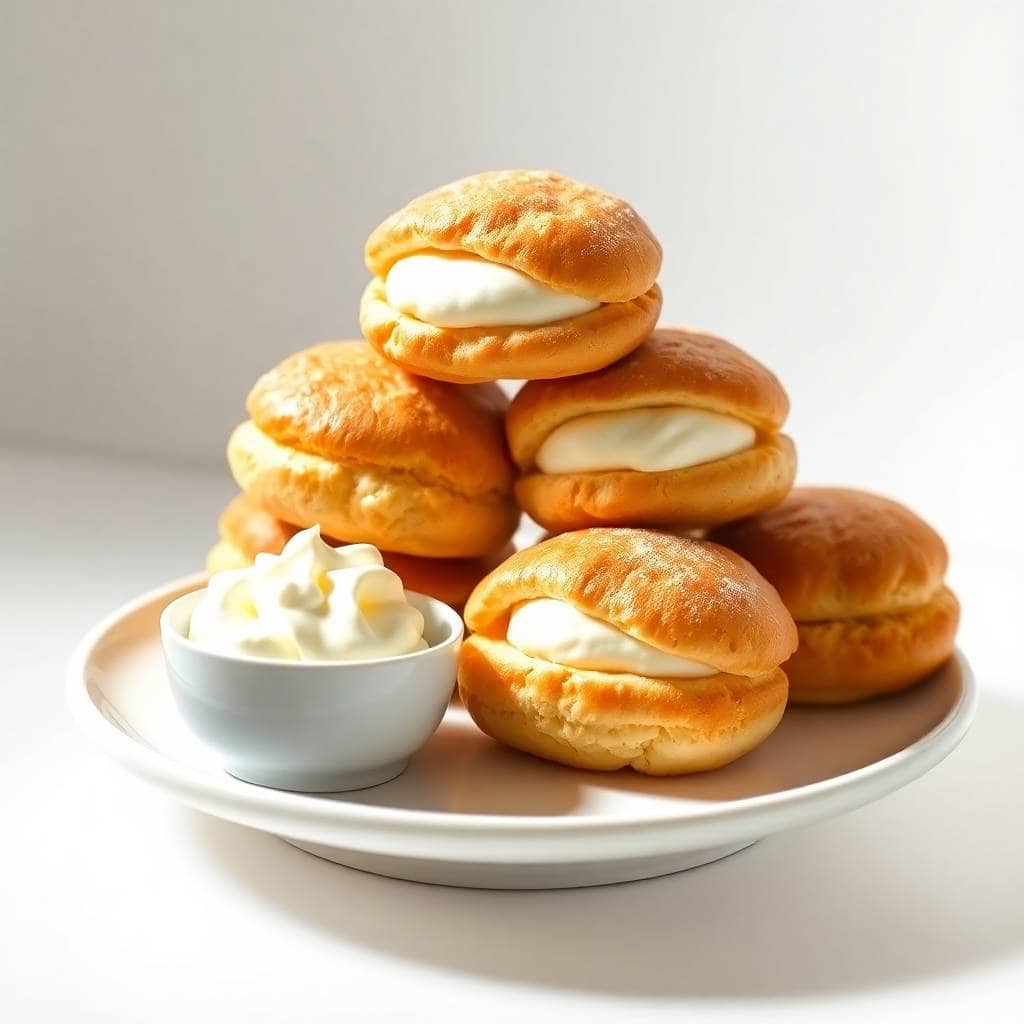
Why You'll Love This Recipe
- One pot for the dough: The choux pastry comes together in a single saucepan, which means minimal cleanup for something that looks this impressive. I use a medium heavy-bottomed pot I've had for years — nothing fancy. You don't need any special equipment to pull this off, just a wooden spoon and a little arm strength.
- The ingredients are already in your kitchen: Water, butter, flour, eggs, milk, sugar — that's basically it. I've made these on a random Tuesday with no planning because I already had everything on hand. No specialty store run, no strange ingredients, nothing you'd have to order online.
- They look like you bought them from a bakery: Golden, puffed, dusted with powdered sugar — people always assume I ordered these somewhere. My husband's colleagues once asked where I'd gotten them from. That never gets old. The reality is that once you've made them twice, the process becomes genuinely straightforward.
- The filling is flexible: I detail the custard version in the directions below, but you can also use whipped cream (lighter, faster), instant pudding (convenient), or even a chocolate pastry cream if you're feeling ambitious. My mother used to switch the filling depending on what was in the fridge. The shells stay the same regardless.
- Make-ahead friendly: The shells can be baked a day in advance and kept in an airtight container at room temperature. The custard filling can be made up to two days ahead and kept chilled. On the day you want to serve them, you're just assembling — which takes about ten minutes. That's a real advantage when you're feeding people for a holiday or a gathering.
Ingredients
- For the Pastry (Choux Dough):
- 1 cup water
- ½ cup unsalted butter
- ¼ teaspoon salt
- 1 cup all-purpose flour
- 4 large eggs, room temperature
- For the Custard Filling:
- 1½ cups whole milk
- ½ cup granulated sugar
- ¼ cup cornstarch
- 2 large egg yolks
- 2 teaspoons vanilla extract
- 2 tablespoons unsalted butter
- Optional Topping:
- Powdered sugar for dusting
- Melted chocolate or ganache for drizzling
Directions
- Step 1: Make the custard filling first. In a medium saucepan, whisk together the milk, granulated sugar, and cornstarch until smooth before turning on the heat. Cook over medium heat, whisking constantly, until the mixture thickens and starts to bubble. In a separate bowl, beat the egg yolks, then slowly ladle a few tablespoons of the hot mixture into the yolks while whisking — this tempers them so they don't scramble. Pour the yolk mixture back into the saucepan and cook for another 2–3 minutes, stirring constantly, until thick and glossy.
- Step 2: Finish and chill the filling. Remove from heat and stir in the vanilla extract and 2 tablespoons of butter until completely smooth. Transfer to a bowl, press a sheet of plastic wrap directly onto the surface of the custard to prevent a skin from forming, and refrigerate for at least 1 hour. I usually make this while the kids are at school so it's fully set by the time I need it.
- Step 3: Make the choux dough. In a medium saucepan over medium heat, combine the water and butter. Once the butter has fully melted, bring to a gentle boil. Add the salt and flour all at once, stirring vigorously with a wooden spoon until the dough pulls away cleanly from the sides of the pan and forms a ball. This takes about 1–2 minutes. Remove from heat and let it cool for 5 minutes — this step matters, because if the dough is too hot when the eggs go in, they'll start to cook.
- Step 4: Beat in the eggs. Add the eggs one at a time, beating well after each addition. The dough will look like it's breaking apart at first — that's normal. Keep stirring until it comes back together and becomes smooth and glossy. By the fourth egg, it should be thick enough to hold a shape when dropped from a spoon but still slide off cleanly.
- Step 5: Shape and bake the shells. Preheat your oven to 400°F (200°C). Line a baking sheet with parchment paper. Drop tablespoon-sized rounds of dough onto the sheet, spacing them about 2 inches apart. If you have a piping bag, use it — the rounds come out more uniform. If not, two spoons work fine; I've done it both ways. Bake for 25–30 minutes until puffed and deep golden brown. Do not open the oven door before the 25-minute mark.
- Step 6: Cool completely before filling. Transfer the shells to a wire rack and let them cool completely — at least 30 minutes. I've tried to rush this step and the custard just melted into the warm shell and made a soggy mess. Once cool, cut each puff in half horizontally. Spoon or pipe the chilled custard into the bottom half, then replace the top. Dust with powdered sugar or drizzle with melted chocolate before serving.
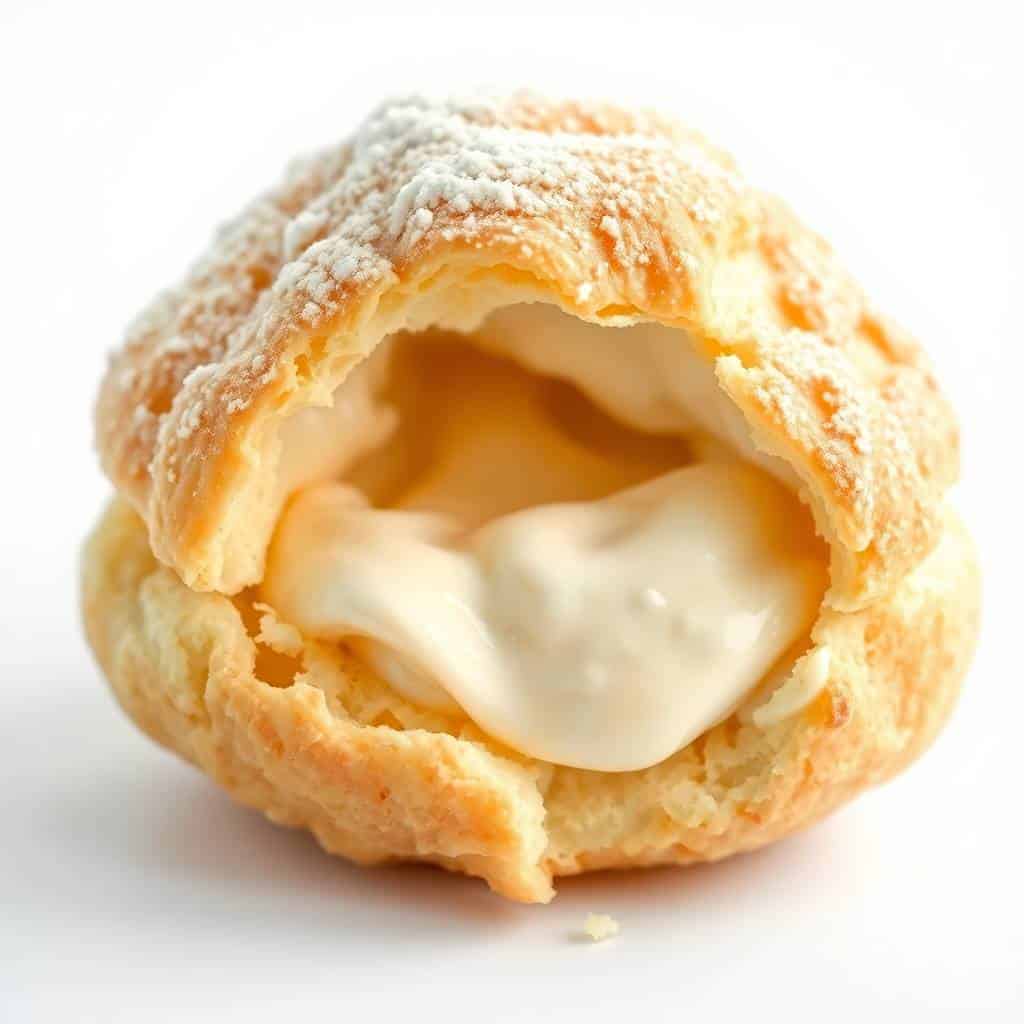
Tips for Success
- Don't open the oven early: I opened mine at the 18-minute mark once, curious, and they collapsed completely in the next two minutes. Choux puffs are held up by steam inside — the moment cool air hits them before they've fully set, they deflate. Set a timer and walk away. You'll hear them puffing up through the oven door.
- Cool the dough before adding eggs: Five minutes off the heat makes a real difference. The dough should be warm to the touch but not steaming. If eggs go in too early, they start cooking on contact and the texture of the finished puff is dense rather than airy. I use that five minutes to wash up the pan I used for the custard.
- Use room temperature eggs: Cold eggs don't incorporate as smoothly and the dough can end up slightly lumpy. I pull my eggs out of the fridge when I start making the custard filling, so by the time I'm ready to make the dough, they've had at least 30 minutes at room temperature. It's a small thing that makes a noticeable difference.
- Space them properly on the pan: Choux puffs expand quite a bit in the oven. If they're too close together, they merge into each other and you end up with one connected blob rather than individual puffs. I space mine about 2 inches apart, which gives them enough room to grow without touching. A standard sheet pan from any grocery store works perfectly.
- Press plastic wrap onto the custard surface: This prevents a rubbery skin from forming on top as it cools. I skipped this step the first time I made custard from scratch and ended up with a thick film on top that had to be stirred back in — it worked, but it left small lumps. Direct contact with the wrap keeps the surface smooth and pipeable.
Variations
- Whipped cream filling: This is the faster, lighter option — beat 2 cups of heavy whipping cream with ½ cup powdered sugar and 1 teaspoon vanilla extract until stiff peaks form. It takes about 5 minutes with a hand mixer. The shells are airier and the whole thing feels less rich, which is great for summer. Just note that whipped cream weeps faster than custard, so fill these no more than a couple of hours before serving.
- Chocolate cream puffs: Stir 2 tablespoons of good-quality cocoa powder into the custard while cooking, or add 2 ounces of melted dark chocolate at the end with the butter. Then drizzle the tops with a simple ganache (equal parts heavy cream and chocolate, melted together). Saad's version — he asks for this specifically every time I make a batch for his birthday.
- Coffee custard: Add 1 teaspoon of instant espresso powder to the milk mixture before cooking. It dissolves completely and gives the custard a subtle mocha flavor that pairs really well with the buttery pastry. I make this version when I'm serving adults at a dinner party — it feels a little more grown-up than straight vanilla.
- Mini cream puffs: Use a teaspoon instead of a tablespoon to drop smaller rounds of dough. Reduce baking time to 18–20 minutes and watch them closely. Mini puffs are great for parties — you get more pieces from the same batch and people can eat them in one bite. I make these for Eid gatherings when I need to feed a crowd. Pair them on a dessert table next to Italian S Cookies for a nice spread.
- Lemon cream puffs: Swap the vanilla extract for lemon extract and add 1 teaspoon of fresh lemon zest to the custard. The result is bright and a little tangy, which cuts the richness of the pastry nicely. This is also a lovely variation to serve in spring when you want something that feels lighter.
Serving and Storage
Serving
Serve chilled or at room temperature, depending on which filling you used. Custard-filled puffs hold up well chilled and I actually prefer them cold — the custard firms up and doesn't slide around when you bite in. Dust with powdered sugar right before serving, not ahead of time, because the sugar absorbs moisture and disappears if you add it too early. A drizzle of melted chocolate over the top makes them look beautiful and adds maybe three minutes of work. I pair these with a mug of Strawberry Hot Chocolate when I'm making them for a cozy weekend at home.
Storage
Assembled (filled) cream puffs keep in the refrigerator for up to 2 days in an airtight container. After that the shells start to soften. If you want to get ahead, store the baked shells separately at room temperature in an airtight container for up to 2 days, and keep the custard covered in the fridge for up to 2 days. Assemble right before you need them. The unfilled shells can also be frozen in a zip-lock bag for up to a month — just thaw them at room temperature for 20 minutes and re-crisp in a 350°F oven for 5 minutes before filling.

Frequently Asked Questions
Can I make the custard filling ahead of time?
Yes, and honestly I recommend it. The custard needs at least an hour to set in the fridge anyway, but it keeps well for up to 2 days covered with plastic wrap pressed directly onto the surface. I almost always make it the day before so there's one less thing to do when I'm ready to assemble.
Why did my cream puffs deflate after baking?
The most common reason is opening the oven door too early. I've done this — curiosity got the better of me and the puffs collapsed within minutes. The other reason is underbaking: they need to be a deep golden brown, not just lightly colored. If they look pale when you pull them out, they haven't fully set inside and will deflate as they cool.
Can I freeze cream puff shells?
Yes, the unfilled shells freeze really well. Let them cool completely, then seal them in a zip-lock bag and freeze for up to a month. When you're ready to use them, thaw at room temperature and pop them in a 350°F oven for about 5 minutes to re-crisp before filling. Do not freeze the custard filling — the texture breaks down and turns grainy when thawed.
Can I use instant pudding instead of homemade custard?
You can, and it works fine for a quick version. Use vanilla instant pudding made with slightly less milk than the package directs so it's thicker and easier to pipe. The homemade custard has a richer, more egg-forward flavor, but instant pudding is a perfectly reasonable shortcut on a busy weeknight. I've done it when I'm short on time and nobody complained.
Do filled cream puffs need to be refrigerated?
Yes, always. Both custard and whipped cream are dairy-based fillings and need to stay cold. Don't leave assembled puffs sitting at room temperature for more than 2 hours. I keep mine in the fridge right up until I'm ready to set them out, and I only dust with powdered sugar at the very last minute.

MOM’S FAMOUS CREAM PUFFS
Ingredients
For the Pastry (Choux Dough):
- 1 cup water
- ½ cup unsalted butter
- ¼ teaspoon salt
- 1 cup all-purpose flour
- 4 large eggs
For the Cream Filling:
- 2 cups heavy whipping cream
- ½ cup powdered sugar
- 1 teaspoon vanilla extract
Optional Topping:
- Powdered sugar for dusting
- Melted chocolate for drizzling
Instructions
- Prepare Pastry: In a saucepan, bring water, butter, and salt to a boil. Add flour all at once and stir until dough pulls away from the sides.
- Add Eggs: Remove from heat. Beat in eggs one at a time until smooth and glossy.
- Shape Puffs: Drop tablespoonfuls of dough onto a parchment-lined baking sheet, spacing them apart.
- Bake: Bake at 400°F (200°C) for 25–30 minutes until golden brown and puffed. Let cool completely.
- Make Filling: Beat heavy cream, powdered sugar, and vanilla until stiff peaks form.
- Fill Puffs: Cut cooled puffs in half. Spoon or pipe whipped cream inside. Replace tops.
- Finish & Serve: Dust with powdered sugar or drizzle with chocolate before serving.
Notes
- Make Ahead: Pastry shells can be baked a day in advance. Fill just before serving for best freshness.
- Different Fillings: Swap whipped cream with custard, pastry cream, or ice cream for variety.
- Storage: Store unfilled puffs in an airtight container for 2 days. Filled cream puffs should be refrigerated and enjoyed within 24 hours.
- Pro Tip: For extra crunch, bake shells a few extra minutes, then turn oven off and let them sit inside with the door slightly open.
I've made a lot of desserts on this blog, and cream puffs are one of the few where the process genuinely feels like something was handed down — because for me, it was. Getting this recipe right took me three tries and a phone call to my mother where I made her describe exactly what the dough looked like when she knew it was ready. She said "it should look like it's tired of being stirred." That's not particularly precise, but somehow it helped.
I make these most often in winter, when we're inside and the oven warmth is welcome. They're also the dessert I turn to when I want something that feels special without requiring a stand mixer or specialty ingredients. Everything comes from a regular grocery store — Walmart, Aldi, Costco, wherever you shop. The butter, flour, eggs, and milk are pantry staples, and the whole project feels achievable even if you've never made choux pastry before. If you've made my Strawberry Cheesecake Bites and want to try something that involves a little more technique, this is a natural next step.
If your first batch doesn't come out perfectly, that's completely normal. Mine didn't either. The shells might be a little flat, or the custard a little loose — but even imperfect cream puffs taste good, and by the second batch you'll know exactly what to adjust. That's how my mother learned too, I think. She just never admitted it. 🥄✨
If you make these, I'd love to know which filling you went with. And if you're looking for more to bake or cook this week, here are a few things from the site that are worth your time:
- Strawberry Cheesecake Bites — no-bake, creamy, and gone in minutes at any gathering
-
{"@context":"https://schema.org","@type":"Article","headline":"MOM’S FAMOUS CREAM PUFFS","description":"Mom’s famous cream puffs are light, airy pastries filled with sweet cream—an irresistible homemade treat perfect for any special occasion.","datePublished":"2025-10-11T09:58:33+00:00","dateModified":"2026-05-03T20:51:44+00:00","author":{"@type":"Person","name":"Sana Umer","url":"https://forfoodiefriends.com/about/","description":"Self-taught home cook with 10+ years of kitchen experience. Mom of two who develops every recipe in her own kitchen.","jobTitle":"Recipe Developer & Food Blogger","image":"https://forfoodiefriends.com/wp-content/uploads/sana-umer-author-photo.jpg"},"publisher":{"@type":"Organization","name":"For Foodie Friends","url":"https://forfoodiefriends.com/","logo":{"@type":"ImageObject","url":"https://forfoodiefriends.com/wp-content/uploads/forfoodiefriends-logo.png"}},"mainEntityOfPage":{"@type":"WebPage","@id":"https://forfoodiefriends.com/moms-famous-cream-puffs/"},"image":"https://forfoodiefriends.com/wp-content/uploads/2025/08/MOMS-FAMOUS-CREAM-PUFFS.jpg"}






Comments
No Comments