
I made these for a birthday party last spring and put them out on the table without saying anything. By the time I got back from the kitchen, half the tray was gone. That's when I knew this was a keeper. Something about individual portions on a dessert table just works — people reach for them without hesitation because there's no cutting, no serving, no mess.
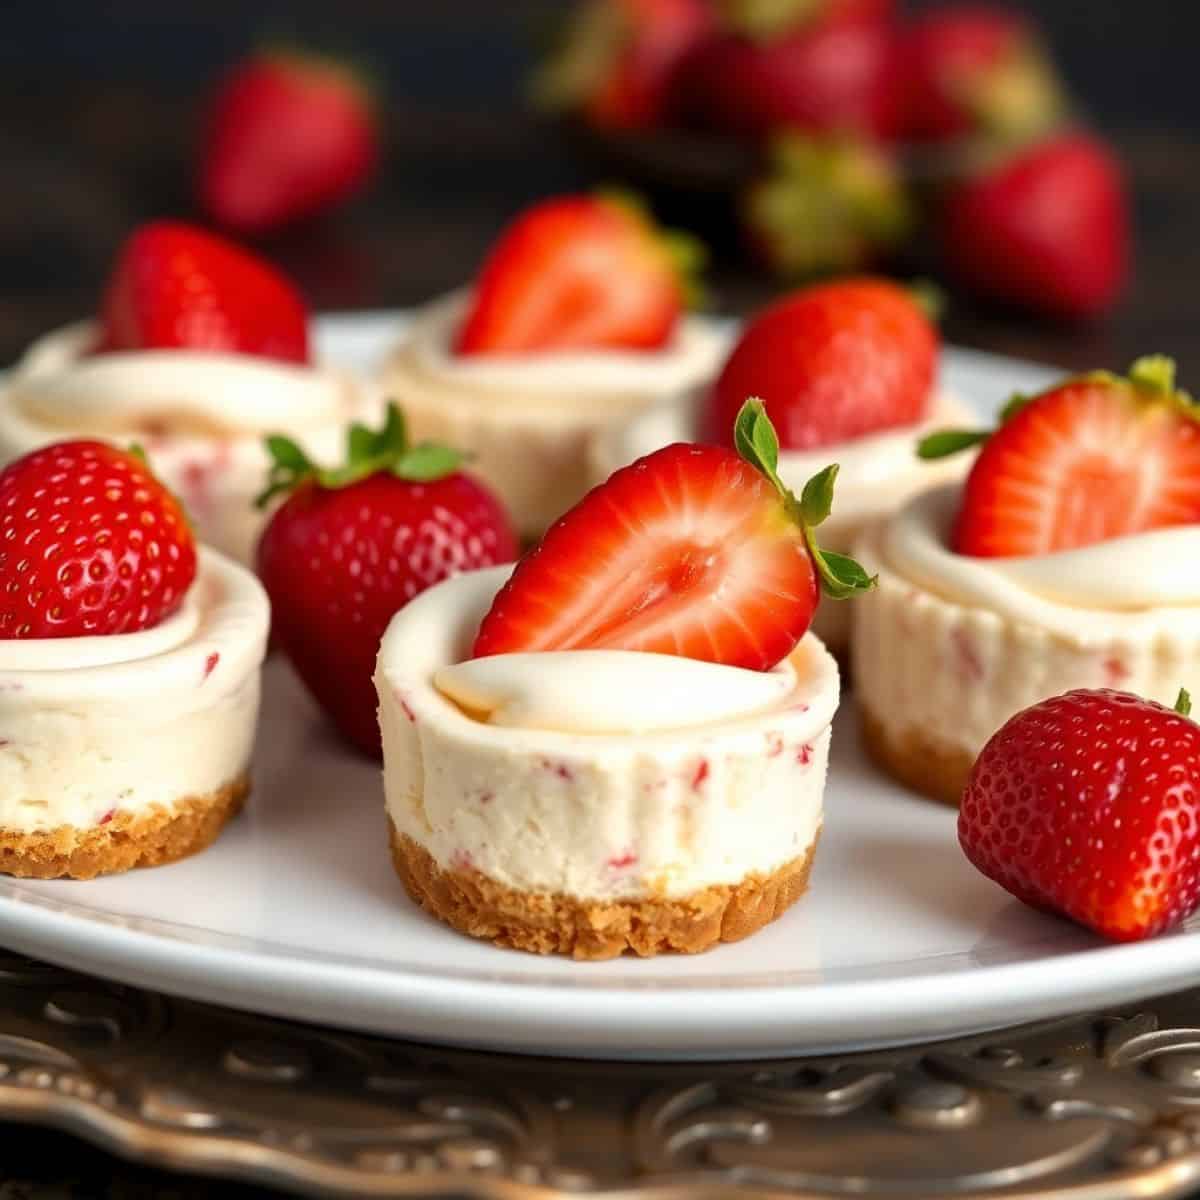
What makes these work is the balance between the crust, the filling, and the strawberries on top. I pre-bake the crust for about 8 minutes before adding the filling — a step the original recipe I was working from skipped, and trust me, it matters. An unbaked crust stays soft and compacts into a sad layer at the bottom. A pre-baked one stays crumbly and distinct, and you actually taste it against the cream cheese. The strawberry topping here is macerated with a little sugar and lemon juice, which pulls out the juices and makes the whole thing look glossy and bright.
I make these whenever I need a bring-a-dish dessert. My daughter Zainab asks for them at basically every birthday gathering now, and my husband — who doesn't usually go for cheesecake — has been caught eating three in a row at family events. I also make them for Eid when we have a lot of guests coming through, because I can prep everything the night before and just pull them out of the fridge when people arrive. If you're looking for more easy party food ideas, my Salted Caramel Pretzel Bark is another make-ahead dessert I bring to the same kinds of gatherings.
One thing to set your expectations on: this is a two-day project if you want them at their best. They need at least 2 hours in the fridge after baking, and honestly overnight is better — the texture firms up and the flavors settle. Plan ahead, and you won't be stressed the day of your event.
Why You'll Love This Recipe
- No slicing required: I've brought full cheesecakes to parties before and ended up being the person standing at the dessert table with a knife for half the event. These muffin-tin bites solve that completely. Everyone just picks one up and walks away. No plates required if you don't want them.
- You can make them the night before: The baking takes about 30 minutes total, but chilling overnight is what makes the texture right. That means the actual day of your party you're doing nothing — just pulling a tray out of the fridge and arranging them. I cannot overstate how much I appreciate that when I'm already cooking multiple dishes.
- The macerated strawberry topping: Tossing the strawberries with sugar and lemon juice for 15 minutes before topping transforms them. The juice pools around each bite on the platter and everything looks almost too good to eat. Fresh strawberries just laid on top look flat by comparison — the maceration step is worth the extra few minutes.
- Beginner-friendly baking: There's no water bath, no springform pan, no worrying about a large cheesecake cracking down the middle. Individual portions in a muffin tin are much more forgiving. Even if one or two crack slightly, they're so small that a strawberry placed on top covers it completely.
- Scales up easily: I always make a double batch because one tray of 12 disappears before I've even set the second dish out. Two muffin tins, same amount of effort. If you have a party of more than 10 people, just double everything.
Ingredients
- For the Crust:
- 1 ½ cups graham cracker crumbs (about 10 full sheets, crushed)
- ¼ cup granulated sugar
- 6 tablespoons unsalted butter, melted
- For the Filling:
- 16 ounces (2 blocks) cream cheese, softened to room temperature
- ½ cup granulated sugar
- 2 large eggs
- 1 teaspoon vanilla extract
- For the Strawberry Topping:
- 1 pound fresh strawberries, hulled and halved (or quartered if large)
- ¼ cup granulated sugar
- 1 tablespoon fresh lemon juice
Directions
- Prepare the tin: Preheat your oven to 350°F (175°C). Line a standard 12-cup muffin tin with paper cupcake liners. The liners make removal so much easier — don't skip them or you'll be digging cheesecake out with a spoon.
- Make the crust: In a medium bowl, stir together the graham cracker crumbs, sugar, and melted butter until the mixture looks like wet sand and holds together when you press it. Spoon about 2 tablespoons into each muffin cup and press down firmly with the back of a spoon or your fingers.
- Pre-bake the crust: Bake the crusts alone for 8–10 minutes, until lightly golden. Pull them out and let them cool for at least 10 minutes before adding the filling. This step keeps the crust from going soggy under the cheesecake layer.
- Make the filling: Beat the softened cream cheese with a hand mixer (or vigorously by hand with a wooden spoon) until completely smooth — no lumps. Gradually add the sugar and beat until combined. Add the eggs one at a time, mixing on low after each one. Stir in the vanilla. Don't overbeat once the eggs are in; that's what causes cracks.
- Fill and bake: Spoon the filling over the cooled crusts, filling each cup about two-thirds full. Bake for 15–20 minutes, until the edges are set but the centers still have a very slight jiggle. They'll firm up as they cool.
- Make the strawberry topping: While the cheesecakes are baking or cooling, combine the strawberries, sugar, and lemon juice in a bowl. Toss gently and let sit for at least 15 minutes. The sugar will pull out the strawberry juices and create a light syrup — that's what you want.
- Cool and chill: Let the cheesecake bites cool completely in the tin at room temperature, then transfer to the refrigerator for at least 2 hours. Overnight is better. Don't rush this step — warm cheesecake filling is too soft to hold its shape when you peel off the liner.
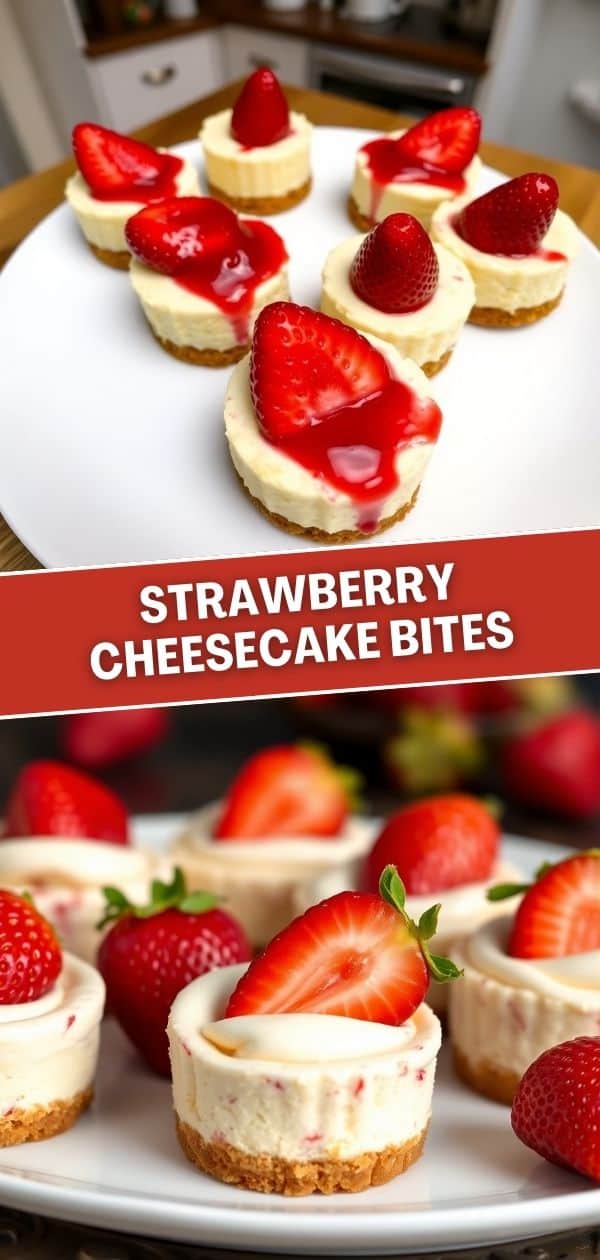
- Top and serve: Once fully chilled, peel off the liners and arrange on a plate. Spoon the macerated strawberries over each bite, including some of the juices. Serve immediately or keep refrigerated until you're ready.

Tips for Success
- Cold cream cheese will ruin your filling: I learned this the hard way. Cold cream cheese doesn't beat smooth — it stays lumpy no matter how long you mix it, and then you overbeat trying to fix it. Pull the blocks out of the fridge at least 30 minutes before you start. If you forgot (I do this all the time), unwrap them, cut into chunks, and microwave for 15 seconds. Check, then go another 10 if needed. You want soft, not melted.
- Don't open the oven door while baking: The sudden drop in temperature can cause the filling to crack. Set your timer for 15 minutes and don't peek until then. A little crack on a mini cheesecake is easy to hide under a strawberry, but it's still worth avoiding.
- Press the crust firmly: A loosely packed crust will crumble apart when you peel off the liner. Press it down with real pressure — I use the bottom of a shot glass or a small measuring cup. It should feel compact and solid before it goes in the oven.
- Add the strawberries right before serving: The macerated strawberries release a lot of juice. If you top the cheesecakes hours before serving and leave them in the fridge, the juice can soften the tops of the cheesecakes. Top them just before you set the platter out for guests.
- No hand mixer? Use a wooden spoon: I don't always pull out the electric mixer for a small batch. If your cream cheese is properly softened, you can beat it smooth by hand with a good wooden spoon and some elbow grease. It takes about 3 extra minutes. The filling doesn't need to be whipped, just smooth and lump-free.
Variations
- Oreo crust: Swap the graham crackers for crushed Oreos (with the filling still in them) and skip the added sugar. The chocolate crust against the vanilla cheesecake and red strawberries is a really good combination. I've brought these to parties and people always ask what's different about them.
- Lemon cheesecake version: Add 1 teaspoon of lemon zest and an extra teaspoon of lemon juice to the filling. It brightens the whole thing up. This version pairs especially well with blueberries instead of strawberries if you want to switch the topping.
- Mixed berry topping: Use a combination of strawberries, raspberries, and blueberries macerated the same way. This works well when strawberries aren't in season and the ones at the store look pale and tasteless. Frozen mixed berries thawed and tossed with the sugar and lemon also work in a pinch.
- Strawberry jam swirl: Before baking, drop half a teaspoon of strawberry jam onto each filled cup and swirl it in with a toothpick. It makes the tops look beautiful and adds an extra layer of strawberry flavor running through the cheesecake itself.
- Bar version: If you don't have a muffin tin, press the crust into a parchment-lined 8x8 inch square pan, pre-bake it, pour the filling over, and bake as bars. Cut into squares after chilling and top each square with strawberries. They won't be as pretty for a platter but taste identical.
Serving and Storage
Serving
Serve these cold, straight from the fridge. They don't hold up well at room temperature for longer than about 30 minutes — the cream cheese filling starts to soften and they lose their shape. For a party, I keep them in the fridge until about 10 minutes before I'm ready to set them out. If you're serving alongside other desserts, these look great on a tiered stand next to something like my Chewy Chocolate Chip Cookies — the variety makes a nice spread.
Storage
Refrigerator: Store in an airtight container in the fridge for up to 5 days. If you've already topped them with strawberries, eat within 2 days — the juice from the berries will start to make the tops slightly wet after that. If you want them to last longer, store the cheesecake bites and the macerated strawberries separately and top right before serving.
Freezer: Freeze the un-topped cheesecake bites (with the liner still on) wrapped individually in plastic wrap, then stored in a zip-lock freezer bag for up to 3 months. Thaw overnight in the fridge. Don't freeze after you've added the strawberry topping — the berries go mushy and watery after thawing.
Frequently Asked Questions
Can I make these the day before?
Yes — and honestly I recommend it. The texture is noticeably better after an overnight chill than after just 2 hours. Bake them the day before, let them cool, refrigerate overnight, and top with the strawberries right before serving. It's much less stressful than trying to make them same-day.
Why did my cheesecakes crack on top?
Usually it's one of three things: the filling was overbeaten (which incorporates too much air), the oven temperature was too high, or the oven door was opened partway through baking. Mix the filling just until smooth after adding the eggs, and don't peek until the timer goes off. Even if they do crack, the strawberry topping covers everything.
Can I use frozen strawberries?
Fresh is better for the topping because frozen strawberries release a lot of liquid as they thaw and can make the tops of the cheesecakes soggy. If fresh strawberries aren't available or aren't ripe, I'd swap in a different fruit — raspberries or blueberries work really well and are available fresh year-round in most grocery stores.
Can I make these without a muffin tin?
Yes — use an 8x8 inch square baking pan lined with parchment paper. Press the crust in, pre-bake it, add the filling, and bake as a slab. After chilling, lift out the whole thing using the parchment overhang, cut into squares, and top each one with strawberries. They won't be round individual bites but the flavor is exactly the same.
How do I know when the cheesecakes are done baking?
The edges should look set and slightly puffed, and the centers should have just a small jiggle when you shake the tin — similar to a soft-set custard. They'll continue to firm up as they cool and then chill in the fridge. If they look completely solid in the oven, they may be slightly overbaked, but they'll still taste fine.
STRAWBERRY CHEESECAKE BITES
Ingredients
- 1 ½ cups graham cracker crumbs
- ¼ cup granulated sugar
- 6 tablespoons (¾ stick) unsalted butter, melted
- 16 ounces cream cheese, softened
- ½ cup granulated sugar
- 2 large eggs
- 1 teaspoon vanilla extract
- 1 pound fresh strawberries, hulled and halved or quartered (depending on size)
- ¼ cup granulated sugar
- 1 tablespoon lemon juice
Instructions
- Prepare the crust: Preheat oven to 350°F (175°C). Line a 13x9 inch baking pan or muffin tin (using cupcake liners) with parchment paper or cupcake liners.
- Make the crust: In a medium bowl, combine the graham cracker crumbs, sugar, and melted butter. Mix well until the crumbs are evenly moistened. Press the mixture firmly into the bottom of the prepared pan or muffin tin to form a crust.
- Bake the crust: Bake for 8-10 minutes, or until lightly golden brown. Let cool completely.
- Make the cheesecake filling: In a large bowl, beat the softened cream cheese with an electric mixer until smooth and creamy. Gradually add the sugar, beating until well combined. Beat in the eggs one at a time, then stir in the vanilla extract.
- Assemble and bake: If using a large pan, pour the cheesecake filling over the cooled crust. If using a muffin tin, fill each cupcake liner about two-thirds full with the cheesecake filling. Bake for 15-20 minutes, or until the cheesecake is set around the edges but still slightly jiggly in the center.
- Prepare the strawberry topping: While the cheesecake is baking (or cooling), prepare the topping. In a medium bowl, combine the strawberries, sugar, and lemon juice. Gently toss and let stand for at least 15 minutes, allowing the strawberries to release their juices.
- Add strawberry topping: Once the cheesecake is cooled, top each cheesecake bite with the strawberry mixture, including some of the juices.
- Chill: Cover and refrigerate for at least 2 hours, or preferably overnight, to allow the cheesecake to set completely.
- Serve: Serve chilled.
Notes
- Crust Variations: You can use other types of cookies for the crust, such as Oreo crumbs or vanilla wafer crumbs.
- Cheesecake Filling Variations: You can add other flavors to the cheesecake filling, such as lemon zest, almond extract, or a swirl of jam.
- Topping Variations: You can use other fruits for the topping, such as blueberries, raspberries, or peaches. You can also use a fruit glaze or whipped cream.
- Make-Ahead: These cheesecake bites can be made ahead of time and stored in the refrigerator for up to 3 days.
These have become one of my most-requested things to bring to gatherings. What I appreciate about them — beyond how easy they are — is that they photograph well, they travel well in a covered container, and they genuinely taste better the next day. That's a rare combination in baking. I've made them probably fifteen times now and the basic formula hasn't changed, though I've gone through an Oreo crust phase and a lemon zest phase and once tried them with mango on top (that one was actually great, for the record).
If you're planning a party spread, these pair really well with savory finger foods. A tray of these cheesecake bites alongside something like my Firecracker Hot Dogs or the Shrimp, Corn, and Smoked Sausage Foil Packs makes a full spread that covers everyone. Sweet and savory on the same table always goes faster than either one alone.
The first time I made these I didn't pre-bake the crust and the bottoms were soft and almost wet — nothing like what I was going for. That one extra step of 8 minutes in the oven before adding the filling makes all the difference. Once I figured that out, I haven't had a bad batch since. If you make them, I hope they disappear off your table as fast as they do off mine. 🍓✨
If you liked this recipe, here are a few more you might want to make: