
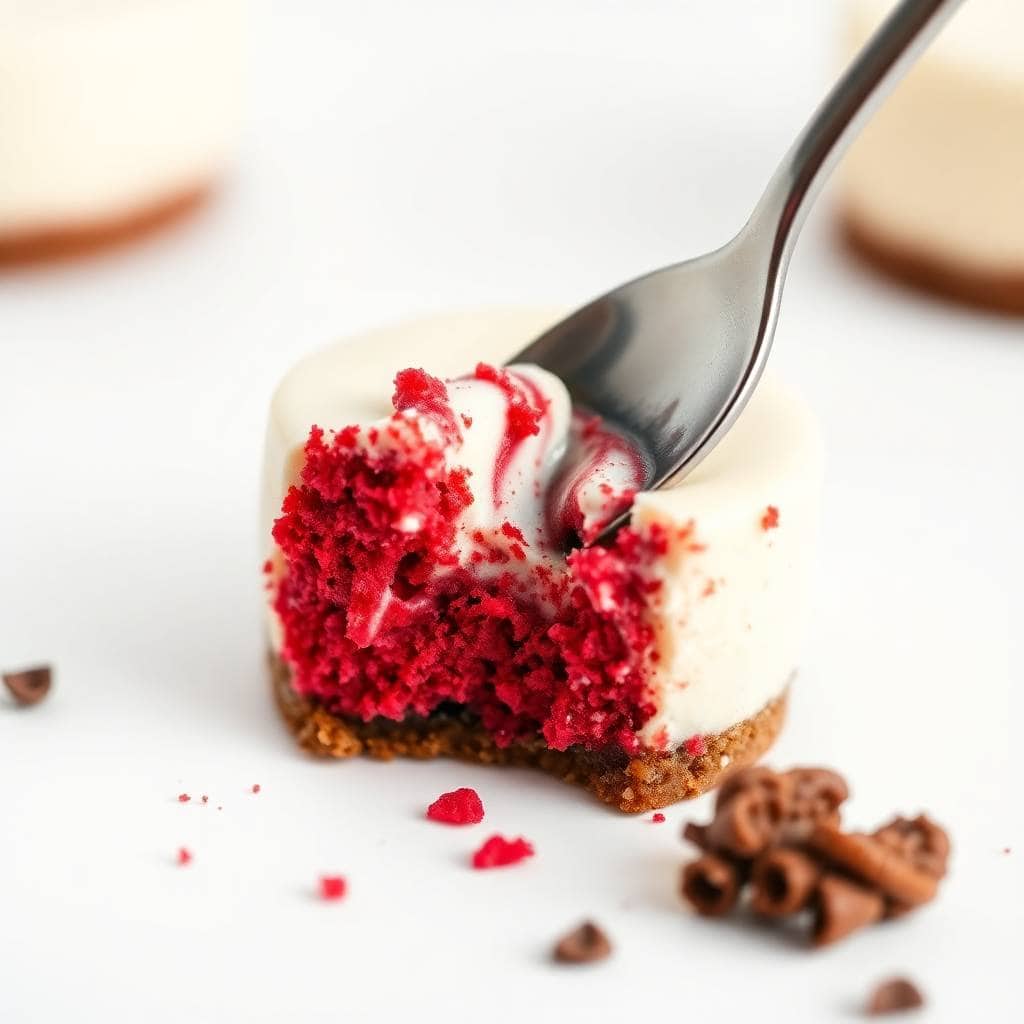
I made these for Zainab's birthday last spring and honestly, the tray was empty before I even got to try one myself. Mini red velvet cheesecakes have this thing where they look like you spent hours in a professional kitchen, but the whole process — crust, filling, bake, chill — is genuinely manageable on a weeknight. The red color makes people stop and stare, and then they pop one in their mouth and immediately reach for another.
What I love about this recipe is that it's really two classic things in one: the tangy, dense richness of cheesecake and the cocoa-tinted depth of red velvet. The chocolate cookie crust holds everything together and adds a little crunch against the creamy filling. I've made these probably six or seven times now, tweaking small things each time — the ratio of sour cream, how long to beat the eggs, when to pull them from the oven — and I think I've landed on a version that reliably works. If you've been wanting to try something that looks impressive without being technically difficult, this is a good place to start. You can also check out my Amish Whoopie Pies if you're on a mini-dessert kick — they're another one that disappears fast at parties.
My husband doesn't usually go for overly sweet desserts, but he always eats two of these without comment, which in his language means he likes them. Zainab likes hers with a big swirl of whipped cream on top. I usually keep mine plain because the cheesecake layer is rich enough on its own. I make a double batch whenever I'm bringing dessert somewhere, because a single batch of twelve disappears faster than I'd like.
One thing to set expectations on: these need at least two hours in the fridge before you eat them. I know that feels like forever when they smell good cooling on the counter, but rushing that chill time will give you a filling that's too soft and falls apart when you peel the liner. Overnight chilling is even better. Plan accordingly and you'll be fine.

Why You'll Love This Recipe
- No fancy equipment needed: I don't own a stand mixer — I use a hand mixer I got from Walmart for about $20, and it does the job perfectly. The filling comes together in one bowl in about five minutes. If you don't even have a hand mixer, a wooden spoon and some elbow grease will work for the crust; you'd just want something electric for the cream cheese to get it fully smooth.
- They bake in under 25 minutes: The small size means these are done at 18 to 20 minutes, which is a fraction of the time a full cheesecake takes. I've started prepping the crust while the oven preheats, and by the time it's up to temperature I'm already filling the liners. Total active time in the kitchen is maybe 30 minutes.
- The color is genuinely striking: That deep red against the white whipped cream just looks dramatic on a dessert plate, in a way that takes zero decorating skill. I've brought these to potlucks where people assumed I'd ordered them from somewhere. The secret is just getting the food coloring ratio right, which I'll explain in the tips section.
- Freezer-friendly for busy weeks: I've frozen these successfully and pulled them out the night before an event. They thaw in the fridge overnight without losing texture or flavor. That make-ahead flexibility means I can bake on Sunday and not worry about dessert again until the following weekend.
- Works for almost any occasion: I've made these for Eid, for a school bake sale, for a birthday, and just for a regular Tuesday when I wanted something nice. Swap the topping — sprinkles for a birthday, chocolate shavings for something more grown-up — and they fit the moment. The base recipe stays exactly the same every time.
Ingredients
- For the Crust:
- ¾ cup chocolate cookie crumbs (I use Oreos with the filling scraped out, or any chocolate wafer)
- 2 tablespoons granulated sugar
- 3 tablespoons unsalted butter, melted
- For the Cheesecake Filling:
- 8 ounces (1 block) cream cheese, softened to room temperature
- ⅓ cup granulated sugar
- 1 large egg, room temperature
- 2 tablespoons sour cream (full-fat works best)
- 1 teaspoon vanilla extract
- 1 tablespoon unsweetened cocoa powder
- 2 teaspoons red food coloring (liquid or gel — gel gives a deeper color)
- Optional Toppings:
- Whipped cream
- Chocolate shavings or sprinkles
Directions
- Step 1: Preheat and prep your tin. Heat your oven to 325°F (165°C) and line a 12-cup muffin tin with paper cupcake liners. The liners make removal so much easier — I tried greasing the tin directly once and lost three cheesecakes to the pan. Not worth it.
- Step 2: Make the crust. In a small bowl, mix the cookie crumbs, sugar, and melted butter together until the crumbs look like damp sand. Press about 1 tablespoon of the mixture firmly into the bottom of each liner. I use the back of a spoon or the bottom of a small glass to pack it down — you want it compact so it doesn't crumble when you lift the cheesecake out.
- Step 3: Beat the cream cheese and sugar. In a medium bowl, beat the softened cream cheese and sugar together until completely smooth with no lumps. This step matters — if your cream cheese is still cold, you'll get little white lumps in the filling that won't beat out. Let it sit at room temperature for at least 15 to 20 minutes before you start.
- Step 4: Add the remaining filling ingredients. Add the egg, sour cream, vanilla, cocoa powder, and red food coloring to the cream cheese mixture. Beat on low speed just until everything is combined and the color is even. Stop as soon as you don't see streaks — overmixing from here adds air bubbles that cause cracking on top.
- Step 5: Fill and bake. Spoon the filling over each crust, filling each liner about ¾ full. Bake for 18 to 20 minutes, until the centers look set but still have a very slight jiggle — like Jell-O, not like liquid. They'll firm up the rest of the way as they cool.
- Step 6: Cool, then chill. Let the cheesecakes cool completely at room temperature — about 45 minutes — then cover the tray loosely and refrigerate for at least 2 hours. Overnight is better. Top with whipped cream or chocolate shavings just before serving, not before chilling, or the toppings get soggy.
Tips for Success
- Cold cream cheese will ruin the texture: I learned this the hard way on my second batch when I was impatient and went straight from the fridge. The filling had small white lumps throughout no matter how long I beat it. Pull your cream cheese and egg out together about 20 minutes before you start, and the whole mixture will come together smooth and silky the way it should.
- Stop mixing once the egg is in: This is the step where most mini cheesecakes go wrong. Once the egg goes in, mix only until you can't see streaks. The extra air from overmixing causes the tops to puff up in the oven and then sink and crack as they cool. A slight dip in the center is normal; a crater is a sign you mixed too long.
- Use gel food coloring if you can find it: Regular liquid red food coloring works, but you often need a lot of it to get that deep, saturated red. Gel coloring gives you vibrant color with just a small amount. Wilton makes a gel food coloring you can find at most Walmart baking sections or at Michaels — it costs a few dollars and one jar lasts forever.
- Press the crust firmly: A loose crust is annoying — it falls apart the moment you peel the liner. Pack it down with real pressure. I use the bottom of a small glass and press each one three or four times. You want the crumbs to stick together as one solid layer, not just sit loosely in the bottom.
- Don't skip the full chill time: I know two hours sounds like a lot when the house smells like warm chocolate and cream cheese, but the texture genuinely is not right until they're fully cold. The filling sets properly in the fridge and becomes that dense, sliceable cheesecake consistency. If you eat them warm, they'll taste okay but feel underdone.
Variations
- Chocolate ganache topping: Skip the whipped cream and drizzle warm ganache (equal parts heavy cream and chocolate chips, melted together) over each cheesecake right before serving. It sets into a thin shell and adds a richness that makes these feel more like a restaurant dessert. My husband prefers this version over whipped cream every time.
- Graham cracker crust: If you want a lighter, less chocolatey base, swap the chocolate cookie crumbs for graham cracker crumbs. Use the same quantities — ¾ cup crumbs, 2 tablespoons sugar, 3 tablespoons butter. The filling's cocoa flavor still comes through, but the crust is more neutral. This is a good option if you're serving people who don't love dark chocolate.
- Nutella swirl: Drop about ½ teaspoon of Nutella onto the top of each filled liner before baking, then drag a toothpick through it in a figure-eight. The Nutella swirls into the red filling and bakes in beautifully. It adds a hazelnut note that works surprisingly well with the cocoa and cream cheese.
- Gluten-free version: Use gluten-free chocolate sandwich cookies (brands like Glutino or Kinnikinnick carry these at most Whole Foods or online) and process them into crumbs the same way. Everything else in the recipe is naturally gluten-free. I've made this version for a friend who can't do gluten and she said she couldn't tell the difference.
- Two-tone layered version: Make a half batch of plain cheesecake filling (no cocoa, no food coloring) and a half batch of red velvet filling. Spoon a thin layer of plain filling over the crust first, then top with the red velvet. The layers stay distinct after baking and look beautiful when you bite in. It takes a bit more effort but it's worth it for a special occasion — would make a great companion on a party platter alongside my Cherry Pie Stars.
Serving and Storage
Serving
Serve these straight from the fridge — they're meant to be eaten cold. Add your toppings (whipped cream, chocolate shavings, sprinkles) right before you put them on the table, not hours earlier. If you're bringing them somewhere, transport them covered and chilled, then add toppings on arrival. A dozen of these on a small platter looks genuinely nice with almost no effort. In Pakistan I'd probably serve these at a dawat (dinner gathering) alongside other sweets, but they fit just as naturally on a Western holiday dessert table.
Storage
Keep leftovers in an airtight container in the fridge for up to 5 days. They actually taste better on day two once they've had more time to set. For longer storage, freeze them without toppings: place on a baking sheet, freeze until solid (about 2 hours), then transfer to a zip-lock freezer bag. They'll keep for up to 1 month. Thaw overnight in the fridge before serving — don't try to rush it at room temperature or they'll sweat and get sticky. Add fresh toppings after thawing.

Frequently Asked Questions
Can I make these the day before?
Yes, and honestly I'd recommend it. These cheesecakes taste noticeably better after an overnight chill — the filling firms up properly and the flavors settle. I almost always make them the evening before I need them. Just keep them covered in the fridge and add toppings right before serving.
What if I don't have red food coloring?
You can leave it out entirely — the cheesecakes will still taste exactly the same, they'll just be a cocoa-brown color instead of red. They won't have that red velvet visual drama, but the flavor is still good. Some people use beet powder as a natural alternative; I've tried it once and got a muted pinkish-red that looked fine. Start with about 1 teaspoon beet powder if you want to try it.
Why did my cheesecakes crack on top?
Usually this comes down to one of two things: overmixing the batter after adding the egg, or overbaking. Both introduce too much air or cook the proteins too fast, causing the surface to split as it cools. A small dip or hairline crack is normal and gets covered by whipped cream anyway. Deep cracks mean pull them from the oven a minute or two earlier next time and mix the filling less.
Can I freeze these mini cheesecakes?
Yes, they freeze well. Freeze without toppings on a flat tray first until solid, then transfer to a freezer bag or airtight container. They keep for about a month. Thaw in the fridge overnight — not on the counter. I've done this when I made a big batch before a busy week and they came out just as good as fresh.
Can I make one large cheesecake with this batter instead?
You can, but you'll need to scale up the recipe — this filling quantity is designed for 12 mini cheesecakes, which is quite a bit less than a standard 9-inch cheesecake. If you double or triple the filling recipe and pour it into a springform pan, bake at 325°F for roughly 45 to 55 minutes, checking for that slight jiggle at the center. I'd also strongly recommend a water bath for a full-sized version to prevent cracking.

MINI RED VELVET CHEESECAKE
Ingredients
For the Crust:
- ¾ cup chocolate cookie crumbs
- 2 tablespoons granulated sugar
- 3 tablespoons unsalted butter melted
For the Cheesecake Filling:
- 8 ounces cream cheese softened
- ⅓ cup granulated sugar
- 1 large egg
- 2 tablespoons sour cream
- 1 teaspoon vanilla extract
- 1 tablespoon cocoa powder
- 2 teaspoons red food colouring
Optional Topping:
- Whipped cream
- Chocolate shavings or sprinkles
Instructions
Prepare the Oven:
- Preheat oven to 325°F (165°C). Line a 12-cup muffin tin with cupcake liners.
Make the Crust:
- In a small bowl, mix cookie crumbs, sugar, and melted butter. Press about 1 tablespoon of the mixture into each liner. Set aside.
Make the Cheesecake Filling:
- In a medium bowl, beat cream cheese and sugar until smooth. Add egg, sour cream, vanilla, cocoa powder, and red food colouring; mix until combined.
Fill and Bake:
- Spoon the filling over the crusts, filling each about ¾ full. Bake for 18–20 minutes, until the centres are set.
Cool and Chill:
- Cool completely, then refrigerate for at least 2 hours before serving. Top with whipped cream if desired.
Notes
Prepare the cheesecakes a day ahead for the best flavour and texture. Customizing the Flavor:
Add a hint of almond extract or a swirl of chocolate ganache for extra richness. Serving Suggestions:
Serve chilled with whipped cream and a sprinkle of chocolate or red velvet crumbs. Allergy-Friendly Options:
Use dairy-free cream cheese and sour cream substitutes for a dairy-free version. Storage Tips:
Store in an airtight container in the fridge for up to 5 days or freeze for up to 1 month.
These mini red velvet cheesecakes have genuinely become one of my go-to bakes when I need to bring something to a gathering and don't want to spend three hours in the kitchen. The active work is maybe half an hour, and then the fridge does the rest. I like that the recipe is forgiving enough that small mistakes — a slightly overfull liner, a tiny crack on top — get hidden under whipped cream and nobody's the wiser.
What keeps me coming back to this recipe is the combination of textures: that firm, snappy crust, the dense and creamy filling, and the cool softness of fresh whipped cream on top. It hits everything you want in a dessert in one small bite. I've started keeping a batch in the freezer as a backup plan for when guests show up unexpectedly — thaw overnight, add toppings, done. If you enjoy recipes like this where the effort is low but the result looks like you worked hard, also take a look at my Strawberry Cheesecake French Toast — same kind of energy, totally different occasion.