
Every December, Zainab stations herself next to the fridge and asks me every twenty minutes if the cheesecakes are ready yet. These mini Christmas cheesecakes are the reason. I started making them three years ago when I needed something easy to bring to a holiday party, and now they're the one thing my family requests by name every single year.
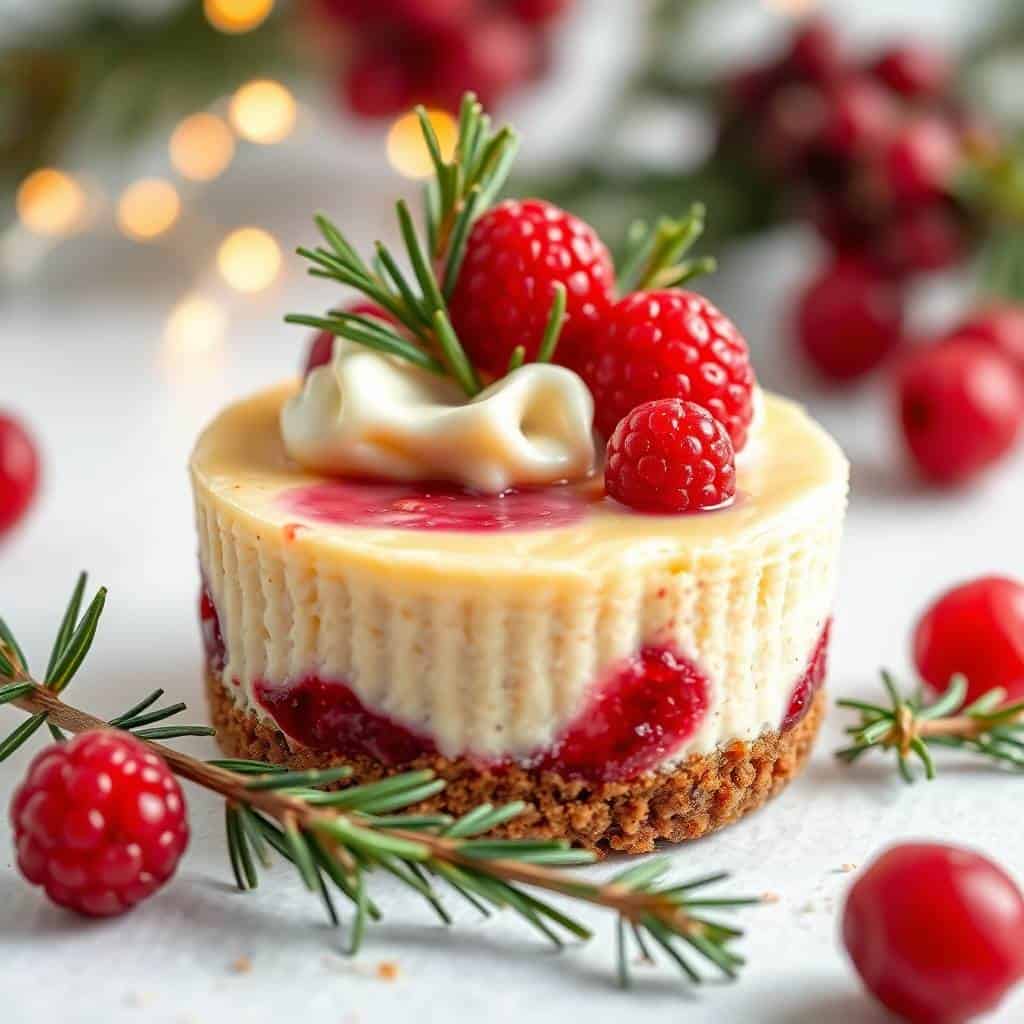
What I like about this recipe is that it doesn't require a water bath, a springform pan, or any of the fussy cheesecake drama I used to dread. You're baking individual portions in a regular muffin tin, which means no cutting, no cracks running across a full cake, and no guessing if the center is done. Each little cheesecake sets up on its own, and you can top them differently for different people — berries for the adults, sprinkles for the kids, crushed candy canes for whoever wants that peppermint hit.
I make a double batch every Christmas because one batch disappears before I even get them all decorated. My husband will eat three in one sitting if I'm not watching. If you've made my Strawberry Crunch Cheesecake Bites before, the technique here is very similar — same basic method, just dressed up for the holidays.
One thing to know going in: these need to chill for at least 2–3 hours before you serve them. I usually make them the night before a party, which honestly makes everything easier. Pull them out of the fridge, add the toppings right before guests arrive, and you're done. The hands-on time is genuinely short — it's the chill time that requires patience.

Why You'll Love This Recipe
- No springform pan needed: I used to be scared of cheesecake because every recipe I found required equipment I didn't own. This one uses a standard 12-cup muffin tin, which almost everyone already has. The paper liners do all the heavy lifting — just peel them off and the little cheesecakes come out cleanly every time.
- Make-ahead friendly: Holiday cooking is already chaotic, so anything I can prep the day before earns a permanent spot in my rotation. These cheesecakes actually taste better after a full night in the fridge — the filling firms up and the flavors settle into something really good. I pull them out about 10 minutes before serving so they're not fridge-cold all the way through.
- Individual portions mean no messy slicing: At a party, nobody has to stand there with a knife trying to cut even slices. Each person gets their own cheesecake, already plated and ready. This is also why they work so well as edible gifts — stack them in a little box lined with parchment paper and they travel surprisingly well.
- Easy to customize for different tastes: I keep a few plain for the kids, add crushed candy canes to some for the peppermint lovers, and pile fresh cranberries and raspberries on the rest for the adults. Everyone gets what they want without me making three separate desserts. That's genuinely my favorite thing about this recipe.
- The graham cracker crust actually stays crispy: I had versions where the crust turned soggy after a day in the fridge. The fix was pressing it firmly and giving it a few minutes in the oven before adding the filling. It sets up properly that way and holds its texture even after overnight chilling.
Ingredients
- For the Crust:
- 1 ½ cups graham cracker crumbs (about 10–11 full crackers, crushed)
- ¼ cup granulated sugar
- 6 tablespoons unsalted butter, melted
- For the Filling:
- 16 oz (450g) cream cheese, softened to room temperature
- ⅔ cup granulated sugar
- 2 large eggs, room temperature
- 1 teaspoon vanilla extract
- ½ cup sour cream
- For Decoration (Optional):
- Fresh berries — cranberries, raspberries, or blueberries all work beautifully
- Fresh mint leaves
- Crushed candy canes
- Edible glitter or festive sprinkles
Directions
- Preheat and prep your tin: Heat your oven to 325°F (160°C). Line a 12-cup muffin tin with paper liners — this is non-negotiable for easy removal. If you use a mini muffin tin instead, reduce the bake time to about 12–14 minutes.
- Make the crust: Mix the graham cracker crumbs, sugar, and melted butter together in a bowl until it looks like wet sand. Press about 1 ½ tablespoons of the mixture firmly into the bottom of each muffin cup. I use the bottom of a small spice jar to press it flat and compact. Bake the crusts for 5 minutes, then pull them out and let them cool slightly while you make the filling. This pre-bake step is what keeps them crispy.
- Make the filling: In a large bowl, beat the softened cream cheese with the sugar until completely smooth — no lumps. If your cream cheese is cold, this will take much longer and still leave lumps, so let it sit out for at least 30 minutes first. Add the eggs one at a time, mixing on low speed (or by hand) after each one. Don't overmix once the eggs go in.
- Add the sour cream and vanilla: Stir in the vanilla extract and sour cream until everything is just combined. The sour cream keeps the filling tangy and light rather than dense and heavy. Mix gently here — you don't want to beat in air, which causes cracks.
- Fill and bake: Divide the filling evenly among the muffin cups, filling each about ¾ full. Bake for 18–20 minutes. The edges should look set and the centers should have a very slight jiggle — like Jell-O, not liquid. They'll firm up fully in the fridge.
- Cool and chill: Let the cheesecakes cool in the pan at room temperature for about an hour. Then transfer to the fridge and chill for at least 2–3 hours, or overnight. Don't rush this step — they really do need the time to set properly.
- Decorate before serving: Right before serving, add your toppings. Fresh berries, a sprig of mint, a pinch of crushed candy cane, or a few sprinkles of edible glitter — whatever feels festive to you. I keep the toppings off until the last possible moment so nothing goes soggy.
Tips for Success
- Cold cream cheese will ruin your filling: I learned this the hard way the first time I made these — I was in a rush and skipped letting the cream cheese warm up. The result was a lumpy filling with little white chunks that never smoothed out, even after baking. Leave it on the counter for at least 30 minutes, or an hour if your kitchen is cold. If you forget, cut it into small cubes to help it warm faster.
- Stop mixing once the eggs go in: Overmixing after adding eggs incorporates air into the batter. That air expands in the oven and then collapses when the cheesecakes cool, causing sunk centers and cracked tops. Mix just until the yolk disappears into the batter — that's all you need. For these minis, cracks matter less than on a full cheesecake, but you'll still get a prettier result with a lighter hand.
- The jiggle test is your best friend: Take the pan out when the centers wobble like set gelatin — not sloshing liquid, but a gentle, even jiggle. If the whole top ripples like water, put it back for another 2–3 minutes. Overbaking is what makes cheesecake dry and grainy. The center will finish setting in the fridge.
- Press the crust harder than you think you need to: A loosely packed crust crumbles the second you try to peel the paper liner off. Use the back of a spoon or the flat bottom of a small jar and really press the crumb mixture down. It should feel solid, not powdery, when you tap it. The 5-minute pre-bake also helps it hold together.
- Add toppings last: Fresh berries release moisture as they sit. If you top the cheesecakes the night before, you'll have soggy decorations and pink juice running down the sides by morning. I keep the cheesecakes plain in the fridge and set out the topping options in small bowls right before guests arrive so people can customize their own.
Variations
- Peppermint candy cane: Replace the vanilla extract with ½ teaspoon of peppermint extract and top with crushed candy canes. Go easy on the peppermint — it's stronger than you'd expect and a little goes a long way. I made this version for a Christmas party last year and it was the first plate to disappear.
- Chocolate swirl: Melt 2 oz of dark chocolate and let it cool slightly, then drop small spoonfuls onto the filled (unbaked) cups and swirl with a toothpick. The chocolate seizes slightly in the oven and gives you these beautiful marbled tops. This version pairs well with a raspberry on top.
- Gingerbread crust: Swap the graham crackers for crushed gingerbread cookies — the kind you find at Trader Joe's or Aldi around the holidays. The spiced crust changes the whole character of the cheesecake. I add a pinch of cinnamon to the filling too when I make this version, and it tastes like Christmas in a bite.
- Orange zest: Add 1 tablespoon of fresh orange zest to the filling in place of any other flavoring. Orange and cream cheese is a combination I underestimated for years. It's subtle and bright — not candy-sweet, just fresh. Top with a small piece of candied orange peel if you want to make them look elegant with very little effort.
- Dairy-free version: Use a block-style vegan cream cheese (I've had good results with Violife) and dairy-free butter for the crust. Replace the sour cream with full-fat coconut cream. The texture is slightly different — a little softer — but the flavor is still really good. This isn't my everyday version, but it works well when I have guests with dietary restrictions.
Serving and Storage
Serving
Serve these cold or at a cool room temperature — they're at their best when the filling is firm but not hard. Pull them out of the fridge about 10 minutes before serving. For a party, arrange them on a flat platter and add the toppings just before guests arrive. If you're serving alongside other holiday desserts, these pair nicely with something warm — a cup of Italian cream soda or warm spiced cider works beautifully. They also make lovely edible gifts packed in a small box between layers of parchment paper.
Storage
Store in an airtight container in the refrigerator for up to 3–4 days. Keep the toppings separate until serving day if possible — berries and candy canes both get wet and slide around after more than a few hours on the cheesecakes. To freeze, place the undecorated cheesecakes on a sheet pan and freeze until solid, then transfer to a zip-lock bag or airtight container. They'll keep in the freezer for up to 2 months. Thaw overnight in the fridge — don't try to rush it at room temperature or they'll get watery.

Frequently Asked Questions
Can I make these mini cheesecakes ahead of time?
Yes, and honestly I'd recommend it. I almost always make these the night before I need them. They need at least 2–3 hours to chill properly anyway, and a full overnight in the fridge gives them an even better texture. Just hold off on the toppings until right before serving.
Can I freeze mini cheesecakes?
Yes. Freeze them undecorated on a sheet pan first until solid, then move them to an airtight container or zip-lock bag. They keep well for up to 2 months. Thaw overnight in the refrigerator before serving — don't leave them out on the counter to thaw quickly or the texture suffers.
What can I use instead of graham crackers for the crust?
Crushed digestive biscuits (common in the UK and easy to find at Walmart or World Market in the US) work perfectly as a 1:1 swap. Crushed gingerbread cookies are my favorite holiday alternative — they add a spiced warmth that complements the cream cheese filling really well.
How do I prevent cracks on top of the cheesecakes?
Two things cause cracks: overmixing after you add the eggs, and overbaking. Mix gently once the eggs are in — just until combined — and pull the cheesecakes out while the centers still have a slight jiggle. Since these are mini and you're covering them with toppings anyway, a small crack isn't the end of the world. But following those two rules keeps them smooth.
My cheesecakes stuck to the pan. What went wrong?
This is almost always a liner problem. Paper liners are the most reliable — they peel away cleanly once the cheesecakes are fully chilled. If you grease the tin without liners, give them a full overnight chill and use a thin offset spatula or butter knife around the edges before popping them out. Room-temperature cheesecakes stick much more than cold ones.

MINI CHRISTMAS CHEESECAKES
Ingredients
For the Crust:
- 1 ½ cups graham cracker crumbs
- ¼ cup granulated sugar
- 6 tablespoons unsalted butter melted
For the Filling:
- 16 oz 450g cream cheese, softened
- ⅔ cup granulated sugar
- 2 large eggs
- 1 teaspoon vanilla extract
- ½ cup sour cream
For Decoration (Optional):
- Fresh berries cranberries, raspberries, blueberries
- Mint leaves
- Edible glitter or sprinkles
Instructions
Prepare the Crust:
- Preheat oven to 325°F (160°C). Mix graham cracker crumbs, sugar, and melted butter. Press evenly into the bottom of lined or greased mini muffin tins.
Make the Filling:
- In a bowl, beat cream cheese and sugar until smooth. Add eggs one at a time, mixing well. Stir in vanilla and sour cream until combined.
Assemble and Bake:
- Pour filling over crust in tins, filling about ¾ full. Bake 18–20 minutes until edges are set but center slightly jiggly.
Cool and Chill:
- Let cool to room temperature, then refrigerate for 2–3 hours until firm.
Decorate:
- Top with fresh berries, mint leaves, or sprinkles before serving.
Notes
- Make Ahead: Can be made a day ahead and kept refrigerated.
- Customizing the Flavor: Add a tablespoon of orange zest or peppermint extract to the filling for holiday flair.
- Serving Suggestions: Serve chilled at holiday parties or as festive gifts in pretty boxes.
- Allergy-Friendly Options: Use dairy-free cream cheese and butter for a vegan-friendly version.
- Storage Tips: Store in an airtight container in the fridge for up to 3 days.
These mini cheesecakes have become my most-requested December recipe, which is saying something because December in my kitchen is busy. I make the base the night before whatever event I'm heading to, stash them in the fridge, and show up with a container of toppings to arrange last minute. It feels a lot more impressive than the actual effort involved, which I appreciate during a season that's already full of things to do.
What I keep coming back to is how flexible the recipe is. Once you have the basic cream cheese filling down, you can go in a dozen directions. I've made the gingerbread crust version, the peppermint version, the plain version with just berries on top — they've all worked. If you want to try another cheesecake bite recipe in a different direction, my Cinnamon Apple Snickerdoodle Cookies give you that same cozy holiday flavor in a totally different format.
The thing I want you to take away from this recipe is that cheesecake doesn't have to be intimidating. Mini versions bake faster, set more reliably, and forgive small mistakes in a way a full cheesecake won't. If one or two come out slightly cracked or imperfect, a raspberry on top fixes everything. Nobody at a holiday party is inspecting cheesecakes that closely. 🎄🍰✨
If you're putting together a holiday dessert spread, here are a few more recipes from my kitchen that work well alongside these cheesecakes:
- Strawberry Crunch Cheesecake Bites — same mini-cheesecake technique, totally different vibe
- Cinnamon Apple Snickerdoodle Cookies — warm, spiced, and great for cookie trays
- Italian Cream Soda — a festive drink that pairs beautifully with dessert
-
{"@context":"https://schema.org","@type":"Article","headline":"MINI CHRISTMAS CHEESECAKES","description":"Mini Christmas Cheesecakes are creamy, festive, and easy to make, perfect for holiday parties and joyful celebrations.","datePublished":"2025-05-31T05:03:12+00:00","dateModified":"2026-05-03T21:24:04+00:00","author":{"@type":"Person","name":"Sana Umer","url":"https://forfoodiefriends.com/about/","description":"Self-taught home cook with 10+ years of kitchen experience. Mom of two who develops every recipe in her own kitchen.","jobTitle":"Recipe Developer & Food Blogger","image":"https://forfoodiefriends.com/wp-content/uploads/sana-umer-author-photo.jpg"},"publisher":{"@type":"Organization","name":"For Foodie Friends","url":"https://forfoodiefriends.com/","logo":{"@type":"ImageObject","url":"https://forfoodiefriends.com/wp-content/uploads/forfoodiefriends-logo.png"}},"mainEntityOfPage":{"@type":"WebPage","@id":"https://forfoodiefriends.com/mini-christmas-cheesecakes/"},"image":"https://forfoodiefriends.com/wp-content/uploads/2025/05/MINI-CHRISTMAS-CHEESECAKES.jpg"}






Comments
No Comments