
Saad asked for these three weeks in a row before I finally stopped eyeballing the recipe and wrote it down. He's not even a huge apple person — but something about that cinnamon sugar crust with the little pockets of soft apple inside just got him. I've been making snickerdoodles for years, and this version honestly might be my favorite thing I've baked this fall.
What makes these different from a regular snickerdoodle is the fresh apple folded right into the dough. I use Honeycrisp or Fuji when I can find them — they're sweet enough to hold their own against the cinnamon and don't turn mushy the way softer apples do. The cream of tartar is non-negotiable here; it's what gives snickerdoodles that slightly tangy chew that sets them apart from every other sugar cookie. Don't skip it, don't substitute it. I learned that the hard way the one time I ran out and tried lemon juice instead — the cookies spread flat and tasted wrong.
I make a double batch when I have the time because one batch disappears the same day. My husband packs them in his work bag, Saad takes them to school, and Zainab eats hers still warm straight off the cooling rack. If you're baking for a crowd — a school event, a holiday tray, anything like that — these hold up beautifully. They actually taste better on day two once the apple flavor settles into the dough. If you're into fall baking, you might also love my Cranberry Cream Cheese Muffins — similar cozy energy, completely different vibe.
One thing to know going in: the dough needs to chill for at least an hour. I usually make it in the morning and bake in the afternoon, or make it the night before. Don't skip the chill step — warm dough spreads too much and you end up with flat, greasy cookies instead of thick, chewy ones. Give the dough its rest and it pays you back.
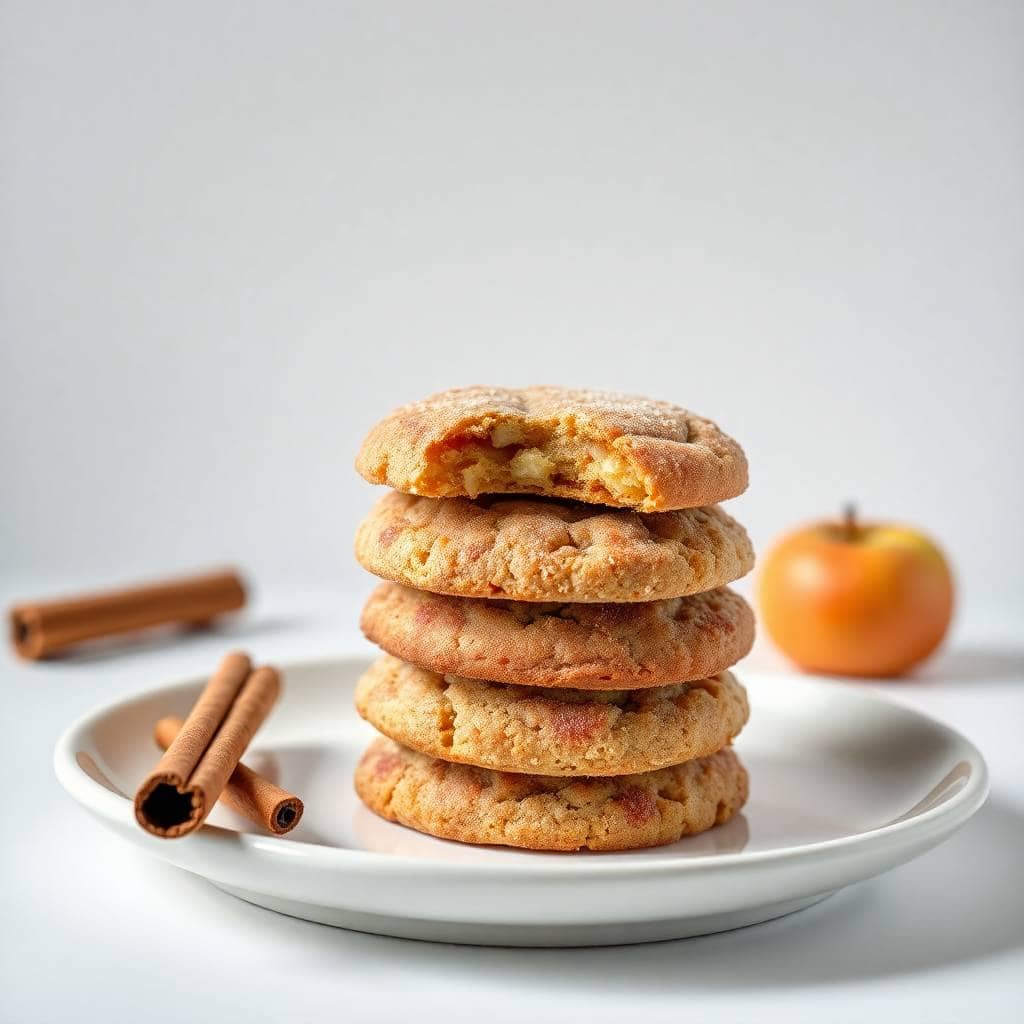
Why You'll Love This Recipe
- That cinnamon-apple combination actually works: I was skeptical the first time I saw apple in a cookie recipe — I thought it would make the dough soggy or weird. It doesn't. The apple pieces stay soft and slightly tart, and against the sweet cinnamon sugar coating it's genuinely one of the better flavor pairings I've landed on. It tastes like apple pie decided to become a cookie, which is not a bad thing.
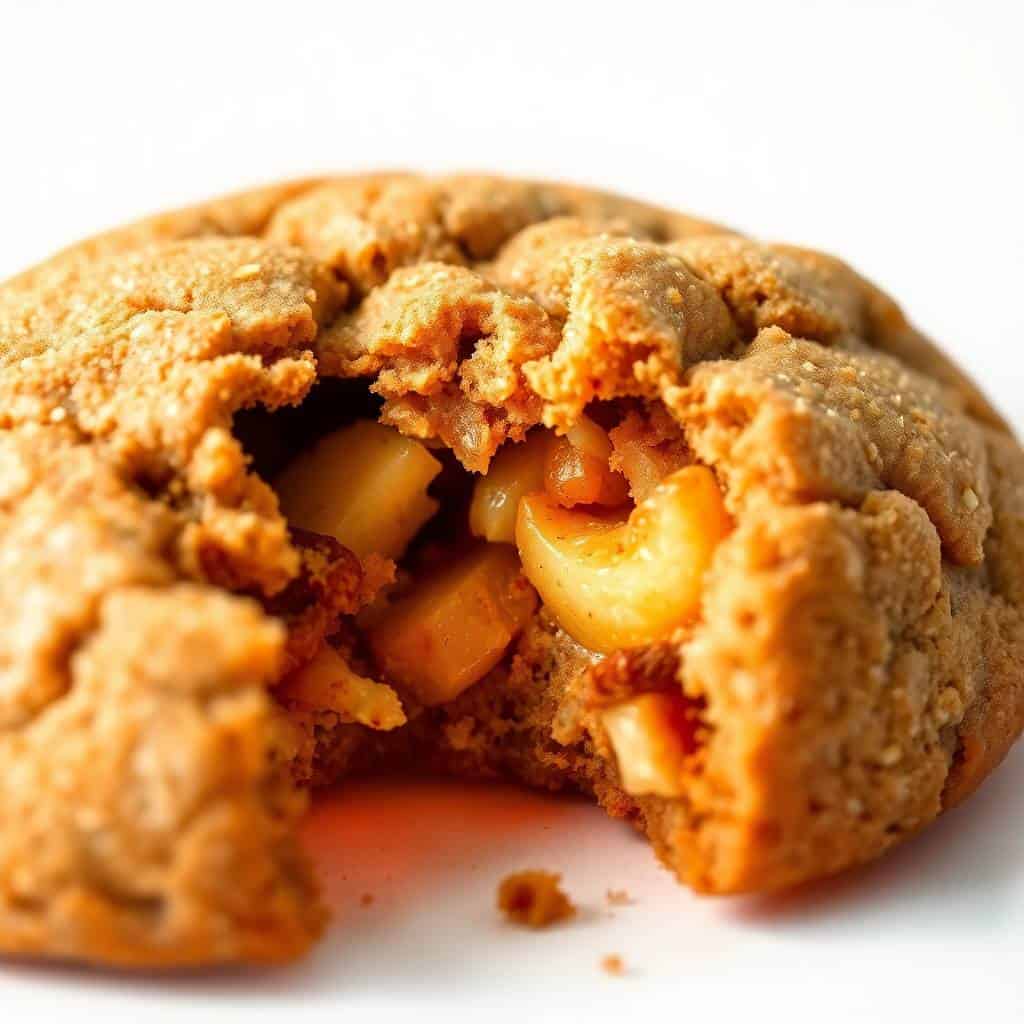
- Soft centers, slightly crisp edges: This is the texture I chase in any cookie. The cream of tartar in the dough is what makes it happen — it changes the texture in a way that baking powder just can't replicate. Pull them out when the edges are just set and the centers still look a little underdone. They firm up on the pan while they cool.
- No fancy equipment needed: I don't own a stand mixer. I use a hand mixer I bought for about $20, and it works perfectly for creaming butter and sugar. If you don't even have that, a wooden spoon and some patience will get you there — it just takes a few extra minutes of elbow work. The dough isn't difficult.
- Make-ahead friendly: The dough keeps in the fridge for up to 48 hours, and you can freeze the rolled dough balls for up to a month. I keep a bag in my freezer so when Saad asks for cookies on a random Tuesday I can just pull out a dozen, roll them in cinnamon sugar, and bake. The frozen ones just need an extra minute or two in the oven.
- Everyday ingredients, nothing obscure: Everything here comes from a regular grocery run — flour, butter, eggs, sugar, apples, cream of tartar. No specialty stores, no unusual extracts. If you bake even occasionally, you probably have most of this already.
Ingredients
- 2 ¾ cups all-purpose flour
- 1 ½ teaspoons cream of tartar
- ½ teaspoon baking soda
- ¼ teaspoon salt
- 1 teaspoon ground cinnamon
- 1 cup unsalted butter, softened (let it sit out for 30 minutes before you start)
- 1 ½ cups granulated sugar
- 2 large eggs
- 1 teaspoon vanilla extract
- 1 cup finely diced peeled apple (Honeycrisp or Fuji work well; Granny Smith if you want more tartness)
- For the cinnamon sugar coating:
- ¼ cup granulated sugar
- 1 teaspoon ground cinnamon
Directions
- Mix the dry ingredients: In a medium bowl, whisk together the flour, cream of tartar, baking soda, salt, and cinnamon. Set it aside. Getting this mixed before you start on the butter means you can add it quickly without overworking the dough.
- Cream the butter and sugar: In a large bowl, beat the softened butter and granulated sugar together until light and fluffy — about 2 to 3 minutes with a hand mixer on medium speed. The mixture should look pale and a little airy. If your butter was too cold, this will take longer and the cookies won't spread right.
- Add eggs and vanilla: Beat in the eggs one at a time, then add the vanilla. Mix until everything is smooth and combined. Scrape down the sides of the bowl here — there's always butter hiding at the bottom.
- Combine wet and dry: Gradually add the flour mixture to the butter mixture, mixing on low just until the dough comes together. Stop as soon as you don't see dry flour anymore. Overmixing here makes the cookies tough.
- Fold in the apple: Switch to a spatula and gently fold in the diced apple until it's evenly distributed through the dough. Don't overdo it — just enough to get the apple spread throughout.
- Chill the dough: Cover the bowl with plastic wrap and refrigerate for at least 1 hour, or overnight. This step is not optional. Cold dough holds its shape in the oven and gives you that thick, chewy result instead of a flat puddle.
- Preheat and prep: When you're ready to bake, preheat your oven to 350°F (175°C) and line your baking sheets with parchment paper. Mix the ¼ cup sugar and 1 teaspoon cinnamon together in a small bowl for the coating.
- Roll and coat: Scoop the dough into roughly 1-inch balls (a tablespoon cookie scoop makes this easier and keeps them even). Roll each ball in the cinnamon sugar coating until fully covered, then place on the lined baking sheet about 2 inches apart.
- Bake: Bake for 10 to 12 minutes, until the edges are just set and the tops look barely done. They'll still look soft in the center — that's what you want. Let them cool on the pan for 5 minutes before moving them to a wire rack. They firm up as they cool.
Tips for Success
- Dice the apple really small: I'm talking small — closer to ¼ inch than ½ inch. The first time I made these I cut the pieces too large and they created wet pockets in the dough that didn't bake through properly. Small pieces distribute evenly and cook all the way without making the dough soggy around them.
- Don't skip the chill time: I've tried shortcutting this. I've put the dough in the freezer for 20 minutes thinking it would be the same. It isn't. The full hour in the fridge lets the flour hydrate and the butter firm up, and the result is a noticeably thicker, chewier cookie. If you have the time, overnight in the fridge is even better.
- Pull them out before they look done: This is the tip that changed my cookies. When the edges are set but the centers still look slightly underbaked, take them out. The residual heat from the pan finishes them. I overbaked my first batch because I waited for the tops to look fully set, and they came out dry instead of chewy.
- Use a cool baking sheet: If you're doing multiple batches, let your baking sheet cool down between rounds. Putting cold dough on a hot pan makes the butter melt before the dough sets, and you get flat cookies. I usually rotate two pans so I always have a cool one ready.
- Bake a test cookie first: Before you bake the whole tray, do one cookie on its own. Every oven runs slightly different — mine runs hot by about 15 degrees — and a single test cookie tells you if you need to adjust time or temperature before you commit the whole batch. Takes 12 minutes and saves you from a failed tray.
Variations
- Brown sugar dough: Replace half the granulated sugar in the dough with packed brown sugar. This gives the cookies a deeper, slightly caramel-adjacent flavor and makes them a little more dense and moist. My husband actually prefers this version — he says it tastes more like a proper autumn cookie.
- Caramel apple version: Press a few caramel chips into the tops of the dough balls just before baking, or drizzle cooled cookies with a little store-bought caramel sauce. It leans more dessert-ish and is great for a holiday cookie tray — I put these next to my Christmas Kitchen Sink Cookies last December and they disappeared first.
- Add warm spices: Mix ½ teaspoon of pumpkin pie spice or a pinch of nutmeg and cardamom into the dry ingredients along with the cinnamon. This makes the spice flavor more layered and interesting. It's not traditional snickerdoodle, but it works really well with the apple.
- Add chopped walnuts or pecans: Fold in ½ cup of roughly chopped walnuts or pecans along with the apple. The crunch breaks up the softness in a good way. I use pecans when I have them — they're slightly sweeter than walnuts and pair better with the cinnamon apple flavor here.
- Maple glaze finish: Whisk together ½ cup powdered sugar with 1 tablespoon maple syrup and a teaspoon of milk, then drizzle over cooled cookies. It adds a touch of sweetness and makes them look bakery-style if you're gifting them. I do this version when I'm bringing cookies somewhere and want them to look a little more put-together.
Serving and Storage
Serving
These are good warm, but honestly they're at their best the next day — the apple flavor settles into the dough overnight and the texture gets even chewier. Serve them with tea, a glass of cold milk, or just eat them standing over the counter like I usually do. If you're putting together a cookie tray for the holidays, these hold up well next to something chocolatey or nutty for contrast. They also pair well alongside something lighter like my Strawberry Crunch Cookies if you want variety on a plate.
Storage
Store baked cookies in an airtight container at room temperature for up to 5 days. They stay soft — actually softer on days 2 and 3 than day 1. For freezing, I prefer freezing the raw dough balls before they're rolled in cinnamon sugar. Freeze them on a sheet pan first until solid, then transfer to a zip-top freezer bag. When you're ready to bake, roll the frozen balls in cinnamon sugar and bake at 350°F — add about 2 minutes to the baking time. They keep in the freezer for up to a month.

Frequently Asked Questions
Why do snickerdoodles need cream of tartar?
Cream of tartar is what makes a snickerdoodle a snickerdoodle — it gives the cookie that slightly tangy flavor and that specific chewy texture you can't get with baking powder alone. It also reacts with the baking soda to help the cookies rise. I've tried substituting it and the cookies came out flat and tasted like a plain sugar cookie. Just keep a container in your pantry — you'll use it more than you think.
Can I freeze the cookie dough?
Yes, and I actually recommend it. Roll the dough into balls but don't coat them in cinnamon sugar yet — freeze them on a lined sheet pan until solid, then transfer to a freezer bag. When you're ready to bake, pull out however many you need, roll them in the cinnamon sugar coating, and bake straight from frozen at 350°F for about 12 to 14 minutes. They come out just as good as fresh.
Which apples work best in this recipe?
I use Honeycrisp or Fuji most often because they're sweet, firm, and easy to find at any grocery store including Walmart or Aldi. Granny Smith works if you want a more tart contrast against the sweet dough. Avoid soft apples like McIntosh or Golden Delicious — they release too much water and can make the dough wet and sticky.
Do I have to peel the apples?
Yes, peel them. I tried leaving the skin on once to save time and ended up with chewy little skin pieces in the finished cookies that felt out of place. Peeled apple disappears into the dough and just gives you little soft, sweet pockets. The peeling takes about 2 minutes and it's worth doing.
Why did my cookies spread too much?
Almost always it comes down to the dough not being cold enough. If you skipped the chill time or your kitchen is very warm, the butter starts melting before the cookie sets and it spreads out flat. Make sure the dough is properly chilled (at least 1 hour in the fridge), bake on a cool sheet pan lined with parchment, and don't let the dough sit out at room temperature for too long before it goes in the oven.
CINNAMON APPLE SNICKERDOODLE COOKIES
Ingredients
For the Cookies:
- 2 ¾ cups all-purpose flour
- 1 ½ teaspoons cream of tartar
- ½ teaspoon baking soda
- ¼ teaspoon salt
- 1 teaspoon cinnamon
- 1 cup unsalted butter softened
- 1 ½ cups granulated sugar
- 2 large eggs
- 1 teaspoon vanilla extract
- 1 cup finely diced peeled apple like Honeycrisp or Fuji
For the Cinnamon Sugar Coating:
- ¼ cup granulated sugar
- 1 teaspoon cinnamon
Instructions
Preheat the Oven:
- Preheat oven to 350°F (175°C). Line baking sheets with parchment paper.
Mix Dry Ingredients:
- In a medium bowl, whisk together flour, cream of tartar, baking soda, salt, and cinnamon.
Make the Dough:
- In a large bowl, cream butter and sugar until light and fluffy. Beat in eggs and vanilla. Slowly mix in dry ingredients until fully combined. Fold in diced apple.
Shape and Coat:
- Roll dough into 1-inch balls. In a small bowl, combine cinnamon and sugar for coating. Roll each dough ball in the mixture.
Bake:
- Place coated dough balls on prepared baking sheets, about 2 inches apart. Bake for 10–12 minutes until edges are set. Let cool on pan 5 minutes before transferring to a wire rack.
Notes
- Apple Tip: Finely dice apples so they bake evenly into the cookies.
- Storage: Store in an airtight container at room temperature for up to 5 days.
- Freezing: Freeze raw dough balls for up to 1 month—just bake straight from frozen.
- Variation: Add a pinch of nutmeg or drizzle with simple icing for a bakery-style finish.
These have quietly become one of my most-made cookie recipes. I like that they feel a little special without requiring anything unusual — no brown butter, no special technique, no ingredient I have to order online. Just a good, solid dough with fresh apple stirred in, rolled in cinnamon sugar, baked until barely set. The smell alone while they're in the oven is reason enough to make them.
If you're making these for the first time, don't rush the chill step and don't overbake them. Those are the two things that tripped me up early on, and once I stopped doing both the cookies came out right every single time. Consistent dough size also matters more than you'd expect — I use a tablespoon cookie scoop so they all bake evenly. A cheap one from any kitchen store does the job perfectly.
If you like having a stash of baked goods ready to go, these freeze well and they're genuinely good cold straight from the freezer — Zainab discovered this accidentally and now requests them that way. For more cookie ideas that come together without a lot of fuss, the Peanut Butter Kiss Cookies on the site are another one I keep coming back to — six ingredients and no mixer required.
I hope your batch turns out chewy, cinnamon-crusted, and gone before the day is over. 🍎🍪✨
If you liked this recipe, these are worth a look too:





Comments
No Comments